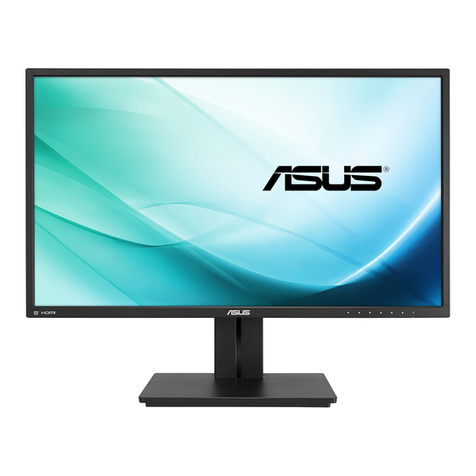
Asus PB278Q User manual

PB278Q Series
LCD Monitor
User Guide

ii
Copyright © 2012 ASUSTeK COMPUTER INC. All Rights Reserved.
No part of this manual, including the products and software described in it, may be reproduced,
transmitted, transcribed, stored in a retrieval system, or translated into any language in any form or by any
means, except documentation kept by the purchaser for backup purposes, without the express written
permission of ASUSTeK COMPUTER INC. (“ASUS”).
Product warranty or service will not be extended if: (1) the product is repaired, modied or altered, unless
such repair, modication of alteration is authorized in writing by ASUS; or (2) the serial number of the
product is defaced or missing.
ASUS PROVIDES THIS MANUAL “AS IS” WITHOUT WARRANTY OF ANY KIND, EITHER EXPRESS
OR IMPLIED, INCLUDING BUT NOT LIMITED TO THE IMPLIED WARRANTIES OR CONDITIONS OF
MERCHANTABILITY OR FITNESS FOR A PARTICULAR PURPOSE. IN NO EVENT SHALL ASUS, ITS
DIRECTORS, OFFICERS, EMPLOYEES OR AGENTS BE LIABLE FOR ANY INDIRECT, SPECIAL,
INCIDENTAL, OR CONSEQUENTIAL DAMAGES (INCLUDING DAMAGES FOR LOSS OF PROFITS,
LOSS OF BUSINESS, LOSS OF USE OR DATA, INTERRUPTION OF BUSINESS AND THE LIKE),
EVEN IF ASUS HAS BEEN ADVISED OF THE POSSIBILITY OF SUCH DAMAGES ARISING FROM ANY
DEFECT OR ERROR IN THIS MANUAL OR PRODUCT.
SPECIFICATIONS AND INFORMATION CONTAINED IN THIS MANUAL ARE FURNISHED FOR
INFORMATIONAL USE ONLY, AND ARE SUBJECT TO CHANGE AT ANY TIME WITHOUT NOTICE,
AND SHOULD NOT BE CONSTRUED AS A COMMITMENT BY ASUS. ASUS ASSUMES NO
RESPONSIBILITY OR LIABILITY FOR ANY ERRORS OR INACCURACIES THAT MAY APPEAR IN THIS
MANUAL, INCLUDING THE PRODUCTS AND SOFTWARE DESCRIBED IN IT.
Products and corporate names appearing in this manual may or may not be registered trademarks or
copyrights of their respective companies, and are used only for identication or explanation and to the
owners’ benet, without intent to infringe.
Table of contents
Notices .............................................................................................iii
Safety information...........................................................................iv
Care & Cleaning ...............................................................................v
1.1 Welcome!............................................................................1-1
1.2 Package contents ..............................................................1-1
1.3 Monitor introduction..........................................................1-2
1.3.1 Front of the LCD monitor........................................1-2
1.3.2 Rear of the LCD monitor ........................................1-4
1.3.3 QuickFit Function ...................................................1-5
2.1 Detaching the arm/stand
(for VESA wall mount) .......................................................2-1
2.2 Adjusting the monitor .......................................................2-2
2.3 Connecting the cables ......................................................2-3
3.1 OSD (On-Screen Display) menu .......................................3-1
3.1.1 Howtorecongure .................................................3-1
3.1.2 OSD Function Introduction.....................................3-2
3.2 Specications ....................................................................3-9
3.3 Troubleshooting (FAQ) ...................................................3-10
3.4 Supported Timing List.....................................................3-11
iii
Notices
Federal Communications Commission Statement
This device complies with Part 15 of the FCC Rules. Operation is subject
tothefollowingtwoconditions:
• This device may not cause harmful interference, and
• Thisdevicemustacceptanyinterferencereceivedincluding
interference that may cause undesired operation.
This equipment has been tested and found to comply with the limits for a
ClassBdigitaldevice,pursuanttoPart15oftheFCCRules.Theselimits
aredesignedtoprovidereasonableprotectionagainstharmfulinterference
inaresidentialinstallation.Thisequipmentgenerates,usesandcan
radiateradiofrequencyenergyand,ifnotinstalledandusedinaccordance
with manufacturer’s instructions, may cause harmful interference to radio
communications.However,thereisnoguaranteethatinterferencewill
not occur in a particular installation. If this equipment does cause harmful
interference to radio or television reception, which can be determined by
turningtheequipmentoffandon,theuserisencouragedtotrytocorrect
theinterferencebyoneormoreofthefollowingmeasures:
• Reorientorrelocatethereceivingantenna.
• Increase the separation between the equipment and receiver.
• Connect the equipment to an outlet on a circuit different from that to
which the receiver is connected.
• Consult the dealer or an experienced radio/TV technician for help.
AsanEnergyStar® Partner, our company has determined
thatthisproductmeetstheEnergyStar® guidelinesfor
energyefciency.
Canadian Department of Communications Statement
ThisdigitalapparatusdoesnotexceedtheClassBlimitsforradio
noiseemissionsfromdigitalapparatussetoutintheRadioInterference
RegulationsoftheCanadianDepartmentofCommunications.
ThisclassBdigitalapparatuscomplieswithCanadianICES-003.

iv
Safety information
• Beforesettingupthemonitor,carefullyreadallthedocumentationthat
camewiththepackage.
• To prevent fire or shock hazard, never expose the monitor to rain or
moisture.
• Nevertrytoopenthemonitorcabinet.Thedangeroushighvoltages
inside the monitor may result in serious physical injury.
• If the power supply is broken, do not try to fix it by yourself. Contact a
qualified service technician or your retailer.
• Beforeusingtheproduct,makesureallcablesarecorrectlyconnected
andthepowercablesarenotdamaged.Ifyoudetectanydamage,
contact your dealer immediately.
• Slotsandopeningsonthebackortopofthecabinetareprovidedfor
ventilation. Do not block these slots. Never place this product near or
over a radiator or heat source unless proper ventilation is provided.
• The monitor should be operated only from the type of power source
indicated on the label. If you are not sure of the type of power supply to
your home, consult your dealer or local power company.
• Usetheappropriatepowerplugwhichcomplieswithyourlocalpower
standard.
• Donotoverloadpowerstripsandextentioncords.Overloadingcan
result in fire or electric shock.
• Avoid dust, humidity, and temperature extremes. Do not place the
monitor in any area where it may become wet. Place the monitor on a
stable surface.
• Unplugtheunitduringalightningstormorifitwillnotbeusedfora
longperiodoftime.Thiswillprotectthemonitorfromdamagedueto
powersurges.
• Never push objects or spill liquid of any kind into the slots on the
monitor cabinet.
• To ensure satisfactory operation, in case use at a PC then it should
use the monitor only with computers which have appropriate
configuredreceptaclesmarkedbetween100-240VAC.
• If you encounter technical problems with the monitor, contact a
qualified service technician or your retailer.
• The wall socket shall be installed near the equipment and shall be
easily accessible.

v
Care & Cleaning
• Before you lift or reposition your monitor, it is better to disconnect the
cablesandpowercord.Followthecorrectliftingtechniqueswhen
positioningthemonitor.Whenliftingorcarryingthemonitor,graspthe
edgesofthemonitor.Donotliftthedisplaybythestandorthecord.
• Cleaning.Turnyourmonitoroffandunplugthepowercord.Cleanthe
monitor surface with a lint-free, non-abrasive cloth. Stubborn stains
may be removed with a cloth dampened with mild cleaner.
• Avoidusingacleanercontainingalcoholoracetone.Useacleaner
intended for use with the LED. Never spray cleaner directly on the
screen, as it may drip inside the monitor and cause an electric shock.
The following symptoms are normal with the monitor:
• Thescreenmayflickerduringtheinitialuseduetothenatureofthe
fluorescentlight.TurnoffthePowerSwitchandturnitonagainto
make sure that the flicker disappears.
• Youmayfindslightlyunevenbrightnessonthescreendependingon
the desktop pattern you use.
• Whenthesameimageisdisplayedforhours,anafterimageofthe
previousscreenmayremainafterswitchingtheimage.Thescreenwill
recover slowly or you can turn off the Power Switch for hours.
• Whenthescreenbecomesblackorflashes,orcannotworkanymore,
contact your dealer or service center to fix it. Do not repair the screen
by yourself!
Conventions used in this guide
WARNING:Informationtopreventinjurytoyourselfwhentrying
to complete a task.
CAUTION:Informationtopreventdamagetothecomponents
whentryingtocompleteatask.
IMPORTANT:InformationthatyouMUSTfollowtocompletea
task.
NOTE:Tipsandadditionalinformationtoaidincompletinga
task.

vi
Wheretondmoreinformation
Refertothefollowingsourcesforadditionalinformationandforproductand
software updates.
1. ASUS websites
The ASUS websites worldwide provide updated information on ASUS
hardware and software products. Refer to http://www.asus.com
2. Optional documentation
Yourproductpackagemayincludeoptionaldocumentationthatmayhave
been added by your dealer. These documents are not part of the standard
package.

1-1ASUS LCD Monitor PB278Q Series
1.1 Welcome!
ThankyouforpurchasingtheASUS®PB278Q Series LCD monitor!
The latest widescreen LCD monitor from ASUS provides a crisper, broader, and
brighterdisplay,plusahostoffeaturesthatenhanceyourviewingexperience.
Withthesefeatures,youcanenjoytheconvenienceanddelightfulvisual
experiencethatthePB278QSeriesbringsyou!
1.2 Package contents
CheckyourPB278QSeriesLCDmonitorpackageforthefollowingitems:
LCD monitor
Power Cord
VGACable
DVI Cable (Dual link)
DisplayPort Cable
HDMI Cable
Audio Cable
QuickStartGuide
WarrantyCard
Ifanyoftheaboveitemsisdamagedormissing,contactyourretailer
immediately.

1-2 Chapter1:ProductIntroduction
1.3 Monitor introduction
1.3.1 Front of the LCD monitor
7 6 5 4321
1. PowerButton/PowerIndicator:
• Press this button to turn the monitor on/off.
• The color definition of the power indicator is shown below.
Status Description
Blue ON
Amber Standby mode
OFF OFF
2. InputSelectButton:
• Press this button to select input source.
3. Button:
• Press this button to increase values or to move your selection
right/up.
• Brightnesshotkey
4. MENUButton:
• Press this button to turn on the OSD menu, or to enact the
selected OSD menu item.

1-3ASUS LCD Monitor PB278Q Series
• Press this button to exit the hotkey OSD menu.
5. Button:
• Press this button to decrease values or to move your selection
left/down.
• Volume hotkey
6. QuickFitbutton:
• PressthisbuttontoactivatetheQuickFitfunctiondesignedfor
alignment.
• TheQuickFitfunctioncontains9pagesofcommongridpatterns,
paper sizes, and photo sizes. (Please refer to 1.3.3 QuickFit
Function)
7. Button:
• Press this button to select a desired preset mode.
• PressthisbuttontoexittheOSDmenuortogobacktothe
previous menu when the OSD menu is active.
• Press this button for 2 ~ 4 seconds to automatically adjust the
imagetoitsoptimizedposition,clock,andphase(forVGAmode
only).

1-4 Chapter1:ProductIntroduction
1.3.2 Rear of the LCD monitor
42 5 6 8
17
3
Rear connectors
1. Kensingtonlockslot.
2. AC-INport:Thisportconnectsthepowercord.
3. DisplayPort. This port is for connection with a DisplayPort compatible
device.
4. VGAport:This15-pinportisforPCVGAconnection.
5. DVIport:This24-pinportisforPC(PersonalComputer)DVI-Ddigital
signalconnection.
6. HDMIport:ThisportisforconnectionwithanHDMIcompatible
device.
7. Audio Line-in Port
8. Earphone jack.

1-5ASUS LCD Monitor PB278Q Series
1.3.3 QuickFit Function
TheQuickFitfunctioncontainsthreepatterns:(1)Grid(2)Papersize(3)Photo
size.
1. Gridpatterns
Thegridpatternsfacilitatedesignersanduserstoorganizecontentandlayoutona
pageandachieveaconsistentlookandfeel.
AlignmentGrid
2. Paper size
QuickFit provides numerous commonly used standard paper sizes for users to
view their documents in real size on the screen.
Letter

1-6 Chapter1:ProductIntroduction
3. Photo size
The various real photo sizes displayed in the QuickFit function provides
photographersandotheruserstoaccuratelyviewandedittheirphotosinrealsize
on the screen.
Photo 4x6, 3x5, 2x2
Photo8x10,5x7

2-1ASUS LCD Monitor PB278Q Series
2.1 Detaching the arm/stand
(for VESA wall mount)
ThedetachablestandofthismonitorisspeciallydesignedforVESAwallmount.
Todetachthearm/stand:
1. Disconnectpowerandsignalcables.Carefullyput the front of the
monitor face down on a clean table.
2. Useascrewdrivertoremovethefourscrewsonthearm(Figure1),
andthendetachthearm/standfromthemonitor(Figure2).
• Werecommendthatyoucoverthetablesurfacewithsoftclothto
preventdamagetothemonitor.
• Holdthestandofthemonitorwhileremovingthescrews.
Figure1 Figure2
• TheVESAwallmountkit(100x100mm)ispurchasedseparately.
• UseonlytheULListedWallMountBracketwithminimumweight/
load28.8kg(Screwsize:4x10mm).

2-2 Chapter2:Setup
2.2 Adjusting the monitor
• Foroptimalviewing,werecommendthatyoulookatthefullfaceofthe
monitor,thenadjustthemonitortotheanglethatismostcomfortable
for you.
• Holdthestandtopreventthemonitorfromfallingwhenyouchangeits
angle.
• Youcanadjustthemonitor’sanglefrom+20˚to-5˚anditallows60˚
swiveladjustmentfromeitherleftorright.Youcanalsoadjustthe
monitor’sheightwithin+/-12cm.
12cm
-5° ~ +20°
60°
0°
60°
Pivoting the monitor
1. Liftthemonitortothehighestposition.
2. Tiltthemonitortoitsmaximumangle.
3. Pivotthemonitorclockwisetotheangleyouneed.
2
1
-5° ~ +20°
3
Itisnormalthatthemonitorslightlyshakeswhileyouadjusttheviewing
angle.

2-3ASUS LCD Monitor PB278Q Series
2.3 Connecting the cables
Connectthecablesasthefollowinginstructions:
• To connect the power cord:Connectoneendofthepowercord
securely to the monitor’s AC input port, the other end to a power outlet.
• To connect the VGA/HDMI/DVI/DisplayPort cable:
a.PlugoneendoftheVGA/HDMI/DVI/DisplayPortcabletothemonitor’sVGA/
HDMI/DVI/DisplayPort jack.
b.ConnecttheotherendoftheVGA/HDMI/DVI/DisplayPortcabletoyour
computer’sVGA/HDMI/DVI/DisplayPortjack.
c.TightenthetwoscrewstosecuretheVGA/DVIconnector.
• To connect the audio cable:
Plugoneendoftheaudiocabletothe
monitor’s Audio Line-in Port
.
Connect the other end of the audio cable to your
computer’s audio Port.
• To use the earphone: Connecttheendwithplugtypetothemonitor’s
earphonejackwhenanHDMIorDisplayPortsignalisfed.
Whenthesecablesareconnected,youcanchoosethedesiredsignal
from the Input Select item in the OSD menu.

3-1 Chapter3:GeneralInstruction
3.1 OSD (On-Screen Display) menu
3.1.1 Howtorecongure
PB278
Splendid
Color
Image
Sound
Input Select
Move Menu Exit
System Setup
Scenery Mode
Standard Mode
Theater Mode
sRGB Mode
User Mode
1. Press the MENU button to activate the OSD menu.
2. Press and tonavigatethroughthefunctions.Highlight
andactivatethedesiredfunctionbypressingtheMENUbutton.Ifthe
function selected has a sub-menu, press and againto
navigatethroughthesub-menufunctions.Highlightandactivatethe
desiredsub-menufunctionbypressingtheMENUbutton.
3. Press and tochangethesettingsoftheselected
function.
4. To exit the OSD menu, press the button. Repeat step 2 and
step 3 to adjust any other function.

3-2ASUS LCD Monitor PB278Q Series
3.1.2 OSD Function Introduction
1. Splendid
This function contains five sub-functions that you can select for your
preference.EachmodehastheResetselection,allowingyoutomaintain
yoursettingorreturntothepresetmode.
PB278
Splendid
Color
Image
Sound
Input Select
Move Menu Exit
System Setup
Scenery Mode
Standard Mode
Theater Mode
sRGB Mode
User Mode
• Standard Mode:Thisisthebestchoicefordocumenteditingwith
SPLENDID™VideoIntelligence.
• sRGB Mode:CompatiblewithsRGBcolorspace.sRGBmodeis
thebestchoicefordocumentediting.
Color
Space
WhitePoint Primaries
Xw Yw Xr Yr Xg Yg Xb Yb
sRGB 0.3127 0.329 0.64 0.33 0.3 0.6 0.15 0.06
• Scenery Mode:Thisisthebestchoiceforsceneryphoto
displayingwithSPLENDID™VideoIntelligence.
• Theater Mode:Thisisthebestchoiceformoviewatchingwith
SPLENDID™VideoIntelligence.

3-3 Chapter3:GeneralInstruction
• User Mode:MoreitemsareadjustableintheColormenu.
Function Standard
Mode
sRGB
Mode
Scenery
Mode
Theater
Mode
User
Mode
Brightness Yes Yes Yes Yes Yes
Contrast Yes No Yes Yes Yes
Saturation No No Yes Yes Yes
Hue No No No No Yes
Color Temperature Yes No Yes Yes Yes
Gamma Yes No No No Yes
Advanced
Setting
Gain No No No No Yes
Offset No No No No Yes

3-4ASUS LCD Monitor PB278Q Series
2. Color
Selecttheimagecoloryoulikefromthisfunction.
PB278
Splendid
Color
Image
Sound
Input Select
Move Menu Exit
System Setup
Brightness
Contrast
Saturation
Color Temp.
100
80
6500k
Gamma
Color Reset
50
50
22
Advanced Setting
Hue
• Brightness:Theadjustingrangeisfrom0to100.The
button is also a hot key to activate this function.
• Contrast:Theadjustingrangeisfrom0to100.
• Saturation:Theadjustingrangeisfrom0to100.
• Hue:Shifttheimagecolorbetweengreenandpurple.
• Color Temp.:Containfourcolormodes:9300K,6500K,5500K,
and5000K.
The DDC/CI tool installed at your PC will display “User 1” instead of the
“5500K” color temperature you selected for this monitor.
• Gamma:Setthecolormodeto2.2or1.8.
• Advanced Setting:
• AdjustthegainlevelsforR,G,B.
• AdjusttheblackleveloffsetvaluesforR,G,B.
• Color Reset:
• Current mode color reset:
Resetthecolorsettingsofcurrentcolormodetothefactory
default value.
• All modes color reset:
Resetthecolorsettingsofallcolormodestothefactory
default value.

3-5 Chapter3:GeneralInstruction
3. Image
YoucanadjusttheimageSharpness,TraceFree,AspectControl,ASCR,
Position(VGAonly),andFocus(VGAonly)fromthismainfunction.
PB278
Splendid
Color
Image
Sound
Input Select
Move Menu Exit
System Setup Focus
Sharpness
Trace Free
Aspect Control
ASCR
50
60
Full
Position
OFF
AUTO Adjust.
• Sharpness:Adjustthepicturesharpness.Theadjustingrangeis
from0to100.
• Trace Free:Speed up the response time by Over Drive
technology.Theadjustingrangeisfromlower0tofaster100.
• Aspect Control:Adjusttheaspectratioto“Full”, “4:3”, “1:1”, or
“Over Scan”. (The “4:3”ratioisonlyfor4:3or5:4imagesource.
The “Over Scan” ratio is only available for HDMI input.)
• ASCR:TurnonorofftheASCR(ASUSSmartContrastRatio)
function. (Only available at Scenery Mode and Theater Mode.)
• Position:Adjustthehorizontalposition(H-Position)andthe
verticalposition(V-Position)oftheimage.Theadjustingrangeis
from0to100(onlyavailableforVGAinput).
• Focus:ReduceHorizontal-linenoiseandVertical-linenoiseofthe
imagebyadjusting(Phase)and(Clock)separately.Theadjusting
rangeisfrom0to100(onlyavailableforVGAinput).
• AUTO Adjust.:Automaticallyadjusttheimagetoitsoptimized
position,clock,andphase.(OnlyavailableforVGAinput.)
• Phaseadjuststhephaseofthepixelclocksignal.Withawrongphase
adjustment, the screen shows horizontal disturbances.
• Clock (pixel frequency) controls the number of pixels scanned by one
horizontal sweep. If the frequency is not correct, the screen shows
verticalstripesandtheimageisnotproportional.
Table of contents
Other Asus Monitor manuals

Asus
Asus VG279QM1A Series User manual

Asus
Asus VG27B Series User manual

Asus
Asus ROG STRIX XG32UQ User manual

Asus
Asus C620A Series User manual

Asus
Asus VW223 Series User manual

Asus
Asus VW226 Series User manual

Asus
Asus VS239H User manual

Asus
Asus VZ279HE User manual

Asus
Asus PW201 User manual

Asus
Asus VP279H User manual

Asus
Asus VS228H User manual

Asus
Asus VP227HE Series User manual

Asus
Asus MB16ACM User manual

Asus
Asus VW246 User manual

Asus
Asus VG245Q User manual

Asus
Asus VG32U Series User manual

Asus
Asus VW192T - 19" LCD Monitor User manual

Asus
Asus VP249 Series User manual

Asus
Asus VB171D - 17" LCD Monitor User manual

Asus
Asus VA24DQF User manual