2
Co
nt
en
ts
Safety information ................................... 2 Unloading the dishwasher ......
..
............ 12
Product description ................................ 3 Washing programmes ..............
..
..
........ 13
Control panel ......................
..
.................. 4 Care and cleaning ................................ 13
First use ....................................
.. ..
......
..
. 5 What to do if.............................
..
....
.. ..
. 15
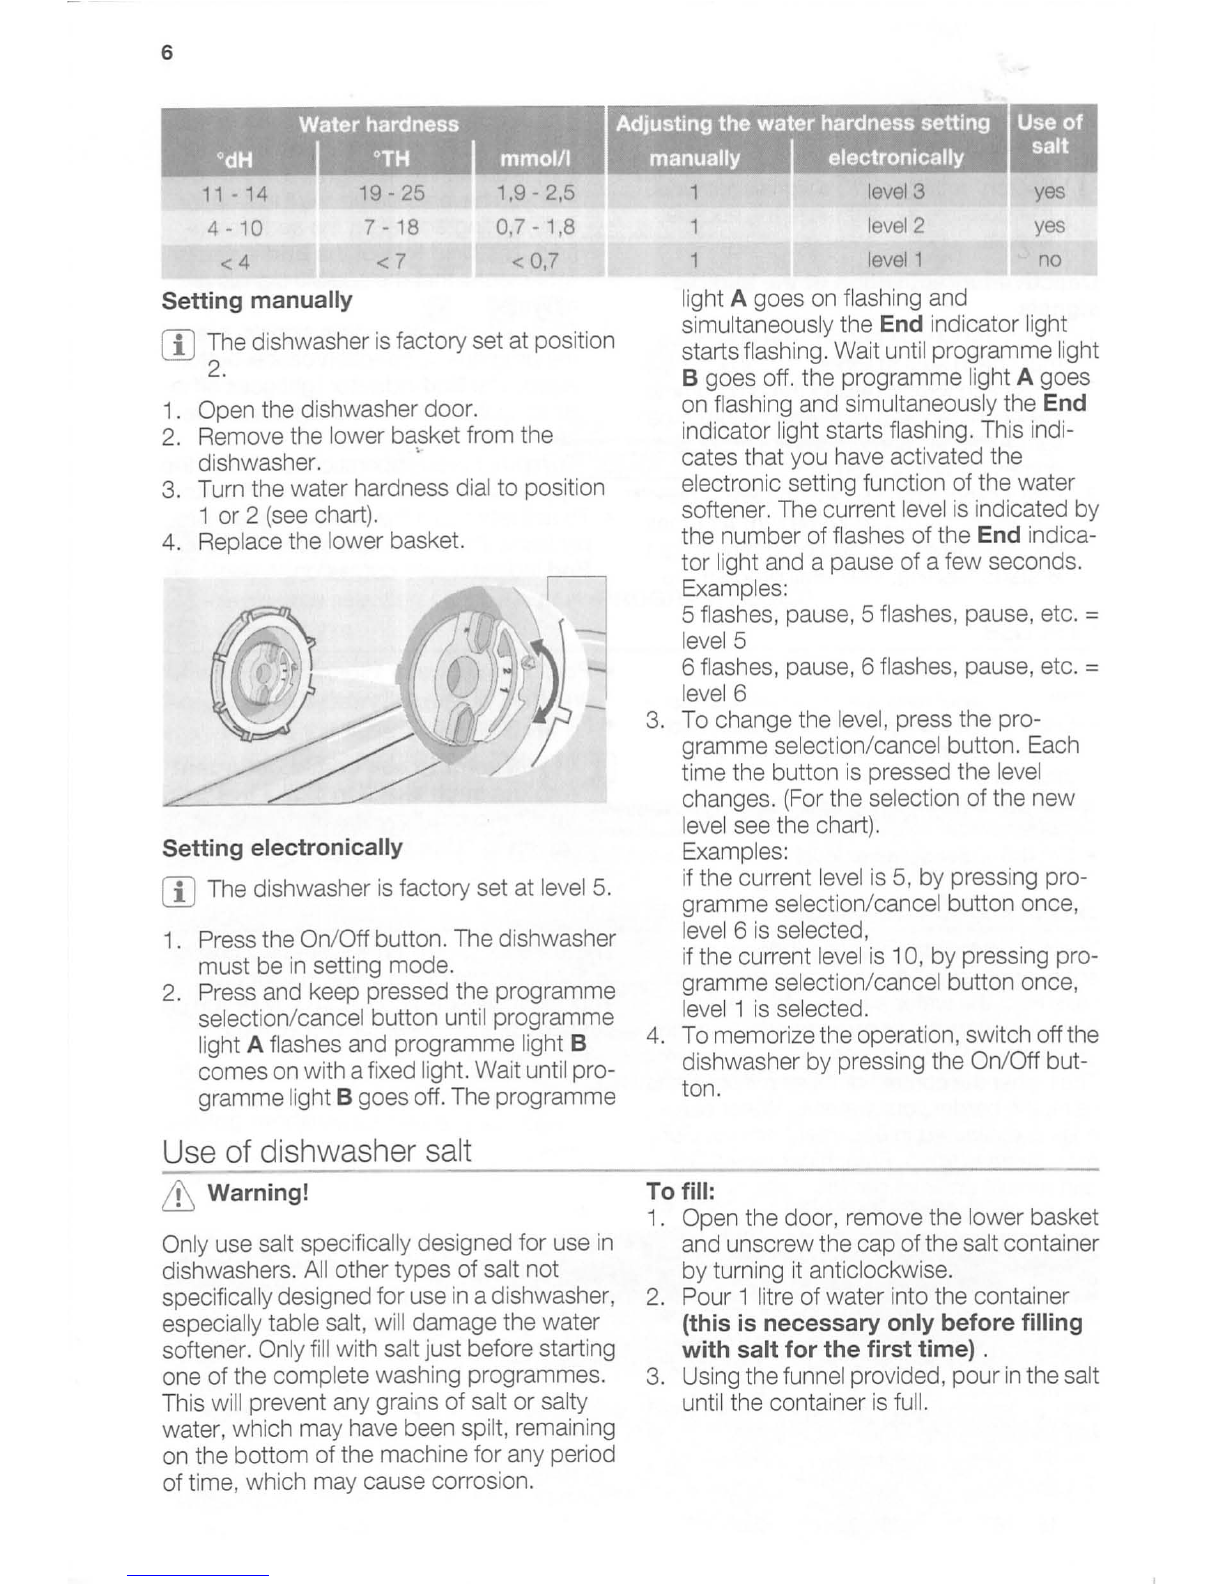
Set the water softener ............................ 5 Techni
cal
data ....................................
..
16
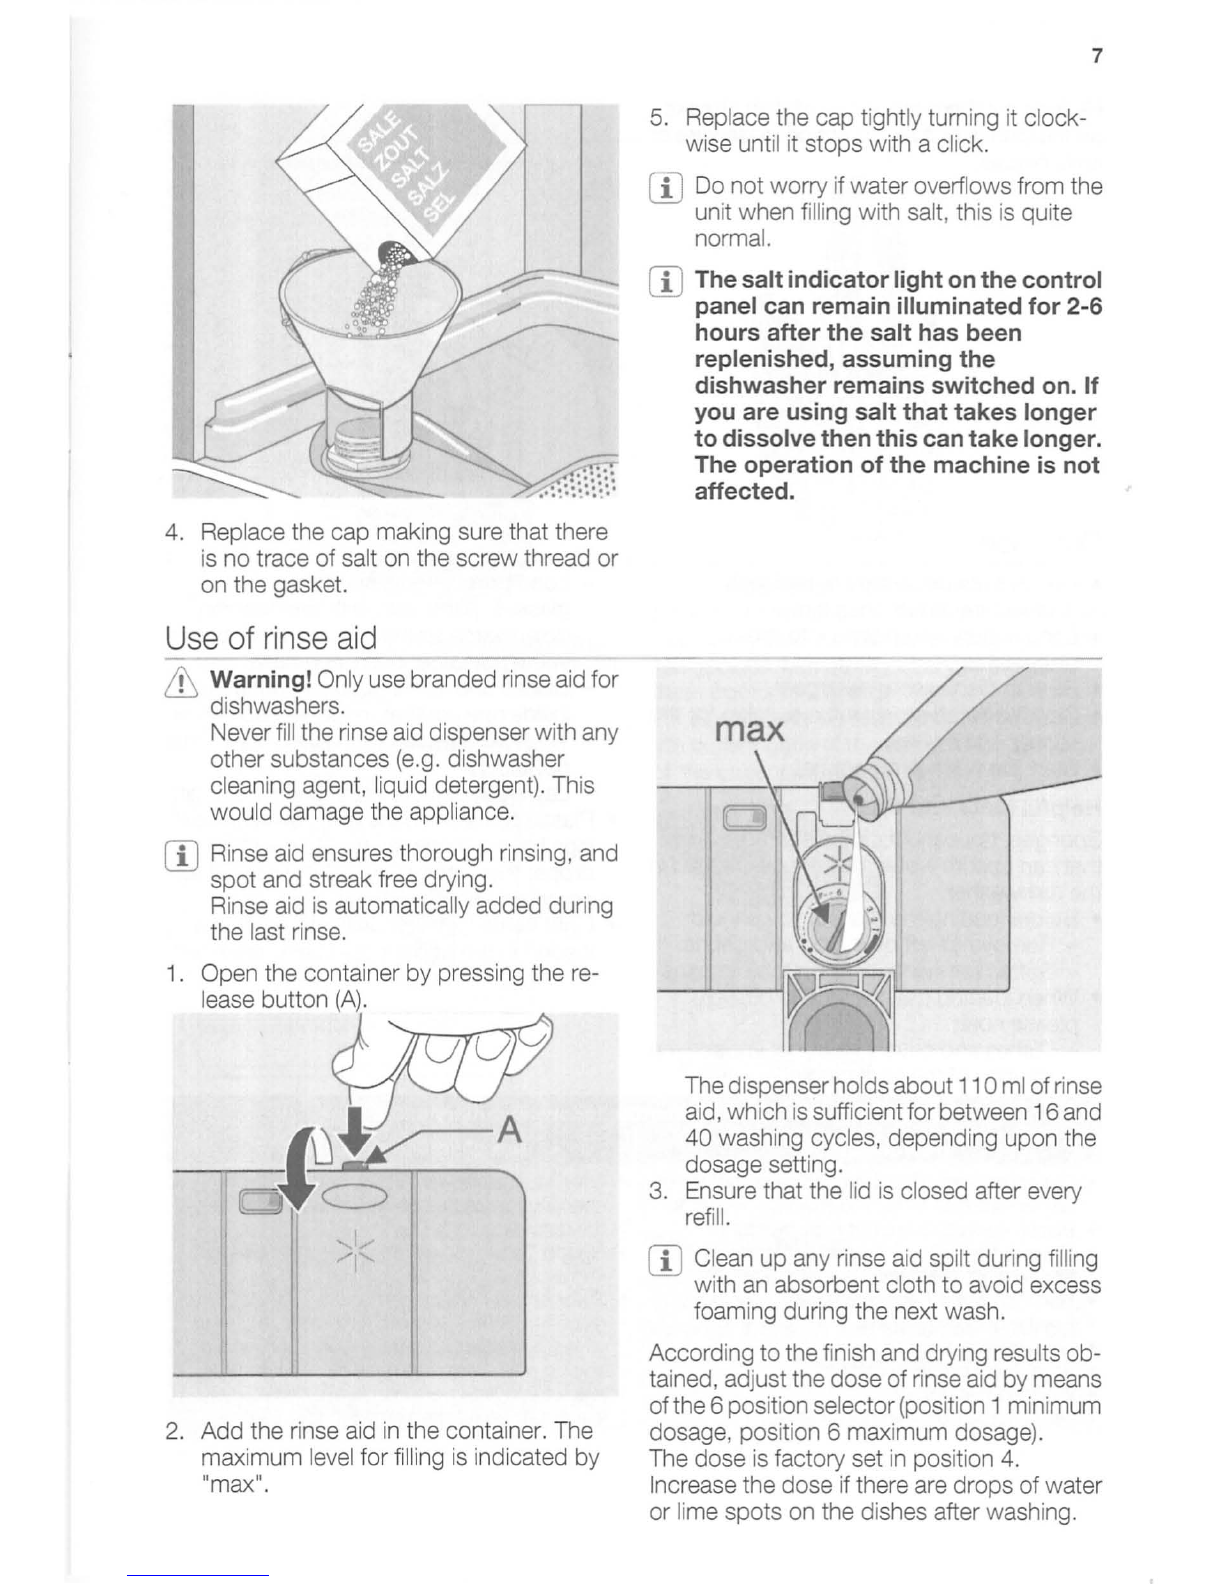
Use of dishwasher
sa
lt ........................
....
6 Hints for test institutes .......................... 16
Use of rinse aid ....................................... 7 Installation ..............
..
......
..
........
..
.......... 17
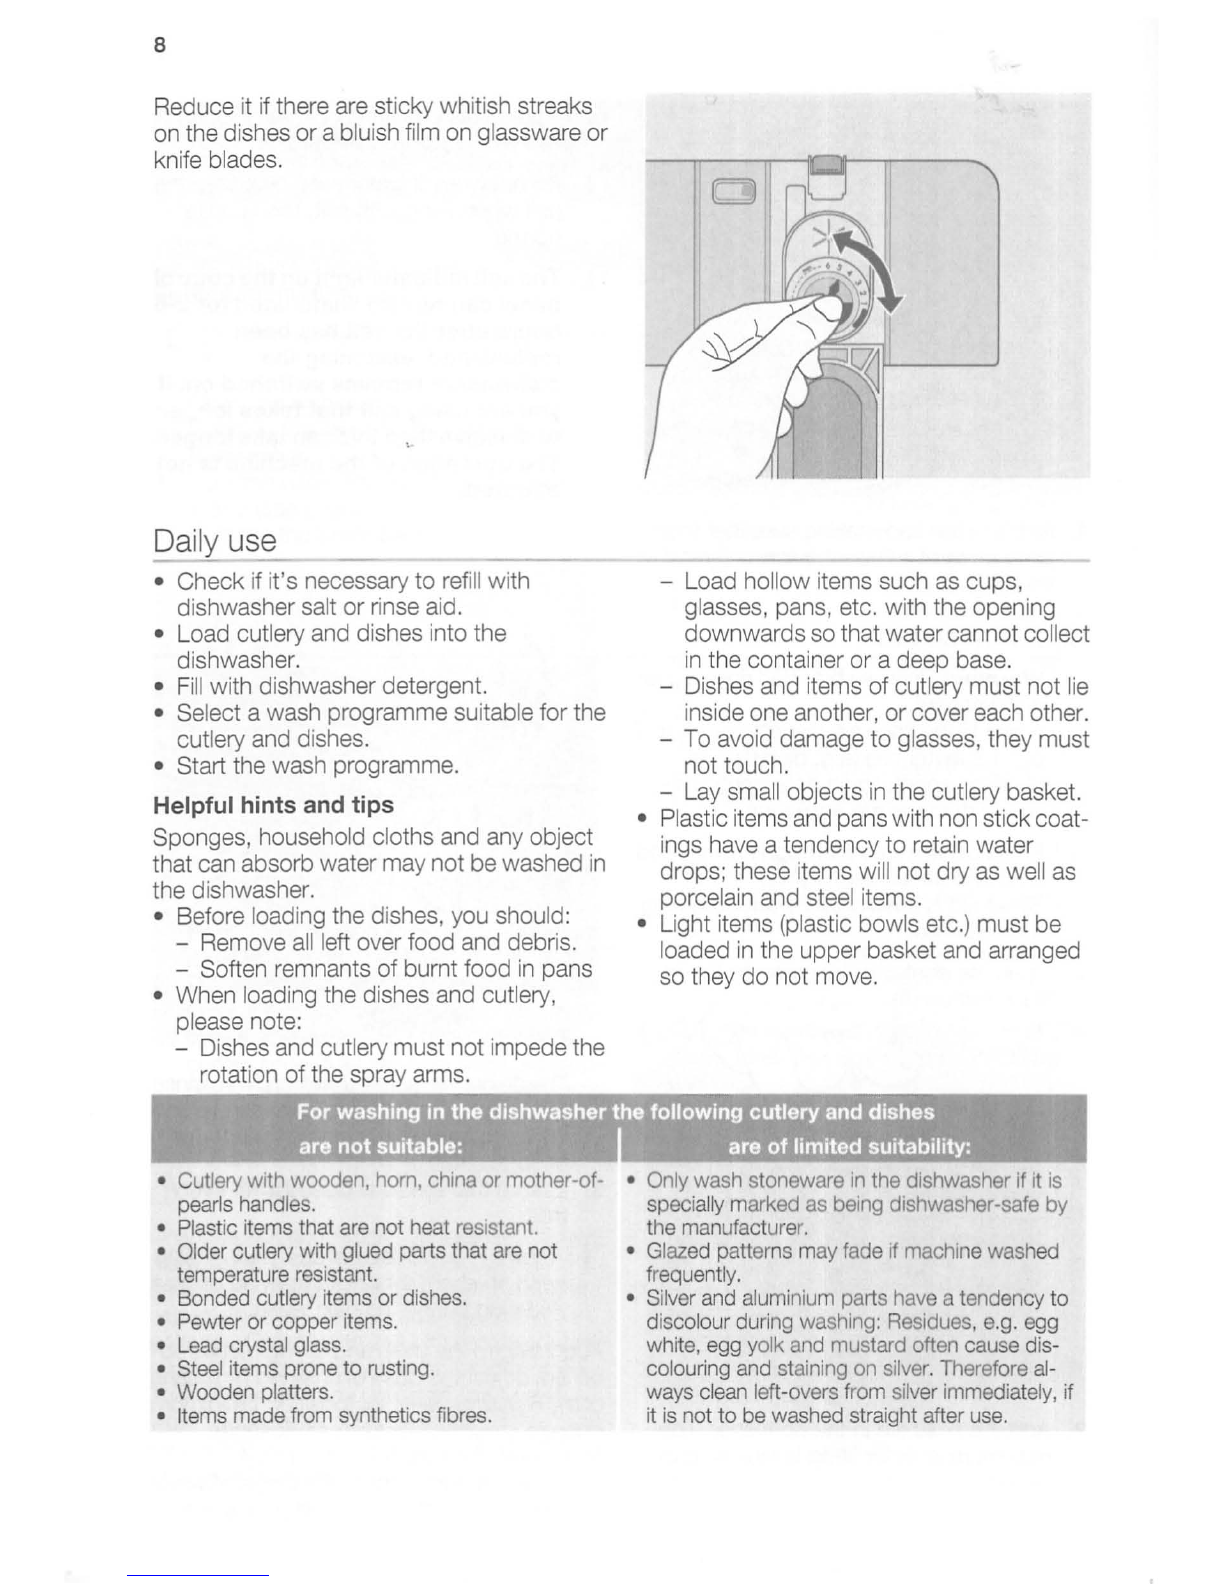
Daily use ........................................
..
....... 8 Water connection ........................
..
....... 18
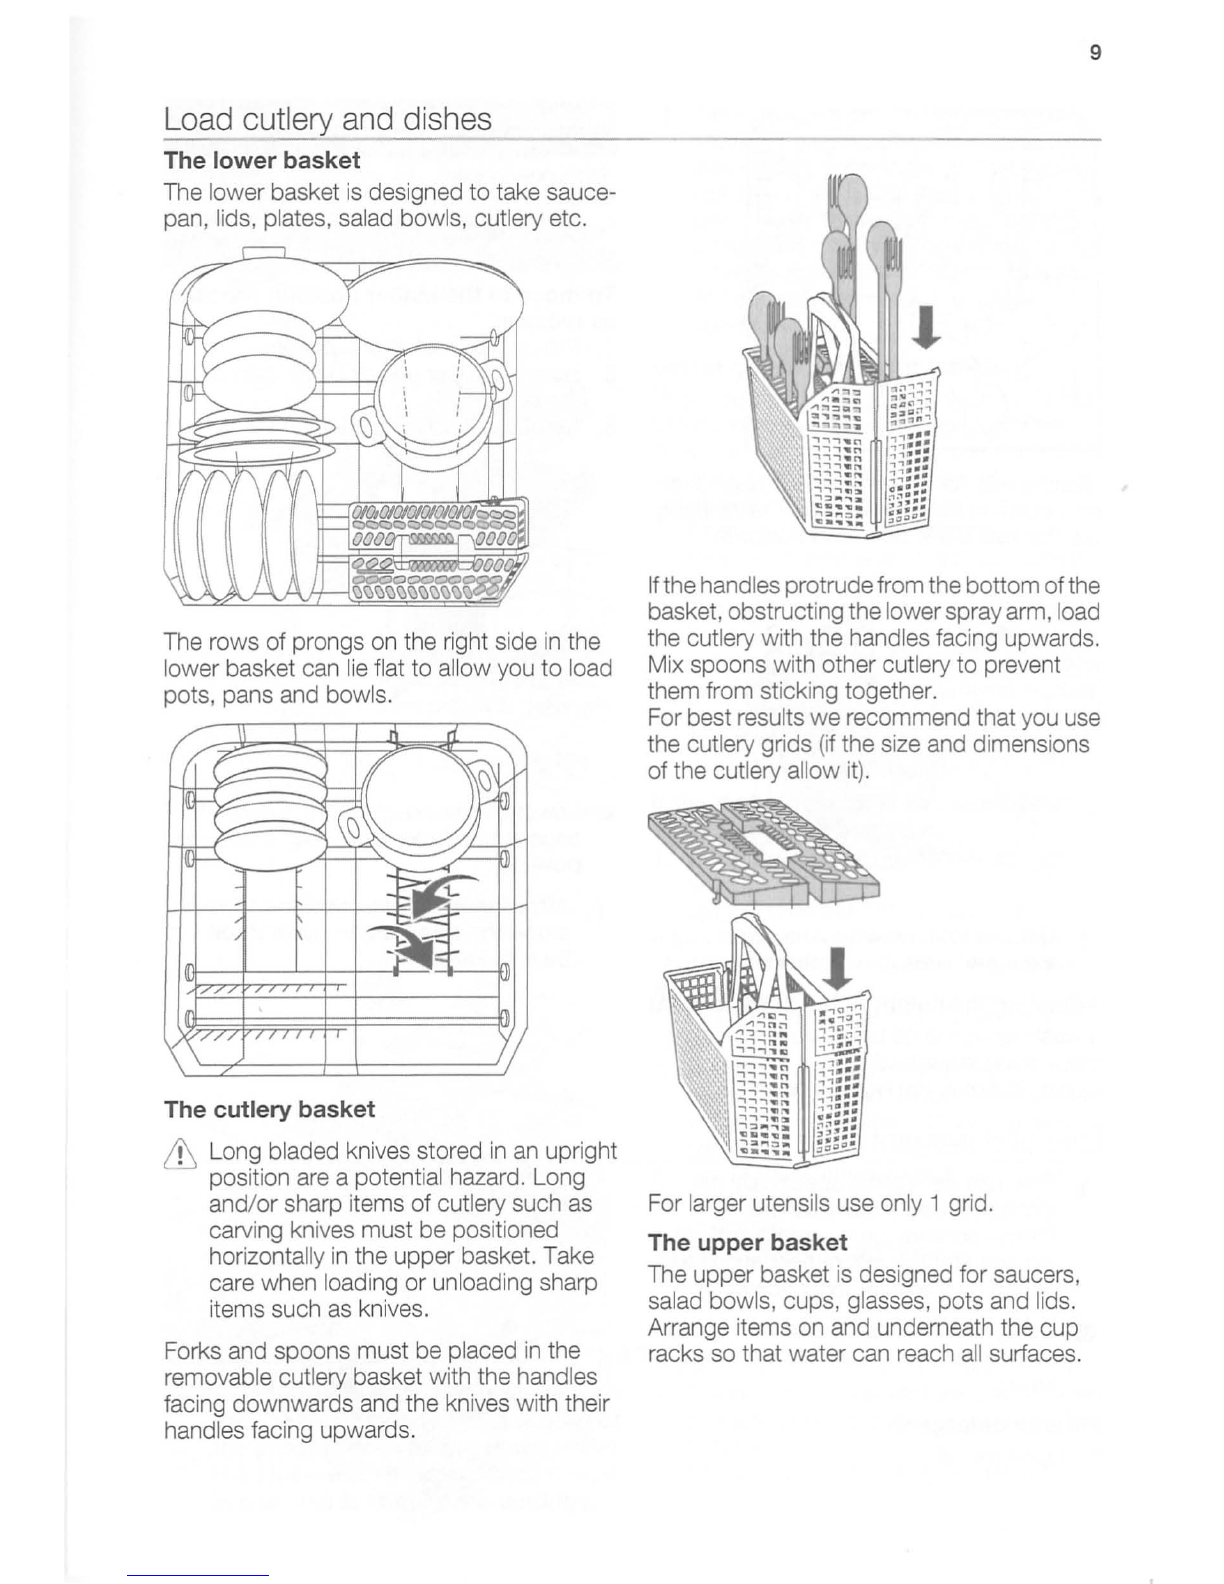
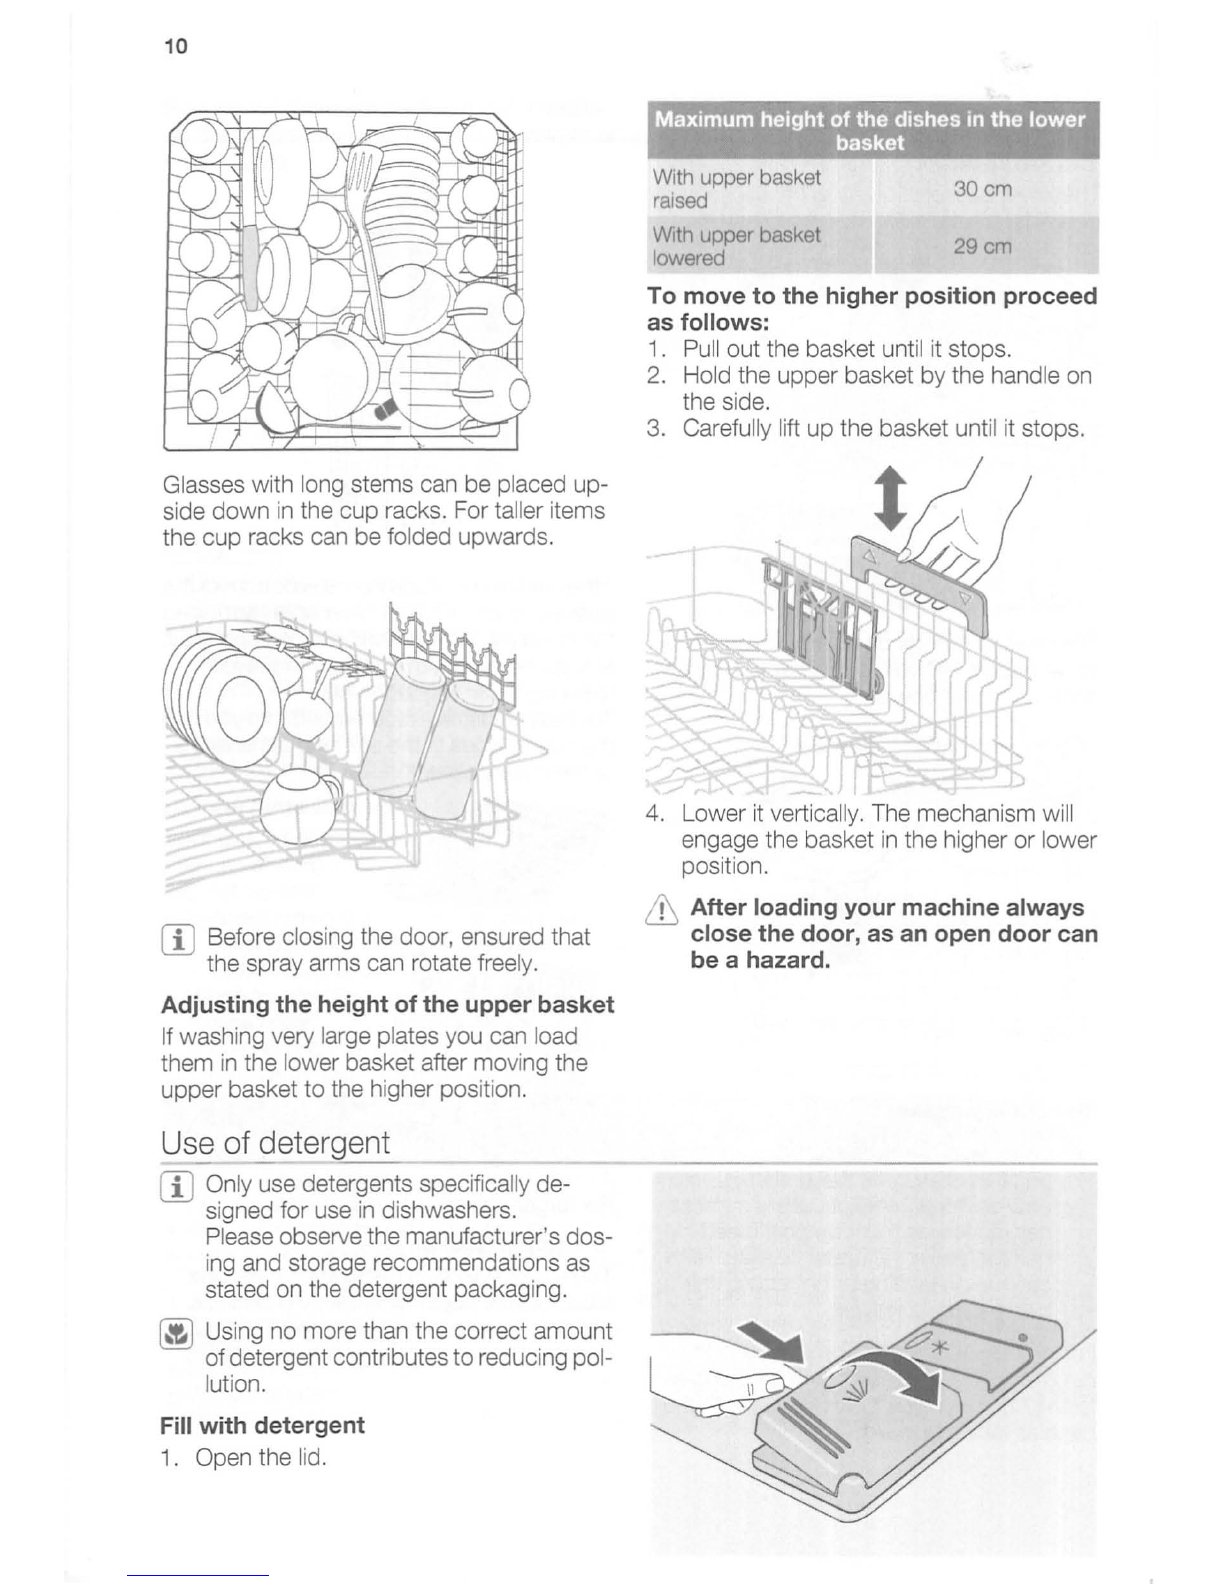
Load cutlery and dishes .......................... 9 Electrical connection
.. .. .. ..
..................... 20
Use of detergent ................................... 10
En
vi
ronment concerns ............
..
............ 20
Select and start a washi
ng
programme
11
(E
Subject to change
wi
thout notice
ill
Safety informati_o_n
___
_
rn
In
the interest of your safety and to en- •
Th
is productshould be serviced only by
an
sure the correct use, before installing authorized service engineer, and only
and first usi
ng
the app
li
ance, read this genuine spare parts should be used.
user manual carefu
lly
, including its hints • Under no circumstances should you at-
and wamings.
To
avoid unnecessary tempt to repair the machine yourself.
Re-
mistakes and accidents, it is important pai
rs
carri
ed
out by inexperienced persons
to ensure that a
ll
people usi
ng
the appli- could cause injury or serious malfunction-
ance
are
thorough
ly
fam
ili
ar wi
th
its ing. Contact your localService Force Cen-
operation and safety features. Save tre. Always insist
on
genui
ne
spare parts.
these instructions and make sure that
they remain with the app
li
ance if it is General safety
mov
ed
or sold, so that eve
ry
one usi
ng
it
• Dishwasher detergents can cause chemi-
through its
li
fe
will
be proper
ly
informed
cal
burns to ey
es
,mouth and throat. Could
on
appliance use and safety. endanger
li
fe!
Comp
ly
with the safety in-
structions of the dishwasher detergent
Correct use manufacturer.
•
Th
is dishwasher
is
only intended for wash- • The water
in
your dishwasher
is
not for
ing household utens
il
s suitable for ma- drinking. Detergent
res
idues may st
ill
be
chine washing. present
in
your machi
ne
.
•
Do
not put any solvents in the dishwasher. • Ensure that the door of the dishwasher
is
Th
is could cause
an
explosion. always closed when it is not being loaded
•
Kn
i
ves
and other items with sharp points orunloaded.
In
this way you will avoid
an
y-
must be loaded in the cutlery basket with body tripping overthe open doorand hurt-
their points down or placed in a horizontal i
ng
themselves.
positi
on
in the upper basket. •
Do
not sit or stand on the open door.
•
Onl
y use products (detergent, salt and Child safety
rinse ai
d)
su
itable for dishwashers.
• Avoid opening the door whilst the app
li
- •
Th
is appliance
is
designed to be operated
ance is
in
operation, hot steam may es- by adults.
Do
not allow children to use the
cape. dishwasher unsupervised.
•
Do
not take
an
y dishes out of the • Keep
all
packaging we
ll
away from
ch
il
-
dishwasher before the end of the w
ash
i
ng
dren. There is a risk of suffocation.
cycl
e.
• Keep
all
detergents
in
a safe place out of
• After
use,
isolate the appliance from the children's reach.
power supply
and
tum off the water sup- • Keep children well away from the
I dishwasher when the door
is
open.
py
.