Atlantis Land A02-WIPCAM-11B User manual


MULTILANGUAGE QUICK START GUIDE
2
ITALIANO
1.1 Contenuto della confezione.....................................5
1.2 I LED frontali..........................................................5
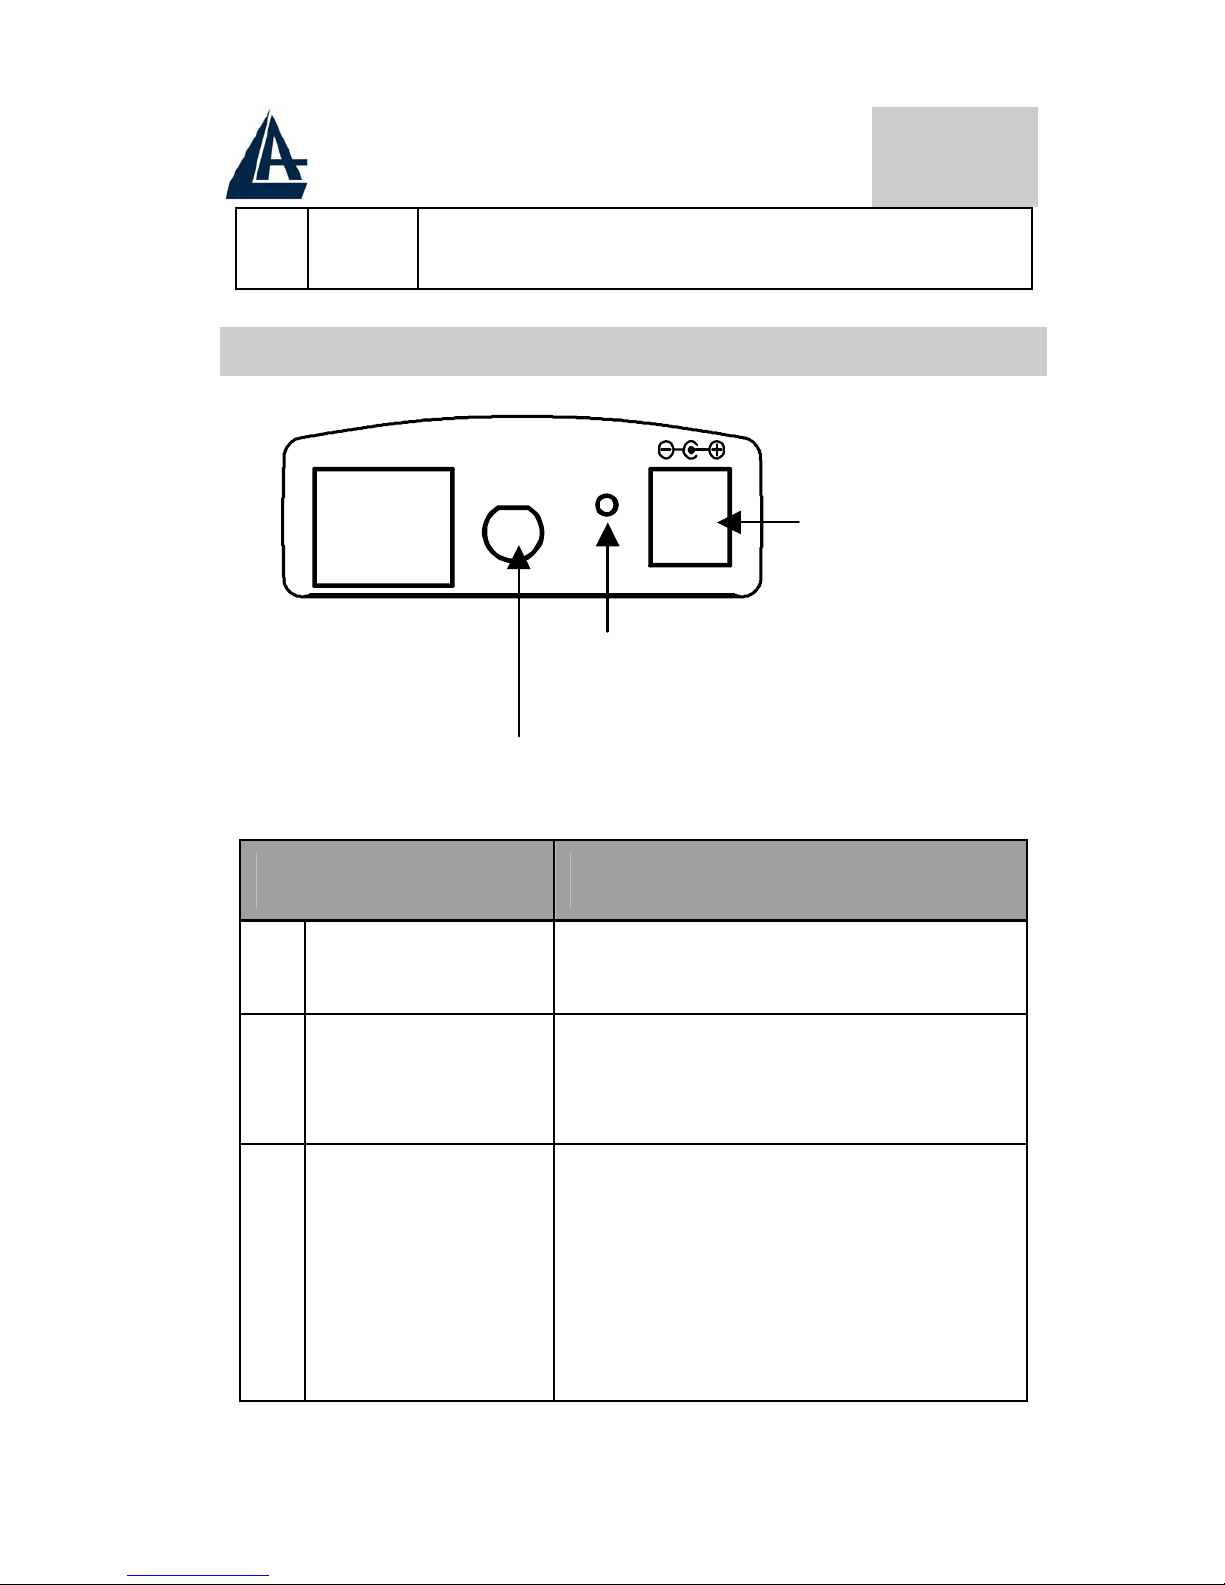
1.3 Le porte posteriori...................................................6
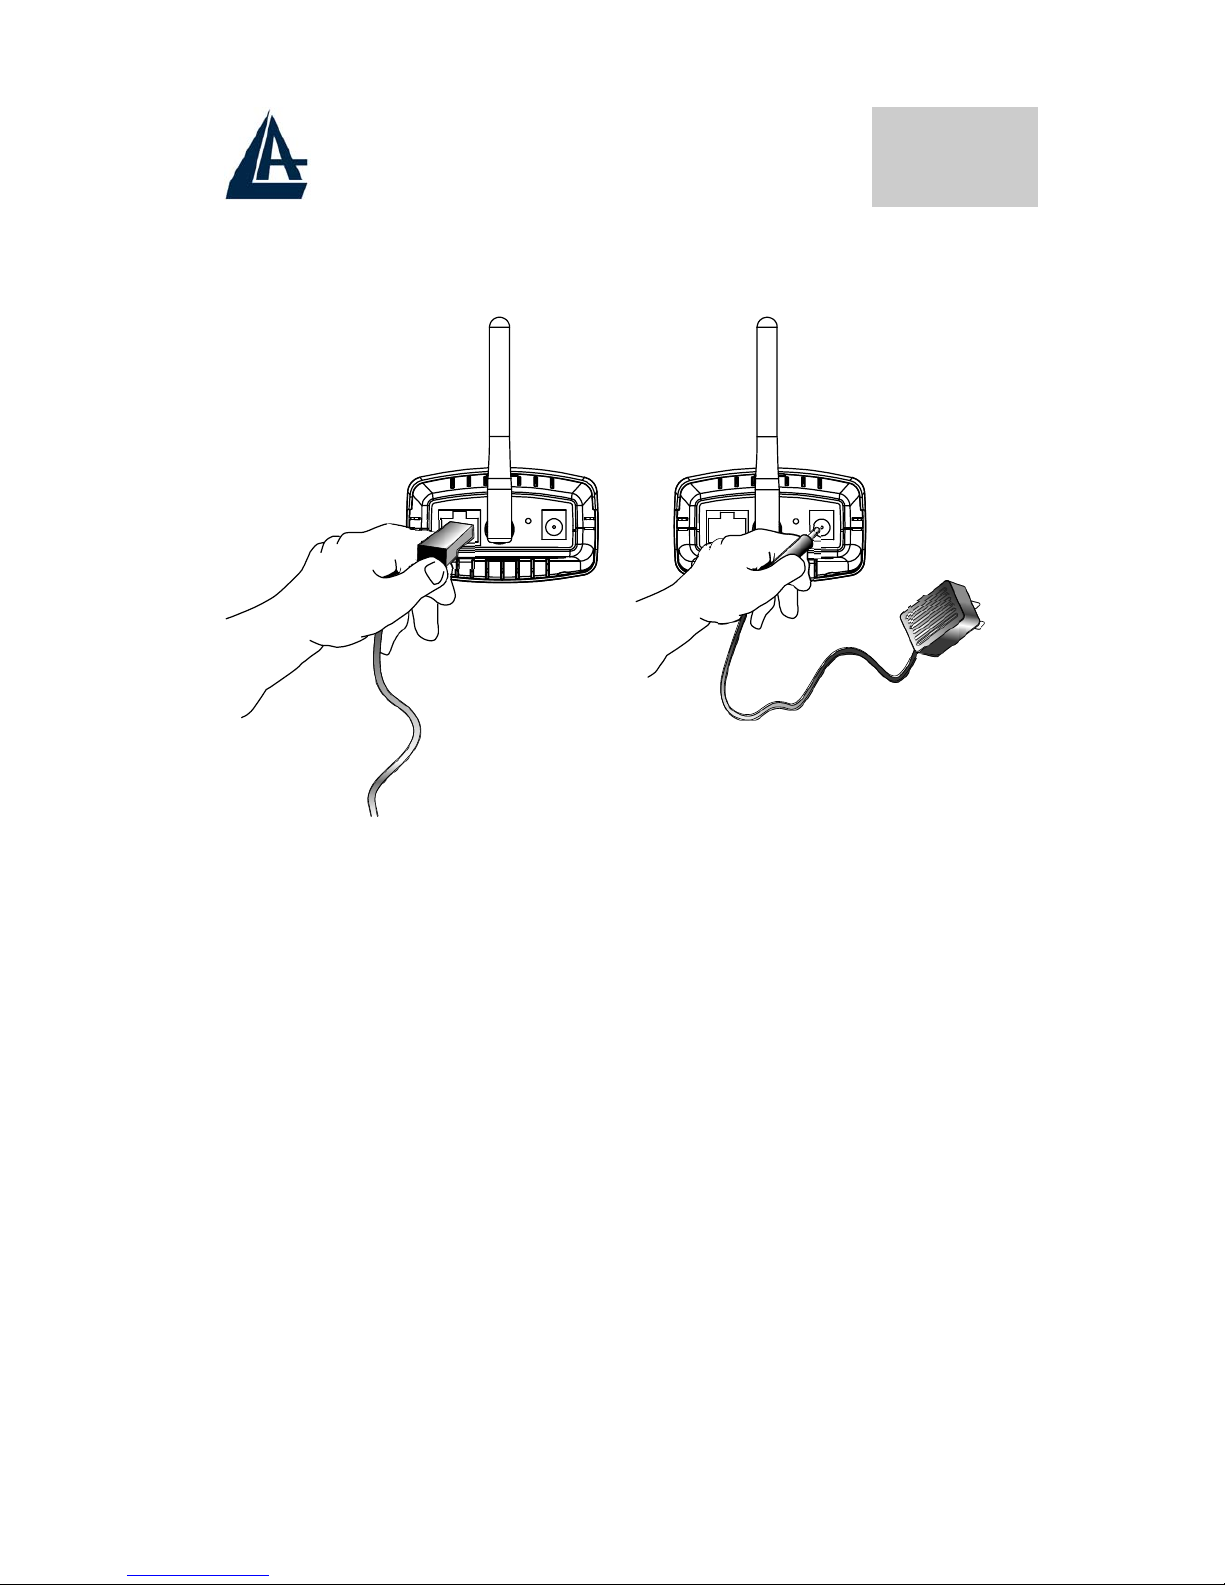
1.4 Cablaggio ................................................................7
1.5 Settaggi di Default ..................................................9
1.6 Configurazione IP Security Cam ............................9
1.7 Java/ActiveX Mode...............................................10
1.8 System Administration..........................................12
ENGLISH
1.1 Package contents...................................................13
1.2 The Front Panel LEDs...........................................13
1.3 The Rear Ports.......................................................14
1.4 Cabling..................................................................15
1.5 Default Settings.....................................................16
1.6 Browser configuration...........................................16
1.7 Java/ActiveX Mode...............................................17
1.8 System Administration..........................................19
FRANCAIS
1.1 Contenu de la boîte ...............................................20
1.2 Face avant .............................................................20
1.3 Face arrière............................................................21
1.4 Câblage..................................................................22
1.5 Configuration initiale ............................................23
1.6 Configuration avec le Browser .............................24
1.7 Mode Java/ActiveX...............................................24
1.8 Administration Système........................................26

MULTILANGUAGE QUICK START GUIDE
3
WARRANTY
FAST SWAP WARRANTY CERTIFICATE............28
DEMAND OF ASSISTANCE FORM .......................32
GARANZIA
CERTIFICATO DI GARANZIA FAST SWAP.........34
MODULO RICHIESTA ASSISTENZA ....................38
GARANTIE
CERTIFICAT DE GARANTIE FAST SWAP...........40
FICHE DE DEMANDE D’ASSISTANCE ................44
A02-WIPCAM-11B_GX01(V1.0 May 2004)

MULTILANGUAGE QUICK START GUIDE
4

ITALIANO
5
Questo manuale è inteso come una guida rapida, pertanto per
ulteriori dettagli sulla configurazione fare riferimento al
manuale esteso presente sul CD. Consultare il sito Web
www.atlantis-land.com per reperire eventuali aggiornamenti.
1.1 Contenuto della confezione
Atlantis Land IP (wireless) Security Cam, CD-ROM contenente il
manuale ed il software IP View SE, Guida di Quick Start, cavo
CAT-5 LAN, Antenna esterna (solo nel modello A02-WIPCAM-
11B), Alimentatore (5V, 2.5A) e Piedistallo in metallo.
1.2 I LED frontali
LED Informazione
1 Power
Acceso di blu indica il corretto collegamento del
dispositivo alla rete elettrica
Power LED
Link LED

ITALIANO
6
2 Link Arancio Fisso= connessione attiva
Lampeggiante quando vi è trasmissione/ricezione
1.3 Le porte posteriori
Porte Utilizzo
1 Network Cable
Connettere il cavo RJ-45 a questa porta per
effettuare l’allacciamento alla Lan.
2 Antenna Connector
Avvitare l’antenna a questo connettore
(presente solo nel modello
A02-WIPCAM-11B)
3 Reset Dopo che il dispositivo è acceso, premere
per effettuare il reset o il restore. Le
operazioni sono le seguenti:
1 secondi: per resettare il dispositivo (il Led
Pwr comincerà a lampeggiare per indicare
l’avvenuto reset)
3 secondi:
p
er ri
p
ortare il dis
p
ositivo alle
Network
Cable
DC Power
Connector
Reset Button
Antenna
Connector
10/100 Ethernet
DC 5V
Reset
ANT

ITALIANO
7
condizioni iniziali (premere sino a che il
tasto power comincerà a lampeggiare)
4 POWER (jack) Connettere l’alimentatore a questo jack
1.4 Cablaggio
Prendere il piedistallo dalla confezione e collegarlo all’ IP Security
camera. Sono presenti, nella base del supporto, 3 fori da utilizzarsi
per un fissaggio sulla parete.
Avvitare l’antenna sul connettore apposito, come da figura:
Collegare a questo punto l’IP Secutity Cam alla LAN utilizzando il
cavo fornito in dotazione. Per terminare collegare l’alimentatore.

ITALIANO
8
Verificare che il LED Power sia acceso.

ITALIANO
9
1.5 Settaggi di Default
Prima di iniziare la configurazione dell’Atlantis IP (wireless)
Security Cam è necessario conoscere quali siano i settaggi di
default:
• Password:
• Username:
• Indirizzo IP: 192.168.0.20
• SSSID=stringa vuota, Canale=11
1.6 Configurazione IP Security Cam
Accedere col browser web al seguente indirizzo IP che di default
è: http://192.168.0.20, e premere il tasto invio.
Apparirà a questo punto il Menù Principale. Nella parte sinistra è
possibile accedere (come se si stessero vedendo i links in una
homepage) a tutte le sezioni disponibili: View Image ActiveX
Mode, View Image Java Mode, System Administration.

ITALIANO
10
Cliccando sulla sezione desiderata, nello spazio della homepage
appariranno tutti i settaggi relativi alla configurazione della
sezione scelta, oppure si apriranno tutta una serie di sottosezioni
tra cui scegliere prima di avere accesso alle configurazione vere e
proprie.
1.7 Java/ActiveX Mode
Cliccare su “View Image – Java Mode/ActiveX” dal menù
principale per avere accesso alla schermata sotto raffigurata.

ITALIANO
11
Camera Name* - Il nome della Camera mostrato è contenuto nel
campo Camera Name in System.
Date/Time***- Viene mostrata l’ora e la data attuale.
E’ possibile configurare nel dettaglio le
funzioni E-Mail Upload ed Image Upload
accedendo all’opportuna sezione.
Nella modalità ActiveX è necessario
installare l’opportuno Plug-In presente nel
CDRom a corredo.
Camera Name*
Date/Time***

ITALIANO
12
1.8 System Administration
In questa sezione è possibile configurare nel dettaglio il
dispositivo. Consultare il manuale completo presente nel CDRom
a corredo.

ENGLISH
13
For more detailed instructions on configuring and using the
IP (wireless) Security Cam, please refer to the online manual.
1.1 Package contents
Atlantis Land IP (wireless) Security Cam, CD-ROM with manual
and IPView SE, Quick Start Guide, cable CAT-5 LAN,
Wireless Antenna (A02-WIPCAM-11B), Power Adapter AC-DC
(5V, 2.5A) and Camera Stand Accessory.
1.2 The Front Panel LEDs
LED Meaning
1 Power Lit when power ON
2 Link
Lit when connected to Ethernet device
Orange for 100Mbps
Blinking when data transmit/received
Power LED
Link LED

ENGLISH
14
1.3 The Rear Ports
Port Meaning
1 Network Cable The Wireless Internet Camera’s rear panel
features an RJ-45 connector for connections
to 10Base-T Ethernet cabling or 100Base-
TX Fast Ethernet cabling
2 Antenna Connector
There is the SMA type antenna connector
located on the rear panel of the Wireless
Internet Camera, providing connection for
one high sensitivity antenna included in the
package.
3 Reset Button After the device has turned on, press it to
reset the device or restore to factory default
settings. The operation is as below:
1 seconds: reset the device
3 seconds: seconds or above: restore to
factory default settings
4 POWER (jack) Connect the supplied power adapter to this
jack.
Network
Cable
DC Power
Connector
Reset Button
Antenna
Connector
10/100 Ethernet
DC 5V
Reset
ANT

ENGLISH
15
1.4 Cabling
The Wireless Internet Camera comes with a camera stand with a
swivel ball screw head that can be attached to the Wireless Internet
Camera's bottom screw hole. Attach the camera stand to the
Wireless Internet Camera and station it for your application.
There are three holes located in the base of the camera stand
allowing the Wireless Internet Camera to be mounted on the
ceiling or any wall securely.
From the rear panel of the Wireless Internet Camera, screw the
external Antenna that came with the Wireless Internet Camera into
the antenna connector.
Connect an Ethernet cable to the network cable connector located
on the Wireless Internet Camera’s rear panel, and then attach it to
the network. Attach the external power supply to the DC power

ENGLISH
16
input connector located on Wireless Internet Camera’s rear panel,
and then connect it to your local power supply.
Confirm power source is supplied from the LED indicators label
Power on the Wireless Internet Camera is illuminated.
1.5 Default Settings
Before you configure this IP (wireless) Security Cam, you need to
know the following default settings:
• Password:
• Userneme:
• IP address : 192.168.0.20
• SSSID= Null String , Channel=11
1.6 Browser configuration
Open the web browser, enter the local port IP address of this
IP (wireless) Security Cam, which default at http://192.168.0.20,
and click “Go” to get the login page.

ENGLISH
17
At the configuration homepage, the left navigation pane where
bookmarks are provided links you directly to the desired setup
page, including: View Image ActiveX Mode, View Image Java
Mode, System Administration.
1.7 Java/ActiveX Mode
To view video images from the browser, click “View Image –
ActiveX Mode / Java Mode” from the welcome screen to access
the video images from Internet Explorer as illustrated below:

ENGLISH
18
Camera Name* - The Camera name will be display when the
Camera Name field is entered in the Web Configuration setting
under System.
Date/Time***- The date/time of the video server will show the
date and time that come from time server or you set manually.
Administrator has the authority to set the
email image functions through the setting in
the “E-mail” of System Administration
menu bar.
The Administrator has the authority to
allow the users to set the image upload
functions through the setting in the
“Upload” of System Administration menu
bar.
Please refer to the appendix on how to
install ActiveX.
Install to the Web Server
Install to your Local PC
Camera Name*
Date/Time***

ENGLISH
19
1.8 System Administration
For more detailed instructions on configuring and using the
IP (wireless) Security Cam, please refer to the online manual.

FRANCAIS
20
Ce guide d’installation rapide vous permet d’installer et de
configurer l’IP (wireless) Security Cam suivant des paramètres
standards. Pour plus de précisions, tant sur les méthodes de
configuration que sur le paramétrage avancé, reportez-vous au
manuel sous format électronique (PDF) disponible sur le
CDRom fourni.
1.1 Contenu de la boîte
Avant l’installation, assurez-vous de disposer des éléments
suivants : Atlantis Land IP (wireless) Security Cam, CD-ROM
avec Application IPView SE, Manuel, Guide d’installation rapide,
Câble réseau RJ45 (Cat 5), Antenne (A02-WIPCAM-11B),
Adaptateur secteur et Pied metallique.
1.2 Face avant
LED Power
Alimentation
LED Link
Témoin de connection
Other manuals for A02-WIPCAM-11B
2
This manual suits for next models
1
Table of contents
Languages:
Other Atlantis Land IP Camera manuals

Atlantis Land
Atlantis Land Netcamera 800NV User manual

Atlantis Land
Atlantis Land IP Security Wireless Motorized Camera... User manual

Atlantis Land
Atlantis Land IP Security Wireless Motorized Camera... User manual

Atlantis Land
Atlantis Land NetCamera A02-IPCAM-W54 User manual

Atlantis Land
Atlantis Land NetCamera 500 User manual