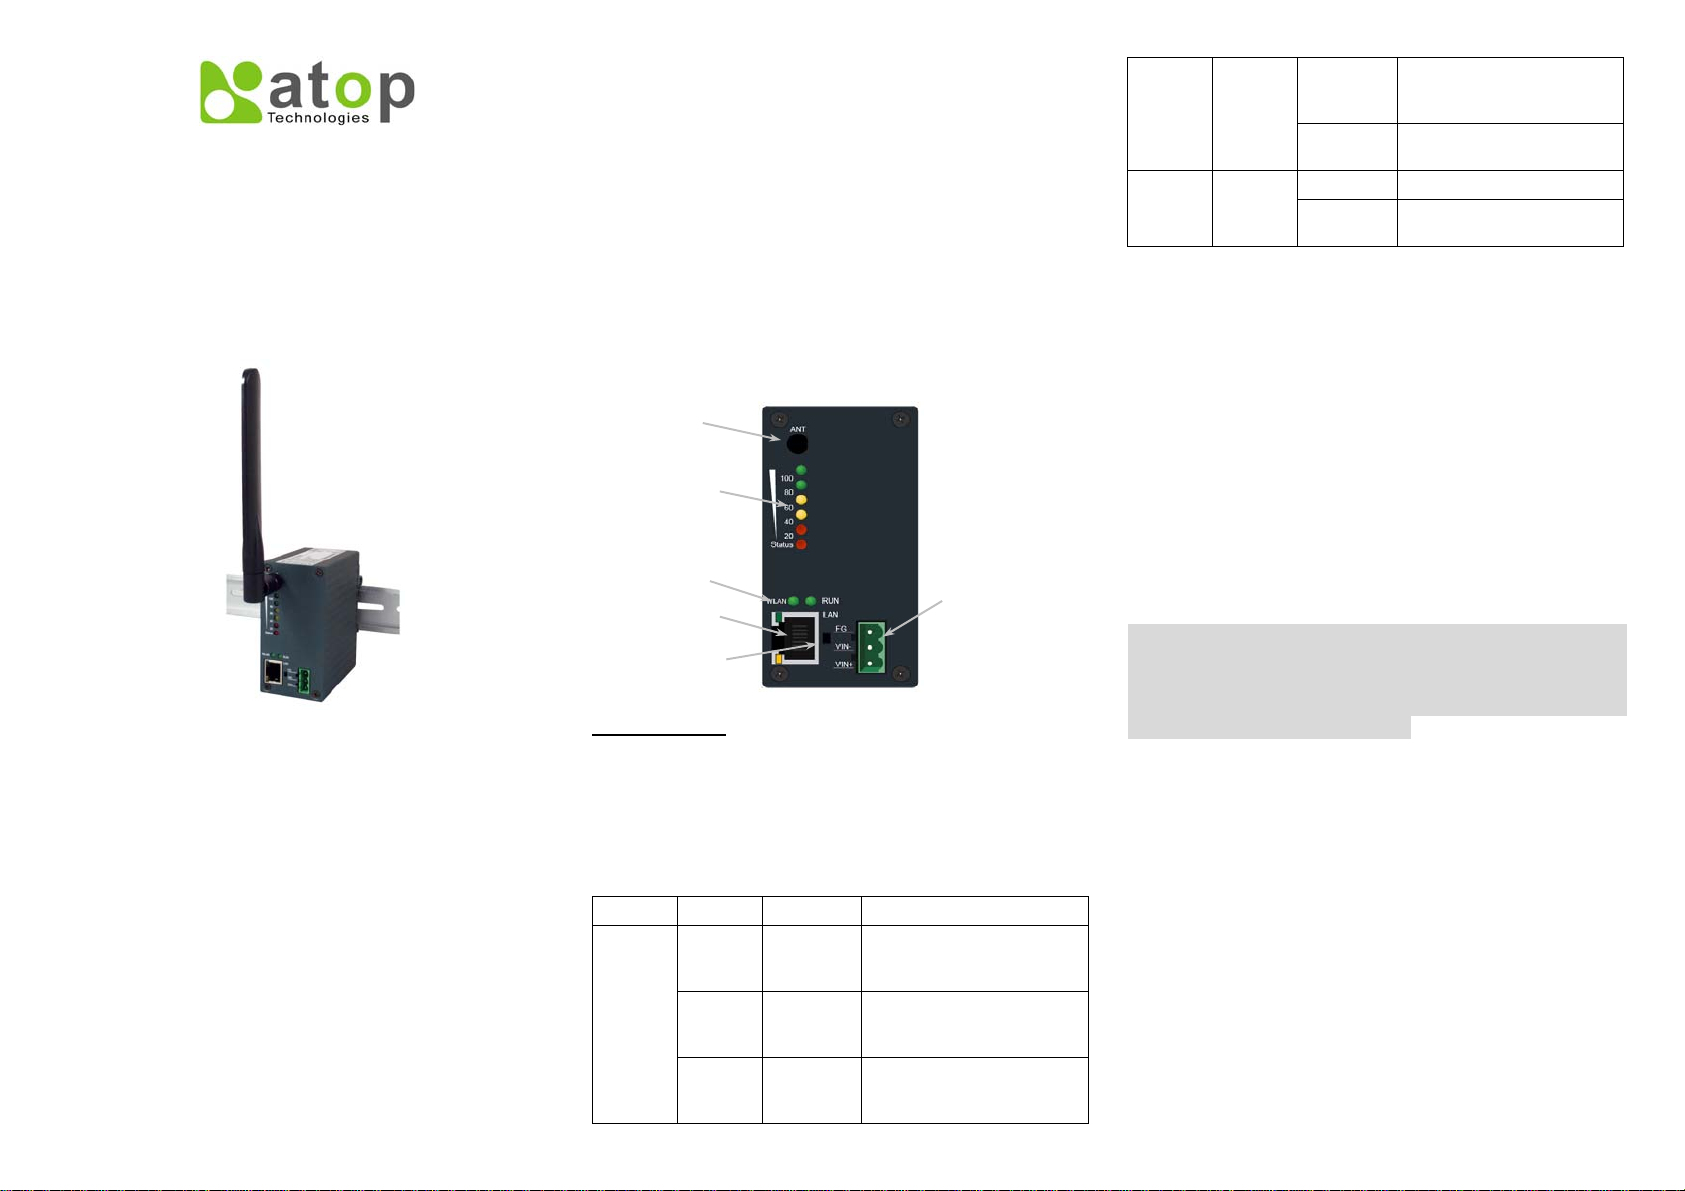
Step 1: Scan a new device by clicking the scan button
Step 2: Get the device’s current IP address from table
list after scanning, and login using the default
username: admin and default password:
(leave it blank)
Step 3: Re-assign an IP address, network mask and
gateway if needed.
Step 4: Then, you can configure a wireless network
interface using a web browser or a telnet
terminal.
Warning: Please avoid connecting LAN and WAN
interface to the same network. This may incur
unexpected networking problem.
Automatic IP Address using DHCP
To avoid any IP address conflict, an automatic IP
address assignment should be used. A DHCP server
can automatically assign an IP address, subnet mask,
and gateway address to EW5300 device. This function
is disabled by default. Please see the user’s manual
for more details.
Configure using Web Browser
Step 1:Open a web browser and type in the IP address
of the device in URL field. A dialog is prompt for
a username and a password. The default
username is admin and the password is null
(leave it blank).
Step 2:Configure network settings from web page links
then click “Save Configuration” to save
settings.
Step 3:Click on ”Restart” button to make the change
effective
Configure using Telnet terminal program
Step 1:Telnet to the device using command shell of
Windows (StartÆRun) or any other terminal
program that supports Telnet. Then, type in
“telnet 10.0.50.100”. The 10.0.50.100 is the
default IP address of the device. You will need to
change it to a new IP address if you have
assigned a new IP address to the device. Then,
type in and default password is null (leave it
blank).
Step 2:Configure the wireless network interface by
selecting the items on the main menu on the left
side of the device’s web page.
Warranty Policy
Warranty Conditions
Products supplied by Atop Technologies are covered
in this warranty for sub-standard performance or
defective workmanship. The warranty is not, however,
extended to goods damaged in the following
circumstances:
(a) Excessive forces or impacts
(b) War or an Act of God: wind storm, fire, flood,
electric shock, earthquake
(c) Use of unqualified power supply, connectors, or
maintenance procedure
(d) Replacement with unauthorized parts
RMA and Shipping Costs Reimbursement
Customers shall always obtain an authorized "RMA"
number from Atop before shipping the goods to be
repaired to Atop. When in normal use, a sold product
shall be replaced with a new one within 3 months after
purchase. The shipping cost from the customer to Atop
will be reimbursed by Atop.
After 3 months and still within the warranty period, it is
up to Atop whether to replace the unit with a new one;
normally, as long as a product is under warranty, all
parts and labor are free of charge to the customers.
After the warranty period, the customer shall cover the
cost for parts and labor.Three months after purchase,
the shipping cost from the customer to Atop will not
be reimbursed, but the shipping cost from Atop to the
customer will be paid by Atop.
Limited Liability
Atop shall not be held responsible for any
consequential losses from using Atop’s
product.
Warranty Period
Product Categories Warranty
Serial-to-Ethernet Server
Serial-to-WLAN Server
Industrial Wireless Ethernet Device
Modbus Gateway Series
Industrial Ethernet Switch
Embedded Serial Server
5 Years
Pick-to-Light System
Auto-Identification and Data
Collection-AIDC
1 Year
*Notes: Warranty coverage for Accessories such as
power adaptors and high-gain antenna is one year.
The Warranty Certification will not be effective until an
authorized stamp issued byAtop’s overseas agents.
PurchaseDate: / / (yyyy/mm/dd)
Serial Number:
※ATOP Customer Services and Supports
1. Please contact your local dealers orAtop technical
support center at the following numbers.
y+886-3-550-8137 (Atop Taiwan)
y+86-21-6495-6232 (Atop China)
2. Please report the defected problems viaAtop’s Web
site or E-mail account