Audeze Mobius User manual

The Traveler’s Handbook
to the
Mobius Universe

May your adventures be infinite and your imagination never ending.

INTRODUCTION
1
You’ve found the Audeze Mobius Immersive, Cinematic 3D Headphone!
Don’t be intimidated. Don’t panic. This two button, two wheel, planar magnetic,
Waves Nx head-tracking enabled pair of cans represents the most technologi-
cally advanced head accessory on the market. Some might call it a fancy space
hat, but this is Mobius. And with your Mobius, we plan on taking you to places
within audio far beyond anything you’ve ever known. So, take a deep breath,
shake out those jitters, it’s time to journey!
When embarking on a quest of this magnitude, it is of course wise to check one’s
inventory. Who leaves with nothing, after all? Such folly! Included in your
Mobius pack, you’ll find: a USB-A to USB-C cable, a USB-C to USB-C cable, an
Analog 3.5mm cable, and a Detachable Microphone. While you’re at it, inspect
the design of Mobius, its flexibility, its durability, its memory foam pads.
Note: We recommend not twisting other headphones like you would Mobius…
NOTICE: BEFORE ANYTHING ELSE, PLEASE READ THE MOBIUS SAFETY
AND WARRANTY INFO! BE RESPONSIBLE, AUDIO ADVENTURERS!
You’ve found the Audeze Mobius Immersive, Cinematic 3D Headphone!
Don’t be intimidated. Don’t panic. This two button, two wheel, planar magnetic,
Waves Nx head-tracking enabled pair of cans represents the most technologi
-
cally advanced head accessory on the market. Some might call it a fancy space
hat, but this is Mobius. And with your Mobius, we plan on taking you to places
within audio far beyond anything you’ve ever known. So, take a deep breath,
When embarking on a quest of this magnitude, it is of course wise to check one’s
inventory. Who leaves with nothing, after all? Such folly! Included in your
Mobius pack, you’ll find: a USB-A to USB-C cable, a USB-C to USB-C cable, an
Analog 3.5mm cable, and a Detachable Microphone. While you’re at it, inspect
the design of Mobius, its flexibility, its durability, its memory foam pads.
We recommend not twisting other headphones like you would Mobius…

WIRED CONNECTION – USB
Let’s begin: Mobius can be used with a wired (USB and AUX) or wireless (Bluetooth) connection.
We’ll begin with a wired USB connection as your likely primary connection. From your inventory
of goodies, identify your USB-A to USB-C Cable to connect your Mobius to your PC (or PS4 or
any appropriate USB enabled device). Mobius’ USB-C input is on the bottom side of the left
ear-cup. Additionally, make sure Mobius is set as the input/output device accordingly and lower
your volume as a responsible precaution. Orient yourself to a desired listening positon and press
the 3D button located on the bottom, front side of the left ear-cup and listen for the “Centered”
confirmation prompt. Wait… you didn’t hear the prompt? Oh, we forgot to turn Mobius on…
You’ll however notice that the LED on the left ear-cup of Mobius is illuminated red to signify that
even though Mobius is off, it is receiving charge. We totally meant to do that…
POWERING UP/DOWN/AUTO
We should probably turn Mobius on… The power button is located on the outer face of the left
ear-cup of Mobius along with all other controls we have and will mention. Press and hold the
power button for 3 seconds so that the Mobius narrator can cheerfully confirm “Power On.” To
give your Mobius some rest, press and hold the power button for 5 seconds to power down and
Mobius’ narrator will confirm “Power Off.” Additionally, if no cables or Bluetooth sources are
connected, Mobius will efficiently power itself off after 3 minutes to conserve battery.
your volume as a responsible precaution. Orient yourself to a desired listening positon and press
the 3D button located on the bottom, front side of the left ear-cup and listen for the “Centered”
confirmation prompt. Wait… you didn’t hear the prompt? Oh, we forgot to turn Mobius on…
You’ll however notice that the LED on the left ear-cup of Mobius is illuminated red to signify that
We should probably turn Mobius on… The power button is located on the outer face of the left
ear-cup of Mobius along with all other controls we have and will mention. Press and hold the
power button for 3 seconds so that the Mobius narrator can cheerfully confirm “Power On.” To
give your Mobius some rest, press and hold the power button for 5 seconds to power down and
Mobius’ narrator will confirm “Power Off.” Additionally, if no cables or Bluetooth sources are

CHARGING
To charge using USB, Mobius supports 1
Amp chargers and takes approximately
3 hours to fully charge when Mobius is
powered off. When plugging Mobius
into a wall-wart, make sure the red LED
is on to indicate that charging is in
effect. Some older wall-warts and USB
Hubs might not provide enough power
to charge Mobius. Instead, please use a
1 Amp charger. When Mobius’ battery
is low, Mobius will attempt to charge
using the USB cable simultaneously to
keep you in the action. If you have a
USB Hub or extender, Mobius will work
equally well with these, but once again,
some USB hubs might not charge
Mobius. Please check your hub specs.
3
WIRED CONNECTION –
ANALOG (3.5 MM)
If needed, complete a wired connec-
tion with your Analog AUX cable in the
same way you connected via USB
previously. The Analog input exists on
the bottom side of the left ear-cup.
Make sure you don’t plug your cable
into the microphone input. You
wouldn’t be the first one to make that
mistake. Mobius has a balanced ampli-
fier built-in, so you do not need any
external amps to power this star of a
headphone. Additionally, some PC's
might have a separate connection
input for headphone and microphone.
In this case, obtain a splitter for your
inventory to split the TRRS connection.
To charge using USB, Mobius supports 1
Amp chargers and takes approximately
3 hours to fully charge when Mobius is
powered off. When plugging Mobius
into a wall-wart, make sure the red LED
is on to indicate that charging is in
effect. Some older wall-warts and USB
Hubs might not provide enough power
to charge Mobius. Instead, please use a
1 Amp charger. When Mobius’ battery
is low, Mobius will attempt to charge
using the USB cable simultaneously to
keep you in the action. If you have a
USB Hub or extender, Mobius will work
equally well with these, but once again,
some USB hubs might not charge
Mobius. Please check your hub specs.
3
To charge using USB, Mobius supports 1
Amp chargers and takes approximately
3 hours to fully charge when Mobius is
powered off. When plugging Mobius
into a wall-wart, make sure the red LED
is on to indicate that charging is in
effect. Some older wall-warts and USB
Hubs might not provide enough power
to charge Mobius. Instead, please use a
1 Amp charger. When Mobius’ battery
is low, Mobius will attempt to charge
using the USB cable simultaneously to
keep you in the action. If you have a
USB Hub or extender, Mobius will work
equally well with these, but once again,
some USB hubs might not charge
WIRED CONNECTION –
WIRED CONNECTION –
ANALOG (3.5 MM)
ANALOG (3.5 MM)
If needed, complete a wired connec
If needed, complete a wired connec
tion with your Analog AUX cable in the
tion with your Analog AUX cable in the
same way you connected via USB
same way you connected via USB
previously. The Analog input exists on
previously. The Analog input exists on
the bottom side of the left ear-cup.
the bottom side of the left ear-cup.
Make sure you don’t plug your cable
Make sure you don’t plug your cable
into the microphone input. You
into the microphone input. You
wouldn’t be the first one to make that
wouldn’t be the first one to make that
mistake. Mobius has a balanced ampli
mistake. Mobius has a balanced ampli
fier built-in, so you do not need any
fier built-in, so you do not need any
external amps to power this star of a
external amps to power this star of a
headphone. Additionally, some PC's
headphone. Additionally, some PC's
might have a separate connection
might have a separate connection
input for headphone and microphone.
input for headphone and microphone.
In this case, obtain a splitter for your
In this case, obtain a splitter for your
inventory to split the TRRS connection.
inventory to split the TRRS connection.

WIRELESS CONNECTION
For a Bluetooth connection, double press the power button to hear the narrator’s “Pairing” prompt. While Mobius
searches for your device of choice, select “Audeze Mobius 3D BT” in your device’s Bluetooth list. The narrator will wisely
confirm “Paired.” Manually switch from USB/AUX mode to Bluetooth on your Mobius by double pressing the 3D button
to cycle between USB, AUX, and Bluetooth voice prompts respectively.
Mobius supports three types of codecs within Bluetooth: SBC, AAC, and LDAC. Mobius uses AAC to connect to iDevic-
es. Newer Android devices will connect utilizing LDAC. If neither codec is available for your device of choice, Mobius
will use SBC. After all, you’ll need adaptability for your journeys ahead with Mobius.
CONNECTION PRIORITY
When multiple connections are active, the AUX (Analog cable) has the highest priority followed by USB and finally
Bluetooth. If neither Analog nor USB is plugged in, Mobius makes a logical conclusion and prioritizes a Bluetooth
connection. As before, double press the 3D button to manually cycle between USB, AUX, and Bluetooth voice prompts
respectively. Good work, traveler.
4

3D OPERATION
With connections established and covered, it’s time to rev up some engines and experience the true experience of
Mobius. There are 3 modes of operation. You can cycle through these modes with a long press of the 3D button.
3D Manual – In this mode, you will specify the direction of the central reference point. First, center your head for the
optimal listening experience. Are you ready? We hope so. This is the big part. Press the 3D button on the bottom,
front side of the left ear cup once. The Mobius narrator will confirm “Centered.” That’s it. Your 3D sound space has
been fully prepped and rendered for the next generation audio experience, all with the simple press of a button. This
is the default mode enabled automatically for USB and Analog connection modes.
3D Automatic – The centering button is disabled in this mode that’s designed for mobile use. Instead, the Waves Nx
algorithm automatically calibrates the center of your audio as you move, whether slightly or drastically. This is ideal
for those that enjoy listening to audio in cars or trains or those who frequently space travel. This is the default
behavior for Bluetooth connections.
3D Off – It’s alright if 3D doesn’t sync with your taste. All 3D processing is turned off in this mode, giving you a
standard Audeze Planar closed-back headphone.
5

6
VOLUME AND MICROPHONE
The next course of our training procedure within this traveler’s
guide covers the various controls that will optimize your
performance and handling of Mobius. On the back of the side
of the left ear-cup are both volume controls. Scroll the top
wheel both directions. Congrats, you’ve adjusted your volume.
Next, repeat the previous procedure with the bottom wheel by
scrolling up and down to adjust your microphone’s volume. Of
course, it helps to have the microphone plugged in. Thus, it’s
logical to retrieve your detachable microphone and plug it into
the mic jack on the front of the left ear-cup. Make sure when
connecting the microphone that the flat parts align and that the
mic is not muted on the left ear-cup. With your microphone
functional, you’re equipped to communicate with friends,
enemies, and dolphins alike.
6
The next course of our training procedure within this traveler’s
guide covers the various controls that will optimize your
performance and handling of Mobius. On the back of the side
of the left ear-cup are both volume controls. Scroll the top
wheel both directions. Congrats, you’ve adjusted your volume.
Next, repeat the previous procedure with the bottom wheel by
scrolling up and down to adjust your microphone’s volume. Of
course, it helps to have the microphone plugged in. Thus, it’s
logical to retrieve your detachable microphone and plug it into
the mic jack on the front of the left ear-cup. Make sure when
connecting the microphone that the flat parts align and that the
mic is not muted on the left ear-cup. With your microphone
functional, you’re equipped to communicate with friends,

When connected via Bluetooth:
- Perform a short press of the power button to answer/end a call.
- Press and hold the power button for 2 seconds to reject an incoming call. If the distance between
your Mobius and its host device exceeds service range, Mobius will attempt to reconnect automatically
within 1 minute. Alternatively, double-click the volume wheel to link back to the last device.
When connected and playing media:
- Perform a short press of the power button to pause/play music.
- Perform a short press and scroll the volume wheel to go to the next or previous song.
- Perform a short press and scroll the mic-gain wheel to change the EQ presets within Mobius.
It’s time for some advanced
tactics. For those brave and
experienced, these controls will
add further efficiency in your
travels throughout the space of
audio. Mobius is the true
omni-tool. Use it wisely and
don’t mix up your buttons.
Default This is the EQ preset that is tuned to the Audeze House curve.
Footsteps This enhances footsteps to better hear those sneaking behind you.
Some might say it’s audio radar.
Ballistics Enhances gunshots and other ballistic sounds so you can clearly pinpoint
the enemy in FPS games and take advantage.
Music This preset is made especially for music and jamming between intergalactic locations.
Racing Activate those warp drives. This preset is designed for racing.
RPG This preset is optimized for role playing games and immersion.
Flat No EQ. You can use this if you are planning to use external EQ options.
... . . -. -.-. . .-.-.- - .... . .-.-.- ...- . .-. -.- - .-.-.- -. .. . --. .. -. -. .. -. -- . .-.-.- -- - ..-. .- .-.- - ... . . .-.-.- .- ..- - .. . --.. . .-.-.- -- --- -. .. .. . .- ... .-. -.- -.-. .-. . .- - .. ...- . .-.-.- -.- . .- -- . --. .- .. --. -. .- .-.- .-- . .-.-.- ... . .- ... - . .-.-.- ... . - .-.-.- ---
..- - .-.-.- - --- .-.-.- -.-. .-. . .- - . .-.-.- .- -. .-.-.- . -..- .--. . .-. .. . -. -.-. . .-.-.- - .... .- - .-.-.- .-- --- ..- .-.. -.. .-.-.- . -. - . .-. - .- .. -. .-.-.- . -. .- -.-. .. - . .-.-.- .- -. -.. .-.-.- .. -. ... .--. .. .-. . .-.-.- . . -- .- --. . . -. .- - .. --- -. .-.-.- -... . ..-.
.. - - .. -. --. .-.-.- - .... . . ... .-. -.- .. -. -.-. .-. . -.. .. - ... .-.. -.-- .-.-.- --. .-. - -- ..- -. -.. -.. . .-. . .- -.- .. - . --. .-.-. - .... . .- -.. .- -. .... --- -. . .-.-.- - . ... . .- .-.- - . . - -- .-.-.- .... . .-. . .-.-. - .- - .-. -.- .- ..- -.. . - -.. . .-.-. - .... . - ...- . .-.-.- - . ... ---
.-. --- . .- --. .... .-.. -.-- .-.-.- . -. .--- --- -.-- . -.. .-.-.- -.. . ... .. --. -. .. -. --. .-.-.- - .... .. . .. .-.-.- . -..- .- -. . .-. .. . -. -.-. . .-.-.- .- -. -.. .-.-.- .-- --- ..- .-.. -.. .-.-.- .-.. .. -.- . .-.-.- - --- .-.-.- . -..- .--. .-. . ... ... .-.-.- --- ..- .-. .-.-.- -- ---
... - .-.-.- .. . .. -. - .-. . .-. . .-.-.- -- . .-. .- - .. - . .- -.. . .-.-.- .- -. -.. .-.-.- .- -.. - - .. .-. .- - .. --- -. .- .-.- ..-. - -- .-. .-. -.- -.-- - -- ..- .-. .-.-.- .. - -. -.-. . - -. -. -. -- .-.-.- . -. . ... --- ..- .-. -.-. . ..-. ..- .-.. -. . ... ... .-.-.- .- -. -.. .-. -.- .- -.. . .. .-.. ..
- -.-- .-.-.- - --- .-.-.- .-. . .- -.. .-.-.- -... . - .- - . . -. .-.-.- - .... . .-.-.- .-.. .. -. . ... .-.-.- -..- -.. .-.-.- .-- . .-.-.- .... --- .--. . .-.-.- - .-. ..- .-.. -.- - .-.-.- . -. .-- - --- -.-- .-.-.- -.-- --- ..- .-. .-.-.- -. . .- - .-.-.- -- --- -... .. ..- ... .-.-.- .... . .- -..
.--. . ... --- -. . .-.-.- .-- .- . -. -- . . .. - .-.-. - .-. . - -. .- .-. -.. ... .-.-.- --..- - .-.-.- -. -. .-. . . - - .. . ..- . .-.- .- -.. .. .-. . -.-. - --- . -. .-.-.- - - .. -. .... .-.-.- --.- ..- .- -.-. . ... .-.-.- .- - .-.-. - .- ..- -.. . --. . . .-.-.- -.-. --- -- .-.-.- --. .- -- . .-.-.- - -- -.
The following EQ presets are available:
ADVANCED CONTROLS

CONCLUSION
With that, your basic training for Mobius is complete. Make sure you store your Mobius
carefully and responsibly in a protective case or on a headphone stand when not in
use. Keep Mobius in a dry environment and avoid exposure to liquids. Like an artifact
from the far reaches of space, treasure your Mobius. We’re excited for the adventures
ahead and hope you are too! You’re officially ready to conquer all challenges and
explore the furthest reaches of audio. Don’t forget which buttons to press and if you
have any further questions, just remember: the answer to everything is 42.
Need Additional Help?
Contact our customer service at support@audeze.com or www.audeze.com/support
Feedback
We put great effort to ensure that your experience with Audeze is as incredible as the sound
of our headphones. We would love to hear from you, your feedback is an important part of our
efforts to continuously improve the Audeze experience.
Connect with us at:
Facebook.com/AudezeLLC
Twitter.com/Audeze
support@audeze.com
8
With that, your basic training for Mobius is complete. Make sure you store your Mobius
carefully and responsibly in a protective case or on a headphone stand when not in
use. Keep Mobius in a dry environment and avoid exposure to liquids. Like an artifact
from the far reaches of space, treasure your Mobius. We’re excited for the adventures
ahead and hope you are too! You’re officially ready to conquer all challenges and
explore the furthest reaches of audio. Don’t forget which buttons to press and if you
of our headphones. We would love to hear from you, your feedback is an important part of our

Button/Control Action Function
Single Click (Short Press) Pause or Play Audio/Answer or End Call
Double Click Begin Bluetooth Pairing
Long Press (3 seconds) Power On/Reject Incoming Call
Long Press (5 seconds) Power Off
Single Click (Short Press) “Center” Your 3D Audio
Double Click Change Source Mode (USB, AUX, BT)
Long Press (3 seconds) Change 3D Audio Mode (Auto/Off/Manual)
Scroll Change Audio Volume (+ / -)
Single Click (Short Press) and Scroll Change Song/Track (Next/Previous)
Double Click Link Back to Last Bluetooth Host Device
Scroll Change Microphone Volume (+ / -)
Single Click (Short Press) and Scroll Change EQ Preset
Long Press (3 seconds) Change Audio Mode (7.1ch, 2ch, Hi-Res)
Toggle Mute/Unmute Microphone
Power Button
3D Button
Headphone Volume Wheel
Microphone Volume Wheel
Mic Mute Switch

Le guide du voyageur
à travers
l’Univers Mobius
Que vos aventures soient infinies et votre imagination sans limites.

INTRODUCTION
1
Voici le casque Mobius d’Audeze, un casque immersif 3D, le plus avancé technologiquement,
et conçu spécialement pour les gamers !
Avec votre Mobius, notre but est de repousser les limites de l’audio et de vous transporter
dans de nouvelles contrées, bien au-delà de tout ce que vous n’avez jamais connu. L’heure
du voyage a sonné !
Passez votre inventaire en revue. Vous trouverez dans votre coffret Mobius : Câble USB-A
vers USB-C, câble USB-C vers USB-C, câble audio analogique 3,5 mm, micro détachable.
Inspection du design de Mobius et de sa durabilité. Vous êtes prêt.
Voici le casque Mobius d’Audeze, un casque immersif 3D, le plus avancé technologiquement,
AVERTISSEMENT : AVANT TOUTE AUTRE CHOSE, VEUILLEZ LIRE LES INFORMATIONS
CONCERNANT LA SÉCURITÉ ET LA GARANTIE DU MOBIUS !
SOYEZ RESPONSABLES, AVENTURIERS DU SON !

MISE SOUS TENSION
Le bouton d’alimentation est situé sur la face extérieure de l’écouteur gauche du Mobius. Appuyez sur le bouton
d’alimentation et maintenez-le enfoncé pendant 3 secondes, le narrateur Mobius confirmera alors « Power On ».
Pour l’éteindre, appuyez sur le bouton d’alimentation et maintenez-le enfoncé pendant 5 secondes et le
narrateur confirmera « Power Off ». De plus, si aucun câble ou aucune source Bluetooth n’est connecté, le
Mobius s’éteint au bout de 3 minutes pour économiser la batterie.
CHARGEMENT
Pour charger via USB, le Mobius supporte un chargeur de 1 Ampère, et met environ 3 heures pour se recharger
complètement lorsqu’il est éteint. Lorsque vous rechargez votre Mobius en le branchant sur une prise murale,
assurez-vous que le voyant rouge LED est allumé ; cela indique le chargement. Certains chargeurs et hubs USB
anciens peuvent ne pas fournir assez de puissance pour recharger le Mobius. Dans ce cas, veuillez utiliser un
chargeur de 1 Ampère.
Lorsque la batterie du Mobius est faible, il tentera de se recharger via le câble USB simultanément. Si vous avez
un hub USB ou une rallonge USB, le Mobius fonctionnera parfaitement avec ces derniers, mais certains hubs
USB peuvent ne pas recharger le Mobius. Veuillez vérifier les spécifications de votre hub.

CONNEXION FILAIRE
Le Mobius peut être utilisé avec une connexion
filaire (USB et AUX) ou sans fil (Bluetooth).
Commencer avec une connexion par câble
USB. Identifiez votre câble USB-A vers USB-C
pour connecter votre Mobius à votre PC, PS4,
ou tout autre périphérique USB approprié.
L’entrée USB-C du Mobius se trouve sur le côté,
en bas de l’écouteur gauche.
Assurez-vous que le Mobius est réglé en tant
que dispositif d’entrée/sortie en conséquence,
et baissez le volume par mesure de précaution.
Le voyant rouge LED sur l’écouteur gauche du
Mobius s’allume pour indiquer que même
lorsque le Mobius est éteint, il se recharge.
3
Le Mobius peut être utilisé avec une connexion
filaire (USB et AUX) ou sans fil (Bluetooth).
Commencer avec une connexion par câble
USB. Identifiez votre câble USB-A vers USB-C
pour connecter votre Mobius à votre PC, PS4,
ou tout autre périphérique USB approprié.
L’entrée USB-C du Mobius se trouve sur le côté,
Assurez-vous que le Mobius est réglé en tant
que dispositif d’entrée/sortie en conséquence,
et baissez le volume par mesure de précaution.
Le voyant rouge LED sur l’écouteur gauche du
Mobius s’allume pour indiquer que même
CONNEXION FILAIRE - ANALOGIQUE
Effectuez une connexion câblée avec votre
câble analogique AUX de la même manière
que vous l’avez fait précédemment via USB.
L’entrée analogique se trouve en bas de
l’écouteur gauche. Veillez à ne pas brancher
votre câble dans l’entrée microphone.
Le Mobius possède un amplificateur
équilibré intégré, vous n’avez donc pas
besoin d’une amplification externe pour
alimenter le Mobius. Certains PC peuvent
avoir une entrée de connexion séparée pour
le casque et le microphone. Dans ce cas,
munissez-vous d’un séparateur pour diviser
la connexion TRRS (jack).

CONNEXION SANS FIL
Pour une connexion par Bluetooth, appuyez deux fois sur le bouton d’alimentation, pour entendre le narrateur dire «
Pairing ». Sélectionnez « Audeze Mobius 3D BT » dans la liste Bluetooth de votre appareil. Le narrateur confirmera «
Paired ». Passez du mode USB au mode Bluetooth sur votre Mobius en appuyant deux fois sur le bouton 3D, pour
alterner entre les invites vocales USB, AUX et Bluetooth.
Le Mobius supporte trois types de codecs Bluetooth : SBC, AAC, et LDAC. Le Mobius utilise le AAC pour se connecter
à iDevices. Les nouveaux appareils Android se connecteront en utilisant le codec LDAC. Si ces codecs ne sont pas
disponibles pour votre appareil, le Mobius utilisera le SBC.
PRIORITÉ DE CONNEXION
Lorsque plusieurs connexions sont actives, la connexion AUX (câble analogique) est prioritaire devant les autres. La
connexion USB a la seconde priorité. Si aucun câble analogique ou USB n’est branché, c’est le Bluetooth qui aura
alors la priorité. Appuyez deux fois sur le bouton 3D pour naviguer manuellement entre les invites vocales USB,
AUX et Bluetooth.
4

FONCTIONNEMENT 3D
Il existe 3 modes de fonctionnement. Vous pouvez passer d’un mode à l’autre en maintenant appuyé le bouton 3D.
3D Manuel – Dans ce mode, vous spécifierez la direction du point de référence central. Tout d’abord, centrez votre tête pour une
expérience d’écoute optimale. Appuyez une fois sur le bouton 3D en bas, à l’avant de l’écouteur gauche. Le narrateur Mobius
confirmera « Centered ». C’est le mode par défaut activé automatiquement pour les modes de connexion USB et analogique.
Automatique – Le bouton de centrage est désactivé dans ce mode conçu pour une utilisation mobile. En lieu et place, l’algorithme
Waves Nx calibrera automatiquement le centre de votre écoute audio lorsque vous vous déplacerez. C’est l’idéal pour écouter de
l’audio en voiture ou en train, et il s’agit du comportement par défaut des connexions Bluetooth.
3D Éteint – Tous les traitements 3D sont désactivés dans ce mode, ce qui vous permet d’obtenir un casque d’écoute planaire
Audeze standard.
5

6
VOLUME ET MICRO
Les deux commandes de volume se trouvent au dos de l’écouteur gauche.
Faites tourner le bouton de contrôle supérieur dans les deux sens pour
régler le volume. Faites tourner le bouton de contrôle inférieur vers le haut
ou vers le bas pour régler le volume de votre microphone.
Prenez votre microphone détachable et branchez-le sur la prise micro-jack
située à l’avant de l’écouteur gauche. Lors de la connexion du microphone,
assurez-vous que les parties plates s’alignent et que le son du micro n’est pas
coupé sur l’écouteur gauche. Une fois votre microphone fonctionnel, vous
êtes prêt à communiquer avec vos amis.

CONTRÔLES AVANCÉS
Ces contrôles supplémentaires offrent plus d’options lors de l’utilisation du Mobius.
Lorsque vous êtes connecté et que vous lisez du contenu multimédia : appuyez brièvement sur le bouton d’alimentation pour mettre
en pause/jouer de la musique.
Lorsque vous êtes connecté via Bluetooth : appuyez brièvement sur le bouton d’alimentation pour répondre/terminer un appel.
Lorsque vous êtes connecté via Bluetooth : appuyez sur le bouton d’alimentation et maintenez-le enfoncé pendant 2 secondes
pour rejeter un appel entrant.
Lorsqu’il est connecté via Bluetooth : si la distance entre votre Mobius et son appareil hôte devient trop grande et dépasse la
portée d’exécution, le Mobius tentera de se reconnecter automatiquement en moins d’une minute. Si cela ne se produit pas,
double-cliquez sur le bouton de contrôle du volume pour le resynchroniser sur le dernier appareil.
Appuyez brièvement et faites tourner le bouton de contrôle du volume pour passer à la chanson suivante ou précédente.
Appuyez brièvement et faites tourner le bouton de contrôle du volume micro pour changer les préréglages de l’égaliseur du
Mobius. Pour l’égaliseur, les préréglages suivants sont disponibles :
Défaut Il s’agit du préréglage de l’égaliseur qui est réglé sur la courbe Audeze House.
Bruits de pas Cela améliore l’écoute des bruits de pas, pour mieux entendre ceux qui se glissent derrière vous.
Balistique Améliore le son des coups de feu et autres sons balistiques pour que vous puissiez clairement localiser l’ennemi dans les jeux FPS.
Musique Ce préréglage est paramétré spécialement pour l’écoute de musique.
Course Ce préréglage est conçu pour les jeux de course.
RPG Ce préréglage est optimisé pour les jeux de rôle et l’immersion.
Plat Pas d’égaliseur. Vous pouvez utiliser ce réglage si vous projetez d’utiliser des options d’égaliseur externe.

CONCLUSION
Votre formation élémentaire au Mobius est maintenant terminée. Rangez soigneusement
votre casque Mobius dans un boîtier protecteur ou posez-le sur un support de casque
lorsque vous ne l’utilisez pas. Conservez votre Mobius dans un environnement sec et
évitez de l’exposer à des liquides.
Nous avons hâte de prendre part aux futures aventures, et nous espérons que vous aussi
! Vous êtes officiellement prêt à explorer les confins de l’univers du son.
Vous avez besoin de plus d’aide ?
Contactez notre service client à support@audeze.com ou www.audeze.com/support
Commentaires
Nous ne ménageons aucun effort pour nous assurer que votre expérience avec Audeze soit aussi
incroyable que le son provenant de nos écouteurs. Nous serions ravis de connaître votre opinion,
les commentaires de nos utilisateurs nous permettent d’améliorer constamment les produits et
services d’Audeze.
Rejoignez-nous sur :
Facebook.com/AudezeLLC
Twitter.com/Audeze
support@audeze.com 8
Votre formation élémentaire au Mobius est maintenant terminée. Rangez soigneusement
votre casque Mobius dans un boîtier protecteur ou posez-le sur un support de casque
lorsque vous ne l’utilisez pas. Conservez votre Mobius dans un environnement sec et
Nous avons hâte de prendre part aux futures aventures, et nous espérons que vous aussi
Nous ne ménageons aucun effort pour nous assurer que votre expérience avec Audeze soit aussi
incroyable que le son provenant de nos écouteurs. Nous serions ravis de connaître votre opinion,
les commentaires de nos utilisateurs nous permettent d’améliorer constamment les produits et
Other manuals for Mobius
2
Table of contents
Languages:
Other Audeze Headphones manuals

Audeze
Audeze iSINE Operating and maintenance manual

Audeze
Audeze iSINE Operating and maintenance manual
Audeze
Audeze LCD-XC User manual
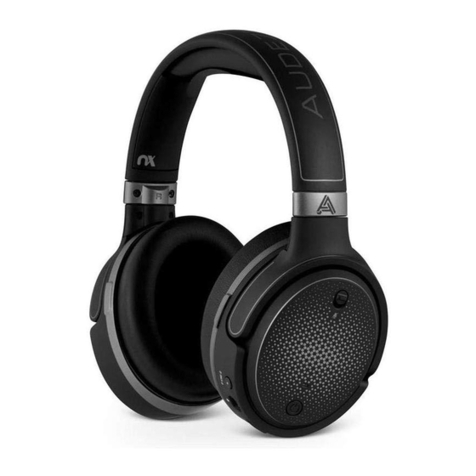
Audeze
Audeze Mobius User manual

Audeze
Audeze Sine User manual
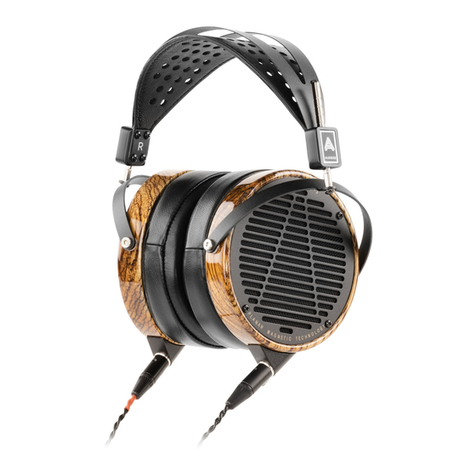
Audeze
Audeze LCD 3 User manual
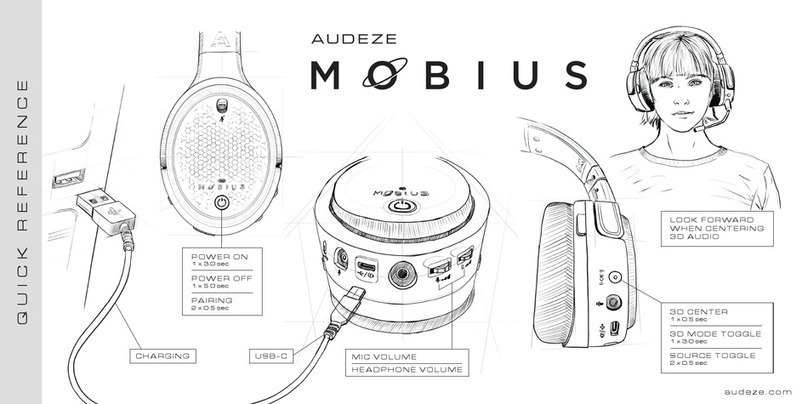
Audeze
Audeze Mobius User manual

Audeze
Audeze LCD-4 User manual
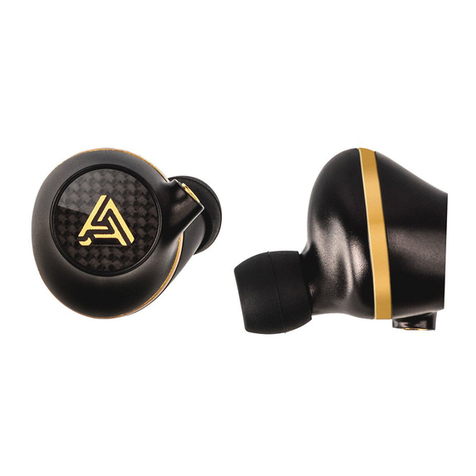
Audeze
Audeze EUCLID User manual

Audeze
Audeze EL-8 User manual
