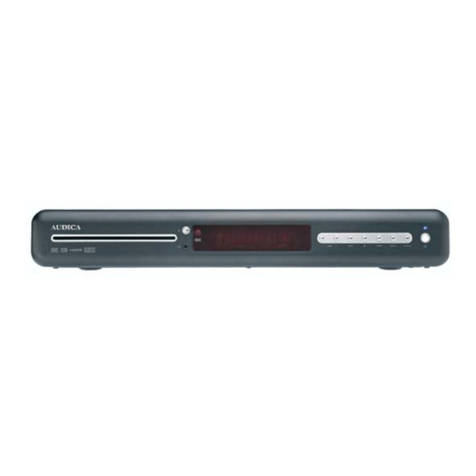
Audica AVR-1 User manual


Welcome
Thank you for choosing AUDICA
AudicaAV products have been designed and engineered to the highest standards, combining style with
functionalityandergonomics.Toextractthebestfromyoursystem,pleaserefercloselyto thismanual. It
mayalsobenecessaryforyoutorefertoothercomponents’userguidestopreventanydamageorlossin
performancewhichmayoccurfromincorrectinstallation.
Enjoy...
Contents
Read this before you begin ----4
Connecting a TV and speakers- ----5
Optional connections- -----6
Front panel and handset controls ----7
Setting up the AVR-1 -----8
Playing a DVD ------12
Playing a CD ------12
Playing the radio ------13
Playing from an external source ----13
On-screen toolbar ------14
Troubleshooting ------15
Specifications ------15
Playing MP3 discs ------12
Viewing JPG photo discs -----13
Remote Control ------15
Guarantee ------15
3
GB
FR
IT
DE
ESP
RU
SOURCE

1. GENERAL INFORMATION
2. UNPACKING YOUR SYSTEM
3. SERVICING
4. PRECAUTIONS
IMPORTANT
ELECTRICAL INFORMATION
MAINS POWER SWITCH
The AUDICA AVR-1 DVD/Receiver includes four system
components in one box - a DVD player, FM/AM radio, surround
sound decoder and 6 channel amplifier. In addition to theAVR-1
you will need a TV and a speaker system with between two and
sixchannels.Afull sixchannelspeaker systemisrecommended
todeliverthemostrealisticsurround-soundexperience.
Care must be taken whilst unpacking your system that no part is
damaged or lost. For an inventory of what should be supplied
with the system, please refer to system specifications on page
16. Retain packaging materials so the system can be re-packed
andshippedifnecessary.
Donotattempttoservicethisproductyourselfasopeningcovers
or panels may expose you to dangerous voltages or other
hazards.Referallservicingtoqualifiedpersonnel.
Where replacement parts are required be sure the service
technicianhasusedreplacementssupplied bythe manufacturer
or have the same characteristics as the original part. Use of
unsuitable parts could cause fire, electrical shock or other
hazardsandmayvoidanywarrantyorguarantee.
The technician must perform any safety checks to test the
performanceofanyrepairs.
Readtheseinstructions.
Keeptheseinstructions.
Heedallwarnings.
Followallinstructions.
Donotusethisapparatusnearwater.
Cleanonlywithaslightlydampcloth.
Donotblockanyventilationopenings.
Installinaccordancewiththemanufacturer'sinstructions.
Do not install or operate near any heat sources such as
radiators,stoves,orotherapparatusthatproduceheat.
Unplug this apparatus during lightning storms or when
unusedforlongperiodsoftime.
Referallservicingtoqualifiedservicepersonnel.Servicingis
requiredwhen theapparatushasbeendamaged inanyway,
such as the power-supply cord or plug is damaged, liquid
has been spilled or objects have fallen into the apparatus,
the apparatus has been exposed to rain or moisture, does
notoperatenormally,orhasbeendropped.
Warning: To reduce the risk of fire or electrical shock, do not
exposethisproducttorainormoisture.Theproductmustnot
be exposed to dripping and splashing and no object filled
withliquidssuchasavaseofflowersshouldbeplacedonthe
product.
Nonakedflamesources suchas candles shouldbe placed
ontheproduct.
Caution: Changes or modifications not expressly approved by
the manufacturer could void the user's authority to operate this
device.
Caution: Usage of controls or adjustments or performance of
procedures other than those specified herein may result in
hazardousexposure.
These labels tell you that the unit contains a Laser component.
Donotstareatthelaserlens.
This equipment has been tested and found to comply with the
limits for a Class B digital device pursuant to part 15 of the FCC
rules.Theselimitsaredesigned toprovide reasonableprotection
against harmful radiation in a residential installation. This
equipment generates, uses and can radiate radio frequency
energy and, if not installed and used in accordance with the
instructions, may cause harmful interference to radio
communication. However, this is no guarantee that interference
will not occur in a particular installation. If this equipment does
causeharmfulinterference toradioor televisionreception,which
can be determined by turning the equipment off and on, the user
is encouraged to try to correct the interference by one of the
followingmeasures:
Reorientorrelocatethereceivingantenna.
Increase the separation between the equipment and
receiver.
Connect the equipment into an outlet on a circuit different
fromthattowhichthereceiverisconnected.
Consultthe dealeroranexperiencedradio/TV technicianfor
help.
Mains Supply: The mains operating voltage of this unit is on the
ratingplateontherear.IntheUKthisis230/240V.
The AVR-1 is supplied with a power cord terminated with a UK
approvedmainsplug fittedwitha 3Afuse. If
The AVR-1 does not have a power
switch. If you need to switch off the mains power to the AVR-1,
remove the mains plug from the wall outlet. For this reason,
ensure that the mains plug remains easily accessible when
installingtheAVR-1.
!
!
!
!
!
!
!
!
!
!
!
!
!
!
!
!
!
thefuseneeds tobe
replaced, an ASTA or BSI approved BS1362 fuse rated at 3A
must be used. If you need to change
themainsplug,remove the fuseand
dispose of this plug safely
immediately after cutting it from the
cord.
Manufactured under license from Dolby Laboratories. “Dolby”,
“Pro-logic" and the double-D symbol are trademarks of Dolby
Laboratories.
Manufactured under license from Dolby Laboratories. Dolby,
and the double-D symbol are trademarks of Dolby Laboratories.
Additionally, softwareproductsrunning onacomputer mustalso
be marked with: Confidential unpublished works. Copyright
1992-2002DolbyLaboratories.Allrightsreserved.
Thisproductincorporatescopyrightprotectiontechnologythatis
protected by method claims of certain U.S. patents and other
intellectual property rights owned by Macrovision Corporation
and other rights owners. Use of this copyright protection
technologymustbeauthorizedby MacrovisionCorporation, and
is intended for home and other limited viewing uses only unless
otherwise authorized by Macrovision Corporation. Reserve
engineeringordisassemblyisprohibited.
Dolby 5.1ch
DTS
copyright protection
Important Safety Information
3A FUSE
BS 1362
BROWN
(Live)
BLUE
(Neutral)
4
Class II construction double insulated. This
productmustnotbeconnectedtoearth.
CAUTION!
RISK OF ELECTRIC SHOCK
DO NOT OPEN
TO REDUCE THE RISK OF ELECTRIC SHOCK DO
NOT REMOVE COVER (OR BACK)
This symbol indicates that dangerous
voltage constituting a risk of electric
This symbol indicates that there are
important operating and maintenance
instructions in the literature

Connecting a TV and speakers
There are 5 video output connections to take the picture to your
TV.Theseare-
1. HDMIdigitaloutput(pictureandsound)
2. PrPbYcomponent(pictureonly)
3. SCART(pictureandsound,240Vversiononly)
4. S-Video(pictureonly)
5. CVBScompositevideo(pictureonly)
The highest quality connection is at the top, the lowest at the
bottom. Your TV will probably have several connection options
forpicture (video)input.Forthebestqualitypicture,checkwhich
connections are available on your TV and use the one nearest
thetopofthelist.
CONNECTING THE AVR-1 TO ATV
There are speaker connections for up to 6 speakers set up in a
surround sound configuration. The speaker connections are
labelledtomatchthepositionofeachspeakerasfollows-
-FRisfrontright
-FLisfrontleft
-RRisrearright
-RLisrearleft
-CENisfrontcentre
-RCENisrearcentre
Position your speakers as instructed in the handbook for the
speakers. Connect the wires from each speaker to the correct
terminals at the rear of the AVR-1 for that speaker. Ensure that
the + speaker terminals (coloured red) connect to the top +
terminals of the AVR-1 by connecting the striped wire to the +
terminals.
CAUTION:- When connecting speaker wires make sure that no
loose wire strands can touch another terminal. This may
permanentlydamagethe circuitryof theAVR-1.
bacde SCART
YHDMI PR PB
CVBSS-VIDEO
CONNECTING SPEAKERS, A SUBWOOFER AND AERIALS TO THE AVR-1
Front
left Front
right
Rear
left Rear
right
Subwoofer
Centre
front
Centre
rear
SPEAKER
LOCATIONS
TV VIDEO CONNECTIONS
5
GB
FM AERIAL
AM AERIAL

Optional connections
The AVR-1 may also be used as a source for an external
surround-sound decoder or receiver. An external decoder or
receiver may be used in a large room with large speakers to
achieve more output power than the internal amplifiers of the
AVR-1canproduce.Allchannelsofthemulti-channelsignalfrom
the AVR-1 are connected to the Decoder/Receiver through a
singledigitalcoaxialphonocable. NOTE:-FM/AM radioandAux
input signals connected to the AVR-1 are not available through
thedigitaloutput.
6
CONNECTING TV SOUNDAND OTHER SOURCES TO THE AVR-1
BothTVAudioandAUXinputs areavailable ontheAVR-1forthe
connectionofothersignalsources.IfyourTVisconnectedwitha
SCART cable, then no further connection is necessary to listen
to TV sound through your AVR-1. If your TV is not using the
SCART connector and has a stereo audio output, we
recommend that you connect it to the TVAUDIO in connections
of theAVR-1. You can then play sound from your TV through the
multi-channelsurrounddecoderbuiltintotheAVR-1 byselecting
theTVinputoftheAVR-1.
Similarly,youmayhaveanotherstereo audio-visualsourcesuch
as a VCR that can be connected to theAUX input of theAVR-1.
The VCR sound can then be played through the AVR-1 on the
main system speakers and decoded into multi-channel sound if
preferred.
EXTERNAL SURROUND
DECODER OR RECEIVER
Coaxial
digital input
TV AUDIO
OUTPUT
CONNECTIONS
VCR/AUX
AUDIO OUTPUT
CONNECTIONS
CONNECTING AN EXTERNAL SURROUND-SOUND DECODER TO THE AVR-1

Front Panel and Handset Controls
7
GB
a
b
c
d
e
f
g
HEADPHONE SOCKET. Connect your headphones here.
The speakers will switch off when headphones are
connected.
DISCUNLOAD.Pressthiskeytoremoveadisc.
Volumecontrols.Thesekeyscontrol thevolume ofspeakers
or headphones connected to theAVR-1. NOTE:- these keys
willnotchangetheTVvolume.
PLAY/PAUSE. This key will play a DVD or CD disc. Press
againtopausediscplay.
STOP. This key will stop play of a DVD or CD disc. It will
eraseaFM/AMradiopresetifpressedtwice.
NEXT/PREVIOUS. Press and hold these keys to
c
SOURCE SELECT.This key selects the source you want to
playontheAVR-1fromDVD/CDdisc - AUX- OPTICALIN-
TV-SCARTIN-FM- AM.
Press briefly to fast search a disc or to
skip to the next radio preset.
hange to the previous or next chapter, track or to search
tunethebandforanotherstation.
STANDBY. Switch theAVR-1 on or off. Set to Standby when
h
FRONT PANEL KEYS
REMOTE CONTROL KEYS
SOURCE
ab c de f g h
a
b
c
d
e
f
g
POWER.Presstoswitchonoroff.
NUMERIC KEYPAD. For direct access
selection of tracks, DVD chapters
(when used with the GOTO key) or
radiopresets.
STORE. For programming discs or for
storing radio presets.
GO TO. Quick selection of a particular
DVDtitleorchapter.
STOP. Stop DVD/CD playback or FM
scanning. Clears radio presets when
held.
MUTE. Instantly mutes the sound.
Pressagaintocancel.
PLAY/PAUSE. Plays a disc. Press
againtopause.
Hold down this
button to start auto-programming for
theradio.
PREV/NEXT. Press briefly to fast
search a disc or select another radio
preset.Pressandholdtochangeto the
previousornextchapterortrack.
CURSOR KEYS. Use these keys to
navigate menus. When playing a disc
use to change the camera angle
(multi-angle discs only) and to
playback in slow motion. Press to
tune the radio in steps, hold to search
tune.
OK.Confirmsaselection.
SLEEP. Activatesthesleeptimer.
MENU.Activatesthediscmenu.
SOURCE SELECT. This key
selects the source you want to play on
the AVR-1 from .
SELECT. Selects audio bass,
trebleandchannelbalancesettings.
VOLUME. Sets the master volume
ofspeakersorheadphones.
SETUP. Enter or exit the AVR-1
setupmenu.
TOOLS. Activates the on-screen
menuforspecialfeatures.
EQ. Selects an audio equaliser mode
from FLAT - EQB+ (bass boost, EQM+
(midrange boost), EQM- (midrange
cut).
AV MODE. Switches between stereo
sound and multi-channel surround-
soundmodes.
h
i
1)
1!
1@
1#
1$
1%
1^
1&
1*
1(
DVD-AUX1-OPTICAL
IN-TV-SCARTIN-FM-AM
a
b
d
f
h
1@
i
1%
1(
1*
1&
1^
1$
1#
1!
e
c
g
h1)

AVR-1 General set-up
SPEAKER SETUP
GENERAL SETUP
VIDEO SETUP
PREFERENCES
EXIT SETUP
SETUP MENU MAIN PAGE
AUDIO OUT
PIC MODE
D.R.C.
ANGLE MARK
OSD LANGUAGE
SCREEN SAVER
MAIN PAGE
GENERAL PAGE
AUTO
VIDEO
SMART
SUPER SMART
FILM
PIC MODE
AUDIO OUT
D.R.C.
ANGLE MARK
OSD LANGUAGE
SCREEN SAVER
MAIN PAGE
GENERAL PAGE
SPDIF/PCM
SPDIF/RAW
Press the SETUP key on the handset.There
are 4 set-up options. Use the cursor key to
navigate the menu options and press OK to
select your chosen menu. The menus
availableareshownattheright.
NOTE:-VideosetupandPreferences menus
arenotaccessiblewhenadiscisplaying.
GENERAL SETUP
PIC MODE
AUDIO OUT
D.R.C.
OSD LANGUAGE
SCREEN SAVER
MAIN PAGE
GENERAL PAGE
OFF
ANGLE MARK ON
PIC MODE
AUDIO OUT
D.R.C.
ANGLE MARK
SCREEN SAVER
MAIN PAGE
GENERAL PAGE
GERMAN
FRENCH
ITALIAN
OSD LANGUAGE ENGLISH
PIC MODE
AUDIO OUT
D.R.C.
OSD LANGUAGE
ANGLE MARK
MAIN PAGE
GENERAL PAGE
OFF
SCREEN SAVER ON
PIC MODE
AUDIO OUT
ANGLE MARK
OSD LANGUAGE
SCREEN SAVER
MAIN PAGE
GENERAL PAGE
D.R.C.
FULL
4/8
6/8
2/8
OFF
8
PIC MODE optimises the video performance
of the AVR-1. Select AUTO and the AVR-1
will optimise automatically. FILM setting
optimises for films, VIDEO for best
resolution, SMART for additional vertical
processing when progressive and SUPER
SMARTformotionadaptiveprocessing.
AUDIO OUT sets the digital audio output
format. If you have an external surround-
sound decoder, choose SPDIF/RAW. If you
haveastereoDAC,chooseSPDIF/PCM.
D.R.C. sets the audio dynamic range
compression.SetthisFULLortoahighvalue
for small speakers. Set to OFF or to a low
valueforlargespeakers.
Angle mark sets the ANGLE symbol to
appear automatically when a DVD includes
multi-angleinformation.
OSD language sets the language for the on-
screen menus. The choices are English,
French, German, Spanish, Italian. The
defaultisEnglish.
SCREENSAVERsetsthescreensaveronor
off. If the AVR-1 is left in STOP or PAUSE
mode for more than 5 minutes, the screen-
saver will start. We recommend that this is
settoON.

AVR-1 Speaker Setup
GENERAL SETUP
SPEAKER SETUP
VIDEO SETUP
PREFERENCES
EXIT SETUP
SETUP MENU MAIN PAGE
SPEAKER POSITION
SPEAKER TYPE
SPEAKER DISTANCE
SPEAKER TEST TONE
MAIN PAGE
SPEAKER SETUP PAGE
SPEAKER TYPE
SPEAKER DISTANCE
SPEAKER POSITION
SPEAKER TEST TONE
MAIN PAGE
SPEAKER SETUP PAGE
SPEAKER TYPE
SPEAKER POSITION
SPEAKER DISTANCE
SPEAKER TEST TONE
MAIN PAGE
SPEAKER SETUP PAGE
SPEAKER TYPE
SPEAKER TEST-TONE
SPEAKER POSITION
SPEAKER DISTANCE
MAIN PAGE
SPEAKER SETUP PAGE
SPEAKER TYPE enables you to select the
model of Audica speaker you are using for
eachpositioninyoursystem.Ifthespeakeris
notanAudica,selectGENERIC.Ifyoudonot
have a speaker in this position (centre and
rear speakers only), select OFF. If using an
Audica CS-LCR set the centre to LCR and
thefrontleftandrightwilldefaulttoLCRalso.
Select the SPEAKER SETUP menu to set
your AVR-1 to correctly match your system
speakersandyourroom.
FRONT SPEAKER
CENTER SPEAKER
REAR SPEAKER
REAR C SPEAKER
SUBWOOFER
PREVIOUS PAGE
SPEAKER TYPE
CS-C1
GENERIC
OFF
CS-LCR
FRONT DISTANCE
CENTER DISTANCE
REAR DISTANCE
SUB DISTANCE
PREVIOUS PAGE
SPEAKER DISTANCE
5 FT/1.5M
FRONT SPEAKER
CENTER SPEAKER
REAR SPEAKER
REAR C SPEAKER
PREVIOUS PAGE
SPEAKER POSITION
ON WALL
FREE 1
ON SHELF
TEST TONE
PREVIOUS PAGE
SPEAKER TEST TONE
MANUAL
AUTO
SPEAKER POSITION enables you to select
the placement of your speakers. Choose
from WALL-MOUNT, SHELF-MOUNT,
FREE 1 (floor standing) or ON GEO STAND
(frontcentreandLCRonly).
SPEAKER DISTANCE enables you to set
the distance that each speaker is from the
listener. TheAVR-1 will automatically correct
for these distances when playing. use the
CURSORkeytoscrollthroughdistances.
With TEST TONE and AUTO selected, you
can check that all speaker volumes are
equal. If you want to adjust the volume of a
particular speaker, select the 'MANUAL'
option and choose the speaker to adjust with
the CURSOR key. Then you can set the
relative volume of that speaker with the
VOLUMEkeys.
9
GB
ON GEO STAND

TV DISPLAY
RESOLUTION
TV TYPE
VIDEO OUTPUT
MAIN PAGE
VIDEO SETUP
1080I
720P
SD INTERLACE
SD PROGRESSIVE
TV DISPLAY
VIDEO OUTPUT
TV TYPE
RESOLUTION
MAIN PAGE
VIDEO SETUP
YPRPB
RGB
TV DISPLAY
TV TYPE
RESOLUTION
VIDEO OUTPUT
MAIN PAGE
VIDEO SETUP
PAL
NTSC
MULTI
TV TYPE
TV DISPLAY
RESOLUTION
VIDEO OUTPUT
MAIN PAGE
VIDEO SETUP
NORMAL/LB
WIDE/HDTV
NORMAL/PS
AVR-1 Video Setup
SPEAKER SETUP
VIDEO SETUP
GENERAL SETUP
PREFERENCES
EXIT SETUP
SETUP MENU MAIN PAGE Select the VIDEO SETUP
menu to set up your AVR-1 to
correctlymatchyourTV.
NOTE:- This menu can only
be selected when the disc is
stopped.
TV DISPLAY enables you to choose the screen shape
of your TV. Choose NORMAL/PS (Pan & Scan) mode
todisplay awidepictureona4:3size screenbycutting
the left and right sides of the picture. Choose
NORMAL/LB (Letterbox) to display the the full
widescreen picture on a 4:3 screen with bands at the
top and bottom. Choose WIDE/HDTV for a 16:9 wide-
screenTV.
TV TYPE enables you to select the video system
compatibility of your TV. Choose MULTI if your TV has
a dual PAL/NTSC video system. Choose NTSC if your
TVis aU.S.specTV. ChoosePALtomatchTVssoldin
other markets. NOTE:- Do not change this setting
unless you are certain that the current setting is
incorrect, you may lose the TV picture.If you set the
incorrect setting and loose the picture press the stop
button for 5 seconds and the AVR-1 will reset and
return to standby. On power up the factory settings will
berestored.
RESOLUTION enables you to change the picture
quality to match your TV from Interlace - Progressive
720P - Interlace 1080. Set the highest quality
compatible with your TV. NOTE:- If you set the
incorrect setting and loose the picture press the stop
button for 5 seconds and the AVR-1 will reset and
return to standby. On power up the factory settings will
be restored. Depending on the way your screen's
internal scaling works the highest setting may not
necessatirly give the best results. Consult your
screen'smanualtoconfirmthebestsetting.
Set the VIDEO OUTPUT to match the video
connectionyou madefrom theAVR-1 toyourTV.Ifyou
connected with a SCART cable, choose RGB. If you
connected with Component Video, choose YPRPB. If
you used a different video output connection, this
settingdoesnotapply.
10

AVR-1 Preferences
SPEAKER SETUP
PREFERENCES
VIDEO SETUP
GENERAL SETUP
EXIT SETUP
SETUP MENU MAIN PAGE
SUBTITLE
AUDIO
DISC MENU
PARENTAL
PASSWORD
DEFAULTS
MAIN PAGE
PREFERENCES
GERMAN
FRENCH
SPANISH
ITALIAN
ENGLISH
AUDIO
SUBTITLE
DISC MENU
PARENTAL
PASSWORD
DEFAULTS
MAIN PAGE
PREFERENCES
GERMAN
FRENCH
SPANISH
ITALIAN
OFF
ENGLISH
AUDIO
DISC MENU
SUBTITLE
PARENTAL
PASSWORD
DEFAULTS
MAIN PAGE
PREFERENCES
GERMAN
FRENCH
SPANISH
ITALIAN
ENGLISH
AUDIO
PARENTAL
SUBTITLE
DISC MENU
DEFAULTS
PASSWORD
MAIN PAGE
PREFERENCES
5
4 PG13
3PG
2
PG-R
NC-17
ADULT
NO PARENTAL
AUDIO
PASSWORD
SUBTITLE
DISC MENU
DEFAULTS
PARENTAL
MAIN PAGE
PREFERENCES
CHANGE
AUDIO
DEFAULTS
SUBTITLE
DISC MENU
PASSWORD
PARENTAL
MAIN PAGE
PREFERENCES
RESET
AUDIO selects the preferred language for
dialogue.
SUBTITLE selects the preferred language
forsubtitles.
DISC MENU sets the preferred language for
discmenus.
PARENTAL sets the access level to
restricted access discs. The setting levels
areshownin the tableonthe left.The factory
settingisNOPARENTAL.
NOTE:- Not all DVD discs have parental
restriction.
PASSWORD protects the parental settings.
The factory setting is 1234. Use this menu
option to change the password. To clear the
password back to 1234, press STOP4 times
whenpromptedfortheoldpassword.
Selectthe RESETmenuoption tosetalluser
adjustable settings back to the factory
defaults.
1G-Kidsmaterial
2-Generalaudience
3PG-Parentalguidance
4PG13-Over13yearsold
5/6PG-RUnder17withadult
7NC-17Over17only
8ADULTAdultsonly
NOPARENTALPlaysalldiscs
11
GB

Playing a DVD
PLAYINGADVD-VIDEODISC
Switch on theAVR-1 and your TV. Select the correctAV input of
yourTV(ifyouareusingSCARTconnectiontheinputmayselect
automatically). Load your DVD disc into the front panel loading
slot. The disc menu will appear on your TV screen. Use the
cursor keys to navigate the on-screen menu and play the movie
orpressthe key.
SETTINGTHEVOLUME
Use the VOLUME keys to set the volume level from the
speakers. NOTE:- TheAVR-1 volume control will not control the
volumefromtheTVspeakers.
STEPPINGTHROUGHCHAPTERS
Holddownthe keystostepthroughchapters.
GODIRECTLYTOANEWTITLEORCHAPTER
STILLFRAME
To freeze the picture in still frame, press the key. Press again
tocancelandreturntoplay.
DISCMENU
Press MENU at any time to return to the disc menu. You can
access disc options encoded in the disc by the publisher. This
may include direct title/chapter access, soundtrack settings,
specialfeaturesetc.
FASTSEARCH
Press the keys, fast search will begin in your chosen
direction.Press againto changethe searchspeedx2,x4,x6,x8.
Press to cancel. This function is only available from the
remotecontrol.
Press the GOTO key. Enter the title or chapter numbers with the
NUMBER keys. Use the CURSOR keys to switch between
title/chapterselection.Pressthe keytogo.
SLOWMOTION
To view a section of the movie in slow motion, press the
CURSOR key repeatedly to set the slow motion speed and
direction.Continuepressingtoreturntoplaythemovie.
AUDIOMODESELECTION
When playing a DVD you can select different sound modes with
the AV MODE key. The sound modes available will depend on
thesoundtracksavailableontheDVD.
PLAYINGACDAUDIODISC
Switch on the AVR-1. Select DVD with the SOURCE key. Load
your CD disc into the front panel loading slot. The disc will play
automatically.
SETTINGTHEVOLUME
STEPPINGTHROUGHTHETRACKS
Holddownthe keystoselecttracks.
PAUSE
To pause the music, press the key. Press again to cancel and
returntoplay.Use the VOLUME keys to set the volume level from the
speakers. NOTE:- TheAVR-1 volume control will not control the
volumefromtheTVspeakers.
FASTSEARCH
Press the keys, fast search will begin in your chosen
direction.Press againto changethe searchspeedx1,x2,x3,x4.
Press to cancel. This function is only available from the
remotecontrol.
JUMPDIRECTLYTOATRACK
Enterthetracknumber with thenumberpad. Press the keyto
go.
STORINGAPROGRAMSEQUENCE
To store a sequence of tracks, stop the disc and press the
STORE key. Now enter each track you want to program in turn
with the NUMBER keys, then OK to store it. Press to play the
program. Press repeatedly to stop playback and clear the
program.
AUDIOMODESELECTION
When playing a CD you can select different sound modes with
theAVMODEkey.2 channelstereoand DolbyProLogic IIMusic
modesarerecommendedforCDsound.
Playing a CD
12
Playing an MP3 Disc
PLAYINGANMP3DISC
You can listen to a CD-R or DVD-R disc of your MP3 music files
withtheAVR-1.
Switch on the AVR-1. Select DVD with the SOURCE key. Load
your MP3 disc into the front panel loading slot. Press to play
thedisc.
SETTINGTHEVOLUME
STEPPINGTHROUGHTHETRACKS
Holddownthe keystoselecttracks.
FASTSEARCH
Press the keys briefly, fast search will begin in your
chosen direction. Press again to change the search speed x2,
x4,x6,x8.Press tocancel.
PAUSE
To pause the music, press the key. Press again to cancel and
returntoplay.
Use the volume keys to set the volume level from the speakers.
NOTE:- The AVR-1 volume control will not control the volume
fromtheTVspeakers.
JUMPTOATRACK
Enter the track number with the NUMBER keys. TheAVR-1 will
jumptothistrack.
ON-SCREENNAVIGATION
You can switch on the TV to navigate folders of tracks more
easily on-screen when the disc is stopped. You will see a folder
list on the left of the screen and a list of your music files on the
right. Navigate the folder list to find your music folder, with the
CURSOR keys, then press OK to select the folder. Press the
CURSOR key to move to the file list of MP3 tracks. Navigate the
listwiththe CURSORkeys.Selectfilenumber0atthetopof
thelisttomovebackupthefolderlist.

Viewing JPG Digital Photos on a CD-R or DVD-R
13
GB
Playing The Radio
PLAYINGTHERADIO
SwitchontheAVR-1.Press theSOURCEkeytoselecttheFMor
AMbandyourequire.
SETTINGTHEVOLUME
AUTO-TUNING
The AVR-1 radio will auto-tune all local stations automatically
and program them into preset locations. To auto-tune, press the
GOTO key. AUTOPROG will show in the display. Wait briefly
whiletheAVR-1searchesoutallavailablestationsandprograms
themintomemory. IfthedisplayshowsFULL,thenmorethan40
stationswerefound.
MANUALTUNING
The AVR-1 can also be tuned manually. Press the or
CURSOR keys to tune manually in steps. Hold down these keys
toscantothenextstationupordowntheband.
STORINGAPRESETSTATION
There are 40 preset radio station memories available for FM or
AM stations. To STORE a station, first tune in to a station, then
press the STORE key, followed by one or two digits with the
NUMBER keys to set the preset number, then press STORE
again.Thisstationwillbestoredinmemoryforfutureuse.
PLAYINGAPRESETSTATION
PressingaNUMBERkeywill recalla presetstation. Ifthestation
numberhastwodigits,pressthetwonumbersinsequence.
STEPPINGTHROUGHPRESETSTATIONS
Use the volume keys to set the volume level from the speakers.
NOTE:- The AVR-1 volume control will not control the volume
fromtheTVspeakers.
Usethe keystostepthrougheachpresetinturn.
VIEWINGJPGDIGITALPHOTOS
You can view a CD-R or DVD-R disc of your digital photos or
otherJPGfileswiththeAVR-1.
Switchon theAVR-1andyourTV.Select DVDwiththeSOURCE
key.Loadyourdiscintothefrontpanelloadingslot.
FINDINGYOURPHOTOSONTHEDISC
SLIDESHOW
Whenyou findthefolderyouwant,selectafilein thefolderanda
slide-show will begin. You can pause the slide-show with the
key. change
thepicturedisplayedbyholdingdownthe keys.Whenall
pictures in the folder have been shown, the AVR-1 will move to
thenextfolder(ifavailable).
ROTATINGTHEPICTURES
RETURNINGTOTHEFOLDERLIST
Toreturntothefolderlist,presstheSTOPkey.
YoucannavigatethediscontheTVscreen.Thescreenwillshow
amapof thediscfolders, Press OKtoselect afolderand display
sub-foldersor filesonthedisc.Use the CURSORkeys
tonavigatethefolderlist.Selecting number0atthetopofthelist
willmovebackupthefolderlist.
Press again tostart theslide-show. You canalso
Usethe CURSORkeystorotateormirrorpictureswhenthey
areonthescreen.
PLAYINGANEXTERNALSOURCE
Three additional sources may be connected to the AVR-1 such
as TV sound (via SCART cable or TV input), a digital source (to
OPTICAL input) or another analogue source such as tape. See
page6forconnectioninstructions.
SELECTTHECORRECTSOURCE
Toselectoneofthese externalsources, presstheSOURCEkey.
This will change the source from
SETTINGTHEVOLUME
Use the volume keys to set the volume level from the speakers.
NOTE:- The AVR-1 volume control will not control the volume
fromtheTVspeakers.
DVD-AUX1-OPTICAL IN-TV-
SCARTIN-FM-AM
Playing From an External Source

14
AVR-1 On-Screen Toolbar
The on-screen TOOLBAR gives quick access to certain
featureswhileamovieisplaying.
SWITCHINGONTHETOOLBAR
PresstheTOOLSkeytoswitchontheon-screentoolbar.
SELECTINGATOOLBARSYMBOL
YoucanchooseaToolbarsymbolwiththe CURSOR keys.
CHANGINGATOOLBARSETTING
The CURSORkeychangestoolbarsettings.
SWITCHINGOFFTHETOOLBAR
Press the TOOLS key again to switch off the toolbar when you
arefinished.
SUBTITLES AUDIO REPEAT A-B LOOP ZOOM DISPLAY
Choose this toolbar symbol to
switchthesubtitlesonorofforscroll
through the available languages
.usingthe CURSORkey
ChoosetheREPEATsymbolif youwant to
set the whole disc to repeat, or to repeat
only a title, chapter or track on the disc.
When the symbol is selected, use the
CURSOR key to choose the repeat option
youwant.
Choose A-B LOOP if you want to repeat a
section of a movie. Press the CURSOR
keyoncewhenyouarereadytostarttheloop
(A point). Press the CURSOR key again
when you want to end the loop. The AVR-1
will now play the loop between start and end
continually. Press the CURSOR key again
tocanceltheA-BLOOP.
Choose the ZOOM symbol to zoom into the
centre of the picture. Press the CURSOR
keytosetthezoomlevelyouwant.
Choose the DISPLAY symbol to switch on a
status display on the TV screen. You can
choose different display options by pressing
repeatedlytheDOWNkey.
Press RETURN to go back to
mainpagewhenplayingadisc.
Choose the AUDIO symbol to change the
audio language. This is only possible if the
discincludesmultiplelanguages.
A-B
RETURN

15
GB
Specifications
NOPICTUREONTHETV
Make sure that you have selected the correctAV input channel
onyourTVforthevideoconnectionthatyouhaveused.
DISTORTED,UNSTABLETVPICTURE
The TV TYPE or RESOLUTION settings may be incorrect for
your TV. To reset resolution to factory settings, press
OPEN/CLOSE,thentheNEXTkey.
UNABLETOACCESSVIDEOORPREFERENCESMENUS
Adisc may be playing.These menus are only accessible when
thediscisstopped.
NOSOUNDFROMTHECENTREORREARSPEAKERS
Check that the speaker has not been switched off in the
SPEAKERSETUPmenu.
POORQUALITYFMRADIORECEPTION
The aerial is not connected or is not sensitive enough - an
outdoor aerial may be required in some areas. Check the aerial
connection or ask a local aerial fitter to recommend a better
aerialsystemforyourAVR-1.
NO SOUND FROM AN EXTERNAL SURROUND SOUND
DECODER
Check that the digital audio output is switched on in the
GENERALSETUPmenu.
WRONG REGION MESSAGE ON THE TV SCREEN WHEN
PLAYINGADVD
Thedisc youareplayingwaspurchasedinanotherDVDregion.
You can only play DVD discs purchased in the same region as
your player. The region setting for the AVR-1 is marked on the
rear panel and will appear as a number inside a globe. The disc
willalsocarrythesameregionmarking.
Troubleshooting
POWERSUPPLY
Voltagerequirement .................220V-240V~50Hz
Powerconsumption ...........................280W
Dimensions(mm) ..............430(W)x360(D)x62(H)
Amplifierpoweroutput........................6x60W
Videooutputs .......HDMI,SCART,YCrCb,SVideo,CVBS
Audiodecoding .....................Dolbydigital,DTS
ITEMSSUPPLIEDWITHTHEAVR-1
1....Powercable
2....Remotecontrolwithbatteries
3....FMaerial
4....AMaerial
5....Auxiliaryphonocable
6....Thishandbook
Remote control battery
REPLACINGTHEREMOTECONTROLBATTERY
If the remote control is not working, remove the battery
compartment and replace the battery with the same type 3V
CR2025asshowninthediagram.
+
+
Guarantee
YourAudica product is warranted for a period of two years from
dateofpurchase.Ifduringthisperiodthesystemmalfunctions,it
willberepairedorreplacedatAudica'soption.
Thewarrantyexcludesfarewearandtearandalldamagedueto
misuse, however caused. The warranty lies in the first instance
withtheretailerfromwhomyoupurchasedtheequipmentandto
whom equipment service should be sent, preferably in the
original packing, carriage paid. Please include your proof of
purchase.GoodsintransittoAudicaareattheriskofthesender.
Ifthisisnotpossible,contactAudicaat:
AudicaUK
ArmourHomeelectronics
StortfordHallIndustrialPark
DunmowRoad
BishopsStortford
Hertfordshire
CM235GZ
UNITEDKINGDOM
ore-mail[email protected]


Bienvenue
Merci d'avoir choisi AUDICA
Les produitsAudicaAV ont été conçus et mis au point avec les normes les plus élevées pour conjuguer
style,fonctionnalitéetergonomie.Pourprofiteraumieuxdevotresystème,veuillezsuivreattentivement
les conseils de ce manuel. Vous devrez peut-être consulter les guides d'utilisation des autres éléments
de votre système pour éviter tout dommage ou perte de performance qui pourraient résulter d'une
installationincorrecte.
Passez un bon moment...
Table des matières
À lire avant de commencer -----17
Brancher un téléviseur et des enceintes ----18
Branchements facultatifs -----19
Panneau avant et télécommande ----20
Installation du AVR-1 -----21
Lire un DVD ------26
Lire un CD ------26
Écouter la radio ------27
Lire une source externe -----27
Barre d'outils à l'écran -----28
Résolution des problèmes -----29
Caractéristiques ------29
Lire un disque de MP3 -----26
Lire un disque de photos JPG -----27
Télécommande ------29
Garantie -------29
17
FR
SOURCE

1. INFORMATIONS GÉNÉRALES
2. DÉBALLAGE DU SYSTÈME
3. RÉPARATIONS
4. PRÉCAUTIONS
IMPORTANT
INFORMATIONS RELATIVES À L'ÉLECTRICITÉ
INTERRUPTEUR PRINCIPAL
Le récepteur AUDICA AVR-1 DVD comprend quatre
composants en un seul appareil : un lecteur DVD, une radio
AM/FM, un décodeur de son surround et un amplificateur à 6
canaux. En plus de l'AVR-1 vous aurez besoin d'un téléviseur et
d'un système de haut-parleurs comprenant 2 à 6 canaux. Il est
recommandé d'utiliser un système à 6 canaux pour obtenir
l'expériencedesonsurroundlaplusréaliste.
Déballez votre système avec précautions de façon à ne pas
endommager ni perdre de pièces. Pour une liste des éléments
fournis avec le système, voir les caractéristiques en page 16.
Conservez les emballages au cas où vous auriez besoin de
renvoyer l'appareil.
N'essayez pas de réparer ce produit vous-même car l'ouverture
du boîtier ou des panneaux peut vous exposer à des tensions
dangereusesoud'autres risques.Confieztoutes lesréparations
àdupersonnelqualifié.
Lorsqu'il est nécessaire de changer des pièces, assurez-vous
que le technicien utilise les pièces de rechange fournies par le
fabricant ou ayant les mêmes caractéristiques que les pièces
d'origine.L'utilisationdepiècesinadaptées pourraitentraînerun
incendie, une électrocution ou d'autres risques, et pourrait
annulertoutes lesgaranties.
Le technicien doit effectuer toutes les vérifications de sécurité
pourtesterlesperformancesdechaqueréparation.
Lisezcesinstructions.
Conservezcesinstructions.
Tenezcomptedetouslesavertissements.
Suiveztouteslesinstructions.
Nepasutilisercetappareilàproximitéd'eau.
Nettoyeruniquementavecunchiffonlégèrementhumide.
Nepasbloquerlesouverturesdeventilation.
Installerconformémentauxinstructionsdufabricant.
Ne pas installer ni utiliser près d'une source de chaleur telle
qu'un radiateur, un four ou autre appareil produisant de la
chaleur.
Débranchez cet appareil pendant les orages ou en cas de
périodeprolongéed'inutilisation.
Confiez toutes les réparations à du personnel qualifié. Des
réparations sont nécessaires lorsque l'appareil a subi des
dommages de quelques façons que ce soit : cordon
d'alimentation ou prise abîmée, liquide répandu dans
l'appareil, introduction d'objets dans l'appareil, exposition à
lapluieouàl'humidité,fonctionnementanormal,chute.
Avertissement : pour réduire le risque d'incendie ou
d'électrocution, ne pas exposer ce produit à la pluie ou à
l'humidité. L'appareil ne doit pas être exposé à des
écoulementsoudeséclaboussuresetaucunobjetremplide
liquidetelqu'unvasenedoitêtreplacésurl'appareil.
Aucune source de flamme nue telle qu'une bougie ne doit
êtreplacéesurl'appareil.
Attention : toute altération ou modification qui ne soit pas
expressément approuvée par le fabricant peut ôter à l'utilisateur
sondroitàutiliserl'appareil.
Attention : l'utilisation de contrôles, d'ajustement ou de
procédures autres que celles qui sont spécifiées ici peuvent
entraînerunrisquepourl'utilisateur.
Ces étiquettes vous indiquent que l'appareil contient un
composantlaser.Neregardezpaslalentillelaser.
Cet équipement a été testé et il est conforme aux limites
imposées pour un équipement numérique de classe B,
conformément à la section 15 des directives FCC. Ces limites
sont conçues pour offrir une protection raisonnable contre les
radiations nuisibles dans une installation résidentielle. Cet
équipement génère, utilise et peut émettre de l'énergie sous
forme de fréquences radio et, s'il n'est pas installé et utilisé
conformément aux instructions, il peut produire des
interférences nuisibles à la communication radio. Cependant, il
n'existe aucune garantie que ces interférences ne se produiront
pas dans une installation particulière. Si cet équipement produit
desinterférencesnuisiblesàlaréceptiond'émissionsderadioou
de télévision, ce qui peut être déterminé en allumant et en
éteignant l'appareil, l'utilisateur est invité à essayer de corriger
l'interférenceparl'unedesméthodessuivantes:
Réorientezoudéplacezl'antennederéception.
Augmentezladistanceséparantl'équipementdurécepteur.
Branchez l'équipement dans une prise appartenant à un
circuitdifférentdeceluisurlequelestbranchélerécepteur.
Consultez le revendeur ou un technicien radio/TV
expérimentépourobtenirdel'aide.
Alimentation secteur : la tension de fonctionnement de cet
appareil est indiquée sur sa plaque nominale, à l'arrière. Au
Royaume-Uni,elleestde230/240V.
Le AVR-1 est fourni avec un cordon d'alimentation terminé par
une prise secteur anglaise certifiée dotée d'un fusible de 3A. S'il
devient nécessaire de remplacer le fusible, choisir un fusible
BS1362 de 3A, certifié ASTA ou BSI. Si vous avez besoin de
changer la prise secteur, retirez le
fusible et jetez la prise
immédiatementaprès l'avoircoupée
du cordon, en respectant les
précautionsdesécurité.
Le AVR-1 ne possède pas
d'interrupteur d'alimentation. Si vous avez besoin de couper
l'alimentationdel'AVR-1,débranchez-ledelaprisemurale.Pour
cette raison, veillez à ce que la prise d'alimentation reste
facilementaccessiblelorsquevousinstallezleAVR-1.
!
!
!
!
!
!
!
!
!
!
!
!
!
!
!
!
!
Fabriqué sous licence de Dolby Laboratoires. "Dolby", "AC-3",
"Pro Logic" et le logo représentant un double D sont des
marquesdéposéesdeDolbyLaboratories.
Informations importantes relatives à la sécurité
FUSIBLE 3A
BS 1362
BRUN
(Sous tension)
BLEU
(Neutre)
18
Construction de classe II à double isolation. Ce
produitnedoitpasêtrereliéàlaterre.
ATTENTION !
RISQUE DE CHOC ÉLECTRIQUE
NE PAS OUVRIR
POUR RÉDUIRE LE RISQUE D'ÉLECTROCUTION,
NE PAS RETIRER LE COUVERCLE (OU L'ARRIÈRE)
Ce symbole indique la présence d'une
tension dangereuse représentant un
risquedechocélectrique.
Ce symbole indique des consignes
importantes pour l'utilisation et la
maintenancedansladocumentation
PRODUIT LASER
DE CLASSE 1

Brancher un téléviseur et des enceintes
Cinq connexions de sortie vidéo sont à votre disposition pour
transmettrel'imageàvotretéléviseur.Cesconnexionssont:
1. SortienumériqueHDMI(imageetson)
2. ComposantPrPbY(imageseulement)
3. SCART(imageetson)
4. S-Video(imageseulement)
5. VidéocompositeCVBS(imageseulement)
Lameilleurequalitédeconnexionestenhautdelaliste,lamoins
bonneestenbas.Votretéléviseurpossèdesansdouteplusieurs
options de connexion pour l'entrée de l'image (vidéo). Pour la
meilleure qualité d'image, regardez quelles sont les connexions
devotretéléviseur, puischoisissezcelle qui apparaît enpremier
danslaliste.
BRANCHER LE AVR-1 À UN TÉLÉVISEUR
Vous pouvez brancher jusqu'à 6 haut-parleurs dans une
configuration de son surround. Les connexions des haut-
parleurs sont étiquetées en fonction de la position de chaque
enceinte,commesuit:
-FR:frontaldroite
-FL:frontalgauche
-RR:arrièredroite
-RL:arrièregauche
-CEN:frontalcentre
-RCEN:arrièrecentre
Placez vos enceintes comme indiqué dans le manuel qui vous a
été fourni. Branchez les fils de chaque enceinte au terminal
correspondantàl'arrièredel'AVR-1.Vérifiezqueleterminal+de
l'enceinte (de couleur rouge) est connecté au terminal + de
l'AVR-1enbranchantlefilrayéauterminal-.
ATTENTION : Lors du branchement des fils de l'enceinte,
vérifiez qu'aucun fil de cuivre ne touche un autre terminal. Ceci
pourraitendommagerdefaçonpermanentelescircuitduAVR-1.
bacde SCART
YHDMI PR PB
CVBSS-VIDEO
BRANCHER DES ENCEINTES, UN CAISSON DE BASSE ET DESANTENNES À L'AVR-1
Avant
Gauche Avant
Droite
Arrière
Gauche Arrière
Droite
Caisson de basses
Centre
Avant
Centre
Arrière
ENCEINTE
EMPLACEMENTS
CONNEXIONS VIDEO TV
19
ANTENNE FM
ANTENNE AM
FR

Branchements facultatifs
L'AVR-1 peut également être utilisé comme source pour un
récepteur ou un décodeur de son surround externe. On peut
utiliser un décodeur ou un récepteur externe dans une grande
pièceéquipée degrandesenceintespourobtenirunepuissance
supérieure à celle offerte par les amplificateurs internes de
l'AVR-1. Tous les canaux du signal multi-canal de l'AVR-1 sont
connectés au décodeur/récepteur via un seul câble phono
coaxial numérique. REMARQUE : les signaux d'entrée radio
FM/AMetAuxconnectésàl'AVR-1nesontpasdisponiblesviala
sortienumérique.
20
BRANCHEMENT DU SON TV ET D'AUTRES SOURCES AU AVR-1
DesentréesTVaudioetAUXsontàvotre dispositionsurl'AVR-1
pour permettre le branchement d'autres sources. Si votre
téléviseur est connecté avec un câble SCART, vous n'avez pas
besoind'effectuerd'autresbranchementspourécouterlesonde
la télévision via votreAVR-1. Si votre téléviseur n'emploie pas le
connecteur SCART et possède une sortie audio stéréo, nous
vous recommandons d'y brancher les connexions TVAUDIO in
de l'AVR-1. Vous pourrez ensuite écouter le son de votre
téléviseurvia ledécodeursurroundmulti-canalintégréàl'AVR-1
ensélectionnantl'entréeTVdel'AVR-1.
De même, vous pouvez utiliser une autre source audio-visuelle
telle qu'un magnétoscope en la branchant à l'entrée AUX de
l'AVR-1. Le son du magnétoscope pourra être transmis par
l'AVR-1 aux enceintes principales du système et décodé en son
multi-canalsivousledésirez.
DÉCODEUR/RÉCEPTEUR
SURROUND EXTERNE
Entrée
coaxiale
numérique
TV AUDIO
SORTIE
CONNEXIONS
VCR/AUX
CONNEXIONS
DÉ SORTIE AUDIO
BRANCHER UN DÉCODEUR DE SON SURROUND EXTERNE À L'AVR-1.
Other manuals for AVR-1
1
Table of contents
Other Audica Receiver manuals
