manuals.online logo
Brands
  1. Home
  2. •
  3. Brands
  4. •
  5. Audio Analogue
  6. •
  7. Amplifier
  8. •
  9. Audio Analogue Maestro User manual

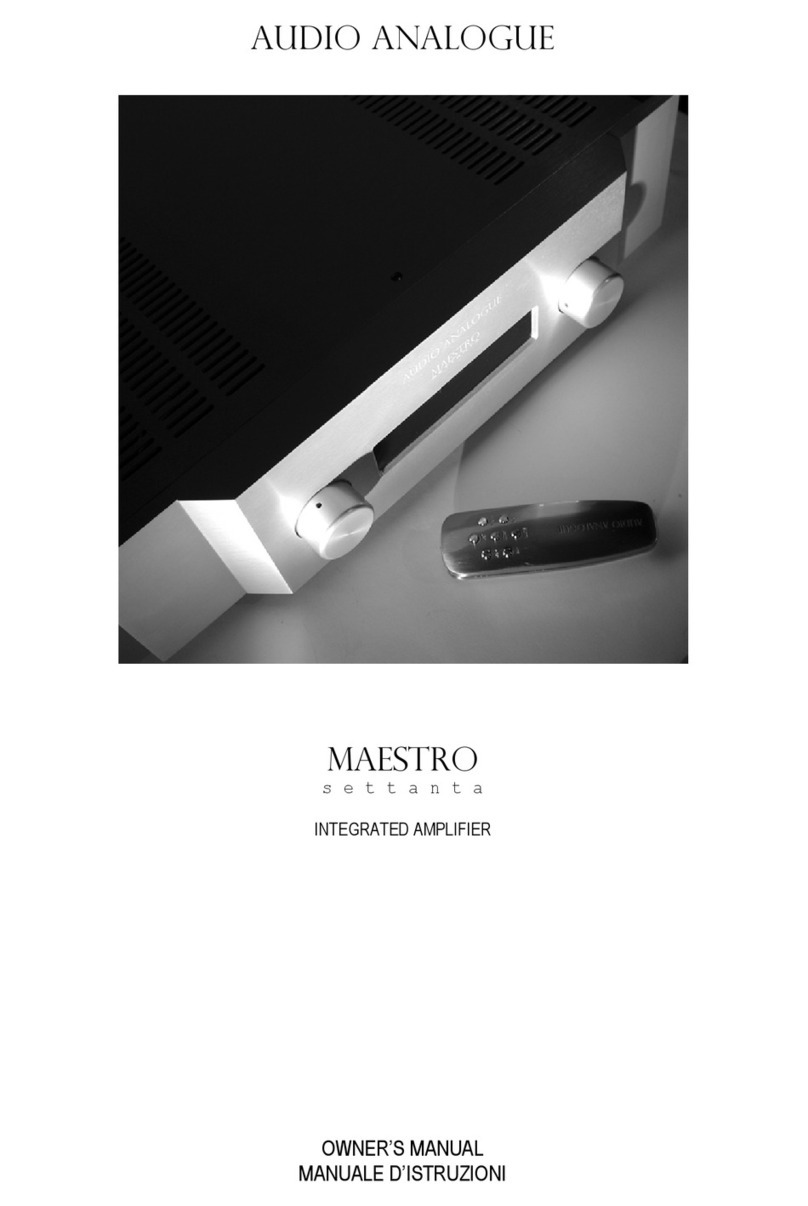
Audio Analogue Maestro User manual

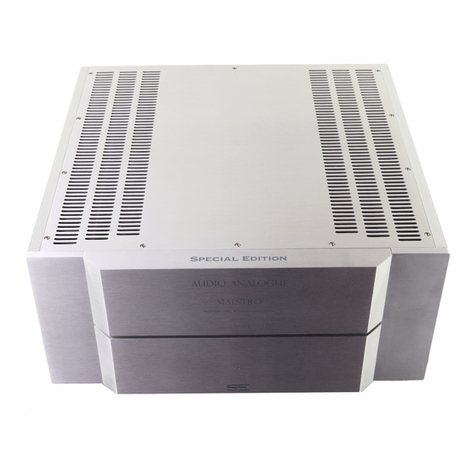
AUDIO ANALOGUE
MAESTRO
MONO BLOCK POWER AMPLIFIER
Special Edition
OWNER’S MANUAL
MANUALE D’ISTRUZIONI
Manual rev.1.0
2
INTRODUCTION
AUDIO ANALOGUE d es n t take any resp nsibilities in the f ll wing cases:
Whenever the perati nal pr cedures related t the use and the maintenance f the equipment as described in this manual are n t
respected.
Whenever damages t the equipment ccur because f fixing and m dificati ns made f rm n n-auth rized staff r because f
n rmal deteri rati n f the system.
N part f this manual can be repr duced by any means, transmitted r c pied f r private r public use with ut private auth rizati n
fr m AUDIO ANALOGUE.
The inf rmati n c ntained in this manual is related t the data kept by AUDIO ANALOGUE at the m ment f the issue f this
publicati n; AUDIO ANALOGUE has the right t make changes t this d cument with ut pri r n tice.
The equipment has been pr jected and manufactured acc rding t the Regulati ns f the C mmunity 89/336/CEE and is marked CE.
This equipment can’t be used f r different purp ses ther than th se f r which it has been manufactured.
AUDIO ANALOGUE d es n t take any resp nsibilities f r accidents r damages due t impr per use f the equipment.
WARNING
Please d respect the safety standards c ntained in this manual bef re starting t perate the equipment.
D n t pen the equipment. N further interventi ns than th se described in this manual sh uld be made. F r technical assistance,
please c nsult a qualified technician r an AUDIO ANALOGUE dealer.
N t respecting the instructi ns c ntained in this manual will invalidate the terms and c nditi ns f the guarantee.
NECESSARY PRECAUTIONS FOR SAFETY AND MAINTENANCE
ATTENTION: bef re starting any perati n, use r maintenance f the equipment it is strictly necessary t understand the f ll wing
manual.
T av id any accidents r hazards it is necessary t f ll w the f ll wing regulati ns.
Activate the equipment nly pri r checking if the installati n has been pr perly made, and if it is related t the instructi ns c ntained
in this manual.
Av id installing the equipment in places subjected t extremely high temperatures r humidity.
Check that the labels c ntaining inf rmati n ab ut safety are always visible and in g d c nditi ns.
Ensure t n t bstruct ventilati n, t av id excessive verheating. The equipment sh uld be kept t a minimal distance f 15 cm
fr m any bject and n t t place n carpet r ther s ft surfaces. Als the installati n cl se t radiat rs r in cl se envir nments
with ut ventilati n sh uld be av ided.
D n t switch n the equipment until it has n t been c rrectly and c mpletely installed.
Only supply the equipment with the kind f the electric supply as stated n the appr priate label. If in d ubts ab ut the kind f supply
available, please c nsult an expert technician f r technical assistance.
The equipment needs t be wired t an earth terminal. The external case is metal made; a defective c nnecti n with the earth may
be danger us.
In case damages ccurs t the supply cable, it sh uld be immediately replaced with the same kind f cable. This perati n sh uld be
nly made pri r t disc nnecting the main supply.
D n t place bjects n the supply cable and check that this is n t p siti ned in way thr ugh. The cable sh uld n t be kn tted r
curly.
Replace the fuses always with ther f the same kind.
D n t use the equipment cl se t the water r ther liquids. If liquid entered the equipment, the plug sh uld be disc nnected fr m
the s cket av iding t uching the metal parts. C mpetent technical staff sh uld be asked t check the equipment bef re perating it
again.
D n t place recipients c ntaining liquids n the equipment. Even when it is switched ff.
Keep the equipment far fr m s urces f heat such as the s lar light, kitchens, radiat rs etc…
Always unplug the supply cable during rainy weather.
Always Switch ff and unplug the supply cable bef re cleaning the equipment externally.: this perati n sh uld be made using a dry
and s ft cl th. Never use alc h l based cleaning material.
If the amplifier was carried fr m an extremely c ld envir nment t and extremely h t ne, it c uld create internal c ndensati n,
causing p ssible bad functi ning.
If this ccurs, please wait f r at least an h ur bef re using it again, t all w it t gradually reach r m temperature.
When n t used f r l ng peri ds, please unplug the equipment.
INSTRUCTIONS TO PUT IT OUT OF SERVICE
C nsult qualified staff
F ll w the regulati ns f the current legislati n regarding recycling and waste disp sal.
3
PREMESSA
AUDIO ANALOGUE non accetta responsabilità nei casi in cui:
Le proce ure operative i utilizzo e manutenzione ell’apparato escritte nel manuale non siano rispettate.
I anni si verifichino in seguito a riparazioni o mo ifiche ell’apparato eseguite a personale non autorizzato o a seguito i normale
eterioramento ell’apparato.
Nessuna parte el presente manuale può essere ripro otta con alcun mezzo, trasmessa o copiata per usi pubblici e/o privati senza
la previa autorizzazione i AUDIO ANALOGUE. Le informazioni contenute nel presente manuale sono relative ai ati in possesso i
AUDIO ANALOGUE al momento ella pubblicazione; AUDIO ANALOGUE si riserva il iritto i apportare cambiamenti al presente
ocumento senza alcun preavviso.
L’apparato è progettato e realizzato in conformità alle Direttive Comunitarie 89/336/CEE e 72/23/CEE e risulta marcato CE.
L’apparato non può essere utilizzato per scopi iversi a quelli per cui è stato progettato.
AUDIO ANALOGUE non si assume alcuna responsabilità per inci enti o anni causati a un utilizzo improprio ell’apparato.
AVVERTENZA
Prima i compiere qualunque operazione attenersi alle norme i sicurezza contenute all’interno el manuale
Non aprire l’apparecchio. Nessun ulteriore intervento oltre a quelli escritti in questo manuale ovrebbe essere effettuato. Per
l’assistenza tecnica, rivolgersi a un tecnico qualificato o a un riven itore AUDIO ANALOGUE.
Il mancato rispetto elle prescrizioni el seguente manuale implica il eca imento ella garanzia.
PRECAUZIONI PER LA SICUREZZA E MANUTENZIONE
ATTENZIONE: prima ell’utilizzo o manutenzione ell’apparato o i qualsiasi operazione sullo stesso è necessario pren ere visione
el seguente manuale.
Al fine i prevenire ogni pericolo i inci ente si impongono le seguenti prescrizioni:
Attivare l’apparato solo opo aver verificato l’a eguatezza ell’installazione e la conformità alle in icazioni contenute nel presente
manuale.
Non installare l’apparecchiatura in luoghi soggetti a sbalzi eccessivi i temperatura e umi ità.
Verificare che le etichette contenenti informazioni sulla sicurezza siano sempre ben visibili e in buono stato.
Le fessure i ventilazione non evono assolutamente essere ostruite per evitare surriscal amento ell’apparato. A tal fine,
posizionare l’unità a una istanza minima i 15 cm a ogni altro ostacolo e non su tappeti, moquette o altre superfici morbi e.
Evitare inoltre i installarlo nei pressi i caloriferi o in ambienti chiusi, privi i una appropriata ventilazione.
Non accen ere l’apparato finché non è completamente installato in maniera corretta.
Alimentare l’apparato con il tipo i alimentazione elettrica riportato sull’apposita targhetta. In caso i ubbi sul tipo i alimentazione
isponibile, consultare il servizio i assistenza tecnica.
L’apparecchio eve essere sempre collegato a terra. Poiché l’involucro è costituito in metallo, una connessione i terra ifettosa o
mancante potrebbe essere pericolosa.
In caso i anneggiamenti al cavo i alimentazione, provve ere imme iatamente alla sostituzione con un altro ello stesso tipo.
Questa operazione eve essere effettuata opo aver isconnesso l’alimentazione primaria.
Non posizionare oggetti sul cavo i alimentazione e verificare che questo non si trovi in una zona i passaggio. Il cavo non eve
essere arrotolato o anno ato.
Sostituire i fusibili sempre con altri ello stesso tipo.
Non usare l’apparato in prossimità i acqua o altri tipi i liqui i. Se nell’unità ovesse entrare el liqui o, scollegare imme iatamente
il cavo i rete alla presa a muro evitan o i toccare le parti metalliche ell’apparecchiatura e rivolgersi al personale tecnico per un
controllo prima el riutilizzo.
Non appoggiare recipienti contenenti liqui i i qualsivoglia natura sopra l’apparato. Anche quan o questo è spento.
Tenete l’apparecchio lontano a fonti i calore come la luce solare, cucine, ra iatori, etc…
Scollegare sempre il cavo i alimentazione alla presa urante i temporali.
Spegnere e scollegare sempre l’alimentazione prima i effettuare la pulizia esterna ell’apparato: questa operazione eve essere
effettuata utilizzan o un panno asciutto e morbi o. Non usare mai solventi o etergenti a base i alcool.
Se l’amplificatore viene trasportato a un ambiente fre o a un altro cal o, si potrebbe formare con ensa al suo interno, causan o
possibili malfunzionamenti. Se ciò si ovesse verificare, si prega i atten ere almeno un’ora prima ell’uso in mo o a permettergli
i raggiungere la temperatura ambiente gra ualmente.
In caso i lunghi perio i i inutilizzo, staccare la spina alla presa i rete.
ISTRUZIONI PER LA MESSA FUORI SERVIZIO
Rivolgersi a personale specializzato.
Seguire le prescrizioni ella corrente legislazione in materia i riciclaggio e smaltimento ei rifiuti.
4
Dear Audi phile,
C ngratulati ns and thank y u f r ch sing Maestr . Y u’ve b ught a high-quality and high-precisi n audi unit that will
pr vide extra rdinary perf rmances when integrated in a high-end system. Its refined circuits pr vide high s und
pureness while its innate elegance will make it easy t integrate the unit in any envir nment and in any audi system. T
btain the best perf rmance fr m y ur new amplifier, we suggest y u t use nly high-quality c nnect rs and
c mp nents; f ll w ur suggesti ns and Maestro Mono SE will grant y u l ng years f music pleasure. Please
read this manual bef re installing y u new amplifier.
Maestro Mono SE is a m n ph nic amplifier built t pr vide an extra rdinary s und clarity. The differential
asymmetric structure f its circuits all ws btaining a special spectrum dist rti n that, t gether with its ther
characteristics, pr duces a unique s n rity.
Maestro Mono SE is pr vided with a differential in wh se structure all ws p wer secti n c ntr lling.
We wish y u a pleasant listening with Audi Anal gue s und.
In any case, we suggest y u t write the amplifier serial number, the date f purchase and the dealer’s name in the
f ll wing space:
Serial Number:
Date f Purchase:
Dealer's Name:
Caro Au iofilo,
Congratulazioni e grazie per aver scelto l’amplificatore Maestro Mono SE. Lei ha acquistato un componente
au io eccezionalmente musicale e ’alta precisione, capace i prestazioni straor inarie inserito in qualunque sistema
high-en . Il suo raffinato circuito fornisce gran e purezza sonora mentre la sua innata eleganza assicurerà una facile
integrazione con qualunque ambiente e col resto el sistema. Per ottenere il meglio al Suo nuovo amplificatore,
consigliamo i usare solo componenti e cavi i alta qualità; segua i nostri consigli e il Maestro Mono SE Le
regalerà anni i piacere musicale. La preghiamo i spen ere qualche minuto per leggere questo manuale prima i
installare il Suo nuovo amplificatore.
Il Maestro Mono SE è un amplificatore monofonico progettato per ottenere una particolare chiarezza sonora. La
struttura ifferenziale antisimmetrica i tutto il circuito consente i ottenere un particolare aspetto spettrale ella
istorsione, che assieme all’eccellenza elle altre caratteristiche pro uce una sonorità unica.
Il Maestro Mono SE è otato i ingresso ifferenziale la cui struttura si esten e fino al pilotaggio ella sezione
i potenza.
Buon Ascolto con il suono i Au io Analogue!
Per ogni evenienza, consigliamo i annotare il numero i matricola stampato sul pannello posteriore ell'amplificatore, la
ata 'acquisto e il nome el riven itore nello spazio sottostante.
Numero i Matricola:
Data 'acquisto:
Nome Riven itore:
5
WARNING
Bef re perating this unit please adhere t the safety instructi ns c ntained in this manual. D n t pen the unit chassis.
N pr cedures different t the nes explained in this manual sh uld be perated. F r servicing please c ntact nly
auth rized pers nnel r y ur l cal AUDIO ANALOGUE dealer. N t f ll wing the instructi ns pr vided in this manual
makes the unit warranty null.
AVVERTENZA
Prima i compiere qualunque operazione attenersi alle norme i sicurezza contenute all’interno el manuale. Non aprire
l’apparecchio. Nessun ulteriore intervento oltre a quelli escritti in questo manuale ovrebbe essere effettuato. Per
l’assistenza tecnica, rivolgersi a un tecnico qualificato o a un riven itore AUDIO ANALOGUE. Il mancato rispetto elle
prescrizioni el seguente manuale implica il eca imento ella garanzia.
PRECAUZIONI PER LA SICUREZZA E MANUTENZIONE
ATTENZIONE: prima dell’utilizzo o manutenzione dell’apparato o di ualsiasi operazione sullo stesso
è necessario prendere visione del seguente manuale.
Al fine i prevenire ogni pericolo i inci ente si impongono le seguenti prescrizioni:
Attivare l’apparato solo opo aver verificato l’a eguatezza ell’installazione e la conformità alle in icazioni contenute nel
presente manuale. Non installare l’apparecchiatura in luoghi soggetti a sbalzi eccessivi i temperatura e umi ità.
Verificare che le etichette contenenti informazioni sulla sicurezza siano sempre ben visibili e in buono stato. Le fessure
i ventilazione non evono assolutamente essere ostruite per evitare surriscal amento ell’apparato. A tal fine,
posizionare l’unità a una istanza minima i 15 cm a ogni altro ostacolo e non su tappeti, moquette o altre superfici
morbi e. Evitare inoltre i installarlo nei pressi i caloriferi o in ambienti chiusi, privi i una appropriata ventilazione.
Non accen ere l’apparato finché non è completamente installato in maniera corretta. Alimentare l’apparato con il tipo i
alimentazione elettrica riportato sull’apposita targhetta. In caso i ubbi sul tipo i alimentazione isponibile, consultare il
servizio i assistenza tecnica. L’apparecchio eve essere sempre collegato a terra. Poiché l’involucro è costituito in
metallo, una connessione i terra ifettosa o mancante potrebbe essere pericolosa. In caso i anneggiamenti al cavo i
alimentazione, provve ere imme iatamente alla sostituzione con un altro ello stesso tipo. Questa operazione eve
essere effettuata opo aver isconnesso l’alimentazione primaria. Non posizionare oggetti sul cavo i alimentazione e
verificare che questo non si trovi in una zona i passaggio. Il cavo non eve essere arrotolato o anno ato. Sostituire i
fusibili sempre con altri ello stesso tipo. Non usare l’apparato in prossimità i acqua o altri tipi i liqui i. Se nell’unità
ovesse entrare el liqui o, scollegare imme iatamente il cavo i rete alla presa a muro evitan o i toccare le parti
metalliche ell’apparecchiatura e rivolgersi al personale tecnico per un controllo prima el riutilizzo. Non appoggiare
recipienti contenenti liqui i i qualsivoglia natura sopra l’apparato. Anche quan o questo è
spento. Tenete l’apparecchio lontano a fonti i calore come la luce solare, cucine, ra iatori, etc…Scollegare sempre il
cavo i alimentazione alla presa urante i temporali. Spegnere e scollegare sempre l’alimentazione prima i effettuare
la pulizia esterna ell’apparato: questa operazione eve essere effettuata utilizzan o un panno asciutto e morbi o. Non
usare mai solventi o etergenti a base i alcool. Se l’amplificatore viene trasportato a un ambiente fre o a un altro
cal o, si potrebbe formare con ensa al suo interno, causan o possibili malfunzionamenti. Se ciò si ovesse verificare, si
prega i atten ere almeno un’ora prima ell’uso in mo o a permettergli i raggiungere la temperatura ambiente
gra ualmente. In caso i lunghi perio i i inutilizzo, staccare la spina alla presa i rete.
6
SAFETY AND MAINTENANCE PRECAUTIONS
T prevent any p ssible inc nvenience, please f ll w the precauti ns listed ab ve:
Turn the unit n nly when y u are sure that it has been installed acc rding t the instructi ns pr vided by this manual.
D n t l cate the unit in places subject t damp and/ r temperature sudden changes. Check that security inf rmati n
labels are visible and preserved. D n t bl ck ventilati n penings t av id unit heating. Place the unit at a minimum
distance f 15cm fr m any ther bject and av id placing in n rugs, carpets r ther s ft surfaces. D n t l cate the
unit near radiat rs r in cl sed r ms with any ventilati n.
D n t turn n the unit bef re its c mplete and c rrect installati n. The unit sh uld nly be plugged t a p wer supply f
the type described n the safety inf rmati n label. If y u’re n t sure ab ut the type f p wer supply, please refer t y ur
l cal dealer. The unit sh uld always be c nnected t the gr und. The unit chassis is metallic and a faulty r absent
gr und c nnecti n sh uld be extremely danger us. If the p wer c rd is damaged, replace it with ne f the same type
after unplugging the unit fr m the wall utlet. D n t place any bject n the p wer c rd and check that is n t likely t be
walked n. Check that the p wer c rd is n t r lled up r kn tted. Replace fuses with ther fuses f the same type. D
n t use the unit near water r any ther liquid. If liquid is spilled in the unit, immediately unplug it fr m the wall utlet
av iding t uching the unit metallic parts and c ntact y ur l cal dealer f r checking bef re perating the unit. D n t put
liquid c ntainers n the unit, even when it is ff. Keep the unit away fr m heat s urces such as direct sunlight, st ves,
radiat rs and the like. Unplug the unit fr m the wall utlet during light st rms. Turn ff and unplug the unit bef re
cleaning it. Clean the unit with a dry and s ft cl th. D n t use s lvents r pr ducts c ntaining alc h l. If the amplifier is
br ught directly fr m a c ld t a warm place, m isture may c ndense inside the unit causing malfuncti ning. In this
cause, please wait f r at least an h ur bef re perating the unit. Unplug the unit when unused f r l ng peri ds f time.
UNIT DISPOSAL
Refer t specialized pers nnel.
F ll w the l cal laws ab ut material recycling and rubbish disp sal.
ISTRUZIONI PER LA MESSA FUORI SERVIZIO
Rivolgersi a personale specializzato.
Seguire le prescrizioni ella corrente legislazione in materia i riciclaggio e smaltimento ei rifiuti.
7
INTRODUCTION
The amplifier Maestro Mono SE has been perfectly realised in every single detail in rder t impr ve the s und
perf rmance.
Many h urs spent t design and simulate the new circuit’s c nfigurati n, have been f ll wed by a l t f listening tests.
The target was t btain an amplifier with balanced inputs suitable t every kind f speaker maintaining the same
refinement f the amplifiers with l w utput p wer.
The study f the circuit’s c nfigurati n and the design f the mechanical parts have had a parallel devel pment in rder t
guarantee a perfect c ling even having the heatsinks c mpletely c vered by the chassis.
INTRODUZIONE
L’amplificatore Maestro Mono SE è stato curato in ogni suo ettaglio per ottimizzare la ripro uzione sonora. Alle
lunghe ore passate per progettare e simulare la nuova configurazione circuitale, sono seguite altrettanto approfon ite
sessioni i ascolto. L’obiettivo è stato quello i ottenere un amplificatore con ingressi bilanciati che possa pilotare
qualsiasi tipo i cassa mantenen o la raffinatezza caratteristica egli amplificatori i piccola potenza. Lo stu io ella
configurazione circuitale è an ato i pari passo con lo stu io elle parti meccaniche per garantire un a eguato
smaltimento el calore pur nascon en o alla vista le alette i raffre amento
CIRCUIT’S CONFIGURATION
The basic structure f the amplifier Maestro Mono SE is the same used in the precisi n balanced amplifier used
in the lab rat ries. It is made f three different amplifiers. The first tw must amplify in tensi n the balanced signal and
the third ne must supply the necessary current amplificati n t drive the speakers. This kind f structure has tw
imp rtant benefits: the first ne is a disturbs high immunity, while the sec nd ne is the p ssibility t impr ve each
amplificati n stage. The separati n between the gain in tensi n and f the gain in current permits t realize class A
tensi n amplifiers made with l w p wer c mp nents, s t btain a frequency resp nse up t ab ut 500kHz. Such
frequency extensi n gives the p ssibility t maintain the phase err rs t a very l w level. The p wer secti n has been
designed t btain a high gain in current and n t in tensi n. Thanks t this s luti n, it is p ssible t keep the frequency
resp nse at full p wer ar und at 200kHz.
Als the bass frequency extensi n has been realised with care applying an ffset rec ver circuit able t g d wn t 3Hz.
Due t its tw stages c nfigurati n, the amplifier Maestro Mono SE d es n t have a gl bal feedback between
inputs and utputs
CONFIGURAZIONE CIRCUITALE
La struttura i base ell’amplificatore Maestro Mono SE rispecchia quella utilizzata negli amplificatori bilanciati i
precisione a laboratorio. E’composta a tre amplificatori istinti. I primi ue si occupano i amplificare in tensione il
segnale bilanciato e l’ultimo i fornire l’amplificazione in corrente necessaria al pilotaggio elle casse. Questo tipo i
struttura presenta ue vantaggi fon amentali; il primo è una alta immunità ai isturbi e il secon o è la possibilità i
ottimizzare ciascuno sta io i amplificazione. La separazione el gua agno in tensione a quello in corrente ha
permesso infatti i realizzare egli amplificatori i tensione in classe A con componenti i piccola potenza, quin i ha
permesso i ottenere una risposta in frequenza estesa fino a circa 500kHz. Una simile estensione in frequenza consente
i mantenere gli errori i fase a un livello molto basso. Di contro la sezione i potenza è stata progettata per avere un
grosso gua agno in corrente ma non in tensione. Questo ha consentito i mantenere la risposta in frequenza a piena
potenza intorno ai 200kHz.
Anche l’estensione a bassa frequenza è stata particolarmente curata con l’applicazione i un circuito i recupero
ell’offset che scen e fin sotto i 3Hz.
A causa ella sua configurazione a ue sta i, l’amplificatore Maestro Mono SE non ha una retroazione globale
fra gli ingressi e l’uscita.
POWER STAGE
The Maestro Mono SE’s n minal utput p wer is f 250W @8 hms impedance. This p wer g es up t
800W@2 hms. The pr tecti ns starts t w rk at ar und 1000W with a l ad f 1 hm(if y ur h use system can supp rt it!)
T btain this kind f p wer levels the supply secti n has been ver dimensi ned. In fact, have been used tw t r idal
transf rmers f r a t tal f 1406W. Each p wer branch is rectified fr m a di de’s bridge, with 50A c mp nents and the
filter secti n c ntains 8 electr lytic 15000µF capacit rs f r a t tal f 120000 µF. Furtherm re, als the supply f the l w
p wer secti n has been realized ne bridge f r each branch and filtrated with tw 15000µF capacit rs.
T maintain a l w utput impedance has been realised 10 pairs f bip lar transist rs wh m l w dist rti n level are
guaranteed by the pr ducer. Their p larizati n current permits t get a class A w rking up t ab ut 10W.
The current pass tr ugh s me c pper bars. Each earth c nverges t a s le juncti n (star c nfigurati n) realised with a
c pper plate half a millimetre thick that has als a shielding functi n.
Obvi usly, such big quantity f different parts is used t supply nly ne channel f y ur stere system!
STADIO DI POTENZA
La potenza nominale el Maestro Mono SE è i 250W su un carico i 8
Ω
. Questa potenza sale fino a 800W su
2
Ω
., Le protezioni intervengono a circa 1000W su un carico i 1
Ω
, se la rete i casa regge! Per ottenere questi livelli i
potenza la sezione i alimentazione è stata sovra imensionata. Sono stati infatti utilizzati ue trasformatori toroi ali per
un totale i 1406 W. Ciascun ramo i potenza è ra rizzato a un ponte i io i realizzato con componenti ultraveloci a
8
50A e la sezione i filtro contiene 8 con ensatori elettrolitici a 15000
µ
F per un totale i 120000
µ
F. Bisogna far notare
che anche l’alimentazione ella sezione i bassa potenza è stata realizzata con un ponte per ramo e filtrata con ue
con ensatori a 15000
µ
F.
Per mantenere una bassa impe enza i uscita sono state utilizzate 10 coppie i transistor bipolari i cui bassi livelli i
istorsione sono garantiti al pro uttore. La loro corrente i polarizzazione consente i ottenere un funzionamento in
classe A fino a circa 10W.
La gran e corrente erogata viene fatta passare attraverso barre i rame. Tutte le masse si richiu ono in un unico no o
(configurazione a stella) realizzato con una piastra i rame spessa mezzo millimetro che ha anche una funzione i
schermatura.
Ovviamente tutto questo ispen io i componenti è usato per alimentare un solo canale el vostro stereo!
PROTECTIONS
An amplifier able t supply m re than 30 ampere must be well pr tected.
The amplifier Maestro Mono SE has a secti n exclusively dedicated t this functi n. At the m ment f the
switching n, the filter capacit rs are l aded tr ugh tw p wer resist rs t limit the p wer c nsumpti n.
Once the supply v ltage has passed the critical phase, the resist rs are excluded by tw 40A relay.
These relay are able t st p the supply f the p wer amplifier and have been used t replace the fuses. The nly existing
fuse n the Maestro Mono SE is used t pr tect the c ntr l b ard and hasn’t any effect t the audi signal.
There are als thers pr tecti ns that are used t c ntr l the presence f DC p wer n the speakers, the AC p wer
v ltage dr p and the current c nsumpti n surplus.
PROTEZIONI
Un amplificatore in gra o i erogare più i 30 ampere eve essere ben protetto. L’amplificatore Maestro Mono
SE ha un’intera sezione e icata soltanto a questo scopo. All’accensione i con ensatori i filtro vengono caricati
attraverso ue resistenze i potenza per limitare l’assorbimento. Una volta che la tensione i alimentazione ha superato
la fase critica, le resistenze vengono escluse attraverso ue relè a 40 A. Questi relè sono in gra o i interrompere
l’alimentazione el finale e quin i sono stati usati per sostituire i fusibili. L’unico fusibile presente sul Maestro
Mono SE serve a proteggere la sche a i controllo e quin i non è mai attraversato al segnale sonoro. Altre
protezioni presenti sul finale si occupano i controllare la presenza i continua sulle casse, l’abbassamento ella tensione
i alimentazione ei finali e l’eccesso i corrente assorbita.
UNIT INSTALLATION
Apart fr m the amplifier and this manual, the package sh uld c ntain the f ll wing items:
1 P wer c rd
1 Warranty card
Please check the package c ntent. If any f the items listed ab ve is missing, please c ntact y ur l cal dealer. After
pening the package, carefully extract the unit and rem ve the plastic pr tecti n. Check the unit t be sure that it hasn’t
been damage during transp rtati n. Please keep the package: y u may need it t return the unit t the technical service.
INSTALLAZIONE
Oltre all’amplificatore e a questo manuale 'uso, l'imballo eve contenere i seguente articoli:
1 Cor one i alimentazione
1 Certificato i garanzia
Si prega i controllare, nel caso i eventuali mancanze, contattate il riven itore. Dopo aver aperto l'imballo, estraete
l’amplificatore con cura e rimuovete la sua busta protettiva; controllate l’amplificatore per eventuali anni causati a un
trasporto poco accurato. Si prega i conservare l'imballo intatto nel caso in cui occorra inviare l'apparecchio al centro i
assistenza tecnica.
UNIT PLACING
The unit n rmally warms up while functi ning. T assure pr per ventilati n t the unit, leave at least 5-8cm ab ve,
behind and n b th sides f the unit and av id bl cking ventilati n penings. The best placement is n a hard and flat
surface.
POSIZIONE DI FUNZIONAMENTO
Durante il funzionamento, è normale che l’amplificatore riscal i. Per questo motivo, almeno 5-8 cm i spazio sopra
evono essere lasciati per assicurare una a eguata ventilazione e, soprattutto, i fori i aerazione non evono essere
ostruiti. Solitamente si hanno i migliori risultati sisteman o l’amplificatore su una superficie ura e piana non coperta a
tappeti o moquette.
9
POWER PLUGGING
Bef re plugging the unit t a wall utlet, please check that the v ltage indicated n the back panel plate near the p wer
inlet matches the l cal v ltage. DO NOT PLUG THE UNIT TO A VOLTAGE DIFFERENT TO THE ONE INDICATED ON
THE UNIT! After c rrectly placing the unit, please plug the IEC p wer c rd int the unit inlet then plug the p wer c rd t
the wall utlet.
After plugging the unit, please wait 10-15 sec nds and check if the p wer led indicat r is n bef re pressing the stand-
by switch t turn n
Maestro Mono SE. There is nly ne fuse in the unit and it is placed in the back panel.
P wer interrupti n value f the fuse is 3.15A retarded f r220-240V systems and 6.3A retarded f r 110-120V systems.
Always replace the fuse with ne f the same type!
COLLEGAMENTO ALLA RETE
Prima i alimentare l’amplificatore, controllare che la tensione i alimentazione, in icata sul pannello posteriore in
prossimità ella presa IEC, corrispon a a quella locale i rete. NON COLLEGARE MAI
L'AMPLIFICATORE AD UNA TENSIONE DI RETE DIVERSA DA QUELLA INDICATA! Dopo aver collocato
l’amplificatore correttamente, prima inserire la spina IEC el cor one i rete nella presa sul pannello posteriore poi
inserire la spina nella presa a muro.
Una volta inserita la spina nella presa a muro atten ere almeno 10 15 secon i, verificare l’accensione el LED i colore
rosso tenue e poi agire sull’interruttore i stan -by per ren ere Maestro Mono SE alimentato e operativo. E’
presente un solo fusibile, accessibile esternamente al pannello posteriore. Il valore ella corrente i interruzione el
fusibile é i 3,15A ritar ato per sistemi a 220-240V, mentre é i 6,3A ritar ato per sistemi a 110-120V. Sostituire sempre
con altri ello stesso tipo!
10
Front panel
1 POWER LED INDICATOR
It turns light red when the amplifier is p wered and in stand-by m de.
It turns bright red when the amplifier is exiting the stand-by m de.
It turns green when the amplifier is p wered and perative.
It turns red and blinks t indicate that the unit pr tecti n is at w rk.
2 STAND-BY BUTTON
By pressing this butt n y u turn n/ ff Maestro Mono SE. If the unit pr tecti n is w rking, this butt n l ses its
functi n. See “Operating” secti n.
1 SPIA DI ALIMENTAZIONE
Si accen e color rosso ebole quan o l'amplificatore é alimentato e in stan -by.
Si accen e color rosso quan o l’amplificatore è in uscita alla situazione i stan -by.
Si accen e color ver e quan o l'amplificatore é alimentato e operativo.
Lampeggia in rosso per segnalare l’intervento elle protezioni.
2 INTERRUTTORE DI STANDBY
L’interruttore i stan -by causa l’inizio ella sequenza i accensione o lo spegnimento el Maestro Mono SE.
Nel caso sia intervenuta la protezione elettronica questo interruttore non ha più alcun effetto, ve ere in proposito il
paragrafo “funzionamento”.
2
1
11
Back panel
Connect ons
1 LINE IN
Preamplifier ut must be c nnected t this input.
2 SPEAKER OUTPUT
3 IEC POWER INLET
4 FUSE HOLDER
5 POWER SWITCH
6 NEGATIVE INPUT FOR BRIDGED USE
PANNELLO POSTERIORE
Collegamenti
1 INGRESSO LINEA
COLLEGARE IL CAVO PROVENIENTE DALL’USCITA DEL PREAMPLIFICATORE A QUESTO INGRESSO.
2 USCITA DIFFUSORE
3 PRESA IEC DI ALIMENTAZIONE RETE
4 PORTAFUSIBILE
5 INTERRUTTORE
6 INGRESSO NEGATIVO PER USO A PONTE DELL’AMPLIFICATORE
INPUTS CONNECTION
C nnect y ur preamplifier utputs t the Maestro Mono SE p wer amplifier RCA line in.
The c nnecti n may be either balanced r unbalanced. If y u ch se an unbalanced c nnecti n, the c nnect r f the
ther phase may be left pen r c nnected t a 600Ω impedance terminati n. Using balanced c nnecti n results int a
better n ise/s und rati . If y u desire a high-quality s und, please use high-quality c nnect rs keeping them away fr m
AC s urces.
COLLEGAMENTO DEGLI INGRESSI
Collegate l’ uscita i un canale el vostro preamplificatore alla presa ingresso linea RCA ell’amplificatore monofonico i
potenza
Maestro Mono SE
.
La connessione può essere realizzata a piacere i tipo bilanciato o sbilanciato. Nel caso la si realizzi sbilanciata il
connettore relativo all’altra fase può essere lasciato aperto oppure connesso a un’impe enza i terminazione a 600
Ω
.
L’uso i connessioni bilanciate consente un vantaggio sul rapporto segnale/rumore el sistema.
Per ottenere i migliori risultati sonori, utilizzare cavetti i segnale i alta qualità, tenen oli lontani a sorgenti i corrente
alternata.
2
1
3
4
5
6
2
1
12
SPEAKERS CONNECTION
The amplifier is equipped with tw g ld-plated binding p sts f r speakers’ c nnecti n. They can be linked t nude wire
r with spades. We rec mmend using sh rt g d quality c nnect rs with adequate secti n. Be careful n t t invert
speakers’ p larity (red n +, black n -): it w uld result int a deteri rati n f the stere ph nic image (the playback will
be ut- f-phase). Be especially careful in av iding speakers sh rt-circuiting because, even if electr nic fuses pr tect
y ur Maestro Mono SE, it may supply 1kW and generate danger us sparks.
COLLEGAMENTO DEI DIFFUSORI
L’amplificatore possie e una coppia i morsetti orati per il collegamento el iffusore, in gra o i accettare filo nu o
oppure elle forcelle. Consigliamo cal amente l’uso i cavi i buona qualità i sezione a eguata e i tenere i
collegamenti i più corti possibile. Abbiate cura i non invertire la polarità egli altoparlanti (rosso sul +, nero sul -) pena
un eterioramento ell’immagine stereo (l’intera ripro uzione sarà fuori fase). Siate estremamente attenti a non
cortocircuitare le uscite ei iffusori poiché, sebbene il vostro
Maestro Mono SE
sia internamente protetto a
fusibili elettronici, può erogare una potenza ragguar evole: circa 1Kw. Eventuali scintille pro otte potrebbero essere
pericolose.
OPERATING
Once the unit is c rrectly c nnected, switch n the p wer switch placed n the back panel, the p wer led indicat r turns
light red. Turn the unit n by pressing the p wer switch n the base, back t the fr nt panel. The p wer led indicat r will
turn bright red f r 15-20 sec nds. During that time, the clicking n ise f tw relays will be heard. After that time, the
p wer led indicat r turns green and the unit is ready t be used. T switch- ff the unit, apply the inverse pr cedure.
Maestro Mono SE is equipped with an electr nic pr tecti n, the p wer led indicat r turns bright red and blinks
when the pr tecti n is perating and the Standby butt n l ses its functi n. In this case, switch- ff the units, wait f r 30
sec nds while checking if the p wer led indicat r turns ff, and then repeat the pr cedure t switch- n the unit.
FUNZIONAMENTO
Una volta che tutti i collegamenti sono stati correttamente effettuati (controllare ue volte!), accen ere l’interruttore posto
sul pannello posteriore, il LED posto sul pannello frontale eve risultare illuminato i colore rosso tenue. Accen ere
successivamente l’apparecchio premen o l’interruttore posizionato sulla base ietro il pannello frontale. Il LED si
accen erà color rosso vivo per circa 15 o 20 secon i. Durante questo perio o si avvertirà il rumore i scatto i ue relè.
Alla fine el perio o il LED eve iventare ver e per segnalare che l’apparecchio è pronto per l’uso. Per lo spegnimento
eseguire l’operazione inversa.
Il
Maestro Mono SE
è provvisto i una protezione elettronica il cui intervento è segnalato al LED iventa i
colore rosso e comincia a lampeggiare. Nel caso avvenga un intervento i tale protezione l’interruttore i stan -by non
ha più alcun effetto sull’amplificatore. In questo caso spegnere l’apparecchio, atten ere circa 30 secon i controllan o
che il LED si sia spento poi ripetere la proce ura i accensione.
BURN-IN
L ng listening tests sh wed that the unit pr vides the best s und perf rmance after being run f r at least 100 h urs.
When the burn–in peri d is ver, the unit pr vides the best s und perf rmance after a warming peri d f 40 minutes.
PERIODO DI RODAGGIO
Lunghe e c mplete pr ve d'asc lt hann dim strat che le migli ri prestazi ni s n re si tterrann d p un peri d di "r daggi " di
almen 100 re. Una v lta c mpletat il "r daggi ", la migli r qualità d'asc lt può essere ttenuta d p circa 40 minuti di
"riscaldament ".
SERVICING
WARNING! POWER AMPLIFIER INTERNAL TENSIONS MAY BE FATAL. IF THE SERVICING LISTED BELOW IS
NEEDED, PLEASE CONTACT AUTHORIZED PERSONNEL OR YOUR LOCAL AUDIO ANALOGUE DEALER.
REMEMBER TO UNPLUG THE UNIT BEFORE ATTEMPTING ANY INTERVENTION.
ASSISTENZA
AVVERTENZA! LE TENSIONI DI RETE PRESENTI DENTRO L’AMPLIFICATORE POTREBBERO ESSERE LETALI.
PER I SEGUENTI INTERVENTI SI PREGA DI RIVOLGERSI AD UN RIVENDITORE O TECNICO AUTORIZZATO
13
AUDIO ANALOGUE! IN OGNI CASO, IL CORDONE DI ALIMENTAZIONE DEVE ESSERE STACCATO PRIMA DI
QUALUNQUE INTERVENTO!
FUSE REPLACEMENT
The p wer amplifier is equipped with a single external fuse placed cl se t the IEC p wer inlet as described bef re (see
“Back panel”, page 11). P wer interrupti n value f the fuse is 500mA delayed f r 220-240V systems and 1A delayed
f r 110-120V systems.
Always replace the fuse w th one of the same type.
SOSTITUZIONE DEL FUSIBILE
L’amplificatore preve e un solo fusibile all’esterno nel porta-fusibile posizionato vicino alla presa IEC come escritto in
prece enza (ve i “Pannello posteriore” – pag.11). Il valore el fusibile i rete é i 500mA ritardato per sistemi a 220-
240V, mentre é i 1A ritardato per sistemi a 110-120V.
Sostituire sempre il fusibile con altro dello stesso tipo
14
SPECIFICATIONS
Output p wer (20 – 20000Hz, 8Ω): 250 W
Output p wer (20 – 20000Hz, 4Ω): 400 W
Output p wer (20 – 20000Hz, 2Ω): 800 W
In impedance: 47kΩ j ined in AC f r each phase t the c mm n.
N minal sensitivity when in balanced m de: 1Vpp between the 2 in phases f r maximum p wer.
N minal sensitivity when in unbalanced m de: 2Vpp between 1 phase and the c mm n f r maximum p wer.
Signal/n ise rati : > 90dB
Frequency range: 2 – 100000Hz
Gl bal harm nic dist rti n: 0.01% @ 10W, 1 kHz.
Input: 2 RCA inlets and 1 XLR c nnect r.
N minal p wer supply: 100-240VAC 50/60Hz.
Maximum abs rbed p wer: 1406W.
Dimensi ns: W.17’52’’ x H.8’66’’ x D.17’72’’
Weight: 31kg.
SPECIFICHE TECNICHE
Potenza i uscita ( 20 – 20000Hz, carico 8
Ω
): 250 W
Potenza i uscita ( 20 – 20000Hz, carico 4
Ω
): 400 W
Potenza i uscita ( 20 – 20000Hz, carico 2
Ω
): 800 W
Impe enza i ingresso: 47k
Ω
accoppiata in AC per ogni fase verso il comune.
Sensitività nominale pilotato in mo o bilanciato: 1Vpp fra le ue fasi i ingresso per la massima potenza.
Sensitività nominale pilotato in mo o sbilanciato: 2Vpp fra una fase e il comune per la massima potenza.
Rapporto segnale / rumore: > 90 B
Ban a passante: 2 – 100000Hz
Distorsione armonica totale: 0.01% @ 10W, 1kHz.
Ingressi: una coppia i prese RCA e un connettore XLR.
Tensione i alimentazione nominale: 100-240VAC 50/60Hz.
Massima potenza assorbita: 1406W.
Dimensioni: L.44.5cm x H.22cm x P.45cm.
Peso: 31kg circa.
TROUBLESHOOTING
SYMPTOM: LED is ff, n s und. CAUSE: p wer c rd inc rrectly plugged. REMEDY: make sure the p wer c rd is
c rrectly plugged int the wall utlet.
SYMPTOM: LED is green, n s und. CAUSE: faulty c nnecti n t the s und s urce. REMEDY: make sure that the
preamplifier is c rrectly h ked-up t the s und s urce.
SYMPTOM: LED is ff, burned- ut fuse. CAUSE: vercharge in the pr tecti n circuit. REMEDY: c ntact y ur l cal Audi
Anal gue dealer.
SYMPTOM: LED blinking red. CAUSE: pr tecti n circuit w rking. REMEDY: make sure that the preamplifier is c rrectly
h ked-up t the speakers. If the sympt m persists, please c ntact y ur l cal Audi Anal gue dealer.
RICERCA GUASTI
SINTOMO: LED spento, nessun suono. CAUSA: errata connessione alla rete i alimentazione. RIMEDIO: verificare la
corretta inserzione el cavo i alimentazione.
SINTOMO: LED ver e, nessun suono. CAUSA: errata connessione alla sorgente sonora. RIMEDIO: verificare la corretta
inserzione ei cavo i collegamento alla sorgente sonora.
SINTOMO: LED spento, fusibile bruciato. CAUSA: sovraccarico nel circuito i protezione. RIMEDIO: consultare il più
vicino centro i servizio autorizzato Au io Analogue.
SINTOMO: LED rosso lampeggiante. CAUSA: intervento el circuito i protezione. RIMEDIO: verificare la corretta
connessione ei cavi el iffusore. Se il sintomo persiste consultare il più vicino centro i servizio autorizzato Au io
Analogue.
15
Attenti n: Y ur pr duct is marked with this symb l. It
means that used electrical and electr nic pr ducts
sh uld n t be mixed with general h useh ld waste.
There is a c llecti n system f r these pr ducts.
Attenzione: il ispositivo è contrassegnato a questo
simbolo, che segnala i non smaltire le
apparecchiature elettriche e elettroniche insieme ai
normali rifiuti omestici. Per tali pro otti è previsto un
sistema i raccolta a parte.
A. INFORMATION ON DISPOSAL FOR USERS (PRIVATE HOUSEHOLDS)
1 In The European Un on
Attenti n: If y u want t disp se f this equipment, please d n t use the rdinary dust bin.
Used electrical and electr nic equipment must be treated separately and in acc rdance with legislati n that requires
pr per treatment, rec very and recycling f used electrical and electr nic equipment.
F ll wing the implementati n by member states, private h useh lds within the EU states may return their used electrical
and electr nic equipment t designated c llecti n facilities free f charge*. In s me c untries* y ur l cal retailer may als
take back y ur ld pr duct free f charge if y ur purchase a similar new ne.
*) Please c ntact y ur auth rity f r further details.
If y ur used electrical r elctr nic equipment has batteries r accumulat r, please disp se f these separately bef re and
acc rding t l cal requirements.
By disp sing f this pr duct c rrectly y u will help ensure that the waste underg es the necessary treatment, rec very
and recycling and thus prevent p tential negative effects n the envir nment and human health which c uld therwise
arise due t inappr priate waste handling.
2. In other countr es outs de the EU
If y u wish t discard this pr duct, please c ntact y ur l cal auth rities and ask f r the c rrect meth d f disp sal.
F r Switzerland: Used electrical r electr nic equipment can be returned free f charge t the dealer, even if y u d n’t
purchase a new pr duct. Further c llecti n facilities are listed n the h me page f www.swisc .ch r www. Sens.ch
B. Information on Disposal for Business Users
1. In the European Un on
If this pr duct is used f r business purp ses and y u want t discard it:
Please c ntact y ur Audi Anal gue dealer wh will inf rm y u ab ut the take-back and recycling. Small pr ducts (and
small am unts) might be taken back by y ur l cal c llecti n facilities.
F r Spain: Please c ntact the established c llecti n system r y ur l cal auth rity f er take-back f y ur used pr ducts.
2. In other Countr es outs de the EU
If y u wish t discard f this pr duct, please c ntact y ur l cal auth rities and ask f r the current meth d f disp sal.
A. INFORMAZIONI SULLO SMALTIMENTO PER GLI UTENTI (PRIVATI)
1 Nell’Unione europea
Attenzione: Per smaltire il presente ispositivo, non utilizzare il normale bi one ella spazzatura!
Le apparecchiature elettriche e elettroniche usate evono essere gestite a parte in conformità alla legislazione che
richie e il trattamento, il recupero e il riciclaggio a eguato ei su etti pro otti.
In seguito alle isposizioni attuate agli Stati membri, i privati resi enti nella UE possono conferire gratuitamente le
apparecchiature elettriche e elettroniche usate a centri i raccolta esignati*.
In alcuni paesi*, anche il riven itore locale può ritirare gratuitamente il vecchio pro otto se l’utente acquista un altro nuovo
i tipologia simile.
*) Per maggiori informazioni i prega i contattare l’autorità locale competente.
Se le apparecchiature elettriche o elettroniche usate hanno batterie o accumulatori, l’utente ovrà smaltirli a parte
preventivamente in conformità alle isposizioni locali.
Lo smaltimento corretto el presente pro otto contribuirà a garantire che i rifiuti siano sottoposti al trattamento, al
recupero e al riciclaggio necessari prevenen one il potenziale impatto negativo sull’ambiente e sulla salute umana, che
potrebbe erivare a un’ina eguata gestione ei rifiuti.
2 In paesi che non fanno parte dell’UE
Se si esi era eliminare il presente pro otto,contattare le autorità locali e informarsi sul meto o i smaltimento corretto.
Per la Svizzera: Le apparecchiature elettriche o elettroniche possono essere restituite gratuitamente al riven itore, anche
se non si acquista un pro otto nuovo. Altri centri i raccolta sono elencati sulla homepage www.swis .ch di
www.sens.ch.
B. INFORMAZION SULLO SMALTIMENTO PER GLI UTENTI COMMERCIALI
1. Nell’Unione Europea
Se il pro otto è impiegato a scopi commerciali. Proce ere come segue per eliminarlo.
Contattare il proprio riven itore Au io Analogue che fornirà informazioni circa il ritiro el pro otto. Potrebbero essere
a ebitate le spese i ritiro e riciclaggio. Pro otti piccoli e quantitativi ri otti potranno essere ritirati anche ai centri i
raccolta locali.
Per la Spagna: Contattare il sistema i raccolta ufficiale o l’ente locale preposto al ritiro ei pro otti usati
2. In paesi che non fanno parte dell’UE
Se si esi era eliminare il presente pro otto, contattare le autorità locali e informarsi sul meto o i smaltimento corretto.
16
Audio Analogue
Manufactured and Distributed by:
AUDIO FUTURA spa
Via Maestri Del Lav r 583
51015 M nsumman Terme (PT) Italy
Tel. 0572 954513 fax 0572 958099
www.audi anal gue.c m - inf @audi anal gue.c m

Other manuals for Maestro

5

Other Audio Analogue Amplifier manuals

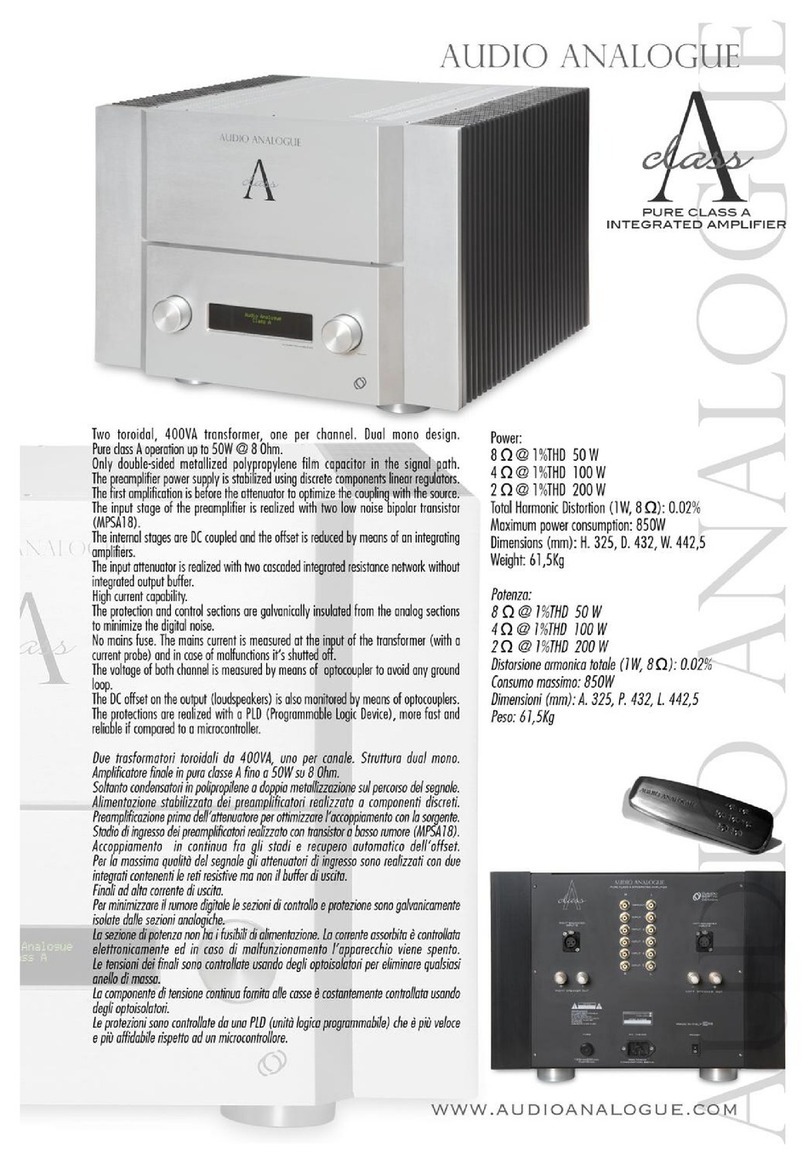
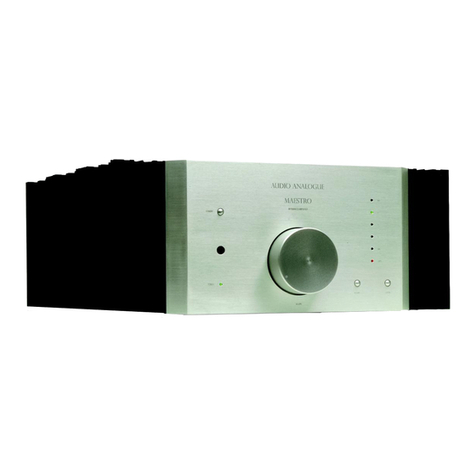
Audio Analogue Maestro Settanta Maestro Settanta User manual

Audio Analogue

Audio Analogue Maestro Settanta Maestro Settanta User manual

Audio Analogue A class User manual

Audio Analogue

Audio Analogue A class User manual

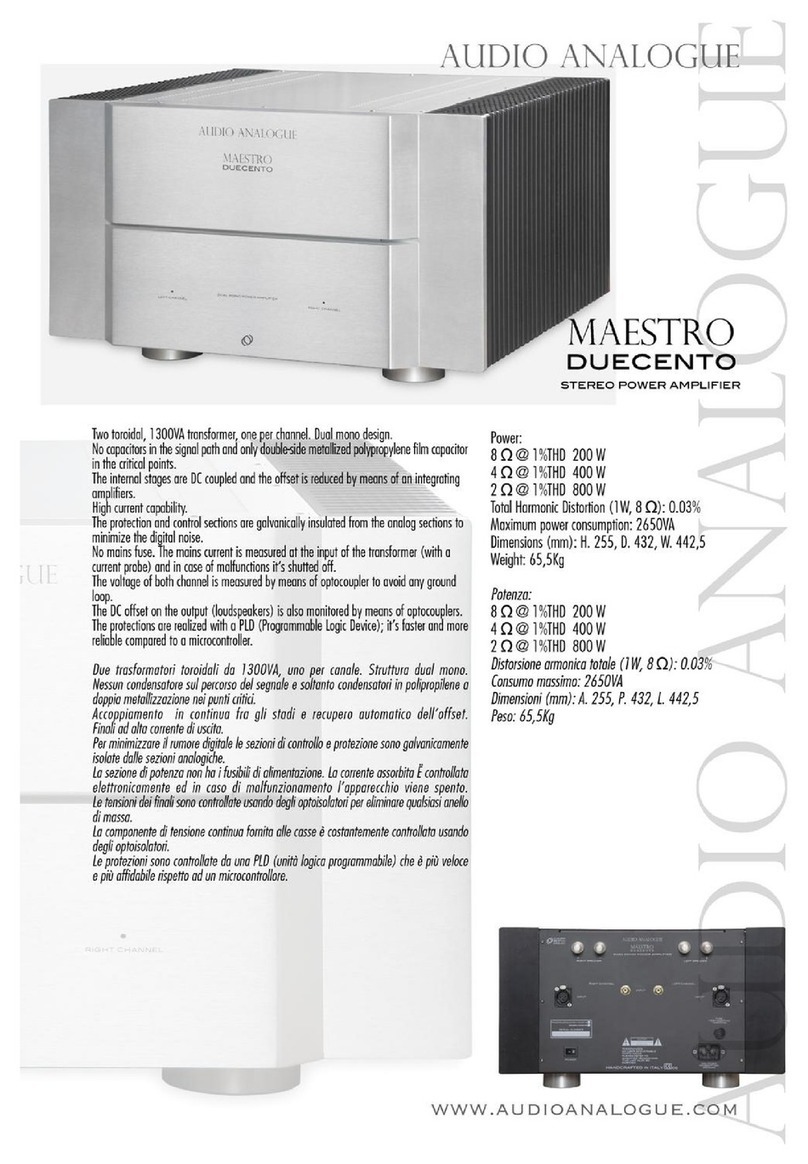
Audio Analogue MAESTRO DUECENTO User manual

Audio Analogue

Audio Analogue MAESTRO DUECENTO User manual

Audio Analogue Pure Class A User manual

Audio Analogue

Audio Analogue Pure Class A User manual

Audio Analogue Puccini Settanta User manual

Audio Analogue

Audio Analogue Puccini Settanta User manual

Audio Analogue primo CENTO VT User manual

Audio Analogue

Audio Analogue primo CENTO VT User manual

Audio Analogue Soundpleasure Bellini preamplifier User manual

Audio Analogue

Audio Analogue Soundpleasure Bellini preamplifier User manual

Audio Analogue Maestro MONO BLOCK POWER AMPLIFIER User manual

Audio Analogue

Audio Analogue Maestro MONO BLOCK POWER AMPLIFIER User manual

Audio Analogue Verdi Cento User manual

Audio Analogue

Audio Analogue Verdi Cento User manual

Audio Analogue MAESTRO DUECENTO User manual

Audio Analogue

Audio Analogue MAESTRO DUECENTO User manual

Audio Analogue Verdi Cento User manual

Audio Analogue

Audio Analogue Verdi Cento User manual

Audio Analogue Verdi Cento User manual

Audio Analogue

Audio Analogue Verdi Cento User manual

Audio Analogue Maestro STEREO LINE PREAMPLIFIER User manual

Audio Analogue

Audio Analogue Maestro STEREO LINE PREAMPLIFIER User manual

Audio Analogue Bellini Anniversary User manual

Audio Analogue

Audio Analogue Bellini Anniversary User manual

Audio Analogue AUDIO ANALOGUE INTEGRATED AMPLIFIER User manual

Audio Analogue

Audio Analogue AUDIO ANALOGUE INTEGRATED AMPLIFIER User manual

Audio Analogue MAESTRO DUECENTO User manual

Audio Analogue

Audio Analogue MAESTRO DUECENTO User manual

Audio Analogue Crescendo User manual

Audio Analogue

Audio Analogue Crescendo User manual

Audio Analogue Cinecitta SIX CHANNELS POWER AMPLIFIER User manual

Audio Analogue

Audio Analogue Cinecitta SIX CHANNELS POWER AMPLIFIER User manual

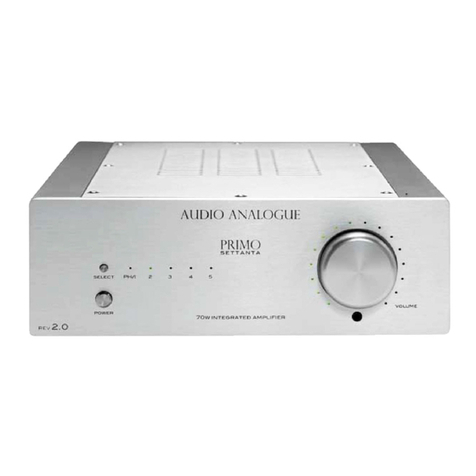
Audio Analogue PRIMO User manual

Audio Analogue

Audio Analogue PRIMO User manual

Audio Analogue verdi SETTANTA User manual

Audio Analogue

Audio Analogue verdi SETTANTA User manual

Audio Analogue BELLINI User manual

Audio Analogue

Audio Analogue BELLINI User manual

Audio Analogue MAESTRO DUECENTO User manual

Audio Analogue

Audio Analogue MAESTRO DUECENTO User manual

Audio Analogue Cento VT User manual

Audio Analogue

Audio Analogue Cento VT User manual

Audio Analogue Crescendo User manual

Audio Analogue

Audio Analogue Crescendo User manual

Popular Amplifier manuals by other brands

Hertz HCP 4DK user manual

Hertz

Hertz HCP 4DK user manual

Panasonic LS-401 instruction manual

Panasonic

Panasonic LS-401 instruction manual

Matrix Audio Mini-Pro user manual

Matrix Audio

Matrix Audio Mini-Pro user manual

Teledyne 6 RU Chassis Operation manual

Teledyne

Teledyne 6 RU Chassis Operation manual

Imagine DA-HR6802+DL Installation and operation manual

Imagine

Imagine DA-HR6802+DL Installation and operation manual

Digitimer NeuroLog NL108A user manual

Digitimer

Digitimer NeuroLog NL108A user manual

Crown CL2 Detailed information

Crown

Crown CL2 Detailed information

Goldmund SRI2 user manual

Goldmund

Goldmund SRI2 user manual

Rolls AMA2152 Specifications

Rolls

Rolls AMA2152 Specifications

Atlona AT-HD-V18 user manual

Atlona

Atlona AT-HD-V18 user manual

Sherwood Newcastle A-965 brochure

Sherwood

Sherwood Newcastle A-965 brochure

Cable Electronics AV400 instruction manual

Cable Electronics

Cable Electronics AV400 instruction manual

Harman Infinity M704a Service manual

Harman

Harman Infinity M704a Service manual

Polk Audio PA250.2 owner's manual

Polk Audio

Polk Audio PA250.2 owner's manual

Aerotech BA10 SERIES user manual

Aerotech

Aerotech BA10 SERIES user manual

Master audio HD series user manual

Master audio

Master audio HD series user manual

Fusion FM-504 user manual

Fusion

Fusion FM-504 user manual

Labgear LDU604G installation instructions

Labgear

Labgear LDU604G installation instructions

manuals.online logo
manuals.online logoBrands
  • About & Mission
  • Contact us
  • Privacy Policy
  • Terms and Conditions

Copyright 2025 Manuals.Online. All Rights Reserved.