AUDIO KITCHEN BIG CHOPPER User manual

Big Chopper
Owner’s Manual


Important safety instructions
WARNING: THIS APPARATUS MUST BE EARTHED!
A PLEASE read this instruction manual carefully before switching on.
B ALWAYS use the supplied mains lead, if a replacement is required please contact your
authorised Audio Kitchen dealer.
C NEVER attempt to bypass the fuses or fit ones of the incorrect value.
D There are no user serviceable parts.
E Refer all servicing to qualified service personnel including replacement of fuses and
valves.
Servicing is required when the apparatus has been damaged in any way, such as when the
power supply cord or plug is damaged, liquid has been spilled or objects have fallen into the
apparatus, the apparatus has been exposed to rain or moisture, does not operate normally or
has been dropped.
F NEVER use an amplifier in damp or wet conditions. No objects filled with liquids should be
placed on the apparatus.
G ALWAYS unplug this apparatus during lightning storms or if unused for long periods of
time.
H PROTECT the power cord from being walked on or pinched particularly at plugs,
convenience receptacles and at the point where they exit from the apparatus.
I ENSURE that any extension cabinets used are of the correct impedance.
Note: This equipment has been tested and found to comply with the requirements of the EMC
directive (Environments E1, E2 and E3 EN 55103-1/2) and the Low Voltage directive in the E.U.
Note: It is recommended that all audio cables used to connect to the Big Chopper are of a high
quality screened type. These should not exceed 10 Metres in length. Always use Audio Kitchen
approved speaker leads with the Big Chopper and speaker cabinets.
WARNING: Do not obstruct ventilation grilles and always ensure free movement of air around
the amplifier!
USA ONLY - DO NOT defeat the purpose of the polarised or grounding type plug. A polarised
plug has two blades with one wider than the other. A grounding type plug has two blades and a
third grounding prong. The wide blade or the third prong are provided for your safety. When the
provided plug does not fit into your outlet, consult an electrician for replacement of the obsolete
outlet.
FOLLOW ALL INSTRUCTIONS
HEED ALL WARNINGS
KEEP THESE INSTRUCTIONS !
2

What is the Big Chopper?
When I started the Big Chopper project, the brief was 'Make the Little Chopper,
but louder'. Of course, when valves and transformers are involved, those kinds
of briefs are doomed, regardless of how tight you keep them. I have learned to
give 'development' space to breathe and allow projects to change course - that it
is much more likely to yield exciting results. The goal remained that the Big
Chopper be an amp loud enough for larger gigs, and that it share the Little
Chopper's fluid, expansive voice, but also that it be permitted to develop and
evolve.
By keeping the output stage running single-ended (yes, four cathode-biased
EL84s), you have four slightly different valves all trying to reproduce the same
signal at the same time. This gives rise to an effect similar to four very good
singers chanting in unison - a thickening of the tone without any mushing-out,
and no cancelling of the '84s' lovely even-order harmonics.
Like the Little Chopper but more insistent. Much more.
Billy Bush (Butch Vig's go-to engineer and guitar amp aficionado) recently told
me that the Big Chopper has THE BEST clean sound of ANY amp he has ever
recorded; and he has recorded a few.
I'm sitting here in the heat of the workshop trying to think how best to convey in
words, the extent of the depth of detail I have striven - and continue to strive! -
to engineer into the Big Chopper's sound.
It is difficult, to say the least.
Because I can pinpoint the improvement in the level of detail which individual
component changes and mods have made over time; you can understand…
Words are not enough.
“Not that I have already obtained all this, or have already arrived at my goal,
but I press on to take hold of that for which Inspiration took hold of me.”
St Paul
Hopefully through the Big Chopper, Inspiration will take hold of you, too.
3

How do I use the Big Chopper?
Like the Little Chopper, the Big Chopper is happy to be used as a studio amp,
and as such has found favour with many of the top producers, engineers and
artists all over the World. The Big Chopper though, has enough of a bark to
enable it to play anything from small venue gigs to stadia, festivals and all stops
in between.
You may have noticed that the Big Chopper has a second channel which, with
one of our a/b/y boxes can be used as an alternate, or in tandem with, the first
'Little Chopper' channel to create different textures and effects.
Connect a speaker cabinet to one of the output jacks, plug your guitar into an
input, turn up the Gain, and off you go!
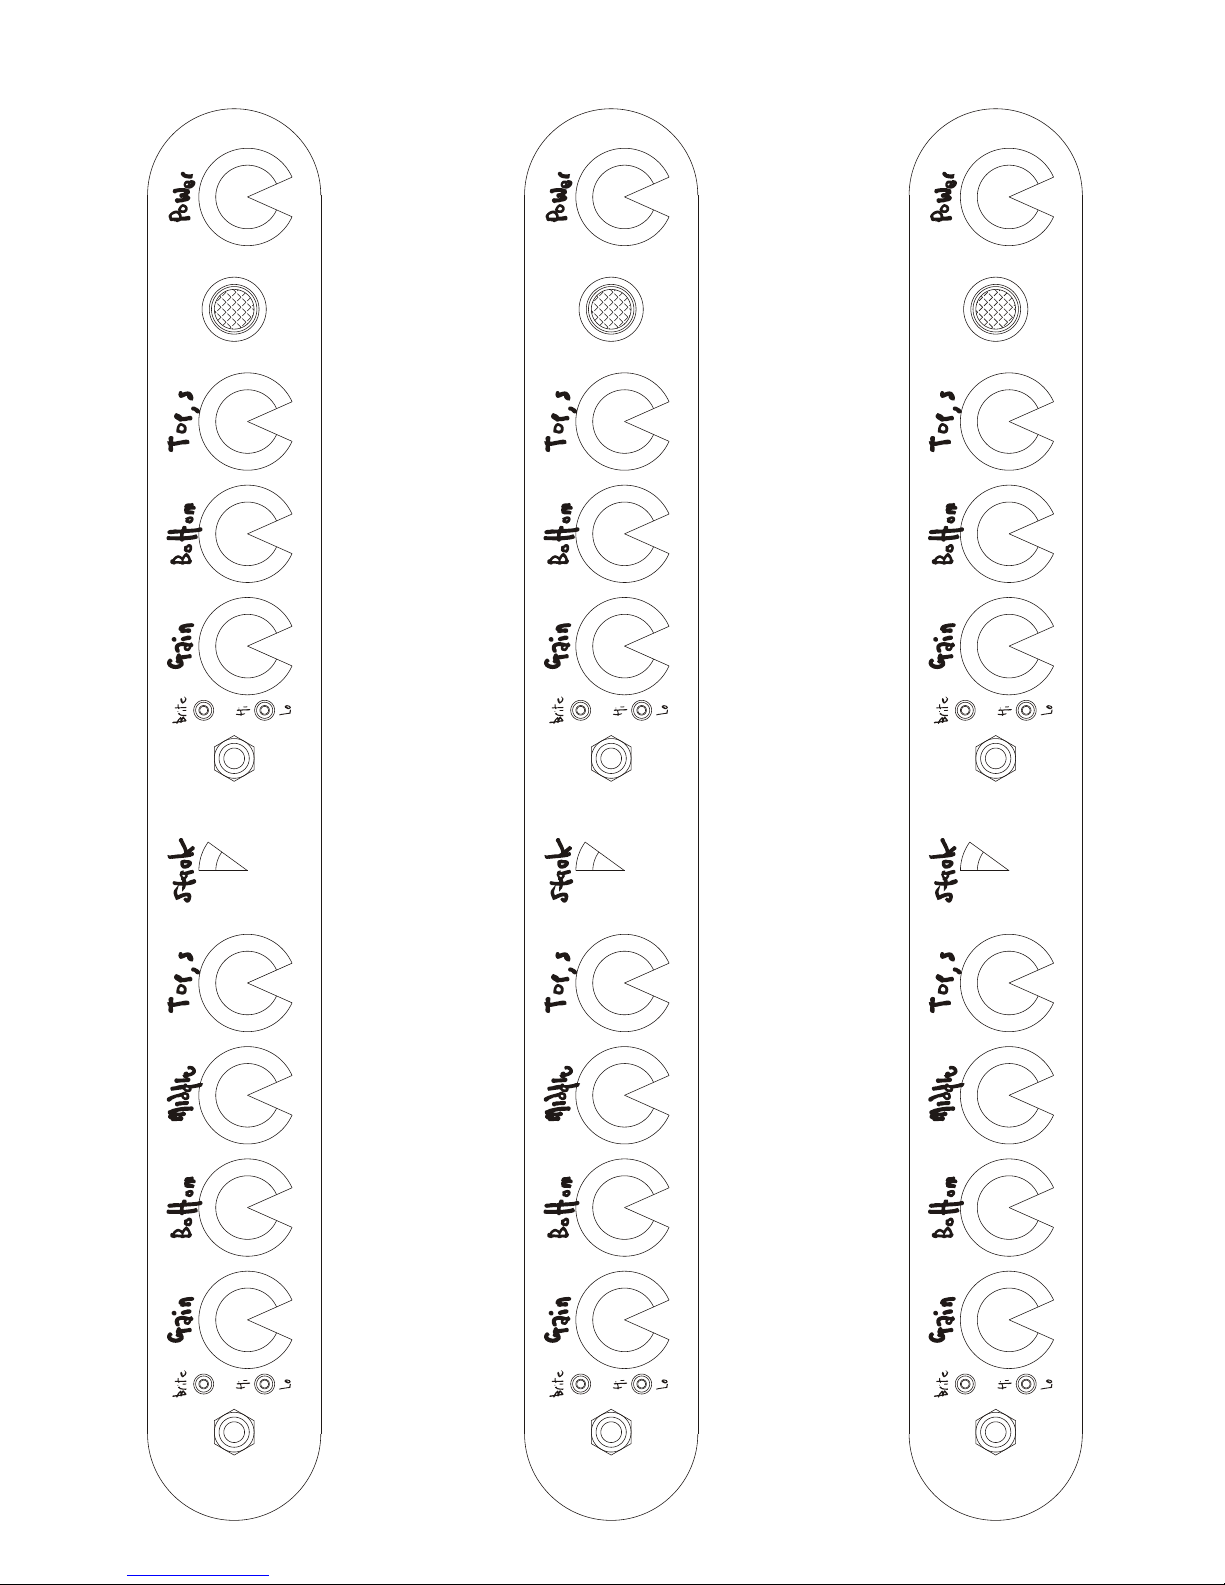
The power switch on the back is Off in the bottom position, Standby in the
middle, and On in the top position.
Channel One:
Gain works as you would expect; Bottom, Middle, Tops likewise.
Stack disables Bottom and Middle, and re-purposes Tops as a high end roll-
off.
Channel Two:
Gain functions as you would imagine, but the EQ on this channel is a bit
different, in that you get a great deal of cut and boost on both Tops and Bottom.
Power is a headroom control for the output stage: as you turn it down the
volume decreases but you get an increase in break-up. Gain and Power are
very interactive, so play around with them together.
The Big Chopper sounds 'all there' as soon as you plug in, so you won't need to
spend time hunting for the sweet spot , but there are so many sounds available,
that I strongly recommend spending time with the amp, playing and
experimenting with the controls to familiarise yourself with the possibilities:
I can assure you this will NOT feel like a chore.
4

15678
23
Controls
1. This Input jack is where you plug your musical instrument in to access channel
one. Yes, really.
2. This Brite switch boosts high frequencies in channel one's tone. Because
of the way this is implemented, the effect reduces the higher up you
sweep the Gain control
3. This Hi/Lo switch replaces the traditional Hi and Lo jacks on the front
panel. The idea was to remedy the loss of top end which always seems to
occur when you plug into the Lo jack. Many people accept that, but it has
always frustrated me. This switch affects channel one, only.
4. Gain controls the level of channel one's preamp signal presented to the
power amp (EL84s).
5. Bottom controls the level of bass frequencies present in channel one's
tone.
6. Middle controls the level of middle frequencies present in channel one's
tone.
7. Tops controls the level of high frequencies present in channel one's tone.
8. Stack is a two position switch. Pointing at 12 o'clock the tone stack
(Bottom, Middle and Tops) function as normal, but when the switch is
moved to 1 o'clock, Bottom and Middle controls are disabled and Tops is
re-purposed as a top end roll off. Because of the frequency response of
the B,M,T tone stack, once Stack is at 1 o'clock a perceived mid-boost
occurs along with a large increase in gain. If you want the frequency
response change without the extra gain, just flip the Hi/Lo switch to Lo
and that will compensate.
5
4

Controls
9. This Input jack is where you plug your musical instrument in to access
channel two. Trust me, people have asked.
10. This Brite switch affects channel two, only.
11. This Hi/Lo switch affects channel two, only.
12. Gain controls the level of channel two's preamp signal presented to the
power amp (EL84s).
13. Bottom on channel two works differently in that it has much more cut
and boost than its counterpart on channel one.
14. Likewise Tops on channel two has a much more extended cut and boost
that that of channel one.
15. The Power Light is illuminated as soon as you switch the amp from Off
to Standby.
16. The Power control is a little more complicated. Turning the Power
control anti-clockwise simultaneously decreases the output level and the
headroom of the power amp, so it gets quieter but more broken up.
Using this control in tandem with the Gain controls you are able to
achieve a given level of break-up at many different volume levels.
910 11 12 13 14 1615
6

Rear Panel
17. Mains Input - Your amp is provided with a detachable mains (power) lead
which is connected here. Before connecting for the first time, please ensure
that the Big Chopper is compatible with your electricity supply. If you
have any doubt, please get advice from your Audio Kitchen dealer.
18. Mains Fuse - The correct value of mains fuse is specified on the rear panel
of the amplifier. Please refer to Important Safety Instructions, Page 2.
19. The Power Switch is the On/ Standby/ Off switch for the power to the
amplifier, middle position being standby.
Please use the Standby position to allow the Big Chopper to warm up its
valves for a couple of minutes when you turn the amp on, and likewise, to
cool when you are switching it off. Also, to extend the life of the EL84s,
flip the amp to Standby if the Big Chopper will be left un-played for over
10 minutes.
20. The Voltage Selector must be set to the correct position for your local
mains voltage.
Your amp should be completely powered down before the selector is
turned.
Adjustment from 240V to 120V or vice versa will require the mains fuse to
be changed to the corresponding value as detailed on the rear panel.
21. The HT Fuse is there to provide protection in the event of a shorted valve
or other problem which compromises the high voltage or High Tension
side of the power supply.
Specification for this fuse is written below the fuse holder.
7
17 18 19 20 21

Rear Panel
22. The 15W/30W switch allows you to utilise all four, or just two of the
EL84s in the power amp.
23. The Speaker Output jacks are paralleled. This allows you to drive more
than one cabinet with The Big Chopper. Make sure that any pair of
cabinets you attach have the same impedance, otherwise you will not get
the best from them. Also remember that when you parallel two cabinets
(let's say they are 8 Ohm cabinets) the resultant impedance is half of their
individual impedances (in the case of two 8 Ohm cabs the resultant is 4
Ohms), so flip the Impedance Selector to the appropriate position.
24. The Impedance Switch allows you to select the appropriate match for your
speaker cabinet configuration.
NEVER attempt to use the amplifier without a speaker attached!
8
22 23 23 24

9
Recall Sheet

10
Recall Sheet

12 Impress House, Mansell Road
Acton, London W3 7QH
+44 (0)20 8735 0045
www.audiokitchen.co.uk
Table of contents