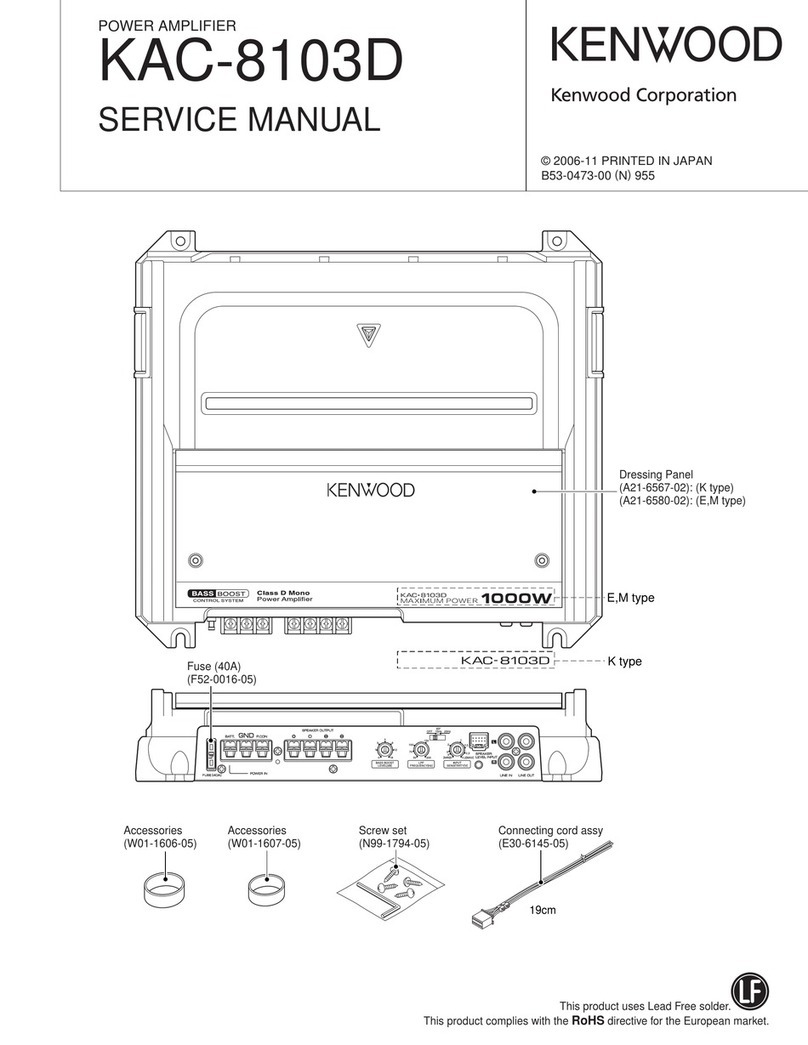
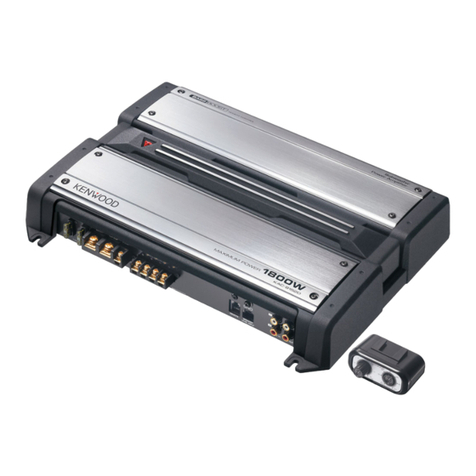
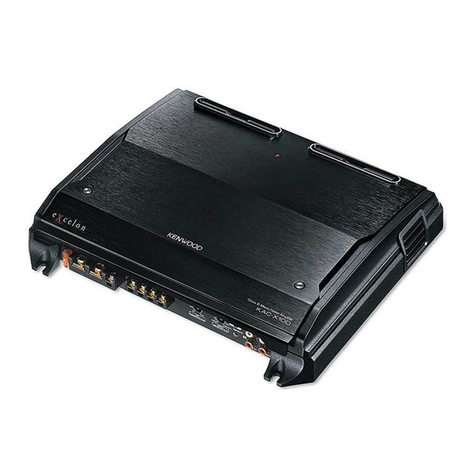
Kenwood XR1000-1 User manual

AFTER MARKET
HEAD UNIT
Safety precautions
WARNING
To prevent injur y or fire, take the following
precautions:
• Mounting and wiring this product requires skills and
experience. For safety’s sake, leave the mounting and
wiring work to professionals.
• When extending the ignition, battery, or ground wires,
make sure to use automotive-grade wires or other wires
with the range of 14 mm (AWG 6) to 21 mm (AWG 4)
to prevent wire deterioration and damage to the wire
coating.
• To prevent a short circuit, never put or leave any
metallic objects (such as coins or metal tools) inside the
unit.
• If the unit starts to emit smoke or strange smells, turn
off the power immediately and consult your KENWOOD
dealer.
• Do not touch the unit during use because the surface of
the unit becomes hot and may cause burns if touched.
CAUTION
To prevent damage to the machine, take the
following precautions:
• Be sure the unit is connected to a 12V DC power supply
with a negative ground connection.
• Do not open the top or bottom covers of the unit.
• Do not install the unit in a spot exposed to direct
sunlight or excessive heat or humidity. Also avoid places
with too much dust or the possibility of water splashing.
• When replacing a fuse, only use a new one with the
prescribed rating. Using a fuse with the wrong rating
may cause your unit to malfunction.
• To prevent a short circuit when replacing a fuse, first
disconnect the wiring harness.
NOTE
• If you experience problems during installation, consult
your KENWOOD dealer.
• If the unit does not seem to be working right, consult
your KENWOOD dealer.
Cleaning the unit
If the front panel gets dirty, turn off the power and wipe
the panel with a dry silicon cloth or soft cloth.
CAUTION
Do not wipe the panel with a hard cloth or a cloth
dampened by volatile solvents such as paint thinner and
alcohol. They can scratch the surface of the panel and/or
cause the indicator letters to peel off.
To prevent battery rise
When the unit is used in the ACC ON position without
turning the engine ON, it depletes the battery. Use it after
starting the engine.
Protection function
The protection function is activated in the following
situations:
This unit is equipped with a protection function for
protecting this unit and your speakers from various
accidents or problems that can occur.
When the protection function is triggered, the power
indicator goes off and the amplifier stops operating.
• When a speaker wire may be short-circuited.
• When a speaker output contacts ground.
• When the unit malfunctions and a DC signal is sent to
the speaker output.
• When the internal temperature is high and unit won’t
operate.
Wiring
• Take the battery wire for this unit directly from the
battery. If it's connected to the vehicle’s wiring harness,
it can cause blown fuses etc.
• If a buzzing noise is heard from the speakers when the
engine is running, connect a line noise filter (optional)
to each of the battery wire.
• Do not allow the wire to directly contact the edge of
the iron plate by using Grommets.
• Connect the ground wire to a metal part of the car
chassis that acts as an electrical ground passing
electricity to the battery‘s negative ⊖terminal. Do not
turn the power on if the ground wire is not connected.
• Be sure to install a protective fuse in the power cord
near the battery. The protective fuse should be the
same capacity as the unit’s fuse capacity or somewhat
larger.
• For the power cord and ground, use a vehicle type
(fireproof) power wring cord. (Use a power wiring cord
with the range of 14 mm (AWG 6) to 21 mm (AWG 4).
• When more than one power amplifier are going to be
used, use a power supply wiring wire and protective
fuse of greater current-handling capacity than the total
maximum current drawn by each amplifier.
Speaker selection
• Using speakers with smaller input ratings than the
amplifier’s output power would result in smoke
generation or equipment failure.
• Use speakers that have an impedance of 2 or greater.
When more than one set of speakers are going to
be used, calculate the combined impedance of the
speakers and then connect suitable speakers to the
amplifier.
<Example>
Précautions de sécurité
AVERTISSEMENT
Pour évite r toute blessure e t/ou incendie, veuillez
prendre les précau tions suivantes :
• Le montage et le câblage de ce produit nécessite des
compétences et de l'expérience. Pour des raisons de
sécurité, laissez un professionnel effectuer le travail de
montage et de câblage.
• Si vous prolongez un câble de batterie ou de masse,
assurez vous d'utiliser un câble pour automobile ou un
câble compris entre 14 mm2(AWG 6) et 21 mm2(AWG 4)
afin d'éviter tout risque de détérioration ou d'endomma-
gement du revêtement des câbles.
• Pour éviter les court-circuits, ne jamais mettre ou laisser
d'objets métalliques (comme une pièce de monnaie ou
un outil en métal) à l'intérieur de l'appareil.
• Si l'appareil commence à émettre de la fumée ou une
odeur bizarre, mettez immédiatement l'appareil hors ten-
sion et consultez un revendeur KENWOOD.
• Ne pas toucher l’appareil quand il est en service car la
température de sa surface est suffisamment élevée pour
provoquer des brûlures.
ATTENTION
Pour évite r tout dommage à l'appareil , veuillez
prendre les précau tions suivantes :
• Bien vérifier que l’appareil est raccordé à une source
d’alimentation CC de 12 V avec raccordement de masse
négative.
• N'ouvrez pas le couvercle supérieur ou inférieur de
l'appareil.
• N'installez pas l'appareil dans un endroit exposé directe-
ment à la lumière du soleil, à une chaleur excessive ou à
l'humidité. Evitez aussi les endroits trop poussiéreux et où
l'appareil risque d'être éclaboussé.
• Lors du remplacement d'un fusible, utilisez seulement
un fusible neuf avec la valeur indiquée. L'utilisation d'un
fusible d'une valeur différente peut être la cause d'un
mauvais fonctionnement de votre appareil.
• Pour éviter les courts-circuits lors du remplacement d'un
fusible, déconnectez d'abord le faisceau de câbles.
REMARQUE
• Si vous rencontrez des problèmes pendant l'installation,
consultez votre revendeur KENWOOD.
• Si l'appareil semble ne pas fonctionner correctement,
consultez votre revendeur KENWOOD.
Nettoyage de l’appareil
Si la surface de l’appareil sale, l’essuyer avec un chiffon au sili-
cone ou un chiffon doux et sec après avoir éteint l’appareil.
ATTENTION
N'essuyez pas le panneau avec un tissu rugueux ou impré-
gné de dissolvant volatile comme un diluant à peinture
ou de l'alcool. Il pourrait rayer la surface du panneau et/ou
écailler les lettres d'informations.
Comment éviter une élévation de la batterie
Lorsque l’unité est utilisée avec l’ACC sur ON, sans que le
moteur ne soit allumé, cela décharge la batterie. Il est pré-
férable de l’utiliser après avoir allumé le moteur.
Fonction de protection
La fonction de protection se met en service dans les cas
suivants:
Cet appareil est pourvu d’une fonction de protection de
l’appareil lui-même et des haut-parleurs de manière à évi-
ter divers incidents.
Lorsque la fonction de protection est déclenchée, l’indi-
cateur d’alimentation s’éteint et l’amplificateur s’arrête de
fonctionner.
• Si un cordon de liaison aux haut-parleurs est en court-
circuit.
• Une sortie de haut-parleur est mise à la masse.
• Une tension continue est appliquée sur les sorties vers
les haut-parleurs en raison d’un défaut de fonctionne-
ment de l’appareil.
• Lorsque la température interne est trop élevée et que
l’appareil ne fonctionne pas.
Câblage
• Pour cette unité, brancher le cordon de la batterie direc-
tement à la batterie. Si celui-ci est connecté à l’installation
électrique du véhicule, l’installation peut disjoncter etc.
• Si un ronronnement se fait entendre dans les haut-
parleurs lorsque le moteur tourne, fixer un filtre antipara-
site de ligne (en option) au câble de la batterie.
• Utiliser un passe-câble de manière que le cordon ne soit
pas en contact avec le tablier.
• Relier les fils de masse à une partie métallique du châssis
du véhicule qui soit en mesure de jouer le rôle de masse
électrique et donc de laisser passer le courant vers le
pôle négatif ⊖de la batterie. Ne pas mettre l’appareil
sous tension si les fils de masse ne sont pas reliés.
• Assurez-vous de mettre en place un fusible protégeant le
cordon d’alimentation situé près de la batterie. Ce fusible
doit avoir un pouvoir de coupure égal ou légèrement
supérieur à celui de l’unité.
• En ce qui concerne le cordon d’alimentation et la terre, il
est conseillé d’utiliser un cordon d’alimentation électrique
pour voiture (ininflammable). (Utiliser un cordon d’alimen-
tation d’un diamètre câble compris entre 14 mm2(AWG 6)
et 21 mm2(AWG 4).)
• Lorsque plus d’un amplificateur de puissance doivent être
utilisés, utiliser un câble de câblage d’alimentation et un
fusible de sécurité dont la limite de tension est supérieure
au courant total maximum tiré par chaque amplificateur.
Sélection des haut-parleur
• L’utilisation de haut-parleurs d’une puissance d’entrée
inférieure à la puissance de sortie de l’amplificateur peut
provoquer un dégagement de fumée ou une panne de
l’équipement.
• Utiliser des haut-parleur dont l’impédance est de minimum
2. Lorsque plus d’un jeu d’haut-parleur va être utilisé, cal-
culer l’impédance combinée des haut-parleur et connecter
ensuite les haut-parleur appropriées à l’amplificateur.
<Exemple>
Impédance combinée
Precauciones de seguridad
ADVERTENCIA
Para evitar el riesgo de lesiones y/o fuego, observe
las siguientes precauciones:
• La instalación y cableado de este producto requiere de
habilidad y experiencia. Por motivos de seguridad, deja
la labor de instalación y montaje en manos de profesio-
nales.
• Cuando extienda los cables de la batería o de masa,
asegúrese de utilizar cables para automóviles u otros
cables que tengan un área de 14 mm (AWG 6) a 21
mm (AWG 4), para evitar el deterioro del cable y daños
en su revestimiento.
• Para evitar cortocircuitos, nunca coloque ni deje objetos
metálicos (por ejemplo, monedas o herramientas metá-
licas) dentro de la unidad.
• Si nota que la unidad emite humos u olores extraños,
desconecte inmediatamente la alimentación y consulte
con su distribuidor KENWOOD.
• No toque el aparato mientras lo utiliza porque su super-
ficie se calienta y puede causar quemaduras si se toca.
PRECAUCIÓN
Para evitar daños en la unidad, tome las siguientes
precauciones:
• Asegúrese de que la unidad está conectada a un sumi-
nistro de alimentación de CC de 12V con una conexión
de toma de tierra negativa.
• No abra las cubiertas superior o inferior de la unidad.
• No instale la unidad en un sitio expuesto a la luz directa
del sol, o excesivamente húmedo o caluroso. Asimismo
evite los lugares muy polvorientos o sujetos a salpicadu-
ras de agua.
• Cuando tenga que reemplazar un fusible, utilice única-
mente uno del régimen prescrito. El uso de un fusible
de régimen incorrecto podría ocasionar un funciona-
miento defectuoso de la unidad.
• Para evitar cortocircuitos mientras sustituye el fusible,
desconecte previamente el mazo de conductores.
NOTA
• Si tiene problemas durante la instalación, consulte con
su distribuidor KENWOOD.
• Si la unidad no está funcionando correctamente, con-
sulte con su distribuidor KENWOOD.
Limpieza de la unidad
Si la superficie de la unidad está sucia, apague la unidad y
limpie con un paño siliconado suave y seco.
PRECAUCIÓN
No limpie el panel con un paño áspero o humedecido
con disolventes volátiles tales como diluyente de pintura
o alcohol. Su uso podría rayar la superficie del panel y/o
hacer que se despeguen las letras indicadoras.
Para evitar agotar la batería
Cuando la unidad se utiliza en la posición ACC ON sin
conectar el motor, agota la batería. Utilícelo después de
arrancar el motor.
Función de protección
La función de protección se activa en los casos siguien-
tes:
Este aparato está equipado con una función de protec-
ción que protege el aparato y los altavoces de diversos
accidentes y problemas que pueden ocurrir.
Cuando la función de la protección está activada, el
indicador de potencia se apaga y el amplificador se inte-
rrumpe.
• Cuando un cable de altavoz puede estar cortocircuitado.
• Cuando la salida de un altavoz entra en contacto con
masa.
• Cuando el aparato funciona mal y se envía una señal de
DC a la salida de los altavoces.
• Cuando la temperatura interna sea alta y la unidad no
funcione.
Cableado
• Lleve el cable de la batería de esta unidad directamen-
te desde la propia batería. Si se conectara al arnés del
cableado del vehículo, puede provocar daños en los
fusibles, etc.
• Si se produce un ruido de zumbido por los altavoces
mientras funciona el motor, conecte un filtro de ruido de
línea (vendido por separado) a cada cable de la batería.
• No permita que el cable entre en contacto directo con
el borde de la placa de hierro, utilizando para ello aran-
delas de caucho.
• Conecte los cables de masa a una parte del chasis del
automóvil que actúe como puesta a masa por donde
pase la electricidad hasta el borne negativo ⊖de la
batería. No conecte la alimentación si no están conec-
tados los cables de masa.
• Asegúrese de instalar un fusible de protección en el
cable de corriente cerca de la batería. El fusible positivo
debería tener la misma capacidad que el de la unidad o
algo mayor.
• Para el cable de corriente y la masa, utilice un cable de
corriente para vehículos (ignífugo). (Utilice un cable
de fuerza con un diámetro entre 14 mm (AWG 6) y 21
mm (AWG 4).)
• Cuando desee utilizar más de un amplificador de
potencia, utilice un cable de suministro de alimenta-
ción y un fusible de protección de una capacidad de
soporte de corriente mayor a la corriente máxima total
utilizada por cada amplificador.
Selección de altavoces
• La utilización de altavoces con entradas nominales más
pequeñas que la potencia de salida del amplificador podría
ser la causa de que se generara humo o fallos en el equipo.
• Utilice altavoces que posean una impedancia de 2 o
más. Cuando desee utilizar más de un juego de altavo-
ces, calcule la impedancia combinada de estos altavo-
ces y luego conecte adecuadamente los altavoces al
amplificador.
<Ejemplo>
Impedancia combinada
Installation / Installation / Instalación Connection / Raccordements / Conexiones
Accessories / Accessoires / Accesorios
①ø 4 x 16 mm
Self-tapping screws / Vis taraudeuses / Tornillo
autorroscantes 4
②2.5 mm Hexagon wrench / Clé polygonale / Llave hexagonal 1
③4.0 mm Hexagon wrench / Clé polygonale / Llave hexagonal 1
Installation board, etc. (thickness : 15 mm or more)
Tableau d’installation, etc. (épaisseur: 15 mm ou plus)
Tablero de instalación, etc. (grosor: 15 mm o más)
①Parts included
Pieces comprises
Partes incluidas
Installation procedure
Since there are large variety of settings and
connections possible according to applications,
read the instruction manual well to select the
proper setting and connection.
1. Remove the ignition key and disconnect
the negative ⊖terminal of the battery to
prevent short circuits.
2. Set the unit according to the intended
usage.
3. Remove the Dressing cover.
4. Connect the input and output wires of the
units.
5. Connect the speaker wires.
6. Connect the power wire, power control wire
and grounding wire following this order.
7. Install the installation fittings in the unit.
8. Attach the unit.
9. Attach the Dressing cover.
10. Connect the negative ⊖terminal of the
battery.
CAUTION
• Do not install in the below locations;
(Unstable location, In a location that interferes
with driving, In a location that gets wet, In a
dusty location, In a place that gets hot, In a
place that gets direct sunlight, In a location
that gets hit by hot air)
• Do not install the unit under the carpet.
Otherwise heat build-up occurs and the unit
may be damaged.
• Install this unit in a location which allows heat
to easily dissipate.
Once installed, do not place any object on
top of the unit.
• The surface temperature of the amplifier will
become hot during use. Install the amplifier
in a place where people, resins, and other
substances that are sensitive to heat will not
come into contact with it.
• This unit has cooling fan to decrease the
internal temperature. Do not mount the unit
in a place where the cooling fan and ducts of
the unit are blocked. Blocking these openings
will inhibit the cooling of the internal
temperature and result in malfunction.
• When making a hole under a seat, inside
the trunk, or somewhere else in the vehicle,
check that there is nothing hazardous on the
opposite side such as a gasoline tank, brake
pipe, or wiring harness, and be careful not to
cause scratches or other damage.
• Do not install near the dashboard, rear tray, or
air bag safety parts.
• The installation to the vehicle should securely
fasten the unit to a place in which it will not
obstruct driving. If the unit comes off due to a
shock and hits a person or safety part, it may
cause injury or an accident.
• After installing the unit, check to make sure
that electrical equipment such as the brake
lamps, turn signal lamps and windshield
wipers operate normally.
Procédure d’installation
Etant donné que le nombre de réglages et de raccor-
dements est assez important, il importe de prendre
pleinement connaissance du mode d’emploi.
1. Retirer la clé de contact et débrancher la
borne négative ⊖de la batterie pour éviter
les court-circuits.
2. Régler l’appareil en fonction de l’utilisation
désirée.
3. Déposer l’enjoliveur.
4. Raccorder les câbles d’entrée et de sortie de
l’appareil.
5. Raccorder les câbles de haut-parleur.
6. Relier, dans l’ordre, le câble d’alimentation,
le câble de commande d’alimentation et le
câble de masse.
7. Mettre en place les accessoires d’installation
sur l’unité.
8. Brancher l’unité.
9. Fixer l’enjoliveur.
10. Raccorder la borne négative ⊖de la batterie.
ATTENTION
•
Ne pas procéder à l’installation de l’appareil si vous
trouvez dans l’un des lieux suivants; (Lieu instable,
Lieu où la conduite du véhicule peut être gênée,
Lieu exposé à l’humidité, Lieu exposé à la pous-
sière, Lieu surchauffé, Lieu exposé directement à la
lumière du jour, Lieu exposé à l’air chaud)
• Ne pas recouvrir l’appareil d’une nappe,
tapis, etc; la chaleur qui s’accumulerait risque
d’endommager l’appareil.
•
Installer cet appareil à un emplacement tel que
la chaleur puisse se dissiper aisément. Après
l’installation, ne placer aucun objet sur l’appareil.
• La surface de l’amplificateur va chauffer
pendant l’utilisation. Installer l’amplificateur
à un endroit où des passagers, de la résine
ou d’autres substances sensibles à la chaleur
n’entreront pas en contact avec lui.
•
Cette unité dispose d’un ventilateur de refroi-
dissement permettant d’abaisser la tempé-
rature interne. Ne pas monter l’unité dans un
endroit où le ventilateur de refroidissement et
les conduites de l’unité sont bloquées. En effet,
si la chaleur interne ne peut pas être éliminée
par la ventilation de l’appareil, une anomalie de
fonctionnement peut aisément survenir.
•
Lors du forage d’un trou sous le siège, à l’intérieur
du coffre ou par tout ailleurs dans le véhicule, véri-
fier s’il n’y a pas d’élément dangereux de l’autre
côté, tel qu’un réservoir à carburant, une conduite
de frein, une gaine de câbles, et faire attention de
ne pas faire de grif fes ou d’autres dégâts.
•
Ne pas l’installer près du tableau de bord, de la
plage arrière ou d’éléments de sécurité de l’airbag.
• Lors de l’installation dans un véhicule, l’appa-
reil doit être fermement fixé à un endroit ou
il ne gênera pas la conduite. Si l’appareil se
détache suite à un choc et heurte quelqu’un
ou un élément de sécurité, il peut occasionner
des blessures ou un accident.
• Après installation de l’appareil, s’assurer que les
différents équipements électriques tels que
lampes frein et les clignotants de direction
fonctionnent normalement.
Procedimiento de instalación
Como se puede hacer una gran variedad de
ajustes y conexiones según las aplicaciones, lea
atentamente el manual de instrucciones para
seleccionar el ajuste y la conexión apropiados.
1. Retire la llave de encendido y desconecte el
terminal negativo ⊖de la batería para evitar
cortocircuitos.
2. Prepare el aparato según el uso que vaya a
hacer de él.
3. Quite la cubierta de adorno.
4. Conecte los cables de entrada y salida de las
unidades.
5. Conecte los cables del altavoz.
6. Conecte el cable de alimentación, el cable
de control de alimentación y el cable de tie-
rra en este orden.
7. Coloque los elementos de instalación en la
unidad.
8. Coloque la unidad.
9. Coloque la cubierta de adorno.
10.
Conecte la terminal negativa ⊖de la batería.
PRECAUCIÓN
•
No instale el equipo en las siguientes ubica-
ciones; (Ubicación inestable; En un lugar que
interfiera a la conducción; En un lugar en el
que pueda mojarse; En un lugar con exceso de
polvo; En un lugar en el que pueda recalentarse;
En un lugar en el que reciba la luz directa del sol;
En un lugar situado en el flujo de aire caliente)
• No utilice el aparato bajo una alfombra por-
que en caso contrario, éste podría sobreca-
lentarse y estropearse.
• Instale este aparato en un lugar donde el
calor pueda disiparse fácilmente. Una vez
instalado, no ponga nada sobre él.
• La temperatura de la superficie del amplifica-
dor se elevará durante su uso. Instale el ampli-
ficador en un lugar seguro donde personas,
resinas y otras substancias sensibles al calor
no entren en contacto con esta superficie.
•
Esta unidad tiene un ventilador de refrigeración
para reducir la temperatura interna. No instale
la unidad en un lugar donde estén bloqueados
el ventilador y los ductos de refrigeración. Al
tapar estas aberturas no podrá reducirse ade-
cuadamente la temperatura interior y podrá
producirse un fallo en el funcionamiento.
•
Cuando haga un orificio bajo el asiento o en el
portaequipajes o en algún otro lugar del vehícu-
lo, verifique que no existan objetos peligrosos al
lado opuesto tales como un tanque de gasolina,
tubo del freno, o los alambres del cableado del
coche y tenga cuidado de no rayar las piezas del
vehículo o causar algún otro daño.
•
No lo instale cerca del panel de controles, bandeja
trasera, o piezas de seguridad del colchón de aire.
•
La instalación de esta unidad debe ser realizada
en un lugar donde no estorbe la conducción.
Si la unidad se sale de su posición debido a un
choque y golpea a una persona o a alguna pieza
de seguridad, puede causar o un accidente.
•
Después de instalar el aparato, cerciórese de que
los equipos eléctricos (luces de freno, intermi-
tentes y limpiadores) funcionen normalmente.
WARNING Remove the ignition key and disconnect the negative
⊖terminal of the battery to prevent short circuits.
AVERTISSEMENT
Retirer la clé de contact et débrancher la borne
négative ⊖de la batterie pour éviter les court-circuits.
ADVERTENCIA Retire la llave de encendido y desconecte el terminal
negativo ⊖de la batería para evitar cortocircuitos.
WARNING
Particular attention must be given to
making good electrical contact at the
amplifier-output and speaker terminals.
Poor or loose connections can cause
sparking or burning at the terminals
because of the very high power that the
amplifier can deliver.
CAUTION
• If sound is not output normally, immediately
turn power off and check connections.
• Be sure to turn the power off before
changing the setting of any switch.
• If the fuse blows, check wires for shorts, then
replace the fuse with one of the same rating.
• Check that no unconnected wires or
connectors are touching the car body. Do
not remove caps from unconnected wires or
connectors to prevent short circuits.
• Connect the speaker wires to appropriate
speaker connectors separately. Sharing the
negative wire of the speaker or grounding
speaker wires to the metal body of the car
can cause this unit to fail.
• After installation, check that the brake lamps,
turn signal lamps and windshield wipers
work properly.
AVERTISSEMENT
Veillez à ce que le contact électrique à la
sortie de l’amplificateur et aux prises des
enceintes soit bien établi.
Un mauvais branchement ou un
branchement lâche peut causer des
étincelles ou un réchauffement des prises
du fait de la très grande puissance de
l’amplificateur.
ATTENTION
• En cas d'anomalie, mettre immédiatement
l'appareil hors tension et vérifier tous les
raccordements.
• Veiller à mettre l'appareil hors tension avant
de changer la position des commutateurs.
• Si le fusible saute, vérifier si les câbles ne sont
pas court-circuités, et remplacer le fusible par
un autre fusible de même capacité nominale.
•
Vérifier qu’aucun câble ou connecteur non
raccordé ne touche la carrosserie de la voiture.
Ne pas retirer les capuchons des câbles ou
connecteurs non raccordés afin d’éviter tout
courtcircuit.
• Raccorder séparément les câbles de haut-
parleur aux connecteurs de haut-parleur
appropriés. La mise en commun du câble
négatif d’un haut-parleur ou des fils de
masse des haut-parleurs à la carrosserie
métallique de la voiture pourrait rendre
l’appareil inopérant.
• Après l’installation, vérifier que les voyants
de frein, les clignotants et les essuie-glace
fonctionnent correctement.
ADVERTENCIA
Debe ponerse especial atención para que se
haga un buen contacto eléctrico en la salida
del amplificador y en los terminales de los
altavoces.
Las conexiones mal hechas o las conexiones
flojas pueden causar chispas o quemaduras
en los terminales debido a la potencia muy
alta que puede suministrar el amplificador.
PRECAUCIÓN
• Si el sonido no sale normalmente,
desconecte inmediatamente la alimentación
y compruebe las conexiones.
• No se olvide de desconectar la alimentación
antes de cambiar el ajuste de cualquier
conmutador.
• Si el fusible se quema, compruebe que no
haya un cortocircuito en los cables, luego
cambie el fusible por uno que tenga el
mismo amperaje.
•
Verifique que ninguno de los cables o
conectores que están sin conectar se
encuentren tocando la carrocería del
automóvil. No retire las tapas de los cables o
conectores que están sin conectar para evitar
de que se produzcan cortocircuitos.
• Conecte los cables del altavoz a los
conectores adecuados del altavoz
separadamente. La puesta en contacto
de terminales de altavoces distintos, o
la conexión como toma de tierra de los
terminales del altavoz al coche del automóvil,
pueden causar daños a la unidad.
•
Después de la instalación, compruebe que
las lámparas del freno, luces de destello y
limpiaparabrisas funcionar correctamente.
WARNING
To prevent fire caused by a short in the wiring,
connect a fusible link or breaker nearby the
battery’s positive terminal.
AVERTISSEMENT
Pour éviter tout incendie dû à un court-
circuit, insérer un fusible ou un coupecircuit à
proximité de la borne de la batterie.
ADVERTENCIA
Para evitar incendios producidos por
cortocircuitos en el cableado, conecte un
fusible o cortacircuito entre la batería y los
terminales de la batería.
Power wireand speaker wire connection
Raccordement d’un câble de l’alimentation et d’enceinte
Conexión del cable de alimentación y del altavoz
Battery
Batterie
Batería
Ground wire
Câble de masse
Cable de masa
Battery wire
Câble de la batterie
Cable de la batería
Protective fuse
Fusible de protection
Fusible de protección
Takethe time to read through this instruction manual.
Familia rity with inst allation an d operation pr ocedures wil l help you obtai n the best perf ormance from y our new
power amplifier.
For your records
Record the serial number, found on the back of the unit, in the spaces designated on the war ranty card, and in the sp ace provided
below. Refer to the model and serial numbers whenever you call upon your KENWOOD d ealer for information or service on the
product.
Model XR1000-1 Serial number
US Residence Only
Register Online
Register your KENWOOD product at www.Kenwoodusa.com
B5A-1811-00/00 (KV)© 2016 JVC KENWOOD Corporation
XR1000-1
CLASS D MONO POWER AMPLIFIER
INSTRUCTION MANUAL
AMPLIFICATEUR MONO CLASSE D
MODE D’EMPLOI
AMPLIFICADOR DE POTENCIA CLASE D MONOFÓNICO
MANUAL DE INSTRUCCIONES
Combined impedance
Dressing cover
Enjoliveur
Cubierta de adorno
Subwoofer (L + R)
Haut-parleurs
d'extrêmes graves
(G + D)
Altavoz de
subgraves (I + D)
Dual voice coil subwoofer / Subwoofer à Bobine Double
Voix / Subwoofer de bobina de voz doble
Dual 4 Ω
Double 4 Ω
Dual 4 Ω
Dual 2 Ω
Double 2 Ω
Dual 2 Ω
Power control wire; AFTER MARKET HEAD UNIT only
Câble de commande de l’alimentation; AFTER MARKET HEAD UNIT uniquement
Cable de control de alimentación; AFTER MARKET HEAD UNIT solamente
* 1
The output from the FACTORY INSTALLED HEAD UNIT up to 50W
can be input. The power is turned on and off as the unit detects
input signal (SIGNAL SENSING TURN-ON). Therefore it is not nec-
essary to connect the power control wire.
La puissance de sortie maximum de la FACTORY INSTALLED HEAD
UNIT ne doit pas dépasser 50W. L’alimentation est activée et
désactivée lorsque l’appareil détecte le signal d’entrée (SIGNAL
SENSING TURN-ON). C’est pourquoi il n’est pas nécessaire de
connecter le câble de commande de l’alimentation.
El FACTORY INSTALLED HEAD UNIT deberá tener una potencia de
salida máxima no superior a 50W. La alimentación se enciende y
apaga conforme la unidad detecte una señal de entrada (SIGNAL
SENSING TURN-ON). Por lo tanto no es necesario conectar el cable
de control de alimentación.
* 2
Use the attached Hexagon Wrench.
Utilisez la clé polygonale rattachée.
Utilice la llave hexagonal suministrada.
When two subwoofers are
connected.
Lorsque deux two
subwoofers sont connectés.
Al conectar dos subwoofers.
③Parts included
Pieces comprises
Partes incluidas
(4.0 mm)
②Parts included
Pieces comprises
Partes incluidas
(2.5 mm)
②Parts included
Pieces comprises
Partes incluidas
(2.5 mm)
*2
*2
*1
②Parts included
Pieces comprises
Partes incluidas
(2.5 mm)
320 mm (12-5/8”)
169 mm (6-5/8”)
51 mm (2”)
XR1000-1KEnFrEs.indd1 2016/11/0714:17

AFTER MARKET
HEAD UNIT L
R
FRONT
L
R
Connection / Raccordements / Conexiones
Controls / Contrôles / Controles
RCA INPUT connection
Raccordement RCA INPUT
Conexión RCA INPUT
SPEAKER INPUT connection
Raccordement SPEAKER INPUT
Conexión SPEAKER INPUT
RCA cable
Câble RCA
Cable RCA
Troubleshooting Guide
What might appear to be a malfunction in your unit may just be the result of slight misoperation or miswiring.
Before calling service, first check the following table for possible problems.
PROBLEM POSSIBLE CAUSE SOLUTION
No sound.
(No sound from one
side.)
(Blown fuse.)
• Input (or output) cables are disconnected.
• Protection circuit may be activated.
• Volume is too high.
• The speaker cord is shorted.
• Connect the input (or output) cables.
• Check connections by referring to
<Protection function>.
• Replace the fuse and use lower volume.
• After check the speaker cord and fixing the
cause of the short, replace the fuse.
The output level is too
small (or too large). • The input sensitivity adjusting control is
not set to the correct position. • Adjust the control correctly referring to
<Controls>.
The sound quality is
bad.
(The sound is distorted.)
• The speakers wire are connected with
wrong ⊕/⊖polarity.
• A speaker wire is pinched by a screw in
the car body.
• The switches may be set improperly.
• Connect them properly checking the ⊕/⊖
of the terminals and wires well.
• Connect the speaker wire again so that it is
not pinched by anything.
• Set switches properly by referring to
<Controls>.
Guide de dépannage
Ce qui peut apparaître comme un mauvais fonctionnement de votre appareil n’est peut-être que le résultat d’une
mauvaise opération ou d’une mauvaise connexion. Avant d’appeler un centre de service, vérifiez d’abord dans le
tableau suivant les problèmes possibles.
PROBLEME CAUSE POSSIBLE SOLUTION
Absence de sons.
(Pas de son d’un côté)
(Fusible grillé)
•
Les câbles d’entrée (ou de sortie) sont débranchés.
• Le circuit de protection peut être actionné.
• Le volume est trop fort.
• Les fils de raccordement d’enceinte sont en
court-circuit.
• Brancher les câbles d’entrée (ou de sortie).
• Vérifier les raccordements en se reportant au
paragraphe <Fonction de protection>.
• Remplacez le fusible et utilisez un niveau de
volume plus faible.
• Après avoir vérifié le câble d’enceinte et réparé
la cause du court-circuit, remplacez le fusible.
Niveau de sortie trop
faible (ou trop fort). • La commande de réglage de la sensibilité
d’entrée n’est pas amenée sur la bonne
position.
• Faire le réglage correctement en se reportant
aux indications données en <Contrôles>.
La qualité sonore est
manuvaise.
(Le son est distordu.)
• Les câbles de haut-parleur ont été
raccordés en inversant la polarité ⊕/⊖.
• Un câble de haut-parleur est pincé par une
vis dans le châssis de la voiture.
• Les commutateurs ne sont peut-être pas
positionnés comme il convient.
• Raccorder correctement en respectant les
indications ⊕et ⊖des bornes et des câbles.
• Rebrancher le câble de haut-parleur en
évitant tout pincement
• Positionner les commutateurs en tenant
compte des indications fournies aux
paragraphes <Contrôles>.
Guía sobre localización de averías
Lo que podría parecer una falla de funcionamiento de su unidad podría ser simplemente el resultado de un
pequeño error de operación o de un defecto de conexión. Antes de acudir al servicio, verifique primero el
siguiente cuadro sobre los problemas que se podrían presentar.
PROBLEMA CAUSA POSIBLE SOLUCION
No hay sonido.
(No hay sonido de un
lado.)
(Fusible fundido)
•
Los cables de entrada (o salida) están desconectados.
• El circuito de protección puede estar
activado.
• El volumen está demasiado alto.
• El cable del altavoz está cortocircuitado.
• Conecte los cables de entrada (o salida).
• Compruebe las conexiones consultando
<Función de protección>.
• Reemplace el fusible y utilice volumen bajo.
•
Después de revisar el cable del altavoz y arreglar
la causa del cortocircuito, reemplace el fusible.
El nivel de salida está
muy bajo (o muy alto) • El control de ajuste de sensibilidad de
entrada no está en la posición correcta. • Ajuste bien el control consultando en
<Controles>.
La calidad del sonido
es mala.
(El sonido está
distorsionado.)
• Los cables de los altavoces están conectados
con las polaridades ⊕/⊖invertidas.
• Un cable de altavoz está pellizcado por un
tornillo de la carrocería del automóvil.
• Los conmutadores pueden estar mal
ajustados.
• Conéctelos correctamente asegurándose
bien de cuáles son los terminales ⊕y⊖.
• Vuelva a conectar los cables de los altavoces
de forma que no queden pellizcados.
• Ponga bien los conmutadores consultando
<Controles>.
Specifications
Specifications subject to change without notice.
Audio section
Rated power output (+B = 14.4V)
(4 ) (20 Hz – 200 Hz, ≤ 1.0 % THD)............................. 500 W × 1
(2 ) (100 Hz, ≤ 1.0 % THD).............................................1000 W × 1
Speaker impedance...............................4 (2 to 8 allowable)
Frequency response (+0, –3 dB)............................20 Hz – 200 Hz
Input sensitivity (RCA)........................................................... 0.2 V – 5.0V
Signal to noise ratio...........................................................................100 dB
Input impedance...................................................................................10 k
Low pass filter frequency (-12 dB/-24 dB oct.)
.....................................................................50 Hz – 200 Hz (variable)
Infrasonic Filter Frequency (-24 dB oct.)
........................................................................15 Hz – 40 Hz (variable)
Bass Boost Control (40 Hz)............................. 0 – +18 dB (variable)
General
Operating voltage................................ 14.4 V (11 – 16V allowable)
Current consumption............................................................................60 A
Dimensions (W × H × D)...................................320 × 51 × 169 mm
12-5/8 × 2 × 6-5/8 inch
Weight.......................................................................................3.1 kg (6.8 lbs)
CTA-2006
RMS Watts per channel @ 4 ohms, ≤ 1%THD+N
..................................................................................500 W × 1
Signal to noise ratio
(Reference: 1Watt into 4 ohms)..................85 dBA
Spécifications
Les spécifications sont sujettes à changements sans
notification.
Section audio
Puissance de sortie norminale (+B = 14,4V)
(4 ) (20 Hz – 200 Hz, ≤ 1,0 % THD)............................. 500 W × 1
(2 ) (100 Hz, ≤ 1,0 % THD).............................................1000 W × 1
Impédance d'enceinte.........................4 (2 à 8 admissible)
Réponse en fréquence (+0, –3 dB)........................20 Hz – 200 Hz
Sensibilité d'entrée (RCA) .................................................. 0,2 V – 5,0 V
Taux de signal/bruit.......................................................................... 100 dB
Impédance d’entrée.............................................................................10 k
Fréquence du filtre passe-bas (-12 dB/-24 dB oct.)
.....................................................................50 Hz – 200 Hz (variable)
Fréquence de coupure du filtre infrasonore (-24 dB oct.)
........................................................................15 Hz – 40 Hz (variable)
Control d’amplification des basses (40 Hz)
..............................................................................0 – +18 dB (variable)
Général
Tension de fonctionnement........14,4 V (11 – 16 V admissible)
Courant absorbé.......................................................................................60 A
Taille d’installation (L × H × P)........................320 × 51 × 169 mm
12-5/8 × 2 × 6-5/8 pouce
Masse .........................................................................................3,1 kg (6,8 lbs)
CTA-2006
RMS Watts par channel @ 4 ohms, ≤1%
THD+N...................................................................500 W × 1
Taux signal/bruit
(référence : 1 Watt/4 ohms) ........................ 85dBA
Especificaciones
Las especificaciones se encuentran sujetas a cambios sin
previo aviso.
Sección de audio
Salida de potencia nominal (+B = 14,4V)
(4 ) (20 Hz – 200 Hz, ≤ 1,0 % de distorsión armónica total)
............................................................................................................. 500W × 1
(2 ) (100 Hz, ≤ 1,0 % de distorsión armónica total)
...........................................................................................................1000 W × 1
Impedancia de altavoz............................4 (2 a 8 permitido)
Respuesta de frecuencia (+0, –3 dB) .......................20 Hz – 200 Hz
Sensibilidad de entrada (RCA) ........................................ 0,2 V – 5,0V
Relación señal a ruido............................................................................ 100 dB
Impedancia de entrada ...........................................................................10 k
Frecuencia del filtro pasa bajos (-12 dB/-24 dB octava)
.....................................................................50 Hz – 200 Hz (variable)
Frecuencia del filtro infrasónico (-24 dB octava)
........................................................................15 Hz – 40 Hz (variable)
Control acentuador de graves (40 Hz)... 0 – +18 dB (variable)
General
Tensión de funcionamiento
......................................... 14,4V (margen de 11 – 16 V permitido)
Consumo........................................................................................................60 A
Tamaño de instalación (Anch × Alt × Prof)...
320 × 51 × 169 mm
12-5/8 × 2 × 6-5/8 pulgada
Peso........................................................................................ 3,1 kg (6,8 libras)
CTA-2006
Vatios RMS por canal @ 4 ohms, ≤ 1 % de
distorsión armónica total + N................... 500W × 1
Relación señal a ruido
(referencia: 1 vatio en 4 ohmios)..................... 85 dBA
①Fuse (40 A x 3 )
NOTE
If you can’t find the specified capacity fuse at your store
etc., consult your KENWOOD dealer.
②Battery terminal (BATT.)
③Power control terminal (P.CON)
Controls the unit ON/OFF.
NOTE
Controls the unit power. Be sure to connect it with all the
systems.
④Ground terminal (GND)
⑤SPEAKER OUTPUT terminals
As this unit accepts speakers with a minimum impedance
of 2 ohm, connect speakers with 2- ohm or higher imped-
ance to these terminals.
⑥LINE IN terminal
⑦LINE OUT terminal
The signal that’s input from the line input terminal is
output.
⑧INPUT SENSITIVITY control
Set this control according to the pre-output level of the
center unit connected with this unit.
NOTE
For the pre-output level, refer to the <Specifications> in
the instruction manual of the center unit.
⑨INFRASONIC FILTER switch
Ultralow frequencies that cannot be reproduced even by
a subwoofer speaker do not become sound but become
unnecessary oscillations, which affect the sound by causing
distortion, etc.
When this switch is set to "ON", the inaudible, ultralow
frequencies below the frequency set with the "INFRASONIC
FILTER FREQUENCY" control are cut off. This improves the
reproduction performance of the speakers by eliminating
unnecessary oscillations which will not become sound.
⑩INFRASONIC FILTER FREQUENCY control
Sets the cutoff frequency when the "INFRASONIC FILTER"
switch is set to "ON".
⑪BASS BOOST LEVEL control
Sets the low frequency level to be compensated.
⑫LPF SLOPE switch
Select -12 dB per octave or -24 dB per octave slope via the
LPF SLOPE switch.
⑬LPF FREQUENCY control
This control adjusts the frequency band output from this
unit.
⑭Cooling fan
⑮Power indicator
When the power is turned on, the Power indicator lights.
①Fusible (40 A x 3)
REMARQUE
Si vous ne trouvez pas de fusible de calibre adéquat dans le
commerce, etc., contacter votre agent KENWOOD.
②Borne BATT. (alimentation)
③Borne P.CON (fil de commande d’alimentation)
Commande l’unité ON/OFF.
REMARQUE
Commande l’unité d’alimentation. Assurez-vous de le
connecter à l’ensemble des différents systèmes.
④Borne GND (masse)
⑤Bornes SPEAKER OUTPUT
Cet appareil étant conçu pour fonctionner avec une
impédance de charge de 2 Ohm, tout haut-parleur dont
l'impédance est égale ou supérieure à 2 Ohm peut être
branché sur ces prises.
⑥Borne LINE IN (entrée de ligne)
⑦Borne LINE OUT (sortie de ligne)
Le signal entrant du terminal d’entrée de ligne constitue la
sortie.
⑧Commande INPUT SENSITIVITY (sensibilité d’entrée)
Régler cette commande selon le niveau de pré-sortie de
l’unité centrale branché à cet amplificateur.
REMARQUE
Se référer à la section <Spécifications> du manuel des
instructions de l’unité centrale à propos du niveau de pré-
sortie.
⑨Commutateur INFRASONIC FILTER (filtre infraso-
nore)
Les fréquences très graves que même un haut-parleur
d’extrêmes graves n’est pas en mesure de reproduire,
génèrent des oscillations parasites qui altèrent les sons
audibles et les déforment, etc.
Lorsque ce commutateur est placé sur "ON", les fréquences
inaudibles ultrabasses en dessous de la fréquence
réglée à l'aide de "INFRASONIC FILTER FREQUENCY", sont
supprimées. Cette disposition permet d'accroître les
performances des haut-parleurs qui ne sont plus tenus de
reproduire des vibrations inutiles puisqu'elles ne sont pas
perçues par l'oreille.
⑩Commande INFRASONIC FILTER FREQUENCY
Cette commande permet de préciser la fréquence de
coupure quand le commutateur "INFRASONIC FILTER" est
sur la position "ON".
⑪Commande BASS BOOST LEVEL
Règle le niveau de basse fréquence devant être compensé.
⑫Commutateur LPF SLOPE
Sélectionner une pente d'octave -12 dB ou une pente
d'octave -24 dB à l'aide du commutateur LPF SLOPE.
⑬Commande LPF FREQUENCY
Cette commande permet de régler la bande de fréquence
en sortie de cet appareil.
⑭Ventilateur de refroidissement
⑮Indicateur d’alimentation
Lorsque l’alimentation est activée, l’indicateur d’alimentation
s’illumine.
①Fusible (40 A x 3)
NOTA
Si no puede encontrar el fusible de la capacidad especificada
en su almacén etc., consulte su distribuidor KENWOOD.
②Terminal BATT. (alimentación)
③Terminal P.CON (control de corriente)
Controla la conexión / desconexión de la unidad.
NOTA
Controla la potencia de la unidad. Asegúrese de conectarlo
con todos los sistemas.
④Terminal GND (tierra)
⑤Terminales SPEAKER OUTPUT
Como este aparato acepta altavoces con una impedancia
mínima de 2 ohmio, conecte altavoces con una impedancia
de 2 ohmio o más a estos terminales.
⑥Terminal LINE IN (entrada de linea)
⑦Terminal LINE OUT (salida de línea)
La señal de entrada del terminal de entrada de línea es la de
salida.
⑧Control INPUT SENSITIVITY (sensibilidad de entra-
da)
Ajustar este control de acuerdo con el nível de presalida de
la unidad central conectada a este amplificador.
NOTA
Referir a <Especificaciones> del manual de instrucciones de
la unidad central con respecto al nível de presalida.
⑨Conmutador INFRASONIC FILTER (filtro infrasóni-
co)
Las frecuencias ultrabajas que no pueden ser reproducidas
ni siquiera por un altavoz de subgraves no se convierten
en sonido, sino en oscilaciones innecesarias que afectan al
sonido y causan distorsión, etc.
Cuando este conmutador se establece en "ON", se cortan
las frecuencias ultrabajas inaudibles situadas por debajo
de la frecuencia establecida con el control "INFRASONIC
FILTER FREQUENCY". Esto mejorará la reproducción de los
altavoces al eliminar las oscilaciones innecesarias que no se
convierten en sonido.
⑩Control INFRASONIC FILTER FREQUENCY
Ajusta la frecuencia de corte cuando el conmutador
"INFRASONIC FILTER" está en "ON".
⑪Control BASS BOOST LEVEL
Ajusta el nivel de baja frecuencia que se va a compensar.
⑫Conmutador LPF SLOPE
Seleccionar la pendiente de -12 dB por octava o -24 dB por
octava mediante el conmutador LPF SLOPE.
⑬Control LPF FREQUENCY
Este control ajusta la salida de la banda de frecuencia de esta
unidad.
⑭Ventilador de refrigeración
⑮Indicador de potencia
Cuando la alimentación se activa, el indicador de potencia
se ilumina.
⑧ ⑩ ⑬ ⑭⑨ ⑪ ⑫
③② ④⑤ ⑥
⑮
① ⑦
For U.S.A.
FCC WARNING
This equipment may generate or use radio frequency energy.
Changes or modifications to this equipment may cause harmful
interference unless the modifications are expressly approved in the
instruction manual. The user could lose the authority to operate
this equipment if an unauthorized change or modification is made.
FCC NOTE
This equipment has been tested and found to comply with
the limits for a Class B digital device, pursuant to Part 15 of the
FCC Rules. These limits are designed to provide reasonable
protection against harmful interference in a residential installation.
This equipment may cause harmful interference to radio
communications, if it is not installed and used in accordance with
the instructions. However, there is no guarantee that interference
will not occur in a particular installation. If this equipment does
cause harmful interference to radio or television reception, which
can be determined by turning the equipment off and on, the user
is encouraged to try to correct the interference by one or more of
the following measures:
• Reorient or relocate the receiving antenna.
• Increase the separation between the equipment and receiver.
• Connect the equipment into an outlet on a circuit different from
that to which the receiver is connected.
• Consult the dealer or an experienced radio/TV technician for help.
Speaker line to male RCA adapter
Ligne de haut-parleur à adaptateur RCA mâle
Línea de altavoz a adaptador RCA macho
For Argentina
Información acerca de la eliminación de equipos eléctricos y electrónicos al final de la vida útil
(aplicable a los países que hayan adoptado sistemas independientes de recogida de residuos)
Los productos con el símbolo de un contenedor con ruedas tachado no podrán ser desechados como
residuos domésticos.
Los equipos eléctricos y electrónicos al final de la vida útil, deberán ser reciclados en instalaciones que puedan
dar el tratamiento adecuado a estos productos y a sus subproductos residuales correspondientes. Póngase en
contacto con su administración local para obtener información sobre el punto de recogida más cercano. Un tratamiento
correcto del reciclaje y la eliminación de residuos ayuda a conservar los recursos y evita al mismo tiempo efectos
perjudiciales en la salud y el medio ambiente.
About the Lead Terminals
1. Wire Thicknesses
You can use wires with the following
thicknesses:
Battery wire and
ground wire AWG 4 – AWG 6
Speaker wire AWG 8 – AWG 16
2. Strip the wire
Make a cut in the wire sheath
(insulator made from vinyl, etc.) at the
position 10-13 mm (3/8”- 1/2”) away
from the end of the wire, and then
remove the unnecessary portion of
the sheath by twisting it.
3. Install the wire
Loosen the screw using the supplied
hexagon wrench. Insert the conductor
of the wire in the terminal hole, and
then tighten the screw.
À propos des bornes de câble
1. Épaisseurs des câbles
Vous pouvez utiliser des câbles aux
épaisseurs suivantes.
Câble de batterie
et câble de masse
AWG 4 – AWG 6
Câble d'enceinte AWG 8 – AWG 16
2. Dénuder le câble
Coupez la gaine du câble (isolant en
vinyle, etc.) à environ 10-13 mm (3/8”
- 1/2”) de l'extrémité du câble, puis
enlevez la portion de gaine inutile en
la faisant tourner dans vos doigts.
3. Installer le câble
Desserrez la vis à l'aide de la clé
hexagonale fournie. Insérez le fil
conducteur du câble dans l'orifice de
la borne, puis serrez la vis.
Acerca de los terminales con-
ductores
1. Grosores de cables.
Puede utilizar cables con los siguientes
grosores:
Cable de batería
y cable de tierra AWG 4 – AWG 6
Cable de altavoz AWG 8 – AWG 16
2. Pele el cable.
Realice un corte en el revestimiento del
cable (aislante de vinilo, etc.) a 10-13
mm (3/8” - 1/2”) del extremo del cable
y, a continuación, retire la parte innece-
saria del revestimiento torciéndola.
3. Instale el cable.
Afloje el tornillo con la llave hexagonal
suministrada. Inserte el conductor del
cable en el orificio del terminal y apriete
el tornillo.
10 - 13 mm
(3/8”- 1/2”)
Hexagon wrench
Clé polygonale
Llave hexagonal
②Parts included
Pieces comprises
Partes incluidas
(2.5 mm)
③Parts included
Pieces comprises
Partes incluidas
(4.0 mm)
FACTORY INSTALLED
HEAD UNIT
SPEAKER OUTPUT
R
-
FRONT
-
L
XR1000-1KEnFrEs.indd2 2016/11/0714:17

MILITARY
Units
pu
rc
hased
t
hroug
h
the
U
S.A
mi
litary
excha
n
ge
serv
i
ce
overseas
may
be
serviced
under
warranty
in
the
c
ont
inen
tal
USA.s
ubj
ec
t
to
th
e
following
condit1ons
1)
T
he
orig
i
nal
wa
r
ranty
is
in
effect.
2)
P
roof
ofpu
rchase
is
pr
ovi
ded
to
the
servicer.
WARRANTY FOR MILITARY
MARKET
JVC
KENWOOD
co
rporati
on
is
proud
of
the
qua
lity
and
workmansh
ip
of
i
ts
aud
io
equipment
Th
is
un
ith
as
been
properly
designed
,
tested
and
inspected
befo
re
itw
as
sh
ipped
to
you.
If
proper
lyi
ns
ta
lled
and
ope
r
ated
in
accordance
with
i
nstruc
t
io
ns
furnis
h
ed
,
it
shou
ld
give
you
an
opt
imu
m
relia
ble
pe
rfo
rmance
WARRANTY PERIOD
This
produc
t
is
warra
n
ted
tor
a
period
of
(I)
year
from
the
da
te
of
the
ori
ginal
p
urchase.
SCOPE OF WARRANTY
Excep
t
as
specified
below.
this
warranty
covers
all
defects
in
mater
ialsa
nd
wo
r
kmanship
of
th
e
Kenwoo
d
brand
pr
od
u
cts
.
Dur
i
ng
the
warranty
peflod.
any
auth
or
ized
Kenwood
Serv
i
ce
Cente
rin
t
he
milita
ry
market
l
isted
in
the
back
of
this
wa
rr
anty
card
wil
l pr
ovide
yo
u
fr
ee
-
of-charge
bot
h
parts
and
labor
requi
red
to
co
r
rec
tany
defect
in
ma
teri
al
s
or
workma
n
sh
i
p.
The
following
are
not
covered
by
th
is
warranty
.
1.
Vol
t
age
conversions.
2.
Per
i
od
ic
ch
eck
-ups
which
do
not
dis
c
lo
se
any
d
efect
covered
by
the
warran
ty
3.
Cabinels
.g
ri
lles.
other
exterior
finis
h
es.
be
lts
.
tape
heads.
and
o
th
ern
on
·du
ra
ble
parts
and
access
ori
es.
4.
Un
its
on
wh
ich
t
t<
serial
number
has
been
eftaced
.
mod
ifi
ed
or
remov
ed.
5.
In
s
tallati
on
a
nd/
or
re
moYa
l
cha
rg
es
.
6.
Damage
dm
agne
tic
tapes
7.
Hous
e
ca
ll
cha
r
ges
for
any
repairs
8.
S
hi
pp
i
ng
or
del
i
very
cha
rge
s
to
or
from
an
aut
h
ori
zed
Kenwo
od
Serv
i
ce
Ce
nt
er.
9.
This
w
arranty
will
not
cove
r
any
fai
lure
tha
t
is
d
ue
to
any
of
the
fo
ll
owing
con
diti
on
sin
accordance
with
the
v
isu
al
i
nspec
ti
on
of
th
eauth
or
iz
ed
Kenwood
Service
Cent
er:
..
Imprope
r
ma
i
nt
ena
n
ce
or
repair.
in
cludi
ng
the
in
st
all
ati
on
of
part
s
or
accessor
i
es
thai
do
not
conform
to
the
quali
ty
and
s
pe
c
ificati
o
ns
of
the
original
parts
.
•
Mi
s
use
.
abuse
.
neg
l
ect
.
unauthorized
prod
uct
modi
fi
ca
tion
or
fa
ilure
to
fo
ll
ow
instruct
io
ns
contai
n
ed
in
th
e
Own
er
's
Manua
L
..
Accidental
or
i
ntention
al
damages.
..
Repa
i
rs
or
aMempted
repairs
by
an
un
author
i
zed
age
nc
y.
(A
ll
r
e ~
::j
ir
s
must
be
perfo
rmed
at
ana
ut
hor
i
zed
Kenw
oo
d
Serv
i
ce
Cen
t
er
)
..
Damages
or
d
eter
iorations
caused
dur
i
ng
sh
ipm
ent(
Cl
ai
ms
must
be
presen
t
ed
to
the
car
rie
r).
R
D
amag
es
or
de
te
ri
orations
r
esult
in
g
from
r
emova
l
an
d/
or
repla
ce
men
t.
PURCHASER'S RESPONSIBILITIES
As
th
e
purchased
ofa
new
Ke
nw
ood
b
ran
d
produc
t,
you
are
requ
es
ted
to
do
the
following
in
order
to
obtain
Ke
nw
oo
d
warra
nt
y
serv
ice.
1.
Retain
yo
ur
sa
l
ess
lipor
other
evidenceo
f
purchase
for
p
rovi
ng
you
r
elig
ibili
ty
for
requesting
Kenwoo
d
warran
ty
~rv
i
ce.
2.
Mak
eyo
ur
u
nit
avai
l
able
to
an
authorized
Kenwood
Serv
ice
Cent
er
in
th
em
ili
ta
rym
arket
for
inspect
ion
and
approved
wa
rr
anty
serv
i
ce
,or
shi
p
your
unit
in
it
s
or
i
ginal
cart
onb
ox.
or
equivalent,
fu
ll
y
insured
and
shipping
cha
rg
es
pr
epaid.
to
t
he
au
t
hor
i
zed
Kenwood
Service
C
enter
.
Dear
Customer,
LIMITATION OF IMPLIED
WARRANTIES
Any
and
all
impl
ied
wa
rran
ti
es
.
including
warr
anti
es of
merchant
ab
ility
and
fi
tness
f
or
a
part
icular
purpose
.
shall
be
li
mited
in
du
r
ation
to
thel
en
g
th
of
thi
s
warranty
.
EXCLUSION OF CERTAIN
DAMAGES
KE
NW
OOD
's
liab
i
lity
for
any
de
fect
i
ve
product
is
limited
to
the
re
p
ai
r
or
r
ep
l
ac
emen
t
of
s
ai
d
pro
duc
t,
at
ou
rpo
ti
on
,
an
d
shall
not
incl
ude
damages
of
any
ki
nd,
w
he
th
er i
nc
ide
nt
al,
conseque
nt
ia
l or
ot
he
rwi
se,
expec
t
to
the
ex
te
nt
proh
ibited
by
app
li
cab
le
t
aw.
KENWOOD AUTHORIZED SERVICE
CENTERS
IN
MILITARYMARKET
JAPAN:
Yokota
Kenwood
Rep
,; c/o
Yokota
BX,
JAAX
AAFES-PAC,
APO
San
Francisco
96328
Zama
Kenwood Rep,;c/o
Zama PX,
JAA
X AAFES-PAC,
APO San Francisco 96343
Misawa
Kenwood Rep,;c/o
Mi
sawa BX,
JAAX
AAFES-
PAC
,
APO San Francisco 96519
Yokosuka
Kenwood Rep,; c/o
A-33, Yokosuka NEX No. 260-010
FPO
Seattle 98760
Atsugi
Kenwood Rep,;c/o
Ats
ugi
NE
X No. 260-020
FPO
Seattle
98767
lwakuni
Kenwood Rep,; c/o
Marine Corps Exchange, Marine Corps
Air
Station,
FPO
Seattle 98764
Sasebo
Sasebo NEX;
Navy Exchange 260-0
40
F.A.
Box
11
5
FPO
Seattle 98766
Okinawa
Kenwood Rep,; c/o
OWAX, AAFES-
PA
C, APO San Francisco
96230
KOREA:
Kenwood Rep,; c/o
KOAX Repair Shop, AAFES-PAC
DO-Camp Market, APO San Francisco
96488
GUAM:
Kenwood Rep,; c/o
Guam NEX No. 230-010,
F
PO
San Francisco 96630
Kenwood Rep,; c/o
GUAX, AAFES-
PAC,
APO San Francisco
96334
U.S
.A.:
In
The
Continental
U.S.A.
For Nearest
Author
ized Service Center;
Te
l:
1-800-536-9663
www
.us.
jv
cke
nwo
od
.
com
EUROPE:
P
le
ase
inquire
at
the
mi
li
tary
resale
out
lets
where
you
bought
your
Kenwoo
d
products
,
or
JVCKENWOOD DEUTSCHLAND GMBH:
Konrad-Adenau
er
Allee
1-1
1,
61
118 Bad
Vii
bel,
Germany
Thank you for purchasing this kenwood product. As mentioned
in
the pages of
thi
s booklet, our warranty is
on
ly
valid in the countries listed. If your country
is
not listed please contact your reta
il
er for information on wa
rr
anty
procedure, or write t
o:
JVC KENWOOD Customer Information Center
3
-1
2,
Mor
i
yacho
,
Kanagawa-
ku, Yokohama-sh
i,
Kanagawa
221-0022,
J
apa
n
Warranty Card
Attention:
I
de
ntif
i
cat
ion
du
produit
Mode
lo
do
ap
are
lho
e
nu
me
ro
de
se
rie
Mode
l
nu
mber
&
ser
ial
num
be
r
Revendeur
&
cache
t
No
me
da
lo
ja
e
ca
rim
bo
De
al
er
&
sta
mp
Da
te
d'
ach
ta
t
Da
ta
da
co
mp
ra
Purc
h
ase
da
te
No
m
&ad
resse
du
client
Nome
e
endereco
do
cliente
Na
me
&
ad
dr
ess
of
c
usto
me
r
Thi
s
ca
rd
and r
ece
ipt
(o
r invoi
ce
)
are
necessary
to purch
ase
a new panel in
cas
e
of
theft
or
da
ma
ge.
Attention:
Vous
aure
z besoin de cette
ca
rte et du
r
e~u
(ou
de
Ia
fa
cture) pour
ache
ter un nouve
au
pa
n
neau
en
cas
devol ou d'
en
dommagement.
Aten~ao:
Em
c
aso
de dano ou
pe
r
da
do
pa
inel frontal,e
ste
Ce
rtifi
ca
do de
Gar
antia
e
aNota Fi
sc
al
decompra
se
r
ao
requisit
ados
p
ar
aa
a
qu
i
s
i
~ao
de um novo
pa
ine
l.
© 846-0824-00/
04
(K)
(1
5/11)

U.S.A.
Th1s
warranty
will
be
honored
only
in
lhe
U.S.A.
KENWOOD LIMITED WARRANTY
FOR CAR STEREO COMPONENTS
HOW
LONG IS THE WARRANTY
JVCKENWOOO
U
SA
Corporalion
("Kenwood')
wa
rran
ls
lhis
producl
for
a
period
of
one
(1)
year
lrom
lh
e
da
te
of
or
igin
al
purchase
.
WHAT
IS
COVERED
AND
WHAT
IS
NOT
COVERED
Exce
pt
as
spec
ifi
ed
be
l
ow,
this
warranty
covers
all
de
f
ects
in
mater
ial
and
work
m
ans
hip
in
Kenwood
car
ster
eo
c
ompo
nents.
The
foll
ow
i
ng
are
n
ot
coYere
d
by
the
war
ran
ty
:
1.
Any
produ
ct
which
1s
not
distribute
d in
the
U.
S.A
. by
Kenwood
or
w
hich
is
no
t
purchased
in
the
U.S.A.
from
an
authorized
Ke
nwood
car
stereo
dealer
or
an
automob
ile
dea
l
er,
un
less
the
product
is
purc
h
ased
t
hroug
hthe
U.S.A
Mil
1l
ary
Excha
n
ge
Serv
ice.
2.
Any
product
on
whi
ch
the
seria
l
numb
er
has
b
een
de
faced.
mod
i
fi
ed
or
removed
3.
Da
m
ag
e,
del
er
iorali
on
or
malfunction
res
ult
i
ng
!rom
:
a.
Any
sh
i
pmen
!
of
lhe
produ
ct
(c
l
aims
mu
st
be
p
re
se
n
ted
to
the
carr
i
er).
b.
Ins
ta
lla
ti
on
or
removal
of
the
prod
u
ct.
c.
Accident.
ac
ts
of
nature.
mi
suse,
ab
use.
n
eglect.
una
ut
ho
rize
d
product
modification
or
failu
re
to
fo
llow
ins
t
ructi
ons
s
upp
li
ed
with
the
p
roduct.
d.
Repa
ir or alle
mp
ted
repair
by
anyone
not
authorized
by
Kenwood
e.
Any
other
cause
wh
ic
h
does
nol
relate
to a prod
uct
d
efect.
JVCKENWOOD
USA
Corporation
WHO
IS PROTECTED
This
wa
rr
anty
is
en
for
cea
b
le
only
by
the
origina
l
pu
rchase
r.
WHAT
WE
WILL
PAY
FOR
We
wi
ll
pay
l
or
a
ll
l
abor
and
ma
te
rial
expe
nses
for
c
ove
red
items_
Pay
me
ntol
shipping
charge
s
is
discussed
in
th
en
ex
t
sect
io
n
of
this
wa
rranty
HOW
TO OBTAIN WARRANTY
SERVICE
II
your
KENWOOD
p
ro
duct
ever
need
s
service:
l
Tak
eor
sh
ip
it
to
any
KENW
O
OD
Authonzed
Serv
i
ce
Cent
er
in
the
U
.S
.A.
along
w
it
h &
com
plet
e
descri
pt
i
on
of
th
e
prob
lem.
(if
yo
ua
re
u
ncertain
as
to
whether
a
Se
rv
ice
Cent
er
is
authorized.
please
ca
ll
i-BOO-K
ENWOOD
for
t
he
nea
r
es
t
Service
Ce
n
ter
.1·800-
536-9663).
2.Al
though
you
must
pa
y
any
shi
pp
i
ng
charges
if
it
is
n
ecessary
to
ship
th
e
produ
ct
lor
wa
r
ra
nty
se
rvice,
we
will
pay
the
retu
rn
shipp
ing
cha
r
ges
ilt
he
repa
i
rs
are
covered
by
the
warranty
wi
thi
n
the
Un
i
ted
States
.
3.
Whenev
er
you
r
uni
tsare
taken
or
sent
f
or
warranty
service
.
you
mu
sti
nc
lu
de
a
copy
of
th
e
orig
i
nal
da
t
ed
sa
l
es
r
ec
eipt
as
pr
oof
of
wa
rr
an
ty
cov
er
age
LIMITATION OF IMPLIED
WARRANTIES
AL
L
IMPLIED
WARRANT
I
ES
. I
NC
LUDING
WARRANT
I
ES
OF
MERCHANTABILITY
AND
F
ITN
E
SS
FOR
A
PARTICULAR
PURPOSE
,
AR
E
LIM
I
TED
IN
DU
RATI
ON
TO
THE
LENGTH
OF
THIS
WARRANTY.
EXCLUSION
OF
DAMAGES
K
ENW
OOD'
S
LI
ABILITY
FOR
/>JIY
DEFECTI
VE
PRODUCT
IS
Ll
MIT
ED
TO
THE
REPAIR
OR
RE
P
LACEME
NT
0
FT
HE
P
ROD
U
CT
AT
OU
RO
PTION.
KENWOOD
SH
ALL
NDT
BE
LI
ABLE
FOR
:
1.
IN
STA
L
LATION
OR
REMOVAL
CHARGES
, D
AMAGE
TO
OT
HER
PR
OPERTY
CAUSED
BY
ANY
D
EF
EC
TS
IN
KEN
WO
OD
CAR
STEREO
COMPONENTS
,
DAMAG
ES
BASED
UPON
INCONVENIENC
E,
LO
SS
DF
US
E
OF
THE
PR
O
DU
CT;
OR
2.
ANY
O
THE
R
DAMAGE
S.
WH
ET
HER
I
NCIDE
NTAL
,
CONSEQUE
NTIAL
OR
O
THERWISE
SOME
S
TATES
00
NOT
AL
LOW
LIMIT
AT
I
ONS
ON H
OW
LONG
AN
IM
P
LIED
WARRANTY
LASTS
AND
/O
RDO
NOT
AL
LD
WTHE
EXCLUSION
OR
LI
MIT
AT
I
ON
OF
I
NC
I
DEN
TAL
OR
CON
SEQUEN
TI
AL
DAMAG
E
S.
SO
THE
ABOVE
LI
MITATI
ONS
AND
E
XCL
USIONS
MAY
NO
T
APP
LYTO
YOU
This
wa
rr
a
nty
gi
ves
you
spec
i
fi
c
legal
rights
.
and
you
m
ay
also
ha
ve
o
the
rr
ig
hts
wh
i
ch
va
ry
fro
ms
ta
te
tost
ate
.
If
a
pro
bl
em
develops
dur
i
ng
or
afte
r
I
he
Limi
le
dWa
rr
a
nty
Period,
or if
yo
u
have
any
quest
i
ons
rega
r
di
ng
the
o
per
at
io
n
of
the
p
ro
duct,
y
ou
shou
ld
con
t
act
you
r
KENWO
OD
Au
t
horize
d
D
ea
l
er
orAu
thoriz
ed
Serv
i
ce
Cente
r.
lll
he
p
rob
l
em
or
you
r
qu
es
ti
on
is
not
ha
ndled
to
your
sa
ti
sfaction
,pl
ease
contac
tourC
ust
o
me
r
Re
l
at
io
ns
Departmen
t
at
l
he
add
re
ss
liste
d
be
low
JVCKENWOOD
USA
Corporation
PO Box 22745,2201 E.
Dominguez
St.
Long
Beach,
CA
90810-5745
Tel: (800) 536-9663
www.us.jvckenwood
.
com
BRASIL JVC KENWOOD DO BRASIL COMERCIO
DE
ELETRONICOS LTDA
0
fabr
i
can
te
ga
r
an
teo
produto
identificad
o
na
N
ota
Fi
sca
l
de
v
enda
ao
consumido
r
contra
qua
l
que
r
de
le
it
o
de
fabrica1ao
ou
de
mater
i
a·
prima
dur
anteo
periodo
de
garantia
.E
sta
ga
ran
l
ia
e
va!ida
no
te
rr
it
Orio
brasileiro
desde
que
o
pro
du
to
t
en
ha
sido
adqu
ir
ido
no
B
ras
il
e
dist
ri
bui
do
pel
a
JVC
KENWOOD
do
Bras
11
Comercio
de
Ele
tr
6n
icos
Li
d
a.
PERiODO DE
GARANTIA
E
ste
pr
oduto
e
garan
tido
pe
la
prazo
de
01
{urn)
ano
,
in
cl
uin
do
o
pe
r
iodo
estabelec
ido
por
le
i,
a
partir
da
data
de
aquis
i
~ao,
comprovada
med
i
an
tea
apresentaQio
da
respectiva
Nota
F
isc
al
de
vend
a
ao
cons
umido
r
fi
na
l.
Eventu
ais
reparo
s r
ea
lizad
os
no
produt
o
du
r
an
te o
pe
ri
odo
de
garantia
nao
i
mplicam
na
dilata
cao
dos
eu
pr
azo
.
EXCLUSAO
DA
GARANTIA
(a)
Prod
u
losc
om
o
nUmero
de
ser
ie
ou
cert
ifica
dode
garant
ia
rasurados.
ad
ulle
rados
ou
il
egive
is
;
(b)
Defeit
os
resu
lt
an
tes
de
acidentes
(q
u
eda
s.
batidas
e
etc).
uso
em
desaco
r
do
como
man
ual
de
i
ns
tr
u~aes,
rna
uli
lizacao
,
li
gacao
a
fonle
de
t
en
sao
diferente
da
especificada
no
Manu
al
de
lnstru~
O
es
,
modif
i
cacoes
nao
autorizadas;
(c)
Danos
ca
u
sados
par
agentes
da
natu
reza
(Ex:
ch
u
vas
,
raios,
ma
re
s
ia,
enchentes
eet
c)
;
(d)
Defeitos
ou
da
no
s
em
d
ecorrencia
de
consertos
rea
lizados
par
pessoas
nao
auto
ri
za
da
s;
(e)
Def
e
it
osouda
nosr
es
ul
tantes
do
uso
de
p~aso
u
di
spo
si
tivos
nao
conformes
as
espec
if
ic
it~;Oes
da
J
VC
KENWOO
O;
(f)
Dano
s ou
deteriorac6es
aos
acabamentos
externos,
par
t
es
cosme
t
icas,
cabos
,
chico
t
es
,
p
aralusos
de
f
ixacao,
luvas,
a
l,as,
balsa
s.
esto
j
os,
adaptadores
,
antenas.
fitas
,
cab~s
gravado
ras,
COs
au
danos
causados
par
p
ilhas
de
fei
tuosas
ou
com
vazamento
;
(g
)
Defeitos
ou
danos
devido
ao
tra
nspo
rt
e(re
cla
rnacoes
devem
ser
feitas
ju
nto
ae
mpr
esa
tran
sport
ador
a)
;
(h)
Qualque
r
outr
a
causa
que
nao
es
te
ja
re
l
acionada
a
de
f
ei
to
sde
materia
-
pr
i
ma
e
de
fabr
ica
c
ao
;
(i)
Dano
s
causados
por
ten
t
at
iv
a
de
roubo
au
furta
;
(j)
Danos
causados
por
u
so
de
COs
de
rna
qua
li
dade
;
(k)
Da
n
os
decorre
n
te
s
do
desgasle
natur
aldo
pr
odu
to;
(I)
Danos
c
ausados
par
ma
u
usa.
(derramam
en
to
de
liq
uidos
e/ou
alimentos
,
corrosao
.
ox
i
daC3
o.
exp
osicao
au
midade
ou
situacoes
c
li
mat
i
cas
ext
r
ema
s.r
isco
s
ou
q
uedas).
CONSERTO
EM
GARANTIA
E
1
nd
i
spensave
l a
ap
r
esen
ta
cao
des
te
Ce
r!lficado
de
Gara
ntia
devida
m
ent
e
preen
chido,
acompanhado
da
r
espec
ti
va
No
la
Fisc
al
de
compra
do
prod
u
to.
desde
que
na
o
apresente
ra
suraso
u
mo
dif
ic
ac
Oes.
0
consumidor
sornen
te
!era
d
ir
eito
a
estes
be
neficios
,
quan
doop
rod
uto
for
en
tr
egue
dire
tamente
no
balcao
de
um
Serv
i
co
Au
tori
zado
da
JV
C
KENWOOD
0
QUE
NAO
E COBERTO PELA GARANTIA
l
nsta
l
a~ao
e
re
m
ocao
do
pr
odut
o,
despesa
s
de
fr
ete,
segu
ro
e
emba
l
agem
sa
o
de
resp
onsab
ilidade
do
proprietcl.rio
Es
te
produto
e
des
li
nado
ex
clus
i
vamente
ao
uso
domest
ico.
IMPORT
ANTE:
P
ara
qua
l
qu
eri
nf
orma
cao
sabre
seu
e
qu
i
pa
m
ento
JVC
KENWO
O
D.
ou
para
ob
l
er
o
ende
re~;o
do
Se
rv
i
ce
Auto
ri
za
dom
ais
pr6ximo,
acesse
os
it
e
www
.
kenw
oo
d.rom.br.
ou
li
g
ue
para
a
Central
de
Atendimento
J
VC
KENWOOD
- Te
l.
:
+55
(
11)
3777-677
1
corn
os
dados
abaixo
pree
n
chidos
JVC
KENWOOD
DO
BRASIL
COMERCIO
DE
ELETRONICOS
LTDA
Tel: (11)3777-6771
www
.
kenwood.com
.
br
Nome
do
consumidor:
_______________
_
Endereco;
CE
P:
___
___
_
Cidade
E
stado
:
_____
_
Tel
efone·
________
_
Data
da
compra
:
__
/ _ _
I
__
Nota
Fi
sca
l:
_____
_
CANADA
KENWOOD WARRANTY
JVCKE
NWOO
DCa
nada
In
c
(hereina
ft
er
called
"KE
NWOOD'
).
gi
ves
the
fol
lo
wing
wr
i
tten
warr
antyto
the
or
ig
inal
custome
rof
eac
hn
ew
Ke
nw
ood
pr
oduc
tdislrib
ut
e<J
in
Ca
na
da
by
KENWOOD
a
nd
p
urch
ased
f
ro
ma
de
alerau
thorized
by
K
ENWOOD
K
ENW
OOD
v.'a
rr
ants
tha
t
each
new
Kenwo
od
pro
du
ct.
u
nde
r
no
rmalu
se
.
is
free
f
rom
any
defec
ts.
subject
to
the
t
erms
and
cond
itio
ns
se
t
torth
be
low.
If
a
defe
ct
should
occur
with
int
he
wa
rr
an
ty
pe
ri
od.
repa
irs
wi
ll
be
made
f
ree
at
cha
rg
efor
pa
rt
s
a
nd
~
bo
u
r
wh
en
suc
h
delec
ts
are
d
et
erm
in
ed
by
KENWOOD
or i
ts
' a
utho
ri
zed
se
rvi
ce ce
nt
res
to
be
att
ributable
to
fa
ulty
ma
te
rials
or
wo
rkm
an
shi
p at t
ime
of
ma
nu
fac
t
ur
e.
Pl
ease
conta
ct
KE
NW
OOD
to
con
firm
il
a
dea
ler
or
se
rvi
ce
centre
is
aut
horized
by
KENWOOD
.
WARRANTY PERIOD
This
Ke
nw
ood
p
ro
duct
is
wa
rr
an
ted
f
or
pa
rtsandl
abo
ur
tora
period
ofo
ne
(1)
yea
rf
rom
the
date
of
orig
in
al
pu
rc
hase,
l
ease
or
r
enta
l.
e
xcep
t
for
p
roducts
wh
i
ch
are
use
dina
pro
fes
si
onal
or
comme
rci
al
ap
pli
ca
ti
o
n,
wh
i
ch
are
warra
nted
fo
ra
period
ol nine
ty
(9
0)
days
t
or
parts
an
d
labou
r
and
a
re
subj
ect
tot
he
te
rm
sa
nd
c
on
d
it
i
ons
ol
th
e
warr
anty_
WARRANTY EXCLUSIONS
This
wa
rranty
excludes
:
{
a)
Pr
oducts
purc
has
ed
in
a
fore
i
gn
c
ou
n
try
or
pu
rc
h
ased
in
Can
ada
and
take
n
to
a
fo
reign
co
untry.
(b)
Produ
c
ts
pu
rc
ha
sed
from
a
deal
er
not
aut
hori
zed
by
K
ENW
OOD
.
(c)
Pr
od
u
cts
w
it
h
th
e
se
ri
al
number
defaced
,
alte
r
ed
or
mi
SSing
.
(d)
Pe
n
odic
ch
ec
k-u
ps
which
do
n
ol
di
sclose
a
ny
de
f
ects
co
v
ered
by
this
warranty
.
GARANTIE KENWOOD
JVC
KEN
WOOD
Ca
na
da
Inc.
(c
i-
apresa
p
pelee
"KENW
OOD')
,
do
nne
pa
r
ecrit
Ia
ga
ra
nt
ie
su
iva
n
te
a
l'ac
h
ete
ur
or
iginal
de
ch
aq
ue
no
uveau
pro
duit
Kenw
o
od
d
is
trib
ut'l
au
Ca
n
ada
par
K
ENWOO
D
et
ac
he
tt'l
a
un
c
oncess
io
nnai
re
a
ut
or
i
stl
par
KE
N
WOOD.
KE
NW
OOD
ga
r
ant
it,
s
ous
r
ese
r
ve
d
es
termes
et
des
conditio
ns
~nonc~s
ci-
dessous
.
qu
e
dlaqu
en
ouvea
u
produit
K
en
wo
od.
da
ns d
es
con
d
it
i
on
sd
'emp
loi n
or
males
.
es
t
exempt
de
lous
d
ef
au
ts.
Si
l'
un
defau
t
se
produit
pen
dant
Ia
peri
oded
e
gara
nti
e,
KENWOOD
s
'eng
a
gea
ass
u
me
rl
ee
out
d
es
p
i
~ces
de!ectue
us
es
el
de
Ia
ma
in-
d'oeuvre
n~cessa
i
res
po
ur
effect
u
er
l
es
r
~pa
r
a
t
io
n
s
p
ou
rvu q
ue
de
tels
d~
f
au
t
s
son!
all
ri
buables
a
des
p
i
~ce
s
d~
f
ecl
ue
u
ses
em
p
l
oy~es
Ia
rs
de
Ia fa
bricat
i
on
du
p
ro
du
it
Ken
w
ood
ou
aIa
ma
in
-d
'
oeuvre
telqu'
etabli
par
KENWOOD
ou
par
l'
un
de
ses
cen
t
res
d
ese
rvi
ce
a
uto
r
ises
.
Appe
l
ez
K
EN
WOOD
p
ourverif
i
ers
iu
ncon
cessionnaireo
uu
ncentredese
r
vice
est
au
to
ri
se
par
K
ENW
OO
D
PERIODE DE GARANTIE
Les
p
ieces
et
Ia
ma
in-d'
oe
u
vre
necessa
i
re
s
po
ur
Ia
r
ep
a
rat
ion
d
es
p
rod
ui
ls
Kenwoo
d
sontgarantie
spenda
nt
la
peri
ode
d'un
(1
)
an
a
c
ampie
r
de
Ia
da
ted'
achat
.de
ba
il
ou
de
1
oca
t1
on
or
ig
inal
e,
sa
ul
da
ns
l
es
cas
aul
es
p
ro
duits
Ke
nwo
od
son!
emp
l
oy
es
dans
unbut
pro
f
ess
ionnel
ou
co
mmerc
ia
l.
oU
Ia
ga
r
ant
ie
des
pi~ces
et
de
!a
ma
i
n-
d'
oe
u
vr
e
deme
ur
ee
nvi
gu
eur
penda
nt
une
pB
riode
de
q
uatre
-v
in
gt-
dix
{
90)
jou
rss
ous
rese
r
ve
des
termes
et
des
conditions
de
Ia
gara
ntie
.
EXCLUSIONS DE GARANTIE
Cette
ga
ran
tie
ne
co
uvrepas:
(a)
l
es
pr
odu
its
ac
he
tes
a
l'etran
ge
roua
chetes
au
Ca
na
da
el
t
ranspo
r
Msaret
r
ange
r;
{b)
l
es
p
ro
du
i
ts
ac
het
es
a
un
c
once
ssio
n
nai
re
no
nau
tori
sB
par
KE
NWOOD
;
(c)l
es
pr
od
uits
dontle
nume
ro
de
ser
ie
m
anque
,a
ete
e
lf
ace
oumo
d
ifie;
(d)les
serv
i
ces
d
'ent
retien
pe
riodi
q
ues
q
ur
n
'i
nd
ique
nt
auc
un
df:fau
tc
ouvert
par
cette
gara
n
tie
;
JVCKENWOOD Canada Inc.
{e)
De
f
ec
ts
resu
lting
fro
mdi
sa
st
er
.a
cc
i
de
n
t.
ab
use,
misuse
,
li
ghtn
ing,
powe
r s
urg
es
, n
eg
l
ect
or
l
ack
of
pe
ri
odiC
ma
intena
nc
e.
un
autho
ri
z
ed
m
od
ifi
cation
or
f
ail
ure
to
ta
ll
ow
instructio
ns
in
th
eow
ne
r'
s
manua
l.
(I)
De
fe
cts
or
da
mage
as
a
res
u
lt
of
re
pa
irs
performed
by
a
p
erson
or
party
no
t
auth
oriz
e<J
by
K
ENWOOD
{g
)
De
fec
ts
resu
lt
ing
fro
mtheu
se
of
parts
or
dev
ices
t
ha
tdo
no
t
con
form
to
KE
NW
OOD
sp
ec
ifi
ca
tions
{h)
Dama
ge
or
de
te
rioration
occur
ri
ng
to
any
exter
iorf
ini
s
hes,
cosmet
ic
par
ts. t
ape
heads
.
adapl
ors
,
anten
na
s,
cables,
ta
pes
. di
scs
or
f
au
lts
or
damage
ca
u
se
d
by
defec
ti
ve
or
l
eak
ing
ba
tt
e
ri
es
(i)
Def
ects
or
dam
ag
e
occum
ng
du
rin
gsh
ipp
i
n<J
(cla
i
ms
s
hould
be
pr
ese
n
ted
Ia
the
shipp
mg
compa
ny)
.
(j)
Produ
ct
vol
ta
ge
and
/or
l
ine
fr
eq
u
ency
convers
ion
s.
(k)
Prod
uct
ins
t
alla
t
ion
or
re
mo
val
cha
r
ges
.
TO
OBTAIN WARRANTY SERVICE
Sh
ould
your
Ke
nwoodpr
oduct
req
u
ire
w
arranty
se
rvi
ce,
de
l
iv
er
it
to
a
ny
author
ized
KE
N
WOOD
se
rvi
ce
cen
tr
e
and
present
theor
igin
al
copy
of
yo
ur
bill
of
sa
le
and
th
is
wa
rranty
ca
rd
as
pro
of ofwa
rra
nty
,or
send
y
ou
rp
rod
uct
f
ull
y
insu
red
an
d
freight
prepa
idtot
he
n
earest
au
th
or
ized
KENW
OO
Ds
erv
ic
e
cen
t
re
. To
avoi
d
poss
i
ble
shipping
damage
,
make
suret
he
prod
uct1s
proper
ly
pac
ked
. In
cl
u
de
a
co
py
of
your
ori
g
in
al
bill
of
sa
le
and
th
is
warranty
ca
rd
as
p
ro
of
of
wa
rr
antya
lon
g
with
y
ou
r
na
me
,
hom
e
an
d/or
wmk
t
ele
p
hon
e
nu
m
ber
{s).
a
comple
te
re
tu
rn
a
ddress
anda d
eta
il
ed
d
esc
r
ipt
i
on
of
the
fau
lt
(s
).
P
ro
d
uc
ts
repaired
wi
th
in
wa
rr
an
ty
wi
ll
be
ret
u
rn
ed
f
re
ight p
repa
id
to
des
tin
at
ion
sw
it
hin
Cana
da.
T
he
cus
t
omer
is
responsib
lefor
all
frei
ght
an
drel
ated
costs
f
or
t
he
ret
urn
of
p
rod
ucl
(s)
to
des
t
in
at
io
ns
ou
ts
i
de
Canada
.
(
e)
les
d{!
fa
uts
causes
par
l
es
dt'l
sastres,
l
es
a
cc
i
dents,
res
ab
us
.l
es
emp
lois
inco
rrec
ts.l
es
eclai
r
s,
les
surt
en
sio
ns
de
co
urant,l
es
man
q
ue
s
de
soins
oud'en
tret
i
ens
pe
ri
odiques
,
les
mo
d
if
i
cat
i
ons
non
aut
orisWs
ou
les
man
qu
es
de
r
es
pe
ct
du
mo
d
ed
'
emplo
i;
(f)
les
defauts
ou
l
es
d
om
mage
s
ca
u
se
sl
ors
de
re
para
ti
ons
eft
ectuees
p
ar
une
pe
r
so
nne
ou
pa
r
une
partie
no
n
au
t
or
i
see
par
KENW
OOD
;
(g)
les
d!'!
fau
tsca
us
es
par
l'
emp
loi
de
p
i
e~
ou
de
disp
osit
i
fs
~
i
ne
se
con
f
orm
e
nt
pa
saux
ex
i
ge
n
ces
de
K
ENW
OOD
;
(h)
l
es
fi
nitio
ns
ext
Ar
i
eu
r
es
,
!es
pi
eces
c
osmeti
ques
,l
es
tetes
de
bandes.
l
es
adap
t
ate
u
rs
. l
es
antennes
.
le
s
Gables
.
!
es
bandes.
lesdi
sq
u
es
end
omma
g
es
ou d
f:p
!'!
ris, ni l
es
dela
utsou
dommages
ca
uses
pa
r
de
sp
il
es
d!'!fectueuses
ouqui
fuie
nt;
(i) l
es
defau
ts
ou
dommages
q
ui
se
pro
duisen
t
pen
da
nt
!'
expe
dit
i
on
des
pro
dui
ts
Ke
n
wo
od
(On
devra
il
deposer
de
lelles
reclamat
io
ns
aup
r
es
des
compa
g
nies
de
trans
p
ort)
;
(j)
les
co
n
ve
r
s1o
ns de
te
nsion
eU
ou
de
frequence
du
produit;
(
k)
les
frais
d'in
stalla
ti
on
ou
d
'
e
nl~
ve
me
nt
dupr
od
uit.
COMMENT
OBTENIR
DU
SERVICE
SOUS GARANTIE
Au
cas
oO
un
serv
ice
so
us
ga
r
antie
de
vo1
re
p
roduit
Kenwood
s
'a
vere
necessa
ire.
veu
i
ll
ezli
~Jr
er
le
pr
odu
ita
n'im
p
orte
que
I
cen
tre
de
serv
ic
e
KE
NW
OOD
et
presen
te
rl
acopie
ori
gi
na
te
du
cont
rat
de
vente
et
ce
tt
e
carte
de
ga
ra
nt
ie
en
tan
!que
preuve
de
gara
nt
ie
au
~Jeu
i
ll
ez
fa
ir
e
parve
ni
rv
otre
prod
u
it
assure
el
port
paye
au
ce
n
tr
e
de
se
rv
ice
KE
NWOO
Daut
orise
le
plus
pr
oc
he
.Pour
ev
i
le
rtout
es
poss
ib
il
it
!'!s
de
dom
mag
es
pe
n
da
nt
le
transport
.v
eu
i
llez
bi
en
em
ba
ll
erle
pr
odu
it.
Veui
ll
ez
in
cl
ure
une
cop
ie
du
cont
r
a!
de
ve
nt
e
original
et
ce
ne
carte
de
ga
r
ant
ie
en
t
an
! q
ue
preu
ve
de
garant
ie
auss
i
bierJ
que
vot
re n
om
,
numer
os
de
te
lep
ho
ne
au
paste
de
t
ravai
l
et/
ouau
dom
icile,
vo
tr
ea
dresse
et
une
descr
i
ption
deta
ill
ee
des
dt'lfau
ts. L
es
produits
sous
garan
tie
rep
ares
s
ero
ntr
etoumes
por
t
paye
aux
dest
inations
a
l'inl
f:r
ieur du
Ca
nad
a.•
le
co
ns
ommateur
se
ra
responsab
le
de
taus
fra
is
de
transp
o
rt
et
d'
au
tres
lrais
q
ui
s'y
r
app
orte
nt p
our
faire
expedier
tes
p
ro
dui
ts
a
des
ti
na
ti
ons
a
l'
exter
ieu
rd
uCana
da.
ENTIRE WARRANTY
T
hi
s
wa
rr
an
ty
co
ns
titu
tes
th
e
en
tir
ewr
itte
n w
ar
r
an
ty gi
ven
by
K
EN
WO
OD
. No
pe
rso
n, p
arty
,
deale
r or
serv
i
ce ce
nt
re
or
t
he
ir agents
or
empl
oyees
are
a
uthor
i
zed
to
ext
e
nd
or
e
nl
arge
t
hrs
wa
rranty
on
b
ehalf
of
KENWOOD
bya
ny
wr
i
tten
or
ve
rbalstat
em
ent or
adve
rt
i
se
m
ent
or
p
ro
molion
.
inc
luding
any
ext
ended
w
arra
nty
pr
o
gra
mor
pla
n
th
at
ma
y
be
off
ered
by
th
e
de
aler
or
serv
i
ce
c
ent
re
,
unl
ess
a
pp
roved
in
wr
it
ing
by
KENWOOD
.
DISCLAIMER
KENWO
OD
di
scla
i
ms
any
resp
onsibi
li
ty
forl
oss
otlimeor
u
se
of
th
epr
oduc
t
or
a
ny
ot
h
er
i
nd
i
rec
t.
i
nc
ide
nt
alor
con
seq
uential
dama
ge
to ot
her
prod
u
cts
or
good
s, i
nco
nv
enie
nce
or
comm
er
cia
l lo
ss
.
NOTICE TO CONSUMER
The
p
ro
visions
co
n
ta
in
ed
in
thi
s
wr
itten
warra
nty
a
re
no
t
int
ended
to
l
imit
,
modify,
ta
ke
aw
ay
,di
sc
l
ai
m
or
ex
clude
any
wa
rr
an
ties
or
r
ig
ht
s
yo
u
may
h
ave
whichare
sel
fo
rt
h
in
an
ya
ppl
i
ca
ble
pr
ov
in
cia
lor
federa
l
la
ws
or
l
egis
l
at
ion
IMPORTANT
Th
is
wa
rr
a
nty
c
ard
by
it
self
IS
not
co
nsidered
by
K
ENW
OOD
as
a
va
l
id
p
roo
f
of
pur
c
hase
.
Whe
n
ap
plyi
ng
l
or
wauanty
rep
ai
rs
,
you
mu
stpr
esent
t
he
ori
gi
n
al
copy
of
yo
ur
bill of
sa
le
and
th
is
warrant
y
card
as
proo
fof
wa
r
ra
n
ty
,so
we
re
commen
d
th
at
they
be
kep
tina
sa
fe
place
,
shou
ld
t
he
y
be
re
q
uire
din
the
fu
tur
e.
JVCKENWOOD
Canada
Inc.
6070
Kestrel
Road,
Mississauga
,
Ontario,
Canada L5T
158
Tel.:
(9051
670-7211
Fax: (905) 670-7248
l'ENTIERE GARANTIE
Cette
g
ar
an
tie
re
p
r!'!se
n
te
l'e
n
tifl
re
garan
lie
don
nee
pa
r
ec
r
it
par
KENWOOD
.
KE
NWO
OD
ne
se
l
ie
n!
auc
un
eme
nl
res
ponsa
b
le
de
toute
s
ext
en
sions
ni
de
tou
tes
aug
me
nt
at
i
ons
de
cette
gara
nti
e
la
ites
ou
en
tr
epr
i
ses
pa
r tout
es
pe
r
so
nn
es
,
part
ies,
co
n
cessionna
i
res
ou
cen
t
res
de
serv
i
ce
au
par
leu
rs
agents
ou
em
ployes
au
n
om
de
KENW
OOD
au
mo
y
en
d'
aff
i
rm
ati
ons
ver
ba
l
es
ou
ec
riles,d'an
non
c
es
au
de
p
rom
oti
ons
,y
inclu
s
tau
s
pro
gr
am
m
es
ou
pl
ans
de
g
aran
ti
e
!'!!en
d
ue
que
pu
i
sse
nt
offm
les
concessio
n
na
i
res
ou
les
cent
r
es
de
se
rvi
ce
,
a
ma
i
ns
que
KE
NWOOD
n'
y
ail
consen
ti
pa
r
ecri
td'
avance
RENONCIATION
KENWOOD
r
en
o
nc
ea
toute
s
resp
o
nsab
il
it
es
depe
rte
de
t
emps
.
d'emploi
dup
rodu
it,
de
to
us
dommages
i
nd
ire
ct
s
ou
acces
soi
r
es
ca
u
ses
a
d'au
tr
es
prod
ui
ts
ou
b
ie
ns,
de
tau
s
in
convenien
ts
ou
det
out
es
pe
rt
es
commerc
ial
es
AVIS
AUX
CONSOMMATEURS
Les
sti
pulat
ions
conte
nu
es
dans
Ia
pr!'!
sente
garanti
e
ecr
it
e
n
'on!
p
as
po
urb
ut
de
lim
ite
r.
de
modif
i
er
.
de
di
minu
e
r.
de
re
jeterni
d'ex
clure
d'
au
tres
ga
ran
t
ies
ni d
roi
tse
non
ces
dans
n'i
m
porte
qu
ell
es
lo
isoul
eg
islationsp
ro
v
inc
ial
es
ou
f
ed!'!
ral
es
.
IMPORTANT
KENW
OO
D
ne
cons
i
d
~re
pas
ce
tte
garan
tie
to
ut
e
se
ule
co
m
me
e
t
a~!
u
ne
preuv
e
d'achat
valide
.
Lorsq
u'on
de
ma
nde
du
servi
ce
so
us
garantie
,
il
faudra
pr
esenter
l
aco
pi
eor
igi
nale
du
contrat
de
ve
nt
eau
ss
ibien
que
cette
carte
de
ga
ran
lie
en
tan!
quep
reuve
de
ga
1
ant
ie.On
recommande
de
l
es
conserver
da
nsun
li
eu
sOr
au
caso
Ue
tt
ess
'a
vereraient
necesa
i
re
sa
l'av
e
ni
r.
JV
CKENWOOD
Canada
Inc.
6070 Kestrel Road, Mississa
uga
,
Ontario,
Canada L5T
158
Telephone: (9051670-72
11
Telecopieur:
(9051
670-7248
Other Kenwood Amplifier manuals

Kenwood
Kenwood KAC-848 User manual

Kenwood
Kenwood KM-992 User manual

Kenwood
Kenwood KAC-5203 User manual

Kenwood
Kenwood KAC-PS811D User manual

Kenwood
Kenwood KAC-6402 User manual

Kenwood
Kenwood XR600-1 User manual

Kenwood
Kenwood KA-87 User manual

Kenwood
Kenwood GE-80 User manual

Kenwood
Kenwood KA-995 User manual

Kenwood
Kenwood KAC-723 User manual

Kenwood
Kenwood BASIC M1D User manual

Kenwood
Kenwood KAC-9152D User manual

Kenwood
Kenwood KA-V7700 User manual

Kenwood
Kenwood KAC-7406 User manual

Kenwood
Kenwood KAC-721 User manual

Kenwood
Kenwood KAC-X810D User manual

Kenwood
Kenwood X502-1 User manual

Kenwood
Kenwood KA-996 User manual

Kenwood
Kenwood RA-90 User manual

Kenwood
Kenwood KAC-8102D User manual