manuals.online logo
Brands
  1. Home
  2. •
  3. Brands
  4. •
  5. EarthQuake
  6. •
  7. Amplifier
  8. •
  9. EarthQuake XJ-1000FR User manual

EarthQuake XJ-1000FR User manual

Warranty Information
page 3
P R O
www.earthquakesound.com
XJ-1000 FR
Product Registration
This XJ-1000FR Power Amp can be registered by returning the Product Registration card
attached to this manual. Please also retain the sales receipt which represents proof of
purchase and helps expedite warranty issues.
Five (5) years limited warranty: (D) Warranty Limitations:
Earthquake warrants the original purchaser that all Factory Warranty does not cover products that have been modified or
Sealed New Audio Products to be free from defects in material abused, including but not limited to the following:
!
and workmanship under normal and proper use for a period of five Damages to cabinet/casing finish due to misuse, abuse or
(5) years from the date of purchase (as shown on the original sales improper use of cleaning materials/methods.
!
receipt with serial number affixed/written on it). The five (5) year Fading and or deterioration of speaker components & finish
warranty period is valid only if an authorized Earthquake dealer due to improper exposure to elements.
properly installs the product and the warranty registration card is !Bent amplifier casing, damaged finish on the casing due to
properly filled out and sent to Earthquake Sound Corporation. If a abuse, misuse or improper use of cleaning material.
non-authorized party installs the product, a ninety (90) day !Burnt tracers on PCB.
warranty period will be applied. !Product/part damaged due to poor packaging or abusive
shipping conditions.
!Subsequent damage to other products.
(A) Five (5) years limited warranty plan coverage guidelines:
warranty claim will not be valid if the warranty registration
!First year: Earthquake pays for labor, parts, and ground card is not properly filled & returned to Earthquake with a
freight (only in US mainland, not including Alaska and Acopy of the sales invoice. Warranty card is located on the
Hawaii) (shipping to us is not covered). last page of this manual.
!Second, third, fourth & fifth year: Earthquake pays labor
only. Customer must pay for parts and freight both ways.
(E) Service Request:
To receive product service, contact Earthquake service
(B) Caution: department at (510) 732-1000 and request an RMA number
(Return Material Authorization). Items shipped without a valid
Your Earthquake amplifier is an integral part of a complete system RMA number will be refused. Make sure you provide us with your
with multiple components. There is a chance that the problem you complete/correct shipping address, a valid phone number, and a
are experiencing is originating from another component. We urge brief description of the problem you are experiencing with the
to contact us (1-800-576-7944) before sending the unit for service; product. In most cases, our technicians might be able to resolve
our technicians might be able to resolve the problem over the the problem over the phone; thus, eliminating the need to ship the
phone; thus, eliminating the need to ship the product. product.
Products (sent for repair) that are tested by Earthquake
technicians and deemed to have no problem(s) will not be covered (F) Shipping Instructions:
by the five (5) year limited warranty. Customer will be charged a
minimum of one (1) hour of labor (at the ongoing rates) plus Product(s) must be packaged in its original protective box(es) to
shipping charges back to customer - regardless of the product minimize transport damage. Shipper claims regarding items
date of purchase. damaged in transit must be presented to carrier. Earthquake
Sound Corporation reserves the right to refuse improperly packed
Each product sent for repair must be packaged in its original product. Original sales receipt must accompany product returned
packaging. Otherwise, there will be repackaging charge in for service. We encourage you to include with the package a
addition to labor, parts and shipping charges. written description of the problem. Ship product to: Earthquake
Sound Corp. 2727 Mc Cone Avenue, Hayward, CA 94545. Ph
(510) 732-1000. You are responsible for the cost of shipping the
product to Earthquake Sound Corporation.
(C) Earthquake will repair or replace - at our option - all
defective products/parts subject to the following provisions:
(G) Disputes Resolution:
!Defective products/parts have not been altered or repaired
by other than an Earthquake factory-approved technician. All disputes - between clients and Earthquake Sound Corporation
!Products/parts are not subjected to negligence, misuse, - resulting from the five (5) years limited warranty policy must be
improper use or accident, damaged by improper line resolved according to the laws & regulations of the county of
voltage, used with incompatible products or have its serial Alameda -California.
number or any part of it altered, defaced or removed, or
have been used in any way that is contrary to Earthquake's
written instructions.
Front Panel
Rear Panel
1267
14
13 13
1211
10
8
9 9 15
page 6
P R O
www.earthquakesound.com
Front / Rear Panels
XJ-1000 FR
ON/OFF control
Function operation
keys
Mute control
Preset EQ
mode Select
Directly back to the
IR CONTROL: NEC PROTOCOL
CUSTOMER CODE: 00HFFH
main screen
Store hot key
Recall hot key
Remote Control
8
1- Power Switch: turns amplifier ON / OFF. Amplifier must be ON for the 12V
trigger and the music auto sensing modes / functions to operate.
2- Remote Eye: receives remote control signal.
3- Potect LED: “RED” color indicates that amplifier is in protection mode (short
speaker wire or other reasons. Turn OFF the amplifier immediately).
4- Clip LED’s (CH-A & CH-B): “RED” color indicates that the input signal on the
channel/s (A or B) is clipped (reduce volume on the clipped channel).
5- LCD Display Module: shows the amplifier status, menus and settings.
6- Button Switches: represent the functions keys.
7- Encoder Switch: controls the operation of the functions.
8- Left / Right RCA Inputs: feed line-level stereo (left / right) signals into the
amplifier. NOTE: either left or right RCA jacks can be used to feed a mono input.
9- Left / Right XLR Balanced Inputs: feed balanced line-level stereo (left/right)
signals into the amplifier. NOTE: either left or right XLR jacks can be used to
feed a mono input.
10- Stereo / Bridged Switch: use this control / function when running the
amplifier in bridge or in stereo mode only.
11- External Trigger Input: powers up / triggers ON the amplifier from other
devices such as processors, receivers or any device with 12 Volts trigger output.
12- USB Port: for operating the amplifier and / or uploading new firmware.
13- Left / Right Speaker Output: for speaker connection (stereo mode or
bridged mode).
14- 110V / 220V AC Voltage Selector: allows the amplifier to operate on 110V-
120V 60Hz and on 220V-240V 50Hz AC.
15. Power Cord / Fuses: must replace fuse with same style / value (see below).
110 Volts (Style: US /Rating: 10 Amp)
220 Volts (Style: EU / Rating: 5Amp)
CLIPPROTECT
CH-B CH-A
3 4 5
page 15
P R O
www.earthquakesound.com
XJ-1000 FR
Amplifier “ON” No Sound
Turn amplifier ON and circuit breaker shuts down
This can either be a short in amp, a poor circuit breaker in
the house or the power cord is not fully connected. Plug
amplifier into another outlet on a different circuit breaker
with nothing connected. If the amp turns on then the
problem is with your home circuit breaker. If the amplifier
still does not power up, please call Earthquake to consult
with a technician.
Humming noise from speakers
Peak LEDs “ON” Constantly
It is normal when running the amplifier to full power that the
LEDs flicker. If the LEDs are on constantly without
flickering (solid red) it means that the amplifier output is
clipping. Reduce volume level to prevent damage to
speakers or amplifier.
Often humming noise is emanating from equipment that
have their ground prong broken. To isolate this problem:
a) With the amplifier OFF, unplug all RCAs connected to
the amp.
b) Turn on amp and listen to speakers. If buzz has
changed or reduced in level, then the problem is
coming to the amp from another source. The rest of
the hum you hear is normal and related to the fact
that the RCAs are open ended.
c) The above step should isolate your problem: star-
ground all components, except amplifier, by daisy-
chaining a thin wire from the processors chassis to all
sources connected to it.
The following maintenance should be performed routinely:
- Clean the exterior surfaces of the unit with a soft, dry, lint-
free cloth.
- Do not use alcohol, benzene, acetone-based cleaners, or
strong commercial cleaners.
- Do not use a cloth made with steel wool or metal polish.
If the unit is exposed to a dusty environment, a low-
pressure blower may be used to remove dust from its
interior & exterior.
Maintenance
Trouble Shooting and Maintenance
b) Now turn on the amplifier only. Check to see if the front
Main Power Switch is on.
c) Check the Input Selector switch and make sure that it is
in the correct position. Either RCA or XLR which ever
you are using. Also slide the Input Selector switch back
and forth to ensure good contact.
d) Set the crossover switch so that it is centered. Slide it up
and down and finally back to the middle position.
e) Confirm that the output wires are connected to the
speaker.
f ) Rock the crossover switch back & forth at the amplifier,
you should hear a thump through the speaker during
this process.
WHEN A THUMP IS HEARD:
Check your input source signal. Make sure they are
connected properly to output from processor/source,
not input of processor.
Try to change source to make sure that at least one of
the sources works.
WHEN NO THUMP IS HEARD:
Check amplifier speaker connections and make sure
the speaker wires are securely connected to the
amplifier speaker output and to the speaker.
NOTE: It is possible that if you have proper
connections and you don’t hear sound, the speaker is
burnt.
a) Completely shut your system down, turn OFF the
Power switch in the front of the amplifier (see
Page 6 , #1).
We recommend that you first call the dealer where
you purchased the amplifier. If Problems Persist,
contact:
Earthquake Sound Technical Service
Phone: 1-800-576-7944 or 510-732-1000
Email: [email protected]

Other manuals for XJ-1000FR

1

Other EarthQuake Amplifier manuals

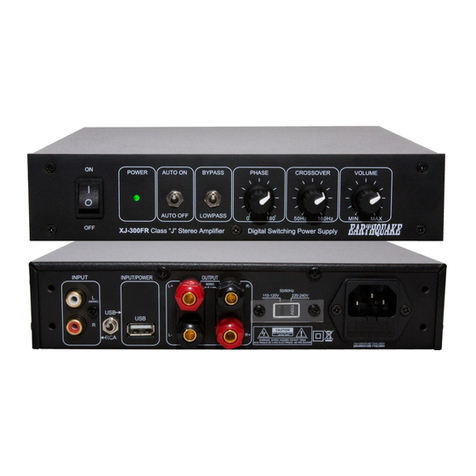
EarthQuake mini D1000 User manual

EarthQuake

EarthQuake mini D1000 User manual

EarthQuake XJ-700R User manual

EarthQuake

EarthQuake XJ-700R User manual

EarthQuake EQ-1000 User manual

EarthQuake

EarthQuake EQ-1000 User manual

EarthQuake XJ-300ST User manual

EarthQuake

EarthQuake XJ-300ST User manual

EarthQuake PH2000W/D1 User manual

EarthQuake

EarthQuake PH2000W/D1 User manual

EarthQuake Nova PA-600 Operation manual Quick start guide

EarthQuake

EarthQuake Nova PA-600 Operation manual Quick start guide

EarthQuake MiNi DI500.2 User manual

EarthQuake

EarthQuake MiNi DI500.2 User manual

EarthQuake Cinenova-16 User manual

EarthQuake

EarthQuake Cinenova-16 User manual

EarthQuake MiNi D3000.4 User manual

EarthQuake

EarthQuake MiNi D3000.4 User manual

EarthQuake XJ-1000FR User manual

EarthQuake

EarthQuake XJ-1000FR User manual

EarthQuake XJ-300R User manual

EarthQuake

EarthQuake XJ-300R User manual

EarthQuake mini D Series User manual

EarthQuake

EarthQuake mini D Series User manual

EarthQuake PH10000W/D1 User manual

EarthQuake

EarthQuake PH10000W/D1 User manual

EarthQuake MiNi D3000.4 User manual

EarthQuake

EarthQuake MiNi D3000.4 User manual

EarthQuake XJ-600R User manual

EarthQuake

EarthQuake XJ-600R User manual

EarthQuake Cinenova 7300 User manual

EarthQuake

EarthQuake Cinenova 7300 User manual

EarthQuake XJ-700DSP User manual

EarthQuake

EarthQuake XJ-700DSP User manual

EarthQuake IQ1500 User manual

EarthQuake

EarthQuake IQ1500 User manual

EarthQuake mini D1000 User manual

EarthQuake

EarthQuake mini D1000 User manual

EarthQuake IQ600 User manual

EarthQuake

EarthQuake IQ600 User manual

EarthQuake Xtreme 300W.2 User manual

EarthQuake

EarthQuake Xtreme 300W.2 User manual

EarthQuake T1000W/2 User manual

EarthQuake

EarthQuake T1000W/2 User manual

EarthQuake XJ-300 FR User manual

EarthQuake

EarthQuake XJ-300 FR User manual

EarthQuake PH800W/2 User manual

EarthQuake

EarthQuake PH800W/2 User manual

Popular Amplifier manuals by other brands

Clarity HA40 user guide

Clarity

Clarity HA40 user guide

Marantz PM-11S3 owner's manual

Marantz

Marantz PM-11S3 owner's manual

Radio Shack XL-110 owner's manual

Radio Shack

Radio Shack XL-110 owner's manual

YORKVILLE Custom Valve YCV40 parts list

YORKVILLE

YORKVILLE Custom Valve YCV40 parts list

QSC PL218 user manual

QSC

QSC PL218 user manual

AVE VDA401 Operation manual

AVE

AVE VDA401 Operation manual

Crate BX-15 owner's manual

Crate

Crate BX-15 owner's manual

McIntosh C49 owner's manual

McIntosh

McIntosh C49 owner's manual

McIntosh MC7150 Service manual

McIntosh

McIntosh MC7150 Service manual

Fender Acoustasonic 30 DSP operating instructions

Fender

Fender Acoustasonic 30 DSP operating instructions

Yamaha MX-A5200 owner's manual

Yamaha

Yamaha MX-A5200 owner's manual

Goldmund Metis 5 user manual

Goldmund

Goldmund Metis 5 user manual

Atoll Electronique AV500 owner's manual

Atoll Electronique

Atoll Electronique AV500 owner's manual

Unika NA-3600 User instructions

Unika

Unika NA-3600 User instructions

Cambridge Audio CXA60 user manual

Cambridge Audio

Cambridge Audio CXA60 user manual

Acurus ARIES user guide

Acurus

Acurus ARIES user guide

swamp KF-PM52D owner's manual

swamp

swamp KF-PM52D owner's manual

Vintage Audio M72 manual

Vintage Audio

Vintage Audio M72 manual

manuals.online logo
manuals.online logoBrands
  • About & Mission
  • Contact us
  • Privacy Policy
  • Terms and Conditions

Copyright 2025 Manuals.Online. All Rights Reserved.