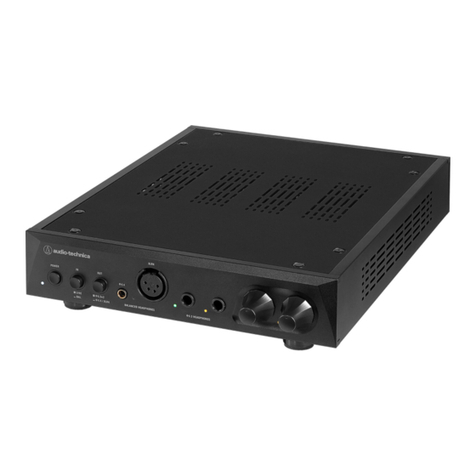
Audio Technica AT-HA5050H User manual

AT-HA5050H
Headphone Amplifier
取扱説明書
ヘッド ホ ン ア ン プ
Instruction booklet
Headphone Amplifier
使用说明书
立体声耳机放大器
使用說明書
耳機放大器
日本語
English
簡体
繁體

2
安全上の注意 ・・・・・・・・・・・・・・ 3
ヘッドホンアンプについて ・・・・・・・・・・・ 3
電源ケーブルについて ・・・・・・・・・・・・・ 3
使用上の注意 ・・・・・・・・・・・・・・ 4
ご使用の前に ・・・・・・・・・・・・・・ 4
各部の名称と機能 ・・・・・・・・・・・・ 5
前面(フロントパネル) ・・・・・・・・・・・・ 5
背面(リアパネル) ・・・・・・・・・・・・・ 6
接続のしかた ・・・・・・・・・・・・・・ 7
ヘッドホン出力端子の使いかた ・・・・・・・ 8
VU メーターの使いかた ・・・・・・・・・・ 9
コントロールパネルの使いかた ・・・・・・・ 10
ブロックダイアグラム ・・・・・・・・・・ 11
外形寸法図 ・・・・・・・・・・・・・・・ 11
テクニカルデータ ・・・・・・・・・・・・ 12
USB 対応リスト ・・・・・・・・・・・・・ 13
目次
日本語
お買い上げありがとうございます。
ご使用の前にこの取扱説明書を必ずお読みのうえ、
正しくご使用ください。
また、保証書と一緒にいつでもすぐ読める場所に保管
しておいてください。
本製品は Windows のパソコンでご使用になる場合「専
用ドライバーソフト」が 必 要 で す。
「 専 用ド ライバ ーソ フト」は、製品ホームページ(http://
www.audio-technica.co.jp/atj/at_ha5050h.html)
より最新ドライバーソフトをダウンロードしてください。
※ MACOS で使用する場合は、「専用ドライバーソフト」
は不 要 で す。

3
安全上の注意
本製品は安全性に充分な配慮をして設計していますが、使いかたを誤ると事故が起こることがあります。
事故を未然に防ぐために下記の内容を必ずお守りください。
警告
警告
警告
注意
注意
この表示は「取り扱いを誤った場合、使用者が
死亡または重傷を負う可能性があります」を意
味してい ます。
この表示は「取り扱いを誤った場合、使用者が
傷害を負う、または物的損害が発生する可能性
があります」を意味しています。
ヘッド ホ ン ア ン プ に つ い て
電源ケーブルについて
●付属の電 源ケーブル以 外使 用しない
電 流 容 量 などの 違 い により、 火 災・感 電
の 原 因に なります。
ま た、 故 障・不 具 合 の原 因に なりま す。
●異常(音、煙、臭いや発熱、損傷など)に
気付いたら使用しない
異 常に 気付 い たらすぐに使 用 を 中止して、
コンセントから抜きお買い上げの販売店
か 当 社 サ ー ビ スセ ン ター に 連 絡 してく だ さ
い。そのまま使用すると、火災など事故
の 原 因に なります。
●火気に近付けない / 火の付いたキャンド
ルなどを上に置かない
火災の原因になります。タバコの灰皿な
ど、本製品の上に置かない。
●分解や改造はしない
感電によるけがや、火災など事故の原因
になります。
●強い衝撃を与えない
感電によるけがや、火災など事故の原因
になります。
●濡れた手で触れない
感電によるけがの恐れがあります。
●水をかけない / 水滴やみずしぶきのかか
る場所に置かない
感電によるけがや、火災など事故の原因
になります。
●本製品に異物 ( 燃えやすい物、金属、液
体など ) を入れない
感電によるけがや、火災など事故の原因
になります。
●じゅうたんや布などで覆わない / 通気口
を塞がない
過熱による火災など事故の原因になりま
す。本製品内部の熱を温度上昇を防ぐた
め、通気口を開けています。
●同梱のポリ袋は幼児の手の届く所や火
のそばに置かない
事故や火災の原因になります。
●電源電圧設定を変えない
火災の原因になります。
●表示している電源電圧以外で使用しない
過熱による火災など事故の原因になります。
●本製品以外には使 用しない
電 流 容 量 な ど の 違 い に よ り、 火 災・感 電
の原因になります。また、故障・不具合の
原 因 になりま す。
●異常(音、煙、臭いや発熱、損傷など)
に気付いたら使 用しない
異常に気付いたらすぐに使用を中止して、
コンセントから抜きお買い上げの販売
店か当社サービスセンターに連絡してく
ださい。
そのまま使用すると、火災など事故の原
因に なりま す。
●ケーブルは釘などで固定しない、束ね
たまま使用しない
過熱による火災など事故の原因になります。
●コンセントや本体にプラグを差し込むと
きは根元まで確実に差し込む
過熱による火災など事故の原因になります。
●ケーブルを引っ張らず、プラグを持って
まっすぐ 抜 き 差しする
断 線 、故 障 の 原 因 に なりま す。
● ケ ーブ ル の上 に物 を 置 い たり、 敷 物 や
家 具 な どの下 に入れ たりしな い
感電によるけがの恐れがあります。
●分解や改造はしない
感電によるけがや、火災など事故の原因
になります。
●強い衝撃を与えない
感電によるけがや、火災など事故の原因
になります。
●濡れた手で触れない
感電によるけがの恐れがあります。
●布などで覆わない
事故や火災の原因になります。
●プラグにたまったほこりなどは乾いた布
で定期的に拭き取る
長い間掃除をしないと、火 災など事 故の
原 因 になりま す。
●アース 線 は 、 必ずコ ン セント の 接 続 前
に取り付け、コンセントを外した後に
取り外す
火 災 の 原 因 に な ること が あ りま す。 安 全
のため、必ず手順を守ってください。
●すぐにコンセントから電 源プラグ を抜
くこと が できる ようにする
電 源 の スイッ チを 切 って も コ ン セ ントか
らは完全に遮断されていません。万一の
事故防止のため、本製品ををコンセント
の 近 くに 置 き、 すぐ にコン セ ントから電
源プラグを抜くことができるようにして
ください。
●本製品を設置する場合は、壁から30cm
以上離す。また他の機器に近付けない
内 部 に熱 が こもり、火 災 の 原 因となりま
す。本製品の天面、背面、左右それぞれ
30cm 以上、隙間をあける。
●すぐにコンセントから電 源プラグ を抜く
ことが できる場所に置く
電源スイッチを切っても、コンセントから
は完全に遮断されていません。故障、不
具合 の 原 因に なりま す。
●不安定な場所に置かない
本製品の落下などにより、けがや故障の
原 因 になりま す。
●換気の良い場所に置く
熱がこもり、火災など事故の原因になり
ます。ラックなどに入れるときは、放熱を
よくするために本製品の周りに隙間を空け
てください。
●直射日光の当たる場所、暖房器具の近
く、高温多湿やほこりの多い場所に置
かない
感電によるけがや、火災など事故の原因
になります。また、故障、不具合の原因
になります。
● 本 製 品 の 上 に 物( 花 瓶・植 木 鉢・水 の 入 っ
た コップ・金 属 ) な ど を 置 か な い
万一、倒れた場合、感電によるけがや、
火災など事故の原因になります。
●ベンジン、シンナー、接点復活保護剤
など薬品は使 用しない
変 形 、 故 障 の原 因 に なります。
日本語

● 本 製 品 の ヘッド ホ ン 出 力 端 子 は ス テレ オヘッド ホ ン 専 用 で す。 ス テ レ オヘッド ホ ン 以 外 の 製 品 は 絶 対 に 接 続 し な い でく だ さ い 。
●φ3.5mm ステレオミニプラグのヘッドホンを接続する場合は、別売の変換プラグアダプターをご使用ください。
変換プラグアダプターの 形状によって、ジャックから抜けなくなりますのでご注意ください。
●本製品のジャックは、音質を向上させるため接点圧力を強めに設計しています。一部のプラグ(指かかり部分の寸法が短いプラグ
など)ではジャックから抜けなくなる恐れがあります。
●電源をオン/ オフする際やヘッドホンを接続するときは、必ずボリュームを最小にしてください。予期しない大音量で、聴力に悪影
響 を与えることが ありま す。ま た、接 続したヘッド ホン の 故 障 の原 因 に なることが ありま す。
●接続する機器に合わせて適切なケーブルをお買い求めください。
●接続するケーブルのプラグは根元まで確実に差し込んでください。
●ケーブルを抜き差しする際は、プレーヤーソフトの再生を停止した状態で行ってください。
●本製品は真空管を使用しているため熱くなります。これは、異常ではありません。
●インバータータイプの蛍光灯、LEDランプ、携帯電話や Wi-Fi などの無線機器から本製品を 1m 以上離してください。
近くで使用するとノイズが入る場合があります。
●本製品は真空管を採用しております。充分な音質を得るために、ご使用前に必ず電源を入れてエージングを行ってください。
・初めて使用する前:3日間以上
・毎回使用する前:15分以上
本製品を初めて使用する前に「 専 用ド ライバーソ フト」を パ ソコン にインスト ールする 必 要 が ありま す※。
AT-HA5050H 製品ホームページよりダウンロードしてから、パソコンにインストールしてください。
本製品をパソコンと接続する前に、必ず「 専 用ド ライバ ーソ フト」のインストールを行ってください。
ドライバーのインストール前にパソコンと本製品を接続すると、正常に動作しない場合があります。
※お持ちのパソコンが Windows の場合のみ。
●「専用ドライバーソフト」のインストール手順の詳細は、製品ホームページ内の「インストール・セットアップマニュアル」を参照ください。
●パソコンのハードウェア、ソフトウェアの構成によっては、「使用可能なパソコンの環境」に該当しているパソコンであっても、動作し
な い 場 合 が ありま す。
●アシンクロナスモードでは、パソコンから出力されたオーディオデータを本製品のクロックを使用して処理するため、データ伝送時の
ジッターを抑制することができます。
●製品ホームページよりダウンロードできるものは下記の通りです。
Windows 専用ドライバーソフトインストールマニュアル、セットアップマニュアル
MacOS セットアップマニュアル(専用ドライバーソフトのインストールは不要です。)
使用上の注意
4
ご使用の前に
■AT-HA5050H 製品ホームページ
下記の製品ホームページからダウンロードができます。
http://www.audio-technica.co.jp/atj/at_ha5050h.html
最新のインストール・セットアップ情報につきましては、AT-HA5050H の製品ホームページに更新していきます。
併せてご確認ください。
注意
●長時間使用しないときは、コンセントから
抜く
火 災 の 原 因 に な る こ と が あ り ま す。 安 全
のため、必ずコンセントから抜いてくださ
い。また、省エネルギーにご配慮ください。
●足に引っ掛かりやすい場所にケーブルを
引き回さない
故障や事故の原因になります。
●ベンジン、シンナー、接点復活保護剤
など薬品は使 用しない
変 形 、 故 障 の原 因 に なります。
日本語

5
前 面( フ ロ ン ト パ ネ ル )
①電源スイッチ
電源をオン/ オフするプッシュ式スイッチです。
押 すと 電 源 が オ ンに なりま す。 再 度、 押 すと オフ に なりま す。
②電源インジケーター
電源をオンにすると約 60 秒オレンジ色(スタンバイ状態)に
点灯します。その後、緑色(動作状態)に点灯します。
オレンジ色のインジケーターが緑色に変わらない場合は「使用
上の注意」(4 ページ)を参照ください。
③入力切り替えスイッチ
入力信号(同軸デジタル入力(S/PDIF)、USB入力(USB)、
ライン入力(LINE)、XLR入力(BALANCED))を切り替えます。
④ デジタル入力の種類とサンプリング周波数
インジケーター
デジタル入力の種類とサンプリング周波数を表示します。
※
※同軸デジタル(S/PDIF)入力時、接続するプレーヤーによっ
てサンプリング周波数が正しく表示されない場合がありま
す。
⑤BitDepthインジケーター
USB 入 力時 のビット幅を表 示します。
USB 未接続時 : 消灯
USB 接続時(未再生) : 青
16Bit 再生時 : 青
24Bit /32Bit 再生時 : ピンク
同軸デジタル(S/PDIF)入力時のビット幅を表示します。
同軸デジタル(S/PDIF)未接続時
: 消 灯
16Bit 再生時 : 青
24Bit 再生時 : ピンク
⑥ヘッドホン出力端子
φ6.3mm ステレオ標準ジャックのヘッドホン端子です。
同じ条件で使用する場合、2 台のヘッドホンが同時に使用でき
ます。また、表示の OUTPUTIMPEDANCE(0.1Ω、32Ω、
82 Ω、120 Ω)はアンプの出力インピーダンスです。ヘッドホ
ンのインピーダンスではありません。
⑦VUメーター
ヘッドホン出力の大きさを表示します。
※詳細は「VUメーターの使いかた」( 9 ペ ー ジ )を ご 参 照 く だ
さい。
⑧ボリューム
ヘッドホンの音量を調整します。MIN 方向に回すと音量が小さ
くなり、MA X 方向に回すと大きくなります。
※ヘッドホン出力端子A、Bに2台接続している場合は、2つ同
時 に調 整 さ れま す。
⑨VUメーターレンジ切り替えスイッチ
ヘッドホンの感度によるメーター表示を最適にします。
※詳細は「VUメーターの使いかた」( 9 ペ ー ジ )を ご 参 照 く だ
さい。
各部の名称と機能
日本語

6
背 面( リ ア パ ネ ル )
⑩XLR 入力端子(BALANCED)
X L R ケーブル( 別 売)を 使 用して、X L R 出 力 端 子 の 搭 載してい る
CDプレーヤーなどの機器と接続します。
⑪ライン入力端子(LINE)
オーディオケーブル(別売)を使用して、CD プレーヤーやアンプ
の ライン 出 力 端 子と 接 続し ま す。形 状 はピ ン ジャック で す。
⑫入 力アッテネー タースイッチ( AT T N)
-12dB の入力アッテネーターです。入力する信号レベルが大き
い場合にご使用ください。
⑬USB入力端子(USB)
USBケーブル(別売)を使用して、パソコンと接続します。
⑭USB接続モード切り替えスイッチ
アシンク ロナスモ ードと アダ プ ティブ モ ード を 切り 替えま す。
接続するパソコンなどの環境に合わせて選択してください。
⑮同軸デジタル入力端子(S/PDIF)
デジタル入力を行う場合に、同軸デジタル ケーブル(別売)を
使 用して、 デ ジタル 出 力 搭 載 機 器 と 接 続しま す。
⑯電源ケーブル用インレット(〜ACIN)
電 源 ケーブル を接 続しま す。
各部の名称と機能
日本語

7
※接続する機器の取扱説明書を併せてお読みください。
※各機器の電源を必ず切ってください。
※本製品の USB 端子はセルフパワー方式(パソコンからの電源供給不要)になっております。
1. 下記の接続例を参考にして、パソコンおよび使用する機器を接続してください。
2.電源ケーブルを本製品インレットと、AC100V コンセントに接続します。
3.接 続 機 器 の 電 源 ス イ ッ チ を オ ン に し ま す 。
4.本 製 品 の 電 源 ス イ ッ チ を オ ン に し ま す 。
パワー LED インジケーターの色がオレンジ色から緑色に変わるまで待ちます。(約 60 秒)
5.入力切り替えスイッチで再生したい機器を選択します。
6.本製品のボリュームで音量を小さくしてから、ヘッドホン出力端子にヘッドホンを接続します。
ヘッド ホ ン の イ ンピー ダ ン ス と、 使 用 す る ヘッド ホ ン 端 子 の 詳 細 は「ヘッドホン出力端子の使いかた」を参照してください。
※大音量の信号が本製品に入力されている状態でヘッドホン端子を抜き差しした場合、電源インジケーターが一時的にオレンジになり音
声 が ミュートさ れ ま す。 こ れ は ア ン プ の 保 護 回 路 が 作 動 した た めで 故 障 で は ありま せ ん 。し ば らくすると( 約 6 0 秒 )元 の 音 量 に 復 帰し ま す。
※お手持ちのヘッドホン端子がφ3.5mm ステレオミニプラグの場合は、別売の変換プラグアダプターをご使用ください。
変換プラグによっては、ジャックから抜けなくなる場合があるのでご注意ください。「使用上の注意」をご参照ください。
7. 再 生機 器 を再 生して、 本 製 品 のボリュームでお 好み の 音 量 に 調整してくだ さい 。
8. VUメーターの針が表示範囲に入るようにVUメーターレンジ切り替えスイッチで調整してください。
詳細は「VUメーターの 使いかた 」(9 ページ)を参照してください。
※針が振り切れる使いかたをすると、メーターが故障する恐れがあります。
接続のしかた
日本語
接続例

8
インピーダンスが16Ω〜64Ωの ヘッドホンを使用する場合
インピーダンスが100 Ω以上のヘッドホンを使用する場合
バランスド・アーマチュアタイプのインナーイヤーヘッドホンを使用する場合
異なるインピーダンスのヘッドホンを同時に使用し、音量をそろえたい場合
(2 台の ヘッドホンを A、B それぞれに接続)
本製品にはヘッドホン出力が2つあります。
ヘッド ホ ン 出 力 A、B にそれぞれヘッドホンを1台接続してください。
下記の使用例を参考に、お好みに合わせて出力端子を選択してご使用ください。
出力インピーダンスが ❹0.1 Ω出力端子をご使用ください。
小さいインピーダンスの出力端子を使用すると、力強い解像度の高い音質になります。
大きいインピーダンスの出力端子を使用すると、中低域豊かな音質になります。
お好みの出力インピーダンスの出力端子をご使用ください。
小さいインピーダンスの出力端子を使用すると、解像度が高く引き締まった音質になります。
大きいインピーダンスの出力端子を使用すると、中低域豊かな音質になります。
シ ング ルユ ニット の バ ラン スド・アー マ チュ アタイ プの イン ナ ー イヤ ー ヘッド ホ ン の 場 合 は お 好 み の 出 力 端 子 を
ご使用ください。
ユニットが2 個以上のバランスド・アーマチュアタイプのインナーイヤーヘッドホンの場合は出力インピーダン
スが❹0 .1Ωの出力端子をご使用ください。
大きいインピーダンスの出力端子をご使用の場合、良好な周波数特性が得られない場合があります。
インピーダンスが大きいヘッドホンを出力インピーダンス❹0.1 Ω の出力端子側に接続してください。
2台のヘッドホンの音量が同じ大きさになるように、インピーダンスが小さいヘッドホンを出力インピーダンス
❶120 Ω や❷82Ω、❸33Ωの出力端子を選んでください。ヘッドホン本体の出力音圧差があるので同じ音量
が得られない場合があります。
ヘッド ホ ン 出 力 端 子 の 使 い か た
使用例
日本語

0dBに 設 定してい る場合
-20dBに設 定している場合
-10 d B に 設 定して いる場 合
-30dBに設 定している 場合
9
本製品のVUメーターの単位はデシベル(dB)です。
出力パワーを確認する場合は、レンジスイッチに対するレベルの読みかたと、下記の換算表を参考に確認してください。
※針が振り切れる使いかたをすると、メーターが故障する恐れがあります。
VU メーター の使いかた
-10dBPosition
16Ω 6.25mW
32Ω 3.13mW
64Ω 1.56mW
150Ω 0.67mW
300Ω 0.33mW
600Ω 0.17mW
-30dBPosition
16Ω 0.06mW
32Ω 0.03mW
64Ω 0.02mW
150Ω 0.01mW
300Ω 0.00mW
600Ω 0.00mW
-20dBPosition
16Ω 0.63mW
32Ω 0.31mW
64Ω 0.16mW
150Ω 0.07mW
300Ω 0.03mW
600Ω 0.02mW
-40dBPosition
16Ω 0.01mW
32Ω 0.00mW
64Ω 0.00mW
150Ω 0.00mW
300Ω 0.00mW
600Ω 0.00mW
0dBPosition
16 Ω 62.50mW
32 Ω 31.25mW
64 Ω 15.63mW
150 Ω 6.67mW
300 Ω 3.33mW
600 Ω 1.67mW
-20dBPosition
16Ω 0.63mW
32Ω 0.31mW
64Ω 0.16mW
150 Ω 0.07mW
300 Ω 0.03mW
600 Ω 0.02mW
-10dBPosition
16Ω 6.25mW
32Ω 3.13mW
64Ω 1.56mW
150 Ω 0.67mW
300 Ω 0.33mW
600 Ω 0.17mW
-30dBPosition
16Ω 0.06mW
32Ω 0.03mW
64Ω 0.02mW
150 Ω 0.01mW
300 Ω 0.00mW
600 Ω 0.00mW
3dBPosition
16Ω 124.70mW
32Ω 62.35mW
64Ω 31.18mW
150Ω 13.30mW
300Ω 6.65mW
600Ω 3.33mW
-17dBPosition
16Ω 1.25mW
32Ω 0.62mW
64Ω 0.31mW
150Ω 0.13mW
300Ω 0.07mW
600Ω 0.03mW
-7dBPosition
16Ω 12.47mW
32Ω 6.24mW
64Ω 3.12mW
150Ω 1.33mW
300Ω 0.67mW
600Ω 0.33mW
-27dBPosition
16Ω 0.12mW
32Ω 0.06mW
64Ω 0.03mW
150Ω 0.01mW
300Ω 0.01mW
600Ω 0.00mW
-10 d B
-30dB
-20dB
-40dB
0dB
-20dB
-10 d B
-30dB
3dB
-17dB
-7dB
-27dB
日本語

10
コントロールパネルは、「専用ドライバーソフト」をインストールした際に一緒にインストールされます。
※ Windows7,Windows8,Windows8.1に対応しています。
コントロールパネル の 使 い かた
再 生 方 式 が 表 示 さ れ ま す。
PCM、DSD64、
DSD128
DoP モードで DSD データを再生する場合は
24bit または 32bit を選択してください。
再生中の詳細な情報が表示
され ま す。 WASAPI モードを使用する場合は、プレーヤー
ソフトにてサンプリング周波数やビット数を変更
してください。
日本語

11
ブロックダイアグラム
外形寸法図
( 単 位:m m )
日本語

12
テクニカルデータ
必要システム仕 様
USB2.0に対応するUSBポートを標準装備したパソコン
CPU:IntelCore2CPU2.2GHz 以上または Intel 同等の AMDCPU
RAM:32bitOS2GB 以上、64bitOS4GB 以上
対応 OS
Windows7
Windows8
Windows8.1
MacOSX10.9 以降*
型式 プリ段:真空管回路 パワー段:バイポーラトランジスターによる A クラスアンプ
対 応 ヘッド ホ ン イン ピー ダ ン ス 16 Ω〜 6 00 Ω
瞬間最大出力レベル
2,000mW+2,000mW(16 Ω負荷 )
1,000mW+1,000mW(32 Ω負荷 )
500mW+500mW(64 Ω負荷 )
62mW+62mW(600Ω負荷 )
定格出力(20Hz 〜 20kHz)
125mW+125mW(16 Ω負荷 )
62mW+62mW(32 Ω負荷 )
31mW+31mW(64 Ω負荷 )
3.3mW+3.3mW(600 Ω負荷 )
周波数特性
ライン入 力 5Hz 〜 200kHz(0、-1dBat32 Ω10mW 出力時 )
XLR 入力 5Hz 〜 200kHz(+0.5、-2dBat32 Ω10mW 出力時 )
全高調波歪率 0.08% 以下 (20Hz 〜 20kHzat32 Ω10mW 出力時 )
利得
ライン入 力 14dB
XLR 入力 13.5 dB
SN 比 104dB(AWeighted)
チャン ネ ル 間 セ パレ ー ション 70dB(1kHzat32 Ω)
入力端子
アナログ
ライン入力(ピンジャック)×2
XLR コネクター×2
デジタル
USB(TypeB)×1
アシンクロナスモ ード
DSD128(5.6448MHz)、DSD64(2.8224MHz):24bit 〜 32bit
PCM384kHz、352.8kHz、192kHz、176.4kHz、96kHz、88.2kHz、48kHz、44.1kHz、
32kHz:16bit 〜 32bit
アダ プ ティブ モ ード
DSD 対応なし
PCM192kHz、176.4kHz、96kHz、88.2kHz、48kHz、44.1kHz、32kHz:16bit 〜 32bit
同軸デジタル(S/PDIF)×1
PCM192kHz、176.4kHz、96kHz、88.2kHz、48kHz、44.1kHz、32kHz:16bit 〜 24bit
出力端子
ヘッド ホ ン 出 力
φ 6.3mm ステレオ標準ジャック( 出力インピーダンス0.1Ω )×2
φ 6.3mm ステレオ標準ジャック( 出力インピーダンス33 Ω) ×2
φ 6.3mm ステレオ標準ジャック( 出力インピーダンス82 Ω)×2
φ 6.3mm ステレオ標準ジャック( 出力インピーダンス120 Ω )×2
DA コンバーター
周波数特性 5Hz 〜 100kHz(0、-1.5dB)
全高調波歪率 0.0006% 以下 (20 〜 20kHz)
SN 比 113dB(AWeighted、1Vrms 出力時 )
チャン ネ ル 間 セ パレ ー ション 110dB(20Hz 〜 20kHz)
入 力アッテネー ター -12dB
VU メーター Range 0dB、-10dB、-20dB、-30dB
電源 AC100V 50/60Hz
消費電力 最大 53W
外形寸法 H100×W332×D327mm(突起部除く)
質量 約 11. 0 k g
付属品 電 源ケーブル
*最新の情報は、製品ホームページをご確認ください。
日本語

13
U S B 対応 リスト
HA5050HAsynchronousPCM384/DSD128 Windows7 Windows8/8.1
ASIO
PCM
32kHz,44.1kHz,48kHz
88.2kHz,96kHz,176.4kHz
192kHz,352.8kHz,384kHz
○ 16-32 ○ 16-32
DSD
DoP64
176 .4k Hz ○ 24-32 ○ 24-32
DoP128
352.8kHz ○ 24-32 ○ 24-32
Native64
88.2kHz ○ 32 ○ 32
Native128
176 .4k Hz 非対応※ 1 非対応※ 1
WASAPI
PCM
32kHz,44.1kHz,48kHz
88.2kHz,96kHz,176.4kHz
192kHz,352.8kHz,384kHz
○ 16-32 ○ 16-32
DSD
DoP64
176 .4k Hz ○ 24-32 ○ 24-32
DoP128
352.8kHz ○ 24-32 ○ 24-32
Native64
88.2kHz 非対応 非対応
Native128
176 .4k Hz 非対応 非対応
DirectSound
PCM
32kHz,44.1kHz,48kHz
88.2kHz,96kHz,176.4kHz
192kHz
○ 16-32 ○ 16-32
DSD 非対応 非対応 非対応
HA5050HAdaptivePCM192 Windows7 Windows8/8.1
ASIO
PCM
32kHz,44.1kHz,48kHz
88.2kHz,96kHz,176.4kHz
192kHz
○ 16-32 ○ 16-32
DSD
DoP64
176 .4k Hz 非対応 非対応
DoP128
352.8kHz 非対応 非対応
Native64
88.2kHz 非対応※3 非対応※3
Native128
176 .4k Hz 非対応※ 3 非対応※3
WASAPI
PCM
32kHz,44.1kHz,48kHz
88.2kHz,96kHz,176.4kHz
192kHz
○ 16-32 ○ 16-32
DSD
DoP64
176 .4k Hz 非対応 非対応
DoP128
352.8kHz 非対応 非対応
Native64
88.2kHz 非対応 非対応
Native128
176 .4k Hz 非対応 非対応
DirectSound
PCM
32kHz,44.1kHz,48kHz
88.2kHz,96kHz,176.4kHz
192kHz
○ 16-32 ○ 16-32
DSD 非対応 非対応 非対応
HA5050HAsynchronousPCM384/DSD128 MACOS
PCM
32kHz,44.1kHz,48kHz
88.2kHz,96kHz,176.4kHz
192kHz,352.8kHz,384kHz
○ 16-32
DSD
DoP64
176 .4k Hz ○ 24-32 ※ 2
DoP128
352.8kHz ○ 24-32 ※ 2
Native64
88.2kHz 非対応
Native128
176 .4k Hz 非対応
HA5050HAdaptivePCM192 MACOS
PCM
32kHz,44.1kHz,48kHz
88.2kHz,96kHz,176.4kHz
192kHz
○ 16-32
DSD
DoP64
176 .4k Hz 非対応
DoP128
352.8kHz 非対応
Native64
88.2kHz 非対応
Native128
176 .4k Hz 非対応
※1 誤って再生した場合、歪んだ大きな音が出ます。
※2 16bit を選択すると、音が出ないまま再生します。
※3 音が出ないまま再生します。
(単 位:bit )
日本語

14
English
CAUTION! ・・・・・・・・・・・・・・・・ 15
Cautions ・・・・・・・・・・・・・・・・ 16
Before use ・・・・・・・・・・・・・・・・ 16
Part names and functions ・・・・・・・・ 17
Front panel ・・・・・・・・・・・・・・・・・・ 17
Rear panel ・・・・・・・・・・・・・・・・・・ 18
Connections ・・・・・・・・・・・・・・・ 19
How to use headphone output terminals ・ ・ 20
How to use a VU meter ・・・・・・・・・・ 21
How to use the control panel ・・・・・・・ 22
Block diagram ・・・・・・・・・・・・・・ 23
Dimensions ・・・・・・・・・・・・・・・ 23
Specifications ・・・・・・・・・・・・・・ 24
USB compatibility list ・・・・・・・・・・・ 25
Contents Thank you for purchasing this Audio-Technica product.
Be sure to read this manual before using this
product. Also, store this manual together with
the warranty in an easily accessible location.
Dedicated driver software is required in order to use this
headphone amplifier. Please download the latest driver
software from the website address listed under
"AT-HA5050H Product Dedicated Address" on page 16 of
these operating instructions.
*Only for Windows users.

10) Protect the power cord from being walked on or pinched
particularly at plugs, convenience receptacles, and the point
where they exit from the apparatus.
11) Only use attachments/accessories specified by the manufacturer.
12) Use only with the cart, stand, tripod, bracket, or
table specified by the manufacturer, or sold with the
apparatus. When a cart is used, use caution when
moving the cart/apparatus combination to avoid
injury from tip-over.
13) Unplug this apparatus during lightning storms or when unused for
long periods of time.
14) Refer all servicing to qualified service personnel. Servicing is
required when the apparatus has been damaged in any way, such
as power-supply cord or plug is damaged, liquid has been spilled
or objects have fallen into the apparatus, the apparatus has been
exposed to rain or moisture, does not operate normally, or has
been dropped.
15
CAUTION!
English
Warning:
To prevent fire or shock hazard, do not expose this apparatus to rain or
moisture.
Caution:
To avoid electric shock, do not open the cabinet.
Refer servicing to qualified personnel only.
To prevent fire, do not place any naked flame sources (such as lighted
candles) on this apparatus.
To prevent fire, do not cover the ventilation of this apparatus with
newspapers, tablecloths, curtains, etc.
Do not expose this apparatus to drips or splashes.
Do not place any objects filled with liquids, such as vases, on this
apparatus.
Do not install this apparatus in a confined space such as a bookcase or
similar unit.
Install this apparatus only in a place with good ventilation.
This apparatus should be located close enough to the AC outlet so that
you can easily grasp the power cord plug at any time.
In case of emergency, unplug the power cord of this apparatus quickly.
This apparatus with ClassⅠconstruction shall be connected to the AC
outlet with a protective grounding connection.
This apparatus is not disconnected from the mains as long as it is
connected to the AC outlet, even if the unit itself has been turned off.
This equipment should be placed at least 30CM away from a rear wall.
This equipment should not be placed near to other electrical equipment.
Keep the top, sides and rear of this equipment at least 30CM away from
any other surface if sitting on shelving, such as an audio equipment
rack. Failure to do so may cause this equipment to overheat which in
turn may cause it or surrounding items to catch fire.
The operating voltage of this equipment is factory-set and cannot be
changed by the user. In order to prevent serious damage and in some
cases the risk of fire, do not attempt to change the voltage of this
equipment.
Lightning Flash Symbol, with "The Lightning Flash with arrowhead
symbol within an equilateral triangle, is intended to alert the user to
the presence of uninsulated "dangerous voltage" within the product
enclosure that may be of sufficient magnitude to constitute a risk of
shock to persons".
Exclamation Point Symbol, with "The exclamation point within an
equilateral triangle is intended to alert the user to the presence of
important operating and maintenance (servicing) instructions in the
literature accompanying the product".
Important Safety Instructions
1) Read these instructions.
2) Keep these instructions.
3) Heed all warnings.
4) Follow all instructions.
5) Do not use this apparatus near water.
6) Clean only with dry cloth.
7) Do not block any ventilation openings. Install in accordance with
the manufacturer’s instructions.
8) Do not install near any heat sources such as radiators, heat
registers, stoves, or other apparatus (including amplifiers) that
produce heat.
9) Do not defeat the safety purpose of the polarized or grounding-type
plug.
A polarized plug has two blades with one wider than the other.
A grounding type plug has two blades and a third grounding prong.
The wide blade or the third prong are provided for your safety.
If the provided plug does not fit into your outlet, consult an
electrician for replacement of the obsolete outlet.
ATTENTION
Caution for FCC
You are cautioned that any changes or modifications not expressly
approved in this manual could void your authority to operate this
equipment.
Warning for FCC
This device complies with Part 15 of the FCC Rules. Operation is subject
to the following two conditions: (1)This device may not cause harmful
interference, and (2) this device must accept any interference received,
including interference that may cause undesired operation.
Note: This equipment has been tested and found to comply with the
limits for a Class B digital device, pursuant to part 15 of the FCC Rules.
These limits are designed to provide reasonable protection against
harmful interference in a residential installation. This equipment
generates, uses and can radiate radio frequency energy and, if not
installed and used in accordance with the instructions, may cause
harmful interference to radio communications. However, there is no
guarantee that interference will not occur in a particular installation.
If this equipment does cause harmful interference to radio or television
reception, which can be determined by turning the equipment off and
on, the user is encouraged to try to correct the interference by one or
more of the following measures:
-
Reorient or relocate the receiving antenna.
-
Increase the separation between the equipment and receiver.
-
Connect the equipment into an outlet on a circuit different from that to
which the receiver is connected.
-
Consult the dealer or an experienced radio/TV technician for help.
IC statement
CAN ICES-3 (B)/NMB-3(B)

●Headphone output terminals of the product are for the use of stereo headphones only. Never connect devices other than stereo
headphones.
●To connect 3.5 mm stereo headphone mini plug, use an appropriate conversion plug adapter (sold separately).
Please note that, depending on the shape of the conversion plug, it may be difficult to remove it from the jack.
●The contact pressure of the jack of this product is designed to be a little stronger in order to improve the sound quality.
It may be difficult to remove some plugs (especially small plugs that are had to grip) from the jack.
●When turn on/off the power or connect headphones to this product, make sure to set volume to the minimum level.
Sudden loud sound may have bad effects on hearing. Also, it may cause failure of the headphone.
●Please buy a cable suitable for the device to be connected.
●Fully insert the plug of the connecting cable.
●Stop playback device when plugging or unplugging cables.
●A vacuum tube used in this product can cause it to become hot, but this is not a malfunction.
●Keep this product at least 1 m from inverter-type fluorescent lights, LED lamps, mobile telephones, Wi-Fi and other wireless devices.
If you use this product near those devices, noise may be caused.
●A vacuum tube is used in this product. To get sufficient sound quality, make sure to turn on the power and age it before using this
product.
・Before using it for the first time: at least 3 days
・Before each use: at least 15 minutes
Download the dedicated driver software from the AT-HA5050H product website and install it on your computer before connecting
this product to a PC for the first time. Please always install the "dedicated driver software."
If you connect the product to the computer before installing the driver, it may not work properly.
*Only for Windows users.
●For details on how to install the dedicated driver software, see the separate "Installation and Setup Manual" also on the website.
●This product may not operate correctly due to the hardware or software configuration of your computer, even if the computer fulfills the
"compatible operating environment" conditions which is indicated in Specifications.
●Since audio data output from a computer is processed in asynchronous mode using the clock of this product, jitter caused during
transmission of data can be reduced.
●The files that you can download from the product website are as follows.
Windows Installation manual, setup manual
Mac OS Setup manual (No installation required for the dedicated driver software)
Cautions
16
Before use
■AT-HA5050H Product Dedicated Address
You can download the drivers from the product website below.
http://www.audio-technica.co.jp/atj/at_ha5050h.html
The AT-HA5050H product website will be updated with the latest installation and setup information. Please check back
frequently for the latest information.
English

17
Front panel
①Power switch
Push-type switch to turn the power on/off.
The power is turned on by pressing the switch. The power is
turned off by pressing the switch again.
②Power indicator
When the power is turned on, the indicator lights orange for
approximately 60 seconds (standby mode). After that, the
indicator lights green (operation mode). If the orange indicator
does not turn green, refer to the instructions for use on page 16.
③Input selector switch
Changes input signals (coaxial digital input (S/PDIF),
USB input (USB), line input (LINE), XLR input (BALANCED).
④Type of digital input and sampling
frequency indicator
Displays the type of digital input and sampling frequency.*
* During coaxial digital (S/PDIF) input, sampling frequency
may not be shown correctly, depending on the player to be
connected.
⑤Bit depth indicator
Displays the bit width during USB input.
When USB is not connected :
The light is turned off.
When USB is connected (not played)
:
blue
During playback of 16 bit :
blue
During playback of 24 bit/32 bit :
pink
Displays the bit width during coaxial digital (S/PDIF) input.
When coaxial digital (S/PDF) :
The light is turned off.
is not connected
During playback of 16 bit :
blue
During playback of 24 bit :
pink
⑥Headphone output jacks
Headphone terminal for 6.3 mm standard stereo jack. When
used under the same conditions, two headphones can be used
at the same time. The output impedance (0.1Ω, 32Ω, 82Ω,
and 120Ω) of an amplifier is displayed. This is not headphone
impedance.
⑦VU meter
Indicates the strength of headphone output.
* For more information, refer to "How to use a VU meter"
(page 21).
⑧Volume
Used to adjust the headphone volume. To decrease or increase
the volume level, turn the button toward MIN or MAX,
respectively.
* When two headphones are connected to headphone
terminals A and B, both are adjusted at the same time.
⑨VU meter range selector switch
Optimizes meter display based on the headphone sensitivity.
* For more information, refer to "How to use a VU meter"
(page 21).
Part names and functions
English

18
Rear panel
⑩XLR input terminals (BALANCED)
Use an XLR cable (optional) to connect to a CD player or other
device equipped with XLR output terminals.
⑪Line input terminal (LINE)
Use an audio cable (optional) to connect to a CD player or
amplifier line output terminals. Jack is pin-shaped.
⑫Input attenuator switch (ATTN)
This is a -12 dB input attenuator. Use this when a large signal
level is input.
⑬USB input terminal (USB)
Use a USB cable (optional) to connect to a computer.
⑭USB connection mode selector switch
Switches between asynchronous mode and adaptive mode.
Make selection based on environment of computer to be
connected.
⑮Digital coaxial input terminal (S/PDIF)
When digital input is performed, use a coaxial digital cable
(optional) to connect to the device equipped with the digital
output.
⑯Power cable inlet (~ AC IN)
Connect the power cable.
Part names and functions
English

19
* Please also read instruction manual of audio device.
* Be sure to turn off the power to each device before connecting.
* The USB terminal of this product is self-powered (does not require power from a computer).
1. With reference to "Connection example", connect a computer and other devices to be used.
2. Insert the power cable into the inlet on this product and 100V AC outlet.
3. Turn on the connected devices.
4. Turn on this product. Wait until the power LED indicator turns from orange to green (about 60 seconds).
5. Select the device for playback using the input selector switch.
6. After turning down the volume on this product, connect the headphone to the headphone output terminal. For more
information on headphone impedance and headphone terminals to be used, refer to "How to use headphone output
terminals."
* If a headphone is inserted or extracted with loud signal input to this product, the power indicator will turn orange temporarily and the
audio will be muted. This is not a failure; it is caused by the activation of the amplifier protection circuit. A short time later (about 60
seconds), the volume will be restored to the original volume level.
* If your headphone has a 3.5 mm stereo mini plug, you will need to use a conversion plug adapter.
Please note that it may be difficult to pull some plug adapters out of the jack. See "Cautions" on page 16.
7. Play the playback device and adjust to the desired volume level using the Volume knob on this product.
8. Adjust the volume and the VU meter range selector switch so that the VU meter's pointer is within the display range.
For more information, refer to "How to use a VU meter" (page 21).
* If you use the meter until the pointer goes off the scale, it may cause failure of the meter.
Connections
English
Connection example

20
To use 16 to 64 ohms impedance headphones:
To use 100 ohms or higher impedance headphones:
To use balanced armature-based earbud headphones:
To use different impedance headphones and make volume levels uniform:
(Connect two headphones to outputs A and B.)
This product has two headphone outputs.
Connect one headphone to output A, one to output B.
Select and use the output terminal to your liking with reference to the following
examples.
Use the output terminal with ❹ 0.1 ohms output impedance.
When you use the output terminal with low impedance, high-resolution, powerful sound will be produced.
When you use the output terminal with high impedance, rich sound in the low-mids will be produced.
Use the output terminal with the output impedance of your choice.
When you use the output terminal with low impedance, high-resolution, tight sound will be produced.
When you use the output terminal with high impedance, rich sound in the low-mids will be produced.
When balanced armature-based earbud headphones for a single unit are used, use any output terminal of
your choice.
When balanced armature-based earbud headphones for two or more units are used, use the output terminal
with ❹0.1 ohms output impedance.
When an output terminal with high impedance is used, you may not get good frequency characteristics.
Connect the higher impedance headphones to the output terminal with ❹0.1 ohms output impedance.
Select the output terminal with ❶ 120 ohms, ❷82 ohms, or ❸33 ohms output impedance, so that the volume
level of the two headphones becomes the same. Since different headphones have different output sound
pressure levels, you may not get the same volume level.
How to use headphone output terminals
Examples of use
English
Table of contents
Languages:
Other Audio Technica Amplifier manuals

Audio Technica
Audio Technica AT-PEQ3 User manual

Audio Technica
Audio Technica ATW-B80 Owner's manual

Audio Technica
Audio Technica NARUKAMI HPA-KG NARU User manual

Audio Technica
Audio Technica AT-PHA55BT User manual

Audio Technica
Audio Technica AT-BHA100 User manual

Audio Technica
Audio Technica ATW-DA49a User manual