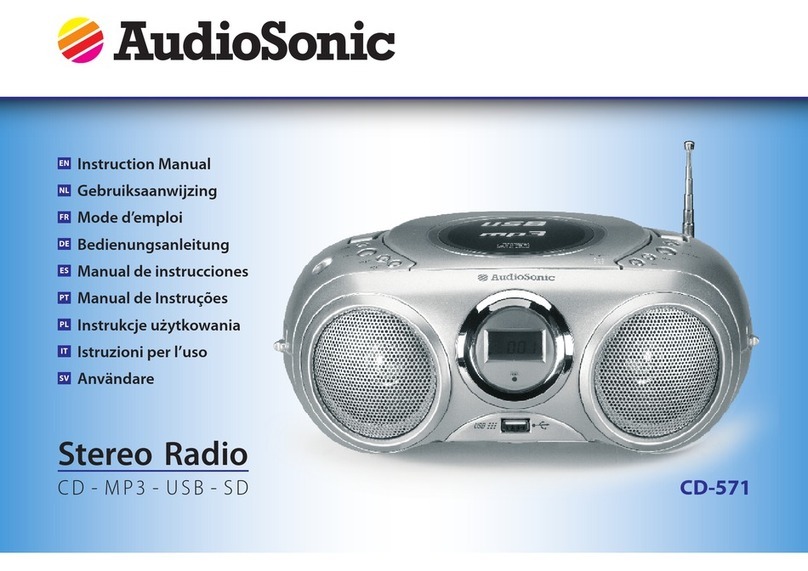
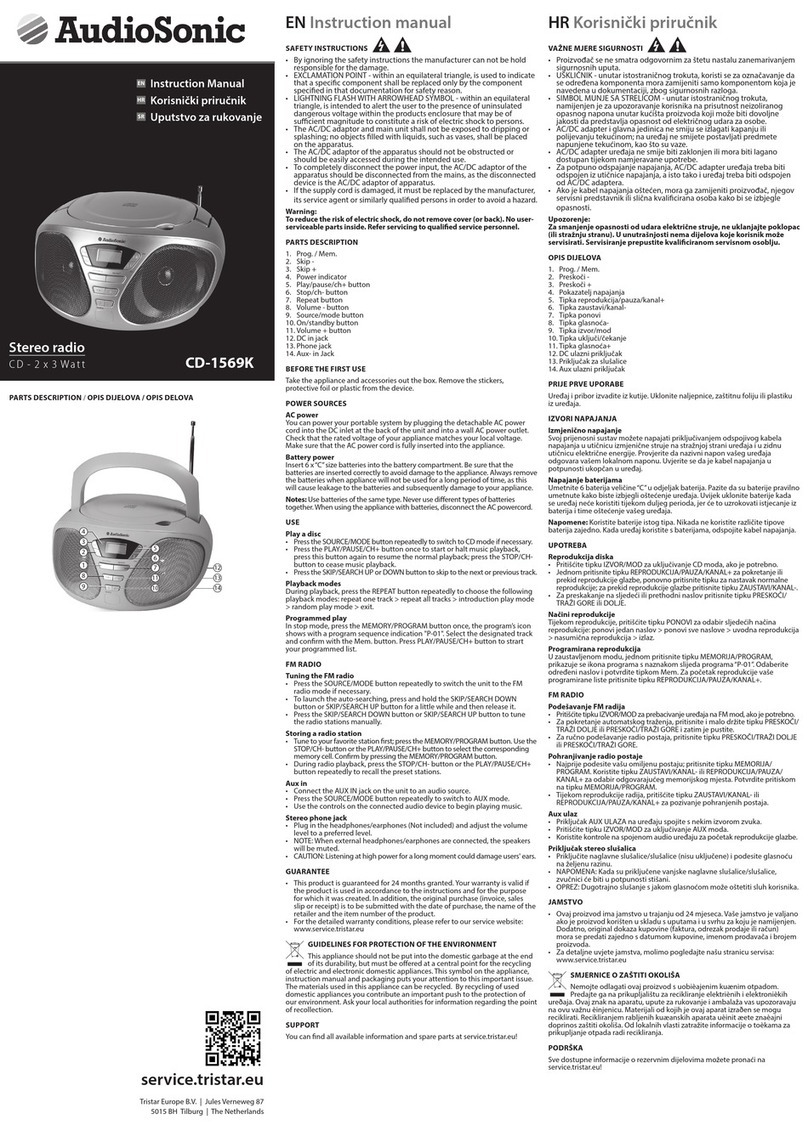
AudioSonic CD-1593 User manual

EN Instruction Manual
NL Gebruiksaanwijzing
FR Mode d’emploi
DE Bedienungsanleitung
ES Manual de instrucciones
PT Manual de Instruções
PL Instrukcje użytkowania
IT Istruzioni per l’uso
SV Bruksanvisning
CS Návod k použití
SK Návod k použitiu
Stereo radio
CD / MP3 / USB - 2 x 3Watt
CD-1593
CD-1594

2

3
ENInstruction Manual
SAFETY INSTRUCTIONS
By ignoring the safety instructions the manufacturer can not be hold responsible
for the damage.
EXCLAMATION POINT - within an equilateral triangle, is used to indicate that a
specific component shall be replaced only by the component specified in that
documentation for safety reason.
LIGHTNING FLASH WITH ARROWHEAD SYMBOL - within an equilateral
triangle, is intended to alert the user to the presence of uninsulated dangerous
voltage within the products enclosure that may be of sufficient magnitude to
constitute a risk of electric shock to persons.
• The AC/DC adaptor and main unit shall not be exposed to dripping or
splashing; no objects filled with liquids, such as vases, shall be placed on the
apparatus.
• The AC/DC adaptor of the apparatus should not be obstructed or should be
easily accessed during the intended use.
• To completely disconnect the power input, the AC/DC adaptor of the
apparatus should be disconnected from the mains, as the disconnected
device is the AC/DC adaptor of apparatus.
• If the supply cord is damaged, it must be replaced by the manufacturer, its
service agent or similarly qualified persons in order to avoid a hazard.
Warning: To reduce the risk of electric shock, do not remove cover (or
back). No user-serviceable parts inside. Refer servicing to qualified
service personnel.
PARTS DESCRIPTION
Front view
1. LCD Display
2. Standby / Function
3. Band / Album
4. Sleep / Time set
5. Vol + / Alarm 1
6. Vol - / Alarm 2
7. USB slot
8. Play / Pause
9. Stop
10. Mode
11. Skip +
12. Skip -
Top view
13. CD door
14. Snooze
Back view
15. Tuning control
16. FM Antenna
17. AC power cord
18. Aux- in Jack
1
7
13
14
15
17
18
16
612
511
410
39
28

4
Instruction Manual
BEFORE THE FIRST USE
• Take the appliance andaccessoriesoutthebox.Removethe stickers,protective
foilorplasticfrom thedevice.
• Place the device on a flat stable surface and ensure a minimum of 10 cm. free
space around the device. This device is not suitable for installation in a cabinet or
for outside use.
POWER SOURCES
AC power
You can power your portable system by plugging the detachable AC power cord into
the AC inlet at the back of the unit and into a wall AC power outlet. Check that the
rated voltage of your appliance matches your local voltage. Make sure that the AC
power cord is fully inserted into the appliance.
Battery power
Insert 6 x “C” size batteries into the battery compartment. Be sure that the batteries
are inserted correctly to avoid damage to the appliance. Always remove the batteries
when appliance will not be used for a long period of time, as this will cause leakage
to the batteries and subsequently damage to your appliance.
Notes:
• Use batteries of the same type. Never use different types of batteries together.
• When using the appliance with batteries, disconnect the AC powercord.
USE
Basic function
• Press the "ST / FUNC" button in the standby mode, to switch on the system. (FM
radio mode as default mode when switch on the system.)
• Press the "ST / FUNC" button to switch the system to CD/MP3/USB/AUX-IN mode.
• Press and hold the "ST / FUNC" button for 3 seconds to switch off the system. (No
matter in which mode.)
Radio
• Press the "ST / FUNC" button to select the “RADIO” mode.
• Press the “BAND / ALBUM” button to select AM or FM.
• Adjust radio frequency to your desired station by using the “TUNING” control.
For better reception
• FM: This appliance has a FM antenna located at the rear cabinet. Make sure this
antenna is fully extended.
• AM: This appliance is equipped with a built - AM antenna. Rotate the appliance to
get better reception.
CD / MP3 operation
• Press the "ST / FUNC" button to select “CD” mode.
• Open the CD door and place a CD / MP3 disc with the label up in the CD compartment.
• Close the CD door.
• Focus search is performed when:
- For CD disc - Total number of tracks is read and appears on the display.
- For MP3 disc - “MP3” appears on the display."
• It will start automatically from the first track.
• Press the “VOL + / AL1” or “VOL - / AL 2” button to adjust the volume to the desired level.
• Press the “PLAY / PAUSE” button again when you want to stop playback temporarily.
• Press the “STOP” button when finished.
Folder select
Press the “BAND / ALBUM” button to select a folder. (Folder select function can only
operate if the discis stored with at least 2 directories / files.)
Program
• Up to 20 tracks of CD disc, 99 tracks of MP3 disc can be programmed for disc play
in any order. Be sure to press the “STOP” button before use.
• Press the “MODE” button, the display will show “P01”.
• Select desired track by using the “SKIP +” or “SKIP -” button. (You may select a
desired album by pressing the “ALBUM” button).
• Press the “MODE” button again to confirm the desired track into the program memory.
• Repeat step 2 and 3 to enter additional tracks into the program memory.

5
• When all the desired tracks have been programmed, press the “PLAY / PAUSE”
button to play the disc in the order you have programmed.
• Press the “STOP” button twice to terminate programmed playback.
Mode
Press the “MODE” button during playing CD / MP3 disc, each press switches the
mode function as follows:
• Repeat 1
• Repeat album ( *mp3 only )
• Repeat all
• Random
• Normal playback
USB operation
• Plug your USB device into the port.
• Press the "FUNCTION" button to select “CD” mode.
• If there is no disc on the disc tray. It will read and play automatic your USB device.
• If There is a disc on the disc tray. It will read and play automatic your DISC,
• Press and hold the “PLAY / PAUSE” button for a few seconds to entry USB mode
when playing CD.
• Playback will start automatically from the first track and the display will show “USB”.
• Press the “STOP” button when you're finished.
Programme mode
The programme mode works the same as the CD / MP3 programme mode.
Aux in
• Connect an external audio source to the device by plugging it in the aux in jack.
• Press the power button to turn on the device.
• Use the native controls on the external audio source to start playing music.
Clock setting
• Press and hold the “ST / FUNC” button to switch unit in the standby mode.
• Press and hold the “SLEEP / TIME SET” button to entry the clock set mode. The
display will show “24H” and is flashing.
• Adjust the time format (12H / 24H) by pressing the “SKIP +” or “SKIP -” button.
• Press the “SLEEP / TIME SET” button to confirm the time format, the display will
show “AM 12:00” if 12H format is set or “0:00” if 24H is set.
• Adjust the hour by pressing the “SKIP +” or “SKIP -” button, press the “SLEEP / TIME
SET” button to confirm.
• Adjust the minutes by pressing the “SKIP +” or “SKIP -” button, press the “SLEEP /
TIME SET” button to confirm.
• Notes: Because the clock setting is at standby mode, the display is dim.
Alarm setting
• Alarm setting must be after completed clock setting.
• Press and hold the “ST / FUNC” button to switch unit at standby mode.
• Press the “VOL + / AL 1” or “VOL - / AL 2” button to entry alarm set mode.
• Adjust hour by pressing the “SKIP +” or “SKIP -” button, press the “VOL + / AL 1” or
“VOL - / AL 2” button to confirm.
• Adjust minute by pressing the “SKIP +” or “SKIP -” button, press the “VOL + / AL 1”
or “VOL - / AL 2” button to confirm.
• Pressing the “SKIP +” or “SKIP -” button to select
BUZZ
RADIO
CD
USB
• Press the “VOL + / AL 1” or “VOL - / AL 2” button to confirm.
• Adjust alarm volume by pressing the “SKIP +” or “SKIP -” button, press the “VOL + /
AL 1” or “VOL - / AL 2” button to confirm.
• After confirm the alarm volume, the display will automatically scan your setting
one time.
• The display will show “1” or “2”. Alarm seting is now complete.
• Press the “VOL + / AL 1” or “VOL - / AL 2” button to activate the alarm on / off function.
• Note: If you need to reset the alarm, press and hold the “VOL + / AL 1” or “VOL - /
AL 2” button for 3 seconds to re-entry the alarm set mode.
ENInstruction Manual

6
Instruction Manual
Snooze
When the alarm is triggered. You may press the “SNOOZE” button to delay the alarm
for another 9 minutes.
Sleep
• In CD mode, press and hold the "SLEEP / TIME SET" button for 3 seconds, the
display will show “SLEEP 90”. That means, after 90 minutes the appliance will
automatically turn to the standby mode.
• Press the “SLEEP” button again to select the automatically turn off time, from 90,
80, 70, 60, 50, 40, 30, 20, 10 minutes.
• Press the “SLEEP” button to “SLEEP 00” to cancel the sleep function.
CLEANING AND MAINTENANCE
• Clean the appliance with a damp cloth. Never use harsh and abrasive cleaners,
scouring pad or steel wool, which damages the device.
• Never immerse the electrical device in water or any other liquid. The device is not
dishwasher proof.
GUARANTEE
• This product is guaranteed for 24 months granted. Your warranty is valid if the
product is used in accordance to the instructions and for the purpose for which
it was created. In addition, the original purchase (invoice, sales slip or receipt) is
to be submitted with the date of purchase, the name of the retailer and the item
number of the product.
• For the detailed warranty conditions, please refer to our service website:
www.service.tristar.eu
GUIDELINES FOR PROTECTION OF THE
ENVIRONMENT
This appliance should not be put into the domestic garbage at the
end of its durability, but must be offered at a central point for the
recycling of electric and electronic domestic appliances. This symbol
on the appliance, instruction manual and packaging puts your attention to this
important issue. The materials used in this appliance can be recycled. By recycling
of used domestic appliances you contribute an important push to the protection of
our environment. Ask your local authorities for information regarding the point of
recollection.
SUPPORT
You can find all available information and spare parts at service.tristar.eu!

7
1
7
13
14
15
17
18
16
612
511
410
39
28
Gebruiksaanwijzing NL
VEILIGHEIDSVOORSCHRIFTEN
Als de veiligheidsinstructies niet worden opgevolgd, kan de fabrikant niet
verantwoordelijk worden gesteld voor schade die daar eventueel het gevolg
van is.
UITROEPTEKEN - in een gelijkbenige driehoek wordt gebruikt om aan
te geven dat een specifiek onderdeel om veiligheidsredenen alleen
vervangen kan worden door het onderdeel dat in de documentatie
gespecificeerd is.
LICHTFLITS MET PIJLSYMBOOL - in een gelijkbenige driehoek wordt
bedoeld als waarschuwing voor de aanwezigheid van ongeïsoleerde
gevaarlijke voltage in de productbehuizing, die sterk genoeg is om een
gevaar te vormen voor mensen op een elektrische schok.
• De AC/DC-adapter en het apparaat mogen niet blootgesteld worden aan
water of spatten. Plaats geen met vloeistof gevulde voorwerpen, zoals vazen,
op het apparaat.
• De AC/DC-adapter van het apparaat mag niet worden belemmerd en moet
gemakkelijk toegankelijk zijn tijdens het beoogde gebruik.
• Om de voeding volledig uit te schakelen, moet de stekker van de AC/DC-
adapter uit het stopcontact worden verwijderd, omdat de AC/DC-adapter het
apparaat van stroom voorziet.
• Als het snoer beschadigd is, moet het worden vervangen door de fabrikant
zelf, de dealer of erkend technicus om brandgevaar te voorkomen.
Waarschuwing: Verwijder de klep (of achterkant) niet, om het risico op een
elektrische schok te reduceren. Er bevinden zich geen onderdelen binnenin,
die door de gebruiker onderhouden kunnen worden. Laat het onderhoud
over aan gekwalificeerd onderhoudspersoneel.
ONDERDELENBESCHRIJVING
Vooraanzicht
1. LCD-scherm
2. Standby / Functies
3. Band / Album
4. Wekker- / Tijdsinstellingen
5. Vol + / Alarm 1
6. Vol - / Alarm 2
7. USB-poort
8. Afspelen / Pauze
9. Stop
10. Modus
11. Overslaan +
12. Overslaan -
Bovenaanzicht
13. CD-klep
14. Sluimerstand
Achteraanzicht
15. Afstemknop
16. FM-Antenne
17. AC-stroomkabel
18. Aux-in

8
Gebruiksaanwijzing
VOOR HET EERSTE GEBRUIK
• Haal het apparaat en de accessoires uit de doos. Verwijder eventuele stickers,
beschermfolie of plastic van het apparaat.
• Plaats het apparaat altijd op een vlakke stabiele ondergrond en zorg voor
minimaal 10 cm. vrije ruimte rondom het apparaat. Dit apparaat is niet geschikt
voor inbouw of buitengebruik.
ENERGIEBRONNEN
AC-Stroom
U kunt het apparaat van stroom voorzien door de ontkoppelbare AC-stroomkabel in
de AC-ingang aan de achterzijde van het apparaat te steken en in het stopcontact.
Controleer of het benodigde voltage van het apparaat overeenkomt met het lokale
voltage. Verzeker u ervan dat de AC-stroomkabel volledig in het apparaat is gestoken.
Batterijstroom
Plaats 6 C-batterijen in het batterijvak. Verzeker u ervan dat de batterijen correct
zijn geplaatst om beschadiging van het apparaat te voorkomen. Verwijder altijd de
batterijen als u het apparaat een langere periode niet gebruikt, aangezien dit lekkage
van de batterijen kan veroorzaken en vervolgens uw apparaat beschadigt.
Opmerkingen:
• Gebruik batterijen van hetzelfde type. Gebruik nooit verschillende types batterijen
tegelijkertijd.
• Ontkoppel de AC-stroomkabel als u het apparaat met behulp van de batterijen gebruikt.
GEBRUIK
Basisfuncties
• Druk op de “ST / FUNC”-knop om het systeem in te schakelen, als deze in
standy-modus is. (de modus FM-radio als standaardmodus wanneer het systeem
ingeschakeld wordt.)
• Druk op de “ST / FUNC”-knop om het systeem om te schakelen naar de CD/MP3/
USB/AUX-IN modus.
• Druk de “ST / FUNC”-knop 3 seconden in om het systeem uit te schakelen.
(ongeacht in welke modus.)
Radio
• Druk op de “ST / FUNC”-knop om de “RADIO”-modus te kiezen.
• Druk op de “BAND / ALBUM”-knop om AM of FM te kiezen.
• Stel de radiofrequentie in op uw gewenste zender door de “TUNING”-knop te
gebruiken.
Voor beter ontvangst
• FM: Dit apparaat heeft een FM-antenne aan de achterkant. Verzeker u ervan dat de
antenne volledig uitgeschoven is.
• AM: Dit apparaat is uitgerust met een ingebouwde AM-antenne. Draai het
apparaat voor een beter ontvangst.
CD / MP3 afspelen
• Druk op de “ST / FUNC”-knop om de “CD”-modus te kiezen.
• Open het CD-deurtje en plaats de CD / MP3-Cd met het etiket naar boven in het
CD-compartiment.
• Sluit het CD-deurtje.
• De gerichte zoekopdracht is uitgevoerd als:
- In geval van CD’s - Het totaal aantal tracks is gelezen en verschijnt op het scherm.
- In geval van MP3-Cd’s - “MP3” verschijnt op het scherm.
• Het apparaat start automatisch vanaf het eerste nummer.
• Druk op de “VOL + /AL 1”- of “VOL - / AL 2”-knop om het volume aan te passen
naar het gewenste niveau.
• Druk nogmaals op de “PLAY / PAUSE”-knop als u tijdelijk het afspelen wilt
onderbreken.
• Druk op de “STOP”-knop wanneer u het afspelen wilt beëindigd.
Map kiezen
Druk op de“BAND / ALBUM”-knop om een map te kiezen. (de mapkeuzefunctie
kan enkel gebruikt worden wanneer het schije minimaal 2 directories / bestanden
heeft.)

9
Programmeren
• U kunt tot 20 nummers van een CD en 99 van een MP3-Cd programmeren in
afspeelvolgorde. Druk eerst op “STOP” voor gebruik.
• Druk op de “MODE”-knop, het scherm zal “P01” weergeven.
• Kies het gewenste nummer met behulp van de “SKIP + “- of “SKIP -”-knop. (u kunt
het gewenste album kiezen door op de “ALBUM”-knop te drukken).
• Druk nogmaals op de “MODE”-knop om het gewenste nummer in het
programmeringsgeheugen te zetten.
• Herhaal stap 2 en 3 om andere nummers aan het programmeringsgeheugen toe
te voegen.
• Als alle gewenste nummers geprogrammeerd zijn, drukt u op de “PLAY / PAUSE”-
knop om de nummers in de geprogrammeerde volgorde af te spelen.
• Druk twee keer op de “STOP”-knop om de geprogrammeerd afspeelweergave te
beëindigen.
Modus
Druk op de“MODE”-knop tijdens het afspelen van een CD / MP3-Cd. Met elke druk op
de knop verandert de modus-functie als volgt:
• Herhaal 1
• Herhaal album (*alleen mp3)
• Herhaal alles
• Willekeurig
• Normale afspeelweergave
Gebruik van USB
• Steek uw USB-apparaat in de USB-poort.
• Druk op de “FUNCTION”-knop om de “CD”-modus te kiezen.
• Indien er geen Cd in de Cd-speler zit, zal het USB-apparaat automatisch worden
gelezen en afgespeeld.
• Als er een Cd in de Cd-speler zit, zal de CD automatisch worden gelezen en afgespeeld,
• Houd de “PLAY / PAUSE”-knop een aantal seconden ingedrukt om op de USB-
modus over te schakelen, wanneer u een CD afspeelt.
• De weergave start automatisch bij het eerste nummer en het scherm geeft de
tekst “USB” weer.
• Druk op de “STOP”-knop wanneer het afspelen wilt beëindigen.
Programmeren
De programmeringmodus werkt hetzelfde als het programmeren van een CD / MP3-Cd.
Aux in
• Verbind een externe audiobron met het apparaat door het in de aux in-aansluiting
te steken.
• Druk op de powerknop om het apparaat in te schakelen.
• Gebruik de bedieningsknoppen op de externe audiobron om het afspelen van de
muziek te starten.
Tijdsinstelling
• Houd de “ST / FUNC”-knop ingedrukt om de eenheid in standby-modus te zetten.
• Houd de “SLEEP / TIME SET”-knop ingedrukt om in de tijdinstellingsmodus te
komen. Het scherm geeft “24U” weer en knippert.
• Pas de weergavevorm (12U / 24U) aan met behulp van de “SKIP +”- en “SKIP -”-knop.
• Druk de “SLEEP / TIME SET”-knop in om de tijdweergave te bevestigen. Het scherm
geeft “AM 12:00” weer als de 12-uurs tijdweergave is gekozen of “0:00” als de 24-
uurs tijdweergave is gekozen.
• Pas de uren aan door de “SKIP +”- of “SKIP -”-knop in te drukken en druk op de
“SLEEP / TIME SET”-knop om te bevestigen.
• Pas de minuten aan door de “SKIP +”- of “SKIP -”-knop in te drukken en druk op de
“SLEEP / TIME SET”-knop om te bevestigen.
• Opmerkingen: Omdat de tijd ingesteld wordt in de standby-modus, is het scherm
niet verlicht.
Alarminstelling
• Het alarm instellen na afronding tijdsinstelling.
• Houd de “ST / FUNC”-knop ingedrukt om het apparaat in standby-modus te
zetten.
• Druk op de “VOL + / AL 1”- of de “VOL - / AL 2”-knop om in de alarminstellingen
te komen.
• Pas de uren aan door de “SKIP +”- of “SKIP -”-knop in te drukken en druk op de
“VOL + / AL 1”- of de “VOL - / AL 2”-knop om te bevestigen.
• Pas de minuten aan door de “SKIP +”- of “SKIP -”-knop in te drukken en druk op de
“VOL + / AL 1”- of de “VOL - / AL 2”-knop om te bevestigen.
Gebruiksaanwijzing NL

10
Gebruiksaanwijzing
• Druk de “SKIP +”- of “SKIP -”-knop in om te kiezen voor
BUZZER
RADIO
CD
USB
• Druk op de “VOL + / AL 1”- of de “VOL - / AL 2”-knop om te bevestigen.
• Pas het volume van de wekker aan door de “SKIP +”- of “SKIP -”-knop in te drukken
en druk op de “VOL + / AL 1”- of de “VOL - / AL 2”-knop om te bevestigen.
• Na het instellen van het volume van de wekker, scant het scherm uw instellingen
één keer.
• Het scherm geeft een “1” of een “2” weer. De alarminstelling is nu afgerond.
• Druk op de “VOL + / AL 1”- of de “VOL - / AL 2”-knop om het alarm aan of uit te zetten.
• Opmerking: Als u de alarminstellingen wilt wijzigen, dient u de “VOL + / AL 1”-
of de “VOL - / AL 2”-knop 3 seconden ingedrukt te houden om opnieuw in de
alarminstellingen te komen.
Sluimeren
Wanneer het alarm afgaat kunt u op de“SNOOZE”-knop drukken om het alarm nog
eens 9 minuten uit te stellen.
Slapen
• Houd de “SLEEP / TIME SET”-knop in de Cd-modus 3 seconden ingedrukt. Er
verschijnt “SLEEP 90” op het scherm. Dit houdt in dat het apparaat na 90 minuten
automatisch overschakelt naar de standby-modus.
• Druk nogmaals op de “SLEEP”-knop om de uitschakeltijd te kiezen van 90, 80, 70,
60, 50, 40, 30, 20 en 10 minuten.
• Druk op de “SLEEP”-knop en kies “SLEEP 00” om de slaapfunctie uit te schakelen.
REINIGING EN ONDERHOUD
• Reinig het apparaat met een vochtige doek. Gebruik nooit agressieve en schurende
schoonmaakmiddelen, een schuurspons of staalwol; dit beschadigt het apparaat.
• Dompel het apparaat niet onder in water of in een andere vloeistof en plaats het
apparaat niet in de vaatwasmachine om te reinigen.
GARANTIEVOORWAARDEN
• Op dit product wordt een garantie van 24 maanden verleend. Uw garantie is geldig
wanneer het product is gebruikt in overeenstemming met de gebruiksaanwijzing
en voor het doel waarvoor het gemaakt is. Tevens dient de originele aankoopbon
(factuur, kassabon of kwitantie) overlegd te worden met daarop de aankoopdatum,
de naam van de retailer en het artikelnummer van het product.
• Voor uitgebreide garantievoorwaarden verwijzen wij u naar onze servicewebsite:
www.service.tristar.eu
AANWIJZINGEN TER BESCHERMING VAN HET MILIEU
Dit product mag aan het einde van zijn levensduur niet bij het normale
huisafval worden gedeponeerd, maar dient bij een speciaal inzamel-
punt voor het hergebruik van elektrische en elektronische apparaten te
worden aangeboden. Het symbool op het artikel, de gebruiksaanwijzing
en de verpakking attendeert u hierop. De gebruikte grondstoffen zijn geschikt voor
hergebruik. Met het hergebruik van gebruikte apparaten of grondstoffen levert u
een belangrijke bijdrage aan de bescherming van ons milieu. Informeer bij uw lokale
overheid naar het bedoelde inzamelpunt.
ONDERSTEUNING
Vind alle beschikbare informatie en onderdelen op service.tristar.eu!

11
Mode d’emploi
1
7
13
14
15
17
18
16
612
511
410
39
28
FR
INSTRUCTIONS DE SÉCURITÉ IMPORTANTES
Le fabricant ne sera pas tenu responsable de tous dommages si les consignes de
sécurité ne sont pas respectées.
LE POINT D’EXCLAMATION dans un triangle équilatéral est utilisé pour
indiquer qu’un composant spécifique peut uniquement être remplacé
par le composant spécifié dans cette documentation pour une raison de
sécurité.
L’ÉCLAIR AVEC SYMBOLE DE FLÈCHE dans un triangle équilatéral est
destiné à avertir l’utilisateur de la présence de tension dangereuse
non-isolée à l’intérieur du boîtier du produit qui peut être de magnitude
suffisante à constituer un risque de choc électrique aux personnes.
• L’adaptateur CA/CC et l’appareil ne doivent pas être exposés à une fuite ou à
des éclaboussures. Aucun objet rempli de liquide, tel qu’un vase, ne doit être
placé sur l’appareil.
• L’adaptateur CA/CC de l’appareil au secteur ne doit pas être bloqué et doit
être facilement accessible pendant son utilisation prévue.
• Pour débrancher complètement l’alimentation, débranchez l’adaptateur CA/
CC du secteur, car l’adaptateur sert à débrancher l’appareil.
• Si le cordon d’alimentation est endommagé, il doit être remplacé par le
fabricant, son service après-vente ou des techniciens similairement agréés
afin d’éviter un danger.
Avertissement : Afin de réduire le risque de choc électrique, ne pas retirer le
cache (ou l’arrière) Aucune pièce à l’intérieur n’est réparable par l’utilisateur
Confiez l’entretien à un personnel technique qualifié.
DESCRIPTION DES PIÈCES
Vue avant
1. Écran LCD
2. Veille/Fonction
3. Bande/Album
4. Veille/Réglage de l’heure
5. Vol +/Alarme 1
6. Vol -/Alarme 2
7. Fente USB
8. Lecture/Pause
9. Stop
10. Mode
11. Avancer +
12. Reculer -
Vue du haut
13. Porte de CD
14. Rappel d’alarme
Vue arrière
15. Contrôle de syntonisation
16. Antenne FM
17. Cordon d’alimentation CA
18. Prise Aux-in (Entrée auxiliaire)

12
Mode d’emploi
AVANT LA PREMIÈRE UTILISATION
• Retirer l’appareil et les accessoires du carton. Retirer les autocollants, le film ou le
plastique protecteur de l’appareil.
• Posez l’appareil sur une surface plate et stable en laissant 10cm d’espace libre de
chaque côté. Cet appareil ne convient pas à une installation intégrée ou en extérieur.
SOURCES D’ALIMENTATION
Alimentation CA
Vous pouvez alimenter votre système portable en branchant le cordon CA amovible
dans la prise CA à l’arrière de l’appareil et dans une prise électrique murale CA.
Vérifiez que la tension nominale de votre appareil correspond à la tension du secteur.
Assurez-vous que le cordon d’alimentation CA est pleinement inséré dans l’appareil.
Alimentation par pile
Insérez 6 piles de taille“C”dans le compartiment à piles. Assurez-vous que les piles
sont insérées correctement pour éviter d’endommager l’appareil. Retirez toujours les
piles lorsque l’appareil n’est pas utilisé pendant de longues périodes, des fuites de
piles pourraient se produire et endommager l’appareil.
Notes:
• Utilisez des piles du même type. Ne mélangez jamais des piles de type différent.
• Lorsque vous utilisez l’appareil avec des piles, débranchez le cordon
d’alimentation CA.
UTILISATION
Fonction de base
• Appuyez sur le bouton “ST/FONC” en mode de veille pour mettre le système en marche.
(le mode radio FM est le mode par défaut lorsque le système est mis en marche).
• Appuyez sur le bouton “ST/FONC” pour basculer entre les modes CD/MP3/USB/AUX-IN.
• Maintenez le bouton “ST/FONC” enfoncé pendant 3 secondes pour éteindre le
système. (Quel que soit le mode)
Radio
• Appuyez sur le bouton “ST/FONC” pour sélectionner le mode “RADIO”.
• Appuyez sur le bouton “BANDE/ALBUM” pour sélectionner AM ou FM.
• Ajustez la fréquence radio jusqu’à la station désirée en utilisant le contrôle de
“SYNTONISATION”.
Pour une meilleure réception
• FM: Cet appareil est muni d’une antenne FM située à l’arrière du boîtier. Assurez-
vous que cette antenne est pleinement déployée.
• AM: Cet appareil est muni d’une antenne AM intégrée. Faites pivoter l’appareil
pour obtenir une meilleure réception.
Fonctionnement CD/MP3
• Appuyez sur le bouton “ST/FONC” pour sélectionner le mode “CD”.
• Ouvrez la porte à CD et placez un disque CD/MP3, la face imprimée dirigée vers le
haut, dans le compartiment à CD.
• Fermez la porte à CD.
• Une recherche centralisée est effectuée lorsque:
- Pour les disques CD - Le nombre total de pistes est lu et il apparait sur l’écran.
- Pour les disques MP3 - “MP3” apparaît sur l’écran.
• La lecture commencera automatiquement à la première piste.
• Appuyez sur le bouton “VOL +/AL1” ou “VOL -/AL 2” pour ajuster le volume au
niveau voulu.
• Appuyez à nouveau sur le bouton “LECTURE/PAUSE” lorsque vous voulez
interrompre temporairement la lecture.
• Appuyez sur le bouton “STOP” une fois que la lecture est finie.
Sélection de dossier
Appuyez sur le bouton“BANDE/ALBUM”pour sélectionner un dossier. (La fonction de
sélection de dossier peut uniquement fonctionner si le disque est enregistré avec au
moins 2 répertoires/dossiers).
Programme
• Jusqu’à 20 pistes de disque CD, 99 pistes de disque MP3 peuvent être
programmées pour la lecture du disque dans n’importe quel ordre. N’oubliez pas

13
d’appuyer sur le bouton “STOP” avant utilisation.
• Appuyez sur le bouton “MODE”, “P01” apparaitra sur l’écran.
• Sélectionnez la piste voulue en utilisant les boutons “AVANCER +” ou “RECULER -”.
(Vous pouvez sélectionner l’album voulu en appuyant sur le bouton “ALBUM”).
• Appuyez à nouveau sur le bouton “MODE” pour confirmer la piste dans la
mémoire de programmation.
• Recommencez les étapes 2 et 3 pour entrer des pistes supplémentaires dans la
mémoire de programmation.
• Lorsque toutes les pistes voulues ont été programmées, appuyez sur le bouton
“LECTURE/PAUSE” pour lire le disque dans l’ordre que vous avez programmé.
• Appuyez deux fois sur le bouton “STOP” pour terminer la lecture du programme.
Mode
Appuyez sur le bouton “MODE” pendant la lecture d’un disque CD/MP3, chaque
appui modifie la fonction de lecture comme suit:
• Répéter 1
• Répéter l’album (*mp3 uniquement)
• Répéter tout
• Aléatoire
• Lecture normale
Fonctionnement USB
• Branchez votre appareil USB à la prise.
• Appuyez sur le bouton “FONCTION” pour sélectionner le mode “CD”.
• S’il n’y a pas de disque dans le compartiment à disque, la lecture de votre appareil
USB commencera automatiquement.
• S’il y a un disque dans le compartiment à disque, la lecture de votre DISQUE
commencera automatiquement.
• Maintenez le bouton “LECTURE/PAUSE” enfoncé pendant quelques secondes pour
passer en mode USB lors de la lecture d’un CD.
• La lecture commencera automatiquement à partir de la première piste et l’écran
affichera “USB”.
• Appuyez sur le bouton “STOP” lorsque vous avez terminé.
Mode programme
Le mode programme fonctionne de la même manière que le mode de programme
de CD/MP3.
Entrée auxiliaire
• Branchez une source audio externe à l’appareil en le branchant dans la prise ‘Aux in’.
• Appuyez sur le bouton ‘Alimentation’ pour allumer l’appareil.
• Utilisez les commandes de la source audio externe pour commencer la lecture de
la musique.
Réglage de l’horloge
• Maintenez le bouton “ST/FONC” enfoncé pour mettre l’appareil en mode de veille.
• Maintenez le bouton “VEILLE/RÉGLAGE D’HORLOGE” enfoncé pour passer en
mode de réglage de l’horloge. L’écran affichera “24H” et clignotera.
• Ajuster le format de l’heure (12 H/24 H) en appuyant sur le bouton “AVANCER +”
ou “RECULER -”.
• Appuyez sur le bouton “VEILLE/RÉGLAGE D’HORLOGE” pour confirmer le format
de l’heure, l’écran affichera “AM 12:00” si le format de l’heure est réglé à 12H et
“00:00” si le format est 24H.
• Ajustez l’heure en appuyant sur les boutons “AVANCER +” ou “RECULER -”,
appuyez sur le bouton “VEILLE/RÉGLAGE D’HORLOGE” pour confirmer.
• Ajustez les minutes en appuyant sur les boutons “AVANCER +” ou “RECULER -”,
appuyez sur le bouton “VEILLE/RÉGLAGE D’HORLOGE” pour confirmer.
• Notes: Parce que le réglage d’horloge est en mode de veille, l’affichage de
l’alarme est pâle.
Réglage de l’alarme
• Le réglage de l’alarme doit être effectué après le réglage de l’horloge.
• Maintenez le bouton “ST/FONC” enfoncé pour mettre l’appareil en mode de veille.
• Appuyez sur le bouton “VOL +/AL 1” ou “VOL -/AL 2” pour entrer en mode de
réglage d’alarme.
• Ajustez l’heure en appuyant sur les boutons “AVANCER +” ou “RECULER -”,
appuyez sur le bouton “VOL +/AL 1” ou “VOL -/AL 2” pour confirmer.
• Ajustez les minutes en appuyant sur les boutons “AVANCER +” ou “RECULER -”,
appuyez sur le bouton “VOL +/AL 1” ou “VOL -/AL 2” pour confirmer.
Mode d’emploi FR

14
Mode d’emploi
• Appuyez sur le bouton “AVANCER +” ou “RECULER -” pour sélectionner
RONFLEUR
RADIO
CD
USB
• Appuyez sur le bouton “VOL +/AL 1” ou “VOL -/AL 2” pour confirmer.
• Ajustez l’alarme en appuyant sur les boutons “AVANCER +” ou “RECULER -”,
appuyez sur le bouton “VOL +/AL 1” ou “VOL -/AL 2” pour confirmer.
• Après avoir confirmé le volume d’alarme, l’écran montrera brièvement tous vos réglages.
• L’écran montrera “1” ou “2”. Le réglage d’alarme est à présent terminé.
• Appuyez sur le bouton “VOL +/AL 1” ou “VOL -/AL 2” pour activer/désactiver la
fonction alarme.
• Remarque: Si vous avez besoin de réinitialiser l’alarme, maintenez le bouton “VOL
+/AL 1” ou “VOL -/AL 2” enfoncé pendant 3 secondes pour revenir au mode de
configuration d’alarme.
Rappel d’alarme
Lorsque l’alarme est déclenchée. Vous pouvez appuyer sur le bouton “RAPPEL
D’ALARME” pour retarder l’alarmer pendant 9 minutes de plus.
Veille
• En mode CD, maintenez le bouton “VEILLE/RÉGLAGE D’HORLOGE” enfoncé
pendant 3 secondes, l’écran affichera “VEILLE 90”. Cela signifie que, après 90
minutes, l’appareil se mettra automatiquement en mode de veille.
• Appuyez à nouveau sur le bouton “VEILLE” pour sélectionner la période de
fonctionnement avant l’arrêt automatique, entre 90, 80, 70, 60, 50, 40, 30, 20, 10
minutes.
• Appuyez plusieurs fois sur le bouton “VEILLE” jusqu’à ce que “VEILLE 00”
apparaisse, afin de supprimer la fonction veille.
NETTOYAGE ET ENTRETIEN
• Nettoyez l’appareil avec un chiffon humide. N’utilisez jamais de nettoyants forts et
abrasifs, de tampon à récurer ni de paille de fer, car cela endommagerait l’appareil.
• N’immergez jamais l’appareil dans l’eau ni aucun autre liquide. L’appareil ne va pas
au lave-vaisselle.
GARANTIE
• Ce produit est garanti pour une période de 24 mois. Votre garantie est valable si le
produit est utilisé selon les instructions et pour l’usage auquel il est destiné. De plus,
la preuve d’achat d’origine (facture, reçu ou ticket de caisse) doit être présentée,
montrant la date d’achat, le nom du détaillant et le numéro d’article du produit.
• Pour connaître les conditions de garantie détaillées, veuillez consulter notre site
Internet de service: www.service.tristar.eu
DIRECTIVES POUR LA PROTECTION DE
L’ENVIRONNEMENT
Cet appareil ne doit pas être jeté aux ordures ménagères à la fin de sa
durée de vie, mais doit être rendu à un centre de recyclage d’appareils
ménagers électriques et électroniques. Ce symbole sur l’appareil,
La notice d’emploi et l’emballage attirent votre attention sur ce sujet important.
Composants utilisés dans cet appareil sont recyclables. En recyclant les appareils
ménagers. Usagés, vous contribuez à un apport important à la protection de notre.
Environnement. Adressez vous aux autorités locales pour des renseignements con-
cernant le centre de Recyclage.
SUPPORT
Toutes les informations et les pièces détachées sont disponibles sur service.tristar.eu !

15
1
7
13
14
15
17
18
16
612
511
410
39
28
Bedienungsanleitung DE
WICHTIGE SICHERHEITSVORKEHRUNGEN
Beim Ignorieren der Sicherheitshinweise kann der Hersteller nicht für Schäden
haftbar gemacht werden.
Das AUSRUFUNGSZEICHEN im gleichseitigen Dreieck weist darauf
hin, dass bestimmte Komponenten aus Sicherheitsgründen nur durch
Komponenten ersetzt werden dürfen, wie in der Dokumentation
spezifiziert.
Der BLITZ im gleichseitigen Dreieck weist auf gefährliche Hochspannung
im Gerät hin, die zu Stromschlag führen kann.
• Das AC/DC Netzteil und das Gerät dürfen keinen Tropfen oder Spritzern
ausgesetzt werden; stellen Sie keine mit Flüssigkeiten gefüllten Gegenstände
wie z. B. Vasen auf das Gerät.
• Das AC/DC Netzteil darf nicht blockiert werden und sollte während der
bestimmungsgemäßen Verwendung leicht zugänglich sein.
• Um das AC/DC Netzteil komplett von der Stromversorgung zu trennen, sollte
der Netzstecker gezogen werden, weil das abgeklemmte Gerät das AC/DC
Netzteil des Geräts ist.
• Wenn das Stromkabel beschädigt ist, muss es vom Hersteller, Kundendienst
oder ähnlich qualifizierten Personen ersetzt werden, um Gefahren zu
vermeiden.
Warnung: Zur Vermeidung von Stromschlag öffnen Sie nicht das
Gerätegehäuse. Es befinden sich keine vom Verbraucher wartbaren
Komponenten im Gerät. Wenden Sie sich mit Reparaturen stets an einen
autorisierten Kundendienst.
TEILEBESCHREIBUNG
Frontansicht
1. LCD-Display
2. Stand-by /
Funktionsumschalter
3. Bandwahl / Album
4. Sleeptimer / Zeit einstellen
5. Vol + / Alarm 1
6. Vol - / Alarm 2
7. USB-Port
8. Wiedergabe / Pause
9. Stopp
10. Modus
11. Skip +
12. Skip -
Draufsicht
13. CD-Laufwerk
14. Schlummertaste
Rückseite
15. Senderwahl
16. UKW-Antenne
17. Netzkabel
18. AUX-Eingang

16
Bedienungsanleitung
VOR DER ERSTEN VERWENDUNG
• Nehmen Sie das Gerät und das Zubehör aus der Kiste. Entfernen Sie die Aufkleber,
die Schutzfolie oder Plastik vom Gerät.
• Das Gerät immer auf eine ebene und feste Fläche stellen und einen Abstand von
mindestens 10 cm um das Gerät einhalten. Dieses Gerät ist nicht für den Anschluss
oder die Verwendung in einem Schrank oder im Freien geeignet.
SPANNUNGSVERSORGUNG
Netzbetrieb
Sie können das System über das abnehmbare Netzkabel an einer Steckdose an-
schließen. Vergewissern Sie sich, dass die Netzspannung mit den Angaben auf dem
Typenschild übereinstimmt. Schließen Sie das Netzkabel ordnungsgemäß an.
Batteriebetrieb
Setzen Sie 6 C-Batterien im Batteriefach ein. Achten Sie auf die Polarität. Entnehmen
Sie die Batterien, wenn das Gerät für längere Zeit nicht benutzt wird, um ein Aus-
laufen der Batterien und Schäden am Gerät zu vermeiden.
Hinweise:
• Benutzen Sie stets gleiche Batterietypen. Mischen Sie Batterietypen nicht.
• Bei Batteriebetrieb ziehen Sie bitte das Netzkabel vom Gerät ab.
ANWENDUNG
Allgemeine Funktionen
• Drücken Sie im Stand-by-Modus zum Einschalten des Geräts „ST / FUNC“ (das
Gerät begibt sich beim Einschalten automatisch in den UKW-Radiomodus).
• Drücken Sie die “ST / FUNC”-Taste, um das System in den CD/MP3/USB/AUX-IN-
Modus zu schalten.
• Halten Sie „ST / FUNC“ für 3 Sekunden gedrückt, um das System auszuschalten (in
jedem Modus).
Radio
• Drücken Sie „ST / FUNC“, um in den Radiomodus umzuschalten.
• Drücken Sie „BAND / ALBUM“ zur Auswahl von AM (Mittelwelle) oder FM (UKW).
• Stellen Sie die Frequenz des gewünschten Senders mit „TUNING“ ein.
Für besseren Empfang
• UKW: Ziehen Sie die UKW-Antenne für besten Empfang vollständig aus.
• MW: Das Gerät hat eine eingebaute MW-Antenne. Richten Sie das Gerät für besten
Empfang aus.
CD / MP3
• Drücken Sie „ST / FUNC“, um das Gerät in den CD-Modus umzuschalten.
• Öffnen Sie das CD-Laufwerk und legen Sie eine CD / MP3-Disc mit dem Aufdruck
nach oben ein.
• Schließen Sie das CD-Laufwerk.
• Die Disc wird gelesen:
- Für CDs – Die Gesamtzahl der Tracks wird im Display angezeigt.
- Für MP3-Discs – „MP3“ wird im Display angezeigt.
• Die Wiedergabe startet automatisch ab dem ersten Track.
• Drücken Sie „VOL + / AL1“ oder „VOL - / AL 2“, um die Lautstärke einzustellen.
• Drücken Sie „PLAY / PAUSE“, um die Wiedergabe zu unterbrechen.
• Drücken Sie „STOP“, um die Wiedergabe zu beenden.
Ordner wählen
Drücken Sie„BAND / ALBUM“, um einen Ordner zu wählen (nur für Discs mit wenig-
stens 2 Verzeichnissen/Dateien).
Programmwiedergabe
• Bis zu 20 Tracks einer CD oder 99 Tracks einer MP3-Disc können in beliebiger
Reihenfolge programmiert werden. Drücken Sie immer erst „STOP“.
• Drücken Sie „MODE“, „P01“ wird angezeigt.
• Wählen Sie den gewünschten Track mit „SKIP +“ oder „SKIP –„ (ein gewünschtes
Album wählen Sie mit der Taste „ALBUM“).
• Drücken Sie erneut „MODE“, um den Track zu speichern.
• Wiederholen Sie die Schritte 2 und 3 zur Eingabe weiterer Tracks in den Speicher.

17
• Nach der Programmierung aller Tracks drücken Sie „PLAY / PAUSE“, um die
Musiktitel in der programmierten Reihenfolge abzuspielen.
• Drücken Sie zweimal „STOP“, um die Programmwiedergabe zu beenden.
Modus
Drücken Sie während der CD / MP3 Wiedergabe„MODE“, mit jedem Tastendruck wird
der Wiedergabemodus wie folgt umgeschaltet:
• 1 wiederholen
• Album wiederholen (nur *mp3)
• Alle wiederholen
• Zufallswiedergabe
• Normalwiedergabe
USB
• Schließen Sie Ihr externes Gerät am USB-Port an.
• Drücken Sie „ST / FUNC“, um das Gerät in den CD-Modus umzuschalten.
• Befindet sich keine Disc im Laufwerk, so wird die Wiedergabe des USB-Geräts
automatisch gestartet.
• Befindet sich eine Disc im Laufwerk, so wird sie gelesen und wiedergegeben.
• Halten Sie „PLAY / PAUSE“ für einige Sekunden zum Umschalten in den USB-
Modus gedrückt.
• Die Wiedergabe startet automatisch ab dem ersten Track, im Display wird „USB“
angezeigt.
• Drücken Sie „STOP“, um die Wiedergabe zu beenden.
Programmwiedergabe
Der Programmmodus entspricht der Programmwiedergabe für CD / MP3.
Aux-Eingang
• Verbinden Sie eine externe Audioquelle mit dem Gerät, indem Sie es am Aux-
Eingang einstecken.
• Drücken Sie die Einschalttaste, um das Gerät einzuschalten.
• Verwenden Sie die nativen Bedienelemente der externen Audioquelle, um die
Musikwiedergabe zu starten.
Uhrzeit einstellen
• Halten Sie „ST / FUNC“ gedrückt, um das Gerät auszuschalten (Stand-by-Modus).
• Halten Sie „SLEEP / TIME SET“ gedrückt, um den Einstellmodus für die Uhr
aufzurufen. Im Display blinkt „24H“.
• Stellen Sie das Zeitformat (12H / 24H) mit „SKIP +“ oder „SKIP –“ ein.
• Drücken Sie „SLEEP / TIME SET“ zur Bestätigung des Zeitformats, im Display wird
bei Auswahl von 12H „AM 12:00“ oder bei Auswahl von 24H „0:00“ angezeigt.
• Stellen Sie die Stunden der Uhrzeit mit „SKIP +“ oder „SKIP –“ ein und drücken Sie
„SLEEP / TIME SET“ zur Bestätigung.
• Stellen Sie die Minuten mit „SKIP +“ oder „SKIP –“ ein und drücken Sie „SLEEP /
TIME SET“ zur Bestätigung.
• Hinweis: Die Uhrzeit wird im Stand-by-Modus eingestellt, daher ist das Display
etwas dunkel.
Alarm einstellen
• Der Alarm wird nach dem Einstellen der Uhrzeit eingestellt.
• Halten Sie „ST / FUNC“ gedrückt, um das Gerät auszuschalten (Stand-by-Modus).
• Drücken Sie „VOL + / AL 1“ oder „VOL - / AL 2“, um den Einstellmodus für den
Alarm aufzurufen.
• Stellen Sie die Stunden des Alarms mit „SKIP +“ oder „SKIP –“ ein und drücken Sie
„VOL + / AL 1“ oder „VOL - / AL 2“ zur Bestätigung.
• Stellen Sie die Minuten mit „SKIP +“ oder „SKIP –“ ein und drücken Sie „VOL + / AL
1“ oder „VOL - / AL 2“ zur Bestätigung.
• Drücken Sie „SKIP +“ oder „SKIP –“ zur Auswahl von
BUZZ (SUMMER)
RADIO
CD
USB
• Drücken Sie „VOL + / AL 1“ oder „VOL - / AL 2“ zur Bestätigung.
• Stellen Sie die Alarmlautstärke mit „SKIP +“ oder „SKIP –“ ein und drücken Sie „VOL
+ / AL 1“ oder „VOL - / AL 2“ zur Bestätigung.
• Nach der Bestätigung der Alarmlautstärke zeigt das Display Ihre Einstellungen
automatisch nacheinander einmal an.
Bedienungsanleitung DE

18
Bedienungsanleitung
• Im Display wird „1“ oder „2“ angezeigt; der Alarm ist nun eingestellt.
• Drücken Sie „VOL + / AL 1“ oder „VOL - / AL 2“ zum Ein- oder Ausschalten der
Alarmfunktion.
• Hinweis: Zum Zurückstellen des Alarms halten Sie „VOL + / AL 1“ oder „VOL - / AL 2“
für 3 Sekunden gedrückt; Sie kehren nun in den Einstellmodus für den Alarm zurück.
Weiterschlummern
Ertönt der Alarm, so drücken Sie„SNOOZE“, um noch einmal für 9 Minuten weiter zu
schlummern.
Sleeptimer
• Im CD-Modus halten Sie „SLEEP / TIME SET“ für 3 Sekunden gedrückt, im Display
wird „SLEEP 90“ angezeigt. Das bedeutet, dass sich das Gerät nach 90 Minuten
automatisch ausschaltet (Stand-by-Modus).
• Drücken Sie erneut „SLEEP“, um die Ausschaltzeit auf 90, 80, 70, 60, 50, 40, 30, 20,
10 Minuten einzustellen.
• Drücken Sie erneut „SLEEP“, um mit der Anzeige von „SLEEP 00“ die
Ausschaltfunktion zu deaktivieren.
REINIGUNG UND WARTUNG
• Reinigen Sie das Gerät mit einem feuchten Tuch. Verwenden Sie niemals
scharfe oder scheuernde Reiniger, Topfreiniger oder Stahlwolle, die das Geräte
beschädigen würden.
• Tauchen Sie das Gerät niemals in Wasser oder andere Flüssigkeiten. Das Gerät in
nicht spülmaschinenfest.
GARANTIE
• Dieses Produkt wird eine Garantie für 24 Monate gewährt. Ihre Garantie gilt, wenn
das Gerät entsprechend der Bedienungsanleitung für seinen Bestimmungszweck
benutzt wird. Im Garantiefall reichen Sie bitte die Kaufquittung ein, aus welcher
das Kaufdatum, der Name des Fachhändlers und die Gerätenummer hervorgehen
müssen.
• Detaillierte Garantiebedingungen finden Sie auf unserer Website: www.service.tristar.eu
UMWELTSCHUTZRICHTLINIEN
Dieses Gerät darf am Ende seiner Lebensdauer nicht im Hausmüll
entsorgt werden, sondern muss an einer zentralen Sammelstelle für das
Recycling von elektrischen und elektronischen Haushaltsgeräten ab-
gegeben werden. Dieses Symbol auf dem Gerät, der Bedienungsanwei-
sung und der Verpackung lenkt Ihre Aufmerksamkeit auf diesen wichtigen Fakt. Das
bei diesem Gerät verwendete Material kann recycled werden. Durch das Recyclen
gebrauchter Haushaltgeräte leisten Sie einen wichtigen Beitrag zum Umweltschutz.
Fragen Sie Ihre örtliche Behörde nach Informationen bezüglich einer Sammelstelle.
SUPPORT
Sie finden alle erhältlichen Informationen und Ersatzteile auf service.tristar.eu

19
1
7
13
14
15
17
18
16
612
511
410
39
28
Manual de instrucciones ES
PRECAUCIONES IMPORTANTES
Si ignora las instrucciones de seguridad, eximirá al fabricante de toda
responsabilidad por posibles daños.
SIGNO DE EXCLAMACION - dentro de un triángulo equilátero, se utiliza
para indicar que un componente específico debe sustituirse únicamente
por el componente indicado en la documentación por razones de
seguridad.
SÍMBOLO DEL RAYO CON UNA FLECHA - dentro de un triángulo
equilátero, indica al usuario que la caja del sistema puede contener una
tensión sin aislar de magnitud suficiente para constituir un riesgo de
descarga eléctrica.
• El adaptador CA/CC y la unidad principal deberán protegerse de goteos y
salpicaduras; no coloque recipientes con líquidos, como jarrones, sobre el aparato.
• El adaptador CA/CC del aparato no debería obstruirse, sino ser fácil de
acceder, durante su uso.
• Para desconectar completamente la entrada de electricidad, el adaptador CA/
CC del aparato debe estar desconectado de la toma de pared y también del
propio aparato.
• Si el cable de alimentación está dañado, para evitar peligros, corresponde al
fabricante, a su representante o a una persona de cualificación similar su reemplazo.
Advertencia: Para reducir el riesgo de descarga eléctrica, no retire el armazón
(o tapa). No existen partes modificables por el usuario en el interior. Solicite
servicio técnico del personal cualificado.
DESCRIPCIÓN DE LAS PIEZAS
Vista frontal
1. Pantalla LCD
2. Standby / Function (Modo en
espera / Función)
3. Band / Album (Banda / Álbum)
4. Sleep / Time set (Reposo /
Ajustar hora)
5. Vol + / Alarm 1 (Vol + /
Alarma 1)
6. Vol - / Alarm 2 (Vol - / Alarma 2)
7. Ranura USB
8. Play / Pause (Reproducir / Pausa)
9. Stop (Detener)
10. Mode (Modo)
11. Skip + (Saltar +)
12. Skip - (Saltar -)
Vista superior
13. Puerta CD
14. Snooze (Repetición de alarma)
Vista trasera
15. Tuning (Sintonizador)
16. Antena FM
17. Cable corriente CA
18. Conector Aux-in

20
Manual de instrucciones
ANTES DEL PRIMER USO
• Extraiga el aparato y los accesoriosdelacaja.Retirelas pegatinas,el envoltorio de
protecciónoel plásticodeldispositivo.
• Coloque el aparato sobre una superficie plana estable y asegúrese de tener
un mínimo de 10 cm de espacio libre alrededor del mismo. Este aparato no es
apropiado para ser instalado en un armario o para el uso en exteriores.
FUENTES DE ALIMENTACIÓN
Corriente alterna
Puede alimentar su sistema portátil conectando el cable de CA desmontable en la
toma de CA a la parte posterior de la unidad y al enchufe de CA. Compruebe que la
tensión nominal de su dispositivo coincide con la tensión local. Asegúrese de que el
cable de CA está totalmente insertado en el dispositivo.
Pilas
Inserte 6 pilas de tamaño“C”en el compartimento de las pilas. Asegúrese de que in-
serta las pilas correctamente para evitar dañar el aparato. Extraiga siempre las pilas si
no va a utilizar el aparato durante un largo período de tiempo, ya que esto provocaría
fugas en las pilas y, por consiguiente, se dañaría el aparato.
Notas:
• Utilice pilas del mismo tipo. No utilice nunca diferentes tipos de pilas juntas.
• Al utilizar el aparato con pilas, desconecte el cable de CA.
USO
Función básica
• Pulse el botón “ST / FUNC” en modo en espera para conectar el sistema. (Modo
radio FM por defecto al conectar el sistema).
• Presione el botón “ST / FUNC” para cambiar el sistema a modo CD/MP3/USB/
ENTRADA AUX.
• Mantenga pulsado el botón “ST / FUNC” durante 3 segundos para apagar el
sistema. (No importa el modo).
Radio
• Pulse el botón “ST / FUNC” para seleccionar el modo “RADIO”.
• Pulse el botón “BAND / ALBUM” para seleccionar AM o FM.
• Ajuste la radiofrecuencia hasta la emisora deseada mediante el sintonizador “TUNING”.
Para una mejor recepción
• FM: Este dispositivo cuenta con una antena FM ubicada en el compartimento
trasero. Asegúrese de que la antena está totalmente extendida.
• AM: Este dispositivo está equipado con una antena AM integrada. Gire el
dispositivo para obtener una mejor recepción.
Funcionamiento CD / MP3
• Pulse el botón “ST / FUNC” para seleccionar el modo “CD”.
• Abra la puerta del CD y coloque un disco CD / MP3 con la etiqueta hacia arriba en
el compartimento de CD.
Cierre la puerta del CD.
• Se realiza una búsqueda cuando:
- Para discos CD - Se lee el número total de pistas y aparece en la pantalla.
- Para discos MP3 - Aparece “”MP3”” en la pantalla.”
• Comenzará automáticamente desde la primera pista.
• Pulse el botón “VOL + / AL1” o “VOL - / AL 2” para ajustar el volumen al nivel deseado.
• Pulse el botón “PLAY / PAUSE” de nuevo cuando quiera detener la reproducción
temporalmente.
• Pulse el botón “STOP” cuando termine.
Seleccionar carpeta
Pulse el botón“BAND / ALBUM”para seleccionar una carpeta. (La función de selec-
cionar carpeta solo funciona si el disco almacena al menos 2 directorios / archivos.)
Programar
• Es posible programar hasta 20 pistas de un CD y 99 pistas de un disco MP3 para
reproducirlas en cualquier orden. Asegúrese de que pulsa el botón “STOP” previamente.
• Pulse el botón “MODE”, en la pantalla aparecerá “P01”.
• Seleccione la pista deseado con el botón “SKIP +” o “SKIP -”. (Puede seleccionar un
álbum pulsando el botón “ALBUM”).
This manual suits for next models
1
Table of contents
Languages:
Other AudioSonic Stereo Receiver manuals