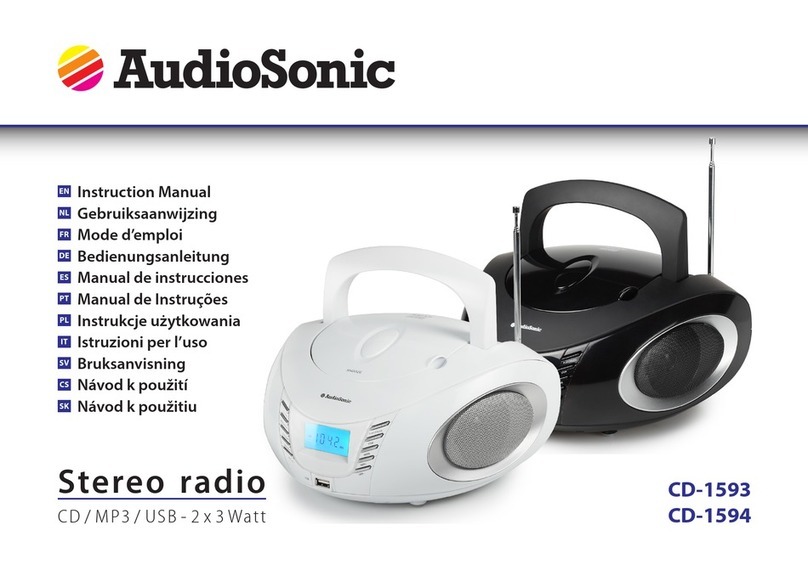
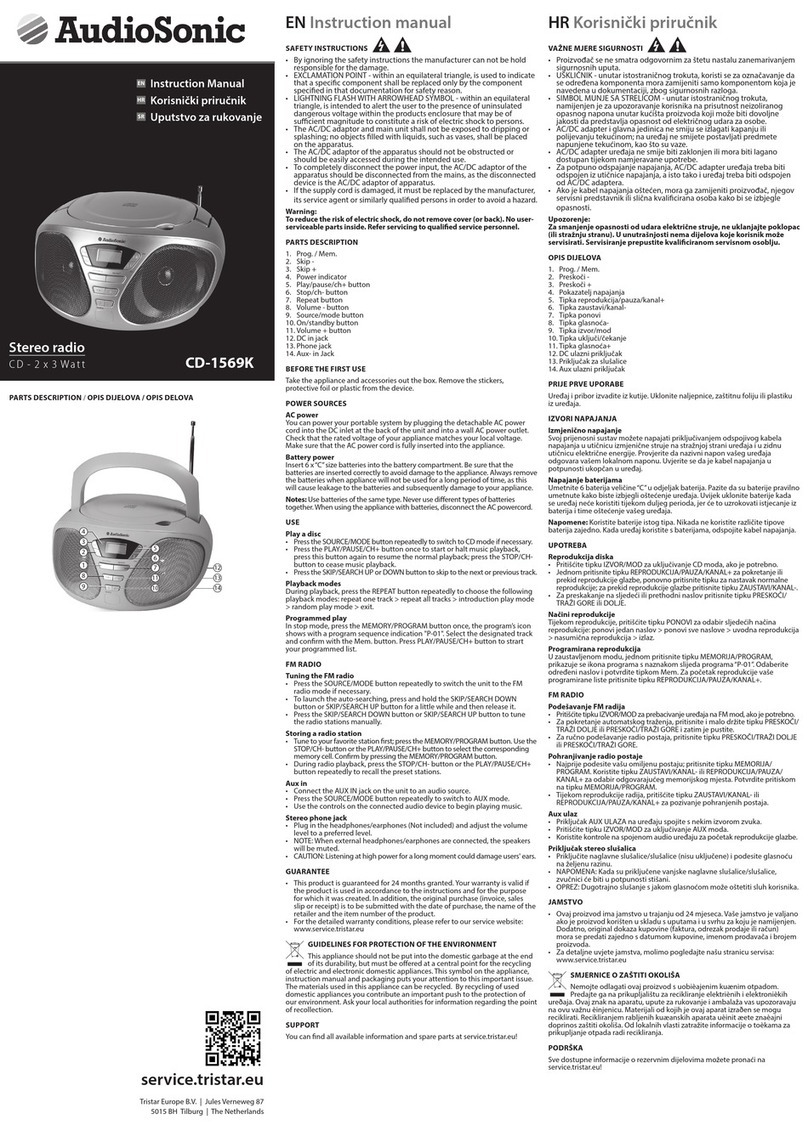
AudioSonic CD-571 User manual

EN Instruction Manual
NL Gebruiksaanwijzing
fr Mode d’emploi
dE Bedienungsanleitung
Es Manual de instrucciones
pt Manual de Instruções
pL Instrukcje użytkowania
it Istruzioni per l’uso
sV Användare
Stereo Radio
CD - MP3 - USB - SD Cd-571

2

3
SAFETY PRECAUTIONS
Read this instruction and safety manual carefully before use. Keep this manual in a
safe place for further reference.
WARNINGS
HAZARD WARNING
Risk of electRic shock do not open
CAUTION: TO MINIMISE THE RISK OF ELECTRIC SHOCK, NEVER REMOVE THE COVER.
THIS PRODUCT CONTAINS NO USER-SERVICEABLE PARTS. ONLY QUALIFIED REPAIR
TECHNICIANS SHOULD WORK ON THIS EQUIPMENTS.
THE LIGHTNING SYMBOL IN SIDE AN EQUILATERAL TRIANGLE
WARNS THE USER OF THE PRESENCE INSIDE THE PRODUCT OF
UNINSULATED HAZARDOUS ELECTRIC VOLTAGES POWERFUL
ENOUGH TO REPRESENT AN ELECTROCUTION RISK.
THE EXCLAMATION MARK SYMBOL INSIDE AN EQUILATERAL
TRIANGLE WARNS THE USER THAT IMPORTANT OPERA TING AND
SERVICING TROUBLESHOOTING INSTRUCTIONS ARE CONTAINED
IN THE DOCUMENTATION ACCOMPANYING THE PRODUCT.
HAZARD WARNING: TO REDUCE THE RISK OFFIRE OR ELECTRIC SHOCK, DO NOT
EXPOSE THIS PRODUCT TO RAIN OR MOISTURE.
CLASS 1 LASER PRODUCT
This product contains a low-power emitter.
PRECAUTIONS FOR USE
To ensure safe use of this product, please follow the advice below:
Positioning
• Do not use the product in extremely hot, cold, dusty or damp condition.
• Place the product on a smooth, flat surface.
• Do not obstruct the flow of air through the product. Place it on a well-ventilated
position; do not cover with fabric or stand on a rug or carpe t.
Power supply
• Before using this product, check that its rated voltage matches your mains power
supply voltage.
Safety instructions
• Never pull on the power cord when plugging in or un-plugging the product:
always use the plug pulling the cord could damage it and create a risk of electric
shock.
• Unplug the product from the mains socket if you do not intend to use it for an
extended period.
• The On/Off button doe s not isolate the product from the power supply. To
disconnect the product from the mains power supply, you must unp lug the
power cord.
• This product should only be used in a horizontal position.
Condensation
• Water droplets or condensation may from inside it is moved into a very warm,
humid atmosphere.
• Condensation can cause the product to malfunction.
• Leave the set in a warm room for 1 to 2 hours to allow the condensation to
evaporate.
• In the event of a problem, unplug the power cord and contact a qualified repair
technician.
Ventilation precautions
• Never obstruct the product's ventilation holes.
Warning concerning liquids
• Do not allow liquids to splash or spill onto the product, and never stand a liquid-
filled container (vase, jar, etc.)on the top of it.
CAUTIONS
INVISIBLE LASER RADIATION WHEN OPEN
AND INTERLOCKS DEFEATED. AVOID
EXPOSURE TO BEAM.
EN Instruction Manual

4
Instruction Manual
Warning concerning excessive sound levels
• Owing to this product's extremely low noise output and extended dynamic range,
the user may be tempted to turn up the volume louder than necessary.
• The sound output may be excessively high, to the point of damaging the product's
headphones or loudspeaker. Always keep the volume within reasonable limits.
SAFETY PRECAUTIONS
IMPORTANT INFORMATION
• This product is designed for use in moderate climate. Do not use or install this unit
where it would be exposed to direct sunlight or in extremely hot temperatures, or
near a radiator, stove or appliance that produces heat.
• Do not take this unit into the bathroom, or near a swimming pool. Do not use it
where it would be exposed to water, moisture, dripping or splashing.
• No objects filled with liquids, such as vases, placed on the product.
• No naked flame sources, such as lighted candies on the product.
• If water gets inside the unit, Unplug the power cord from the supply socket and
consult your dealer.
• Do not handle the power cord with wet hands. To avoid electric shock, NEVER touch
any internal parts. Repairs/servicing should be left to qualified service personnel.
• When connecting or disconnecting from the mains supply, hold the plug but not
the cord. Pulling the cord may damage it and is dangerous.
• Do not drop the unit, spill liquid into it or allow objects to fall in it.
• When plugged in, a very small current will flow. To save electricity and for safe, it
is recommended that the product is completely disconnected with the AC mains
socket after the unit not used for a long time.
• Consult your nearest dealer when damage, disconnection or contact failure is
found with the cord.
• Do not bend the cord sharply, pull or twist it.
• Do not modify the power cord in any manner.
• Do not insert any metallic object in the unit.
• Unplug the power cord when there is the possibility of lighting.
• Mains plug is used as the disconnecting device. It shall remain readily operable
and should not be obstructed during intended used.
• To be completely disconnected the apparatus from supply mains, the mains plug
of the apparatus shall be disconnected from the mains socket outlet completely.
• In case of malfunction due to electrostatic discharge, just reset the product
reconnect of power source may be required to resume normal operation.
POSITIONING THE UNIT
• A minimum distance of 6 INCHES must be kept to provide sufficient ventilation.
• Do not place the product in closed bookcases or racks without proper ventilation.
• Allow adequate ventilation for the unit ventilation. It should not be impeded by
covering the ventilation openings with items such as newspapers, table cloths,
curtains etc.
• Do not stand it on a thick pile carpet, install it in a thick pile carpet, or install it in a
place with inadequate air flow. Place the unit on a flat even surface.
• Do not use the unit in excessively hot, cold, dusty, damp or humid place.
• Condensation may form inside the CD player if the unit is left anywhere warm and
damp, or if you move the unit from somewhere cold to a warm room. In this case,
let the unit stand for 1-2 hours or gradually increase the room temperature that
the unit will be dry before use.
SAFETY PRECAUTIONS
• Do not place it where it could be subject to vibration.
• Do not place it where it could be magnetised by a magnet or speaker. Since there
are magnets, do not place tapes as recorded data could be erased.
• When this unit is used near a TV, the TV picture could be distorted. If this happens,
move the unit away form the TV. If the situation could not be solved, avoid using
the unit when the TV is turned on.
• Keep the CD door closed so the lens is not contaminated by dust. Do not ouch the lens.
• Mains plug is used as the disconnect device. It shall remain readily operable and
should not be obstructed during intended use. To be completely disconnected
the apparatus from supply mains, the main plug of the apparatus shall be
disconnected from the mams socket outlet completely.
• Batteries shall not be exposed to excessive heat such as sunshine, fire or the like.
• Warning: excessive sound pressure from earphones and headphones can cause
hearing loss.

4
16
22
17
12
18
1311
10
9
19
14
20
15
21
7
2
8
1
3
5
6
5
EN Instruction Manual
• Attention should be drawn to the environmental aspects of battery disposal.
SAFETY MECHANISM
• This unit incorporates a safety interlock mechanism that switches the laser beam
on and off, when the disc holder is open, the laser baser beam stops automatically.
FUNCTIONS AND CONTROLS
1. FUNCTION SELECTOR
2. AC POWER SUPPLY
3. SPEAKER
4. DISPLAY
5. FMSTEREO INDICATOR
6. USB JACK
7. BATTERY COMPARTMENT
8. BAND SELECTOR (MW'FM'FM ST.)
9. HANDLE
10. VOLUME CONTROL
11. STEREO HEADPHONE JACK
12. MODE
13. PROGRAM
14. FOLDER UP
15. FOLDER DOWN
16. TELESCOPIC ANTENNA
17. NEXT
18. PLAY/PAUSE
19. BACK
20. STOP
21. CD DOOR
22. TUNING KNOB

6
POWER SUPPLY
If you would like, the electrical power supply can be used to save the batteries. Make
sure that the unit is unplugged from the wall outlet before inserting the batteries.
USING THE DC POWER SUPPLY
Batteries (not included)
Open the battery compartment and insert 8 R14 batteries with respect to the "+" and
"-" polarity indications in the compartment.
Important:
When replacing the batteries, make sure you dispose of the old batteries in
accordance with applicable regulations. They should be disposed of in a location
specifically designated for that purpose so they can be recycled safely and without
posing any risk for the environment. Do not burn or bury them. Incorrect use
of the batteries may result in electrolyte leakage having a corrosive effect in the
compartment.
• Do not mix different types of batteries: do not use alkaline batteries with saline batteries,
for example. only use batteries of the type recommended by the manufacturer.
• Do not mix old and new batteries when inserting new ones.
• If the unit is not to be used for an extended period of time, remove the batteries
from the unit.
• Batteries shall not be exposed to excessive heat such as sunshine, fire or the like.
• Warning: excessive sound pressure from earphones and headphones can cause
hearing loss.
USING THE AC POWER SUPPLY
1. Make sure that the voltage indicated on the manufacturer's nameplate in the
battery compartment corresponds to the voltage supplied by your electrical
installation. If this is not the case, consult your dealer or service center.
2. Connect the electrical power cable the unit then plug it into the wall outlet. The
wall outlet must be located near the product and be easily accessible.
3. To turn power to the apparatus off, unplug the power supply cable from the wall
outlet.
4. To protect the unit during violent thunderstorms, unplug the power supply cable
from the wall outlet.
GENERAL OPERATION
GENERAL OPERATION
1. Select the source by setting the FUNCTION SELECTOR to CD/MP3/USB, OFF or
RADIO.
2. Set the desired volume level using the VOLUME KNOB.
3. To turn off the unit, set the FUNCTION SELECTOR to OFF.
RADIO
• To listen to the FM radio, extend the telescopic antenna and orient it for optimum
reception. Reduce the length of the antenna if the signal is too strong (if you are
very near the transmitter, for example).
• As the unit is equipped with a built-in antenna, the telescopic antenna does not
have to be used to listen to MW stations. Move the entire unit to orient the built-in
antenna.
RADIO RECEPTION
1. Set the FUNCTION SELECTOR to RADIO.
2. Position the FREQUENCY BAND SELECTOR on the desired band: MW, FM or FM ST.
3. Turn the TUNING CONTROL to search for the desired station.
NOTE: The FM stereo indicator comes on if the FREQUENCY BAND SELECTOR is set
on FM stereo and you have tuned the radio to an FM stereo station.
4. Adjust VOLUME CONTROL for the desired volume level.
5. When you have finished listening to the radio, position the FUNCTION SELECTOR
to OFF to turn the unit off.
Instruction Manual

7
STEREO HEADPHONE JACK
• Plug stereo headphones (not included), equipped with a 3.5mm mini-plug, into
the PHONES jack (on top of the unit, left-hand side) for private listening, without
disturbing those around you.
• Reduce the VOLUME to a low level before putting on the headphones. You can
then adjust the VOLUME progressively to a comfortable level.
CD/MP3/USB PLAYER OPERATION
CD/MP3 FILE PLAYBA CK
The CD player supports audio discs, CD-R, CD-RW, MP3 and USB files. Do not attempt
to read CD-ROM, CDi, VCDs, DVDs or data CDs.
Note: Even if this portable radio-CD player is able to read CD-R and CD-RW discs, in
addition to conventional compact discs, it is not possible to offer a 100% guarantee
that all CD-R/RW discs can be read, playback depends on the quality and condition
of the blank discs that you use, among other things. A play back failure does not
necessarily indicate that the unit is malfunctioning.
1. Position the FUNCTION SELECTOR on CD/MP3/USB (the display unit briefly
displays - - -).
2. To open the CD player door, raise it by the corner marked OPEN/CLOSE.
3. Insert a CD, CD-R, CD-RW or MP3 disc, printed surface facing upwards and gently
press the CD player door to close it.
4. Start playback by pressing PLAY/PAUSE.
• Press PLAY/PA USE for 2 seconds to switch from CD/MP3 to USB mode. Press PLAY/
PAUSE again for 2seconds to return to CD/MP3 mode.
5. Press PLAY/PA USE to interrupt or resume playback.
6. To stop CD playback, press STOP.
NOTE: CD playback stops automatically when:
• the CD compartment is opened;
• the radio function is selected;
• the CD/MP3/USB is finished.
SELECTING A DIFFERENT TRACK
During playback, press NEXT or BACK on the unit or remote control unit to select a track.
• If you have selected a track number in Stop or Pause mode, press PLAY/PAUSE to
resume playback.
• Briefly press NEXT to pass to the next track or press NEXT several times until the
desired track number appears in the display.
• Briefly press BACK to return tot he start of the current track.
• Press BA CK several times to find a previous track.
SELECTING A DIFFERENT FOLDER
• Press FOLDER UP for 2 seconds. When the display unit flashes, press NEXT or BACK
to select the desired folder.
• To select the previous files, press FOLDER DOWN.
(Comment: the FOLDER UP/DOWN function can only be activated if the disc contains
at least 2 files)
SEARCHING FOR A PASSAGE ON A TRACK
1. Press and hold BACK or NEXT to read the track in fast forward mode at reduced
volume.
2. When you have found the desired passage, release the BACK or NEXT
button(normal playback resumes automatically).
MODE
Repeat: play back of the current track continuously.
Repeat all: play back of the entire CD continuously.
Album: playback of selected folder continuously.
Random: playback in random order continuously.
PROGRAMMING OF TRACK NUMBERS
Up to 20 tracks can be programmed in any order. If desired, a given track can be
programmed more than once.
1. In STOP mode, press BACK or NEXT to select a track.
2. When the desired track number appears press the PROG button once to record the
track (the display unit displays "prog", briefly followed by the track number selected).
3. Repeat steps 1 and 2 to select and program the desired tracks.
4. To start playback of your programmed tracks, press PLAY/PAUSE.
EN Instruction Manual

8
PROGRAM CHECK
In STOP mode, press the PROG, button, (the display unit displays the track numbers in
the order programmed).
DELETING A PROGRAM
Perform the following operations to delete the memory:
• Open the CD door;
• Select the RADIO source;
• Press STOP once.
USE WITH A USB KEY
1. Slide the FUNCTION SELECTOR to CD/MP3/USB.
2. Insert your USB key into the USB socket.
3. Press and hold PLAY/PAUSE for 2 seconds to switch from CD/MP3 mode to USB mode.
The display unit shows:
(USB MODE)
4. Start playback by pressing PLAY/PAUSE.
5. To stop playback, press STOP.
Press PLAY/PAUSE again for 2 seconds to return to CD/MP3 mode.
The display unit shows:
(CD MODE) (MP3 MODE)
NOTE: Before removing your USB key, press STOP then press and hold PLAY/PAUSE for
2 seconds to return to CD/MP3 mode.
MAINTENANCE & SAFETY
OPERATING PRECAUTIONS AND GENERAL MAINTENANCE
• Place the unit on a hard and plane surface to ensure that it does not tip over.
• Do not expose the unit, batteries or the CDs to humidity, rain, sand or an excessive
source of heat from a heater or direct sunlight.
• No not open the apparatus. A gap of at least 15 cm must be kept between the
ventilation openings and the surrounding surfaces in order to ensure sufficient
ventilation and avoid all accumulation of heat.
• The unit's mechanism features self-lubricating bearings and thus do not require
grease or lubrication.
• Use a soft and dry cloth to clean the unit. Never use cleaning agents containing
alcohol, ammonia, benzene or abrasives, which may damage the cabinet.
CLEANING CDs
• Use a soft and clean cloth to wipe away fingerprints or dust from the surface of
the disc.
• Wipe in a straight motion from the center to the edge. Very small dust particles
and slight smudges have absolutely no effect on the sound quality.
• Never use chemical products such as sprays for conventional (vinyl) records, anti-
static aerosols, benzene or thinners to clean your CDs.
• To reduce the risk of scratches, always store CDs in their case when not used.
• Do not expose CDs to direct sunlight, high humidity or excessively high
temperatures for long periods of time.
• Never write or affix labels to the CD's surfaces.
CLEANING THE LENS
If the lens is dirty, the sound may skip and the CD may not be read correctly. Open
the CD door and clean the lens as follows:
• Unplug the power cord.
• Dust or dry particles:
Blow on the lens several times using a camera lens brush, then wipe it gently with
the brush to remove the dust. Then blow again on the lens.
Instruction Manual

9
Fingerprints:
If you are unable to clean the lens with the camera lens brush, use a dry cotton swab
to clean the surface, from the center to the outside.
TROUBLESHOOTING
TROUBLESHOOTING
If a problem occurs, check the points below before taking the apparatus in for repair.
Do not open the apparatus to prevent all risk of electrocution.
If you are unable to solve a problem using the indications provided below, contact
your dealer or after-sales service center.
WARNING: Under no circumstances should you attempt to repair the apparatus
yourself; doing so will void the guarantee.
NO SOUND / ELECTRIC POWER
The volume is not properly set. Adjust the volume.
The electrical power cord is not plugged
in correctly. Check the power cord connections.
The batteries are dead/not inserted
correctly.
Check the installation and charge of the
batteries.
THE DISPLAY UNIT DOES NOT FUNCTION CORRECTLY / THE BUTTONS DO NOT FUNCTION
Electrostatic discharge. Turn the unit off and disconnect it. Plug it back
in a few seconds later.
NO INFORMATION DISPLAYED ABOUT THE DISC
No CD in the player. Insert a CD, CD-R or CD-RW in the player.
The CD is scratched or very dirty. Replace/clean CD. See Maintenance.
The laser lens is covered with
condensation.
Wait until condensation disappears from
the lens.
The CD-R is blank or the disc is not
finalized. Use a finalized CD-R.
THE CD IS NOT READ
The CD is scratched or very dirty. Replace/clean CD. See Maintenance.
The laser lens is covered with
condensation.
Wait until condensation disappears from
the lens.
THE CD SKIP TRACKS
The CD is scratched or dirty. Replace/clean CD. See Maintenance.
A program sequence us activated. Exit the programming mode(s).
IMPORTANT
Note: Although this CD player can read CD-R, CD-RW and MP3 discs - in addition to
normal CD's - the playability of CD-R, CD-RW and MP3 discs may be affected by the
type of software that was used to create the discs, as well as the quality and condition
of the blank media you are using. 100% playability cannot be guaranteed. This is not
an indication of a problem with the player.
Important
• The USB port of this product is fully compatible with the USB 1.1 and 2.0 standard.
• If MP3 players connected to this port are not written in compliance with the
official USB 1.1 or 2.0 standard it may occur that those MP3 players do not work
on this port.
• This is not a defective of this product.
• The MP3 player does not comply with the official USB 1.1 or 2.0 standard.
EN Instruction Manual

10
INSTRUCTIONS IN ENVIRONMENT PROTECTION
Do not dispose of this product in the usual household garbage at the
end of its life cycle; hand it over at a collection point for the recycling
of electrical and electronic appliances. The symbol on the product,
the instructions for use or the packing will inform about the methods
for disposal. The materials are recyclable as mentioned in its marking. By recycling,
material recycling or other forms of re-utilization of old appliances, you are making an
important contribution to protect our environment.
Please inquire at the community administration for the authorized disposal location.
Instruction Manual

11
NL Gebruiksaanwijzing
VEILIGHEIDSVOORZORGEN
Netvoeding
Deze uitrusting werd ontworpen om te werken op wisselstroom netvoeding van 230
volt, 50 Hz. Andere stroombronnen kunnen dit apparaat beschadigen.
Gelieve na te kijken of op het informatieplaatje van het apparaat 230 V wisselstroom
staat voordat u de stekker voor het eerst in een stopcontact stopt.
Netstekker
Wij hebben dit apparaat uitgerust met een standaard netstekker.
• Een beschadigd netsnoer mag uitsluitend worden vervangen door een goedgekeurd
netsnoer van hetzelfde type bij een gekwalificeerde, erkende reparatieservice.
• Wanneer u de stekker afsnijdt, bijvoorbeeld om een ander type stekker aan te
sluiten, verzoeken wij u de oude stekker te vernietigen omdat hij gevaarlijk kan
zijn wanneer iemand hem per ongeluk in een stopcontact onder stroomspanning
stopt. Volg nauwlettend de instructies voor de bekabeling die bij de nieuwe
stekker werden meegeleverd.
• Wanneer de stekker is voorzien van een zekering, verwijdert u de zekering voordat
u de stekker wegwerpt.
• Volg nauwlettend de instructies voor de bekabeling die bij de nieuwe netstekker
werden meegeleverd.
• Gebruik een stekker met zekering nooit zonder dat de afdekking van de zekering intact is.
Symbolen
Deze uitrusting is dubbel
geïsoleerd waardoor een
aardeaansluiting niet
vereist is.
Een gevaarlijk voltage dat
een risico voor elektrische
schokken inhoudt is binnenin
dit product aanwezig.
Deze markering is
aangebracht om aan te
geven dat het apparaat
voldoet aan de Europese
normen voor veiligheid
en elektromagnetische
congruentie.
Belangrijke instructies voor
het gebruik en onderhoud
zijn ingesloten in de
documentatie die bij dit
product werd meegeleverd.
Veilig gebruik en onderhoud van uw audio-apparatuur
Hoewel wij dit product hebben ontworpen en vervaardigd in overeenstemming met
de Europese veiligheidsnonnen, moet men zoals met alle elektrische apparatuur
voorzichtig zijn om een zo lang mogelijke gebruiksduur en veilig gebruik te garand-
eren. Hier volgen enkele tips om u daarbij te helpen.
• Lees deze gebruiksaanwijzing aandachtig voordat u dit apparaat in gebruik neemt.
• Bescherm het netsnoer. U dient ervoor te zorgen dat niemand over het netsnoer
kan vallen en dat het netsnoer niet platgedrukt, geschaafd, gesneden enz. wordt.
• Voorkom omstandigheden die problemen kunnen veroorzaken zoals natte of
stomende ruimtes, een hoge vochtigheidsgraad, sterke trillingen, extreem hoge of
lage temperaturen, rechtstreeks zonlicht en zeer stoffige ruimtes.
• Sta nooit toe dat iemand voorwerpen in de openingen en ventilatiesleuven stopt.
VEILIGHEIDSVOORZORGEN
• Om stroom te besparen schakelt u de netvoeding uit of verwijdert u de netstekker
uit het stopcontact wanneer het apparaat niet in gebruik is, tenzij de functie van
het apparaat een ononderbroken stroomvoeding vereist.
• Gebruik dit apparaat niet wanneer er vloeistof op is gemorst, wanneer het op de
een of andere manier beschadigd is of wanneer het abnormaal functioneert. Trek
de stekker dan meteen uit het stopcontact en vraag advies aan een specialist.
• Trek tijdens onweer de netstekker uit het stopcontact.
• Dit product is uitsluitend bestemd voor huishoudelijk gebruik. Alle andere vormen
van gebruik kunnen de garantie teniet doen en gevaarlijk zijn.
Ventilatie
Zet dit apparaat neer op een harde, vlakke ondergrond waar het niet aan rechtstreeks
zonlicht of warmtebronnen kan worden blootgesteld. Wanneer u dit apparaat in
een kast zet, moet u aan alle zijden een minimum van 10 cm vrije ruimte voorzien.
Blokkeer de ventilatieopeningen niet, ook niet de ventilatieopeningen onderaan
het apparaat door het neer te zetten op een zachte stoffering e.d. Door oververhit-
ting kan de gebruiksduur van dit apparaat drastisch verkorten en bestaat een groter
brandgevaar.

12
Schoonmaken
Trek de stekker uit het stopcontact en gebruik alleen een zachte, lichtbevochtigde
doek. Gebruik geen chemische schoonmaakproducten of sterke detergenten, omdat
deze de esthetische afwerking kunnen beschadigen.
Batterijen
Verwijder de batterijen wanneer het apparaat lange tijd niet zal worden gebruikt.
Batterijen die in het apparaat worden gelaten kunnen gaan lekken en het apparaat
beschadigen. Dergelijke schade wordt niet door de garantie gedekt. Gelieve oude
batterijen terug te brengen naar een zaak die batterijen verkoopt, van waaruit ze kun-
nen worden gerecycleerd. Zo helpt u ons milieu te beschermen.
Wegwerpen
Afgedankte elektrische en elektronische apparatuur mag niet als huisvuil worden
behandeld. Gelieve het terug te brengen naar de zaak waar u dit apparaat aankocht
of daar instructies betreffende het wegwerpen ervan te vragen. Breng de batterijen
en de verpakkingsmaterialen terug naar een plaatselijk inzamelsysteem, van waaruit
ze kunnen gerecycleerd worden.
Belangrijke waarschuwingen in verband met de veiligheid
• De behuizing van dit apparaat mag niet worden opengemaakt om elektrische
schokken te voorkomen.
• In geval van problemen mag u het apparaat niet zelf proberen te repareren. Vraag
een gekwalificeerde erkende reparatieservice om het probleem te onderzoeken.
• Stel dit apparaat niet bloot aan druppelende of spattende vloeistof en zet geen
voorwerpen die met water gevuld zijn zoals vazen bovenop het apparaat.
• Zet nooit een naakte vlam op of vlakbij dit apparaat.
• Kleine onderdelen. Laat jonge kinderen niet met dit apparaat spelen.
Categorie 1 laserapparaat
Dit apparaat bevat een laserapparaat onder laagspanning.
Onzichtbare laserstraling wanneer de behuizing is geopend
of de sluitklemmen losgemaakt. Voorkom blootstelling aan
de straal.
Waarschuwing in verband met auteursrechten
De meeste platen, compact disks en radio-uitzendingen bevatten materiaal dat
beschermd wordt door auteursrechten. Het is in strijd met de wet om dergelijk
materiaal op te nemen zonder toestemming van de eigenaar van de auteursrech-
ten. Personen die dergelijk materiaal zonder toestemming van de eigenaar van de
auteursrechten opnemen kunnen worden veroordeeld tot schadevergoeding aan
de eigenaar van de auteursrechten en in sommige gevallen gerechtelijk vervolgd
worden.
IDENTIFICATIE VAN DE ONDERDELEN
1. LUIDSPREKER
2. DISPLAY
3. FM-STEREO INDICATOR
4. USB-CONTACT
5. TELESCOPISCHEANTENNE
6. GOLFBANDSCHAKELAAR (MW • FM • FM ST.)
7. VOLGENDE
8. WEERGAVE/PAUZE
9. TERUG
10. STOP
11. CD-LADE
12. MAP LAGER
13. MAPHOGER
14. PROGRAMME
15. MODUS
16. STEREO HOOFDTELEFOONINGANG
17. FUNCTIESCHAKELAAR
18. HANDVAT
19. VOLUMEKNOP
20. WISSELSTROOM NETVOEDING
21. DEKSEL BATTERIJENVAK
22. AFSTEMKNOP
Gebruiksaanwijzing

4
16
22
17
12
18
1311
10
9
19
14
20
15
21
7
2
8
1
3
5
6
13
COMPACT DISK
1. Gebruik alleen compact disks waarop het volgende label is aangebracht:
2. Opmerkingen bij het hanteren van disks
• Verwijderen van disks uit hun doosje en er terug inzetten.
• Raak de weerspiegelende opnamezijde niet aan.
• Kleef of schrijf niets op het diskoppervlak.
• Buig disks niet om.
3. Opbergen
• Bewaar disks in hun doosje.
• Stel disks niet bloot aan rechtstreeks zonlicht, hoge temperaturen, een hoge
vochtigheidsgraad of stoffige plaatsen.
4. Schoonmaken van disks
• Veeg vuil, stof en vingerafdrukken op disks weg met een zachte doek.
• Disks moeten van het midden naar de buitenrand toe worden schoongeveegd.
• Gebruik nooit benzeen, thinners, schoonmaakproducten voor vinylplaten of
antistatische sprays op Disks.
• Vergeet niet de cd-lade te sluiten zodat stof niet bij de lens kan komen.
• Raak de lens niet aan.
STROOMVOEDING
Het gebruik van geli jkstroomvoeding
U kunt netvoeding gebruiken om batterijstroom te besparen. Vergeet NIET de stekker
uit het stopcontact te verwijderen wanneer u de batterijen gaat inzetten.
Batterijen (niet inbegrepen)
• Maak het batterijenvak open en zet 8 batterijen van het type R14 in, erop lettend
dat de “+” en “-” polen correct worden ingezet.
Belangrijk:
Na het vervangen van de batterijen moet u de oude batterijen in overeenstemming
met de plaatselijke reglementering wegwerpen. Ze moeten worden teruggebracht
naar een specifieke locatie, van waaruit voor een veilige recyclage wordt gezorgd
zodat ze geen enkel gevaar voor het milieu vormen. Werp batterijen nooit in vuur.
NL Gebruiksaanwijzing

14
OPMERKINGEN:
• Onjuist gebruik van batterijen kan leiden tot lekkage van elektrolyt, wat het
batterijenvak gaat corroderen. Gebruik geen batterijen van verschillende types
samen: gebruik bijvoorbeeld geen alkaline batterijen met zouthoudende
batterijen.
• Gebruik geen oude en nieuwe batterijen samen. Gebruik batterijen van hetzelfde
type als wordt aanbevolen door de fabrikant.
• Verwijder de batterijen uit dit apparaat wanneer het lange tijd niet zal worden
gebruikt om schade door batterijlekkage te voorkomen.
• Het gebruik van wisselstroomvoeding
• Controleer of het voltage dat is aangegeven op het informatieplaatje van de
fabrikant in het batterijenvak overeenstemt met het voltage van de netvoeding bij
u thuis. Gebruik dit apparaat NIET wanneer dit niet het geval is, doch vraag advies
aan een gekwalificeerde technicus.
• Sluit het netsnoer aan op het apparaat en stop daarna de stekker in het
stopcontact. Het stopcontact moet zich vlakbij het apparaat bevinden en
gemakkelijk bereikbaar zijn.
• Trek de stekker uit het stopcontact om de stroomvoeding naar het apparaat
volledig uitte schakelen. Trek van het apparaat de stekker tijdens onweer uit het
stopcontact.
ALGEMENE BEDIENING
Algemene bediening
• Selecteer een bron door de FUNCTIESCHAKELAAR te schakelen naar CD, MP3, USB,
OFF (uit) of RADIO.
• Stel het gewenste volumeniveau in met behulp van de VOLUMEKNOP.
• Schakel de FUNCTIESCHAKELAAR naar de stand OFF (uit) om het apparaat uit te
schakelen.
De radio
• Om naar FM-zenders te luisteren trekt u de telescopische antenne uit en richt u
de antenne voor een optimale ontvangst. Maak de antenne korter wanneer het
signaal te sterk is (bijvoorbeeld wanneer u zich vlakbij de zender bevindt).
• Dankzij de ingebouwde antenne van dit apparaat heeft u de telescopische
antenne niet nodig voor het luisteren naar MW-zenders.
• Verplaats het volledige apparaat om de ingebouwde antenne te richten vooreen
optimale ontvangst.
Radio-ontvangst
1. Schakel de FUNCTIESCHAKELAAR naar de stand RADIO.
2. Schakel de GOLFBANDSCHAKELAAR naar de gewenste stand:MW, FM of FM ST.
3. Draai de AFSTEMKNOP om naar de gewenste zender te zoeken.
4. OPMERKINGEN: De FM-stereo indicator gaat branden wanneer de
GOLFBANDSCHAKELAAR naar de stand FM ST. is geschakeld en u de radio heeft
afgestemd op een FM-stereo zender.
5. Schakel de FUNCTIESCHAKELAAR naar de stand OFF (uit) wanneer u klaar bent
met luisteren naar de radio.
Stereohoofdtelefoon contact
• Sluit een hoofdtelefoon aan nadat u het volume op een laag niveau heeft
geschakeld en zet het volume indien nodig daarna harder. Langdurig via de
hoofdtelefoon luisteren naar hoge volume-instellingen kan gehoorstoornissen
veroorzaken.
• Zet het VOLUME op een zacht niveau voordat u de hoofdtelefoon opzet. U kunt
daarna het VOLUME geleidelijk harder zetten tot een comfortabel niveau.
CD, MP3 EN USBMP3
Deze cd-speler ondersteunt audiodisks, CD-R, CD-RW, MP3-bestanden en USB-
bestanden. Probeer met dit apparaat geen CD-
ROM, CDi, VCD’s, DVD’s of DATA-CD’s te lezen.
Opmerking: Zelfs wanneer deze draagbare radio-cd-speler in staat is om sommige
bestanden op CD-R en CD-RW disks te lezen, kunnen wij niet 100% garanderen dat
alle CD-R/RW disks kunnen worden gelezen. De weergave ervan is onder meer afhan-
Gebruiksaanwijzing

15
kelijk van de kwaliteit en conditie van de gebruikte blanco disks. Niet-weergeefbare
bestanden wijzen niet op een defect van dit apparaat.
1. Schakel de FUNCTIESCHAKELAAR naar de stand CD / MP3 / USB (“- - -” verschijnt
kort op de display).
2. Druk op de hoek van de cd-lade die gemarkeerd is met OPEN/CLOSE om de cd-
lade te openen.
3. Zet een CD, CD-R, CD-RW of MP3-disk met de gedrukte zijde naar boven gericht in
de cd-lade en sluit voorzichtig de cd-lade.
4. Start de weergave door te drukken op PLAY/PAUSE.
• Druk 2 seconden lang op PLAY/PAUSE om van de modus CD MP3 over te
schakelen naar de modus USB MP3. Druk nogmaals 2 seconden lang op PLAY/
PAUSE om terug te keren naar de modus CD MP3.
5. Druk op PLAY/PAUSE voor de WEERGAVE en om de weergave TIJDELIJK TE
ONDERBREKEN.
6. Druk op STOP om de cd-weergave te stoppen.
OPMERKING: De cd-weergave stopt automatisch wanneer de cd-lade wordt
geopend, de radiofunctie wordt geselecteerd of de volledige CD MP3/USBMP3diskis
weergegeven.
Selecteren van een ander muzieknummer
Druk tijdens de weergave op NEXT of BACK van het apparaat om een ander muziek-
nummer te selecteren.
• Wanneer u in de modus stop of pauze een muzieknummer heeft geselecteerd,
drukt u op PLAY/PAUSE om de weergave te hervatten.
• Druk kort op NEXT om naar het volgende muzieknummer over te gaan of
druk meermaals op NEXT tot het gewenste muzieknummer op de display is
aangegeven.
• Druk kort op BACK om terug te keren naar het begin van het huidige muzieknummer.
Druk meermaals op BACK om een eerder muzieknummer terug te vinden.
Selecteren van een andere map
• Druk vanuit de modus STOP op FOLDER UP. Druk wanneer de display knippert op
NEXT of BACK om de gewenste map te selecteren.
• Om eerdere mappen te selecteren drukt u op FOLDER DOWN.
(Opmerking: de functie FOLDER UP/DOWN kan alleen worden gebruikt wanneer
minstens 2 overzichten op de disk zijn opgenomen.)
Zoeken naar een passage in een muzieknummer
1. Houd BACK of NEXT ingedrukt om snel binnen een muzieknummerte zoeken
terwijl het geluid is uitgeschakeld.
2. Laat de toets BACK of NEXT regelmatig los tot u de gewenste passage heeft
gevonden (de gewone weergave hervat automatisch).
CD, MP3 EN USBMP3
Herhaal
Herhaal: voortdurend herhaalde weergave van het huidige muzieknummer. Herhaal
alles: voortdurend herhaalde weergave van de volledige CD.
Druk eenmaal op de toets MODE om het huidige muzieknummer te herhalen, druk
tweemaal om (tijdens de weergave van MP3-bestanden) de huidige map te herha-
len. Druk een 3’ maal om de hele disk of USB-stick te herhalen.
OPMERKING: Bij CD drukt u een eerste maal om het muzieknummer te herhalen en
een tweede maal voor de volledige disk.
Programmeren van muzieknummers
• U kunt tot 20 muzieknummers in een gewenste volgorde programmeren. U kunt
ook eenzelfde nummer meermaals programmeren.
• Druk in de modus STOP op BACK of NEXT om een muzieknummer te selecteren.
• Wanneer het gewenste muzieknummer op de display is verschenen, drukt u eenmaal
op de toets PROG om dat muzieknummer in het geheugen op te slaan (“prog”
verschijnt even op de display, gevolgd door het geselecteerde muzieknummer).
• Herhaal de stappen 1 en 2 om ander muzieknummers aan uw prognamma toe te
voegen.
• Dnuk op PLAY/PAUSE om de weengave van uw pnognamma te stanten.
• “FUL” (vol) venschijnt op de display wanneen u meen dan 20 muzieknummens
pnobeent te pnognammenen.
NL Gebruiksaanwijzing

16
Gebruiksaanwijzing
Nakijken van het programma
• Dnuk in de modus STOP op de toets PROG. (De muzieknummens wonden in de
pnognammeende volgonde op de display aangegeven).
Wissen van het programma
Omhet geheugen te wissen kunt u het volgende doen:
• de cd-lade openen;
• de bnon RADIO selectenen;
• Tweemaal op STOP dnukken.
Het gebruik van een USB-geheugenstick
1. Verschuif de FUNCTIESCHAKELAAR naar de stand CD / MP3 / USB.
2. Stop uw USB-geheugenstick in het USB-contact.
3. Houd PLAY/PAUSE 2 seconden lang ingedrukt om vanuit de modus CD / MP3 naar
de modus USB over te gaan.
4. Het apparaat schakelt automatisch over op de aangesloten media wanneer slechts
één bron (CD of USB) beschikbaar is.
Het volgende wordt op de display aangegeven:
(USB-MODUS)
5. Start de weergave door te drukken op PLAY/PAUSE.
6. Druk op STOP om de weergave te stoppen.
• Druk nogmaals 2 seconden lang op PLAY/PAUSE om terug te keren naar de modus
CD / MP3.
• Het volgende wordt op de display aangegeven:
(CD-MODUS) (MP3-MODUS)
OPMERKING:
Druk op STOP en houd PLAY/PAUSE 2 secondenlang ingedrukt om terug te keren
naar de modus CD / MP3 voordat u de USB-geheugenstick verwijdert.
OPLOSSEN VAN PROBLEMEN
Het apparaat werkt niet
Geen functies
Controleer of het
apparaat op een
stopcontact is
aangesloten. Kijk de
stroomvoeding na met
een ander apparaat.
De zekering is
gesprongen. De
batterijen zijn leeg.
Sluit het apparaat aan op
een stopcontact.
Kijk de netvoeding na
met een ander apparaat.
Vervang de zekering in
de stekker.
Vervang de batterijen.
Geen geluid
Er is een verkeerde
geluidsinstelling
geselecteerd.
Kijk na of de
GOLFBANDSCHAKELAAR
naar de correcte stand is
geschakeld.
Is de cd vuil of zijn er
vingerafdrukken op?
Het geluid is onstabiel of
vervormd
Storingen op de radio
Probleem met de
batterijen.
Teveel trilling.
Vervang de batterijen.
Zet het apparaat neer
op een vlakke, stabiele
ondergrond.
Kijk de antenne na.
Het geluid wordt
overstemd door
storingen
Externe storing.
Zwak signaal.
Verplaats de ontvanger.
Probeer de ontvanger fijn
af te stemmen.
Zwakke ontvangst.
De antenne is niet goed
gericht of u bevindt
zich in een gebied met
zwakke signalen.
Richt de antenne,
verplaats de ontvanger
bij voorkeur vlakbij een
raam of gebruik een
binnenantenne

17
BELANGRIJK
Opmerking: Hoewel deze CD speler naast gewone CD’s ook CD-R, CD-RW en MP3
schijven kan lezen, kan het afspeelbaar zijn van CD-R, CD-RW en MP3 schijven
worden beïnvloed door het type software waarmee de discs zijn gemaakt. Ook de
kwaliteit en de conditie van de lege media die u gebruikt, spelen daarbij een rol. Een
afspeelbaarheid van 100% kan niet worden gegarandeerd. Dit is geen aanwijzing
voor een probleem met de speler.
Belangrijk
• De USB poort van dit product is volledig compatibel met de USB 1.1 en 2.0
standaard.
• Indien een aangesloten MP3 speler niet functioneert, bestaat de mogelijkheid dat
de speler niet aan de officiële USB 1.1 of 2.0 standaard voldoet.
• Dit is geen defect aan dit product.
• De MP3 speler voldoet niet aan de officiële USB norm 1.1 of 2.0.
AANWIJZINGEN INZAKE DE MILIEUBESCHERMING
Dit product mag aan het einde zijn levensduur niet samen met het
normale huishoudelijke afval verwijderd worden, maar moet afgegeven
worden op een verzamelpunt voor de recycling van elektrische en
elektroniche apparatuur. Het symbool op het product, in de gebruiksaanwizing of op
de verpakking maakt u daarop attent. De grondstoffen zijn volgens hun kenmerking
herbruikbaar. Met het hergebruik, de materiële verwerking of andere vormen van
recycling van oude apparaten levert u een belangrijke bijdrage tot de bescherm-
ing van ons milieu. Gelieve bij het gemeentebestuur informatie te vragen over het
bevoegde verzameplunt.
NL Gebruiksaanwijzing

18
Mode d’emploi
MESURES DE SÉCURITÉ
Réseau d’électricité
Cet appareil doit être branché sur une source d’alimentation AC de 230V 50Hz. Toute
autre source d’alimentation peut endommager l’appareil. Assurez-vous que la fiche
signalétique de l’appareil indique 230V AC avant de brancher l’appareil sur le secteur
pour la première fois.
Prise de branchement
Cet appareil est muni d’une prise de branchement sur le secteur standard.
• Si le cordon d’alimentation est endommagé de quelque manière que ce soit, il
doit être remplacé par un cordon du même type par l’un de nos agents agréées
ou un électricien qualifié.
• Si vous sectionnez la prise de branchement, par exemple pour installer un autre
type de prise, détruisez la vieille prise afin d’éviter qu’elle ne soit insérée par
mégarde dans une prise murale sous tension. Suivez attentivement les instructions
pour procéder à l’installation de la nouvelle prise électrique.
• Si la prise est munie d’un fusible, enlevez le fusible avant de mettre la prise au
rebut.
• Suivez attentivement les instructions pour procéder à l’installation de la nouvelle
prise en toute sécurité.
• N’utilisez jamais une prise munie d’un fusible sans son couvercle.
Symboles
Cet appareil est équipé
d'une double isolationl; une
mise à la terre n'est donc pas
nécessaire.
Présence d'une tension
dangereuse à l'intérieur de
l'appareil, constituant un
risque de chocs électriques.
Ce symbole est utilisé
pour indiquer que cet
appareil est conforme aux
normes européennes de
sécurité et de compatibilité,
électromagnétique.
Instructions importantes
relatives au fonctionnement
et à la maintenance
de de l'appareil dans
la documentation
accompagnant l'appareil.
Utilisation et entretien de votre équipement audio
Cet appareil a été conçu et fabriqué de façon à se conformer aux normes eu-
ropéennes de sécurité. Toutefois, comme avec tout appareil électrique, certaines
précautions d’emploi doivent être observées afin de prolonger la durée de vie de
l’appareil et permettre une utilisation en toute sécurité. Vous trouverez ci-après
quelques conseils pouvant vous aider.
• Lisez attentivement toutes les instructions et mises en garde avant d’utiliser cet
appareil pour la première fois.
• Protégez le cordon d’alimentation. Acheminez le cordon d’alimentation de façon à
ce qu’il ne risque pas d’être piétiné, écrasé ou sectionné.
• Choisissez un emplacement avec soin. Evitez les endroits poussiéreux, humides
ou détrempés, les fortes vibrations, les températures extrêmes et les rayons directs
du soleil.
• N’insérez aucun objet dans les trous d’aération de l’appareil.
MESURES DE SÉCURITÉ
• Faites des économies d’énergie. Coupez l’alimentation à la source ou débranchez
le cordon d’alimentation lorsque vous n’utilisez pas l’appareil, à moins que le
fonctionnement de l’appareil ne nécessite une alimentation en continu.
• Cessez immédiatement toute utilisation si des liquides se sont déversés à
l’intérieur de l’appareil, si l’appareil est endommagé de quelque manière que ce
soit ou s’il ne semble pas fonctionner normalement. Débranchez l’appareil de sa
source d’alimentation et faites appel à un technicien qualifié.
• Débranchez le cordon d’alimentation de la prise murale pendant un orage.
• Cet appareil est destiné à un usage ménager uniquement. Toute utilisation de
cet appareil à des fins autres que celles prévues peut présenter des dangers et
invalider la garantie.
Ventilation
Posez l’appareil sur une surface plane et solide à l’abri des rayons directs du soleil
et des sources de chaleur. Si l’appareil est posé sur une étagère ou un meuble de
rangement, maintenez une distance d’au moins 10cm tout autour de l’appareil.
Veillez à ne pas obstruer les trous d’aération, y compris ceux situés sur l’envers de
l’appareil, en posant l’appareil sur un tapis ou sur de la moquette, afin d’éviter toute

19
Mode d’emploi
surchauffe pouvant réduire considérablement la durée de vie de l’appareil et causer
des incendies.
Nettoyage
Débranchez toujours l’appareil avant de le nettoyer. Nettoyez le corps de l’appareil
avec un chiffon doux légèrement humide. N’utilisez pas de solvants chimiques ni de
détergents puissants au risque d’endommager la finition.
Piles
Enlevez les piles si vous ne comptez pas utiliser l’appareil pendant un certain temps.
Les piles laissées à l’intérieur de l’appareil peuvent couler et corroder les pièces
internes de l’appareil et invalider la garantie. Procédez à une mise au rebut de vos
piles usées dans le respect de l’environnement en faisant usage des points de collecte
et de recyclage prévus à cet effet.
Mise au rebut
Les appareils électriques et électroniques ne doivent pas être mis au rebut avec
le reste de vos ordures ménagères. Demandez à votre revendeur quelles sont les
mesures de recyclage appropriées pour ce type de produit. Recyclez vos plies usées
et les matériaux d’emballage en faisant usage des points de collecte et de recyclage
prévus à cet effet.
Importantes Mesures de Sécurité
• Pour éviter les risques de chocs électriques, n’ouvrez pas le bottier de l’appareil.
• En cas de panne ou de mauvais fonctionnement, n’essayez pas d’y remédier vous-
même. Faites appel à un technicien qualifié.
• Maintenez l’appareil à l’abri des éclaboussures et veillez à ne pas poser d’objets
remplis d’eau ou de tout autre liquide (vases, etc.) sur l’appareil.
• Ne laissez pas cet appareil à proximité d’une flamme nue.
• Ne laissez pas de jeunes enfants s’amuser avec cet appareil. Contient des pièces de
petite taille pouvant être ingérées.
Produit laser de classe 1
Cet appareil est muni d’un dispositif laser de faible puis-
sance. Rayon laser invisible en cas d’ouverture ou de défail-
lance du mécanisme de verrouillage. Evitez toute exposition
au rayon.
Mise en garde concernant les droits d’auteur
Les droits d’auteurs s’appliquent aux enregistrements sonores tels que les disques,
cassettes, disques compacts et stations radio. Il est illégal d’enregistrer ou de repro-
duire tout matériel sans la permission du titulaire du droit d’auteur. Toute personne
qui enregistre ou reproduit tout matériel sans la permission du titulaire du droit
d’auteur peut être tenue de verser des dommages et intérêts au titulaire du droit
d’auteur et faire l’objet de poursuites pénales.
A pleine puissance, l’écoute prolongée du baladeur peut endommager l’oreille de
l’utilisateur. Pensez à ajuster le volume à un niveau normal,et non pas au maximum.
fr

4
16
22
17
12
18
1311
10
9
19
14
20
15
21
7
2
8
1
3
5
6
20
IDENTIFICATION DES BOUTONS DE COMMANDE
1. SÉLECTEUR DE FONCTIONS
2. ALIMENTATIONAC
3. ENCEINTE
4. AFFICHAGE
5. INDICATEUR FM STÉRÉO
6. PRISE USB
7. TRAPPE DU COMPARTIMENTA PILES
8. SÉLECTEUR DE BANDES (MW • FM • FM ST.)
9. POIGNÉE
10. BOUTON DE RÉGLAGE DU VOLUM
11. MODE
12. DOSSIER SUIV
13. PROGRAMME
14. PRISE DE BRANCHEMENT POUR ÉCOUTEURS STÉRÉO
15. DOSSIER PRÉC
16. ANTENNE TÉLESCOPIQUE
17. SUIVANT
18. LECTURE/PAUSE
19. RETOUR
20. ARRÊT
21. PORTE CD
22. BOUTON DE RÉGLAG
Mode d’emploi
Table of contents
Languages:
Other AudioSonic Stereo Receiver manuals