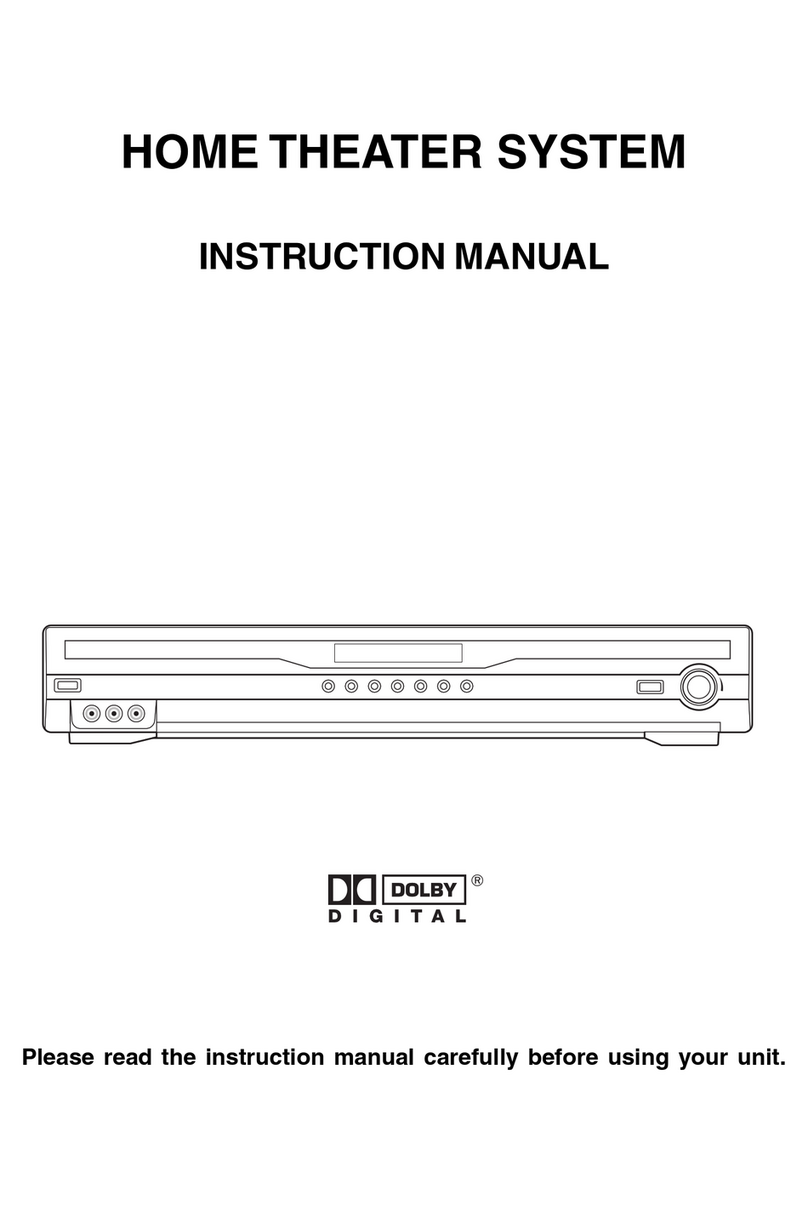
Audiovox AVR2000 User manual

HOMETHEATER SYSTEM
INSTRUCTION MANUAL
Please read the instruction manual carefully before using your unit.

GENERAL
Table Of Contents
IMPORTANTSAFETYINSTRUCTIONS ...........1
Supplied Accessories
Main unit .............................................................X1
Remote control unit ..............................................X1
Home theater speaker .........................................X6
Speaker wire .......................................................X5
Audio/Video cable ................................................X1
AM LOOP antenna ..............................................X1
FM antenna .........................................................X1
Manual guide book ..............................................X1
FUNCTION CONTROL .......................................2
Front Panel .........................................................2
Rear Panel .........................................................2
Remote Control ..................................................3
Using the Remote Control Correctly ......................3
Battery Replacement ..........................................3
SETUP ..............................................................4
Power Connection ...............................................4
Connecting the Speakers & Subwoofer .................4
Mounting the Rear Surround Speakers .................4
Positioning the Speakers & Subwoofer .................5
Setting the Input Mode and Listening Channels ...5
Connecting the Radio Antenna ............................6
Video & Audio Input/Output Setting ......................6
SOUND ADJUSTMENT ......................................8
To Adjust the Balance ........................................8
To Adjust the Sound Quality ................................8
To Adjust the Delay Effect ...................................8
RADIO OPERATION ..........................................9
ToTune Into a Station Manually ...........................9
To Search for a Station Automatically ..................9
To Preset Stations ..............................................9
To Tune Into a Preset Station ..............................9
TROUBLE SHOOTING GUIDE .........................10
Introduction
Thank you for purchasing this production.
For best performance, please read this manual
carefully.
It will guide you in operating your product.
Manufactured under license from Dolby
Laboratories.‘Dolby’,‘Dolby Digital’,‘Pro Logic’
and the double-D symbol are trademarks of
DolbyLaboratories.

FCC Information
This device complies with Part 15 of FCC Rules.
Operation is subject to the following two conditions:
(1) This device may not cause harmful interference, and
(2) This device must accept any interference received, including interference that may cause undesirable
operation.
Notes on Placement
• Do not use the unit in places which are extremely hot, cold, dusty, or humid.
• Place the unit on a flat and even surface.
• In a cabinet, allow about 2.5cm (1 inch) of free space around the unit for adequate ventilation.
• Do not restrict the air flow of the unit by placing it in a place with poor air flow, by covering it with a cloth,
or by placing it on carpet.
Notes on Safety
• When connecting or disconnecting the AC cord, grip the plug and not the cord itself. Pulling the cord
may damage it and create a hazard.
• Unplug the unit during lightning storms or when unused for a long period of time.
• Check that the rated voltage of your unit matches your local voltage before use.
Note on Condensation
• When left in a heated room where is warm and damp, water droplets or condensation may form inside
the unit. When there is condensation inside, the unit may not function normally. Let the unit stand for
1 to 2 hours before turning the power on, or gradually heat the room up and dry the unit before use.
Notes on Maintenance
• Do not use volatile chemicals on this unit. Clean by lightly wiping with a soft cloth.
• Do not place a heavy object on or step on the unit. The object may fall, causing serious personal injury
and serious damage to the unit.
• Protect the power cord from being walked on or pinched particularly at plugs, convenience receptacles,
and the point where they exit from the unit.
IMPORTANT SAFETY INSTRUCTIONS
The lightning flash with an arrowhead symbol, within
the equilateral triangle, is intended to alert the user to
thepresenceofuninsulated"dangerousvoltage"within
the product's enclosure that may be of sufficient
magnitude to cause an electric shock.
The exclamation point within the equilateral triangle is
intended to alert the user to the presence of important
operating and maintenance (servicing) instructions in
this owner manual.
WARNING:TOREDUCETHERISK OFELECTRIC
SHOCK, DO NOT REMOVE COVER (OR BACK).
NO USER-SERVICEABLE PARTS INSIDE.
REFER SERVICING TO QUALIFIED SERVICE
PERSONNEL.
WARNING:
TO PREVENT FIRE OR SHOCK HAZARD,DO NOT EXPOSETHIS APPLIANCETO RAIN OR
MOISTURE.
CAUTION: TO PREVENT ELECTRIC SHOCK, MATCH WIDE BLADE OF PLUGTOWIDE SLOT,FULLY
INSERT.(FOR USA AND CANADA ONLY)
The symbol for Class II (Double lnsulation)
1
WARNING:
•Shouldanytroubleoccur,disconnecttheACpowercordandreferservicingtoaqualifiedtechnician.
• Do not place anything directly on top of the unit, it may cause damage.

Rear Panel
FUNCTION CONTROL
1. POWERbutton
Turn the power on or off.
2. AV3 AUDIO IN (L&R) jacks
Connect to audio outputs.
3. AV3VIDEO IN jack
Connect to video outputs.
4. AV1/2/3 buttons
Press AV1 or AV2 to enter auto-detected/auto-
switching mode, press again to switch to
“forced analog mode”. Press AV3 button to
select the AV3 input.
5. TUNER / BAND button
Select the radio mode and press again to select
between FM and AM band.
6. PRESET button
Select the memorized radio station.
7. TUNING -/+ buttons
Search a radio station.
8. Display window
Show the status of the unit.
9. RemoteControl sensor
Accepts the remote control signals.
10. VOLUME knob
Adjust the volume.
11. STANDBY indicator
When the unit is turned into standby mode by
the remote control, the light will illuminate.
12. 3 STEREO indicator
The light illuminates when 3 STEREO is
selected in AV IN mode.
13. PRO LOGIC indicator
The light illuminates when Dolby Pro Logic is
active in AV IN mode.
14. DIGITAL indicator
The light illuminates when Dolby Digital signal
is input in AV IN mode.
Front Panel
15. AV2 VIDEO IN Jack
16. AV2 AUDIO IN (L & R) Jacks
17. AV2 DIGITAL AUDIO IN Jack
18. AV1 DIGITAL AUDIO IN Jack
19. AV1 VIDEO IN Jack
20. AV1 AUDIO IN (L & R) Jacks
21. Right Front Speaker terminals
22. Center Speaker terminals
23. Left Front Speaker terminals
24. Power Cord
25. FM ANTENNA terminals
26. AM LOOP ANTENNA jack
27. TV VIDEO OUT jack
28. TV AUDIO OUT (L & R) jacks
29. Right Rear Speaker terminals
30. Subwoofer terminals
31. Left Rear Speaker terminals
2
12 3 4 567 8 9 10
11 12 13 14

FUNCTION CONTROL (Continued)
Remote Control
1. Point the remote control at the remote sensor located on the unit.
2. When there is a strong ambient light source, the performance of the infrared remote sensor may be degraded,
causing unreliable operation.
3. The recommended effective distance for remote operation is about 4 meters (13 feet).
When the battery becomes weak, the operating distance of the remote control is greatly reduced and you will
need to replace the battery.
Note:
If the remote control will not be used for a long prriod of time, remove the battery to avoid damage caused by
battery leakage corrosion.
1.Open the battery door. 2.Insert one CR2025
(3V) size battery. Attention:Take out the PVC sheet before operating
the remote control.
1. POWER button
Turns the unit ON, or puts the unit into
STANDBY mode.
2. BANDbutton
Switch the radio band between FM and AM.
3. TUNING button
Search a radio station.
4. MEMORY button
Memorize a radio station.
5. SURROUNDbutton
Change the output channels or the output
sound mode in AV IN mode.
6. VOL +/- buttons
Increase or decrease the volume.
7. FUNCTIONbutton
Select the tuner mode and AV inputs. Every
time the button is pressed, the mode will
change cyclically as: AV1->AV2->AV3->Tuner
3
8. NEXT button
Select the preset stations or adjust the sound
level.
9. DISPLAY button
Show the current sound channel or status.
10. TUNING button
Search a radio station.
11. SOUNDbutton
Select sound balance and tone control for
adjustment with the NEXT/PREV buttons.
12. MONO/STEREObutton
Select FM STEREO or FM MONO mode.
13. PREV button
Select the preset stations or adjust the sound
level.
14. TEST button
Test the volume of each speaker.
MONO/
STEREO
MEMORY
FUNCTION
DISPLAY
TEST
BAND
NEXT
PREV
POWER
1
8
9
10
11
12
13
14
7
2
3
4
5
6
Battery Replacement
Using the Remote Control Correctly

SETUP
Power Connection
Caution:
•Before you plug in the unit, make sure that the rated voltage of your unit matches your local voltage.
•Keep your hands dry when you are connecting the power cord to the wall outlet in case of electric shock.
•When you are not going to use the unit for a long period of time, disconnect the power cord.
1. The speaker cords have been color-cord to simplify connection. Just plug the ends of each speaker wire
into the corresponding jacks on the rear of the unit, matching the color tube on the end of the speaker wire
to the color-cord connector. Make sure to connect the red (+) wire to the red (+) terminal on the rear of the
unit, and the black (-) wire to the black (-) terminal on the rear of the unit.
2. Connect each of the speaker wires to a satellite speaker. Make sure to connect the red (+) wire to the red (+)
terminal on the rear of the unit, and the black (-) wire to the black (-) terminal on the rear of the unit.
3. The subwoofer is the ONLY speaker which should be connected to the subwoofer jacks on the rear of the
unit. Connecting any other speaker to the subwoofer jacks may damage the unit.
Caution:
To prevent damage to the unit, be sure to turn off the unit before making any connection.
1. Mark the correct mounting position on the wall.
2. Insert a fixing screw(s) at the marked position on the wall.
3. Align the slot hole(s) of the speaker over the screw and pull the speaker downward until it is firmly hooked.
Need More Help?
DO NOT RETURN THIS TO THE STORE
Please call Customer Service at 1-800-252-6123
or visit online help at http://www.18002526123.com
4
Mounting the Rear Surround Speakers
Connecting the Speakers & Subwoofer

SETUP (Continued)
Positioning the Speakers & Subwoofer
Setting the Input Mode and Listening Channels
Remarks:
1. "O" The speaker is active." X " The speaker is inactive.
2. Generally, only Front Left, Right speakers and Subwoofer are active in TUNER mode.
3. 3 STEREO mode creates a surround sound effect without using the rear speakers. In this mode, no sound
comes from the rear speakers.
AV1: Turn on the unit and “AV1”will automatically show on the display, press AV1 button again until “AV1
ANALOG”appears on the display.
AV2: Turn on the unit and press AV2 button to select the AV2 input mode, press the button again until “AV2
ANALOG”appears on the display.
AV3:The AV3 audio input is analog only.
Notes:
•AV1 and AV2 input mode can auto-detect the input source(digital or analog) and auto-switch to the
correspondingmode.
•Toenter “forceanalog”mode,pressAV1or AV2buttonagain until“AV1ANALOG”or“AV2ANALOG”appears
on the display. “Force analog”mode is available for AV1 and AV2 only.
•You can press the SURROUND button repeatedly on the remote control to change the sound output status.
Please see the table below.
The following table shows which speakers are working in various modes.
5
SUBWOOFER
Can be placed anywhere.
REARSPEAKERS
Place right beside or slightly
behind your listening position,
and a little higher than your ears.
CENTER
Place on the top of or below the TV.
FRONTSPEAKERS
Place on both sides of the TV,
equal distances apart.

SETUP (Continued)
Connecting the Radio Antenna
FM: Connect the FM antenna (included) to the FM ANTENNA terminals. Fully unwind the wire antenna.Then
extend the wire antenna and place it in the position that sounds best.
AM: Connect the loop antenna (included) to the AM LOOP ANTENNA jack. Rotate the antenna to get the best
receiving position.
AV1 (SAT/VCR)
Connect the audio and video output jacks of the AV equipment (VCR, Satellite receiver, etc.) to the audio and
video input jacks on the unit with an Audio/Video cable (included).
If the AV equipment has a bitstream/PCM coaxial audio out jack, Connect the equipment to the unit by using
a coaxial cable.
AV2 (DVD)
Connect the audio and video output jacks of the DVD player to the audio and video input jacks on the unit with
an Audio/Video cable (included).
Connect the coaxial digital audio output jack of the DVD player to the DIGITAL AUDIO IN on the unit by using
a coaxial cable.
Video & Audio Input/Output Setting
6
TV
Connect the audio and video input jacks of your TV to the audio and video output jacks on the unit with an
Audio/Video cable (included).Refer to thatTV’s owner’s manual.
To record the playing signal, connect AUDIO OUT to the recordable equipment (Recordable cassette player,
Recordable MD player, etc.).
WatchingaDVD
1. Connect the unit to the TV and the DVD player.
2. Turn on the unit and press the FUNCTION button on the remote control to select AV2 auto-detected mode,
or press AV2 button on the front panel directly. If no sound in digital input mode, press AV2 button of the
front panel to AV2 ANALOG mode.“Force analog”mode is activated by pressing the front panel AV2 button
only.
3. Turn on your TV and select the corresponding video input that you have connected to the unit.
4. Turn on your DVD player to start playing.

Video & Audio Input/Output Setting(Continued)
SETUP (Continued)
AV3
Connect the audio and video output jacks of the AV equipment (Video game console, etc.) to the audio and
video input jacks on the unit.
7
Remarks:
Dolby Digital is a surround sound technology used in theaters showing the latest movies, and now available
to reproduce this realistic effect in the home.
You can enjoy motion picture and live concert DVD video discs with this dynamic realistic sound by connecting
the unit to the DVD player with bitstream/PCM coaxial output.
Dolby Pro Logic is a sound system that was developed to get a better sense of presence from sources
encoded with Dolby Surround.The feeling of position has been improved by the addition of a separate center
speaker channel.
You can enjoy the dynamic realistic sound of Dolby Pro Logic Surround by connecting the unit to the equipment
gives Dolby Pro Logic signal with a coaxial cable or Audio cable.The output sound from the rear speakers will
be monaural.

Adjust the speaker balance with the remote control. Press the SOUND button to select the desired speaker
and press NEXT or PREV button to adjust the channel level.
Notes:
1. If you do not press any button within a few seconds, the display will return to normal.
2. Every press on the SOUND button will change the menu cyclically as below:
Press the SOUND button repeatedly to select an equalization mode (BASS, MIDDLE, TREBLE). Press the
NEXT or PREV button to adjust the level.
•BASS: Adjust the low range of sounds.
•MIDDLE: Adjust the middle range of sounds.
•TREBLE: Adjust the high range of sounds.
Press the SOUND button until the menu “MODE LINE ”appears. Press the NEXT or PREV button to switch
between “MODE LINE ”and “MODE RF ”.The “MODE LINE”and “MODE RF ”are only effective when Dolby
Digital signal is input in AV IN mode.
•MODE LINE: Enables dialogue normalization without compression scaling.
•MODE RF: Causes dialogue to be reproduce at a level that compares well with quality television broadcasts
and premium movie channels with fully compression scaling.
Note:
•Bass, middle and treble control the sound from the front left and right speakers.
Press the SOUND button repeatedly to select the delay time of the center speaker and the rear speakers.
Press the NEXT or PREV button to adjust the delay time (millisecond).
•P DELAY: Set the delay time of the rear speakers for Dolby Pro Logic mode.
•D DELAY: Set the delay time of the rear speakers for Dolby Digital mode.
•C DELAY: Set the delay time of the center speaker.
8
SOUND ADJUSTMENT
To Adjust the Balance
To Adjust the Sound Quality
To Adjust the Delay Effect
Notes:
1. This unit supports three digital input modes:
•Dolby Digital 5.1ch. In this mode, press the SURROUND button on the remote control to select between
Dolby D (5 CH.) and Downmix (2 CH.).
•Dolby Digital 2.0ch. In this mode, press the SURROUND button to select among Dolby D (2 CH.), 3
STEREO (3 CH.) and DOLBY PRO LOGIC (4 CH.).
•PCM. In this mode, press the SURROUND button to select among STEREO, 3 STEREO and DOLBY
PRO LOGIC.
2. When analog signal is input, press the SURROUND button to select among STEREO, 3 STEREO and
DOLBY PRO LOGIC.
The table below shows the front panel indicator and the display status in various modes.

RADIO OPERATION
1. Press theTUNER/BAND button on the unit or the FUNCTION button on the remote control until the frequency
band appears on the display.
2. Press the TUNER/BAND button again or the BAND button on the remote control to select the desired band.
3. Press either of the TUNING buttons to tune into a station.
FM Stereo
Press the MONO/STEREO button on the remote control until “STEREO”appears on the display. When the
radio signal is weak, the “((ST)) ”indicator will flash.
Weak FM Stations
Press the MONO/STEREO button until “MONO”appears on the display. Background noise will be reduced but
the signal reproduced will be mono.To restore stereo reception, press the MONO/STEREO button again.
•Hold down either of the TUNING buttons on the unit or the remote control for 1 to 2 seconds, and a station
is searched automatically. After tuning into a station, the search stops.
•The search may not stop at a station with a very weak signal.
•When the search is in progress, press either of the TUNING buttons again to stop searching.
You can tune into a stored station directly by pressing the PRESET button.
20 stations on FM band can be preset.
20 stations on AM band can be preset.
1. Press the TUNER/BAND button on the unit or the FUNCTION button on the remote control until the frequency
band appears on the display.
2. Press the TUNER/BAND button on the unit again or the BAND button on the remote control to select the
desired band.
3. Use the TUNING button to find your desired station.
4. Press the MEMORY button on the remote.
5. Press the NEXT or PREV button to select the preset number and press the MEMORY button on the remote
control to store the station.
6. Repeat steps 2-5 to store other stations.
7. To change the preset station. Repeat steps 2-5.
1. Press the TUNER/BAND button on the unit or the FUNCTION button on the remote control until the frequency
band appears on the display.
2. Press the TUNER/BAND button again or the BAND button on the remote control to select the desired band.
3. Press the PRESET button on the unit repeatedly or the NEXT or PREV button to select the preset station.
4. To check the preset stations. Press the PRESET button repeatedly.
Notes:
•Only the two front speakers and the subwoofer are active in tuner mode.
•The SURROUND andTEST buttons on the remote control are unavailable in tuner mode.
9
ToTune Into a Station Manually
To Search for a Station Automatically
To Preset Stations
ToTune Into a Preset Station

The following checks will assist in the correction of most problems which you may encounter with your
system.
TROUBLE SHOOTING GUIDE
PROBLEMS
No Power.
No sound.
No sound from one channel or
unbalanced left and right volume.
Reversed left and right sound.
The centre speaker or the surround
speakers give no sound
The remote control does not function.
RADIORECEPTION
The FM STEREO indicator flashes.
Severe hum or noise.
SOLUTIONS
•Check that the AC power cord is connected.
•Rotate the VOLUME clockwise to increase volume.
•Select the correct AV input and the correct input mode
(Digital or analogy sound).
•Check the speaker connections of the inoperative channel.
•Check the speaker cord connection and speaker location.
•Check the speaker connection for proper phasing.
•Check that the speaker connections are correct.
•The current mode does not support surround sound.
•Remove any obstacles between the remote control and
the unit.
•Use the remote control near the unit.
•Point the remote control at the remote sensor on the unit.
•Replace the battery in the remote control with new one.
•Unwind the antenna.
•Switch to MONO sound in FM Radio mode.
10
PRINTED IN CHINA
811-AVR291-011
Specificationsand externalappearance aresubject tochange withoutadvance notice
due to continuous product improvement.

CHAÎNE DE CINÉMA MAISON
MANUEL D’INSTRUCTIONS
Veuillez lire ce manuel d’instructions attentivement avant d’utiliser l’appareil.

RENSEIGNEMENTS D’ORDRE GÉNÉRAL
Accessoires fournis
Appareil principal................................................X1
Télécommande.................................................X1
Enceintes et câble pour cinéma maison..............X6
Fils d’enceintes..................................................X5
Câble audio/vidéo..............................................X1
Antenne CADRE AM.........................................X1
Antenne FM......................................................X1
Manuel d’utilisation............................................X1
Table des matières
CONSIGNES DE SÉCURITÉ IMPORTANTES ..1
COMMANDE DE FONCTION.... ........................2
Panneau Devant................................................2
Panneau Arrière........... .....................................2
Télécommande.................................................3
Utilisationcorrecte de la télécommande..............3
Remplacement de la pile...................................3
RÉGLAGE INITIAL...........................................4
Branchement d’alimentation...............................4
Raccordementde toutes les enceintes................4
Pose des enceintesambiophoniquesarrière........4
Emplacement de toutes les enceintes...............5
Réglagedu mode d’entrée et descanaux
d’écoute .........................................................5
Raccordementdel’antennederadio...................6
Réglage d’entrée et sortie vidéo et audio............6
RÉGLAGE DU SON.........................................8
Réglage de I’équilibre......................................8
Réglage de la qualité du son..............................8
Réglagedutempsde propagation.........................8
FONCTIONNEMENT DE LA RADIO...................9
Syntonisationmanuelled’unestation..................9
Rechercheautomatique d’unestation...................9
Préréglage de stations.......................................9
Syntonisationd’unestationpréréglée....................9
GUIDE DE DÉPANNAGE................................10
Introduction
Nous vous remercions d’avoir acheté ce produit.
Pour obtenir un rendement optimal, veuillez lire ce
manuelattentivement.
Il vous aidera à faire fonctionner correctement votre
appareil.
Fabriqué sous licence de Dolby Laboratories.Dolby,
Dolby Digital, Pro Logic et le symbole à deux D sont
desmarques de commerce de DolbyLaboratories.

Renseignement FCC
Cet appareil est en conformité avec la section 15 des règles de la FCC.
Son fonctionnement est soumis aux deux conditions suivantes :
(1) Cetappareil nedoitpascauserd’interférencesgênantes, et
(2) Cetappareil doit supporter toute interférence reçue,ycompris celles qui pourraient causer son mauvais
fonctionnement.
Emplacement
• N’utilisez pas l’appareil dans les endroits extrêmement chauds, froids, poussiéreux ou humides.
• Placez l’appareil sur une surface plate et de niveau.
• Dansune armoire, laissez un espace libre d’environ 2,5 cm (1po)pourassurer une aération adéquate.
• Laissezl’air circuler librementautourde l’appareil. Nele couvrez pas avecdu tissu et nele placez passur
un tapis.
Sécurité
• Lorsquevousbranchez et débranchez le cordon CA, tenez laficheet non le cordon. Le tirage ducordon
peutl’endommager et créer un risque.
• Débranchezl’appareil durantles orages ets’il nevapas êtreutilisépendant unelongue période detemps.
• Débranchezle cordon d’alimentationCAsi vous n’allezpas utiliser l’appareil pendantune longue période
de temps.
Condensation
• Si l’appareil est laissé dans une pièce chaude et humide, des gouttelettes d’eau ou de la condensation
peuvent se former à l’intérieur de l’appareil. S’il y a de la condensation à l’intérieur de l’appareil, son
fonctionnementnormal peut être affecté. Attendez de 1à2 heures avant de mettre l’appareil enmarche,
ou chauffez graduellement la pièce pour faire sécher l’appareil avant de l’utiliser.
Remarques sur l’entretien
• N’utilisez pas de produits chimiques volatils sur cet appareil. Nettoyez-le en l’essuyant avec un chiffon
doux.
• Neplacez pas un objetlourd sur l’appareil etnemontez pas dessus.Unobjet lourd peut tomberetcauser
uneblessure graveouendommager considérablementl’appareil.
• Veillez à ce que personne ne marche sur le cordon d’alimentation et à ce qu’il ne soit pas coincé
particulièrement près des fiches, des prises et des points de sortie de l’appareil.
CONSIGNES DE SÉCURITÉ IMPORTANTES
Le symbole de l’éclair et d’une flèche à l’intérieur
d’un triangle équilatéral signale qu’il y a une «
tension dangereuse » non isolée à l’intérieur de
l’appareil, suffisamment élevée pour causer un
choc électrique.
Le point d’exclamation à l’intérieur d’un triangle
quilatéral signale qu’il y a des instructions
importantes de fonctionnement et d’entretien qui
accompagnent l’appareil.
DE CHOCS ÉLECTRIQUES, NE PAS RETIRER LE
COUVERCLE (NI LE DOS). AUCUNE PIÈCE
NÉCESSITANT L’ENTRETIEN PAR L’UTILISATEUR À
L’INTÉRIEUR. POUR RÉPARATION, S’ADRESSER À
UN RÉPARATEUR QUALIFIÉ.
AVERTISSEMENT : POUR ÉVITER UN INCENDIE OU UN RISQUE DE CHOC ÉLECTRIQUE, NE PAS
EXPOSER CET APPAREIL À LA PLUIE OU À L’HUMIDITÉ.
MISE EN GARDE : POUR ÉVITER UN CHOC ÉLECTRIQUE, FAIRE CORRESPONDRE LA BROCHE
LARGE DE LA FICHE AVEC LA FENTE LARGE DE LA PRISE ET ENFONCEZ LA
FICHE À FOND. (CANADA ET É.-U. SEULEMENT)
1
AVERTISSEMENT :
• En cas de problème, débranchez le cordon d’alimentation CA et faites réparer l’appareil par un personnel
qualifié.
• Ne placez aucun objet sur le dessus de l’appareil,car ceci pourrait l’endommager.
WARNING
AVERTISSEMENT
POUR RÉDUIRE LE
RISQUE
Symbole pour Classe II (double isolation)

panneau arrière
COMMANDES DE FONCTION
1. TOUCHEPOWER
Met l’alimentation en et hors circuit.
2. PRISES ENTRÉE AUDIO AV3 (G et D)
Pour raccordement auxsorties audio.
3. PRISES ENTRÉEVIDÉO AV3
Pour raccordement aux sorties vidéo.
4. TOUCHES AV1/2/3
Pressez AV1 ou AV2 pour mode auto-
détection/auto-commutation; pressez de
nouveau pour passer au mode analogique
forcé. Pressez la touche AV3 pour choisir
l’entréeAV3.
5. TOUCHETUNER / BAND
Pour choisir le mode de radio et à presser de
nouveaupour alternerentreles bandesFMet
AM.
6. TOUCHE PRESET
Pour choisir lesstationsà mettreenmémoire.
7. TOUCHESTUNING -/+
Pour chercher une stationderadio.
8. FENÊTRED’AFFICHAGE
Indiquele mode de fonction de l’appareil.
9. CAPTEURDETÉLÉCOMMANDE
Capte les signaux de la télécommande.
10. BOUTON DEVOLUME
Pour régler le volume.
11. INDICATEUR STANDBY
Quand l’appareil est mis en mode STANDBY
(disponibilité)à l’aide dela télécommande, ce
voyant s’allume.
12. INDICATEUR 3 STEREO
Cevoyant s’allume lorsque leson 3 STEREO
est choisi en mode AV IN (entrée A/V).
13. INDICATEUR PRO LOGIC
Ce voyant s’allume lorsque le son Dolby Pro
Logic est mis en service en mode AV IN
(entréeA/V).
14. INDICATEUR NUMÉRIQUE
Ce voyant s’allume lorsque le signal d’entrée
estDolbyDigitalen mode AV IN(entréeA/V).
panneau devant
15. Prise d’entrée AV2VIDÉO IN
16. Prises d’entrée AV2 AUDIO IN (G et D)
17. Prised’entréeAV2 DIGITAL AUDIO IN
18. Prised’entréeAV1 DIGITAL AUDIO IN
19. Prise d’entrée AV1VIDÉO IN
20. Prises d’entrée AV1 AUDIO IN (G et D)
21. Bornespourenceinte avant droite
22. Bornes pourenceinte centrale
23. Bornespourenceinte avant gauche
24. Cordond’alimentation
25. Bornes D’ANTENNEFM
26. Borne D’ANTENNECADRE AM
27. Prise de sortieTVVIDÉO OUT
28. Prises de sortieTV AUDIO OUT (G et D)
29. Bornes pourenceinte arrière droite
30. Bornespourenceinte d’extrêmes graves
31. Bornes pourenceinte arrière gauche
2
12 3 4 567 8 9 10
11 12 13 14

COMMANDES DE FONCTION (Suite)
Télécommande
1. TOUCHE POWER
Met l’appareil en circuit quand celui-ci est en
mode STANDBY (disponibilité) ou le met en
mode STANDBY.
2. TOUCHE BAND
Pour alterner entre la bande FM et la bande
AM
3. TOUCHE TUNING
Pour syntoniser une station de radio
4. TOUCHE MEMORY
Pour mise en mémoire d’une station de radio
5. TOUCHE SURROUND
Pour changer les canaux d’écoute et la sortie
du son en mode AV IN
6. TOUCHE VOL +/-
Pour augmenter ou diminuer le volume
7. SÉLECTEUR DE FONCTION
Pour choisir le mode TUNER (syntonisateur)
et les entrées A/V. Chaque fois que vous
pressezcette touche, le mode change de façon
cyclique comme suit :AV1->AV2->AV3->Tuner
3
8. TOUCHENEXT
Pour choisir les stations préréglées ou régler
leniveau sonore.
9. TOUCHE DISPLAY
Indique le canal de la piste sonore en cours
ou l’état
10. TOUCHE TUNING
Pour syntoniser une station de radio
11. TOUCHE SON
Pour choisir l’équilibre de la piste sonore et
contrôler la tonalité pour permettre de faire des
réglages avec les touches NEXT/PREV
12. TOUCHEMONO/STÉRÉO
Pour choisir le mode FM STÉRÉO ou FM
MONO.
13.TOUCHEPREV
Pour choisir les stations préréglées ou régler
leniveau sonore.
14. TOUCHE TEST
Pour tester le volume de chaque enceinte
acoustique
MONO/
STEREO
MEMORY
FUNCTION
DISPLAY
TEST
BAND
NEXT
PREV
POWER
1
8
9
10
11
12
13
14
7
2
3
4
5
6
Utilisation correcte de la télécommande
1. Pointez la télécommande vers le capteur de la télécommande situé sur l’appareil.
2. Si l’éclairage ambiant est élevé, le rendement du capteur de télécommande à infrarouge peut baisser et
entraînerun mauvais fonctionnement.
3. La distance efficace conseillée pour le fonctionnement de la télécommande est d’environ 4 m (13 pi).
Remplacement de la pile
Quandla pile s’affaiblit, ladistancede fonctionnement de la télécommandebaisse considérablement et il faut
remplacerla pile.
Remarque:
Si vous n’allez pas utiliser la télécommande pendant une longue période de temps, retirez la pile pour éviter
toute corrosion en cas de fuite de la pile.
1.Ouvrez le compartiment
de la piIle. 2.Insérez une pile
CR2025(3V). Attention : Retirez la pellicule de PVC avant
d’utiliserla télécommande.

RÉGLAGE INITIAL
Branchement de l’alimentation
4
Avez-vous besoin d’aide
supplémentaire?
NE RETOURNEZ PAS L’APPAREIL AU MAGASIN
Veuillez appeler le service à la clientèle au 1-800-252-6123
ou visitez notre site d’aide au http://www.18002526123.com
Pose des enceintes ambiophoniques arrière
1. Faites un repère del’emplacementdésirésurle mur.
2. Insérez une vis sur le repère au mur.
3. Faites coïncider l’encoche sur l’enceinte avec la vis et tirez l’enceinte vers le bas jusqu’à ce qu’elle soit
biencalée dans l’encoche.
MISE EN GARDE:
• Avant d’effectuer la connexion, vérifiez si la tension indiquée pour l’appareil correspond à votre tension
locale.
• Assurez-vousque vos mains soient sèches lorsque vousbranchezle cordon d’alimentation dans la prise
muralepouréviter le risque d’un choc électrique.
• Débranchezle cordon d’alimentation si vous n’allez pas utiliser l’appareil pendantunelonguepériode de
temps.
Raccordement de toutes les enceintes
1. Lesfils desenceintes acoustiques comportentun code-couleurpoursimplifier lebranchement.Raccordez
l’extrémité de chaque fil d’enceinte dans la prise correspondante à l’arrière de l’appareil, en faisant
correspondre le tube de couleur sur l’extrémité du fil avec le connecteur à code-couleur.
2. Raccordez chaque fil d’enceinte aux enceintes satellites. Les enceintes avant et arrière de gauche et de
droitesontidentiques.Cependant,veillezàfaire leraccordementde l’enceintecentrale(couleur) àl’enceinte
légèrementplus longue que les autres.
3. Neraccordez pas les autres enceintes à l’enceinted’extrêmesgraves, car ceci risque d’endommager les
enceintes.
MISE EN GARDE:
Pour éviter d’endommager l’appareil, mettez-le hors circuitavant d’effectuerun raccordement.
ARRIÈRE (DROITE)
EXTRÊMES GRAVES
ARRIÈRE (GAUCHE)
AVANT (GAUCHE)
AVANT(DROITE)
CENTRE

Remarques:
1. Oindique que l’enceinte est en service. X indique que l’enceinte n’est pas en service.
2. En général, seules les enceintes avant de gauche et de droite et l’enceinte d’extrêmes graves sont en
serviceen modeTUNER(syntonisateur).
3. Lemode 3STEREOcrée uneffet sonoreambiophoniquesans utiliserlesenceintes arrière.Avecce mode
aucunson ne provient des enceintesarrière. 5
ENCEINTED’EXTRÊMES GRAVES
Peut se placer n’importe où.
ENCEINTESARRIÈRE
Placezjusteà côtéoulégèrement derrière
lazoned’écoute et légèrement plus haut
que le niveau des oreilles
ENCEINTESAVANT
Placez de part et d’autre du téléviseur,
à distance égale de chaque côté.
RÉGLAGE INITIAL (Suite)
Emplacement de toutes les enceintes
CENTRE
Placez sur le dessus ou en-dessous du
téléviseur.
EXTRÊMES
GRAVES
AVANT
GAUCHE
CENTRE
AVANT
DROITE
ARRIÈRE
DROITE
ARRIÈRE
GAUCHE
Réglage du mode d’entrée et des canaux d’écoute
AV1: Mettezl’appareilencircuit et AV1 est affiché automatiquement;pressezla touche AV1 jusqu’à ceque
AV1 ANALOG soit affiché.
AV2: Mettez l’appareil en circuit et pressez la touche AV2 pour choisir le mode d’entrée AV2; pressez de
nouveau la touche jusqu’à ce que AV2 ANALOG soit affiché.
Remarques:
• Les modes d’entrée AV1 et AV2 permettent une auto-détection de la source d’entrée (numérique ou
analogique)et une auto-commutationau mode correspondant.
• Pour obtenir le mode analogique forcé, pressez de nouveau la touche AV1 ou AV2 jusqu’à ce que AV1
ANALOGou AV2 ANALOG soit affiché.Le mode analogique forcés’obtient seulement avec AV1etAV2.
• Vous pouvezpresserla toucheSURROUNDdefaçonrépétée surlatélécommande pourchanger l’étatde
sortie de la piste sonore.Veuillez consulter le tableau ci-dessous.
Le tableau suivant indique quelle enceinte acoustique est en service selon les modes variés
.

Raccordement de l’antenne de radio
FM : Raccordezl’antenneFM (incluse)aux bornesFMANTENNA. Déroulezcomplètement l’antenne filaireet
placez-ladans la position qui procure la meilleure réception.
AM :Raccordez l’antenne cadre (incluse) à la prise AM LOOP ANTENNA. Tournez l’antenne de façon à
obtenirla meilleure réception.
Réglage d’entrée et de sortie vidéo et audio
AV1 (SATELLITE/MAGNÉTOSCOPE)
Connectez les prises de sortie audio et vidéo des appareils A/V (magnétoscope, récepteur satellite, etc.) aux
prises d’entrée audio et vidéo sur l’appareil en utilisant le câble audio/vidéo (inclus).
Si l’appareil A/V comporte une prise de sortie audio coaxiale à train numérique/PCM, établissez la connexion
en utilisant un câble coaxial.
AV2 (DVD)
Connectez la sortie AUDIO OUT L/R (G/D) et la sortieVIDEO OUT de l’appareil A/V (lecteur de DVD, etc.) à
laprise d’entrée AUDIO IN L/R (G/D) et l’entréeVIDEOIN sur l’appareil à l’aided’un câbleaudio/vidéo.
Connectezla prisedesortieaudionumériquecoaxiale sur le lecteur de DVDà la priseDIGITAL AUDIOINsur
l’appareil en utilisant un câble coaxial.
TÉLÉVISEUR
L’appareil peut se raccorder à votre téléviseur ou moniteur en connectant la priseVIDEO OUT (sortie vidéo)
surl’appareil à la priseVIDEO IN (entrée vidéo) sur votre téléviseur ou moniteur.Pour enregistrer le signal de
lecture,connectezlapriseVIDEO OUTàl’appareil d’enregistrement(magnétocassette,mini-lecteur de disque
àenregistrement,etc.).
Lecture d’un DVD
1. Connectezl’appareil au téléviseur et au lecteur deDVD.
2. Mettez l’appareil en circuit et pressez le sélecteur de FONCTION sur la télécommande pour choisir le
mode à auto-détection AV2 ou pressez la touche AV2 sur le panneau devant. S’il n’y a aucun son en
moded’entrée numérique,pressezla touche AV2 surlepanneau devantpour obtenir le modeanalogique
AV2 ANALOG.Le mode analogique forcé s’obtient seulement en pressant la touche AV2 sur le panneau
devant.
3. Mettezvotre téléviseur encircuitet choisissez l’entréevidéo correspondant à celleutilisée pour connecter
l’appareil.
4. Mettez votre lecteur de DVD en circuit pour commencer la lecture d’un DVD.
6
RÉGLAGE INITIAL (Suite)
Table of contents
Languages:
Other Audiovox Home Theater System manuals

Audiovox
Audiovox VD1400HT User manual

Audiovox
Audiovox DV1530 User manual

Audiovox
Audiovox RB-3600 User manual

Audiovox
Audiovox DV1300B User manual

Audiovox
Audiovox DV1532 User manual

Audiovox
Audiovox RB-3600 User manual

Audiovox
Audiovox DV5007 - 500with 5 DVD Home Theater System User manual

Audiovox
Audiovox Jensen JHT350 User manual

Audiovox
Audiovox DV 7300 User manual

Audiovox
Audiovox DV1100 User manual