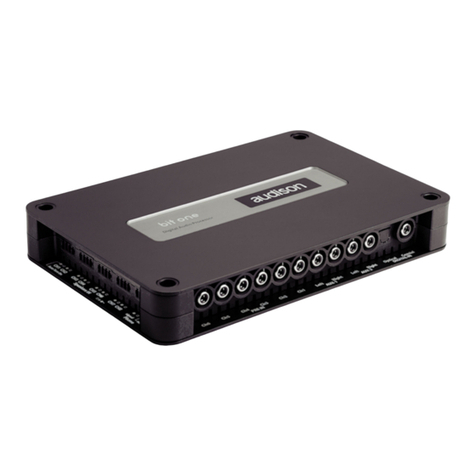
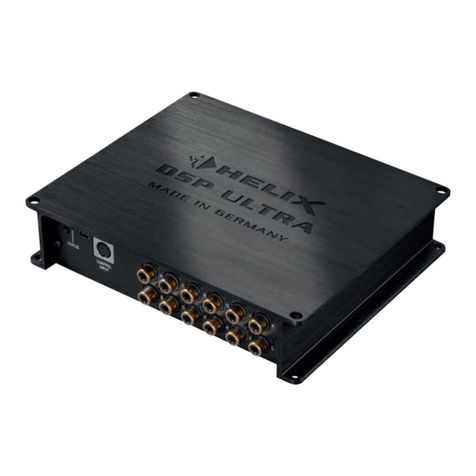
Audison bit One HD Virtuoso User manual

USER’S
MANUAL
rev. 3.0
aidison.com

2
USER'S MANUAL
Index
1. PRODUCT DESCRIPTION..........................................................................................................................................................3
2. PACKAGING CONTENTS...........................................................................................................................................................3
3. bit One HD Virtuoso AND DRC MP INSTALLATION ...........................................................................................................4
4. CONNECTION PANELS - DESCRIPTION ...............................................................................................................................5
4.1 INPUT SIGNALS ...................................................................................................................................................................5
4.2 OUTPUT SIGNALS ...............................................................................................................................................................7
4.3 INPUTS - REMOTE CONTROL OUTPUTS AND POWER SUPPLY ..............................................................................8
5. CONNECTIONS..........................................................................................................................................................................10
5.1 POWER SUPPLY AND REMOTE TURN ON...................................................................................................................10
5.2 HOW TO TURN THE bit One HD Virtuoso ON/OFF .....................................................................................................10
5.3 PERSONAL COMPUTER and DIGITAL REMOTE CONTROL (DRC MP)...................................................................10
5.4 LOW-LEVEL AND DIGITAL INPUT SIGNALS................................................................................................................11
5.4.1PRE IN - CH1/CH6 ANALOG STEREO SIGNAL......................................................................................................11
5.4.2AUX - LEFT/RIGHT - ANALOG STEREO SIGNAL ..................................................................................................11
5.4.3"AUTO INPUT SWITCH” AUX SIGNAL......................................................................................................................11
5.5 HIGH-LEVEL INPUT SIGNALS.........................................................................................................................................12
5.5.1SPEAKER IN HI-LEVEL MULTICHANNEL (MAX 12 CHANNELS) .......................................................................12
5.6 OPTICAL 1/OPTICAL 2 DIGITAL INPUT SIGNALS ......................................................................................................12
5.6.1“AUTO INPUT SWITCH” OPTICAL 1 / OPTICAL 2 SIGNALS. ..............................................................................13
5.7 OUTPUT SIGNALS .............................................................................................................................................................14
5.7.1OUTPUT TO AN AMPLIFIERS SYSTEM PROVIDED WITH AD LINK
AND AC LINK CONNECTION (THESIS TH / AV AMPLIFIERS) ............................................................................14
5.7.2OUTPUT TO AN AMPLIFIERS SYSTEM WITH PRE INPUT..................................................................................15
5.7.3OUTPUT TO AN AMPLIFIERS SYSTEM PROVIDED WITH AD LINK AND AC LINK CONNECTIONS
(THESIS TH) AND AMPLIFIERS PROVIDED WITH PRE INPUT ..........................................................................15
6. bit One HD Virtuoso SOFTWARE AND DRIVERS - INSTALLATION GUIDE .................................................................16
6.1 SOFTWARE INSTALLATION GUIDE ...............................................................................................................................16
6.2 DRIVERS INSTALLATION GUIDE FOR WINDOWS VISTA, 7/8/10............................................................................18
6.3 bit One HD Virtuoso SOFTWARE UNINSTALL .............................................................................................................18
7. bit One HD Virtuoso SETUP WITH PC .................................................................................................................................19
7.1 OFFLINE MODE IIR/FIR ....................................................................................................................................................19
7.2 CONNECT MODE................................................................................................................................................................21
7.2.1I/O CONFIGURATION WIZARD .................................................................................................................................23
7.2.2AUTOMATIC ROUTING...............................................................................................................................................24
7.2.3PASS THROUGH..........................................................................................................................................................35
7.2.4MASTER INPUT OPTICAL 1 ......................................................................................................................................43
8. bit One HD Virtuoso SETUP USING A PC ...........................................................................................................................47
8.1 FEATURES...........................................................................................................................................................................47
8.2 MAIN MENU': “FILE” ..........................................................................................................................................................48
8.3 MAIN MENU' “CONFIG” ....................................................................................................................................................50
8.4 MEMORY .............................................................................................................................................................................54
8.5 SELECT A CHANNEL / BATTERY STATUS ...................................................................................................................55
8.6 CHANNEL MAP...................................................................................................................................................................56
8.7 FILTER SETTINGS / DELAY .............................................................................................................................................57
8.7.1FILTER SETTINGS .......................................................................................................................................................57
8.7.2SET DISTANCE AND DELAY......................................................................................................................................60
8.8 EQ SETTINGS......................................................................................................................................................................64
8.8.1INPUT EQ ......................................................................................................................................................................64
8.8.2CHANNELS AND FRONT EQUALIZER .....................................................................................................................68
8.8.3MAIN EQ ........................................................................................................................................................................75
8.9 OUTPUT LEVEL ..................................................................................................................................................................76
8.10 VOLUME LEVEL ...............................................................................................................................................................77
8.11 SELECT INPUT.................................................................................................................................................................77
8.12 SETUP................................................................................................................................................................................78
8.13 DEVICE INFO.....................................................................................................................................................................82
9. TROUBLESHOOTING ...............................................................................................................................................................83
9.1 SYNCHRONIZATION WITH THE PC...............................................................................................................................83
9.2 BACKGROUND NOISE.......................................................................................................................................................83
9.3 FIRMWARE UPDATE .........................................................................................................................................................83
9.4 RESCUE MODE ...................................................................................................................................................................85
10.TECHNICAL SPECIFICATIONS ..............................................................................................................................................87
11.ADDENDUM ...............................................................................................................................................................................88
11.1 USE OF THE KEYBOARD TO ADJUST THE BIT ONE HD SETTINGS.....................................................................88
11.2 ACOUSTICS RTA VIA bit Tune ......................................................................................................................................89

3
USER'S MANUAL
WARNING: a PC provided with Windows Vista, Windows 7 or Windows 8, operating system, 1.5 GHz minimum
processor speed and 1 GB RAM minimum memory, is required to install the software and setup
the bit One HD Virtuoso.
1. PRODUCT DESCRIPTION
The bit One HD Virtuoso is a digital signal processor developed to obtain outstanding performance from car audio
systems.
The main features include 2 optical SP/DIF inputs, 12 analog inputs, 13 digital outputs and Hi-Res 24bit/96kHz
internal signal processing which, along with many other functions make it a powerful and versatile product, ready for
future evolutions.
To this end, several hardware updates have already been planned. These updates will enable the product to adapt
to future technological innovations, providing the ability of interfacing with OEM systems which, at the time of the
product conception, were merely hypothetical.
The all-round software and the endless dedication of the R&D team, aimed at improving and updating the product,
make the bit One HD Virtuoso the reference device on the market, keeping its leadership for many years to come and
rewarding the user with the quality of its sound and with a long-lasting investment.
2. PACKAGING CONTENTS
-Quick Start Guide bit One HD Virtuoso
- bit One HD Virtuoso - Signal Interface Processor
- DRC MP (Digital Remote Control) Control Panel
-Multipolar cable, Speakers Input:
-Multipolar cable, Controls
-RVA cable 4.5 m
-Jack/RCA Stereo Adapter
-N.2 x 5.0 m / 196,85” AC Link (RJ-12) cable
-N.2 x 5.0 m / 196,85” AD Link (LAN class 5S - RJ45) cable
-1.8 m/ 70,8661” USB cable:
-4.5 m / 177,16” DRC / AC Link cable
-N. DRC MP holder Kit.
- CD ROM including:
Software bit One HD Virtuoso
This Advanced Manual (.pdf format)
Audio test tracks
- DVD comprising:
Test tracks encoded with Dolby Digital 5.1
- N. 4 4,2 x 32 mm self-tapping, cross-head xing screws
L
R
IN 3
IN 2
IN 1
IN 4
IN 5
IN 6
IN 7
IN 8
IN 9
IN 10
IN 12
IN 11
OPTICAL 2 SEL.
AUX SELECT
OPTICAL 1 SEL.
AVERALL PRESETS
-Warranty
-Quick Start Guide DRC MP
1/2
SETUP CD 3.0
High Definition Signal Processor

4
USER'S MANUAL
3. bit One HD Virtuoso AND DRC MP INSTALLATION
External dimensions
Fixing instructions
How to install the DRC MP
Mounting dimensions
bit One HD Virtuoso:
92 mm / 3.62 in
41 mm / 1.61 in
Light sensor
DRC MP:
87 mm / 3.45 in
36 mm / 1.41 in
11 mm / 0.43 in
1
1
4
3
22
*
To release the DRC MP from its holder,
use a flat-blade screwdriver for leverage
as shown in the picture.
*WARNING do not use aggressive cleaning
agents or abrasive cloth to clean the display.
Simply use a soft cotton cloth lightly damped
with water.
233 mm / 9.17 in 209 mm / 8.22 in
148 mm / 5.82 in
124 mm / 0.94 in
43,6 mm
1.7 in
4,2 mm x 32 mm
3

5
USER'S MANUAL
1. SPEAKERS IN hi-level MASTER input (see section 5.5)
Ch1 - Ch2 - Ch3 - Ch4 - Ch5 - Ch6 - Ch7 - Ch8 - Ch9 - Ch10 - Ch11 - Ch12
HI LEVEL MASTER inputs to connect the amplied signal wires coming from the main analog
source. Input sensitivity automatically adjustable from 2 to 15 V RMS (see sec. 7.2.4).
Channels Ch1 - Ch2 feature the AUTO TURN ON (ART) function through the connection with the source
speakers outputs. This function can be excluded using the PC software (see section 7.2.2.2).
The input signals are interfaced to the bit One HD Virtuoso via wiring with a multi-pin 24 poles connector as
described below.
4. CONNECTION PANELS - DESCRIPTION
4.1 INPUT SIGNALS
Remark: when connecting a speaker input cable, use Faston crimp terminals.
IN 3
IN 2
IN 1
IN 4
IN 5
IN 6
IN 7
IN 8
IN 9
IN 10
IN 12
IN 11
IN 3
IN 2
IN 1
IN 4
IN 5
IN 6
IN 7
IN 8
IN 9
IN 10
IN 12
IN 11
320 mm / 12.6 in.
Wire Size: AWG
80 mm / 3.15 in.
10 mm / 0.39 in.
FRONT VIEW
13
14
15
16
17
18
19
20
21
22
23
24
1
2
3
4
5
6
7
8
9
10
11
12
1: white IN1+
13: gray IN1-
2: white IN2+
14: gray IN2-
3: white IN3+
15: gray IN3-
4: white IN4+
16: gray IN4-
5: white IN5+
17: gray IN5-
6: white IN6+
18: gray IN6-
7: white IN7+
19: gray IN7-
8: white IN8+
20: gray IN8-
9: white IN9+
21: gray IN9-
10: white IN10+
22: gray IN10-
11: white IN11+
23: gray IN11-
12: white IN12+
24: gray IN12-
MASTER INPUTS
2 31
4
SDCDRCC
4

6
USER'S MANUAL
2. PRE IN low-level MASTER inputs (see section 5.4.1)
Ch1 - Ch2 - Ch3 - Ch4 - Ch5 - Ch6
To connect RCA cables coming from the main analog signal source.
If these inputs are used, the MASTER SPEAKER IN inputs can not be used.
3. AUX auxiliary low-level STEREO inputs (see section 5.4.2)
To connect the RCA cables coming from additional analog signal sources.
4. OPTICAL IN digital inputs (see section 5.6)
Bit One HD accepts input PCM signals up to 192 kHz / 24 bit sampling frequency rate. So DOLBY DIGITAL
(AC3) multi-channel signals coming from audio/video sources (such as the audio of a lm in DVD) or DTS
can not be reproduced. These inputs can be selected using the external DRC control or activated using the
terminals (see section. 4.3.4).
OPTICAL 1. Connect an optical ber cable with TOSLINK connector
OPTICAL 2. Connect an optical ber cable with TOSLINK connector
Remark: when performing the installation of ber optic cables, the minimum bending radius should be 40 mm.
A bending with higher radius value may cause the cable to break and the consequent disruption of the digital
signal.
4

7
USER'S MANUAL
321
4
1. PRE OUT low-level analog signal (4 Volt RMS) (see section 5.7.2)
Ch1 - Ch2 - Ch3 - Ch4 - Ch5 - Ch6 - Ch7 - Ch8 - Ch9 - Ch10 - Ch11 - Ch12 - Ch13
To connect the RCA cables going to the system’s ampliers.
2. AD Link - OUT digital signal (see section 5.7.1)
S/PDIF standard digital signal (Ch1÷Ch13) to connect ampliers provided with the specic AD Link input.
AD LINK 1: S/PDIF standard digital signal (Ch1÷Ch8) to connect ampliers provided with the specic AD Link input
AD LINK 2: S/PDIF standard digital signal (Ch9÷Ch13) to connect ampliers provided with the specic AD Link input
3. AC Link: Connection socket to control the ampliers provided with AC Link connection (see section 5.7.1).
AC LINK 1: Connection socket to control the ampliers (Ch1÷Ch8) provided with AC Link connection.
AC LINK 2: Connection socket to control the ampliers (Ch9÷Ch13) provided with AC Link connection.
4. RVA (Remote Volume Aux): control signal output to connect to the master source AUX input, to enable the
“AIS - Auto Input Switch” function. (see 5.4.3 - 5.6.1; 8.3.5).
Remark: the Remote Out signal is available on the AC LINK 1 / AC LINK 2 connection plugs and is active to the
ampliers supporting this function (Audison AV ampliers with AV bit IN input).
RCA / Jack
stereo Adapter
Included
4.2 OUTPUT SIGNALS
4500 mm / 177.17 in.
4

8
USER'S MANUAL
1. POWER SUPPLY / REMOTE IN-OUT (see section 5.1)
+BATT 12V: positive connection terminal for car 12V power supply
-BATT: negative connection terminal for car 12V power supply.
REMOTE IN: for the processor remote turn-on through one or multiple signal sources, featuring Rem Out control.
REMOTE OUT: for the remote turn-on of the other devices/ampliers connected to the processor.
The REMOTE OUT output has a current capability of 130 mA (it can also drive an automotive relay).
The processor only takes 7 seconds to supply the REM OUT to the output after turn on.
WARNING: make sure the connection polarity is as indicated on the terminals. A misconnection may result in
damage to the bit One HD Virtuoso. After applying a 12V power, wait at least 10 seconds before turning the
bit One HD Virtuoso on.
WARNING: the bit One HD Virtuoso must be switched on before the ampliers connected are turned on. It is
necessary to connect the sources Remote Out to the bit One HD Virtuoso Remote In and then the
bit One HD Virtuoso Remote Out to the Remote In of the other devices / ampliers connected to the
bit One HD Virtuoso (section 5.1)
Remark: the Remote Out signal is available on the AC LINK 1 / AC LINK 2 connection plugs and is active to the
ampliers supporting this function (Audison AV ampliers with AV bit IN input).
2. DRC: connection plug for the DRC MP (Digital Remote Control), to control the processor’s functions
3. DRCC: terminals for future use.
4. SDC: terminals for future use.
7 8
9
6
2 3 4 5 1
SDCDRCC
4.3 INPUTS - REMOTE CONTROL OUTPUTS AND POWER SUPPLY
4

9
USER'S MANUAL
5. CONTROLS: terminals to activate and control input audio signals.
-OVERALL PRESET: selection of a bit One HD Virtuoso memory previously saved via PC software
(see section 8.4). This function is activated by connecting the terminal to + 12V.
-OPTICAL 1 SELECT: selection of the OPTICAL 1 input. This function is activated by connecting the
terminal to + 12V.
-OPTICAL 2 SELECT: selection of the OPTICAL 2 input. This function is activated by connecting the
terminal to + 12V.
-AUX SELECT: selection of the AUX. This function is activated by connecting the terminal to + 12V.
The control signals are interfaced to the bit One HD Virtuoso via wiring with a multi-pin 4 poles connector
as described below.
6. CNK: terminals for future use.
7. USB (section 5.3)
USB connection plug (Female type micro), to connect the processor to a PC and manage its functions
through the bit One HD Virtuoso software. The standard connection is USB 1.1/2.0/3.0 compatible.
8. UPDATE MODE: Switch ON enables the update in RESCUE MODE (section 9.4) and the bit One HD Virtuoso
logo will start flashing.
9. FUSE: Blade 2A protection fuse. When needing to replace the fuse, only use the same type and value as the
original.
FRONT VIEW
3
1
4
2
1: brown OVERALL PRESET
2: pink OPTICAL 1 SEL
3: pink/black OPTICAL 2 SEL
4: orange AUX SEL
MASTER INPUTS
OPTICAL 2 SEL.
AUX SELECT
OPTICAL 1 SEL.
AVERALL PRESETS
320 mm / 12.6 in.
80 mm / 3.15 in.
10 mm / 0.39 in.
Wire Size: AWG
4

10
USER'S MANUAL
5. CONNECTIONS
REMOTE TURN ON
1. Through the DRC MP main control switch (to turn on). Keep the DRC MP main control knob pressed (to shut
down). In this case no other Remote In connections are required, but they can coexist (see section 5.1).
2. By connecting the REMOTE IN terminal with a Remote Out signal coming from an after-market audio source.
3. Through the SPEAKER IN CH1-CH2. The AUTO TURN ON (ART) is activated by connecting the amplied
head unit output to the SPEAKER IN CH1-CH2 input channel. This function can be enabled/disabled using
the bit One HD Virtuoso PC software (see section 7.2.2.2).
The bit One HD Virtuoso is on when the Audison logo lights up in blue.
After receiving the turn on input the bit One HD Virtuoso takes 6 seconds to start working. It can be turned on / off
in the following ways:
WARNING: to power the bit One HD Virtuoso,
use 1 mm2(16 AWG) min. cables
POWER SUPPLY
5.1 POWER SUPPLY AND REMOTE TURN ON
5.2 HOW TO TURN THE bit One HD Virtuoso ON/OFF
5.3 PERSONAL COMPUTER and DIGITAL REMOTE CONTROL (DRC MP)
FUSE HOLDER
Not provided
suggested fuse
2A delayed
Ground Battery
12V
Ground
DRC IN
DRC / AC Link cable (4,5 m / 177.16”)
USB cable
(powered)
USB INPUT
DRC/ACLink cable (provied)
HOW TO CONNECT THE DRC MP
Remote in
Remote in
Remote out
Remote out
AMPLIFIERS
WARNING: if you chose
to turn on the ampliers
equipped with the AV
bit In module using the "AC
LINK Turn On" function, do
not connect the remote wires
coming from the bit One HD
Virtuoso. If you decide to turn
on the ampliers equipped
with AV bit In modules with
the remote wires coming from the bit One HD Virtuoso, place the
"AC LINK Turn On" switch in the "OFF" position. The two ignition
systems cannot coexist.
5

11
USER'S MANUAL
5.4.1. PRE IN - Ch1/Ch6 analog STEREO signal
5.4.3. "AUTO INPUT SWITCH” AUX SIGNAL
Activate the ”AUTO INPUT SWITCH” function on the AUX input via PC software to enable the bit One HD Virtuoso
AUX input, each time the source AUX input is activated. When using this function the bit One HD Virtuoso volume
can be controlled through the source volume (see section 7.2.4).
Selection of the MASTER PRE IN input
1.Through the DRC MP, selecting the MASTER input.
2.Through the MASTER input, using the bit One HD Virtuoso PC software
5.4.2. AUX - Left/Right - analog STEREO signal
Selection of the AUX IN input
1.Through the DRC MP, selecting the AUX input.
2.Through the AUX SEL terminal (see section 4.3.4). This control is
enabled by connecting the terminal at + 12V.
3.Through the bit One HD Virtuoso PC software, selecting the AUX input.
4.Through the selection of the AUX input from the OEM source, using the “Auto Input Switch” function, via
the bit One HD Virtuoso PC software (see section 5.4.3 - 7.2.4).
Connect the
bit One HD Virtuoso
AUX input to the
audio source and
the processor’s
RVA input D to the
Master source AUX
input (Head Unit) of
the audio system.
Remark: when activating the “Auto Input Switch” function, the DRC/PC Software can no longer be used for the switch
of the audio system inputs. The switch can be enabled through the audio system source, selecting the AUX or
Master input.
*If the HEAD UNIT
of the car does not
have an AUX analog
input, connect a
USB memory (or SD
Card) to the USB
reader of your audio
source as shown to
the side. The USB/
SD device must
contain the mp3
format le available
in the RVA TONE folder located inside the Setup CD (these les can also be downloaded from the Audison website).
Please note that the storage device must only contain this le and no other les. If you use the USB memory to
activate the switching via the RVA function, simply select the USB (SD) or Master input.
5.4 LOW-LEVEL AND DIGITAL INPUT SIGNALS
FRONT LEFT
AFTER MARKET HEAD UNIT
MAX 6 PRE OUT
REAR LEFT
CENTER
FRONT RIGHT
REAR RIGHT
SUB
SD
bit One HD Virtuoso
Bottom Side
SDCDRCC
SD
Auxiliary Stereo
Preamplier Source
OEM HEAD UNIT
HEAD UNIT
AUX IN
USB
TO AUX IN HEAD UNIT
*USB Storage / SD Card
bit One HD Virtuoso
Front panel
bit One HD Virtuoso
Front panel
Auxiliary stereo
preamplier
Source
Auxiliary stereo
preamplier
Source
bit One HD Virtuoso Rear panel
bit One HD Virtuoso Rear panel
Left
Right
SUB
SUB
PRE IN
REAR
REAR
FRONT
FRONT
CENTER
CENTER
HI LEVELS
OUTPUT
HI LEVELS
OUTPUT
SD
5

12
USER'S MANUAL
5.5.1. SPEAKER IN Hi-level MULTICHANNEL (max 12 CHANNELS)
MASTER SPEAKER IN input selection
1.Through the DRC MP, selecting the MASTER input.
2.Through the MASTER input, using the bit One HD Virtuoso PC software.
*CH1-CH2: Auto Turn On System (ART) (see section 7.2.2)
WARNING: the digital inputs accept up to 192 kHz / 24 bit stereo PCM signals. So DOLBY DIGITAL (AC3)
multi-channel signals coming from audio/video sources (such as the audio of a lm in DVD) or DTS can
not be reproduced. The output of these devices will therefore be set in STEREO mode for the signal to be
reproduced.
*Remark: when performing the installation of ber optic cables, the minimum bending radius should be 40 mm.
A bending with higher radius value may cause the cable to break and the consequent disruption of the digital signal.
OPTICAL 1/OPTICAL 2 inputs selection
1.Through the DRC MP, selecting the OPTICAL 1 / OPTICAL 2 input.
2.Through the OPTICAL 1 SEL / OPTICAL 2 SEL terminal properly set up (see section 4.3.4).
This control is activated by connecting the terminal at + 12V.
3.Through the selection of the OPTICAL 1/ OPTICAL 2 input via the bit One HD Virtuoso PC software.
4.Through the selection of the OPTICAL 1/ OPTICAL 2 input on the OEM source, using the “Auto Input Switch”
function, via the bit One HD Virtuoso PC software (see section 5.6.1 - 7.2.4).
AUX
S/PDIF 0.1V 2.0V
OPTICAL OUT
ON
+
-
Rem
+ R
ANALOG OUT
Not Supplied
Not Supplied
S/PDIF OUT
75 Ohm Coax Cable
COAX S/PDIF
24 bit 192 kHz max
OPTICAL S/PDIF
24 bit 192 kHz max
*
5.5 HIGH-LEVEL INPUT SIGNALS
bit One HD Virtuoso
Bottom Side
SDCDRCC
OEM
AMPLIFIER
OEM HEAD UNIT
MAX 12
CHANNELS
INPUT
*
5.6 OPTICAL 1/OPTICAL 2 DIGITAL INPUT SIGNALS
5

13
USER'S MANUAL
5.6.1. “AUTO INPUT SWITCH” OPTICAL 1 / OPTICAL 2 SIGNALS.
Activate the ”AUTO INPUT SWITCH” function on the OPTICAL 1 or OPTICAL 2 input via PC software to enable the
bit One HD Virtuoso OPTICAL 1 or OPTICAL 2 input, each time the source AUX input is activated. When using this
function the bit One HD Virtuoso volume can be controlled through the source volume (see section 7.2.4 - 8.3.5).
Connect the bit One HD Virtuoso OPTICAL 1 or OPTICAL 2 input to the audio source and the processor’s RVA input
to the Master source AUX input (Head Unit).
WARNING: the “Auto Input Switch” function activation, and the subsequent selection of the auxiliary input to be used,
may cause the loss of the other two auxiliary inputs not selected.
Remark: when activating the “Auto Input Switch” function, the DRC/PC Software can no longer be used for
the switch of the audio system inputs.
The switch can be enabled through the audio system source, selecting the AUX or Master input.
When the “AIS - Auto Input Switch” function is active and a bit Play HD is connected to the system along with
Full DA ampliers (AD LINK - AC LINK) the DRC MP will be disabled and will display the following: “DRC DISABLED”.
SD
AUX
S/PDIF 0.1V 2.0V
OPTICAL OUT
ON
+
-
Rem
+ R
ANALOG OUT
Not Supplied
Not Supplied
S/PDIF OUT
75 Ohm Coax Cable
COAX S/PDIF
24 bit 192 kHz max
OPTICAL S/PDIF
24 bit 192 kHz max
HEAD
UNIT
TOSLINK
Connector
bit One HD Virtuoso
Front panel
bit One HD Virtuoso Rear panel
SD
AUX
S/PDIF 0.1V 2.0V
OPTICAL OUT
ON
+
-
Rem
+ R
ANALOG OUT
Not Supplied
Not Supplied
S/PDIF OUT
75 Ohm Coax Cable
COAX S/PDIF
24 bit 192 kHz max
OPTICAL S/PDIF
24 bit 192 kHz max
HEAD
UNIT
AUX IN TO AUX IN HEAD UNIT
TOSLINK
Connector
bit One HD Virtuoso
Front panel
bit One HD Virtuoso Rear panel
Left
Right
SUB
SUB
REAR
REAR
FRONT
FRONT
CENTER
CENTER
HI LEVELS
OUTPUT
HI LEVELS
OUTPUT
Connect the
bit One HD Virtuoso
AUX input to the
audio source and the
processor’s RVA input
to the Master source
AUX input (Head Unit)
of the audio system.
If the HEAD UNIT
of the car does not
have an AUX analog
input, connect a USB
memory (or SD Card)
to the USB reader of
your audio source
as shown to the
side. The USB/SD
device must contain
the mp3 format le
available in the RVA
TONE folder located
inside the Setup
CD (these les can
also be downloaded
from the Audison
website). Please
note that the storage
device must only
contain this le
and no other les.
If you use the USB
memory to activate
the switching via the RVA function, simply select the USB (SD) or Master input.
*USB Storage / SD Card
*
5

14
USER'S MANUAL
AD LINK-OUT
5.7.1. OUTPUT TO AN AMPLIFIERS SYSTEM PROVIDED WITH AD LINK
AND AC LINK CONNECTION (THESIS TH / AV AMPLIFIERS)
(see section 7.2.2.12 - 7.2.3.9 - 7.2.4.5)
Remark: the output channels are 13
in total. The sum of the channels of
the ampliers connected must not
exceed 13. To increase the number of
channels, however, the same function
(AMP ID) can be assigned to more
than one amplier.
4
ON TH
OVL SPK
AV bit IN
LEVELS
(0.3 - 5V)
CH A
AV quattro
15
2
3
4
CH B
15
2
3
4
MENU DOWN ENTERUP
AV bit IN
REAR
FRONT
LEVELS
(0.3 - 5V)
CH A
ON TH
OVLS PK
AV 5.1k
15
2
3
4
CH B
15
2
3
4
CH C
15
2
3
4
MENU DOWN ENTERUP
4
ON TH
OVL SPK
AV bit IN
LEVELS
(0.3 - 5V)
CH A
AV quattro
15
2
3
4
CH B
15
2
3
4
MENU DOWN ENTERUP
CH A: 1-2
CH A: 1-2
AD LINK 1
AD LINK 2
CH A: 5-6
CH C: 5
CH B: 3-4
CH B: 3-4
CH B: 7-8
WARNING: Output setups, with speakers named: Surround
Left/Right, Front Super Tweeter Left/Right, Front
MiD Bass Left/Right, Rear Midrange, are not
compatible with AV bit In digital inputs. The same
Setups are incompatible with AUTO SET systems
performed with bit Tune.
5.7 OUTPUT SIGNALS
CH1÷CH8 CH9÷CH13
bit One HD Virtuoso
Top Side
5

15
USER'S MANUAL
Remark: the output channels are 13 in
total. The sum of the analog and digital
outputs (AD Link) must not exceed the
number of available channels.
5.7.3. OUTPUT TO AN AMPLIFIERS SYSTEM PROVIDED WITH AD LINK AND AC LINK CONNECTIONS
(THESIS TH) AND AMPLIFIERS PROVIDED WITH PRE INPUT (see section 7.2.2.12 - 7.2.3.11 - 7.2.4.6 - 8.3.3).
5.7.2. OUTPUT TO AN AMPLIFIERS SYSTEM WITH PRE INPUT
AV Amplier
CH9 ÷ CH12CH5 ÷ CH8CH1 ÷ CH4 CH13
CH1÷CH4 CH5÷CH8 CH9÷CH13
5

16
USER'S MANUAL
1. Insert the “bit One HD Virtuoso Setup CD” into the CD-Player of the PC you are going to use
6. bit One HD Virtuoso SOFTWARE AND DRIVERS - INSTALLATION GUIDE
2. Windows Vista: select “Computer” from the Windows START menu;
Windows 7: select “Computer” from the Windows START menu;
Windows 8/10: click on the DESKTOP icon;
3. Windows Vista: right-click your mouse on the “bit One HD Virtuoso Setup CD” icon and select “Explore";
Windows 7: right-click your mouse on “bit One HD Virtuoso Setup CD” and select “Open”;
Windows 8/10: double click on the Computer icon.
4. Windows Vista: double click on the “setup” icon;
Windows 7: double click on the “setup” icon;
Windows 8/10: select the CD ROM drive and double click on setup icon.
Windows Vista Windows 7 Windows 8/10
Windows Vista Windows 7 Windows 8/10
Windows Vista Windows 7 Windows 8/10
6.1 SOFTWARE INSTALLATION GUIDE
6

17
USER'S MANUAL
5. Windows Vista: select NEXT to go on with the installation, CANCEL to interrupt it;
Windows 7: select NEXT to go on with the installation, CANCEL to interrupt it;
Windows 8/10: select NEXT to go on with the installation, CANCEL to interrupt it.
6. Windows Vista: select I Agree and then NEXT;
Windows 7: select I Agree and then NEXT;
Windows 8/10: select I Agree and then NEXT;
7. Windows Vista: select
- Everyone if you have the system administrator privileges, so, once installed, the program can be
used by anyone who uses that PC;
- Just me if you want that, once installed, the program can only be used by yourself as single
system user. Then select NEXT;
Windows 7: select
- Everyone if you have the system administrator privileges, so, once installed, the program can be
used by anyone who uses that PC;
- Just me if you want that, once installed, the program can only be used by yourself as single
system user. Then select NEXT;
Windows 8: select
- Everyone if you have the system administrator privileges, so, once installed, the program can be
used by anyone who uses that PC;
- Just me if you want that, once installed, the program can only be used by yourself as single
system user. Then select NEXT;
6

18
USER'S MANUAL
1. Turn the bit One HD Virtuoso on.
2. Connect the USB cable located on the appropriate connector on the bit One HD Virtuoso to the USB available on
the PC.
To uninstall the bit One HD Virtuoso PC software you can
use the link listed on the menu:
Start / All Programs / bit One HD Virtuoso / uninstall
3. Windows Vista: the PC will recognize the bit One HD Virtuoso interface and will automatically install the driver;
Windows 7/8/10: the PC will recognize the bit One HD Virtuoso interface and will automatically install the driver;
4. The peripheral device has been installed correctly and is ready for use.
Windows Vista Windows Vista
Windows 7/8/10 Windows 7/8/10
8. Windows Vista: go on and complete the installation procedure, then select CLOSE to exit the installation;
Windows 7: go on and complete the installation procedure, then select CLOSE to exit the installation;
Windows 8/10: go on and complete the installation procedure, then select CLOSE to exit the installation;
9. The bit One HD Virtuoso PC software is now installed in your system.
WARNING: when connecting a laptop PC via USB cable to the bit One HD Virtuoso while the device is turned on, the
laptop has to work with its own battery, keeping it disconnected from the mains adapter (external power supply).
Once the connection between the laptop PC and the bit One HD Virtuoso is established, you can immediately
connect the computer, if necessary, through the mains adapter.
Remark: the bit One HD Virtuoso uses HID drivers already integrated in Windows. For this reason, they are not
included in the CD and will always install automatically.
6.2 DRIVERS INSTALLATION GUIDE FOR WINDOWS VISTA, 7/8/10
6.3 bit One HD Virtuoso SOFTWARE UNINSTALL
6

19
USER'S MANUAL
7. bit One HD Virtuoso SETUP WITH PC
To adjust the bit One HD Virtuoso functions a software is required. The processor needs to be connected to the PC
and turned on. After installing the software, start it by selecting the icon shown on your desktop.
The rst window is the startup page where one of the following modes needs to be selected:
- CONNECT WIRED USB, connects the bit One HD Virtuoso to the PC via USB;
- CONNECT WIRELESS WI-FI, it allows the connection via W-CON module connected to the bit One HD
Virtuoso in wireless mode with the PC;
- OFF LINE MODE IIR FILTERS, demo mode with active FIR Filters;
- OFF LINE MODE IIR FILTERS, demo mode with active IIR Filters;
- RESCUE, bit One HD Virtuoso connected for update/maintenance (see section 9.4).
In this case even if the bit One HD Virtuoso
processor is connected to the PC, it does
not interact with the software.
The OFFLINE mode can be used to work
on the software to get familiar with the
processor multiple functions without
connecting the bit One HD Virtuoso to the
PC and it is possible to select two operating
modes: IIR and FOR. For more information
on the specic functions (see section 7.2)
(CONNECT mode).
The software is pre-set to start with a
3-way Front active Stereo + 2-way Rear
active Stereo + Sub + 2-way active central
channel.
To set a new “virtual” system, and so to
change the inputs and select the outputs,
the function I/O Conguration Wizard in
the “Cong” window of the software main
menu needs to be selected. Follow the
same instructions as per CONNECT mode
(see section 7.2).
Here is how the bit One HD Virtuoso IIR software appears when started in OFFLINE mode.
Here is how the bit One HD Virtuoso FIR software appears when started in OFFLINE mode.
7.1 OFFLINE MODE IIR/FIR
7

20
USER'S MANUAL
•To make the window full-screen, click on the Enlarge button or double
click on the title bar of the PC software window.
•To restore the previous size from full-screen, click on the Reset button or
double click on the title bar on the window.
•To resize the PC software window (make it smaller or larger), position the mouse
pointer on one edge or corner of the window. When the mouse pointer becomes
an arrow with a double point, drag the edge or corner to make the window larger
or smaller
Pop Up Mode:
•It is possible to exploit the active Pop Up mode during the setup of your audio system on the equalizer windows,
Filter settings and Delay, to obtain greater resolution and have a better view of your setup. Clicking on the icon
, the windows will be enlarged and it will be possible to make a more precise setup, to return to the main
menu, just click outside the active pop up.
Pop-up Eq settings IIR Mode
Pop-up Eq settings FIR Mode
Pop-up Filter Settings Pop-up Delay Settings
How to change the size of the PC software window
7
Table of contents
Other Audison Signal Processor manuals
Popular Signal Processor manuals by other brands
Anritsu
Anritsu Rubidium MG362 1A Series Operation manual
Tektronix
Tektronix TSG 95 Pathfinder user manual

WEISS
WEISS DSP501 quick start guide
Bose
Bose FreeSpace E4 Series II owner's guide

Texas Instruments
Texas Instruments TMS320VC5402 datasheet
Texas Instruments
Texas Instruments TMS320C6000 DSP reference guide
