Aura LX-505 User manual

LX-505
DIGITAL PIANO
Owners Manual
Kaino Co., Ltd
http://www.k pianos.comaino

PLEASE READ CAREFULLY BEFORE PROCEEDING
Please keep these precautions in a safe place for future reference.
IMPORTANT SAFETY INSTRUCTIONS
CAUTION
RISK OF ELECTRIC SHOCK
DO NOT OPEN
The lightning flash with arrowhead symbol, within an equilateral triangle is intended to
alert the presence of uninsulated "dangerous voltage" with the product enclosure that may
be of sufficient magnitude to constitute an electrical risk to persons.
The exclamation point within an equilateral triangle is intended to alert the user to the
presence of important operating and maintenance (servicing) instructions in the literature
accompanying the instrument.
BeforepluggingthepowercordintoanACoutlet,makesurethatalltheconnectionshavebeenmade.
CAUTION
TO REDUCE THE RISK OF ELECTRIC SHOCK DO NOT REMOVE COVER(OR BACK) OR
EXPOSE THIS APPLICANCE TO MOISTURE ,
CAUTION
These servicing instructions are for use by qualified service personnel only. To reduce the risk of electric
shock do not perform any servicing other than contained in the operating instructions unless you are
qualified to do so. Refer to the service manual for servicing instructions.
1) Read and keep these instructions.
2) Heed all warnings and follow all instructions.
3) Do not use near water, and clean only with a dry cloth.
4) Do not block any ventilation openings. Maintain well ventilated conditions around the product. Do
not put the product on a bed, sofa or anything that blocks ventilation. Install in accordance with the
manufacture's instructions.
5) Do not install near any heat sources such as radiators, heat registers, stoves, or any other apparatus
(including amplifiers) that produces heat.
6) Do not defeat the safety purpose of the polarized or grounding-type plug.Apolarized plug has two
blades with one wider than the other. A grounding type plug has two blades and a third grounding
prong. The wide blade or the third prong is provided for your safety. If the provided plug does not fit
into you outlet, consult an electrician for replacement of the obsolete outlet.
8) Only use attachments/accessories specified by the manufacturer.
9) Use only with the cart, stand, tripod, bracket, or table specified by the
manufacturer, or sold with the unit. When a cart is used, use
caution,manufacturer, or sold with the unit. When a cart is used, use caution.
10) Unplug this unit during lighting storms or when unused for long periods of time.
11) Refer all serving to qualified service personnel. Servicing is required when the unit has been
damaged in any way, such as power-supply cord or plug is damaged, liquid has been spilled or objects
have fallen onto the unit, the unit has been exposed to rain or moisture, does not operate normally, or
has been dropped.
12) The unit should not be exposed to dripping or splashing, and no objects filled with liquids, such as
vases, should be placed on the apparatus.
NOTE

Contents
Contents
Specification................................................26
....... ... 27
.. ...... 28
MIDI Implementation....................................30
31
Sounds list................. .............. ..........
Styleslist................... ...................... .....
Troubleshooting...........................................
Piano teaching system 20
Step1Follow me............................... ....20
Step 2Ensemble................................ ...21
Load MIDI file for teaching.................. ...21
Select left or right hand........... ...21
.......
.......
.......
..................
Appendix 26
USB MIDI interface 24
USB MIDI interface.......................................24
Setting up 1
Power connection...........................................1
Understanding the LCD Display.......................1
Use the menus.......... ..2
Volume..........................................................3
Externaljacks.................................................3
...................................
Playing demo songs 4
Play main demo song......................... ...........4
Play other demosong.....................................4
.
Playing sounds 6
Select sound by panel buttons. ...........6
Select sound in sound menu page .............6
Select sound by sound groups ..........6
Dual...............................................................7
Split...............................................................7
Touchsensitive...............................................8
Transpose......................................................8
Reverb and Chorus........................................9
............
.....
..............
Panel memory feature 14
Datastoredbythememoryfunction ....14
Storingyoursettingsintoamemorybutton . ..14
Recallingyour savedpanel memories ... .....14
............
... .
Auto accompaniment 10
Select style by panel buttons........................10
Select style in style menu page.....................10
Select style by style groups.. ...............10
Accompaniment sections........... ..................11
Tempo setting...............................................12
Metronome..................... .............................12
Auto bass chord............................................12
.........
.
.Foot pedals 24
Foot pedals..................................................24
Player system 22
Player mode selection................... 22
Song selection................... 22
Start and stop playing......... 22.
...............
..........................
........................
Firmware update and new features
25
Get new version firmware. ............ 25
Check piano s firmware version...................25
Enter firmware update page............ 25
Start firmware update ...................... 25
'
.
.
............... .
............
..........
Recording system 15
Start to record........ ....15
Select track to record. .........16
Multi track recording.....................................16
Accompaniment recording............................16
Play .............................17
Track mute option .....17
Track solo option..................... .........17
Delete track data. .................. ..........18
Save recorded song................ .........18
..................................
.........................
................................
....................................
............
..... ........
............
Setup 23
Background..................................... .23
Brightness..................................... .23
Touch curve............................... ..23
plit point..................................... 23
Factory reset.................................. 23
............
..............
................
................
..............
S
Save as..................... .18
Select saving memory. ...........19
Load MIDI file..... ........19
..................................
......................
..................................

Power connectionPower connection
01
The screen displays working information of the digital piano use the dial MENU and ENTER
buttons and other control panel button to operate the digital piano
In the corner of the screen there are hidden buttons Press the hidden buttons so you can enter
the HOME main menu
,,
.
,.
.
s
[]
MENU ENTER
Setting Up
Setting Up
Follow the instructions below according to the power
source you intend to use.
issettoOFF.
1
2
3
4
Make sure that the [POWER] button
Connect the power cord to the digital piano and
plug it into an active outlet.
Minimize the volume of the digital piano.
Turn the POWER ON.
When the power is on, the LCD display of your digital piano will show a variety of information about
the current settings of various functions
WARNING
Do not use a voltage other than
the indicated power supply
voltage. Use of a voltage other
than indicated may cause fire or
electrical shock.
Unplug the power cord when
not using the instrument, or
during electrical storms.
FUSE
AC INPUT
Understanding the LCD displayUnderstanding the LCD display
Effect
Song
Style
Return to
main menu
To MenuHOME
Main Sound
Dual Sound Left Sound
Tempo
Transpose
PowerSupply

Setting Up
02
The screen can display menus so it is easy to coperate the piano by selecting the features in
the menu.
2HOME Menu
In the main menu page, press the [HOME]
button. The [HOME] button is hidden in
the left top corner. You can also press the
[MENU] button to enter the TOP menu.
Turn the dial to select the feature icons,
then press the [ENTER] button to enter
the selected feature page.
1MainMenu
After power on, the piano enters the main
menu.
In the HOME menu page, press the
[MAIN] icon or select the [MAIN] icon by
turning the dial and then pressing the
[ENTER] button to enter the main menu
page.
3Sound Menu
In the main menu page, press the sound
icon or turn the dial to select the sound
icon. Then press the [ENTER] button to
enter the sound menu page.
In the sound menu page, turn the dial or
press the sound name bar to select a
sound.
4Sound Group Menu
In the sound menu page, press the sound
group icon on the screen to enter the sound
group menu. Turn the dial to select the
sound group. Then press the [ENTER]
button or directly press the sound name
bar to select a sound.
,In any display page press the MENU button to return to the main menu page[] .
Use the menus to operate the digital piano

Output Input Jacks/Output Input Jacks/
HEAPHONE LINE MIC USB MIDI USB
DISK
OUT INABIN
Volume Controls
Setting Up
03
1:Master Volume control
.
,.
Turn the master volume knob to set the master volume The master volume control affects
keyboard accompaniment and microphone volume
MASTER ACCMPANIMENT MIC
2
3
:
.
:
Accompaniment volume control
Turn the accompaniment volume knob to set the
accompaniment volume
Microphone volume control
Turn the microphone volume knob to set the
microphone volume
1
3
5
Headphone jacks
6.35mm 1 4 cables
system
:
".
:
:
(/ )
,
2
4
:
:
,,,
.
With a usb disk inserted the piano can play midi wave mp3 files that are on the usb disk
Also the piano can save recorded song to the usb disk as midi file .
Astandard pair of stereo headphones can be plugged into this jack for private listening. The
internal stereo speaker system will be automatically shut off when a head phone is plugged into
the PHONES jack. Please use diameter headphone
Line Out/In jacks
The Line out jack deliver the output of the digital piano for connection to an amplifier
mixing console, etc.
The Line in jack is used to connect other audio device's line out/earphone out to digital piano for
example iPod CD DVD MP3 etc .
MIC jack
You can connect your microphone using the Mic socket. Adjust the volume knob to get proper
input level when you use a microphoe.
USB disk jack
USB midi jack
,
,, , ..
You can connect the piano with your computer with the USB MIDI socket.With your favorate
music editor software,you can melodize,record,or just play for fun.
Output Input jacks
/

DEMO
DEMO
Play other demo song
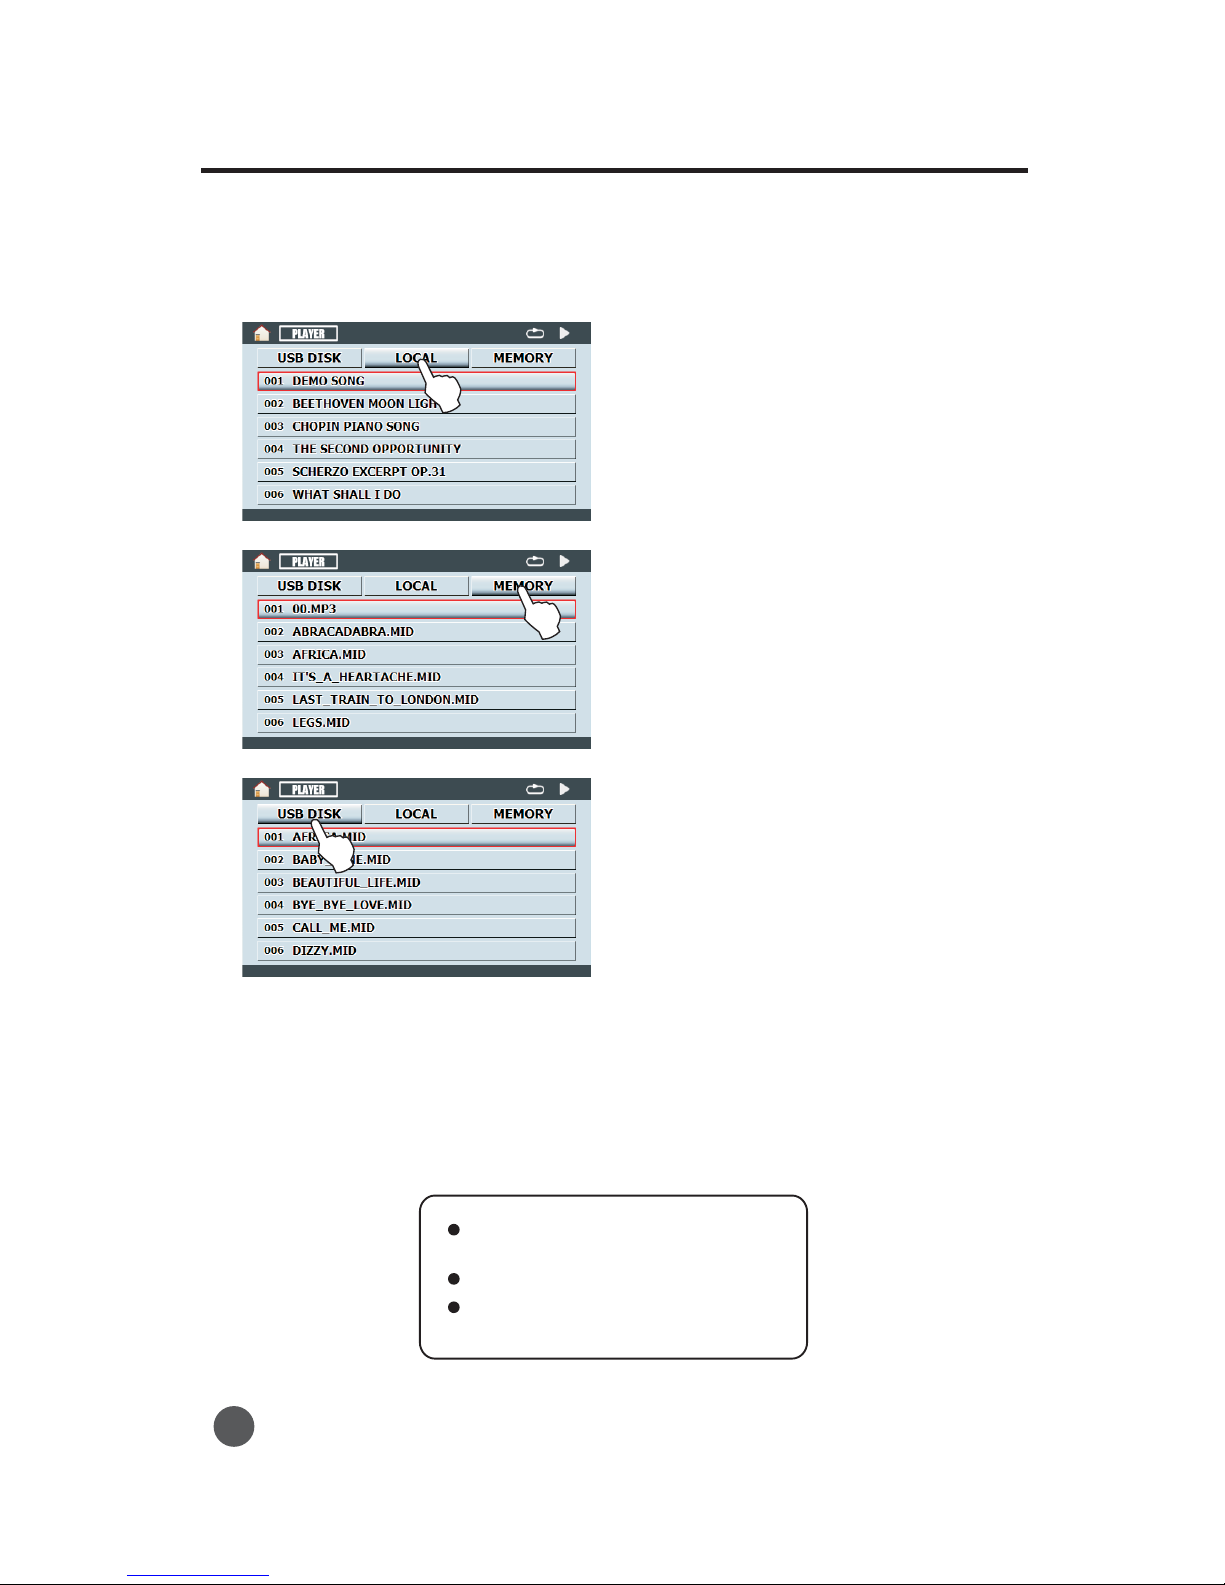
3Pressthe[USBDISK], [LOCAL]or[MEMORY]icontoselectthesonglibrary.
1
2.
.
Press the DEMO button to play the
main demo song
Press the DEMO button again to stop
demo song playing
[]
[]
Playing demo songs
Playing demo songs
Play main demo songPlay main demo song
04
When playing the demo,
increase the master volume
gradually to avoid
uncomfortable volumes.
Note
The digital piano has a large selection of demo songs. Once you have set up your digital piano, you
can listen to the pre-programmed demonstration songs. The digital piano has a total of 89 demo
songs. You can also use the piano teaching system to learn these demo songs. For more information
about the piano teaching system, please refer the "piano teaching system" chapter.
With the USB disk, the piano can play midi, wave and mp3 files that are on the USB disk. Also, the
teaching system can use midi files on the USB disk for learning.
1.
,
.
Hold down one of the 88 keys Then
press the DEMO button to start one
demo song each key represents a
different demo song
[]
,
,
.
2Press the SONG icon on the screen and
the screen enters the song page turn the
dial to select other song
[]
Press the ENTER button The song selected will be played While the song is being
played press the ENTER button again to stop the playing .
,.
[].
[]
Playing demo songs
05
After USB DISK LOCAL or MEMORY song library is selected the songs in the library will
be listed on the screen
[ ],[ ] [ ] ,
.
4
5
,
,
.
After selection of the song library turn the dial or press the listed song name bar to select a
song
Af er song selection press the ENTER button or press the listed song name bar to play
the selected song
.
t[]
Note
:,, .
.
The music file types the piano can
play are MID MP3 WAV
Recorded songs are saved as MID files
.
Only MID files can be used for the
teaching system
Teaching Song Menu
Press the LOCAL icon to select the
teaching song library
[]
.
User Song Menu
Press the MEMORY icon to select the
user song library
[]
.
USB Song Menu
Press the USB DISK icon to select the
usb song library
[]
.

1In the main menu page, turn the dial to select the [SOUND] graphic icon.
Select sound in sound menu page
2
3
4
Press the [ENTER] button or directly press the [SOUND] graphic icon to enter the sound menu
page.
Turn the dial or directly press the sound icon on the screen to select a sound.
If no sound is selected, the screen will return to the main menu page.
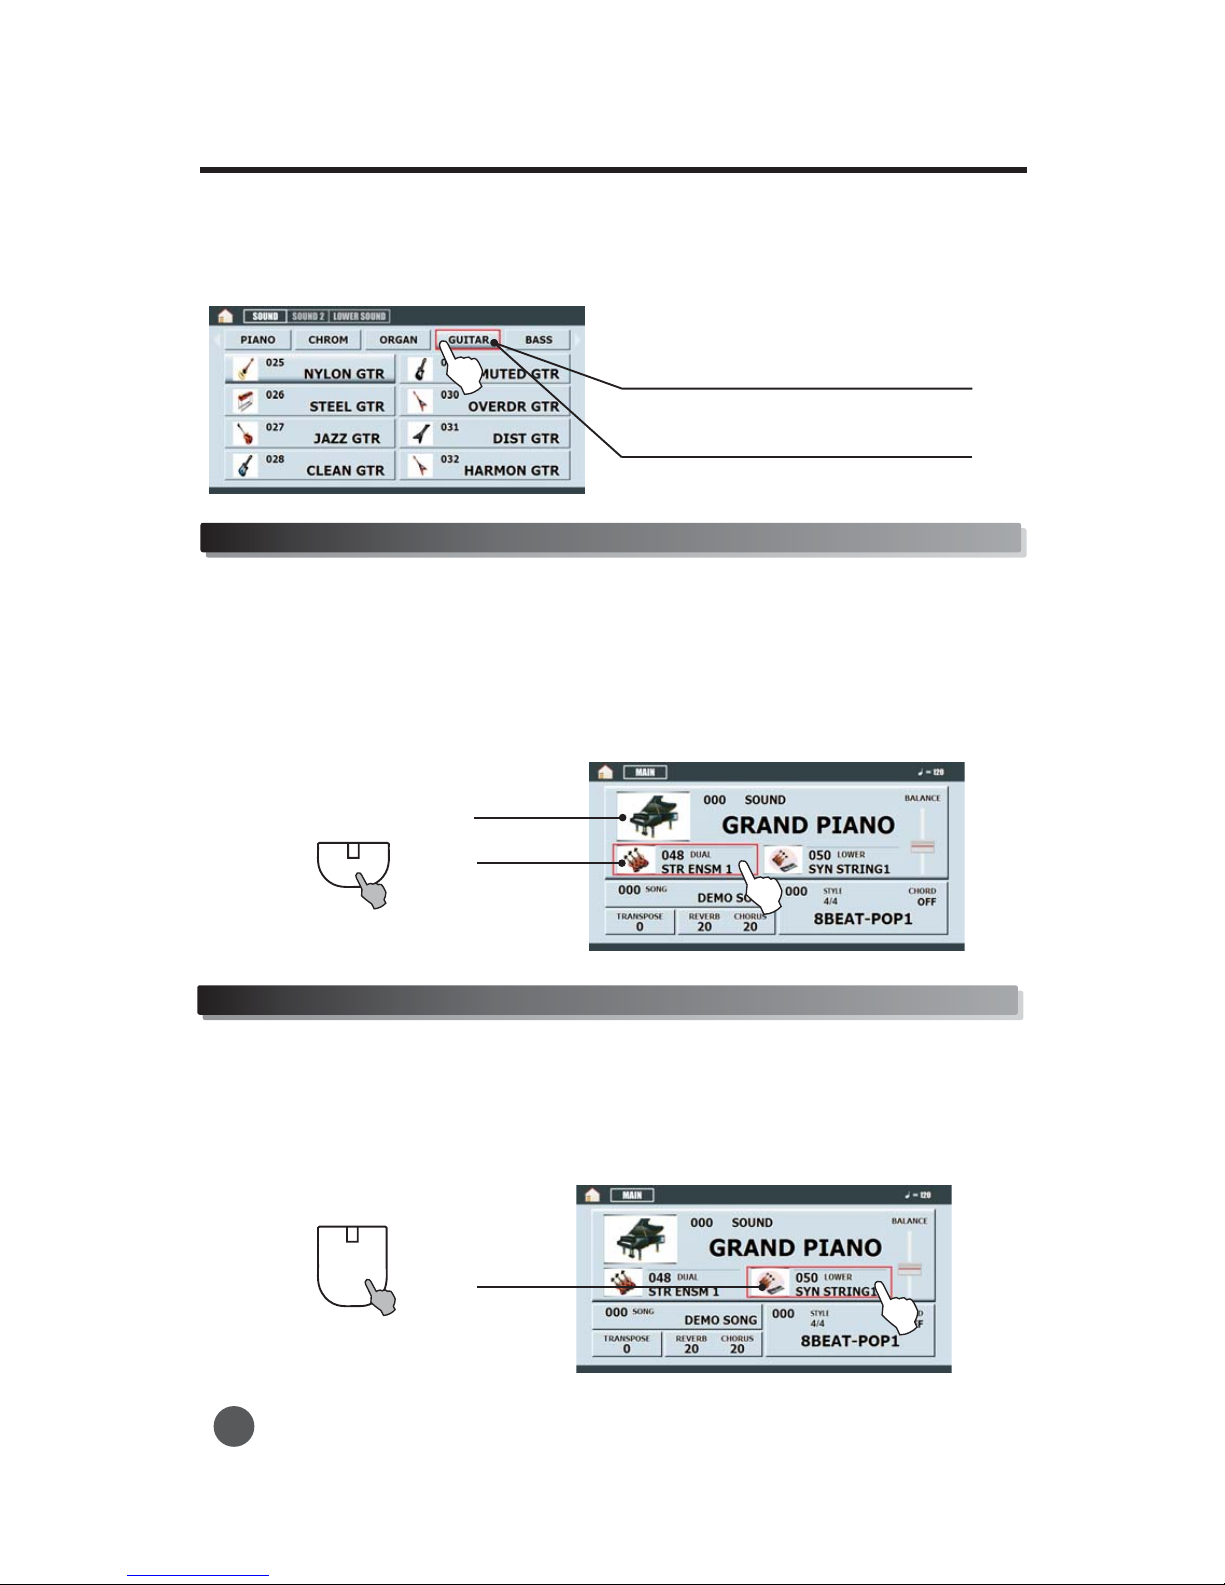
Select sound by sound groups
1
2
In the sound menu page, press the sound group icon to enter the sound group selection mode.Turn
the dial or press the sound group icon on the screen to select a sound group.
Press the [ENTER] button or press the sound name bar to select a sound.
Playing Sounds
06
enter sound menu pageselect sound graphic icon
PIANO VIBRA ORGAN GUITAR BASS STRINGS TRUMPET FLUTE SHAMI DRUMS
1Press one of the 10 sound buttons to select a sound.
The digital piano has 128 sounds. Refer to the sound list in the appendix.
Select sound by panel buttons
2Press the [PIANO] button to select a piano sound and turn off the auto bass chord accompaniment.
Playing Sounds
PIANO
NORMAL S FINGER.
FINGER
SPLIT
DUAL
SPLIT
Dual
3Turnthedialorpressthesoundnamebartoselectasound.
1Press the [DUAL] button. The dual light turns on, and the piano enters dual playing mode.The
screen display the dual sound page. If a sound is selected, the sound is for dual use.
2
3Sound selected by using the [SOUND] icon is the first sound.
Press the [DUAL] button again to quit dual mode, and the dual light turns off.
If dual is on,two sounds will be generated when a key is pressed down.
Split
Ifsplitison,thekeyboardissplitintotwoparts,leftkeyboardandrightkeyboard.
1
2Pressthe[SPLIT]button.Thesplitlightturnson,andthepianoenterssplitmode.
Pressthe[LOWER]icononthescreentoselecttheleftsound.
Playing Sounds
07
Second sound
First sound
left sound
Turn the dial to select sound group.a
Press the sound group button to select a
sound group.

TOUCH
1
2
Press the [TOUCH] button. The touch light turns on, and the piano is
touch sensitive.After power on, the touch sensitive is default on.
Press the [TOUCH] button. The touch light turns off, and the piano
isn't touch sensitive.
The keyboard of the digital piano is equipped with a touch response feature that lets you dynamically
and expressively control the level of the sounds played depending on your playing strength.
However, some instruments don't naturally have touch response, such as organs. In this case you can
turn off the touch sensitive function while you are playing.
Touch sensitiveTouch sensitive
Playing Sounds
Transpose
1
2
3
In the main menu page, turn the dial to select the [TRANSPOSE] icon. Press the [ENTER] button
to confirm selection.
Turn the dial to set transpose. The transpose unit is by semitone, and the setting range is -12 to
+12.
Press the [MENU] button to exit the transpose setting.
select transpose icon
08
3Press the [SPLIT] button again to quit split mode, and the split light turns off.
middle C split point,
right keyboard
left keyboard

REVERB
CHORUS
Reverb and Chorus
Reverb
Chorus
09
Playing Sounds
1Press the REVERB button and the screen
display effect setting page
[]
.
2
3
4
5
Press one of the 8 reverb type icons to
select a reverb type
Turn the dial to set the reverb level If the
reverb ype or level isn t the power on default
the reverb light turns on
.
.
t' ,
.
.
,L
.
[].
Press the RESET icon to reset reverb and
chorus to the default value
Press the OK icon to confirm reverb type and
level selection or press the CANCE icon to
cancel the selection and return to the main
menu page
Press the REVERB button The reverb light
6
1Press the CHORUS button and the screen
display effect setting page
[]
.
2
3
Press one of the 8 chorus type icons to
select a chorus type
Turn the dial to set the chorus level If the
chorus ype or level isn t the power on
default the chorus light turns on
Press the RESET icon to reset reverb and
chorus to the the default value
Press the OK icon to confirm chorus type and
level selection or press the CANCE icon to
cancel selection and return to the main menu
page
Press the CHORUS button The chorus light
turns off and the keyboard is restored to the
default chorus type and chorus level
.
.
t'
,.
.
,L
.
[].
,
.
.
4
5
6
Reverb Setting
ChorusSetting
turns off and the keyboard is restored to default reverb type and reverb level,.
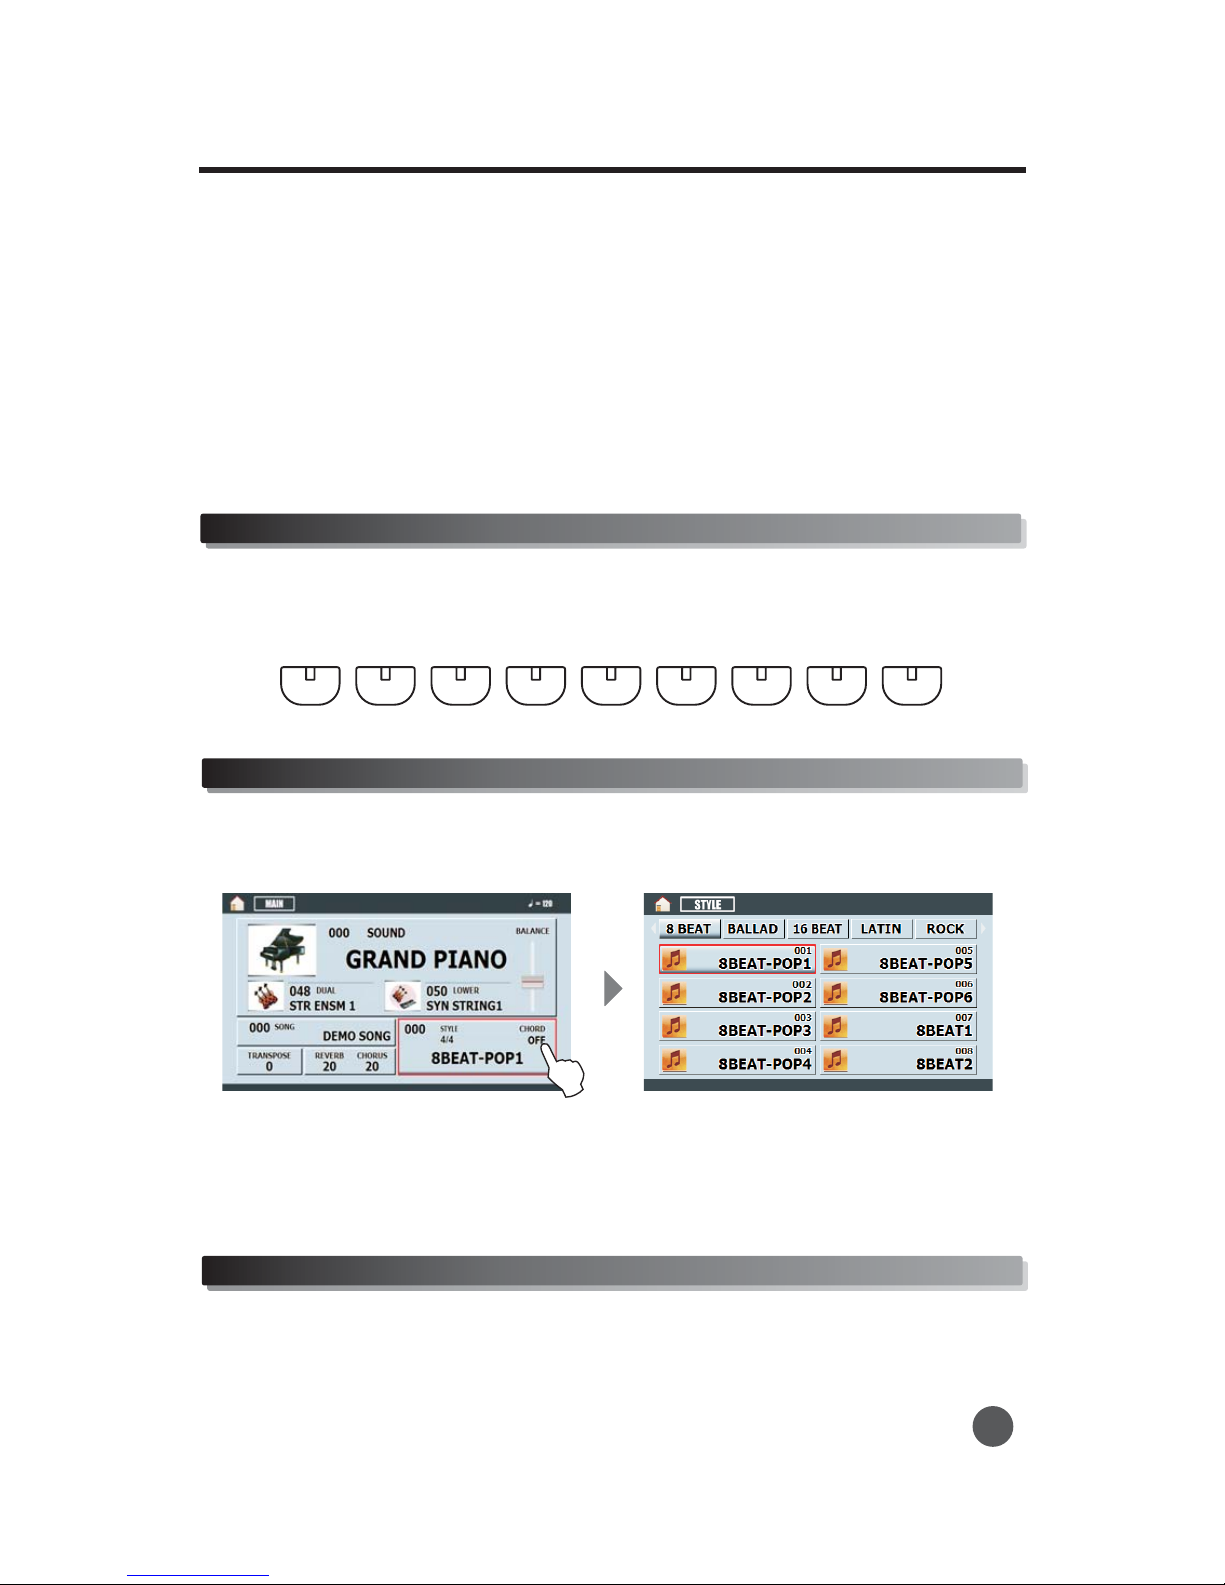
1Press one of the 9 style buttons to select a style.
Select style by using the panel buttonsSelect style by using the panel buttons
1In the main menu page turn the dial to select the style icon,.
Select a style in the style menu pageSelect a style in the style menu page
2
3
4
Press the [ENTER] button or press the style icon to enter the style menu page.
Turn the dial or press the style name bar to select a style.
If no style is selected, the screen will return to the main menu page.
Select style by style groups
1In the style menu page, press the style group icon to enter the style group selection mode. Turn the
dial or press the style group icon to select a style group.
Auto Accompaniment
Auto Accompaniment
10
8 BEAT BALLAD 16 BEAT RHUMBA ROCK DISCO COUNTRY SWING MARCH
The auto accompaniment function puts a full band at your fingertips. Using it, all you have to do is
play the chords with your left hand as you perform, and the selected accompaniment style matching
your music will automatically play along following the chords you play. With auto accompaniment, a
solo performer can enjoy playing with the backing of an entire band or orchestra.
The digital piano features 200 styles featuring a variety of different musical genres.
Try selecting some of the different styles and play with the auto accompaniment.

2
3Press the [ENTER] button or press the style name bar to select a style.
Turn the dial or press the style name bar to select a style.
There are various types ofAutoAccompaniment sections that allow you to vary the arrangement of
the accompaniment to match the song you are playing. The different types are: Intro, Main, Fill-in,
and Ending. By switching among them as you play, you can easily produce the dynamic elements of a
professional sounding arrangement in your performance.
Sync
Press the [Sync] button. Now press any note or chord in the left part of the keyboard, and the
introduction will start.
This is used for the beginning of a song. When the intro is finished, the accompaniment will shift to
the main section. The length of the introduction differs from style to style.
Press the [Sync] button. Then press the [INTRO/ENDING] button. Now press any note or chord
in the left part of the keyboard and the introduction will begin.
1
2Press the [INTRO/ENDING] button to start the accompaniment immediately from the Intro part.
Intro section
Auto Accompaniment
11
The fill-in section lets you add dynamic variations and breaks in the rhythm of the accompaniment,
to make your performance sound even more professional.
Simply press the [A-FILLIN1], [B-FILLIN2] buttons as you play, and the selected fill-in section will
play automatically, spicing up the auto accompaniment. When the fill-in section is finished, it leads
smoothly into the variation indicated on the FILL-IN button you used (Aor B).
Fill-in section
Accompaniment sectionsAccompaniment sections
STYLE CONTROL
SYNC.
A / Fill In1
B / Fill In2
START/STOP
INTRO/ENDING
Fade In/Out
Turn the dial to select a style group.
Press the style group icon to select a
style group.
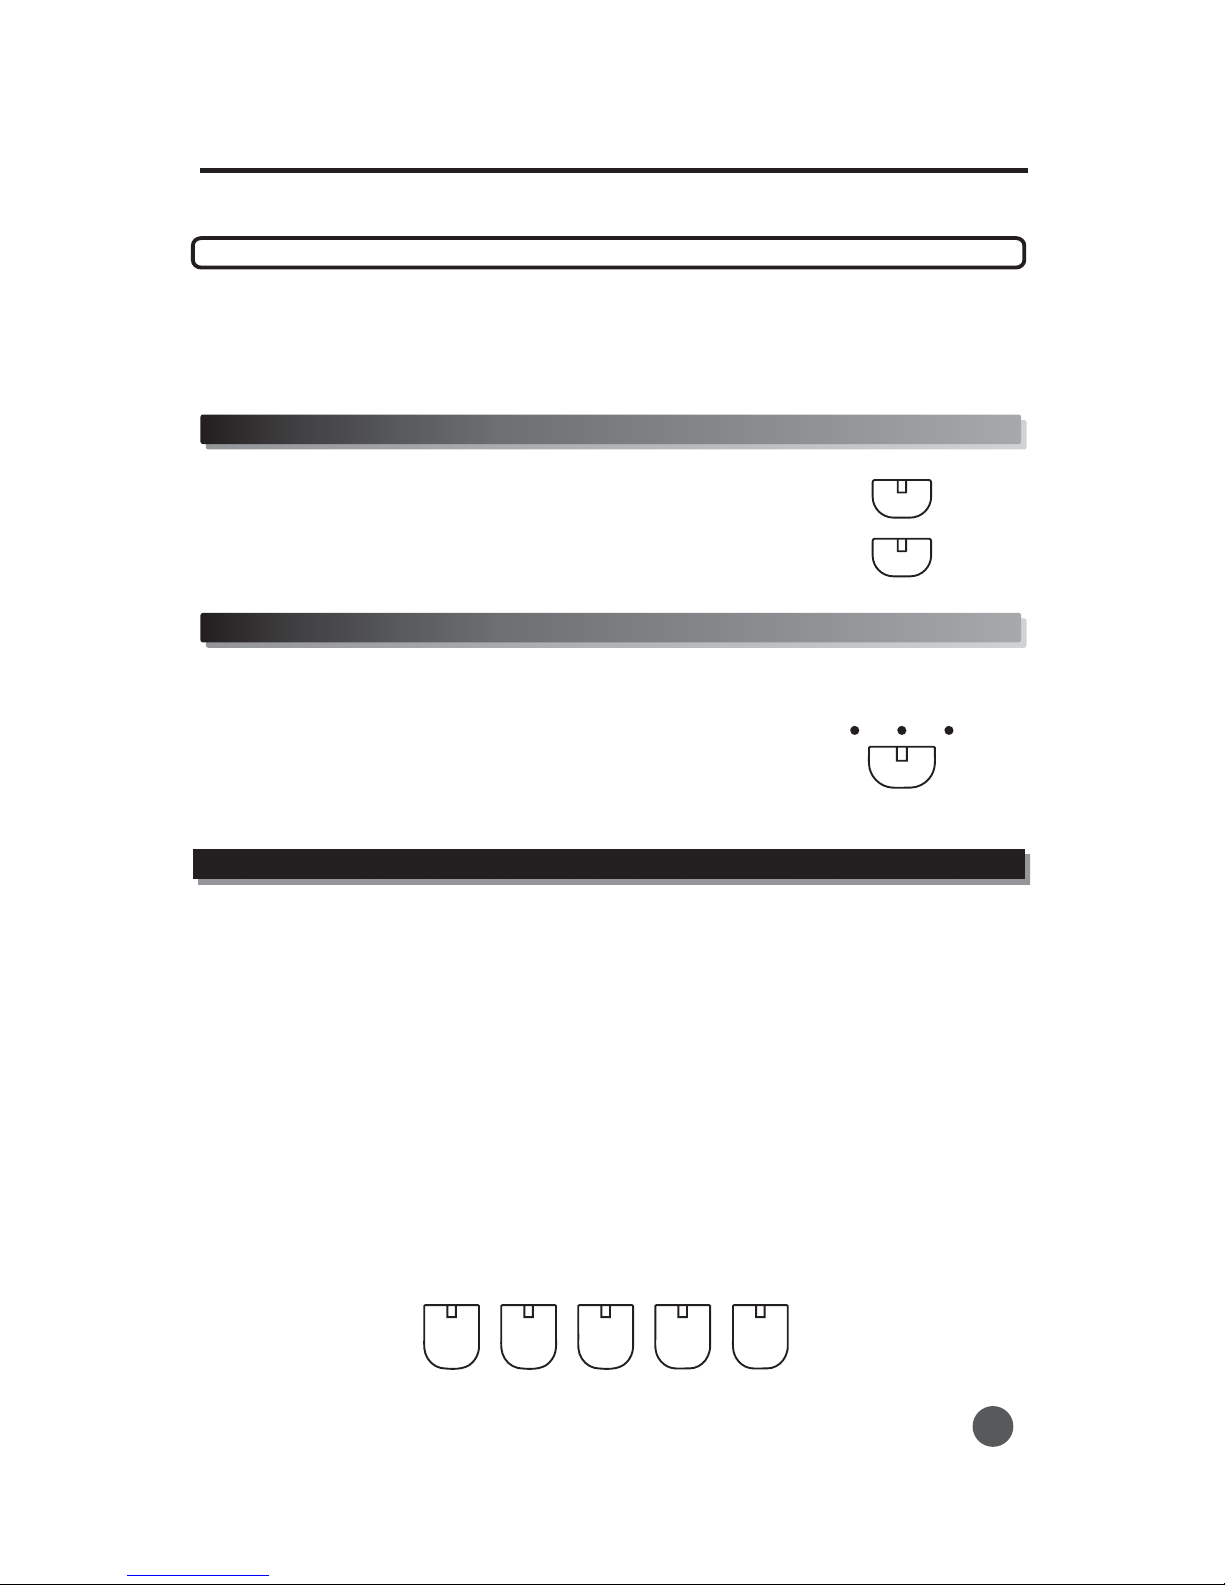
Metronome
1
2
Press the [METRONOME] button repeatedly. The lights change
between [4/4], [3/4], and [2/4], as does the metronome sound
depending on the setting. The metronome speed is changed by
using the TEMPO buttons.
Press the [METRONOME] button repeatedly until all lights turn
off and the metronome turns off.
Ending section
Press the Tempo+ and Tempo- button to increase or decrease the
tempo.
The tempo can be a value from 30 to 240 beats per minute.
Auto bass chordAuto bass chord
Select the Chording (Fingering) mode.
This mode allows the player to use musically correct chords in the left hand. The player can also use
shortcuts, such as adding only the minor note to the base note, (3 semitones above the base note) or adding
only the 7th (2 semitones below the base note).
This mode is easy to use for both the beginner and the advanced player.
1
2
FINGERED
S. FINGER
To make a major chord, just play a single note in the left hand.
To make a minor chord, add a black note to the left of the base note.
To make a 7th chord, add a white note to the left of the base note.
To make a minor 7th chord, add a white note and a black note to the left of the base note.
Auto Accompaniment
12
Tempo settingTempo setting
+
-
TEMPO
METRONOME
2/4
3/4
4/4
PIANO
NORMAL S FINGER.
FINGER
SPLIT
This is used for an automatic ending of the song.
The length of the ending differs from style to style.
Press the [INTRO/ENDING] button and the piano will end your song for you automatically

13
Auto Accompaniment
Using single-finger mode to play chords makes it simple to produce beautifully orchestrated
accompaniments using major, minor, and minor-seventh chords by pressing a minimum number of
keys on theAuto Accompaniment The following abbreviated chord fingering is used:
Playing single-finger chords
Major: Just press the basic key
Minor: Press the basic key and any black key on its left side.
Seventh: Press the basic key and any white on its left side.
Minor seventh: Press the basic key and one white key, and one black on its left side.
This is the default accompaniment mode, and relies on your musically correct fingering to make
chords.
Playing fingered chords

Panel Memory Feature
Since the digital piano is such a sophisticated instrument with such a large variety of controls and
functions such as voices, styles, auto accompaniment, and effect settings, the MEMORYfunction is
one of the most convenient and useful features of the instrument. It allows you save panel settings to
a Register Memory button, and then instantly recall your custom panel settings by pressing a single
button.
The memory function provides 4 memory spaces. This allows you to store 4 different settings.
SOUND L
SOUND R
STYLE
TEMPO
1
2Set up the piano as desired.
Hold down the [SET] button, then press
one of the MEMORY buttons: [1]
through [4].
Any data that was previously
recorded in the Status
Register location you
selected will be erased and
replaced by the new setting.
Press one of the MEMORY buttons to recall the settings:
Panel Memory Feature
Accompaniment volume
Accompaniment mode
Accompaniment section A/B
Accompaniment track on/off
Touch Sensitive on/off
Effect on/off
Dual on/off
14
Data stored by the menory funtionData stored by the menory funtion
Storing your settings into a memory buttonStoring your settings into a memory button
Recalling your saved panel memoriesRecalling your saved panel memories
SET 1
2
34
SET 1
2
34
Note

Recording System
Recording System
15
REC
PLAY
DEL
Press the REC button The record light turns on and the screen displays the record page[] . , .1
Start to record
2
3
.[],
.
[][ ] , .
Play the piano to start recording You can also start recording by pressing the PLAY button in
this case the piano will record rest notes before you play the piano
Press the REC or PLAY buttontostoprecording thetrackwithrecordeddatadisplayalinebar
With the powerful and easy to use Recording System, you can record your own keyboard
performance and create your own complete, fully orchestrated compositions. The recorded song can
includes up to 7 tracks, and up to 10,000 notes.
Data that can be recorded for a user song
The following information is important for you to keep in mind as you record:
1
2
3
4
5
UsingtheMetronomefunctioncanmakeyourrecordingsessionsmuchmoremusical.
Using Status Registration can make your recording sessions much more efficient, since various
settings(such asvoices,styles,etc.) canberecalledbyasinglebutton press.
Whenever you record, please note that any previously recorded material in the same track will be
erased.
Themaximumrecordingcapacityisupto10 000notes
In the HOME menu page press he REC icontoentertherecord page Orpress the DEL button
toenterrecordpageiftherecordpageisnotavailable
.,
,t[] . []
.
Tempo
Accompaniment style number
Section changes and their timing
Chord changes and their timing
Note ON/OFF (key press and release)
Touch Sensitive ON/OFF
Sound change settings
Effect setting

Recording System
16
Enter the record page.
2
3
Turn the dial or press the track bar
icon to select the track 1 6
Press the track s R column position
repeatedly
-.
'
1
[]
.
[]
.
.
to make the track display
R .This means that this track is to be
recorded
Press the REC button and then play the
piano to start recording The keyboard
notes played will be recorded on this track
4
Select track to record
Multi track recording
2
3
4
Turn the dial or press the track bar
icon to select track 1 6-.
1
5
,
.
.
After a track is recorded you can
continue to record other tracks
Enter the record page
Press the track s R column position
repeatedly to make the track display R .
This means that this track is to be
recorded
Press the REC button and play the
piano to start recording
.
'
[]
.
[]
Accompaniment recording
The recording system can record the piano saccomapniment'.
Turnthedialor ress he rackbar contoselectthe track0.
1
2Enter therecordpage p t t i.
enable accompaniment record disable accompaniment record

Recording System
17
1
2Press the PLAY buttontostartplayingoftherecordedsong
Press the PLAY buttonagaintostopplayingoftherecordedsongwhile playbackisinprocess
[] .
[] .
Play
Track mute option
Track solo option
Press the track s R column position repeatedly to make track display R After starting recording
accomaniment will be recorded on track 0 If there is data in track 0 before recording the new
accompaniment data will overwrite the old one
'0[].,
.,
.
3
4
',.
'
,.
If you don t want new accrompaniment to overwrite he old one turn the dial to select track 0
Then press track 0 s R column position repeatedly to make track 0 cancel R This means new
accompanimentwillnotberecorded
The first time you use recordingsystem track 0 is ready to record accompaniment
t
[].
.
When a couple of tracks have been
recorded the mute option can be set to
decide whether the track is played when
playing
Enter the record page
Turn the dial or press the track bar
icon to select the track
.
.
,
1
2.
[] [].
[] ,
3
4
Press the track s M column position
repeatedly to make the track
display M or cancel M
When M is displayed it means that the
'
1
2Enter the record page
Turn the dial or press the track bar
icon to select the track
Press the track s S column position
repeatedly to make the track
display S or cancel S
When S is displayed it means that
only this track will play and when blank
is displayed it means the track will play
normaly
.
[] [].
[] ,
,
,
.
.
'
3
4
track doesn t play and when blank is displayed it means the track will play', , .
Table of contents
Other Aura Musical Instrument manuals


