Auralex Acoustics Max-Wall User manual

Thank you for purchasing the Auralex Acoustics MAX-Wall
™
Modular Acoustical Environment.
You now have a higher quality recording and listening environment.
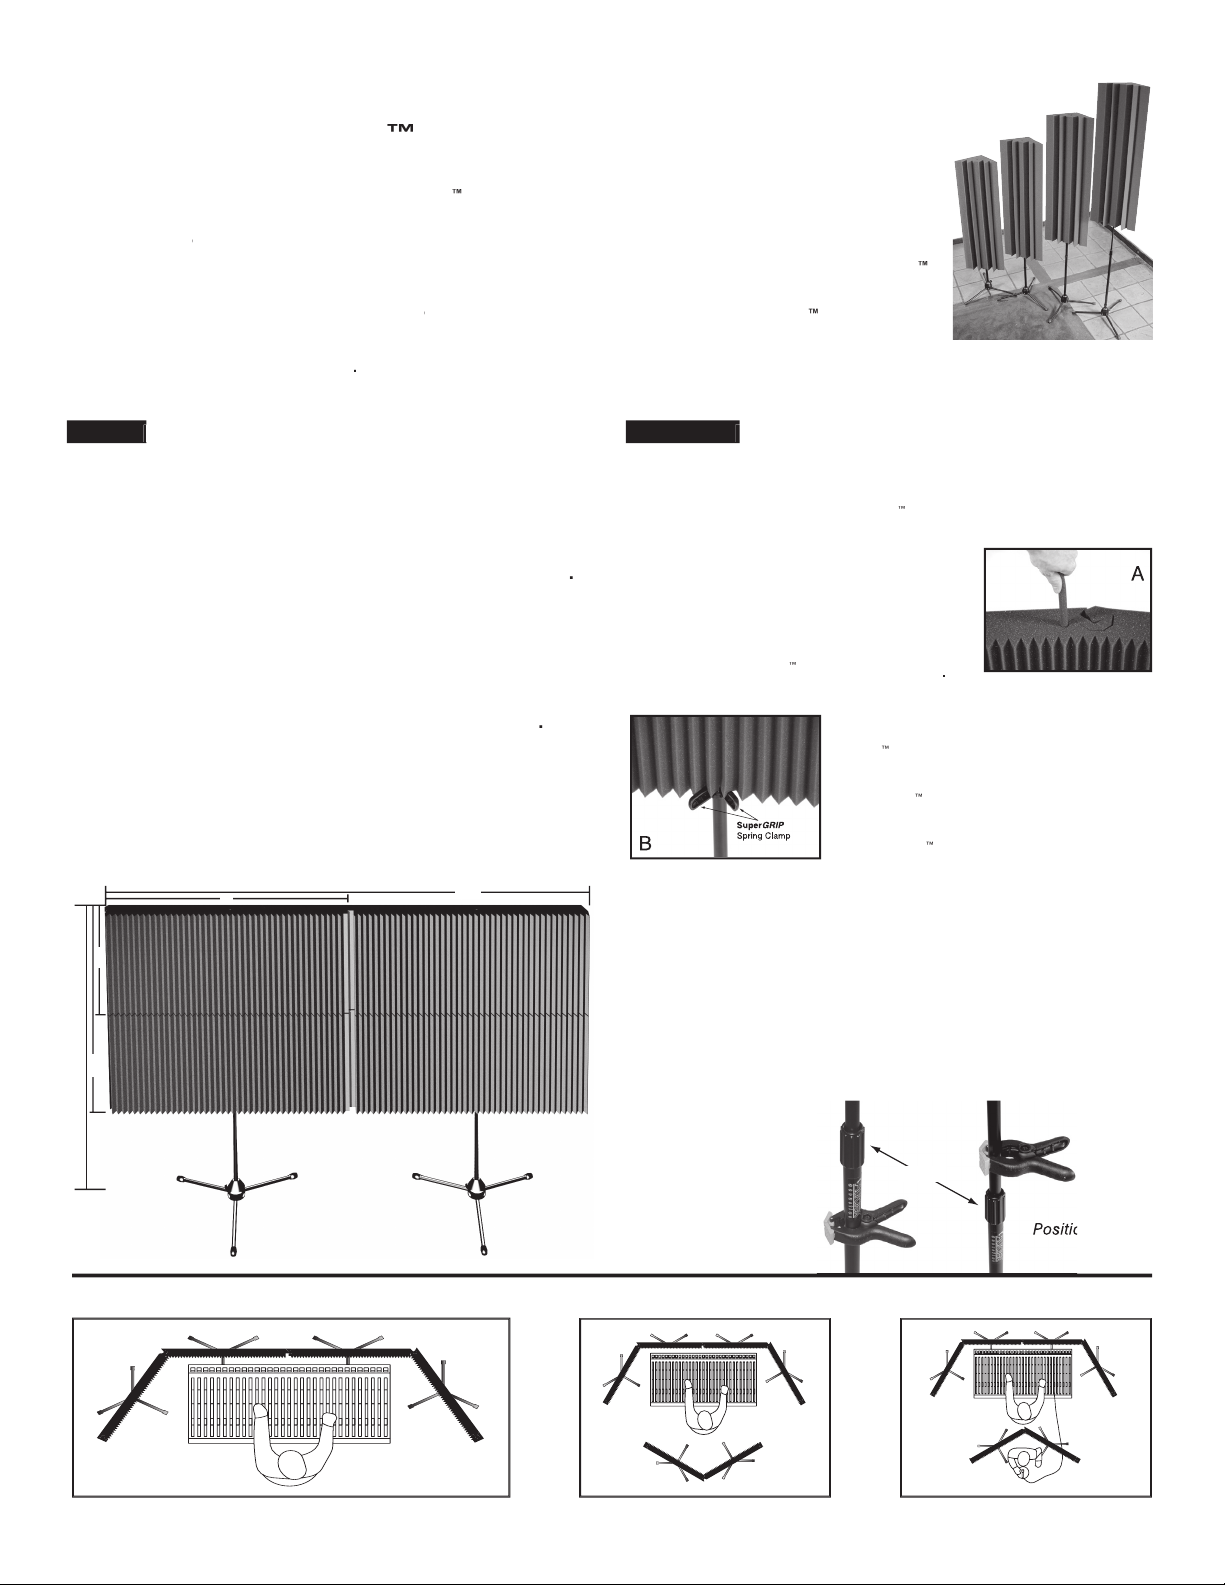
Clutch
Position A
Position B
Position B
Second.
Decide how you want it setup,
Decide how you want it setup,
then follow these easy steps:
1. Setup the MAX-Stand
™
to the desired height. Fully
extended if the top panel is to
be above 5’4”.
2. Remove the inner foam core
from the c enter of each
MAX-Wall
™
panel
(photo A)
.
3. Insert stand into hole in MAX-
Wall
™
panel and push down to
desired height. Use the MAX-
Clamps
™
to secure the bottom
panel
(photo B)
. Continue adding
MAX-Wall
™
panels until the desired
height is achieved.
4. If the desired height is above the clutch, place a
MAX-Clamp
™
on the smaller part of the stand using
position “b”. If the panels are below the clutch, then
friction will likely hold the panels in position. We
suggest you place the clamp underneath the panel
(position “a”)
to insure no slipping or sagging over
time.
Thank you for purchasing your
MAX-Wall
™
Modular Acoustical Environment
. This modular,
absorptive, expandable acoustical kit is ideal for situations where you cannot permanently place
Studiofoam
®
on your room surfaces. It’s also great when you need to be able to quickly and
® on your room surfaces. It’s also great when you need to be able to quickly and
®
easily change your recording/listening environment for a variety of situations. The
MAX-Wall
™
offers you a great deal of flexibility, is easy to setup, and can be easily expanded. Be sure to
check out the complete line of
Auralex
®
products such as
® products such as
®
Stand-Mounted LENRD
™
bass traps
,
our complete line of
Studiofoam
®
and family of diffusors, as well as all of our construction-related
materials at
www.auralex.com
.
4' 7' 8"
1'8"
3'4"
figure 1
3 panels = 5'
The MAX-Wall
™
Instruction Sheet
First.
Decide how you want to layout your
Decide how you want to layout your
new MAX-Wall:
(Keep in mind that there is no specific top,
bottom, left or right sides to these panels. They can be setup any way you
choose. Make sure the wedged surface faces the source of the
sound to be absorbed.)
1. What Width - Number of panels
(see figure 1)
.
a. 1 single panel = 4’
b. 2 interlocked panels = 7’8”
c. 3 interlocked panels = 11’4”
(not pictured)
2. How Tall - Number of panels
(see figure 1)
.
a. 1 single panel = 20” (1’8”)
b. 2 stacked panels = 40” (3’4”)
c. 3 stacked panels = 60” (5’)
(not pictured)
3. Starting height from the floor?
A
B
Serving Suggestions:
Stand-mounted
LENRD™

Third.
Locking panels together:
The ends of each panel are designed to
“peel” away
(see figure 2)
, allowing the
panels to be locked together. This creates a
continuous acoustical wall. Panels can then
be hinged up to 60°. When removing these
pieces, we suggest labeling both the panel
and the end cap in a location that will be
concealed once connected. This will allow
you to replace the end caps without them
being mismatched. Our cutting tolerance
can vary slightly; end caps that are mis-
matched with panels may not exactly match, and thus may
not be a perfect fit
(too loose)
. Decide which set of panels
are to be interconnected and remove the adjacent end
pieces. Must be male to female for this to work. If you need
to, just flip the MAX-
Wall
™
panel over so
the panels correctly
connect male to
female
(figure 3)
.
If ends of panels
are adjacent, but
hinged greater than
60°
(actually 120°
for you mathematicians)
, leave the end caps on and connect
the panels together with long pins
(clothing, t-pins, etc.)
or
purchase our optional MAX-Wall
™
CornerCouplers
™
. If the
ends of the panels are at the end of your setup, we suggest
leaving them on for appearance reasons!
Optional Accessories:
1. Window Unit:
20” x 48” MAX-Wall
™
panel with an 18”
x 12” Plexiglass window
(¼” thick)
. The MAX-Stand
can be adjusted so you can attach a microphone
gooseneck
(as pictured)
.
2. MAX-Wall
™
CornerCouplers
™
Designed to allow panels to
be attached at a 90°
(80° to
100°)
angle
.
End Cap
Serving Suggestions:
Figure 2
MAX-Wall Tips:
1. Some panels may show a slight variation in color/
shade. This is due to the direction of the cut from
our production saw. Pull all of the panels out of the
box
(es)
and mix/match the best combinations. We
suggest the closest matches be used on the same
stand for color consistency.
2. If you need to extend the height of the MAX-Wall
™
beyond the capabilities of the MAX-Stand
™
, 5/8”
PVC pipe can be placed over the smaller diameter
top of the stand and cut to a height to support
panels above normal height.
3. A more “curved” environment
(figure 4)
. If you
desire the MAX-Wall
™
to “surround” you beyond
the normal hinging of the panels, you can
“frac-
ture”
the hole lock in the center
ture” the hole lock in the center ture”
of the panel, creating a
45° with an individual
panel. Be aware
that the hole lock
can be restored,
but may not be as
strong or attractive
as before. The
“frac-
tured”
panels are
best used when the
ends are interlocked
with other panels to
prevent sagging.
4. Keep the shipping box
(es)
for storage if the MAX-
Wall
™
will be moved around or used intermittently.
Figure 4
Male Female
Figure 3
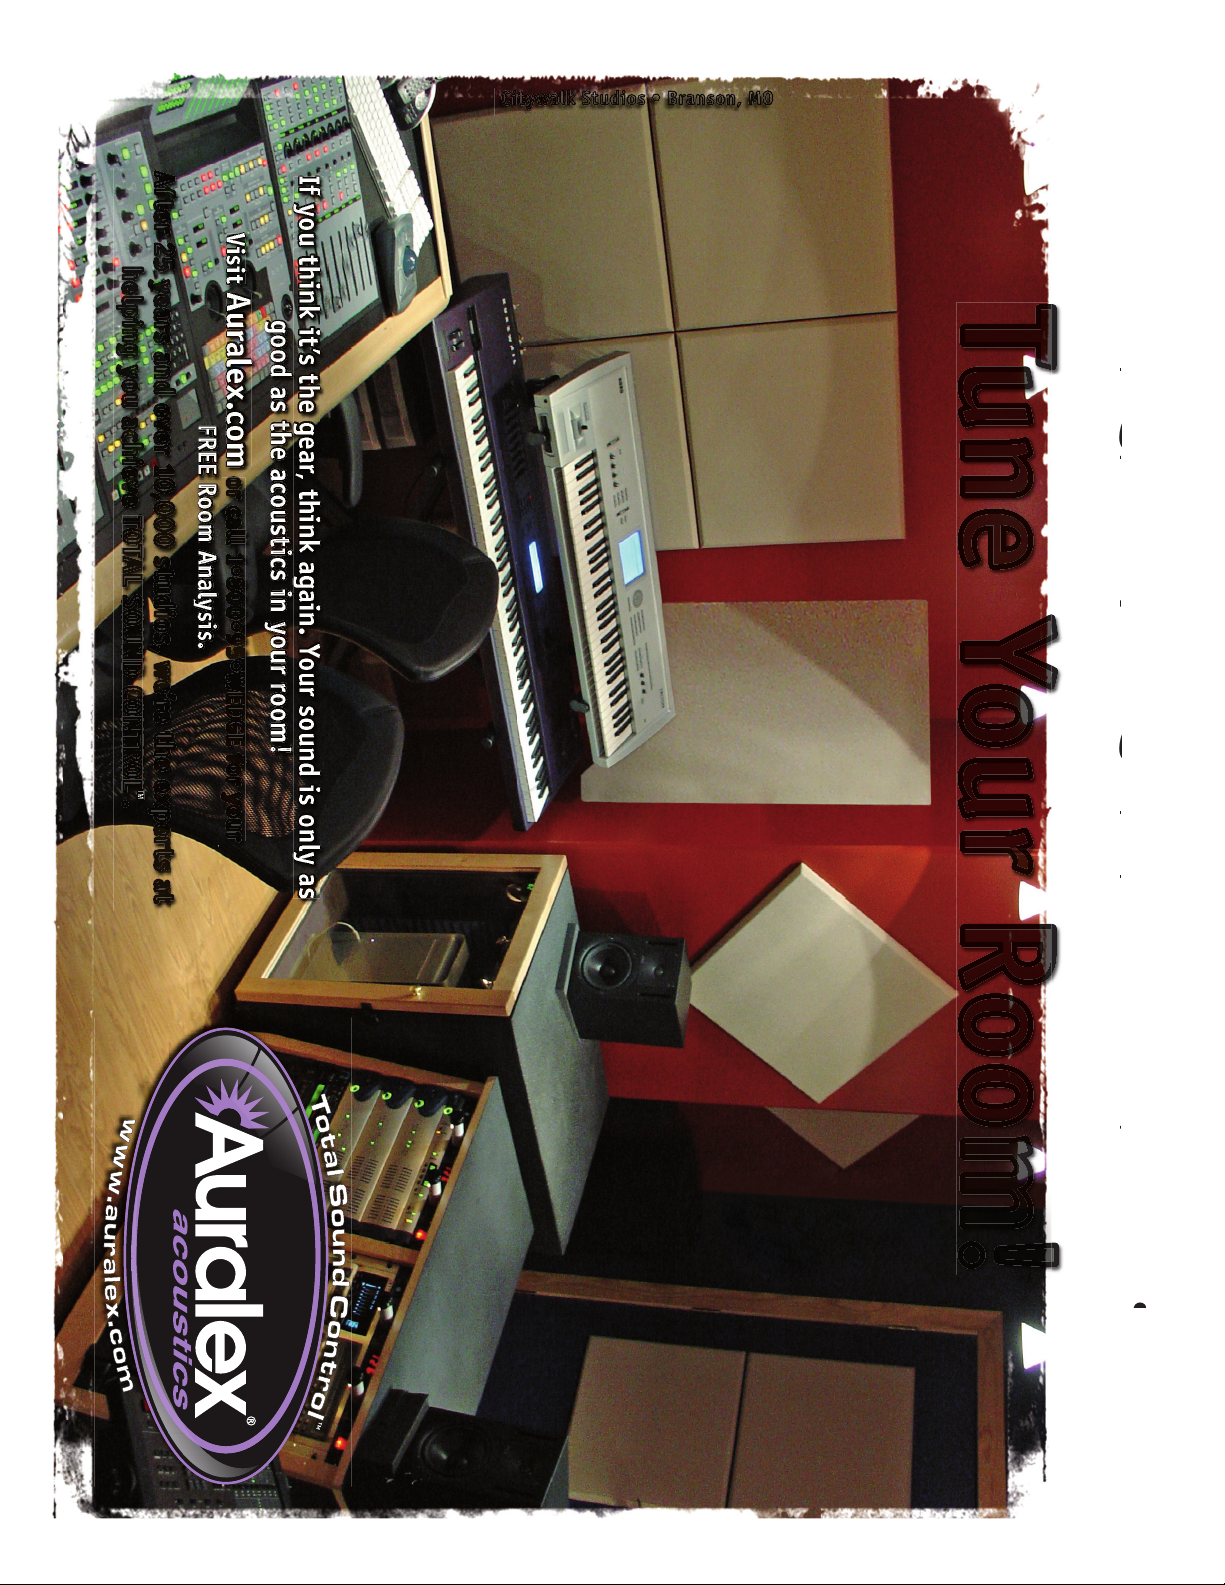
Great gear and great tracks,
BUT
...
BUT...BUT
your mix doesn’t sound the same in the car?
Great gear and great tracks,
your mix doesn’t sound the same in the car?
Great gear and great tracks,
good as the acoustics in your room!
or call 1•800•95•WEDGE for your
FREE Room Analysis.
After 25 years and over 10,000 studios, we’re the experts at
helping you achieve TOTAL SOUND CONTROL™.
Citywalk Studios • Branson, MO
Tune Your Room!
Other Auralex Acoustics Accessories For Musical Instruments manuals


