Aurender W20SE Manual

www.aurender.com
Customer Service: [email protected]
Aurender America Inc. / 63 Brixton, Irvine, CA 92620, USA
W20SE Hardware Installation Guide
1.
2.
3.
4.
5.
6.
On/Off/Standby
AMOLED Display
Display Menu
Play/Pause
Play Previous
Play Next
1.
2.
3.
4.
5.
6.
AC Power Switch
AC Power Socket
USB Audio Class 2.0 Output
AES/EBU XLR Output 1
AES/EBU XLR Output 2
Optical Output
7.
8.
9.
10.
11.
12.
Coaxial RCA Output (SPDIF)
Coaxial BNC (SPDIF) Output
Coaxial BNC Word Clock Input
USB 2.0 Data Port 1
USB 2.0 Data Port 2
Gigabit Ethernet Port
10 11
3 4 5 6 7 8 9
12
12
5 6
3 41 2
STEP 1: Connect to Power
Using the included power cable, connect your Aurender to 110V/120V or 220V (depending on your
region) electrical outlet or a power conditioner/surge protector.
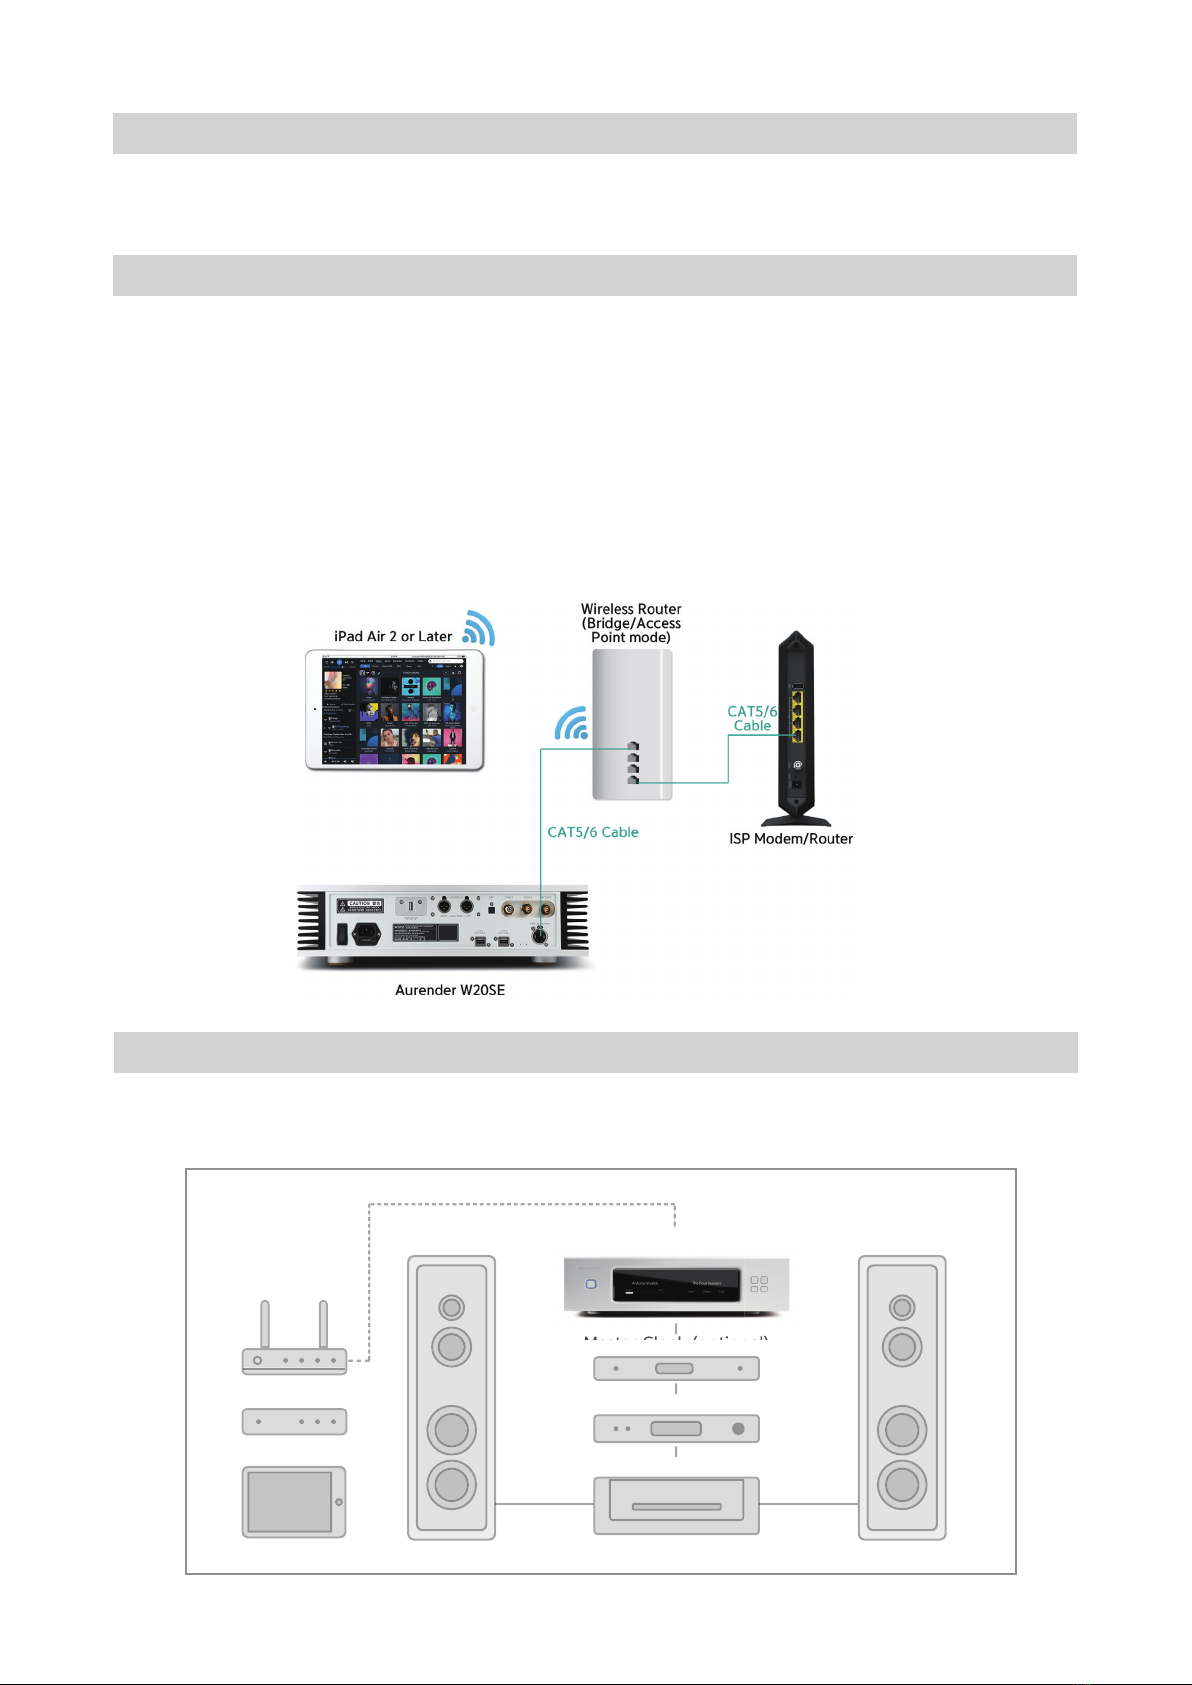
STEP 2: Connect to Local Area Network (LAN)
Your Aurender server must be connected to your router via a hard-wired Ethernet connection.
Aurender servers do NOT have any WiFi connectivity (this is by design as most WiFi networks are
unreliable and subject to drop-outs and limited bandwidth).
In cases where your listening room location makes it physically impossible to run an Ethernet
connection back to the router, you might consider using a WiFi extender or ethernet-over-powerline
adapter to establish connectivity. Please contact Aurender Support for assistance.
Below is a diagram of a common connection schematic. Your network configuration may vary:
Note: Your Aurender is supplied with a generic IEC power cable. However, many Aurender
users choose to use an upgraded power cable for enhanced performance. Please consult your dealer
for cable recommendations.
STEP 3: Connection to Main Amplifier or Preamplifier
Using the included power cable, connect your Aurender to 110V/120V or 220V (depending on your
region) electrical outlet or a power conditioner/surge protector.
Router
NAS
iPad
Speaker Speaker
Master Clock (optional)
DAC
AMP
Aurender W20SE
Other Aurender Server manuals


