manuals.online logo
Brands
  1. Home
  2. •
  3. Brands
  4. •
  5. Aurora
  6. •
  7. Outdoor Light
  8. •
  9. Aurora LINEAR FLUORESCENT WALKOVER LUMINAIRE Manual

Aurora LINEAR FLUORESCENT WALKOVER LUMINAIRE Manual

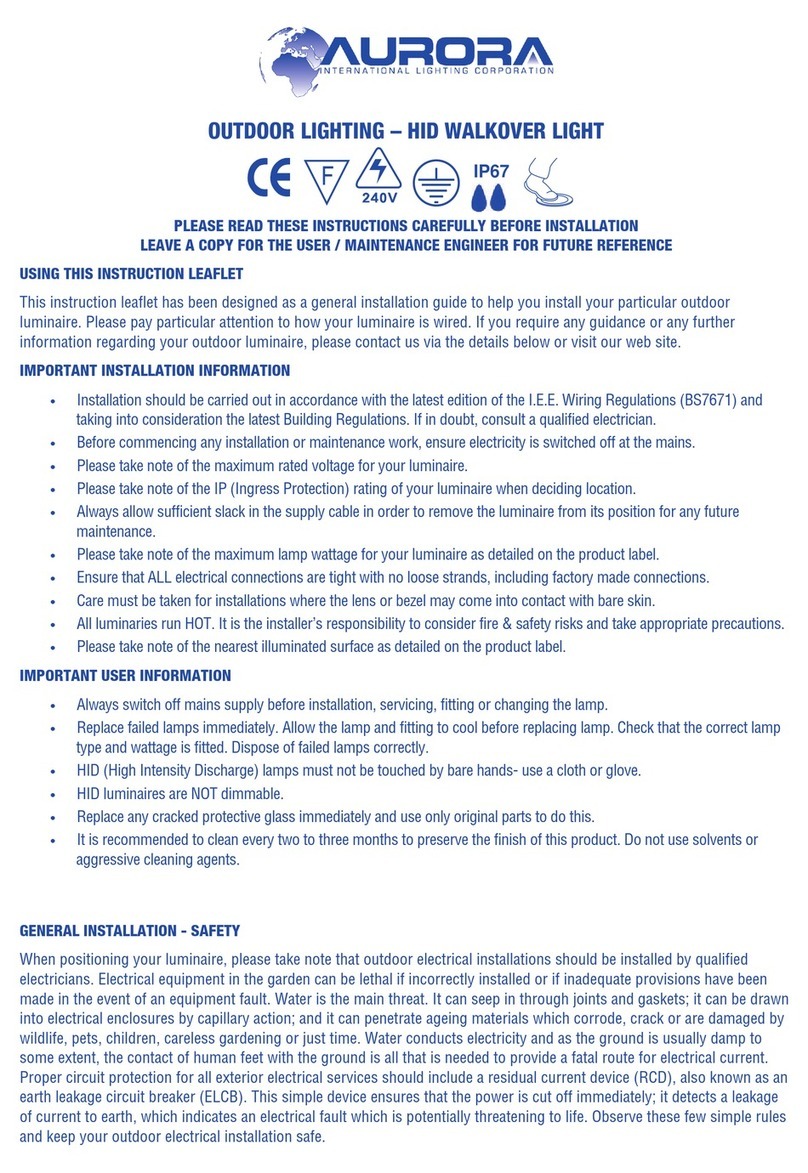
OUTDOOR LIGHTING – LINEAR FLUORESCENT WALKOVER LUMINAIRE
INSTRUCTION LEAFLET
PLEASE READ THESE INSTRUCTIONS CAREFULLY BEFORE INSTALLATION
LEAVE A COPY FOR THE USER / MAINTENANCE ENGINEER FOR FUTURE REFERENCE
USING THIS INSTRUCTION LEAFLET
This instruction leaflet has been designed as a general installation guide to help you install your particular outdoor
luminaire. Please pay particular attention to how your luminaire is wired. If you require any guidance or any further
information regarding your outdoor luminaire, please contact us via the details below or visit our web site.
IMPORTANT INSTALLATION INFORMATION
•Installation should be carried out in accordance with the latest edition of the I.E.E. Wiring Regulations (BS7671)
and taking into consideration the latest Building Regulations. If in doubt, consult a qualified electrician.
•Before commencing any installation or maintenance work, ensure electricity is switched off at the mains.
•Please take note of the maximum rated voltage for your luminaire.
•Please take note of the IP (Ingress Protection) rating of your luminaire when deciding location.
•Always allow sufficient slack in the supply cable in order to remove the luminaire from its position for any future
maintenance.
•Please take note of the maximum lamp wattage for your luminaire as detailed on the product label.
•Ensure that ALL electrical connections are tight with no loose strands, including factory made connections.
•Care must be taken for installations where the lens or bezel may come into contact with bare skin.
•All luminaries run HOT. It is the installer’s responsibility to consider fire & safety risk and take appropriate
precautions.
•Please take note of the nearest illuminated surface as detailed on the product label.
LABEL SYMBOLS EXAMPLES
•Luminaire can be mounted on a normally flammable surface e.g. a material based on wood.
•Luminaire can not be mounted on normally flammable surfaces.
•Double insulated – does not require an earth connection.
•Luminaire must be earthed.
•Complies with Class 3 – SELV (Safety Extra Low Voltage) less than 50VAC.
•Nearest illuminated surface in front of the luminaire.
•Indicates a non-replaceable LED (Light Emitting Diode) lamp.
•IP44 - Protected against splashing water.
•IP65 – Protected against low pressure jets of water.
•IP68 – Protected against submersion in water.
IMPORTANT USER INFORMATION
•Always switch off mains supply before installation, servicing, fitting or changing the lamp.
•Replace failed lamps immediately. Allow the lamp and fitting to cool before replacing lamp. Check that the correct
lamp type and wattage is fitted. Dispose of failed lamps correctly.
•Replace any cracked protective glass immediately and use only original parts to do this.
•It is recommended to clean every two to three months to preserve the finish of this product. Do not use solvents
or aggressive cleaning agents.
GENERAL INSTALLATION - SAFETY
When positioning your luminaire, please take note that outdoor electrical installations should be installed by qualified
electricians. Electrical equipment in the garden can be lethal if incorrectly installed or if inadequate provisions have been
made in the event of an equipment fault. Water is the main threat. It can seep in through joints and gaskets; it can be drawn
into electrical enclosures by capillary action; and it can penetrate ageing materials which corrode, crack or are damaged by
wildlife, pets, children, careless gardening or just time. Water conducts electricity and as the ground is usually damp to
some extent, the contact of human feet with the ground is all that is needed to provide a fatal route for electrical current.
Proper circuit protection for all exterior electrical services should include a residual current device (RCD), also known as an
earth leakage circuit breaker (ELCB). This simple device ensures that the power is cut off immediately; it detects a leakage
of current to earth, which indicates an electrical fault which is potentially threatening to life. Observe these few simple rules
and keep your outdoor electrical installation safe.
GENERAL INSTALLATION – LAYING CABLE
Laying electrical cables in the ground may be subject to specific regulations. The aim is to ensure that the cables are buried
deeply enough in the ground to avoid any disturbance which is likely to occur. Where armoured cables can be buried at
adequate depth to avoid being damaged by any reasonable foreseeable disturbance of the ground, they can be laid in a
buffer layer of sand and covered with cable warning tape. Where it is not possible to bury the cables deeply enough because
of the presence of tree roots or unsuitable ground conditions, extra mechanical protection around the cables will be
required. This is usually in the form of plastic ducts or conduits through which the cables are run.
INSTALLATION
1. When positioning your luminaire, please take note of:
•The IP rating (See IP rating table Fig.1.)
•Beware of existing water pipes and electric cables when preparing the site.
2. Never install your luminaire in a dip in the ground or in an area of localised flooding. This is to avoid pooling of water
over the top of the glass. (see Fig.2)
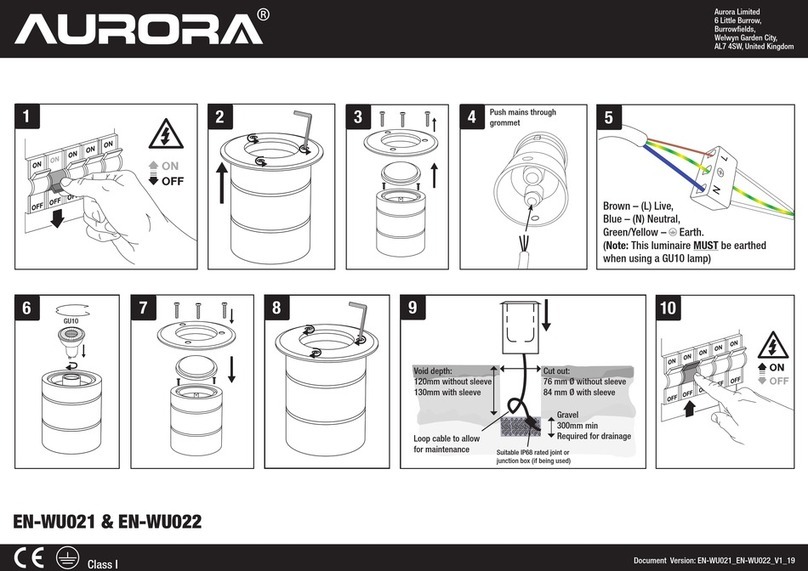
3. When installing the mounting sleeve of the luminaire into the ground, always prepare a minimum of 30cm of gravel
under the sleeve housing to allow for drainage. Check that drainage is adequate by filling the hole with water and
confirming that the water has completely drained in 30 minutes. To avoid any water damage to this luminaire, it may
be necessary to add further drainage (e.g. a drainage tube).
4. Secure the mounting sleeve into position using concrete or cement. Ensure sleeve is not distorted by the concrete or
cement. It must remain square to allow the luminaire to fit once set.
5. Always allow sufficient slack in the supply cable in order to remove the luminaire from its mounting sleeve or
position for any future maintenance. It may be possible to use an IP68 connector (available from Aurora AU-CK01).
6. When dismantling your luminaire, take note of the orientation and position of key components.
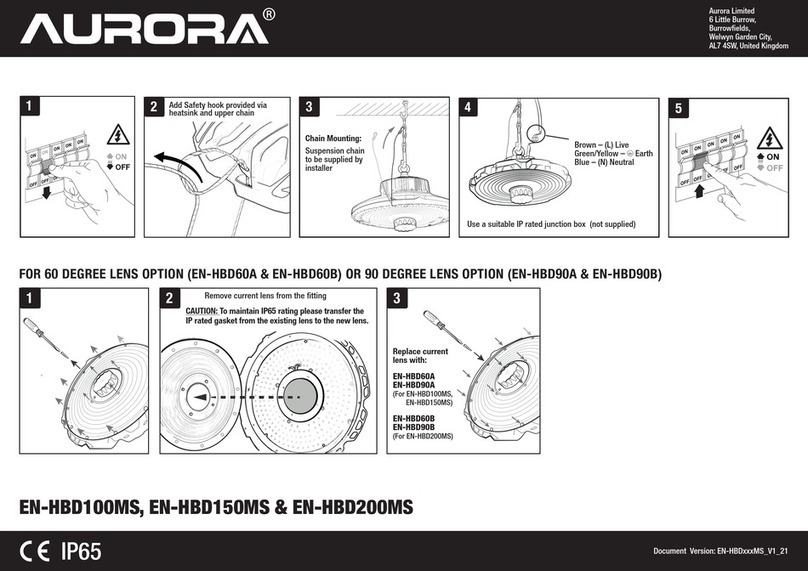
7. The bezel can be removed by un-screwing the nuts on the fixing studs on the underside of the bezel. This will give
you access to the lamp.
8. This product comes supplied with two cable entry glands. This is to ease wiring and enable ‘loop in, loop out’ wiring.
If using only one entry gland, the other gland must be sealed from the environment with suitable silicon sealant.
9. To access the supply connections, remove the end cap with the cable entry glands. Remove bracket which is holding
one end of the lamp connector, remove terminal plate for connection. Mark position of bracket prior to removal.
10. Use 3-core 0.75mm2rubber insulated cable for connection. (H05RN-F).
11. Supply connections are as follows:
•LIVE – (Red or Brown) to terminal marked ‘L’.
•NEUTRAL – (Black or Blue) to terminal marked ‘N’.
•EARTH – (Green & Yellow) to terminal marked ‘ ‘.
12. Place back into position terminal plate. Refit bracket which is holding one end of the lamp connector.
13. Install the required lamp. Confirm lamp type and maximum wattage on label of product.
14. Check all seals and glass are intact and seated correctly. When securing the bezel back on top of the luminaire,
tighten the first screw and then the opposite screw to distribute even pressure.
15. Wipe clean surfaces, turn on mains supply and test luminaire.
FOREIGN BODIES First Digit LIQUIDS Second Digit
0 No Protection 0 No Protection
1 Protected against solid objects greater than 50mm (e.g.
accidental touch by hands)
1 Protection against vertically falling drops of water (e.g.
condensation)
2 Protected against solid objects greater than 12mm (e.g.
fingers)
2 Protection against direct sprays of water up to 15 degrees
from the vertical
3 Protected against solid objects greater than 2.5mm (e.g.
tools and wires)
3 Protection against direct sprays of water up to 60 degrees
from the vertical
4 Protected against solid objects greater than 1mm (e.g.
small tools and wires)
4 Protection against water sprayed from all direction –
limited ingress permitted
5 Protected against dust, limited ingress (e.g. no harmful
deposits)
5 Protection against low pressure jets of water from all
direction
–
limited ingress permitted
6 Totally protected against dust 6 Protection against high pressure jets of water from all
direction
–
limited ingress permitted
7
Protection against the effects of immersion between 15cm
and 1m
8
Protection against long periods of immersion under
pressure
Fig.1.
‘IP’ (Ingress Protection) RATING
FIRST DIGIT
Protection Against ingress of foreign bodies e.g. tools, dust, finger, etc
SECOND DIGIT
Protection against ingress of liquids i.e. IP44 is protection against solid objects greater than 1mm and water sprayed from all directions
Fig.2.
Avoid installing in areas
of flooding
ENVIRONMENTAL PROTECTION (W.E.E.E.) – AURORA’S WEEE REG.NO. WEE/BG0130YX
Waste Electrical & Electronic Equipment Regulations (WEEE) requires that any of our products showing
this marking (left) must not be disposed of with other household or commercial waste. Aurora does not
levy any WEEE disposal charges to its customers for affected WEEE related products. To prevent possible
harm to the environment or human health from uncontrolled waste disposal, please separate any such
product from other waste types and recycle it responsibly at your local facilities. Check with your Local
Authority, Recycling Centre or retailer for recycling advice. If, when you purchased any Aurora product, your supplier
included a WEEE disposal fee, you should then contact your supplier for advice on his takeback of the product for the
correct disposal.
GUARANTEE
This product is guaranteed in the UK for a period of 1 year from the date of purchase, unless otherwise stated in
current company literature. The guarantee is invalid in the case of improper use, installation, tampering, removal of the
Q.C. date label, installation in an improper working environment or installation not according to the current edition of
the I.E.E. Wiring Regulations (BS7671). Should this product fail during the guarantee period, it will be replaced free of
charge, subject to correct installation and return of the faulty unit. Aurora does not accept responsibility for any
installation costs associated with the replacement of this product. Your statutory rights are not affected. Aurora
reserves the right to alter specifications without prior notice.
Aurora Limited 16 Alban Park Hatfield Road St Albans Hertfordshire AL4 0JJ United Kingdom
Website: www.aurora.eu.com
Document version - AU-OUTDOOR_RUT_V1_09.doc

Other Aurora Outdoor Light manuals

Aurora DECKLIGHT User manual

Aurora

Aurora DECKLIGHT User manual

Aurora RGL1-EN User manual

Aurora

Aurora RGL1-EN User manual

Aurora AU-A1VGSZ5E/19 User manual

Aurora

Aurora AU-A1VGSZ5E/19 User manual

Aurora HID WALKOVER User manual

Aurora

Aurora HID WALKOVER User manual

Aurora EN-HBD100MS User manual

Aurora

Aurora EN-HBD100MS User manual

Aurora EN-WU021 User manual

Aurora

Aurora EN-WU021 User manual

Popular Outdoor Light manuals by other brands

Landi 59894.01 manual

Landi

Landi 59894.01 manual

BONETTI 710011 manual

BONETTI

BONETTI 710011 manual

LIGMAN GINO 2 installation manual

LIGMAN

LIGMAN GINO 2 installation manual

Powerfix Profi HG03497A Operation and safety notes

Powerfix Profi

Powerfix Profi HG03497A Operation and safety notes

Prilux Merk quick start guide

Prilux

Prilux Merk quick start guide

Philips Fair user manual

Philips

Philips Fair user manual

DoorHan LAMP installation manual

DoorHan

DoorHan LAMP installation manual

Ares 534002 Assembly instructions

Ares

Ares 534002 Assembly instructions

Anglepoise 75 Giant instructions

Anglepoise

Anglepoise 75 Giant instructions

Ingo Maurer The MaMo Nouchies Moonati instructions

Ingo Maurer

Ingo Maurer The MaMo Nouchies Moonati instructions

LIGMAN SMITH 3 installation manual

LIGMAN

LIGMAN SMITH 3 installation manual

Perel LAMPH10S user manual

Perel

Perel LAMPH10S user manual

John Lewis MUSHROOM LED TOUCH user guide

John Lewis

John Lewis MUSHROOM LED TOUCH user guide

Volt VPL-1043-4-BBK installation instructions

Volt

Volt VPL-1043-4-BBK installation instructions

LIGMAN MAR 11 installation manual

LIGMAN

LIGMAN MAR 11 installation manual

Thorn AVENUE W300 II quick start guide

Thorn

Thorn AVENUE W300 II quick start guide

MONTEAUX DC-C1848-L Use and care guide

MONTEAUX

MONTEAUX DC-C1848-L Use and care guide

dentalfarm SOLAR PROFESSIONAL Instruction and maintenance manual

dentalfarm

dentalfarm SOLAR PROFESSIONAL Instruction and maintenance manual

manuals.online logo
manuals.online logoBrands
  • About & Mission
  • Contact us
  • Privacy Policy
  • Terms and Conditions

Copyright 2025 Manuals.Online. All Rights Reserved.