AUTO-XS 44266 User manual

USA 800-505-8311 acs@americancustomerservice.com
12/2015Product Code: 44266
2
AFTER SALES SUPPORT • SERVICIO POSVENTA
DISTRIBUTED BY / DISTRIBUIDO POR:
ALDI INC., BATAVIA, IL 60510
www.aldi.us
User Guide
Manual
del usuario
YEAR WARRANTY
AÑOS DE GARANTÍA
CAR ACCESSORIES
600 PEAK BATTERY AMP JUMP STARTER
ARRANCADOR DE BATERÍA CON
AMPERAJE PICO DE 600 AMPERIOS
English...Page 3
Español...Página 13

Contents
Overview .................................................................................. 03
Operating Instructions and User Cautions ............................. 04
First Aid For Battery Acid Contact .......................................... 06
Charging/recharging ................................................................ 06
Unit & Specification.................................................................. 08
Correct Procedure For Jump-Starting A Vehicle .................... 09
Using 12V DC Power Port of Power Pack ................................ 10
Battery Status Monitor.............................................................. 10
12 Volt DC Charging Method.................................................... 10
Charging/Recharging Using the 120 Volt AC
Charger and a Standard Household Extension Cord .............. 11
USB Charging Port.................................................................... 11
LED Work Light ........ ............................................................... 11
Trouble Shooting ........ ............................................................. 12

5
7
Overview3
1
1
2
3
4
5
6
7
8
9
10
11
12
2
3
4
5
6
7
8
9
10
10
12
11
Input Socket for DC Power Charger
Red LED for Battery Charging & Yellow LED for Maintaining Battery
12 Volt Power Port for 12 Volt Accessories
Battery Status LED Indicators with Button Switch
Easy Carry Handle
On/Off Main Power Pack Switch
USB 2.4A Charging Port
On/ Off Light Switch
LED Work Light
Booster Clamps
120 Volt Built-in Plug
12V DC charge cord with cigarette lighter plug
5

800-505-8311[email protected]
Operation/User Cautions
4
AFTER SALES SUPPORT
USA
USA
600 Peak Battery Amp Jump Starter
Congratulations on your purchase of a AUTO XS Portable Power Pack.
The AUTO XS Portable Power Pack offers convenient, portable power
wherever and whenever you need it.
Jump-start your automobile, truck, motorcycle, boat, RV or tractor, or
take it along as portable power for your
12 volt devices.
The 2.4 Amp USB plug has plenty of power to charge cell phones,
tablets and other devices - and features
an connection sensor that automatically switches off the port when it’s
not needed, saving energy.
Compact and lightweight, the unit includes an LED Flashlight that’s
handy for nighttime roadside repairs, or use with camping and other
outdoor activites.
Operating Instructions and User Cautions
CAUTION: Before using this product, read this manual and follow all
Safety Rules and Operational Instructions.
IMPORTANT - BEFORE USE
Please recharge Power Pack a minimum of every 2 months. Always
recharge after use.
WARNING
WARNING
Thank you for buying the AUTO XS
Portable Power Pack. SAVE THESE
INSTRUCTIONS. This Owner’s
Manual contains important safety
and operating instructions.
Risk of SERIOUS INJURY OR DEATH.
ELECTRICAL SHOCK, EXPLOSION, FIRE, AND EYE
INJURY HAZARDS.
PROTECT YOURSELF AND OTHERS.
Before use, READ AND UNDERSTAND the
manufacture’s instructions and Owner’s Manual and
User Guide.
Failure to read and understand this information could
result in SERIOUS INJURY or DEATH.
DO NOT REMOVE OR COVER THIS INFORMATION.
BATTERY MUST BE RECYCLED OR
DISPOSED OF PROPERLY.
Consult your local yellow pages
directory under the category "recycling"
to locate a battery recycle in your area.
RECYCLE
LEAD
RETURN
approved by the party responsible for compliance could
void the user’s authority to operate the equipment.

800-505-8311 [email protected]
Operation/User Cautions
5
AFTER SALES SUPPORT
USA
USA
600 Peak Battery Amp Jump Starter
NOTE
CAUTION
This equipment has been tested and found to comply with
the limits for a Class B digital device, pursuant to Part 15 of the
FCC Rules. These limits are designed to provide reasonable
protection against harmful interference in a residential
installation. This equipment generates, uses and can radiate
radio frequency energy and, if not installed and used in
accordance with the instructions, may cause harmful
interference to radio communications.
SAFETY FIRST "Failure to heed these warnings may result in
personal injury, blindness, loss of life and/or damage to
machineries or power pack unit."
"When working with lead acid batteries, always use
eye goggles. Contact with battery acid may cause
blindness and/or severe burns."
• There is a risk of explosive gases being released when batteries are
being charged or discharged.
accident.
y occur.
• Never allow battery clamps to touch each other or another common
metal conductor - This can cause damage to the unit and/or create
dangerous sparks/explosion hazards.
s
battery system.
n the
positive (Red) jumper cable next.
• When charging unit from a 120-volt AC electrical outlet, the outlet
being used should be protected by a ground fault interrupt (GFI)
switch.
• To avoid electrical shock, do not allow the electrical cords and outlets
to get wet.
• Perform jump start procedures only in a safe, dry, well ventilated area.
• When using this unit close to the vehicle's battery and engine, place
cords, clothing and body parts away from moving vehicle
components.
• Keep unit out of reach of children when in storage or while in use.
• Before disposing of battery, protect terminals with heavy duty

800-505-8311[email protected]
Charging/Recharging
6
AFTER SALES SUPPORT
USA
USA
600 Peak Battery Amp Jump Starter
FIRST AID FOR BATTERY ACID CONTACT:
• SKIN: Rinse area of acid contact with water, then wash thoroughly with
soap and water. Seek immediate medical attention if redness, pain or
irritation occurs.
ately for
a minimum of 15 minutes then immediately seek medical attention.
IMPORTANT SAFETY INSTRUCTIONS
WARNING: This product or its power cord contains lead, a chemical
known to the State of California to cause cancer and birth
defects or other reproductive harm.
Wash hands after handling.
CHARGING/RECHARGING
Lead-acid batteries require routine maintenance to ensure a full charge
and long battery life.
All batteries lose energy from self-discharge over time; more rapidly at
higher temperatures.
Therefore, batteries need periodic charging to replace energy lost
through self-discharge.
When the unit is not in frequent use, manufacturer recommends the
battery be recharged at least every 30 days.
The unit’s on-board circuitry is a revolutionary smart system that deter-
mines the battery voltage based on organic feedback, and quickly and
full charge, without overcharging. The power pack can be left connected
WARNING: Never attempt to use the AC and DC charging methods at
the same time. Note: This unit is delivered in a partially charged state –
should be min. of 36 hours.
Recharging battery after each use will prolong battery life; and prepare
the unit for frequent heavy discharges
CAUTION
SAFETY FIRST Failure to follow these statements
may result in damage to vehicles, appliances, and the
power pack unit.

800-505-8311 [email protected]
Charging/Recharging
7
AFTER SALES SUPPORT
USA
USA
600 Peak Battery Amp Jump Starter
• Recharge the power pack immediately after each use.
• Turn switch to OFF position when unit is being charged or when not in use.
• Always switch to OFF position before connection to a power source/load.
• This system is designed to be used only on vehicles with 12-volt DC
battery systems. Do not connect to a 6-volt or 24-volt battery system.
• Check for damaged parts. A part that is damaged should be properly
repaired or replaced by an authorized service center before further use
unless otherwise indicated elsewhere in this instruction manual. Have
defective switches replaced by authorized service center. Do not use
power pack if switch does not turn unit on and off.
• This power pack employs parts (switches, relays, etc.) that produce
arcs or sparks. Therefore, if used in a garage or enclosed area, the unit
• Do not use this unit to operate appliances that need more than 12
amps to operate from the 12 volt DC accessory outlet.
• Do not insert foreign objects into either the USB outlet or the 12 volt
DC accessory outlet.
• Vehicles that have on-board computerized systems may be damaged if
vehicle battery is jump started. Before jump starting, check vehicle's
• Excessive engine cranking can damage a vehicle's starter motor. If the
engine fails to start after the recommended number of attempts,
discontinue jump start procedure and look for other problems that may
need to be corrected.
• Although this unit contains a non-spillable battery, it is recommended
that unit be kept upright during storage and usage. To avoid possible
damage that may occur to the power pack - avoid direct sunlight,
direct heat, and moisture.
• Before each use, check unit for wear and tear. Replace worn or defec
tive parts by calling our customer service # 800-505-8311.
• Do not attempt to jump start a frozen battery.
• This unit will not operate appliances and equipment that produce heat,
such as hair dryers, microwave ovens, and toasters.
IMPORTANT - BEFORE USE
hours.
Please recharge Power Pack a minimum of every 2 months. Always
recharge after use.

800-505-8311[email protected]
Unit Specifications
8
AFTER SALES SUPPORT
USA
USA
600 Peak Battery Amp Jump Starter
5
1
2
3
4
5
6
7
8
9
10
10
12
11
5
UNIT FEATURES
1. Input Socket for DC Power Charger
2. Red LED for Battery Charging & Yellow
LED for Maintaining Battery
3. 12 Volt Power Port for 12 Volt Accessories
4. Battery Status LED Indicators with Button Switch
5. Easy Carry Handle
6. On/Off Main Power Pack Switch
7. USB 2.4A Charging Port
8. On/ Off Light Switch
9. LED Work Light
10. Booster Clamps
11. 120 Volt Built-in Plug
12. 12V DC charge cord with cigarette lighter plug
44266 SPECIFICATIONS
Battery Type: 12 volts DC, Maintenance-free, Sealed lead-acid
AGM,
Battery Ampere: 12 volts,600 Peak Battery Amps@77F
Power Peak Ampere: 12 volts DC, 200 Amps, maintain above 7.2 volts
for 5 seconds @ 77F
Area Light: 1 long-life white LED
USB Port: 5V DC, 2400m A
DC Accessory Outlet: 12V DC, 12A

800-505-8311 [email protected]
Jump Starting Procedure
9
AFTER SALES SUPPORT
USA
USA
600 Peak Battery Amp Jump Starter
1. Turn vehicle ignition and all accessories such as
lights, radio, air conditioner, “OFF”.
2. Make sure all switches on the Power Pack are
turned off (“OFF” position for the Power Pack
Booster Cable Switch - see “A” at left).
3. Securely connect the red (+) clamp to your vehicle
battery’s positive (+) battery terminal (see: “B” at
left).
4. Connect the black (-) clamp to your battery's
negative (-) battery terminal or to a non-moving
metal part of the vehicle (see: “C” at left).
5. Turn Power Pack Booster Cable Switch to “ON”
position
(see: “D” at left).
6. Turn vehicle ignition “ON” and crank the engine
in 3-5 seconds bursts until engine starts.
If vehicle does not start after trying 3 times, check
the battery status and electrical system.
7. After vehicle starts, turn the Power Pack Booster
Cable Switch to “OFF” position. Disconnect the
clamp.
8. If the connections to
the battery’s POSITIVE
and NEGATIVE terminals
are incorrect, the
Reverse Polarity
Indicator will light (red)
and the unit will sound
a beep. Disconnect
clamps and reconnect to
battery with correct polarity.
Make sure unit switch is in the
“OFF” position before connecting
power clamps
Securely connect the red (+) clamp
to your vehicle battery’s positive (+)
battery terminal. Connect the black (-)
clamp to your battery's negative (-)
battery terminal OR to a non-moving
metal part of the vehicle
Turn Switch on Power Pack to
ON position; start vehicle
B
C
A
D
CORRECT PROCEDURE FOR JUMP-STARTING A VEHICLE
If vehicle does not immediately start, turn Power
Pack Booster Cable Switch “OFF” and wait 3
minutes before trying again (failure to wait may
damage Power Pack, vehicle’s starter or electrical
system).

800-505-8311[email protected]
Power Port/Battery Status/12V Charging
10
AFTER SALES SUPPORT
USA
USA
600 Peak Battery Amp
Jump Starter
Green Light: Fully Charged
Amber Light: Battery Usable
Red Light: Recharge Necessary
– Do Not Use without recharge
Using 12V DC Power Port of Power Pack
Convenient and simple to use anywhere, the
AUTO XS Power Pack has a 12 Volt plug for all
your 12 Volt accessories.
1. Remove the protective cover.
2. Plug in your 12-volt accessory.
Note: The AUTO XS Power Pack has a 12 amp
automatic overload protection circuit breaker.
Battery Status Monitor
With the AUTO XS Power Pack, you can tell at a
glance how much charge your Power Pack has ready.
1. Before checking the battery status and to receive
an accurate reading, unplug the AC or DC charging
adapter from the unit and wait for few minutes for
correct status reading.
2. Press and hold the Battery Test Button.
3. The Battery Level Indicator LEDs will illuminate to
indicate the amount of charge remaining in the
Power Pack.
12 Volt DC Charging Method
Charging the unit from an external 12 volt DC power
source requires the use of the approved 12 Volt DC
cord. This cord has a male DC connector at each
end (see: “A” at left).
1. Insert the cigarette lighter plug of 12 Volt DC
charge cord into the vehicle’s 12 volt DC accessory
outlet (see: “B” at left).
2. Insert the other end of the plug into the DC input
socket on the front panel of the unit (see: “C” at left).
3. Charge the unit until the green FULL indicator
lights when the Battery Test Button is pressed (with
the DC adapter unplugged from the unit). DO NOT
CHARGE MORE THAN 6 HOURS MAXIMUM
USING THIS METHOD.
4. When charging is complete, remove the charging
cord and store in a safe place.
Note: Some vehicles require that the ignition be
switched to the accessory outlet position in order to
power the accessory outlet.
DO NOT LEAVE THE UNIT UNATTENDED WHEN
CHARGING USING THIS METHOD.
C
B
A

800-505-8311 [email protected]
120V AC Charger/USB Charging Port/LED
11
AFTER SALES SUPPORT
USA
USA
600 Peak Battery Amp
Jump Starter
USB CHARGING PORT
Plug your device’s USB cable into the USB Charging
Port and power will automatically turn on and operate
normally.
Output power will automatically turn off after USB
cable or powered device is disconnected from the
Charging Port.
Note: This unit’s USB Charging Port does not support
data communication. It can provide 5 volt/500mA –
2400mA DC power to an external USB cable or
powered Device.
Disconnect the USB cable powered device when it is
not in use.
LED WORK LIGHT
Turn the LED work light ON and OFF by the Light
Switch on the front panel of unit (see: “4” at left).
Make sure the LED work light is turned off when the
unit is being recharged or stored.
Charging/Recharging Using the 120 Volt AC
Charger and a Standard Household
Extension Cord (extension cord not
included)
The unit’s on-board circuitry is a revolutionary smart
system that determines the battery voltage based on
decisions on how to charge the battery. The
keep the battery at full charge, without overcharging.
The power pack can be left connected to an outlet
1. Connect an extension cord (not included) to the 120
volt build-in plug which is on the back of power pack
(see: “1” at left). Plug the other end of the cord into a
standard 120 volt AC wall outlet.
2. Red LED (see: “2” at left) will illuminate indicating
the charging process has started.
3. Charging cycle will automatically switch to
maintaining cycle, LED will change from RED to
YELLOW (see: “3” at left)
4. The power pack can be left connected at all times
to provide maintenance charging. However, it is good
practice to check the battery periodically.
Note: The unit cannot be overcharged using this method.
1
2
3
4

800-505-8311[email protected]
Trouble Shooting
12
AFTER SALES SUPPORT
USA
USA
600 Peak Battery Amp Jump Starter
TROUBLE SHOOTING
PROBLEM POSSIBLE CAUSE REASON/SOLUTION
Have the battery checked.
Check for poor connection to battery and
frame. Make sure connection points are
clean. Rock clips back and forth for a
better connection.
Clips are not making a good
connection to the battery.
The power pack battery
is not charged.
The vehicle's battery
is defective.
Connections are reversed.
The power pack
won't jump start
my car.
The power pack
won't power my
12V device.
The battery in the
power pack won't
hold a charge.
Check the battery charge status by
pressing the button on the front of the
power pack. See LED Indicators section
of this manual.
Check the battery charge status by
pressing the button on the front of the
power pack. See LED Indicators section
of this manual.
Disconnect the 12V device and press the
reset button located on the back of the
power pack. Try the 12V device again. If
it happens again, replace the 12V device.
Disconnect the power pack and reverse
the clips.
Have the battery checked.
The 12V device is not
turned on. Turn on the 12V device.
The power pack battery
is not charged.
The 12V device draws more
than 15A or has a short
circuit.
The battery is bad (will
not accept a charge).

Contenido
Información general ........................................................................... 14
Manual de instrucciones y precauciones del usuario ........................ 15
Primeros auxilios para el contacto con el ácido de la batería ........... 15
Cargar/recargar ..................................................................................... 17
Características y especificaciones de la unidad ................................ 19
Procedimiento correcto para ayudar a arrancar un vehículo ............ 20
Utilización del puerto de 12 V de CC de la fuente de alimentación .. 21
Monitor de estado de la batería ........................................................... 21
Método de carga con 12 voltios de CC ................................................ 21
Cargar/recargar usando el cargador de 120 voltios de CA y
un cable de extensión estándar doméstico ....................................... 22
Puerto de carga USB ............................................................................ 22
Luz de trabajo a LED ............................................................................ 22
Soluciones a los problemas ........ ........................................................ 23

5
7
Información general3
1
1
2
3
4
5
6
7
8
9
10
11
12
2
3
4
5
6
7
8
9
10
10
12
11
Toma de entrada para el cargador de alimentación de CC
Indicador LED rojo de carga de la batería e indicador LED
amarillo de mantenimiento de la batería
Puerto de alimentación de 12 voltios para los accesorios de 12 voltios
Indicadores LED de estado de la batería con botón interruptor
Asa para facilitar el traslado
Interruptor principal de encender/apagar la fuente de alimentación
Puerto de carga USB de 2.4 A
Interruptor de encender/apagar la luz
Luz de trabajo a LED
Pinzas del arrancador
Enchufe incorporado de 120 voltios
Cable de carga de 12 V CC con enchufe de tipo encendedor
de cigarrillos
5

800-505-8311[email protected]
Instrucciones y
precauciones del usuario
15
SERVICIO POSVENTA
USA
USA
Arrancador de batería con
amperaje pico de 600 amperios
Instrucciones de funcionamiento y precauciones del usuario
PRECAUCIÓN: Antes de utilizar al producto, lea este manual y siga todas
las reglas de seguridad e instrucciones de funcionamiento.
ADVERTENCIA
Felicitaciones por la compra de una fuente de alimentación portátil
Auto XS®.
La fuente de alimentación portátil Auto XS® ofrece una fuente de
energía eléctrica conveniente, portátil, donde y cuando la necesite.
Para arrancar su automóvil, camión, motocicleta, embarcación, RV o
un tractor, o para llevarla como fuente de alimentación portátil para
dispositivos de 12 voltios.
El conector USB de 2.4 A tiene la potencia suciente para cargar
teléfonos móviles, tabletas y otros dispositivos - y cuenta con un
sensor de conexión que desconecta automáticamente al puerto
cuando no se necesita, ahorrando energía.
Compacta y ligera, la unidad incluye una linterna LED que es muy útil
para las reparaciones en la carretera durante la noche o para utilizar
en el campismo y otras actividades al aire libre.
IMPORTANTE - ANTES DE USAR
Antes de utilizar la unidad por primera vez, esta debe cargarse por
un total de 36 horas. Recargue la fuente de energía por lo menos
cada 2 meses. Siempre recargar después de su uso.
Gracias por haber comprado
la fuente de alimentación portátil
Auto XS®. GUARDE ESTAS
INSTRUCCIONES. Este Manual del
usuario contiene instrucciones
importantes de seguridad y
funcionamiento.
LA BATERÍA SE DEBE RECICLAR O
DESECHAR DE MANERA APROPIADA.
Consulte su directorio telefónico local bajo
la categoría de "reciclaje" para localizar
un reciclaje de baterías en su área.
RECICLAR
REGLETA
RETORNO
ADVERTENCIA
Riesgo de LESIONES GRAVES O LA MUERTE. PELIGRO
DE DESCARGA ELÉCTRICA, EXPLOSIÓN, INCENDIO Y
LESIONES OCULARES. PROTÉJASE A SÍ MISMO Y A
LOS DEMÁS. Antes de usar, LEA Y COMPRENDA las
instrucciones del fabricante y el Manual del usuario y
Guía del propietario. No leer y entender esta
información podría resultar en LESIONES GRAVES o
MUERTE. NO QUITE O CUBRA ESTA INFORMACIÓN.
Los cambios o modicaciones a esta unidad no aprobados
expresamente por la parte responsable del cumplimiento
podrían anular la autoridad del usuario para operar el equipo.

Instrucciones y
precauciones del usuario
Arrancador de batería con
amperaje pico de 600 amperios
800-505-8311 [email protected]
16
SERVICIO POSVENTA
USA
USA
NOTA
PRECAUCIÓN
LA SEGURIDAD PRIMERO
El incumplimiento de estas advertencias puede causar
lesiones personales, ceguera, pérdida de la vida y/o
daños a las maquinarias o a la unidad de fuente de
alimentación. Utilice siempre gafas protectoras al
trabajar con baterías de plomo ácido. El contacto con
el ácido de la batería puede causar ceguera y/o
quemaduras graves.
• Existe el riesgo de que se emitan gases explosivos cuando las baterías
se están cargando o descargando. Asegúrese de que hay disponible
asistencia de primeros auxilios inmediata en caso de accidentes.
• No exponga la batería al fuego o al calor intenso ya que puede produ-
cirse una explosión.
• Nunca permita que las pinzas de la batería se toquen entre sí o a otro
conductor común de metal - Esto puede causar daños a la unidad y/o
crear chispas peligrosas/riesgos de explosión.
• No fume ni use cerca de llamas expuestas mientras trabaja en el
sistema de la batería de un vehículo.
• Desconectar primero siempre el puente del cable negativo (negro),
luego el puente del cable positivo (rojo).
• Al cargar la unidad desde un tomacorriente de 120 voltios CA, la toma
que se utilice debe estar protegida por un interruptor de fallos de
conexión a tierra (GFI).
• No dejar que los cables eléctricos y enchufes se mojen para evitar
descargas eléctricas.
• Realizar los procedimientos de ayuda al arranque solamente en una
zona segura, seca y bien ventilada.
• Cuando utilice esta unidad cerca de la batería y el motor del vehículo,
coloque la unidad solamente en una supercie plana y estable,
Este equipo ha sido probado y cumple con los límites
para un dispositivo digital de Clase B, de acuerdo con la
Parte 15 de las Normas de la FCC.
Estos límites están diseñados para proporcionar una
protección razonable contra interferencias perjudiciales
en una instalación residencial.
Este equipo genera, utiliza y puede irradiar energía de
radiofrecuencia y, si no se instala y utiliza de acuerdo con
las instrucciones, puede causar interferencias molestas
en las comunicaciones de radio.

800-505-8311[email protected]
Cargar/recargar
17
SERVICIO POSVENTA
USA
USA
Arrancador de batería con amperaje
pico de 600 amperios
INSTRUCCIONES IMPORTANTES DE SEGURIDAD
asegurándose de mantener todas las abrazaderas, cables, ropas y a
su cuerpo alejados de los componentes móviles del vehículo.
• Mantener la unidad fuera del alcance de los niños cuando está
almacenada o durante su uso.
• Antes de desechar la batería, proteger los terminales con cinta
aislante de alta resistencia para evitar cortocircuitos que puedan
causar lesiones o incendios.
PRIMEROS AUXILIOS PARA EL CONTACTO CON EL ÁCIDO
DE LA BATERÍA:
• PIEL: enjuagar el área de contacto del ácido con agua, luego lavar con
abundante agua y jabón. Buscar atención médica inmediata en caso de
enrojecimiento, dolor o irritación.
• OJOS: Si la batería entra en contacto con los ojos, láveselos
inmediatamente por un mínimo de 15 minutos y luego buscar
inmediatamente atención médica.
ADVERTENCIA: Este producto o su cable de alimentación contienen
plomo, una sustancia química que el Estado deb California conoce como
causante de cáncer, defectos de nacimiento y otros daños reproductivos.
Lávese las manos después de manipularlo.
CARGAR/RECARGAR
Las baterías de plomo requieren un mantenimiento de rutina para asegurar
una carga completa y una larga duración de la batería.
Todas las baterías pierden energía por la auto-descarga con el tiempo;
esto ocurre más rápidamente a temperaturas más altas.
Por lo tanto, las baterías necesitan cargarse periódicamente para reempla-
zar la energía perdida a través de la auto-descarga.
Cuando la unidad no está en uso frecuente, el fabricante recomienda que
la batería se recargue al menos cada 60 días. La tarjeta de circuitos de la
unidad es un revolucionario sistema inteligente que determina el voltaje de
la batería con base en la retroalimentación orgánica, y de forma rápida y
eciente toma las decisiones sobre la forma de cargar la batería. El ciclo
de carga/mantenimiento se repite indenidamente para mantener la
batería a plena carga, sin sobrecargarla. Se puede dejar conectada la
fuente de alimentación a un tomacorriente indenidamente.
ADVERTENCIA: Nunca intente utilizar los métodos de carga de CA y CC
al mismo tiempo. Nota: Esta unidad se entrega en un estado de carga
parcial – la debe cargar completamente antes de usarla por primera vez.
La carga de CA inicial debe ser durante un mínimo de 36 horas. Recargar
la batería después de cada uso prolongará la vida de la batería; y prepa-
rará la unidad para descargas completas frecuentes.

Cargar/recargar
PRECAUCIÓN
800-505-8311 [email protected]
18
SERVICIO POSVENTA
USA
USA
LA SEGURIDAD PRIMERO
El incumplimiento de estas declaraciones puede resultar en
daños a los vehículos, electrodomésticos y la unidad de
fuente de alimentación.
• Recargar la fuente de alimentación inmediatamente después de cada
uso.
• Colocar el interruptor en la posición de apagado (OFF) cuando la unidad
se está cargando o no está en uso.
• Poner el interruptor siempre en la posición de apagado (OFF) antes de la
conexión a una fuente de alimentación/carga.
• Este sistema está diseñado para ser utilizado sólo en vehículos con
sistemas de baterías de 12 voltios de CC. No lo conecte a un sistema de
baterías de 6 voltios o 24 voltios.
• Comprobar si tiene piezas dañadas. Una pieza dañada se debe reparar
o reemplazar por un centro de servicio autorizado antes de seguir
utilizándola, salvo se indique lo contrario en este manual de instrucciones.
Haga que un centro de servicio autorizado reemplace los interruptores
defectuosos. No utilizar la fuente de energía si el interruptor no enciende y
apaga la unidad.
• Esta fuente de energía emplea piezas (interruptores, relés, etc.) que
producen arcos o chispas. Por lo tanto, si se utiliza en un garaje o área
cerrada, la unidad SE DEBE colocar a no menos de 18 pulgadas por
encima del suelo.
• No utilizar esta unidad para operar aparatos que necesiten más de 12
amperios para funcionar, desde el tomacorriente accesorio de 12 voltios
de CC.
• No insertar objetos extraños en el tomacorriente USB ni en el toma-
corriente accesorio de 12 voltios de CC.
• Los vehículos que tienen a bordo sistemas computarizados pueden
dañarse si a la batería del vehículo se le aplica la ayuda de arranque. Antes
aplicar la ayuda de arranque revise el "Manual de instrucciones" del
vehículo para conrmar que la ayuda externa de arranque es aconsejable.
• Intentar arrancar al motor una cantidad excesiva de veces puede dañar el
motor de arranque de un vehículo. Si el motor no arranca después de la
cantidad recomendada de intentos, interrumpa el procedimiento de ayuda
de arranque y busque otros problemas que puedan necesitar corregirse.
• Aunque esta unidad contiene una batería con protección contra fugas, se
recomienda que la unidad se mantenga en posición vertical durante el
almacenamiento y el uso. Evitar la exposición directa a la luz solar, al calor
y la humedad para prevenir posibles daños a la fuente de energía.

Arrancador de batería con amperaje
pico de 600 amperios
800-505-8311[email protected]
Características y
especificaciones de la unidad
19
SERVICIO POSVENTA
USA
USA
5
1
2
3
4
5
6
7
8
9
10
10
12
5
11
• Antes de cada uso, revisar si la unidad tiene signos de desgaste y
deterioro. Reemplace las piezas desgastadas o defectuosas llamando a
nuestro servicio al cliente al (800) 258-5913
• No intente ayudar a arrancar a una batería congelada.
• Esta unidad no hará funcionar a aparatos y equipos que produzcan calor,
tales como secadores de pelo, hornos microondas y tostadoras.
.
IMPORTANTE - ANTES DE USAR
Antes de utilizar la unidad por primera vez, esta debe cargarse por un total
de 36 horas.
Recargue la fuente de energía por lo menos cada 2 meses. Siempre
recargar después de su uso.
CARACTERÍSTICAS DE LA UNIDAD
1. Toma de entrada para el cargador de alimentación de CC
2. Indicador LED rojo de carga de la batería e indicador LED
amarillo de mantenimiento de la batería
3. Puerto de alimentación de 12 voltios para los accesorios de 12 voltios
4. Indicadores LED de estado de la batería con botón interruptor
5. Asa para facilitar el traslado
6. Interruptor principal de encender/apagar la fuente de alimentación
7. Puerto de carga USB de 2.4 A
8. Interruptor de encender/apagar la luz
9. Luz de trabajo a LED
10. Pinzas del arrancador
11. Enchufe incorporado de 120 voltios
12. Cable de carga de 12 V CC con enchufe de tipo encendedor de cigarrillos
ESPECIFICACIONES DEL 44266
Tipo de batería: 12 voltios de CC, sin necesidad de mantenimiento, AGM
de plomo-ácido sellada
Amperaje de la batería : 12 voltios, 600 amperios pico de la batería a 77°F
Amperios de potencia pico: 12 voltios de CC, 200 amperios, se mantiene por encima
de 7,2 voltios durante 5 segundos a 77°F
Iluminación de área: 1 LED blanco de larga duración
Puerto USB: 5 V CC 2400 mA
Salida accesoria de CC: 12 V CC, 12 A

Arrancador de batería con amperaje
pico de 600 amperios
800-505-8311 [email protected]
Arrancar un vehículo
20
SERVICIO POSVENTA
USA
USA
B
C
A
D
PROCEDIMIENTO CORRECTO PARA AYUDAR A
ARRANCAR UN VEHÍCULO
1. Girar el encendido del vehículo y todos los
accesorios tales como luces, radio, aire acondiciona-
do a la posición "OFF" (apagado).
2. Asegúrese que todos los interruptores en la fuente
de alimentación estén apagados (posición "OFF"
para el interruptor principal de la fuente de
alimentación - ver "A" a la izquierda).
3. Conectar rmemente la pinza roja (+) al terminal
positivo (+) de la batería de su vehículo (ver: "B" a la
izquierda).
4. Conectar la pinza negra (-) al terminal negativo de
la batería (-) o a una parte metálica del vehículo que
no se mueva (ver: "C" a la izquierda).
5. Poner el interruptor principal de la fuente de
alimentación en la posición "ON" (ver: "D" a la
izquierda).
6. Girar el encendido del vehículo a la posición "ON"
e intentar arrancar el motor en intervalos de 3 a 5
segundos, hasta que arranque.
Si el vehículo no arranca inmediatamente, colocar el
interruptor principal de la fuente de alimentación en
la posición "OFF" y esperar 3 minutos antes de
intentar de nuevo (si no espera puede dañar a la
fuente de alimentación, o al motor de arranque o
sistema eléctrico del vehículo).
Si el vehículo no arranca después de probar 3 veces,
comprobar el estado de la batería y el sistema
eléctrico.
7. Una vez que arranque el vehículo, girar el interrup-
tor principal de la fuente de alimentación a la
posición "OFF". Desconectar primero la pinza
negativa NEGRA, luego la pinza positiva ROJA.
8. Si las conexiones a los
terminales positivo y negativo
de la batería son incorrectas,
se iluminará el indicador de
polaridad inversa (rojo) y la
unidad emitirá un pitido.
Desconectar y conectar las
pinzas a la batería con la
polaridad correcta.
Asegúrese que el interruptor de la
unidad esté en la posición "OFF"
antes de conectar las pinzas
de alimentación.
Conectar rmemente la pinza roja (+)
al terminal positivo (+) de la batería
de su vehículo. Conectar la pinza
negra (-) al terminal negativo de la
batería (-) o a una parte metálica del
vehículo que no se mueva.
Poner el interruptor principal de la
fuente de alimentación en la posición
"ON"; arrancar el vehículo.
Table of contents
Languages:
Other AUTO-XS Remote Starter manuals
Popular Remote Starter manuals by other brands
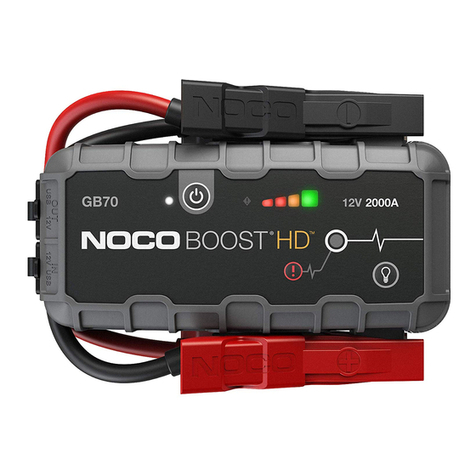
NOCO Genius
NOCO Genius Boost HD GB70 user guide

Directed Electronics
Directed Electronics AutoCommand 25522 installation manual

Ultra Start
Ultra Start 1172 SERIES owner's guide

Schumacher Electric
Schumacher Electric FARM & RANCH FR01241 owner's manual

Sledstart
Sledstart SS1000YAM Operation manual
idatastart
idatastart VWX000A Product guide
