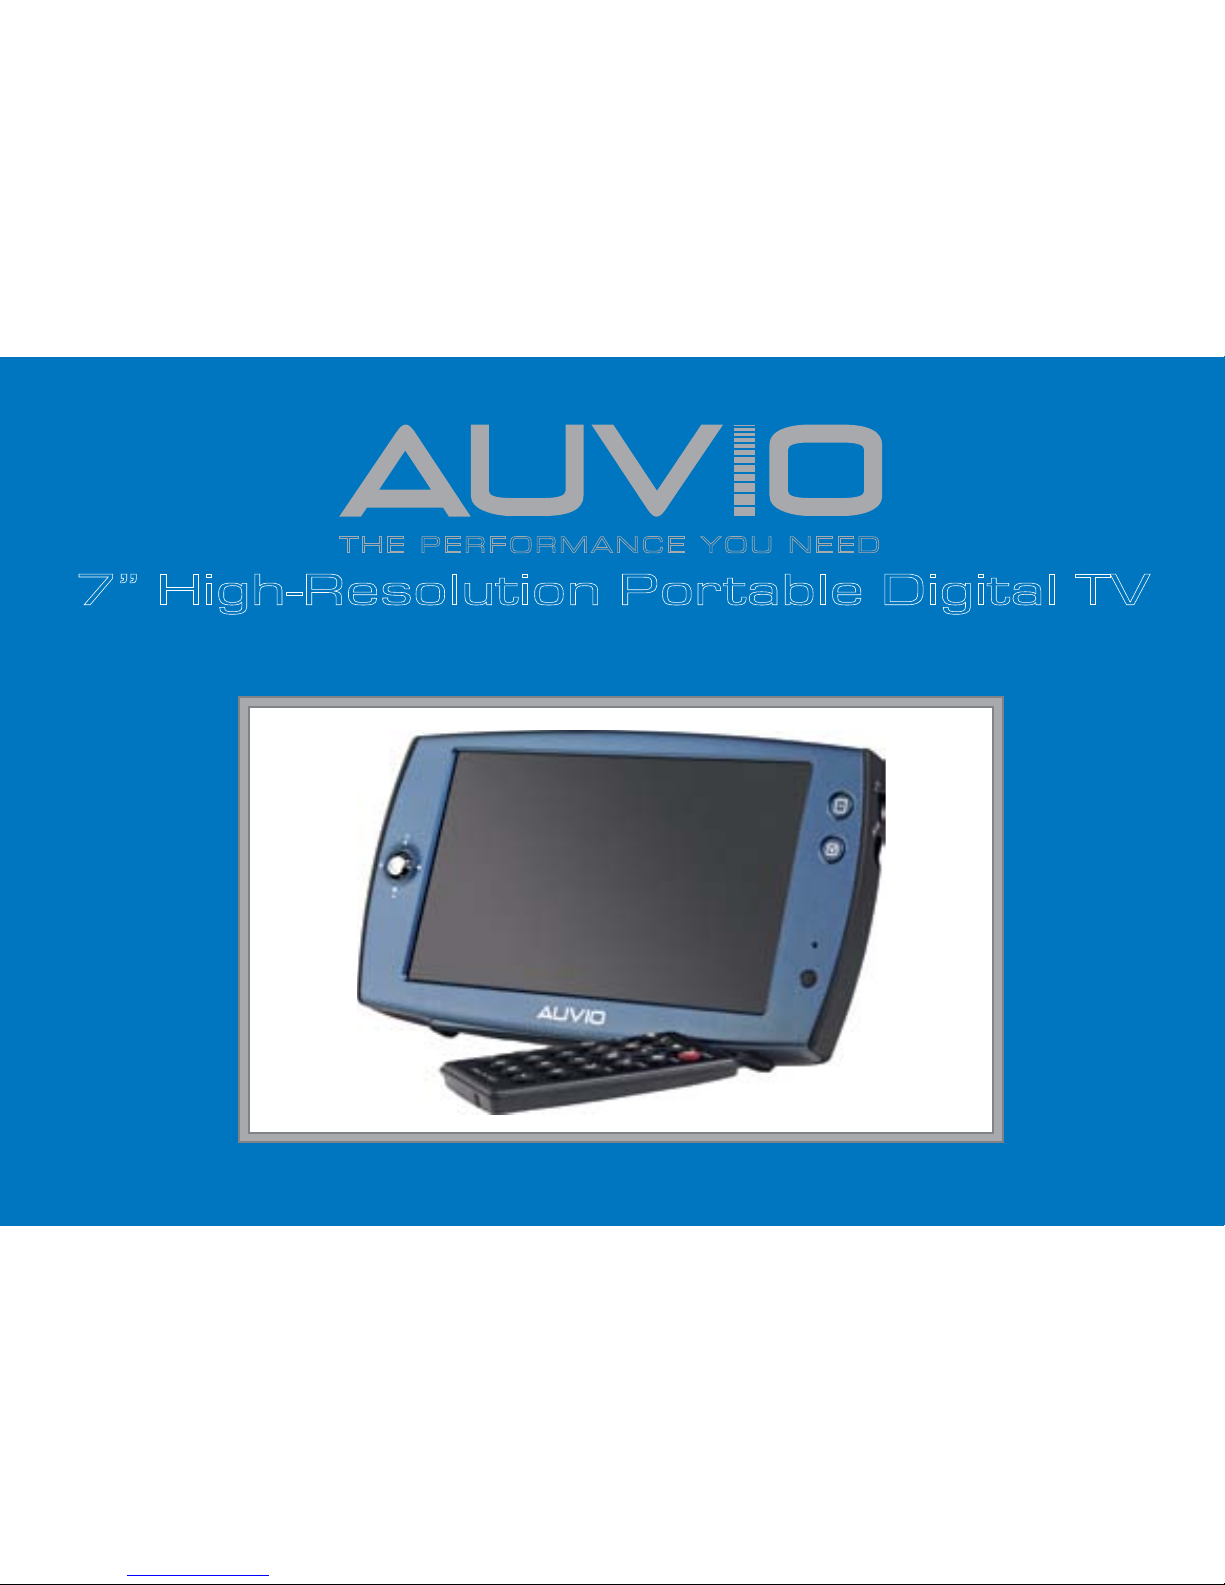
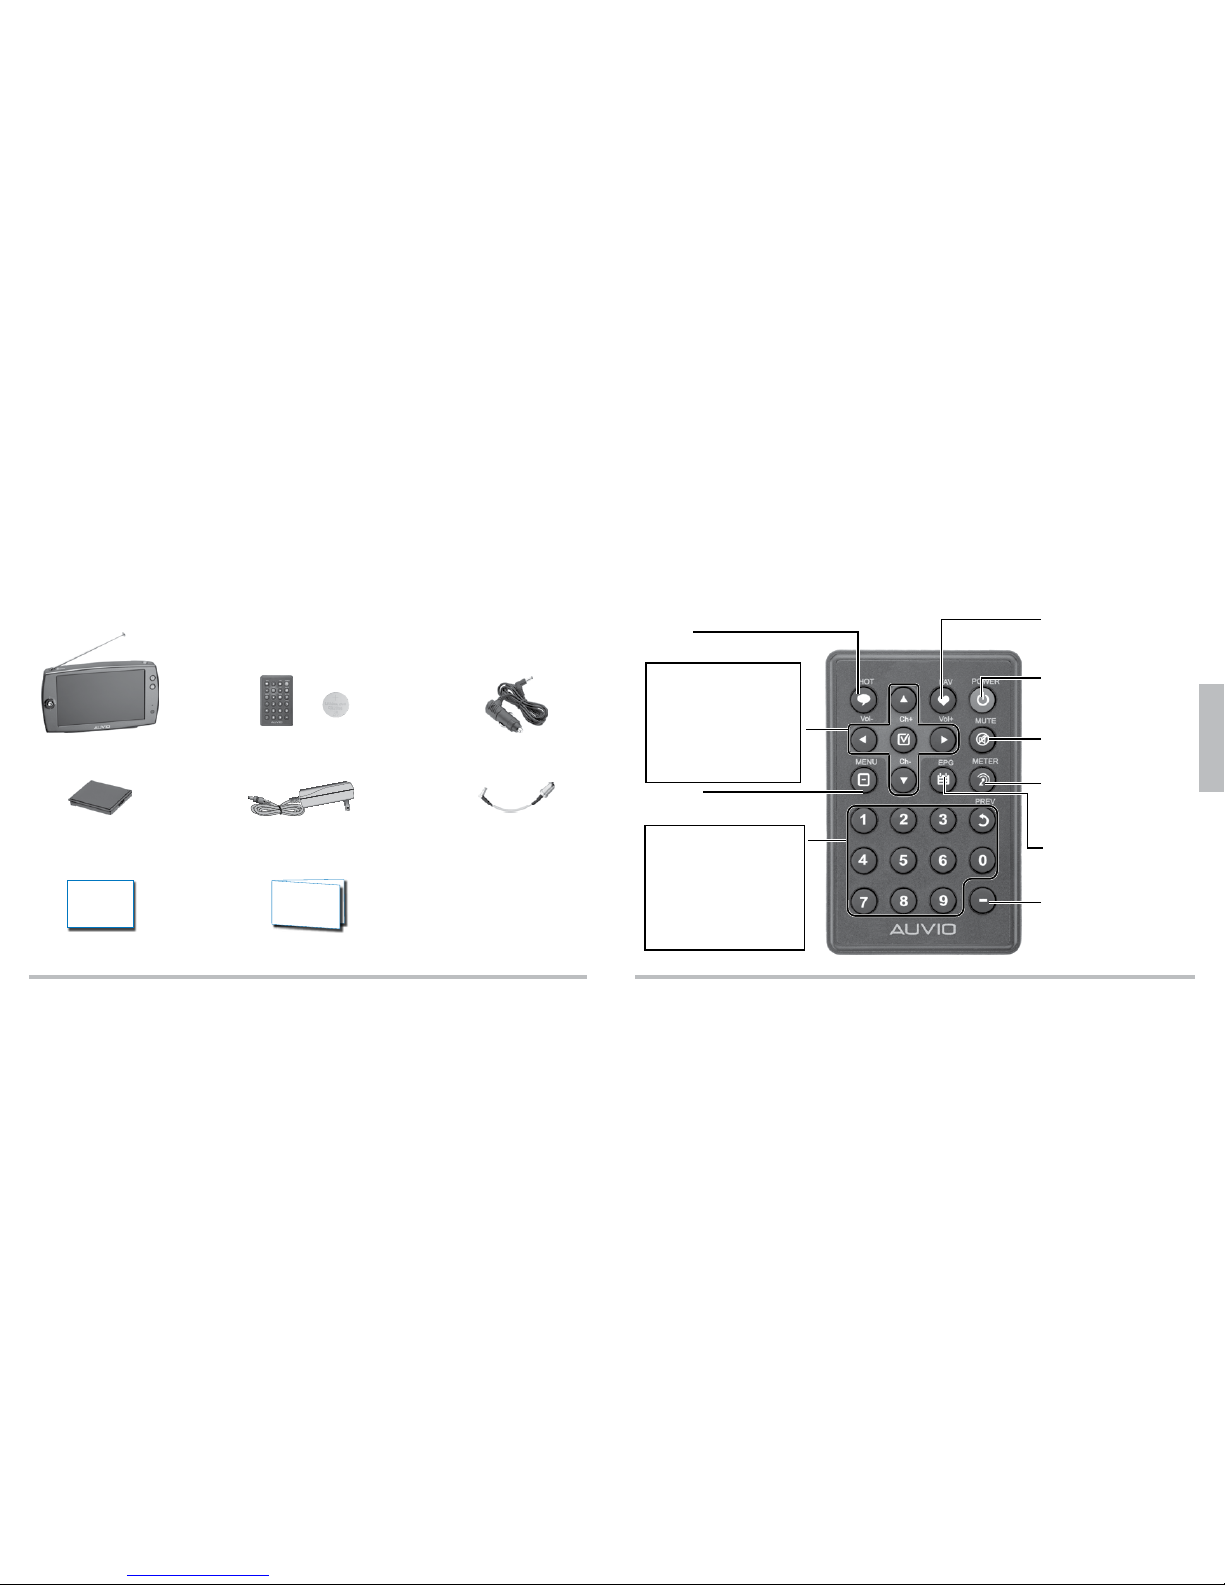
12
Setup
13
Setup
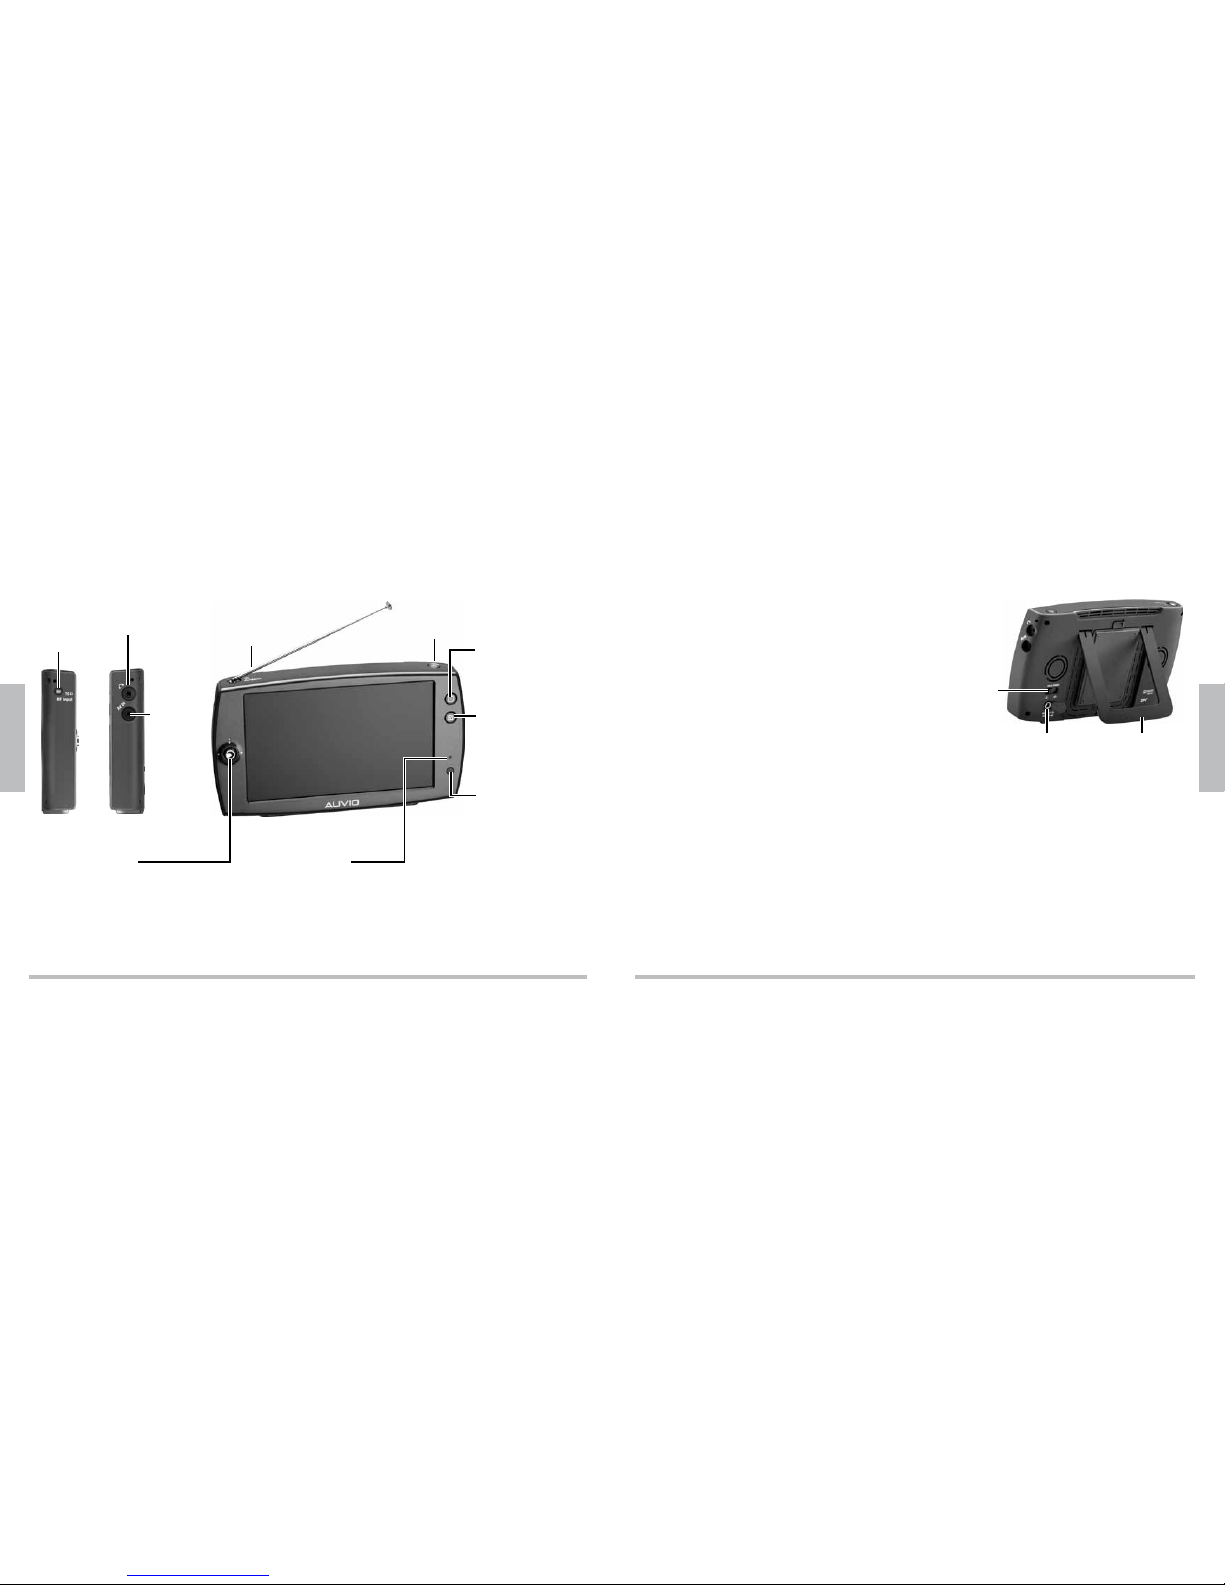
Installing the Li-Poly Battery
1. Insert the supplied Li-Poly battery (2,000 mAh) into
the battery compartment contact end first.
2. Pull the latch up and press the top of the battery
down until it clicks.
3. To remove the battery, pull the latch upwards.
Charging the Li-Poly Battery
1. After the battery is installed, power your TV using the AC or car power adapter.
2. Slide MAIN POWER ON/OFF at the back of your TV to ON to enter standby
mode. Charging starts and the LED:
lights continuously while charging
flashes every four seconds when charging is finished and TV is in standby mode
turns off when charging is finished and TV is on
b Battery Notes:
It takes 2 Ãhours to fully charge the battery. Once charged, the TV will run for
approximately 2 hours on battery power.
Leaving the TV in standby mode for an extended time will slowly drain the battery. Slide
the MAIN POWER switch on the back of your TV to OFF to turn the TV off.
You can use your TV while it is charging.
Activate Power Save or Max. Battery functions to maximize the duration of your battery
life. See “Setting Up Functions” on Page 20.
Do not burn or bury batteries. Do not puncture or crush. Do not disassemble.
Use only the supplied Lithium Polymer battery.
Remove the battery if you do not intend to use your TV for an extended time.
Never allow loose cells to short circuit against battery tabs or other conductive items.
Keep loose cells and battery packs out of reach of children.
If the electrolyte in the cells gets on your skin, thoroughly wash with soap and water. If it
gets in the eyes, rinse thoroughly with cool water and immediately seek medical attention.
Charge the battery before use.
Use only chargers rated for lithium cells. Be sure the charger’s voltage and current
settings are correct for the battery pack being charged.
Charge batteries on a fireproof surface away from flammable items or liquids.
Batteries should never be left unattended while charging.
Follow the manufacturer’s instructions for charging the product. Unplug the charger when
the battery is charged.
Recycle lithium batteries. Do not dispose of in the trash.
Recycle Rechargeable Batteries
Recycle your old rechargeable batteries at one of the many collection sites in the U.S.
and Canada.To find the site nearest you, visit www.call2recycle.org or call toll-free
1-877-2-RECYCLE.
Latch