Dear Customers,
Thank you for choosing AVA Sport equipment!
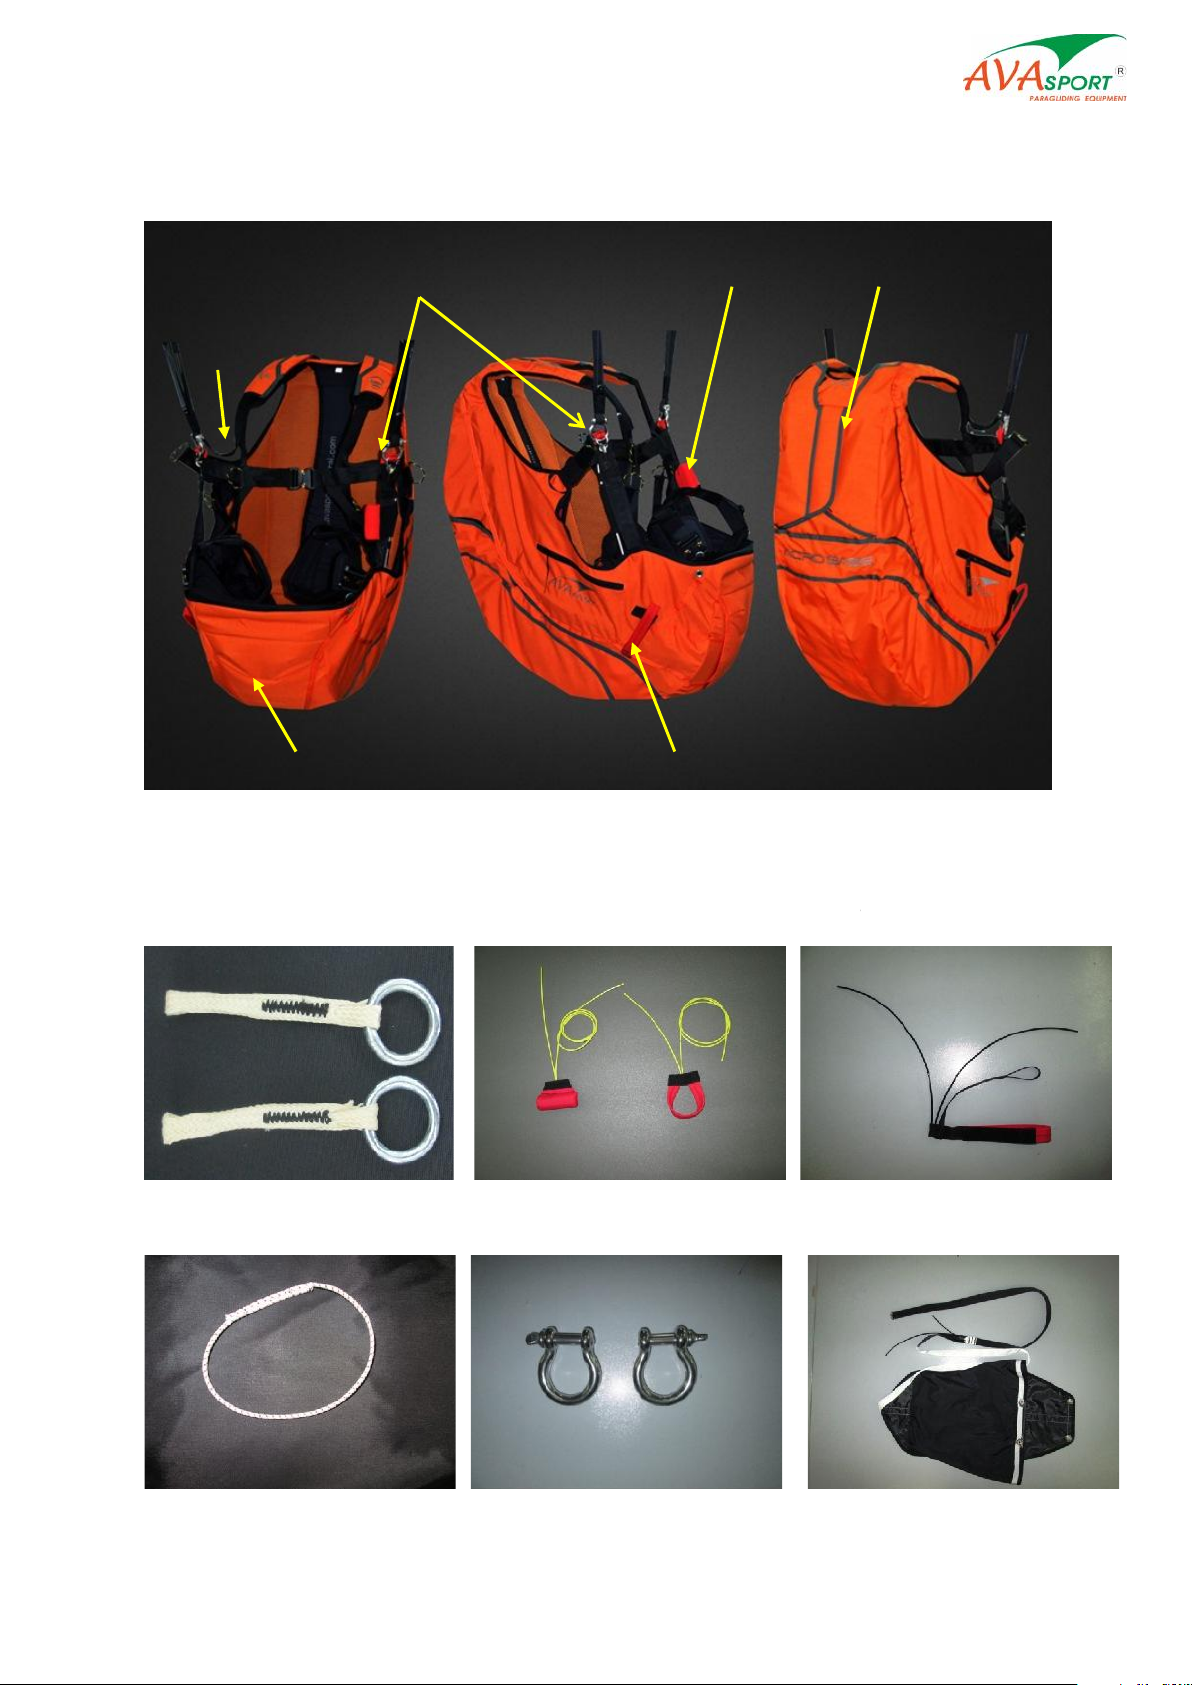
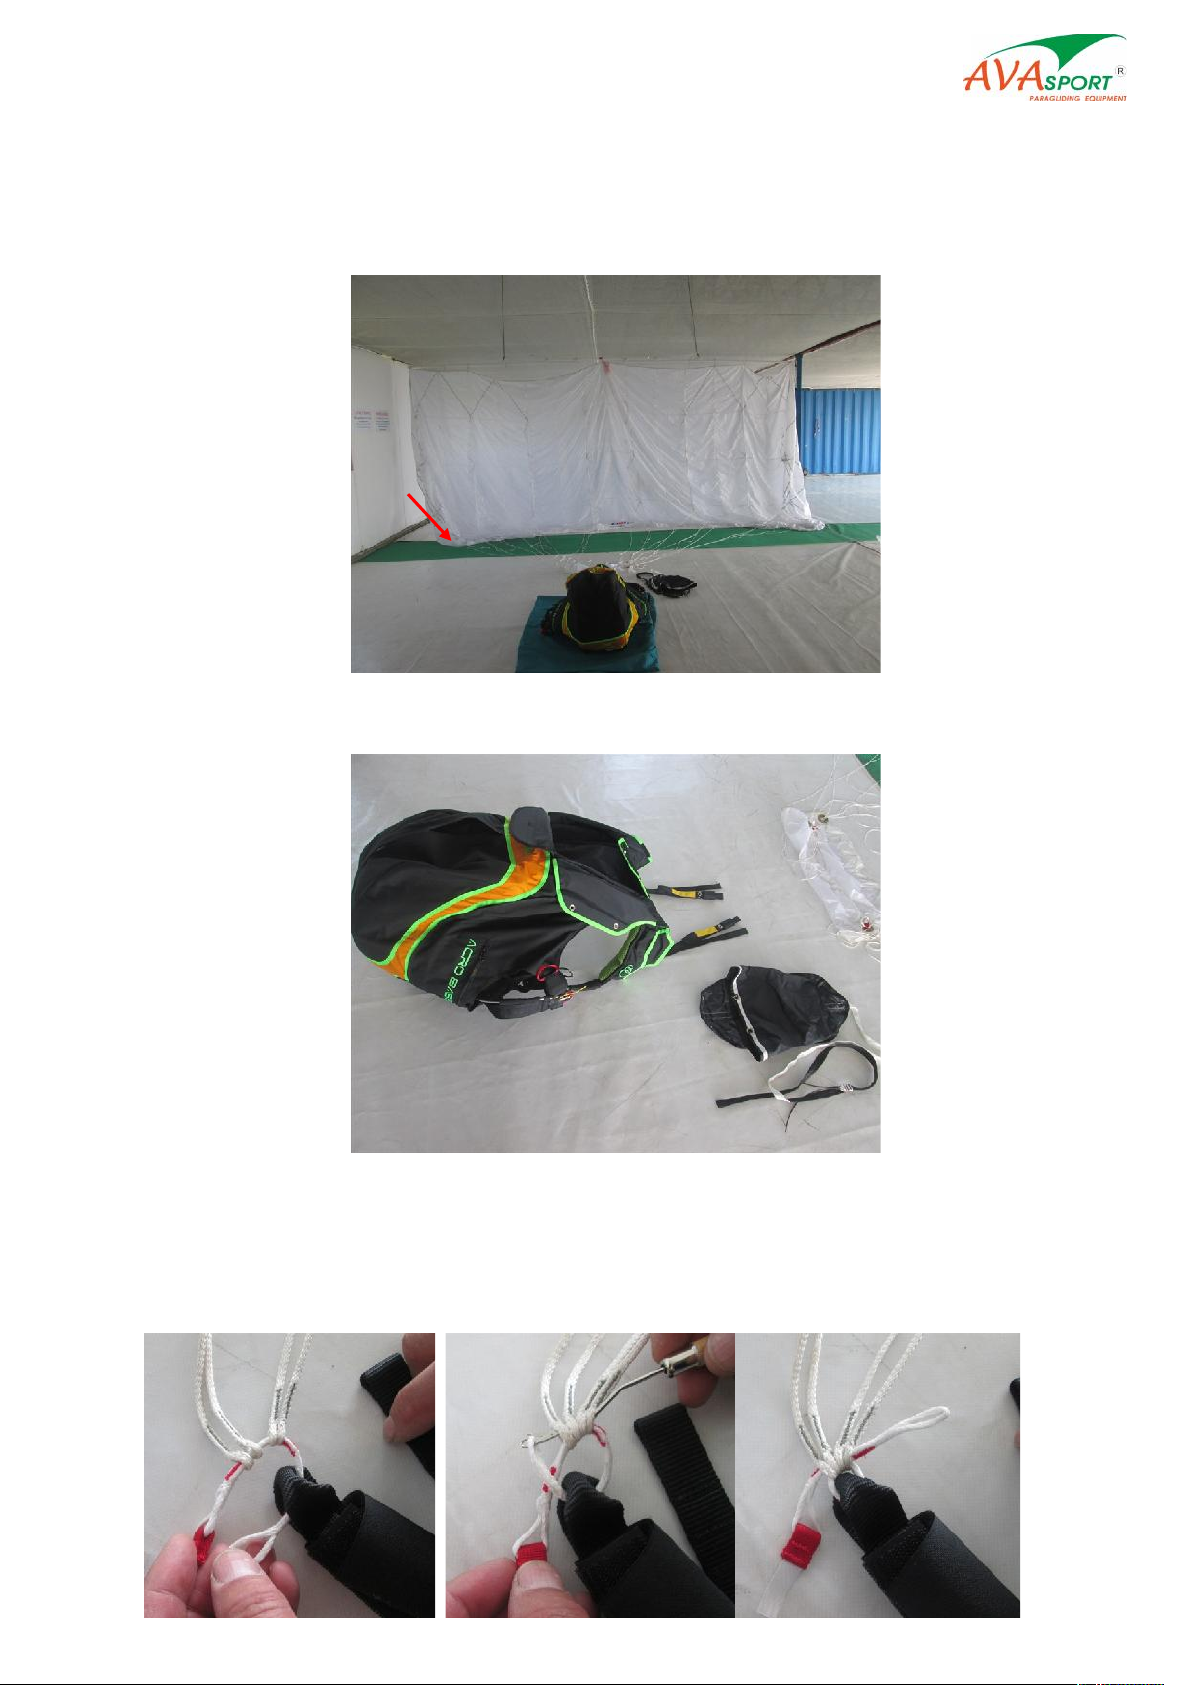
The Acro Base is the harness that raises whole new standards regarding safety in paragliding.
Integrating the usual under the seat rescue and new main container on the back of the harness – for
the square rescue. More to this is the cutaway system together with the Rescue Static Line ( RSL ) and
the whole this system makes all your troubles go away in case of a malfunction. For Acro Base Harness
we use elements from skydiving equipment, that proven as most reliable and safety in the sport. The
fresh overall look and the funky colors are just additional perks of this amazing harness, created to
comfort you in your adrenaline rush.
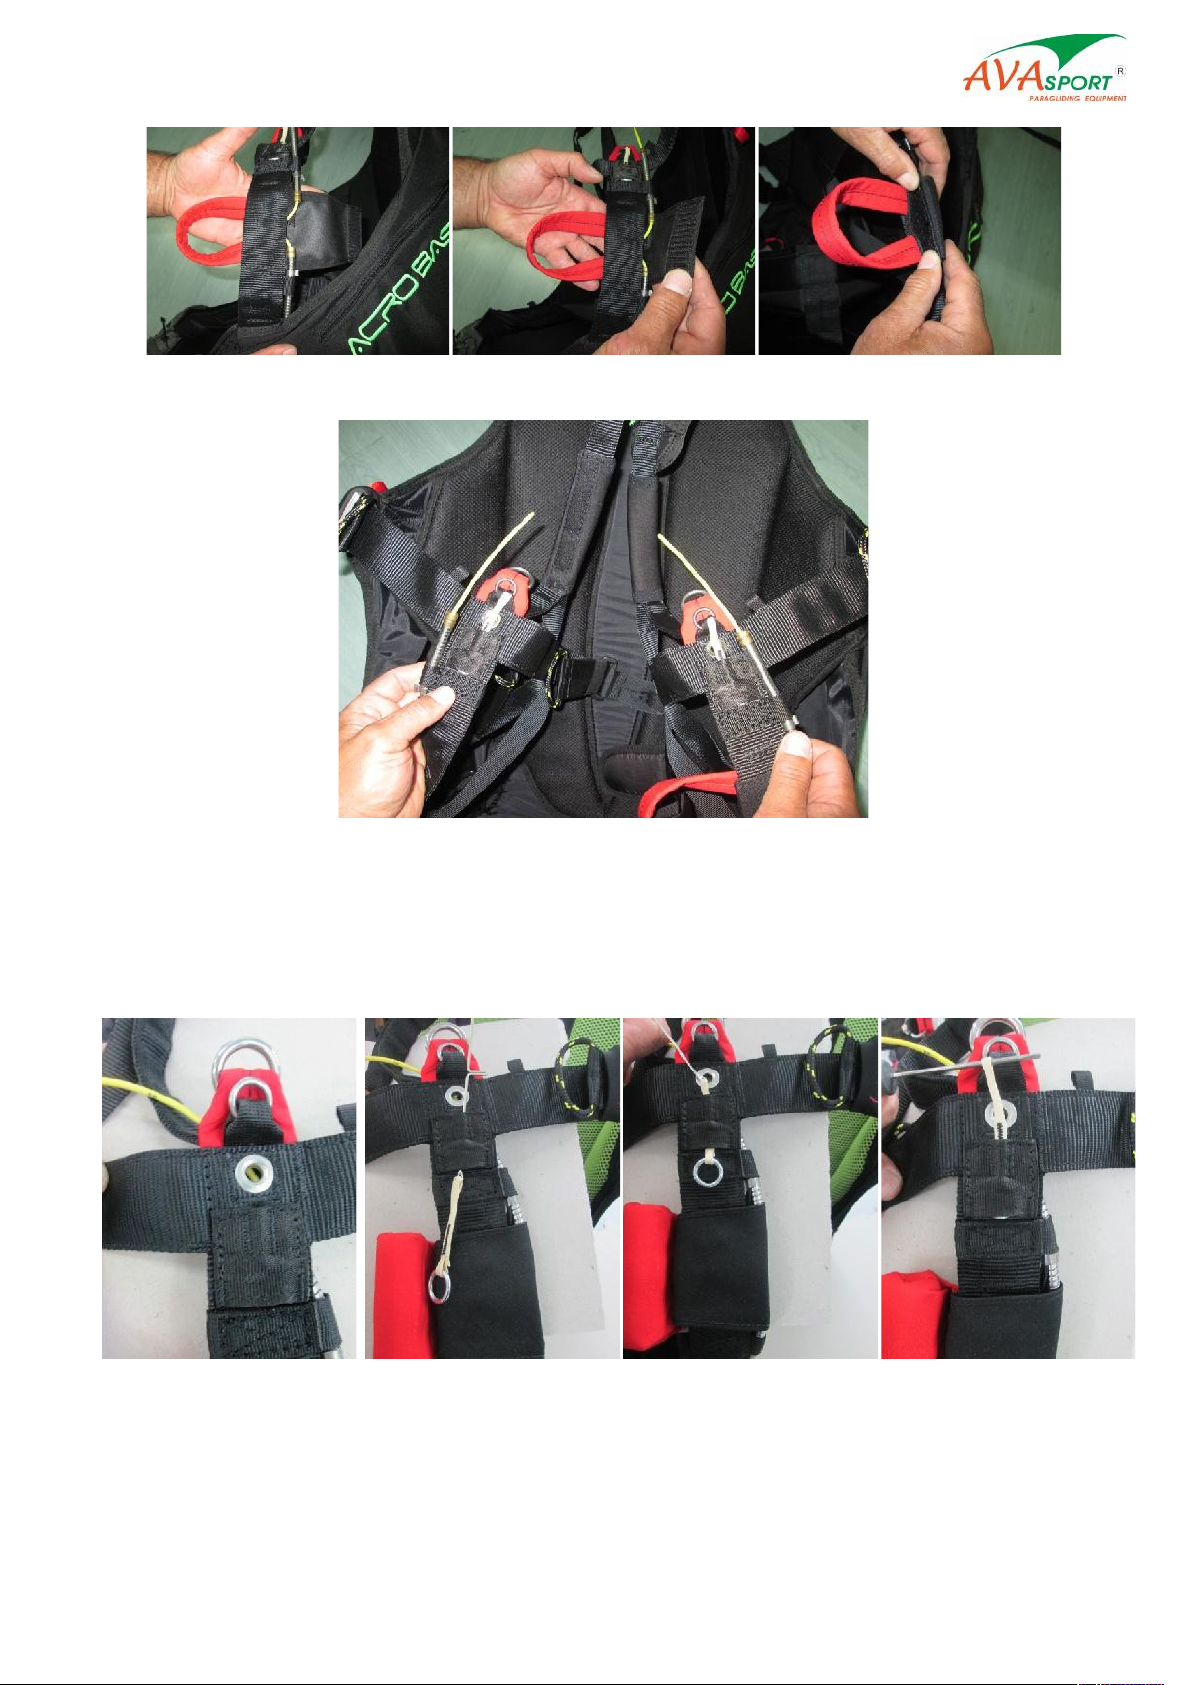
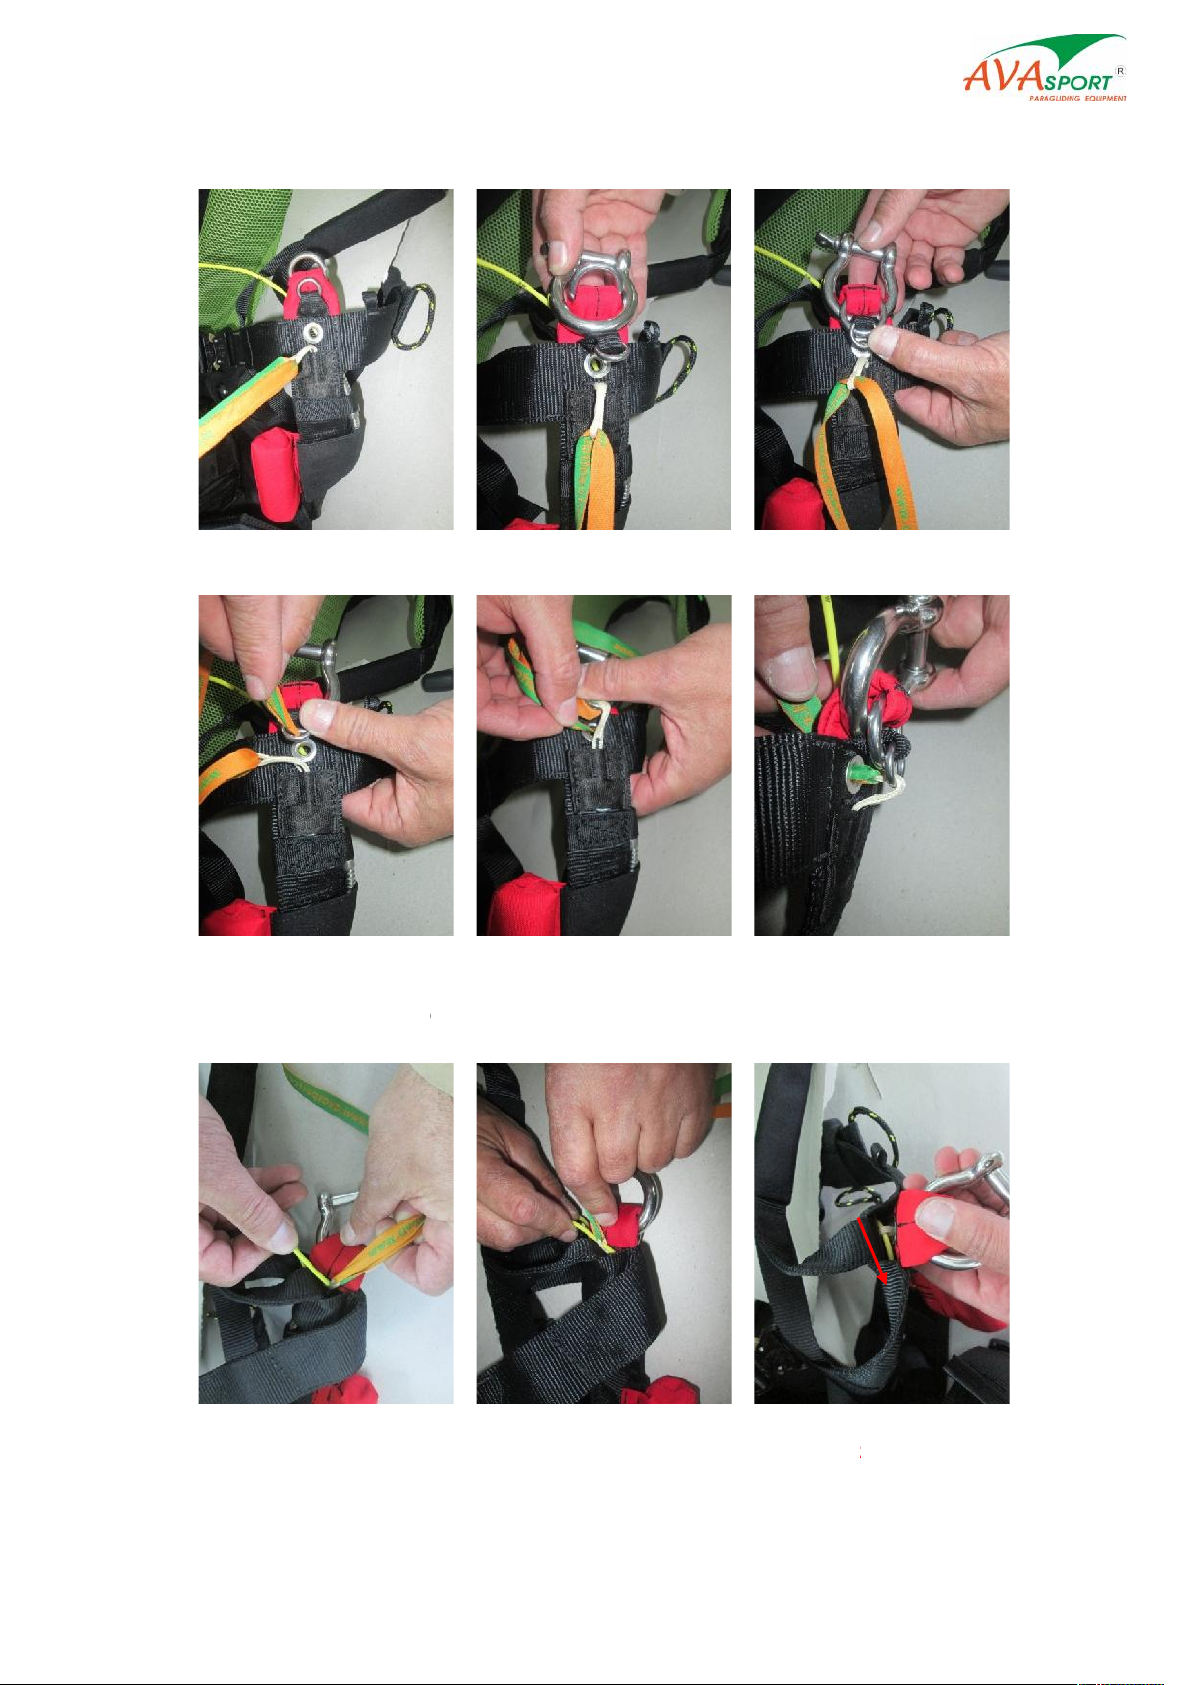
The basic Acro Base harness comes with 3-Ring System, Free bag with RSL for the square
rescue parachute, with all the handles and one pair of karabiners. You can ask us or your AVA dealer
for extras such as : custom embrodery, cutaway system for somke bombs, speed bar detachements,
speedbar, soft links and backpack.
!!!
Please read this operating manual carefully. Paragliding is an activity requiring, skills,
specific knowledge and sound judgement. Be safe by learning in certified schools, subscribe
and obtain an adequate insurance policy as well as a flying license while always making sure
your flying skills are up to the task and weather conditions. Given the high risk of acro flying
and the consequences of this kind of flying you must be responsible for your decisions and
activities.
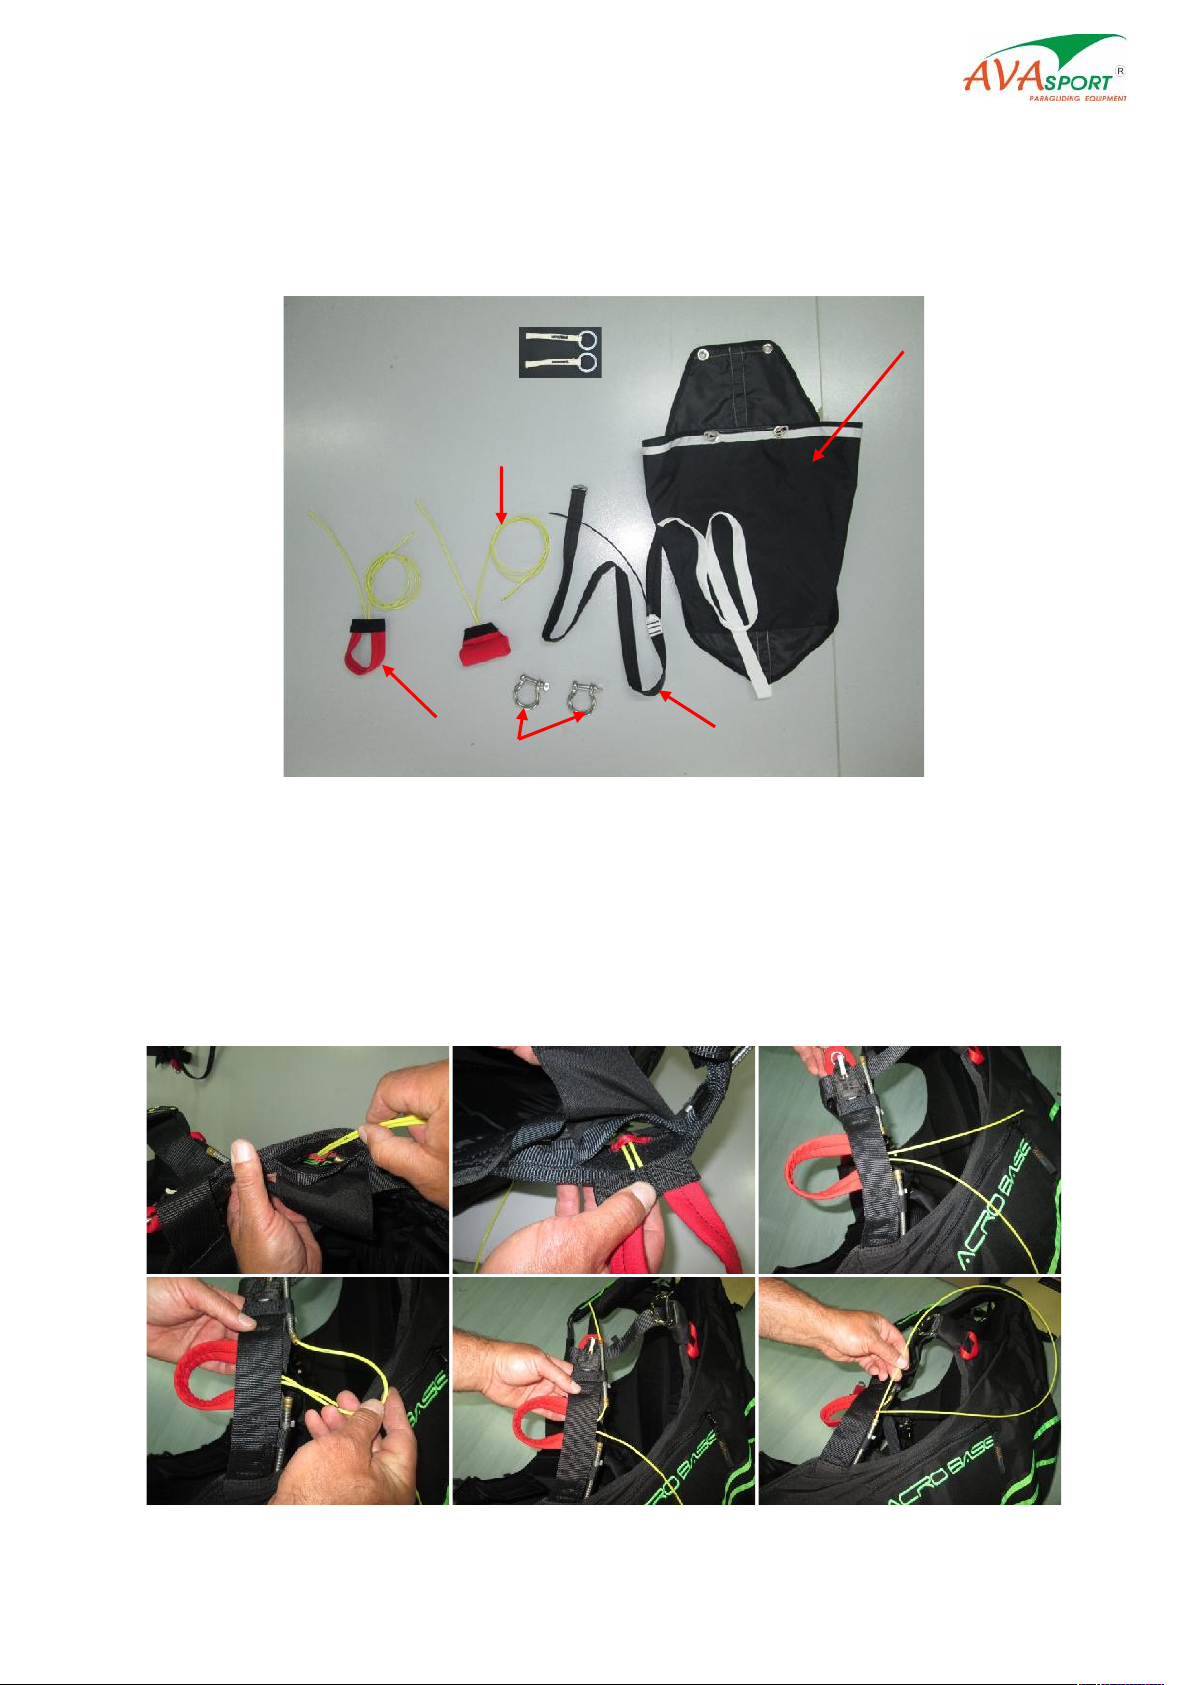
Acro Base harness is designed to provide fast, easy and safe opening of your controlled
rescue canopy, which you can use to land safely on a desire location.
The Acro Base harness was designed for the paragliding activity only. It is NOT a Base
jumping or a freefall harness. The PILOT is responsible for the proper use of the harness.
It`s recommended the Cut Away System to be used only in emergency situations.
Because of the use of many different rescue parachutes and their opening time
difference, Cut Away System needs min. 150 m to be safely. Under this minimum it`s
recommended to use the second rescue parachute located under the seat.
In case of an accidental fall into the wing, the only recourse of action would
be to deploy the classic reserve parachute located under the seat. The Cut Away System
cannot be used in this situation.
Do not leave your hand(s) in the risers or in the toggles during the cut away process.
Dear Customers,
Thank you for choosing AVA Sport equipment!
The Acro Base is the harness that raises whole new standards regarding safety in paragliding.
Integrating the usual under the seat rescue and new main container on the back of the harness – for
the square rescue. More to this is the cutaway system together with the Rescue Static Line ( RSL ) and
the whole this system makes all your troubles go away in case of a malfunction. For Acro Base Harness
we use elements from skydiving equipment, that proven as most reliable and safety in the sport. The
fresh overall look and the funky colors are just additional perks of this amazing harness, created to
comfort you in your adrenaline rush.
The basic Acro Base harness comes with 3-Ring System, Free bag with RSL for the square
rescue parachute, with all the handles and one pair of karabiners. You can ask us or your AVA dealer
for extras such as : custom embrodery, cutaway system for somke bombs, speed bar detachements,
speedbar, soft links and backpack.
!!! W A R N I N G S !!!
Please read this operating manual carefully. Paragliding is an activity requiring, skills,
specific knowledge and sound judgement. Be safe by learning in certified schools, subscribe
and obtain an adequate insurance policy as well as a flying license while always making sure
your flying skills are up to the task and weather conditions. Given the high risk of acro flying
and the consequences of this kind of flying you must be responsible for your decisions and
activities.
Acro Base harness is designed to provide fast, easy and safe opening of your controlled
rescue canopy, which you can use to land safely on a desire location.
The Acro Base harness was designed for the paragliding activity only. It is NOT a Base
jumping or a freefall harness. The PILOT is responsible for the proper use of the harness.
It`s recommended the Cut Away System to be used only in emergency situations.
Because of the use of many different rescue parachutes and their opening time
difference, Cut Away System needs min. 150 m to be safely. Under this minimum it`s
recommended to use the second rescue parachute located under the seat.
In case of an accidental fall into the wing, the only recourse of action would
be to deploy the classic reserve parachute located under the seat. The Cut Away System
cannot be used in this situation.
Do not leave your hand(s) in the risers or in the toggles during the cut away process.
Dear Customers,
Thank you for choosing AVA Sport equipment!
The Acro Base is the harness that raises whole new standards regarding safety in paragliding.
Integrating the usual under the seat rescue and new main container on the back of the harness – for
the square rescue. More to this is the cutaway system together with the Rescue Static Line ( RSL ) and
the whole this system makes all your troubles go away in case of a malfunction. For Acro Base Harness
we use elements from skydiving equipment, that proven as most reliable and safety in the sport. The
fresh overall look and the funky colors are just additional perks of this amazing harness, created to
comfort you in your adrenaline rush.
The basic Acro Base harness comes with 3-Ring System, Free bag with RSL for the square
rescue parachute, with all the handles and one pair of karabiners. You can ask us or your AVA dealer
for extras such as : custom embrodery, cutaway system for somke bombs, speed bar detachements,
speedbar, soft links and backpack.
Please read this operating manual carefully. Paragliding is an activity requiring, skills,
specific knowledge and sound judgement. Be safe by learning in certified schools, subscribe
and obtain an adequate insurance policy as well as a flying license while always making sure
your flying skills are up to the task and weather conditions. Given the high risk of acro flying
and the consequences of this kind of flying you must be responsible for your decisions and
activities.
Acro Base harness is designed to provide fast, easy and safe opening of your controlled
rescue canopy, which you can use to land safely on a desire location.
The Acro Base harness was designed for the paragliding activity only. It is NOT a Base
jumping or a freefall harness. The PILOT is responsible for the proper use of the harness.
It`s recommended the Cut Away System to be used only in emergency situations.
Because of the use of many different rescue parachutes and their opening time
difference, Cut Away System needs min. 150 m to be safely. Under this minimum it`s
recommended to use the second rescue parachute located under the seat.
In case of an accidental fall into the wing, the only recourse of action would
be to deploy the classic reserve parachute located under the seat. The Cut Away System
cannot be used in this situation.
Do not leave your hand(s) in the risers or in the toggles during the cut away process.