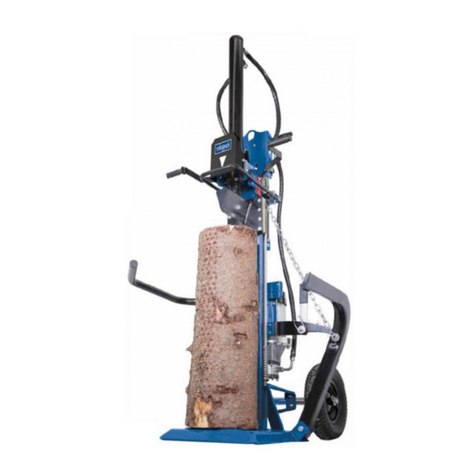
Avantco A413195 User manual

Log splitter 2011 1
Please read this manual carefully before using the equipment, and follow all
instructions.
Keep this manual for later reference.
Operator’s
Operator’sOperator’s
Operator’s
manual for Attachment
manual for Attachmentmanual for Attachment
manual for Attachment
Log splitter
Product number: 300-700-series loaders: A413181
A413195
200-series loaders: A413194

Log splitter 2011 1
CONTENTS
1. Foreword..................................................................................................................................3
2. Designed purpose of use .........................................................................................................3
3. Safety instructions for the log splitter........................................................................................3
4. Technical specifications ...........................................................................................................4
5. Assembly of the log splitter ......................................................................................................5
5.1. Mounting the log splitter to the loader
......................................................................................5
5.2. Connecting and disconnecting the hydraulic fittings
...................................................................6
6. Operation.................................................................................................................................7
6.1.Setting up the log splitter....................................................................................................7
6.2.Using the splitter.................................................................................................................8
6.2.1. Adjusting the stroke length
....................................................................................................9
6.2.2. Adjusting the blade height
.....................................................................................................10
7. Maintenance and servicing.......................................................................................................10
7.1. Troubleshooting
....................................................................................................................11
7.2. Hydraulic system
...................................................................................................................11
8. Warranty terms ........................................................................................................................12
This manual uses the following warning symbols to indicate factors that must be taken into account to reduce
the risk of personal injury or property damage:
DANGER:
This safety symbol refers to important safety information in this manual. It warns of
an immediate hazard that could cause serious personal injury or property damage.
Read the warning text accompanying the symbol carefully and ensure that other
operators are also familiar with the warnings, since personal safety is at stake.
Note:
This notice symbol indicates information about the correct operation and
maintenance of the equipment.
Failure to observe the instructions accompanying the symbol can lead to equipment
breakdown or other property damage.
In addition to the safety instructions included in this manual, you must observe all occupational safety
regulations, local laws and other regulations concerning the use of the equipment. Due to continuous product
development, some of the details in this manual may differ from your equipment. We reserve the right to
change the contents of the manual without notification. This manual is a translation of the original Finnish
version.

3(14)
1. Foreword
Avant Tecno Oy would like to thank you for your purchase of this attachment for your AVANT loader. It has
been designed and manufactured on the basis of years of product development and experience. By
familiarising yourself with this manual and following the instructions, you ascertain your safety and ensure the
reliable operation and long service life of the equipment. Read the instructions carefully before starting to use
the equipment or performing maintenance.
With these instructions, a person with basic knowledge and experience of using the loader can use the
attachment safely. The manual includes important instructions for experienced AVANT operators as well.
Ensure that all persons using the loader have received proper guidance and familiarised themselves with the
manual of the loader and attachment and all safety instructions before using the equipment. Keep this manual
at hand throughout the service life of the equipment. If the manual is lost or damaged, you can request a new
one from the retailer or manufacturer. If you sell or transfer the equipment, be sure to hand over this manual to
the new owner.
2. Designed purpose of use
The log splitters are attachments designed and manufactured to be suitable for use with AVANT multi purpose
loaders. They are intended to be used by one person at a time for splitting firewood, whose diameter is max
400 mm. The splitting is operated by a hydraulic cylinder, which presses the wooed against the splitting
wedge. The height of the splitting wedge is adjustable to split the wood into halves instead of quarters. The
splitter returns thecylinder after the wood has been split. Both the starting and ending points of the cylinder are
adjustable according to the length of the wood. During splitting operation the operator’s hands are kept on the
two-hand control system of the splitter.
The attachments have been designed to require as little maintenance as possible. Regular maintenance tasks
can be performed by the operator. Demanding repair and maintenance operations, such as hydraulic repairs,
are to be left for professional maintenance. Familiarise yourself with the manual's instructions regarding
service and maintenance. Please contact your AVANT retailer if you have additional questions about the
operation or maintenance of the equipment or if you require spare parts or maintenance services.
3. Safety instructions for the log splitter
Please bear in mind that safety is the result of several factors. The loader-attachment combination is highly
powerful, and improper or careless use or maintenance may cause serious personal injury or property
damage. Due to this, you should carefully familiarise yourself with the manuals of both the loader and the
attachment before starting operation. Do not use the attachment if you have not completely familiarised
yourself with its operation and the related hazards. The purpose of these instructions is to help you to:
•use the equipment in a safe and efficient manner
•observe and prevent any hazardous situations
•keep the equipment intact and ensure a long service life
•When mounting the log splitter to the loader, ensure that the locking pins of the loader's
quick attach plate are in the lower position and that they have locked the attachment
to the loader.
•The log splitter is to be used by one operator at a time. The operation of the log splitter
creates a crushing hazard; do not let others near the machine when it is in use. Keep a
safety distance of minimum of 2 meters.
•When using the log splitter, keep it securely against the ground and attached to the
loader. Read the instructions about the work site from section 6.
•Always transport the log splitter as low and close to the machine as possible to keep the
centre of gravity low.
4(14)
•Pay attention to the contours of the terrain as well as other hazards, such as branches
and trees reaching the driver's area. Pay attention to the surroundings and any other
persons and machines moving in the vicinity.
•Shut down the loader engine before any maintenance or adjustments.
•Do not modify the structure of the attachment in a manner that would affect its safety.
•Do not use the log splitter to other than its intended use.
•Also read the safety instructions for the loader in the loader manual.
Familiarise yourself with the loader controls in a safe area. Pay particular attention to the
safe stopping of the attachment and the machine.
Note that the loader boom moves down and may be tilted even if the engine has been
stopped. Never go near the raised boom or the attachment.
Remember to wear proper protective clothing:
Never wear loose clothing, long scarves, jewellery or other items that might become
entangled with the moving or rotating parts of the splitter or the wood being split. If
needed, also wear a hat to prevent long hair from coming into contact with the
splitter.
•The noise level in the driver's seat and the operating area may exceed 85 dB(A). Wear
hearing protection while working with the loader.
•Wear safety boots while working with the log splitter.
•Wear protective gloves when handling logs or attaching the hydraulic hoses.
4. Technical specifications
Table 1 – Log splitter technical data specifications
Product number A413194 A13181 A413195
Log length, min/max:: 200 / 650 mm 200 / 1000 mm
Log diameter, min/max: 100 / 400 mm 100 / 400 mm
Weight: 152 kg 198 kg
Minimum operating
temperature: -25’C
Dimensions: L x W x H: 2435 x 694 x 1250 mm 3275 x 700 x 1250 mm
Supporting area: 654 x 880 mm 640 x 1040 mm
Maximum input of
hydraulic energy: 60 l/min,
2,25 MPa (225 bar) 70 l/min,
2,25 MPa (226 bar)
Suitable AVANT
loader: 216, 218, 220 300-700 400-700

5(14)
Shown on the following page are the labels and markings, which must be visible on the equipment. Replace
the warning labels, if they have become unclear or detached completely. New labels are available via your
retailer or contact information provided on the cover.
The warning labels contain important safety information. Replace damaged or missing
warning labels with new ones.
•A46771 – Read instructions before use.
•A46772 – Do not go under a raised attachment, stay
away from raised equipment.
•A46803 – Crushing hazard, stay clear of moving parts.
•A46749 – Shearing hazard, keep hands away from the
splitting tools
A46771 A46772 A46803 A46749
5. Assem ly of the log splitter
The log splitters are ready for use as delivered. Mount the attachment and its hydraulic hoses according to the
instructions and read the following instructions for operating, adjustments and maintenance of the log splitter
before starting to use the equipment.
Never move or raise an attachment that has not been locked. Keep the log splitter that
has not been attached at even and firm ground.
Mounting the attachment to the loader is quick and easy, but it must be done carefully. If the attachment is not
locked to the loader, it may detach from the loader and cause hazardous situations. In the worst case, the
attachment may slide onto the driver along a raised boom. For this reason, the attachment must under no
circumstances be raised over one metre when it has not been locked. To prevent hazardous situations, always
follow the attachment mounting instructions provided in the following pages. Also remember the safety
instructions in Section 3.
5.1. Mounting the log splitter to the loader
If your machine is equipped with the hydraulic locking and/or serial quick attach system, refer
to the relevant manuals for additional mounting instructions.
The attachment is mounted to the AVANT loader boom quick attach plate and the counterpart on the
attachment. The locking is semi-automatic, but because the attachment plate of the log splitter is at relatively
high level, the locking pins must be locked manually. The attachment is mounted to the loader as follows:
Identification plate of the attachment

6(14)
Step 1:
•Lift the quick attach plate locking pin / locking pins
up and turn them backwards into the slot so that
they are locked in the upper position.
•Ensure that the hydraulic hoses are not in the way
during installation.
Step 2:
•Turn the quick attach plate hydraulically to an
obliquely forward position.
•Drive the loader onto the attachment. If your loader
is equipped with a telescopic boom, you can utilise
this.
Step 3:
•Lift the boom slightly – pull the boom control lever
backward to raise the attachment off the ground.
•Turn the boom control lever left to turn the bottom
section of the quick attach plate onto the
attachment.
•Lock the locking pins manually as you connect
the hydraulic fittings.
Do not use the automatic return of the locking pins with the log splitter. Because the
attachment plate of the log splitter is at relatively high level, tilting of an unlocked
splitter increases the risk of toppling over. We recommend that you lower the log
splitter onto the ground and secure the locking manually.
Before moving or raising the attachment,
ensure that the locking pins are in the lower
position and come through the fasteners on
both sides.
5.2. Connecting and disconnecting the hydraulic fittings
The log splitter has two hydraulic fittings, which must be connected to the corresponding fittings on the loader.
When connecting or disconnecting fittings, shut down the loader engine and move the auxiliary hydraulics
lever of the loader to its extreme positions a few times. This way, there will be no residual pressure in the
system and the fittings are easy to connect.
To connect and disconnect the fittings, move the collar at the end of the female fitting. For correct operation of
the splitter, connect the fittings with the coloured caps first, and the remaining fittings will then be fitted
correctly.
In a 200-series equipment, the hose can be connected by pushing the fitting in the counterpart. When
connecting and disconnecting the 200-series hydraulics quick couplings, you should pay attention to their

7(14)
locking. The locking prevents the female and male fittings from being disconnected from each other by
accident when the attachment moves. The fitting collar may also turn by accident into the locking position,
making it impossible to connect or disconnect the fittings.
In the 200-series equipment, there is a small groove in the collar of all
female fittings and a small ball below the collar. When the fittings need
to be disconnected, the above-mentioned groove and ball need to be
aligned. Then, the grooved collar of the female fitting is pulled
downwards to disconnect the fittings from each other.
When taking the attachment off from the loader, always disconnect the hydraulic
fittings before detaching the quick attach plate, to prevent hose damage and any oil
spills. Reinstall the protective caps on the fittings to prevent impurities from entering
the hydraulic system.
Never connect or disconnect quick couplings or other hydraulic components while the
system is under pressure. High-pressure fluid injection may cause serious injuries.
Keep the fittings as clean as possible; use the protective caps for quick couplings on the attachment and
loader. Dirt, ice, etc. may make using the fittings significantly more difficult. Note that the protective caps on
the loader and the attachment can be fastened to each other during operation to reduce the accumulation of
dirt. Never leave the hoses hanging on the ground; place them on top of the equipment.
6. Operation
Once the log splitter has been mounted according to the instructions and the hydraulic hoses are connected, it
is ready for work. Read the following instructions about work site, adjustments and use of the log splitter.
6.1. Setting up the log splitter
•Transport the log splitter carefully and note the effect of weight on the front to the stability of the
loader. The splitter extension plate must be removed or folded during transportation.
•Choose a level working site, which can carry the load of the equipment and the logs. Clear the area
from any obstacles that could cause a tripping hazard. The working area must not be slippery.
•Operate the log splitter in daylight or good artificial light and only in well-ventilated areas.
•Lower the splitter firmly on the ground and apply the parking brake of the loader.
Lower the log splitter firmly on the ground for use. Never go under a raised
attachment or the loader boom. Note that the loader boom may be lowered or tilted
even if the engine has been shut down.
Never perform any adjustments, maintenance or cleaning of the equipment if the
splitter can start by accident. Shut down the loader engine first.
Never leave the equipment unattended while the engine is running.

8(14)
Shut down the loader engine and release the residual pressure to prevent the splitting
cylinder from moving during adjustments. If there are other persons at the work area
also remove the keys from the ignition or disconnect a hydraulic fitting.
6.2. Using the splitter
Lower the attachment firmly on the ground, apply the parking brake of the loader and set moderate engine
revolutions depending on the working pace. Depending on the loader model, two hydraulic pumps may be
used to reduce engine noise. Note that unnecessarily high engine rotating speed will not improve the splitting
force.
•Check that the log splitter is intact and that all obstacles have been removed from the working area
before starting the work.
•Check the correct operation of the controls by completing a few empty cycles with the splitter. The
splitting cylinder should move only when both of the control levers are actuated. After releasing the
levers the cylinder should automatically return to its initial position and stop.
•Operate the attachment only from the operator’s area next to the controls of the splitter.
•Ensure that the loader and the splitter are used in a safe and intended manner. Smoking near the
operating area is prohibited. Do not allow children to operate the equipment.
•Check regularly to ensure there are no hydraulic leaks or faults. Refer to Section 7 for maintenance
instructions.
Familiarise yourself with the controls of the log splitter before using it. Pay special
attention to stopping the equipment. Check before use that the controls work as
intended. Never reach into the splitting area or the moving components of the
equipment while it is in use; severe injuries may occur.
Turn the auxiliary hydraulics control lever on the loader to its locked position. The control device is a lever on
the loader that locks to its front or side position or a pedal that locks to its lower position.
Load a log against the splitting blade, so that the squarer end of the log is placed towards the carriage plate.
Never attempt to split more than one log at a time unless the carriage has been fully extended and a second
log is needed to complete the separation of the first log.
Operation of the control levers, when both are operated simultaneously:
1. Return: The carriage will move back to its starting
position as set by the setting flange. See section
6.2.1. for information about the adjustment flange.
Stopped: The carriage will stop after it reaches the
initial position determined by the adjustment flange.
2. Heavy duty: The carriage will move towards the
splitting wedge with the force of 6,5t at 180 bar.
3. Light duty, fast forward: The carriage will move
towards the splitting wedge with the force of 4,4t at
180 bar.
•When the levers are released, they will return to position 1 and the carriage will return to its initial
position automatically.
•The levers move steplessly and the splitting speed/force can be adjusted as needed.
•Once the log starts to split the levers can be released to reduce unnecessary travel of the carriage.

9(14)
To stop the splitter pull only one of the levers.
The one-lever stopping is only for temporary
stopping of the cylinder and the cylinder will start
its travel once the lever is released. Shut down the
loader before any adjustments or removing of
blockages.
In case the log gets stuck or other disruptions in use, first turn the control lever to its
middle position and shut down the loader engine before other procedures. Solve the
disruption after the engine has been shut down.
Always keep your fingers away from any cracks that open in the log during splitting.
They can quickly close and pinch your fingers.
The log splitter is intended to be used by one operator only. Do not allow others to stay
near the machine.
Do not use the splitter for other purposes than splitting firewood.
6.2.1. Adjusting the stroke length
When the logs are shorter than the cylinder stroke, the
stroke can be adjusted so that unnecessary travel of
the cylinder is minimized, thus speeding up the work.
The initial position of the stroke is adjusted by moving
the adjustment flange on the push rod with tools. By
moving the stopper to the left the cylinder will not
return to its original starting point, making it faster to
split shorter wood.
To move the flange, the cylinder should be extended
slowly, and the loader engine must then be stopped. Stopper screws for adjusting the stroke length
Make sure that the cylinder will not move during adjustment by shutting down the
loader engine.

10(14)
6.2.2. Adjusting the blade height
The height of the splitting wedge can be adjusted
to match the log diameter. It can also be set to split
the log to two pieces. It may be easier to split stiff
wood or wood with many branches by splitting it
only into two halves, so that the wood will not stick
on the blade.
The adjusting bar can be extended by pulling it for
easier adjustment of the height. Lock the
adjustment to a suitable position in tooth rim.
Adjusting the splitting wedge
7. Maintenance and servicing
The log splitter does not require specific scheduled maintenance. Keep the equipment clean and monitor the
condition of the hydraulic components. The slide pads on the carriage may be lubricated lightly and they can
be adjusted to compensate normal wearing. However, the slide pads should not be set tightly against the
splitter frame; the clearance should be at least 2 mm.
You may use a pressure washer and a mild detergent to wash the equipment. Avoid spraying directly at the
hydraulic parts at high pressure. In addition, mind the labels on the attachment. Do not use solvents when
washing.
Clean the attachment before long storage periods, touch up the paint where needed and oil the blade and
other visible metal parts to prevent rust damage. The cylinder should be completely retracted during storage.
Apply a small amount of oil to the visible part of the cylinder shaft.
Check the condition of the hydraulic hoses and components when the engine has been turned off and the
pressure has been relieved. Repair all leaks immediately after detecting them; a small leak can quickly grow
into a big one. Do not use the equipment, if you have discovered a leak in the hydraulic system. Leaking
hydraulic fluid may penetrate skin and cause serious injuries. The fluid is also harmful to the environment.
Check hoses visually for cracks or abrasions. Monitor the wearing of the hoses and stop the use, if the surface
layer of the hose has worn off. If there are signs of leaking, to check the component, hold up a piece of
cardboard in the area where a leak is suspected. Finding any of these faults means that the hydraulic hose or
component must be replaced. Spare parts are available from your nearest AVANT retailer or service point.
Never tighten a hydraulic fitting under pressure,
since the fitting may break and the released oil may
cause serious injuries. Do not use the equipment, if
you have discovered a fault in the hydraulic system.

11(14)
7.1. Troubleshooting
PROBLEM POSSIBLE CAUSE SOLUTION
No or too little oil Stop immediately, check the loader hydraulic oil
level and add oil
Carriage movement incorrectly
adjusted Adjust carriage movement
Oil too cold Let oil circulate freely for a few minutes
Broken or leaking hose or other
hydraulic component Stop the use, replace broken components
No splitting action
Frozen Melt nad clean the equipment
Oil too cold
Slow or weak
splitting action Too little oil Anna öljyn kiertää vapaasti
Lisää öljyä
Incorrect blade position Adjust blade position
Large knot at splitting point Stop splitting, turn log
Log too large Max diameter 40 cm
Log does not split
Decreased oil pressure Check hydraulic system (section 7.2)
Log rises up Unsuitable log dimensions or many
branches Check carriage stroke
Remove branches
Incorrect stroke of carriage Extend carriage stroke
Log gets jammed
on blade Blunt blade Sharpen the blade
7.2. Hydraulic system
The hydraulic pressure of the log splitter can be checked from the flow regulator valve shown below. To check
and adjust the pressure suitable equipment is needed. Contact service if the log splitter does not function
properly.
Locking nut
Pressure in
Pressure to cylinder piston
Hydraulic flow divider is regulated for pressure 200 bar.
If necessary (normal job is disturbed) the pressure should
be checked. When turning the adjustment screw clockwise.
the pressure will increase.

12(14)
8. Warranty terms
Avant Tecno Oy grants a warranty of one year (12 months) from the date of purchase for the attachment it manufactures.
The warranty covers repair costs as follows:
•Work costs are covered, if the repair is not performed at the factory.
•The factory replaces any defective components or consumables.
The factory may reimburse the price of components purchased by the customer in special cases that have been agreed in
advance.
The warranty does not cover:
•Normal maintenance work or parts and consumables required for it.
•Damages caused by unusual operating conditions or ways of use, negligence, overheating, structural changes made
without the consent of Avant Tecno Oy, use of non-original parts or lack of maintenance.
•Consequences of a defect, such as interruption of work or other possible additional damages.
•Travel and/or freight costs caused by the repair.


This manual suits for next models
2
Table of contents
Other Avantco Log Splitter manuals
Popular Log Splitter manuals by other brands

Gude
Gude GHS 500/8TB Translation of the original instructions

MTD
MTD 240-610-000 owner's guide

Elem Garden Technic
Elem Garden Technic FB1500-5TEG52 Original instructions

Far Tools
Far Tools FBH 7T Original manual translation

sunjoe
sunjoe LJ10M user manual

B.W. Machinery
B.W. Machinery BWM LSE30 Essential Series user manual