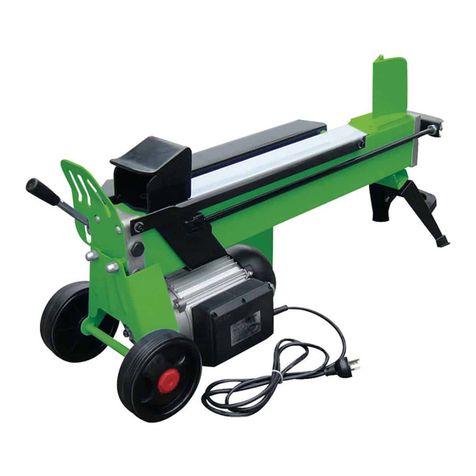
Hyundai HFBE10T105 User manual

、
ELECTRIC LOG SPLITTER
HFBE10T105
WARNING: Read thoroughly the instruction manual before using.

CONTENTS
1. SAFETY INSTRUCTIONS....................................................................................................................3
2. YOUR PRODUCT.................................................................................................................................. 9
3. ASSEMBLY...........................................................................................................................................16
4. OPERATION......................................................................................................................................... 18
5. MAINTENANCE AND REPAIR......................................................................................................... 25
6. DISPOSAL............................................................................................................................................ 25
7. DECLARATION OF CONFORMITY.................................................................................................26
8. WARRANTY......................................................................................................................................... 27
9. PRODUCT FAILURE.......................................................................................................................... 28
10. WARRANTY EXCLUSIONS............................................................................................................29
02

1. SAFETY INSTRUCTIONS
GENERAL INFORMATION
We wish you much joy and success in working with your new machine.
Note: The manufacturer of this equipment shall not be liable in accordance with the applicable
product liability law for damage caused by this device through:
Improper treatment;
Failure to comply with the operating instructions;
Repair by unauthorized personnel;
Installation and replacement of non-original parts;
Improper use;
Failure of the electrical system due to non-compliance with electrical requirements and VDE
specifications 0100, DIN 57113/VDE0113.
We recommend:
Read the entire operating instructions before assembly and getting started with the device. This
operating manual should help you become familiar with your machine and use it as intended.
The operating manual includes important information on how to work safety, correctly and
economically with the machine and how to avoid hazard, save repair costs, reduce downtimes and
increase the reliability and service life of the machine.
In addition to the safety regulations of this operating manual, you must follow the national
provisions applicable to the operation of the machine.
Keep the operating manual close to the machine, in a plastic cover protected against dirt and
moisture. It must be read by every operator before starting work and carefully followed. Work at the
machine may be done only persons who are instructed on using the machine and the associated
hazards. The minimum age specified should be observed.
Check all parts for any transportation damage after unpacking them. In case of complaints, the
supplying carrier must be notified immediately. Later claims will not be accepted. Check the
shipment for completeness.
Familiarize yourself with the device before using it by referring to the operating manual. Use only
original parts for accessories, wear parts and spare parts. You will receive spare parts from your
specialist dealer.
Indicate our article numbers as well as type and model of the device in your orders.
GENERAL SAFETY INFORMATION
Manual concerning your safety:
WARNING: When using electric tools, you should follow these basic safety precautions in order to
reduce the risk of fire, electric shock and personal injury.
Please read all instructions before operating this tool.
Operator must receive necessary training and instruction from a qualified person before handling
the tool.
Use the tool only for the intended use. Misuse (such using material other than log) can damage
the tool and cause accidents and injuries.
Split only logs with a maximum length of 1060 mm.
Split only logs with a minimum diameter of 70 mm and a maximum diameter of 400mm.
03

The splitting operation of the machine is designed to be activated by one person. While there is
the possibility that additional operators could be working with the machine (e.g. for loading and
unloading), only one operator should activate splitting operations.
The machine shall not be used by children.
Wear personal protective equipment (safety goggles/protective visor, safety gloves, and safety
shoes) to protect yourself from possible injury.
Before starting work, hydraulic pipes and hoses shall be inspected and the stopping devices
shall be tested.
The working area shall be free from obstructions; before installation and operation, clear the
working area. Keep the working area free from obstructions, e.g. logs, split wood, etc.
Stop the machine before cleaning or making adjustments.
Never leave the machine unattended while it is running. If you leave the machine, even for a
short time, remove the power supply or any possible cause of accidental start-up.
Never try to split logs larger than those indicated in the technical specifications. This could be
dangerous and may damage the machine.
Break wood in the direction of the grain, do not place wood across the log splitter and leave it in
that position for splitting; it may be dangerous and may seriously damage the machine.
Never force the log splitter for more than 5 seconds keeping the cylinder under pressure in the
attempt to split excessively hard wood. After this time interval, the oil under pressure is
overheated and the machine could be damaged. It is thus better to stop and rotate the log by 90°
to see whether it can be split in a different position. In any case, if you are not able to split the log,
this means that its hardness exceeds the capacity of the machine and thus that log should be
discarded so as not to damage the lop splitter.
Never place your hands on moving parts of the machine when it is turned on.
Observe all safety and hazard instructions at the machine.
Keep all safety and hazard instructions at the machine completely in a legible condition.
The safety devices on the machine must not be dismantled or destroyed.
Check mains supply lines. Do not use a defective power cable.
Before starting up, check for proper functioning of the two-hand operation.
The operator must be at least 18 years old. Apprentices must be at least 16 years old, but may
work at the machine only under supervision.
Wear safety gloves when working.
Caution when working: Risk of injury to fingers and hands when using the splitting tool.
To split heavy or bulky parts, use appropriate supporting implements.
Carry out refitting, adjustment and cleaning, as well as maintenance and service, only when the
motor is turned off. Disconnect the mains plug!
Installations, repairs and maintenance work on the electrical installation may be performed only
by qualified personnel.
All protective and safety equipment must be re-installed immediately after repair and
maintenance work is completed.
The setting on the hydraulic valve and the control levers may not be changed. Risk of accident
and destruction of the hydraulic components!
When leaving the workplace, turn off the motor. Disconnect the mains plug!
Provide for adequate lighting.
04
In case of danger, turn off the machine and disconnect the mains plug!
No other person should be in the work area.
Never split logs containing nails, wire or other objects.
Already split wood and wood chips create a dangerous work area. There is a risk of stumbling,
slipping or falling. Keep the work area tidy at all times.
The log splitter may not be operated in the transport position.
INTENDED USE
The machine conforms to the current EC Machinery Directive.
The hydraulic log splitter may be used only in the “standing mode”, logs may be split only in an
upright state and along the grain direction.
Never split the log when it is lying down or across the grain direction.
The safety, work and maintenance instructions of the manufacturer as well as the dimensions
indicated in the technical data must be followed.
The relevant accident prevention regulations and other generally accepted safety rules must be
followed.
The machine may be used, serviced or re-paired only by people .who are familiar with it and are
instructed about the hazards. Independent modifications to the machine
Exclude liability of the manufacturer for resulting damage.
The machine may be used only with original accessories and tools of the manufacturer.
Any other use is considered improper. The manufacturer does not assume liability for resulting
damage; the associated risk is solely borne by the plant operator
ACCIDENT PREVENTION RULES
The machine may be operated only by qualified personnel who are thoroughly familiar with the
contents of this operating manual.
Prior to start-up, the integrity and perfect functionality of the safety devices must be checked.
Prior to start-up, you should also familiarize yourself with the control mechanisms of the machine,
following the operating instructions.
The specified performance of the machine may not be exceeded. The machine may never be
used for any purpose other than that intended.
According to the laws of the country in which the machine is used, the staff must wear the
specified work clothes, wherein one must not wear wide, flapping garments, belts, rings and
necklaces; long hair should be tied back as far as possible.
The workplace should always be neat and clean, and the tools, accessories and wrenches
should all be within reach.
When cleaning or servicing the machine, it may never be connected to the mains supply.
It is strictly forbidden to operate the machine without the safety devices or with disabled safety
mechanisms.
It is strictly forbidden to remove or modify safety equipment.
Do not carry out maintenance or adjustment measures before carefully reading this operating
manual.
The plan given here for regular maintenance must be observed both for safety reasons and for
efficient operation of the machine.
05

The safety labels should always be clean and legible and be followed precisely to avoid
accidents, but if the signs are damaged or lost or belong to parts that were exchanged, they
must be replaced by new original signs to be requested from the manufacturer and attached at
the designated places.
In the case of fires, dry chemical extinguishing agents must be used. Fires at the machine may
not be extinguished with a water jet due to risk of short-circuit.
If the fire cannot be immediately extinguished, one has to pay attention to the spilled fluids.
In case of persistent fire, the oil tank or pressurized systems may explode: therefore, make sure
that you do not come in contact with the leaking liquids.
DISMANTLING AND DISPOSAL
The machine does not contain any health or environmentally harmful substances, since it was
built entirely from materials that are recyclable or can be disposed of in the normal way.
For disposal, you should consult specialist firms or a qualified professional who is aware of the
possible risks, has read these instructions and follows them carefully.
If the machine has reached the end of its service life, the following approach is adopted in
compliance with all industrial safety standards specified:
Interrupt the power supply (electric or PTO),
Disconnect all power cords and transfer to a specialized collection point by following the latest
relevant national provisions.
Empty the oil tank; deliver the oil in sealed containers to a collection point by following the latest
relevant national provisions.
Deliver all other parts of the machine to a scrap collection point by following the latest relevant
national provisions.
Make sure that each and every part is disposed of in compliance with the latest relevant national
provisions.
RESIDUAL RISKS
The machine has been built in accordance with the state of the art and recognized safety
standards. Nevertheless, individual residual risks can occur when working.
Risk of injury to fingers and hands from the splitting tool when improperly leading or supporting
the wood.
Injuries from flying workpiece due to improper guidance or support.
Risk of electric shock when using improper mains supply cables.
Furthermore, latent residual risks can persist in spite of all measures adopted.
Residual risks can be minimized if safety instructions and proper use as well as the operating
manual are followed altogether.
TRANSPORTATION/STORAGE
Transport with forklift trucks/lifting carts:
Before delivery, the machine should be secured with steel tapes and securely mounted on a pal-let.
The machine is protected by a plastic sheet.
To lift it off the pallet, several persons or technical resources are required.
NOTE: The center of gravity of the log splitter is high risk of tipping over!
Transport by crane:
06

For transport using the hook, the crane lifting eye on the upper part of the machine should be used.
Never lift on the splitter blade!
Storage conditions:
Please adhere to the following specifications:
Dry, covered storage location
Max. humidity 80%
Temperature range from -20 °C to + 60 °C
The machine should operate under the following environmental conditions:
Min. Max. Recommended
minimum
maximum
recommended
Temperature
5 °C
40 °C
16 °C
Humidity
-
95 %
70 %
At ambient temperatures below 5°C, the machine should run at idle for about 5 minutes, so that the
hydraulic system reaches the operating temperature.
INSTALLATION
Prepare the workplace where you want to install the machine. Create enough space for safe,
trouble-free working.
The machine is designed to work on flat surfaces and must be erected on a level, solid base.
START-UP
Make sure that the machine is assembled completely and properly. Check the following
before each use:
The main cables for defects (cracks, cuts, etc.),
The machine for any damage,
Whether all screws are tightened,
The hydraulics for leaks and
The oil level.
that the guides are lubricated with grease
Check the direction of run of the motor. When the splitter arm is not in the upper position, move the
splitter blade to the top position using the return bracket or the handles. If the splitter arm is already
at the topmost position, activate the splitting mechanism by moving the two levers down.
This moves the splitting arm downwards.
If the splitter blade does not move despite pressing the handles or the return bracket, Please check
the direction of the motor or check the connection between pump and the motor.
Never run the motor in the wrong direction of rotation! This inevitably leads to the
destruction of the pumping system, and thus, no guarantee can be claimed.
CAUTION!
Before start-up, loosen the filler plug (fig. 7).
Never forget to loosen the filler plug!
Otherwise, the air in the system is com-pressed and relaxed again and again, leading to the
destruction of the seals of the hydraulic circuit and rendering the log splitter unusable.
In this case, the seller and the manufacturer dissociate themselves from any guarantee
claims.
07

Turning on/off
Press the green button to turn on.
Press the red button to turn off.
Note: before every use, check the on/off switch unit for proper functioning by turning on and off
once.
Securing against restart in case of power outage (zero voltage trigger)
In the case a power outage, accidental disconnection of the mains plug or defective fuse, the
machine switches off automatically. To restart, press the green button on the control unit once
again.
Modifications of any kind to the machine are prohibited!
Before servicing or when the split-ting wedge gets stuck, disconnect the machine from the mains.
The machine should never be left unattended, unless it was unplugged from the mains!
SYMBOLS
Read manual before operation
Use safety footwear
Use work gloves
Wear eye protection
Use hearing protection
No trespassing
No smoking in the working area
Only the operator may stand within the operating range of the machine. Keep
non-involved persons, as well as domestic and farm animals, out of the hazard
area (minimum distance: 5m)
Keep your work space tidy! Untidiness can lead to accidents
Only the operator may stand within the operating range of the machine.
08

Caution! Switch off the engine before repair, maintenance and cleaning. Unplug
the mains plug.
Do not remove jammed trunks with your hands.
Danger of bruising and injury from sharp edges; never touch danger areas when
the cleaver is moving.
2. YOUR PRODUCT
Description
1-Wheels,
2-Inspection window,
3-Cylinder fixing part,
4-Side retaining arm,
5-Switch(3.7kw/230v/50HZ),
6-Return bracket,
7-Operation handle,
8-Splitting knife,
9-Cylinder,
10-Chain,
11-Lifting device.
09

Technical Data
Engine
Electrical motor
Input power(P1)
3.7kW
Voltage
230V~/50Hz
Motor speed
2800/min
Operating mode
S6/40%
Splitting force
10ton
Weight
169kg
Protection class
I
Cutting length
1060mm
Size of log
70-400mm
IP number
IP54
Hydraulic pressure
Max. 22MPa
Sound power level
91dB(A)
The specified values are emission levels and do not necessarily represent safe workplace values.
Although there is a correlation between emission and emission levels, it can’t be inferred with
certainty whether or not additional precautions are necessary. Factors which affect the current
emission level at the workplace include the nature of the working space, other noise sources, such
as the number of machines and other adjacent operations. The allowed working values may from
country to country. Merely, the information should enable the user to make an assessment of
hazard and risk.
Wiring diagram
10

Hydraulic diagram
Introduction of parts
Fig1
11

Fig2
Fig3
12

Fig4
Fig.5
13

Fig.6
Fig.7
14

Fig.8
Fig.9
Fig.10
15

3. ASSEMBLY
Mount axle Fig.2
Insert axle through the hole in the base of splitter (No.2).
Assemble the wheels Fig.2
Place 2 wheels (No.1) on both sides of the axle and secure it with a cotter pin (No.3)
Assemble the control handle Fig.3
Because of packing reasons you must mount two control handles yourself. You can see it on the
mounted control handle and at picture Fig.3 (with tool: 13-15 wrench)
According to the following steps:
16

Assemble the support arm Fig.6
Fix two support arms with 3 bolts M10*45+1long special bolt, and 4 nuts.(with tool:17-19 wrench)
Assemble the lifting device Fig.1
With 2 hexagonal bolts M10*25 and 2 nuts M10 to fix the support of lifting device. Then with 1
hexagonal bolts M10*55 and 1 nut M10 to connect the lifting device. Finally connect the chain.
Caution!
17

Manual handling
Transport by hand when transport, the cylinder must always be brought to the transport position.
Fig.7 (the bleed screw must be sealed tight.)
To this end, move the splitter blade with slight pressure on the support. (E.g. wooden block)
Lower the cylinder by pressing the return bracket downwards or the handles upwards, but only to
the extent that no connectors or cables are damaged.
Transport the log splitter.
Following transport, bring the log splitter to the working position, retract the support wheel and lock
the cylinder in working position.
It is prohibited to work with the log splitter in a tilted transport position.
Function test
NOTE: Before each use, perform a function test.
Action
Result
Press both handles downwards.
Splitter blade goes down-up to about 18 cm
above the base.
Press return bracket downwards or both
handles upwards.
Splitter blade moves to the selected upper
position.
Release the two handles
Splitter blade remains in the selected position.
4. OPERATION
Plan your work carefully. Pre-planning your work guarantees safety. Place the log such that it can
be easily reached. Stack the split wood at a place nearby or load it onto a truck or other means of
transportation. Place the log splitter on a firm, level surface.
If you slightly lubricate the wedge with grease before start-up, the service life of the splitter is
extended.
18

Release the air from the hydraulic system before putting the log splitter in operation.
Loosen the bleed screw of the column tank by turning a couple of times until the air can flow in and
out.
The draught of the oil tank should be detectable.
Before moving the log splitter, never forget to loosen the bleed screw (fig. 7)!
Otherwise, the air in the system is com-pressed and relaxed again and again, leading to the
destruction of the seals of the hydraulic circuit and rendering the log splitter unusable. In this case,
the seller and the manufacturer will dissociate themselves from any guarantee claims.
Switching on: Set the switch to ON position.
Switching off: Set the switch to OFF position.
Check the direction of run of the motor. When you turn on the motor, activate the splitting
mechanism by moving both levers down.
If the splitter arm does not move after the machine is turned on, Please check the direction of the
rotation of the motor immediately.
Place the log vertically on the support table, so that it lies flat on its face, and press it against the
retaining pin.
To secure it. Make sure that the wedge and support table touch the end faces of the log completely.
Never attempt to split the log at an angle. Move the splitter wedge down until the log is split.
Return the splitter wedge to the starting position by pressing the return bracket downwards or the
handles upwards.
The splitting force and speed is regulated by a 2-step system.
The lower lever is generally meant for higher speed and lower splitting pressure to split normal
wood (press both levers all the way down).
Push the control lever (2-manual operation) slightly upwards to achieve maximum splitting force
and thus, a lower splitting speed for split-ting freshly cut and hard wood.
The individual levels can be easily set up or down by slowly moving the lever.
It is prohibited to work with the log splitter in a tilted transport position.
Split the wood along the grain direction. Do not place the log to be split transversely on the log
splitter. This can be dangerous and may seriously damage the machine.
Do not remove a firmly stuck log with your hands. You should never get the help of other people to
remove firmly stuck log.
Piled up, split wood and wood chips can be dangerous. Never work in a messy work area in which
you may slip, stumble or fall.
Use of the protective sleeve
The protective sleeve is height-adjustable in different stages, depending on the timber length.
Splitting at temperatures below 5 °C, allow the machine to run idle for about five minutes so that the
hydraulic system reaches the operating temperature. Insert the log in an upright position under the
splitter blade.
Note: the splitter blade is very sharp – risk of injury!
When you press the two levers down, the splitting blade moves down and splits the wood.
Split only logs that are cut straight.
Split logs in an upright state.
19

Never split logs that are lying down or across the grain direction!
When splitting wood, wear appropriate safety gloves and safety shoes.
In case of extremely overgrown wood, split the logs from the edge.
Note: certain woods can come under severe stress and rupture suddenly during splitting.
Knock out jammed wood against the cleavage direction or by moving the splitter wedge upwards. In
this case, only press the handles upwards; do not use the return bracket. Note: risk of injury!
Stroke limiter
The stroke limiter is infinitely adjustable. For logs about 100 cm in length, set the socket at the top
of the rod and lock it with the star grip.
Bring the log splitter to working position. Fig.4
Because of packing reasons the cylinder was descended in the lowest position, so after the engine
is running, the cylinder must raise to working position.
Press two operation handles downward until the cylinder raise to the top of the machine, then
insert two shafts(2)into the holes of the machine, and lock with two R-pins (1) to secure the cylinder
on the machine.
20
Table of contents
Other Hyundai Log Splitter manuals
Popular Log Splitter manuals by other brands

Northern Tool + Equipment
Northern Tool + Equipment M11571GNEA owner's manual

Central Machinery
Central Machinery 63366 Owner's manual & safety instructions

Timberwolf
Timberwolf TW-3 Operator's manual

Hakki Pilke
Hakki Pilke 50 Easy Instructions for assembly, operation and maintenance

Troy-Bilt
Troy-Bilt TB 27 LS Operator's manual

MTD
MTD 249-610-000 owner's guide

Generac Power Systems
Generac Power Systems G10 Operator's manual

Clarke
Clarke LOGBUSTER 8 Operation & maintenance instructions

Posch
Posch HydroCombi 18 operating instructions

PowerTek
PowerTek 825 Operation & maintenance manual

Craftsman
Craftsman 247.34625 owner's manual

EINHELL
EINHELL BT-LS 44 Original operating instructions