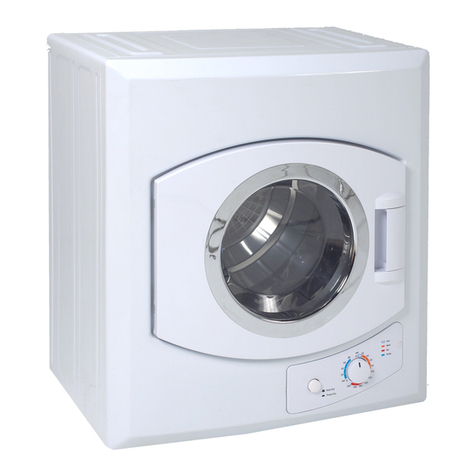
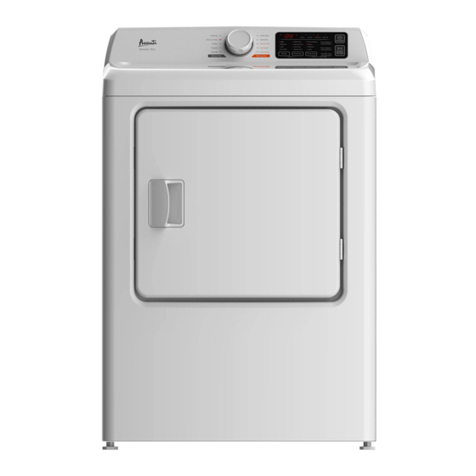
Avanti FLD40V0W User manual

Model FLD40V0W
Ventless Condensing
Clothes Dryer
INSTRUCTION MANUAL
BEFORE USE, PLEASE READ AND FOLLOW ALL SAFETY RULES AND
OPERATING INSTRUCTIONS.
Avanti has a policy of continuous improvement on its products and
reserves the right to change materials and specifications without notice.
Avanti Products LLC
3265 Meridian Pkwy # 114
Weston, FL 33331
www.avantiproducts.com

Thank you for choosing this product.
This User Manual contains important safety information and instructions on the
operation and maintenance of your appliance.
Please take the time to read this User Manual before using your appliance and keep
this book for future reference.
Icon Caption Description
WARNING Risk of serious injury or death
RISK OF ELECTRIC SHOCK Dangerous voltage
FIRE
ATTENTION Risk of injury or material damage
IMPORTANT/NOTE Information on correct operation of the system
Read the instructions.
Hot surface

EN - III
CONTENTS
Help Us Help You .............................................................................................V
1. QUICK START ..................................................................................................VI
2. SAFETY INSTRUCTIONS ................................................................................. 3
2.1. Electrical Safety............................................................................................... 3
2.2. Important Safety Instructions........................................................................... 4
2.3. Grounding Instructions .................................................................................... 5
2.4. Children's Safety ............................................................................................. 6
2.5. Product Safety................................................................................................. 7
2.6. Correct Use ..................................................................................................... 8
2.7. Installing On Top Of a Washing Machine......................................................... 9
3. INSTALLATION INSTRUCTIONS.................................................................... 11
3.1. Connection to Water Outlet (with optional drain hose) .................................. 11
3.1.1. Connecting the Water Discharge Hose ...................................................... 12
3.2. Electrical Connection..................................................................................... 12
3.3. Electric Installation......................................................................................... 12
3.4. Electrical Connection..................................................................................... 12
3.5. 4-Wire Power Supply Cord Connection......................................................... 13
3.6. 3-Wire Power Supply Cord Connection......................................................... 14
3.7. Under Counter Installation............................................................................. 16
3.8. Adjusting the Adjustable Feet ........................................................................ 16
3.9. Positioning the Machine on the Ground ........................................................ 16
4. OPERATING INSTRUCTIONS ........................................................................ 17
4.1. OVERVIEW ................................................................................................... 17
4.2. PREPARING THE LAUNDRY ....................................................................... 18
4.2.1. Sorting the Laundry to be Dried.................................................................. 18
4.3. Preparing the Laundry to be Dried ................................................................ 19
4.4. Load Capacity................................................................................................ 19
4.5. USING THE TUMBLE DRYER...................................................................... 20
4.6. Control Panel................................................................................................. 20
4.7. Program Selection and Consumption Table .................................................. 21
4.7.1. Auxiliary Functions...................................................................................... 22
4.7.2. Starting the Program .................................................................................. 23
4.7.3. Selection Stand By .................................................................................... 24
4.8. Drum Light Information.................................................................................. 24

EN - IV
5. CLEANING AND CARE................................................................................... 26
5.1. Cleaning the Lint Filter................................................................................... 26
5.2. Emptying the Water Tank............................................................................... 26
5.3. Cleaning the Condenser................................................................................ 27
5.4. Cleaning the Humidity Sensor....................................................................... 27
5.5. Cleaning the Inner Surface of the Loading Door ........................................... 28
6. TECHNICAL SPECIFICATIONS...................................................................... 29
7. TROUBLESHOOTING..................................................................................... 30
8. AUTOMATIC FAULT WARNINGS AND WHAT TO DO................................... 32
9. PRODUCT WARRANTY.................................................................................. 33
10. ENVIRONMENTAL PROTECTION AND PACKAGING INFORMATION ...... 34
10.1. Packaging Information................................................................................. 34
10.2. Energy Efficiency......................................................................................... 34

EN - V
HELP US HELP YOU...
Read this guide carefully.
It is intended to help you operate and maintain your new
appliance properly.
Keep it handy to answer your questions. If you don’t
understand something or need more help, please call:
Avanti Customer Service
800-220-5570
Keep proof of original purchase date (such as your sales
slip) with this guide to establish the warranty period.
Write down the model and serial numbers.
rear outside wall of the appliance.
Please write these number here:
----------------------------------
Date of Purchase
----------------------------------
Model Number
----------------------------------
Serial Number
Use these numbers in any correspondence
or service calls concerning your appliance.
If you received a damaged appliance, immediately
contactthedealer(orbuilder)thatsoldyoutheappliance.
Save time and money. Before you call for service,
check the Troubleshooting Guide. It lists causes of
minor operating problems that you can correct yourself.
CAUTION:
THIS APPLIANCE IS NOT DESIGNED FOR THE
STORAGE OF MEDICINE OR OTHER MEDICAL
PRODUCTS.
IF YOU NEED SERVICE
We’re proud of our service and want you to be pleased. If
for some reason you are not happy with the service you
receive, here are some steps to follow for further assistance.
FIRST, contact the people who serviced your
appliance. Explain why you are not pleased.
In most cases, this will solve the problem.
NEXT, if you are still not pleased, write all the details,
including your telephone number, and send it to:
Customer Service
Avanti Products
3265 Meridian Pkwy # 114
Weston, FL 33331 USA

EN - VI
1. QUICK START
Please check the user manual for detailed information.
1Separate your clothes according to their types, place into the
machine and close the door.
2Select the suitable program for your laundry by rotating the adjustment knob.
3You can select additional functions for drying.
You can run the program by pushing Start / Pause button.
4After the drying program is completed, the water tank must be
emptied.
*** Please check the user manual for detailed information.
5After the drying program is completed, the filter must be cleaned.
*** Please check the user manual for detailed information.

EN - 1
PRIMARY CONSIDERATIONS
• This appliance can be used by children aged from
8 years and above and persons with reduced
physical, sensory or mental capabilities or lack
of experience and knowledge if they have been
given supervision or instruction concerning use of
the appliance in a safe way and understand the
hazards involved. Children must not play with the
appliance. Cleaning and user maintenance must not
be made by children without supervision.
• Children of less than 3 years should be kept away
unless continuously supervised.
• This tumble dryer is intended only for household
and indoor use. The warranty will be void in case of
commercial use.
• Use this product only for laundry with a label that
indicates it is suitable for drying.
• The manufacturer will not accept responsibility for
damages resulting from incorrect use or transport.
•
ventilation openings.
• Installation and repair of the machine should
only be made by an authorised repair agent.
The manufacturer cannot be held responsible for
damages resulting from un-authorised repairs.
WARNING: Never spray or pour water onto the
dryer to wash it! There is risk of electric shock!
• Leave at least 3 cm of space between the side and
rear walls of the product and above if you plan on
placing your appliance under a worktop.
• Assembly / disassembly for under-counter
installation if neccessary must be done by an
authorised service agent.
• Before installation, check the product for visible
damage. Never install or operate a damaged
product.

EN - 2
• Keep pets away from the dryer.
• Fabric softeners, or similar products, should
be used in accordance with the manufacturers
instructions.
• Remove all objects from pockets such as lighters
and matches.
• The appliance must not be installed behind a
lockable door, a sliding door or a door with a hinge
on the opposite side to that of the tumble dryer, if it
prevents the door from being fully opened.
WARNING:
• Do not put any living thing in your machine for any
purpose.
• Condensation water which accumulates in the
water tank, may contain external particles such as
detergent residue, laundry thread, and lint. For this
reason, the water accumulated in the water tank
should not be used for any purpose.
• Opening the door before the cooling process is
• Do not take the laundry out of the machine before
the program ends.
•
performance.

EN - 3
2. SAFETY INSTRUCTIONS
This section contains safety instructions that will help
protect you from risk of personal injury or property
damage. Failure to follow these instructions will void
any warranty.
2.1. Electrical Safety
• The appliance must not be supplied through an
external switching device, such as a timer, or
connected to a circuit that is regularly switched on
• Do not touch the power plug with wet hands. Always
pull the plug to unplug the product, otherwise, there
will be risk of an electric shock.
• Connect the dryer to a grounded socket with fuse
protection. Have the earth connection installed by
responsible for damages/losses resulting from using
the dryer without an earth connection as required
by local regulations.
• The voltage and the allowable fuse protection are
indicated on the type plate.(For the type plate,
please see Overview)
• Voltage and frequency values indicated on the
type plate must be equal to the mains voltage and
frequency value in your house.
• Unplug the dryer when it is not used for an
extended period, and before installation,
maintenance, cleaning and repair, otherwise, the
dryer may get damaged.
• The plug socket must be freely accessible at all
times after installation.

EN - 4
give you an electric shock. When damaged it must
personnel.
use extension cords, multi sockets or adapters to
connect the dryer to mains power.
2.2. Important Safety Instructions
WARNING -
or injury to persons when using your appliance, follow
basic precautions, including the following:
• Read all instructions before using the appliance.
• Do not dry articles that have been previously
cleaned in, washed in, soaked in, or spotted with
that could ignite or explode.
• Do not allow children to play on or in the appliance.
Close supervision of children is necessary when the
appliance is used near children.
• Before the appliance is removed from service
or discarded, remove the door to the drying
compartment.
• Do not reach into the appliance if the drum is
moving.
• Do not install or store this appliance where it will be
exposed to the weather.
• Do not tamper with controls.
• Do not repair or replace any part of the appliance
recommended in the user-maintenance instructions
or in published user-repair instructions that you
understand and have the skills to carry out.

EN - 5
• Do not use fabric softeners or products to eliminate
static unless recommended by the manufacturer of
the fabric softener or product.
• Do not use heat to dry articles containing foam
rubber or similarly textured rubber-like materials.
• Clean lint screen before or after each load.
• Keep area around the exhaust opening and
adjacent surrounding areas free from the
accumulation of lint, dust, and dirt.
• The interior of the appliance and exhaust duct
personnel.
• Do not place items exposed to cooking oils in your
dryer. Items contaminated with cooking oils may
contribute to a chemical reaction that could cause
cycle occurs without heat (cool down period). Avoid
stopping a tumble dryer before the end of the drying
cycle unless all items are quickly removed and
spread out so that the heat is dissipated.
SAVE THESE INSTRUCTIONS
CALIFORNIA WARNING:This product can expose
you to chemicals including Diisononyl phthalate
(DINP) which is known to the State of California
to cause cancer. For more information go to www.
P65Warnings.ca.gov
2.3. Grounding Instructions
• This appliance must be grounded. In the event of
malfunction or breakdown, grounding will reduce
the risk of electric shock by providing a path of

EN - 6
least resistance for electric current. This appliance
is equipped with a cord having an equipment-
grounding conductor and a grounding plug. The
plug must be plugged into an appropriate outlet that
is properly installed and grounded in accordance
with all local codes and ordinances.
• WARNING: Improper connection of the
equipment-grounding conductor can result in a risk
or service representative or personnel if you are
in doubt as to whether the appliance is properly
grounded.
• Do not modify the plug provided with the appliance:
2.4. Children's Safety
• This appliance is not intended for use by persons
(including children) with reduced physical, sensory
or mental capabilities, or lack of experience
and knowledge, unless they have been given
supervision or instruction concerning use of the
appliance by a person responsible for their safety.
• This appliance can be used by children aged from
8 years and above and persons with reduced
physical, sensory or mental capabilities or lack
of experience and knowledge if they have been
given supervision or instruction concerning use of
the appliance in a safe way and understand the
hazards involved. Children must not play with the
appliance. Cleaning and user maintenance must not
be made by children without supervision.
• Do not leave children unattended near the machine.
• Children might lock themselves in the machine
resulting in risk of death.
• Do not allow children to touch the glass door during
operation. The surface becomes extremely hot and

EN - 7
may cause skin damage.
• Keep packaging material away from children.
• Poisoning and irritation may occur if detergent and
cleaning materials are consumed or come into
contact with the skin and eyes.
• Keep cleaning materials out of the reach of children
Electrical products are dangerous for children.
• Keep children away from the product while it is
running.
• To prevent children from interrupting the dryer cycle,
you can use the child lock to avoid any changes in
the running program.
• Do not allow children to sit/climb on or climb inside
the product.
2.5. Product Safety
Due to risk of re, the following laundry items
and products should NEVER be dried in the dryer:
• Do not dry unwashed items in the tumble dryer.
• Items that have been soiled with substances such
as cooking oil, acetone, alcohol, petrol, kerosene,
spot removers, turpentine, waxes and wax
removers should be washed in hot water with an
extra amount of detergent before being dried in the
tumble dryer.
• Cleaning cloths and mats that have residues
patrol, stain remover, turpentine, candle, wax, wax
remover or chemicals.
• Laundry that has residues of hair sprays, nail polish
remover and similar substances.
• Laundry on which industrial chemicals have been
used for cleaning (such as chemical cleaning).
• Laundry that has any kind of foam, sponge, rubber
or rubber-like parts or accessories. These include
latex foam sponge, shower caps, waterproof

EN - 8
•
jackets). Foam protruding from these items might
• Operating the dryer in environments that contain
ATTENTION: Underwear that contains metal
reinforcements should not be put in the dryer. The
dryer may be damaged if metal reinforcements come
2.6. Correct Use
ATTENTION: Never stop a tumble dryer before
the end of the drying cycle unless all items are quickly
removed and spread out so that the heat is dissipated.
ATTENTION: Make sure that pets do not enter
the dryer. Check the inside of the dryer before
using it.
ATTENTION: Super heating of clothes inside of
the dryer can occur if you cancel the program or in the
event of a power failure whilst the dryer is running.
This concentration of heat can cause self-combustion
so always activate the Refresh program to cool down
or quickly remove all laundry from the dryer in order to
hang them up and dissipate the heat.
• Use the dryer only for household drying and to dry
fabrics with a label that indicates they are suitable
for drying. All other uses are out of the scope of
intended use and are prohibited.
• The warranty will be void in case of any commercial
use.
• This appliance is designed to be used inside
domestic residences only, and should be placed on
a straight and stable surface.

EN - 9
• Do not lean against or sit on the door of the dryer.
The dryer may tip over.
• To maintain a temperature that will not harm the
laundry (e.g. to prevent the laundry from catching
process. After this, the program ends. At the end of
the program, always remove the laundry promptly.
ATTENTION: Never use the dryer without a lint
• after each use as
indicated in Cleaning the Lint Filter.
•
process.
• Lint accumulation must not to be allowed around
the tumble dryer (not applicable for appliances
intended to be vented to the exterior of the building)
IMPORTANT: The clearance between the dryer
intake cannot be ensured for the machine.
• Do not install the dryer in rooms where there is risk
the dryers performance.Condensation that freezes
in the pump and hose may cause damage.
2.7. Installing On Top Of a Washing Machine
ATTENTION: A washing machine cannot be placed
on the dryer. Pay attention to the warnings below
when installing the dryer on a washing machine.
ATTENTION: The dryer can only be placed on
washing machines that have same capacity and
above.

EN - 10
•
part must be used between the two products. The
Service Provider.
• When the dryer is placed on the washing machine,
the total weight of these products may reach almost
330 lbs (when loaded). Place the products on a
Appropriate Installation Table for Washing Machine and Tumble Dryer
Tumble Dryer
(Depth)
Washing Machine
37-41 cm
14.5-16.1 inch
42-45 cm
16-17.7 inch
46-49 cm
18.1-19.2 inch
50-56 cm
19.6- 22 inch
57-63 cm
22.4-24.8 inch
52,5 cm / 20.6 inch X
56 cm / 22 inch X X
61 cm / 24 inch X X X
64 cm / 25.1 inch X X X X
(For the depth information, please see 7. Technical Specications)
In order to put the dryer machine onto the washing
machine, a special stacking kit is required as an
optional extra. Please contact customer service to
acquire. The assembly instruction will be served
together with the stacking kit.
CE Declaration of conformity
We declare that our products meet the applicable European Directives, Decisions and
Regulations and the requirements listed in the standards referenced.
Disposing the Old Product
The symbol on the product or on its packaging indicates that this product
may not be treated as household waste. Instead it shall be handed over to
the applicable collection point for the recycling of electrical and electronic
equipment. By ensuring this product is disposed of correctly, you will help
prevent potential negative consequences for the environment and human
health, which could otherwise be caused by inappropriate waste handling of
this product. For more detailed information about recycling of this product,
or the shop where you purchased the product.

EN - 11
3. INSTALLATION INSTRUCTIONS
Install the clothes dryer according to the
manufacturer’s instructions and local codes.
WARNING Risk of Fire”
“Clothes dryer installation must be
(foil type) duct is installed, it must be of a
manufacturer as suitable for use with clothes
dryers. Flexible venting materials are known
to collapse, be easily crushed, and trap lint.
These conditions will obstruct clothes dryer
“To reduce the risk of severe injury or death,
follow all installation instructions.”
“Save these instructions.”
• Before contacting the local Authorised
Service Provider for the installation
of the dryer, check the information in
the user manual to make sure that the
electrical installation and water outlet is
electrician and a plumber to have the
necessary adjustments made.
• It is the customer’s responsibility to
prepare the dryer’s installation place, as
well as the electricity and waste water
installation. Before installation, check
the dryer for damage. If damaged, do
not have it installed. Damaged products
may endanger your health.
•
surface.
• Run the dryer in a dust-free environment
where the air ventilation is good.
• The clearance between the dryer and
should not be reduced with
objects such as carpets, wood or tape.
• Do not block the ventilation grills
found on the plinth of the tumble dryer.
• The appliance must not be installed
behind a lockable door, a sliding door
or a door with a hinge on the opposite
side of the tumble dryer, in such a way
that blocks the full opening of the tumble
dryer door.
• Once the dryer has been installed, the
connections must remain stable. When
installing the dryer, make sure that the
rear surface is not leaning on anything
(e.g. tap, socket).
• The operating temperature of the dryer
is +5°C to +35°C. If operated out of this
temperature range, the performance of
the product will be damaged.
• Be careful when carrying the product
since it is heavy. Always wear safety
gloves.
• Always install the product should be
placed against a wall.
• The rear surface of the product should
be placed against the wall.
• When the product is placed on a stable
surface, use a water level to check if it
is fully stable. If not, adjust the feet until
it becomes steady. Repeat this process
every time you relocate the product.
• Do not place the dryer onto the power
cable.
• Install the clothes dryer according to
the manufacturer’s instructions and
local codes
3.1. Connection to Water Outlet (with
optional drain hose)
In products with a condenser unit, water
accumulates in the water tank during
the drying process. You must empty the
accumulated water after each drying
process. Instead of periodically emptying
the water tank, as an option, you can also
use a water drain hose to directly drain the
water outside.

EN - 12
3.1.1. Connecting the Water Discharge
Hose
1. Pull and take out the end of the hose at the
back of the dryer. Do not use any tools to
take out the hose.
2.
3.
.
ATTENTION: The hose must be
connected in a manner that it cannot be
displaced. If the hose comes out during
your house.
IMPORTANT: The water discharge
house must be installed at a height of 80
cm maximum.
IMPORTANT: The water discharge
hose must not be bent between the outlet
and the product, folded or stepped over.
3.2. Electrical Connection
ATTENTION:
electric shock.
• Your dryer is set to 208-240 V and 60
Hz.
• The mains cable of the dryer is
equipped with a special plug. This
plug must be connected to an earthed
socket protected by a fuse of 16
Amperes as indicated on the type plate.
The fuse current rating of the power
line where the outlet is connected must
electrician if you do not have such an
outlet or fuse.
• Our company cannot be held
responsible for damages resulting from
usage without earthing.
2
1
3
IMPORTANT: Operating your machine
at low voltage values will shorten the
service life and decrease the performance
of your machine.
3.3. Electric Installation
• The clothes dryer installation must be
• Install the appliance according to the
manufacturer’s instructions and local codes.
• To reduce the risk of severe injury or
death, follow all installation instruc¬tions.
• If local codes do not permit the 3-wire
power supply cord conenction, only 4-wire
power supply cord must be used.
• Do not use an extension cord.
3.4. Electrical Connection
Before you start, select your receptacle
type.
• If you have 4-wire receptacle, you must
use UL listed NEMA 14-30P 240V / 30A
4-wire supply cord with ring terminals
or spade terminals with upturned ends.
Supply cord must be type SRDT and at
least 5 ft. length.
• If you have 3-wire receptacle, you must
use UL listed NEMA 10-30P 240V / 30A
3 wire supply cord with ring terminals
or spade terminals with upturned ends.
Supply cord must be type SRDT and at
least 5 ft. length.

EN - 13
3.5. 4-Wire Power Supply Cord Connection
WARNING
•Before the connection, disconnect the power.
•Use UL listed 240V / 30A power supply cord.
Your dryer was equipped with strain relief. Use this strain relief in connection.
1. Remove the screw and terminal box cover.
2. Remove the clamp of the strain relief which has already attached on your machine.
Then pass the clamp through the supply cord and put the supply cord through the main
body of the strain relief. Be sure that wire insulation of the cord inside the strain relief.
3. Remove the terminal block screws which are indicated by A and grounding screw
which is indicated by B. Nuetral ground conductor (central terminal) is provided in the dryer
as a closed loop.

EN - 14
4. Connect the ground conductor (green wire) under the terminal B. Then connect the
neutral wire (white wire) to center of the terminal. Nuetral ground conductor of the dryer
should remain on the center terminal. Be sure that neutral ground conductor of dryer and
neutral wire of supply cord connected to center terminal together. Tighten all screws.
5. Connect remaining wires under the outer terminals of the block and tighten all screws.
After every connection is completed, tighten strain relief clamp in order to secure the
supply cord. Finally, cover up the box cover.
3.6. 3-Wire Power Supply Cord Connection
WARNING
•Before the connection, disconnect the power.
•Use UL listed 240V / 30A power supply cord.
Your dryer was equipped with strain relief. Use this strain relief in connection.
1. Remove the screw and terminal box cover.
2. Remove the clamp of the strain relief which has already attached on your machine.
Then pass the clamp through the supply cord and put the supply cord through the main
body of the strain relief. Be sure that wire insulation of the cord inside the strain relief.
Table of contents
Other Avanti Dryer manuals
Popular Dryer manuals by other brands

Asko
Asko T754CW operating instructions

Electrolux
Electrolux EWMED70J IW Guide d’utilisation et d’entretien

Asko
Asko T2082H Instructions for use

Hotpoint
Hotpoint Ultima Condenser Tumble Dryer User handbook

AEG
AEG 7000 Series user manual

Blomberg
Blomberg DV 17540 NBL00 Owner's guide & installation instructions