7
12.HI EQ
This control gives you up to
15 dB boost or cut above 12kHz,
and it is flat (no boost or cut) at
the detent,Use it to add sizzle to
cymbals,and an overall sense of
transparency,or edge to
keyboards,vocals,guitar and bacon
frying.Turn it down a little to reduce sibilance,or to
hide tape hiss.
13.MID EQ
Short for “midrange,” this
knob provides 15 dB of boost
or cut, centered at 2.5 kHz,also
flat at the center detent.
Midrange EQ is often thought
of as the frequencies that define
any particular sound are almost
always found in this range.You can create many
interesting and useful EQ changes by turning this
knob down as well as up.
14.LOW EQ
This control gives you up to 15
dB boost or cut below 80 Hz.The
circuit is flat at the center detent
position.This frequency
represents the punch in bass
drums,bass guitar,fat synth
patches,and some really serious
male singers.
Used in conjunction with the
low cut switch,you can boost the
low EQ without injecting a ton
of subsonic debris into the mix.
12
13
14
15
16
17
19
18
8
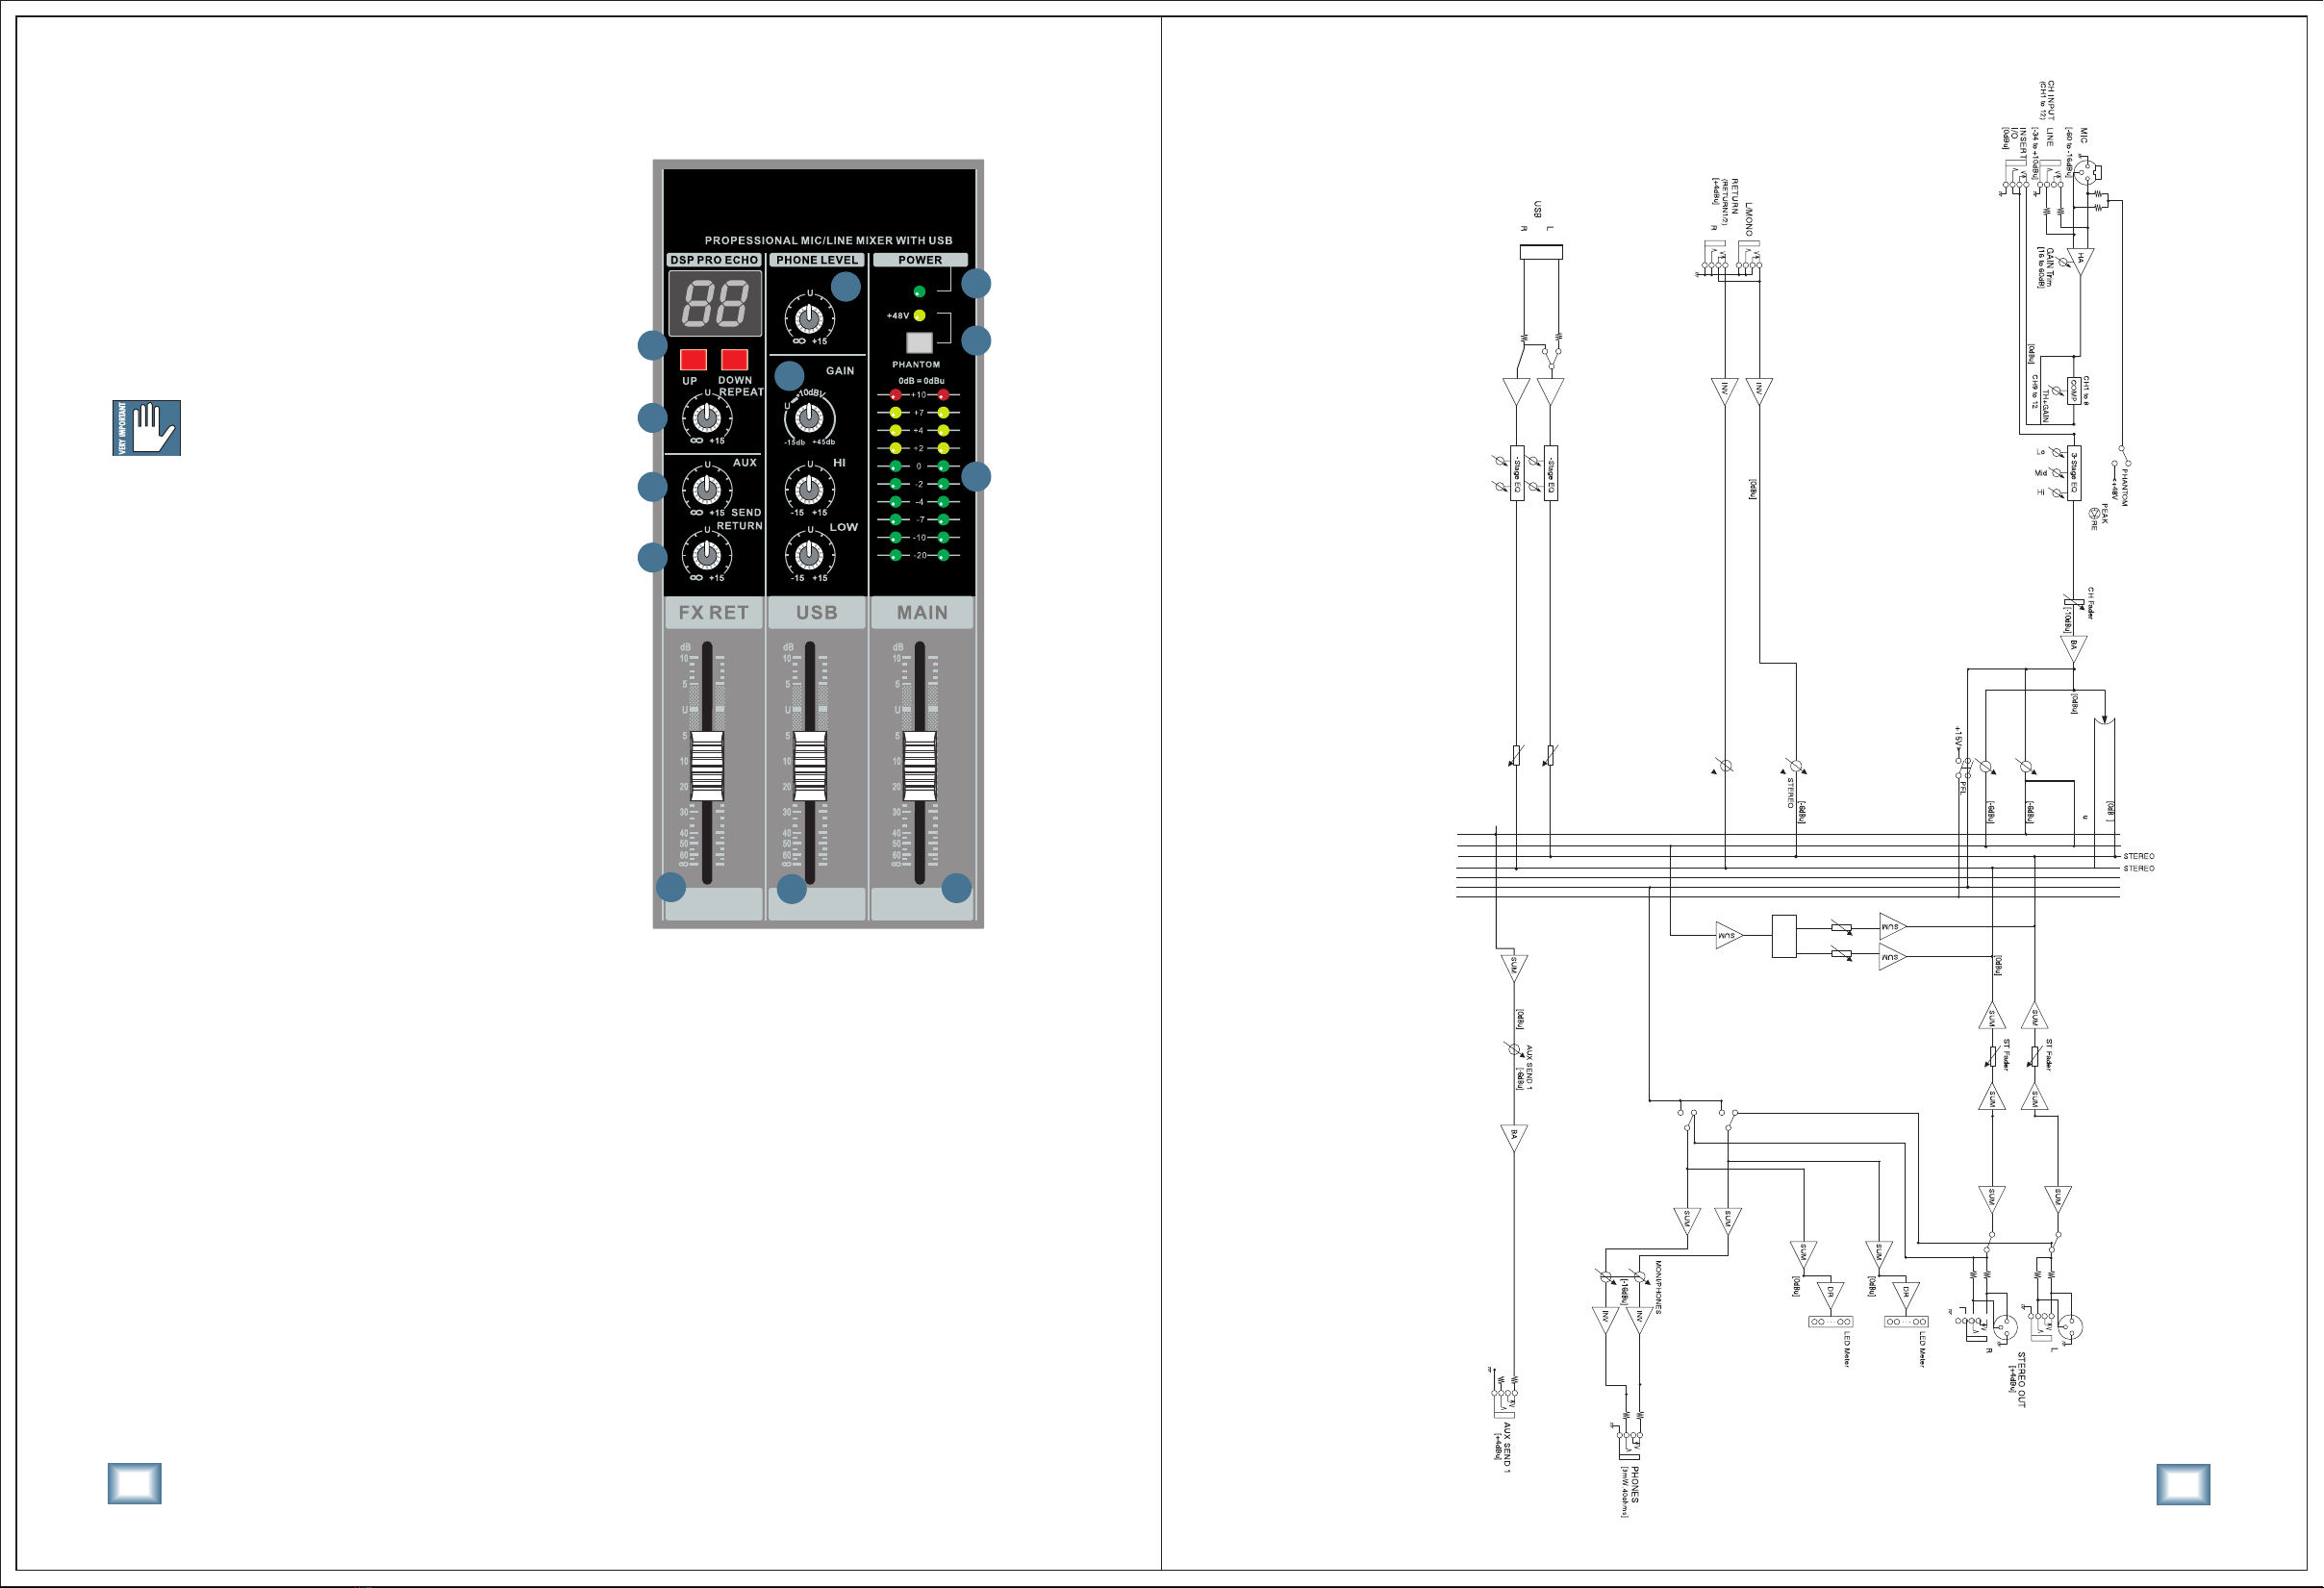
16.AUX
17.PAN
These knobs adjust the amout of channel signal sent
to the left versus the right outputs.On mono channels
these controls act as pan pots.On hybrid and stereo
channels,they work like the balance control on a home
stereo.They do not affect the aux mon or FX mixes.
19.CHANNEL FADER
These faders control the channel’s level from off,
to unity gain,on up to 10 dB of additional gain.The
mono channels have mono faders,and the hybrid and
stereo channels use stereo faders.
With the gain control [16] set correctly,the faders
should be set around unity gain (U).
12
13
14
15
16
17
19
15.AUX / FX
18
18.PEAK(PEAK LEVEL INDICATOR)
A red LED indicates a signal level at the insert return point,
pre master fader,It illuminates at approximately 5dB below
clipping.
This switch is used to select whethev the AUX
signal assign to the FX bus or the AUX send bus.
These tap a portion of each channel’s signal out
to an effects processor or for stage monitoring.
The AUX send levels are contrilled by the channel’s
AUX 1-3 knobs,and by the AUX SEND MASTERS knobs.
Master Controls Description
21.PHANTOM POWER SWITCH
If the microphones need phantom power,press in
this switch to add phantom power to all the XLR
microphone inputs of the mixer.This lets the mixer
send low-current DC voltage to the mic’s electronics
through the same wires that carry audio.The LED
will turn on as a reminder that phantom power is
engaged.
20.POWER LED
This LED comes on when the mixer is plugged
into the AC mains supply,and the rear panel power
switch [10] is on.
If the LED does not turn on,make sure the AC
power is live,both ends of the power cord are
correctly inserted,the electricity bill has been paid
and the lights in town are on.
K