AVE RT-195- G User manual

RT-195- G
MOBILE VIDEO CASSETTE RECORDER
USER GUIDE
(NTSC & PAL)
OPERATION MANUAL
VHS

CAUTION!
RISK OF ELECTRICAL SHOCK!
DO NOT OPEN!
CAUTION! TO PREVENT ELECTRIC SHOCK, DO NOT
REMOVE COVER. NO USER SERVICEABLE PARTS
INSIDE. REFER SERVICING TO QUALIFIED PERSONNEL.
WARNING!
THIS EQUIPMENT GENERATES, USES, AND CAN RADIATE RADIO FREQUENCY AND IF
NOT INSTALLED AND USED IN ACCORDANCE WITH THE INSTRUCTIONS MANUAL, MAY
CAUSE INTERFERENCE TO RADIO COMMUNICATIONS. IT HAS BEEN TESTED AND FOUND
TO COMPLY WITH THE LIMITS FOR A CLASS A COMPUTING DEVICE PURSUANT TO
SUBPART J OF PART 15 FCC RULES, WHICH ARE DESIGNED TO PROVIDE REASONABLE
PROTECTION AGAINST SUCH INTERFERENCE WHEN OPERATED IN A COMMERCIAL
ENVIRONMENT.
OPERATION OF THIS EQUIPMENT IN A RESIDENTIAL AREA IS LIKELY TO CAUSE
INTERFERENCE IN WHICH CASE THE USER AT HIS OWN EXPENSE WILL BE REQUIRED
TO TAKE WHATEVER MEASURES MAY BE REQUIRED TO CORRECT THE INTERFERENCE.
WARNING: TO PREVENT FIRE OR ELECTRIC SHOCK, DO
NOT EXPOSE THIS APPLIANCE TO RAIN OR MOISTURE!
Copyright (c)1999
TransAmerican International, Inc.

4

5
CONTENTS
1. INTRODUCTION.............................................................................................................. 6
2. FEATURES...................................................................................................................... 7
3. SPECIFICATIONS ........................................................................................................... 8
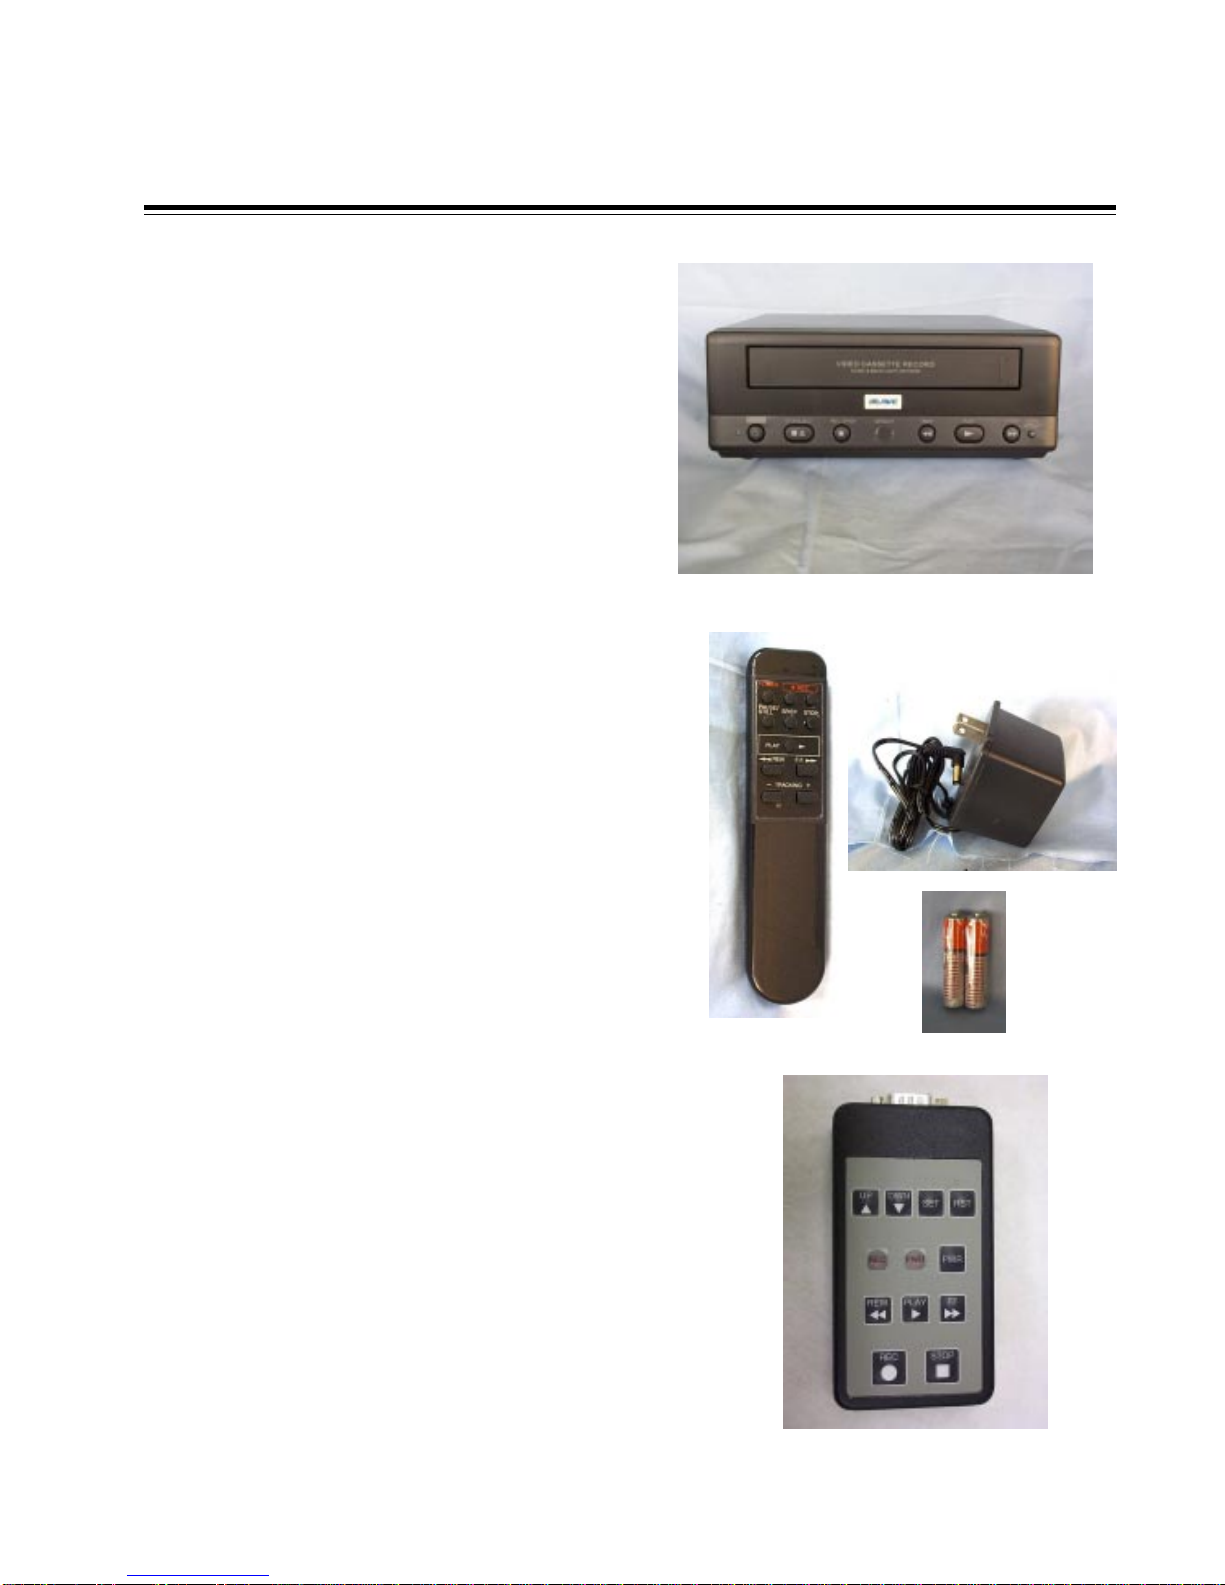
4. ACCESSORIES ............................................................................................................... 9
5. MENU LEGEND............................................................................................................. 10
6. FRONT PANEL.............................................................................................................. 11
7. BACK PANEL................................................................................................................ 13
8. REMOTE CONTROL ..................................................................................................... 15
9. WIRED REMOTE ........................................................................................................... 17
10. BASIC OPERATION.................................................................................................... 19
11. PROGRAMMING ......................................................................................................... 20
11.1 RT-195-G On-screen Programming ........................................................................ 20
12 FUNCTION SETTINGS................................................................................................. 21
12.1 Time/Date ..................................................................................................................21
12.2 Titler .......................................................................................................................... 21
12.3 RECORD SETTING ................................................................................................... 22
Recycle Record ................................................................................................................ 22
Power-Up Record ............................................................................................................. 22
Alarm Record Dwell ......................................................................................................... 22
Alarm-In Mode .................................................................................................................. 23
Tape Speed ....................................................................................................................... 24
Maximum Recording/Playback Time .............................................................................. 24
12.4 DISPLAY SETTING ................................................................................................... 25
Display Format ................................................................................................................. 25
Horizontal Position........................................................................................................... 25
Vertical Position ...............................................................................................................25
Gray Scale......................................................................................................................... 25
VCR Status........................................................................................................................ 26
AVE’s LIMITED EQUIPMENT WARRANTY for The RT-195 NTSC or PAL Models .... 28

6
1. INTRODUCTION
Thank you for purchasing an AVE Event Recorder. You have made a wise investment
by choosing the latest addition to our Mobile VCR product line. This RT-195-G is an eco-
nomical, 12VDC event recorder with interactive on-screen programming. All on screen pro-
gramming is entered via the wireless IR or wired remote control included with the VCR. This
eliminates push-button programming for VCRs mounted in permanent enclosures or hard to
reach areas. An unobstructed line of sight to the front of VCR is all that is necessary for all
programming. An on-screen Alarm counter allows instant verification of alarm occurrence
since the last reset. The EOT output is also available for notifying the user when the tape
needs replacement.

7
2. FEATURES
•EOT End of Tape Output
•Alarm Input Programmable (Normally Open or Normally Closed)
•Time and Date On-Screen
•12 hr/24hr Mode (Standard AM/PM and European time)
•Universal Date Format Programmable (DD/MM/YY, MM/DD/YY or YY/MM/DD)
•20 Character Title
•Recycle Record On/Off
•Power up Record On/Off
•The RT-195 can record
•NTSC: T-120 - SP 2 Hrs / EP 6 Hrs T-160 - SP 4 Hrs / EP 8 Hrs
•PAL: E-180 - SP 3 Hrs / LP 6 Hrs E-240 - SP 4 Hrs / LP 8 Hrs
•Alarm Dwell Record 15 Sec. - 60 Min.
•Display Settings:
•Horizontal Position
•Vertical Position
•Character Gray Scale
•Character Gray Border
•VCR Status On-Screen Display Programmable On/Off
•IR Remote or Wired Remote On Screen programing
•Tape Speed Selection (SP/EP) in NTSC and (SP/LP) in PAL.

8
3. SPECIFICATIONS
Description Specification
Video Input 1 P-P 75 ohm Terminated
Video Output 1 V P-P into 75 ohm Terminated, 2 V P-P
unterminatted
Horizontal Resolution 220 lines B&W and Color
Video S/N 42 dB
Audio Output -5 dBm
Audio S/N 38 dB
Audio Response 150Hz-8Khz
Operation Temperature -5 Deg °C to 40 Deg °C
Power Draw 0.7 Amp
Voltage 12 to 14 VDC
Dimensions 250W X 94H X 260D mm
Accessories IR wireless remote, Wired Remote, Car Cord,
batteries, 12VDC Adapter
Alarm Input Hi-Z or High Impedance
Normally Open Mode - closure to ground trig
gers alarm mode. Normally Closed Mode must
be shorted and when opened triggers alarm.
EOT End of Tape Output Open Collector, Normally Open
Imax=20ma@ 12 VDC max

9
4. ACCESSORIES
(1) RT-195-G vcr
(2).Remote control
(3). 2 AAA Battried
(4). 110 VAC Adapter to 12 VDC
(5). Wired Remote control

10
5. MENU LEGEND
Set Time / Date
Time/Date
T/D Display ON [OFF]
Time Format 12 Hour [24 Hour]
Date Format MM/DD/YY [DD/MM/YY, YY/MM/DD]
Set Time/Date
Reset Time/Date
Exit
Titler
Record Setting
Recording Setting
Recycle Rec OFF [ON]
Power-up Record OFF [ON]
Alarm Rec Dwell 1 min
Alarm-In mode NO[NC]
Tape Speed EP [SP]
Exit
Display Setting
Screen Setting
Display Format BOTTOM [TOP]
Horizontal Position
Vertical Position
Gray Scale/Background
VCR Status ON [OFF]
Exit
Exit

11
CASSETTE COMPARTMENT
Insert the VHS cassette into this compartment to load the tape.
POWER
DONOT USE THIS BUTTON. VCR power is controlled by the display microprocessor.
The VCR will automatically power up when 12 VDC is applied. A red light on this button
iindicate that VCR’s power is ON.
STOP/EJECT
To stop the tape or eject a stopped tape. A green light on this button indicate that cas-
sette is in the VCR.
REC/SPEED
This button can also be used to start recording manually.
A dim Red light indicate that the VCR speed is on SP mode. Green light indicate that
VCR is in LP/EP mode. Orange light indicate that the VCR is recording in LP mode and a
dark red light indicate that the VCR is recording in SP mode. See programming section to
set the speed of VCR.
6. FRONT PANEL

12
SENSOR
This sensor receives the infrared signal from the remote control.
REWIND
Use this button to rewind the tape in the stop mode or to perform a reverse picture search
in the play mode. A green light indicate that the VCR is rewinding the tape.
PLAY
Use this button to start the play back mode. A green light on this button indicate that the
VCR is in the Play back mode.
FAST FORWARD
Use this button to fast forward the tape from stop mode or to perform a forward picture
search during play back. A green light on this button indicate that VCR is fast forwarding
the tape.
AUTO REPEAT
When the tape ends and auto repeat is on then the VCR automatically starts rewinding the
tape and start replay. A red light on this button indicate that AUTO REPEAT is ON. The
tape will auto rewind and play again indefinitely while in this mode.

13
Power
The RT-195 G takes 12-14 VDC adaptor that connects to the rear of the VCR via the DC
coax jack.
Audio Output
Connect the Audio output of the VCR to the audio input of the monitor.
Video Output
Connect Video output of the VCR to the Video input of the monitor.
Audio Input
Connect audio output from the audio services to the Audio input of the VCR.
Video Input
Connect video output of the camera or other video source to video input of the VCR.
7. BACK PANEL

14
Pin Out for DB-9Pin Out for DB-9 Female
P3-Pin Terminal Block
EOT GND ALM REC
RESET
PROG3 IN
PROG 2 IN
PROG 1 IN
REC OUT
GND
IR RMT IN
PWR OUT
12 VDC SW

15
8. REMOTE CONTROL
POWER
Don’t use this button. VCR power is controlled
by the internal microprocessor. The VCR will
automatically power up when 12 VDC is applied
to the VCR.
REC
Use combination of these two buttons pressed
simultanously to manually start recording.
PAUSE/STILL
Press during the recording to pause recording.
Press during the playback to freeze picture.
Caution: If this button is held for 6 seconds then
it will master reset the VCR and clear all the
programming to factory deafult.
SP/EP
Don’t use this button. Recording speed can
only be set in the on-screen programming mode.
STOP
Press this button to stop a running tape. Alter-
natively press and hold that button for 3 to 5
seconds to access in the programming mode.

16
PLAY
Press this button to start the play back mode.
REW
To rewind the tape during the stop mode and to reverse picture search in play back mode.
FAST FORWARD
To Fast Forward the tape during the stop mode and forward picture search in the play back
mode. In programming mode use this button to access the menu selection.
TRACKING
Use (+) or (-) button to manually adjust the tracking of the picture. In the programming
mode use these buttons to move the cursor upward and downward.

17
9. WIRED REMOTE
STOP
REC
REW PLAY FF
PWR
UP DOWN
SET RST
RECPWR
Wired remote can also use in place of IR remote to allow simple changing of display
setting as well as the on screen programing of the VCR. Follow the important programing
steps to change the display settings. The Rec,Stop, Rew, Play, FF, and PWR buttons do
the same function as describe in the front pannel control section of this manul.
Changing the Gray scale
Down Up Set Reset
1) Press and hold the Down button
2) Press and release the Reset button
3) Release the Down button
4) Press Down or Up to select the Gray scale
5) When choice is made, press and release the Reset button

18
Changing the Horizontal Position
Down Up Set Reset
1) Press and hold the Up button
2) Press and release the Reset button
3) Release the Up button
4) Press Down or Up to move the text block
5) When choice is made, press and release the Reset button
Changing the Vertical Position
Down Up Set Reset
1) Press and hold the Set button
2) Press and release the Reset button
3) Release the Set button
4) Press Down or Up to move the text block
5) When choice is made, press and release the Reset button

19
10. BASIC OPERATION
Insert Cassette
nPower up the VCR.
nInsert the tape in to the cassette compartment until VCR pulls cassette in.
WARNING : Do not force the tape in the mechanism or this will demage theVCR. If 12
VDC is not applied to the VCR it will not accept the tape.
Start Recording
nAlternatively, Press and release the REC/SPEED button on the front panel or on the
IR Remote control to start recording.
Stop Recording
nPress the Stop/ Eject button from the front panel or the Stop button of the IR Re-
mote control to stop recording.
Playback
nPress and release the Play button either from the front panel or from the IR Remote
control.
Ejecting the Tape
nPress the Stop/ Eject button once to stop the tape then press and Stop/Eject button
again to eject the tape.

20
11. PROGRAMMING
11.1 RT-195-G On-screen Programming
The RT-195-G can be programmed via the IR or wired remote control. You will need a composite
video source in and a monitor connected to be able to see the programming menu.
The programing menu can be access via both wired or IR remote control. Following table shows
the comparsion of accessing the programing menu using the IR remote and wired remote control.
NOITCNUF ETOMERRI ETOMERDERIW
uneMnaiMces3rofnottub’POTS’dloH sserpdnanottub’NWOD’dna’PU’dloH
esaelernehtdnanottub’TSR’esaelerdna
.nottub’NWOD’dna’PU’
purosruCnottub’+’nottub’PU’
nwodrosruCnottub’-’nottub’NWD’
noitponagnitceleSnottub’LLITS/ESUAP’nottub’TES’
To access the programming menu of the RT-195 VCR, press and hold the STOP button for
approximately 3 seconds. The following program menu will appear:
Set Time/Date
Titler
Record Setting
Display Setting
Exit
MANEUVERING INSIDE MENUS AND SUB-MENUS
Use the (+) or (-) buttons to move the arrow up or down the on screen-menu. To select press the
PAUSE/STILL button.
EXITING MENUS AND SUB-MENUS
Utilize the (-) or (+) buttons to select EXIT. Once the cursor is on EXIT press the PAUSE/STILL
button.

21
12 FUNCTION SETTINGS
12.1 Time/Date
Access Main Menu, and select SET TIME/DATE. The following Sub-menu should appear:
Time/Date
T/D Display ON [OFF]
Time Format 12 Hour [24 Hour]
Date Format MM/DD/YY [DD/MM/YY, YY/MM/DD]
Set Time/Date
Reset Time/Date
Exit
Make your selection by using the (+) or (-) buttons. Press the PAUSE/ STILL button to
make the selection.
Time/Date Display
Time and date display can be toggled on/off by pressing and release PAUSE/STILL button.
Time Format
European or Standard AM/PM time is selected by pressing and releasing the PAUSE/STILL button.
Date Format
Date Format can be toggle through the selections by pressing and release PAUSE/STILL button.
Set Time/Date
Use the (+) or (-) buttons to increment or decrement numerical value. To save selection press and
release PAUSE/STILL button. To move to next selection press and release PAUSE/STILL button.
To return Back to sub-menu press and release STOP button.
Reset Time/Date
The time and date can be reset to the factory default by pressing and release PAUSE/STILL but-
ton.
Exit
Press and releae the PAUSE/STILL button to go back to the main menu.
12.2 Titler
Programming a Title - The RT-195-G provides you with the option of displaying a 1 line by 20
character title. This will appear as one line of 20 solid blocks, with the first block flashing. Use the
(-) or (+) buttons to select the first character of your title. After your selection is displayed, press
and release the PAUSE/STILL button to advance to the next character position. Follow this proce-
dure to complete the programming of your title. When you have programmed the last character of
your title, press and release the STOP button. This will return you to the main sub-menu.
Other manuals for RT-195- G
1
Table of contents
Other AVE VCR System manuals