manuals.online logo
Brands
  1. Home
  2. •
  3. Brands
  4. •
  5. Avey
  6. •
  7. Accessories
  8. •
  9. Avey AV-2 User manual

Avey AV-2 User manual

AV-2 Precision Parrot Incubator
Owners Manual
Avey Incubator, LLC
PO Box 279
ugo CO 80821-0279
Customer Support www.precisionincubators.com/support.htm
Email: [email protected]
voice (719)297-7010
fax (303)328-3897
1
AV-2 Incubator Owners Manual
Throughout the design process the goals have been:
1. Keep it simple.
2. Limit operator errors.
3. Provide the best for the egg/baby.
We share a common goal. appy healthy baby birds to raise.
Why did we build the Avey Incubator?
The Avey Incubator a confidence builder. A trust builder. I have some problem birds. Do
you? I have a pair macaws that lay eggs with very porous shells that dry out twice as fast
as they should. And another pair of African Greys that bite off toes and wing tips on
hatching.
Before the Avey Incubator was hatched I used to weigh my options. With my problem
Greys I could leave the eggs in the nest and pull them just before they hatched.
With the macaws that wasn't an option. Their eggs never hatched. In either case the
humidity is so low here in Denver that leaving the eggs in the nest just guaranteed a poor
hatch rate.
With my old hobby incubator, something would go wrong. I'd bump the temperature
control, not get the top back on tight and allow air to leak or I'd have problems getting the
humidity right. Sometimes I'd not even know what I did wrong except the eggs just didn't
hatch. Only later I learned that because of the way the old hobby incubator was designed,
bacteria could grow unchecked through the incubation period. It turned out it was a race -
does the egg hatch before bacteria gets it?
When eggs don't hatch the problems usually falls into three broad categories. Incubator
error, something basically wrong with the egg, and/or operator error. The Avey Incubator
is a solution to these problems. If we limit the operator errors through incubator design,
for example, equipping the incubator with hi and low temperature alarms, (the most
common cause of low temp alarms is leaving the door open), and solving some basic
2
incubator problems such as ease of cleaning, proper humidity, and the right amount of
egg turning then we have dealt with two of the three categories of egg failure. The third
category, which is a bad egg, can be addressed through better flock management, --
healthy breeders lay healthy eggs. These are my ideas on keeping healthy birds and
getting healthy eggs.
Using the Avey incubator is more than just putting eggs in an incubator. It’s a system for
hatching eggs. Our design philosophy deals with why we made the incubator the way we
did, and a little about what we saw in other incubators that we both liked and didn't like.
Ultimately the Avey Incubator was created in response to not finding all the features we
wanted in the same incubator.
Thank you for choosing the Avey Incubator. We have designed this unit to be trouble
free and easy to use. We want to hear you comments and concerns. You may always call
303-719-4253 for customer support or email at avey[email protected].
Setup:
Remove the packaging, place the egg trolley in the incubator, on top of the included
rubberized shelf liner. Make sure the hooks on the right side fit into the corresponding
slots in the fan panel. The humidifier in the picture has been discontinued. The
replacement for it won't fit inside. You must place the humidifier behind or along
side the incubator. Use the supplied hose to pipe moisture from the humidifier into
3
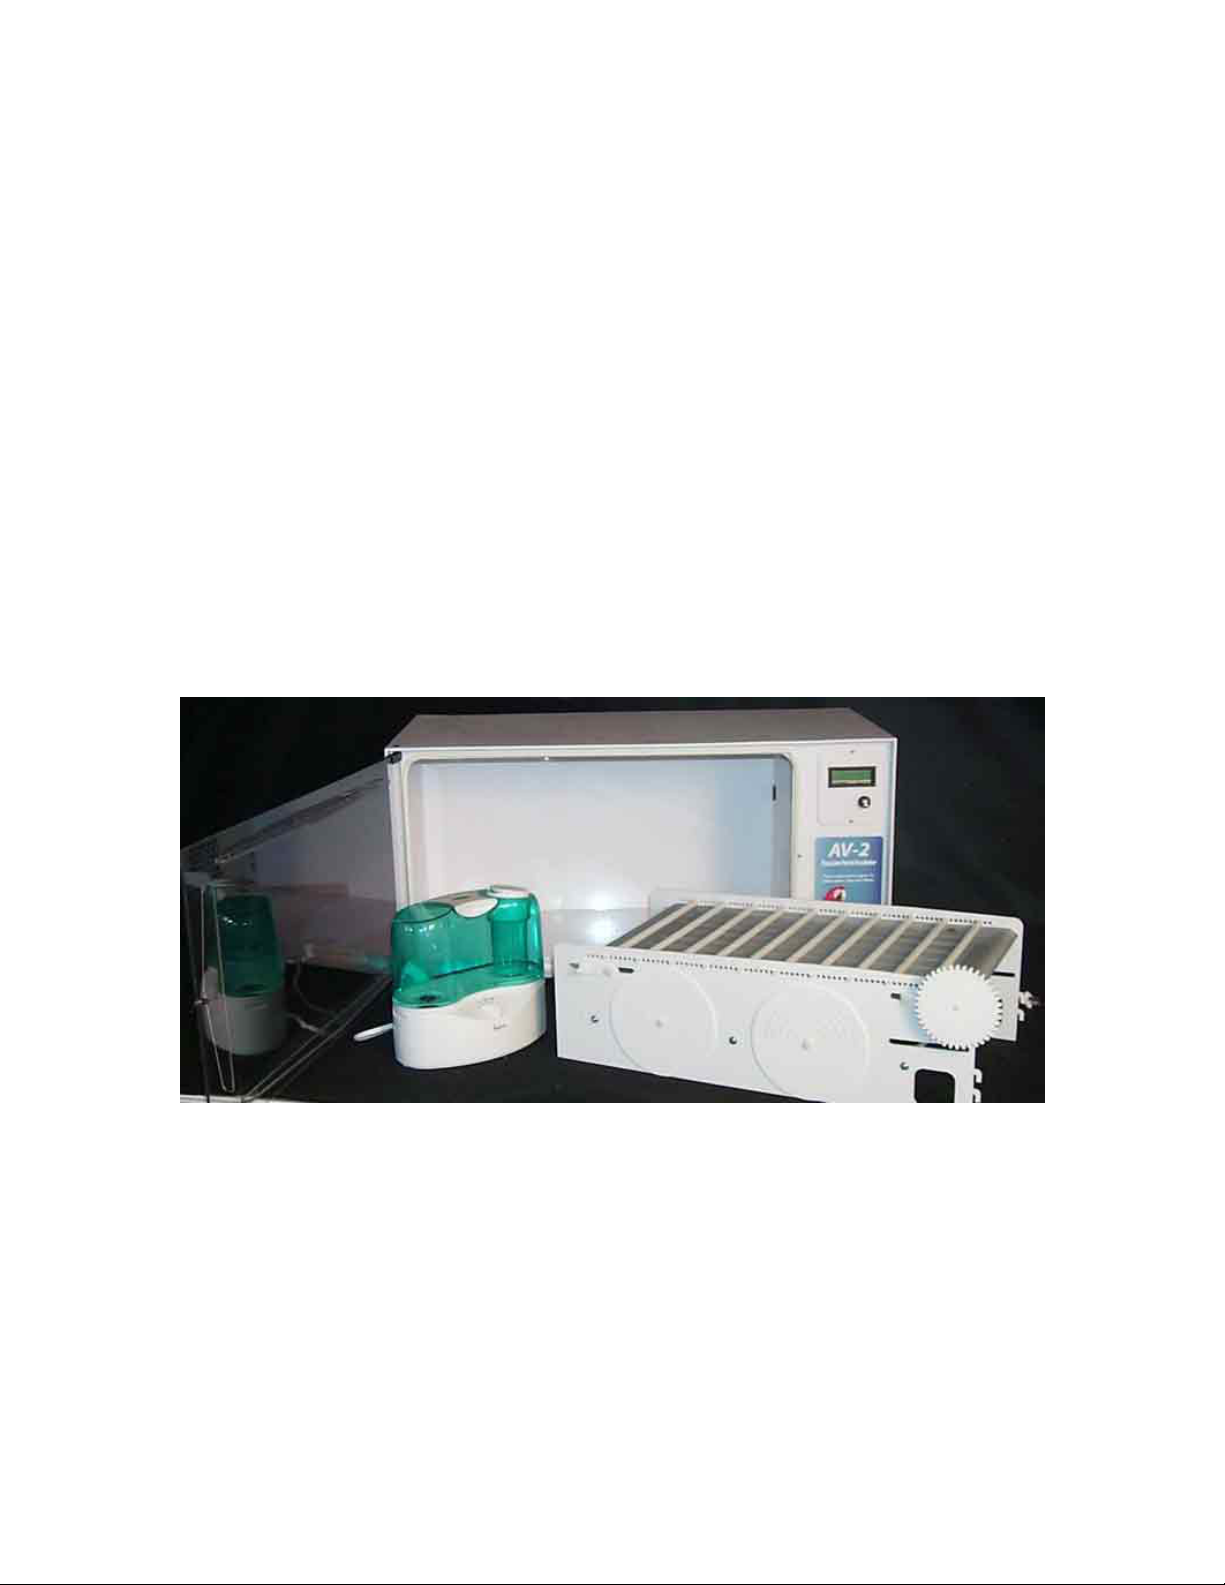
the incubator. The 1 3/8” hole on the back of the humidifer recei es the hose. The
hose end, along with the reducing white washer are pushed into the humidifier
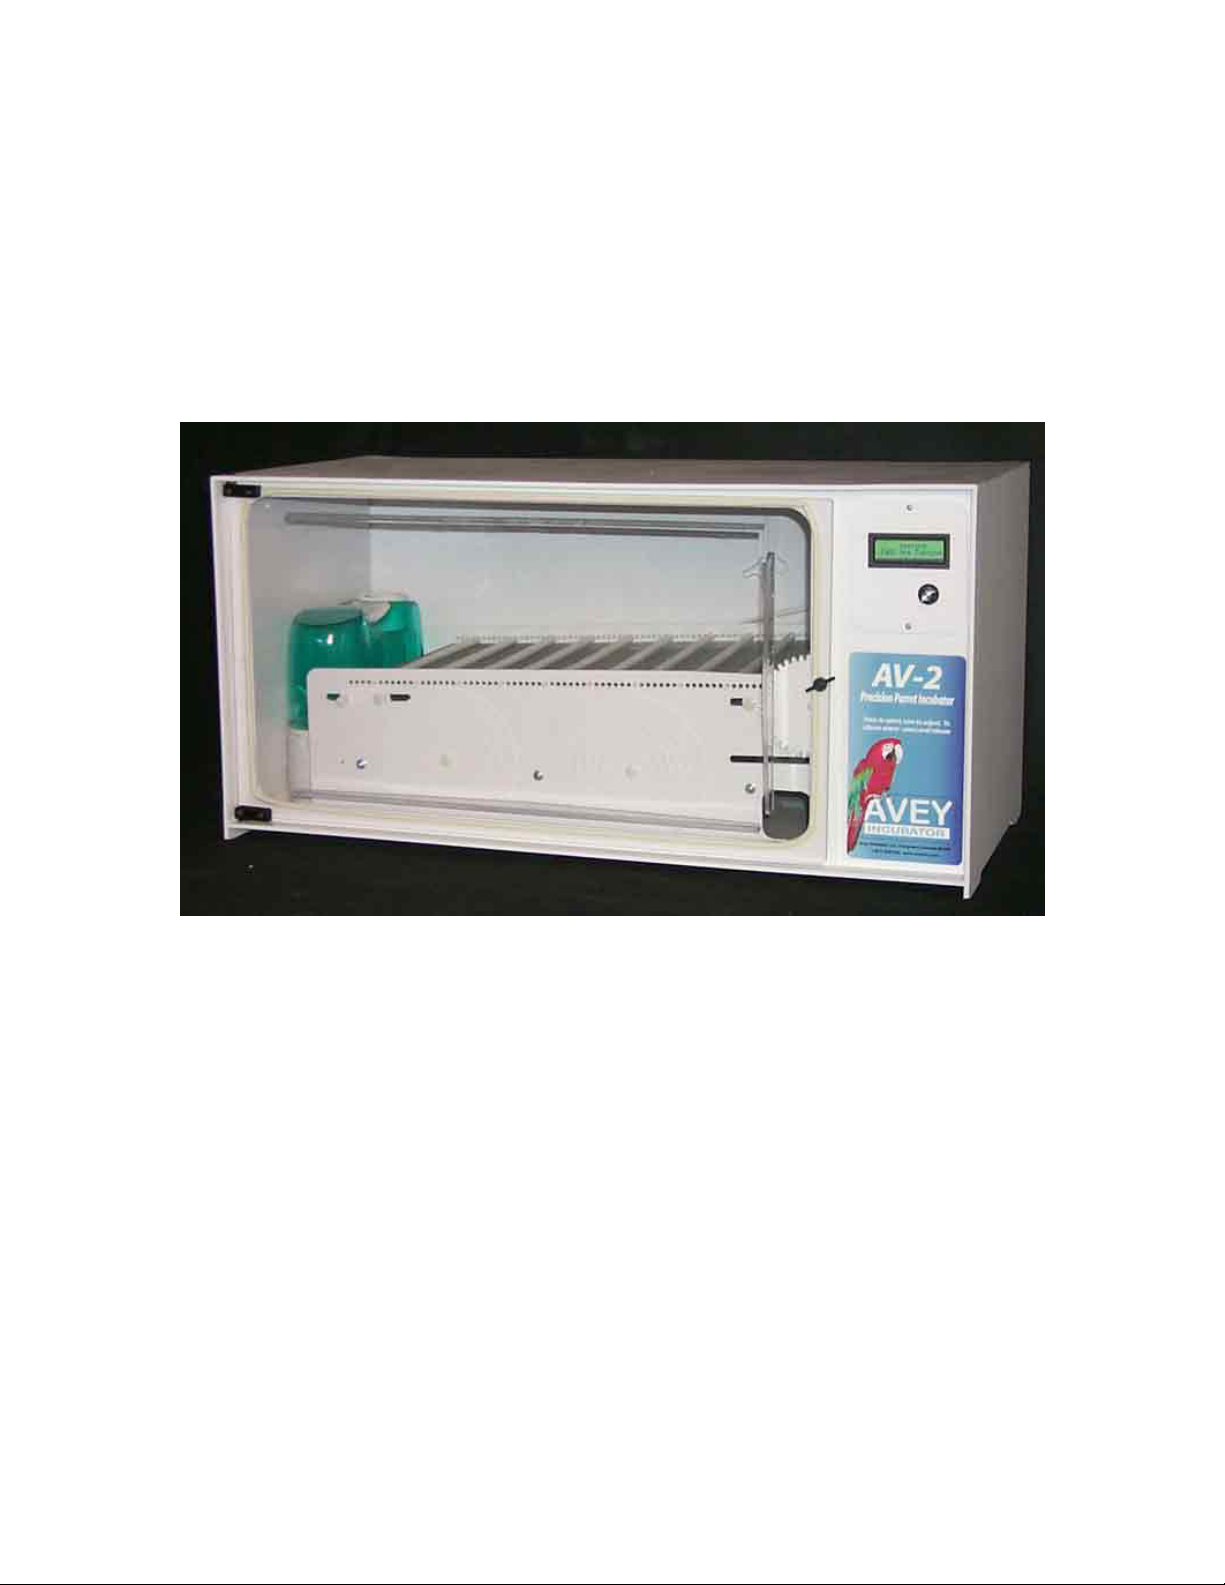
tank. Place the base of the humidifier in place on the right side of the incubator
cabinet. Plug the humidifier plug into the outlet on the rear of the incubator (this is
the same place the on/off switch is located). This special outlet controls the operation
of the humidifier. It switches the power to the humidifier and regulates how often
the humidifier runs. This outlet energizes when the incubator senses a demand for
humidity and turns off when the humidity le el is at or abo e the setpoint.
The Avey Incubator is designed to run in very dry climates to very humid ones. And the
humidity needs in various parts of the country vary greatly. When you first set up your
incubator, if the humidity level wants to stay above your setpoint then there are some
additional steps to take. But first, set up the incubator and let it stabilize by running for at
least 12 hours.
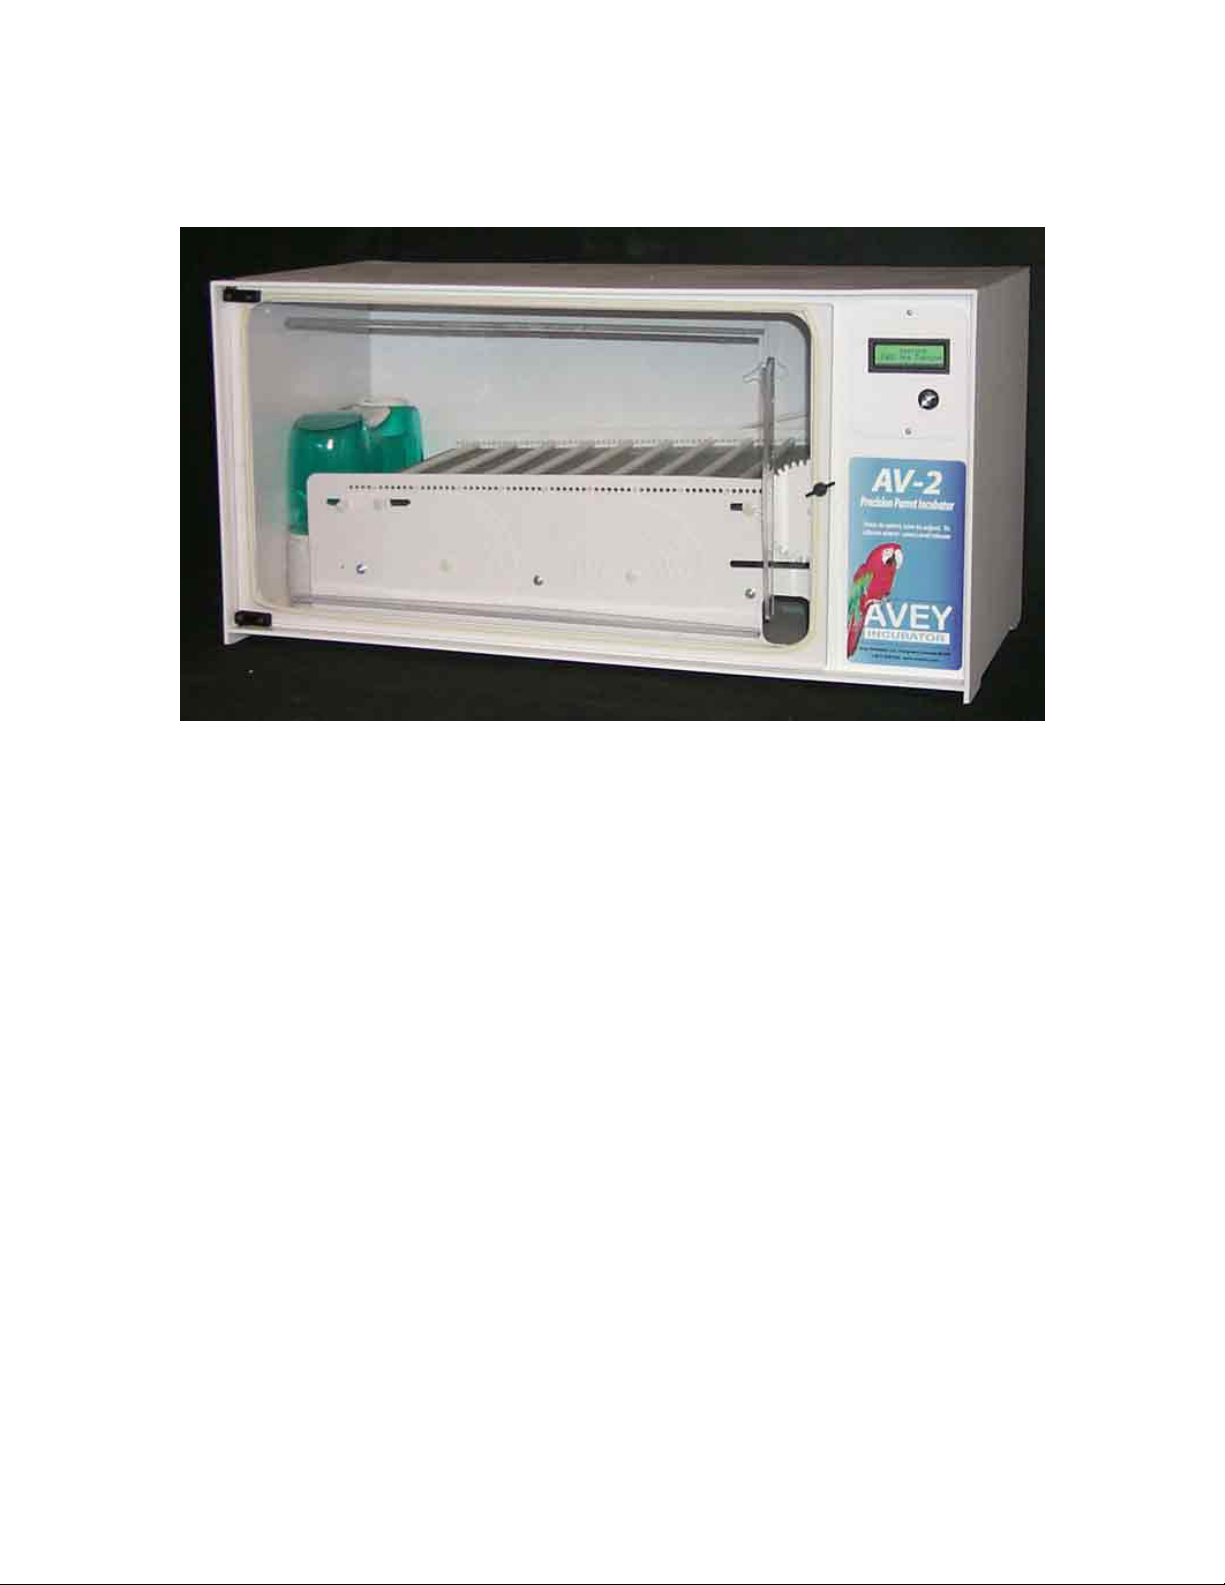
By design the Avey Incubator has a combination of passive and active humidity
management. The passive side is the water in the humidifier that is exposed to air. The
active side is the water vapor emitted by the humidifier to evaporate. The passive side
gives you a basic level of humidity in the Avey Incubator. The active side continuously
monitors and adjusts to the desired level.
If your humidity reading is 56% and you have it set to run at only 50% then what is
happening is the moisture in the air is combining with the water exposed to air in the
humidity tray to passively raise the relative humidity level. This problem is most evident
in more humid areas.
The solution is to allow more fresh air to enter the incubator. One way of doing this is to
remove a small piece of weather stripping from the bottom of the door – about 1 inch.
Then test and observe for a day or so any changes. These adjustments are subtle and you
need to let the unit stabilize after making a change. If not enough then remove another
inch. The balance you achieve today may change depending on the season and the
relative humidity of the outside air you are mixing in with the incubator’s air.
If too much weatherstripping is removed then the humidity system will work harder to
keep enough moisture in the system and the humidity system will have to work too hard
and run too often to maintain the humidity, plus you’ll have to refill the water tank more
often.
If you feel the humidity system is working too hard, running more than every 4 or 5
minutes, then the passive side of the humidity control isn’t helping enough. The incubator
is allowing too much outside air to mix. The solution is to “tighten up” the incubator.
Check your weatherstripping around the door.
Turning off the Active umidity
4
If you wish to not use the automatic humidity feature then humidity may be regulated by
placing a pan of water in the incubator. The amount of surface area of the water exposed
to air (so the water can evaporate) will determine the humidity level. The display will still
read out the actual humidity level.
5
Egg Trolley
The egg trolley is designed to be removable without any tools. It simply lifts in and out
with a carefully adjusted “press” fit. Clean the egg trolley by soaking in a 10 to 1 solution
of water to Clorox Bleach for a period of ten minutes or use the cleaner/disinfectant you
prefer. This will disinfect all the surfaces that come in contact with the eggs. After
soaking, thoroughly rinse with water and air-dry the egg trolley. The big gear touches
the drive motor inside the control box. The hooks on the right side of the egg trolley slip
into slots on the control cabinet. The installation procedure is as follows: set the egg
trolley in the incubator, the fit is relaxed and engineered so nothing will bind. The Egg
trolley should be resting on the bottom of the incubator. Line up the hooks with the slots.
When you do the big gear wheel will also fit into the slot on the control box. Lift the right
rear side of the egg trolley about a quarter of an inch and slip the hooks into the slots.
You’ll feel some resistance at this point. Then slip the hooks on the right front into their
slots. When the hooks drop into the slots and bottom out the egg trolley is installed.
Snap in Egg Dividers
The snap in egg dividers are adjustable by gently bending and fitting the ends into the
appropriate holes on the egg trolley sides
Adding Water
6
Use only distilled water (reverse osmosis filtered water also works well) otherwise the
minerals in the water will clog up the humidifier.
Power Up
The power on/off switch is located at the back of the cabinet. When power is on the
Backlit LCD (Liquid Crystal Display) will come on. The unit will start to run using the
settings that were last used. The display will read: “Testing Eggs are Turning”
The egg turner will move the turn distance stored in memory.
igh Temperature Alarm
A. The high temperature alarm is pre-programmed for about 2 degrees C higher than
the setpoint temperature.
B. The over high temperature scenario includes:
1. Sun shining through a window onto the Incubator
To silence the alarm sounder, push and release the control knob. The display will
continue to indicate an alarm condition and will automatically reset when the temperature
returns to normal.
Display
On power up the display will first test egg turning, moving the belt the distance last
entered in the setup menu. The display will then show the current temperature in Celsius
and Fahrenheit and the percentage of relative humidity. The approximate time remaining
until egg turn is also displayed.
7
Selection Knob
The selection knob has 2 functions. Push it in to select and turn left and right to adjust,
then push in the selection knob. The display changes to the first set up menu.
Adjusting the Avey Incubator
The selection knob (Rotary Encoder) has 2 operations. Push in (momentarily then let go)
to start and push in to finish a selection and turn left or right to change the selection.
(Push in and then release - some people try to hold the knob in and then turn the knob
while it is held in - this won't work! Push in means push and release)
This is really a great control system – very powerful – yet only one knob and a display to
operate. We were one of the very earliest manufacturers of digital products with “rotary
encoder” technology. Now they are commonplace – Like the IPOD.
Passcode
a) Your passcode is 5 (Five)
b) Push in the selection knob.
c) When prompted dial in your passcode.
d) Push in selection knob (and then let it out)
(i) If you wait too long, the operation times out and the Incubator resumes
normal operation.
(ii) If you dial in the wrong passcode the Incubator resumes normal operation
(iii) If you dial in the correct password the Incubator moves to the
temperature selection screen .
Temperature Selection
a. Dial in the desired temperature.
b. Push in the selection knob to set.
Alpha Numeric Display
A. Displays the temperature in both Celsius and Fahrenheit.
B. Automatically uses the last settings even if the power has been off.
8
Turn the selection knob left or right to set the temperature you want. Then push in the
selection knob to move on to the next menu, which is the humidity menu.
In the same manner turn the knob to the desired humidity, push in the knob to move to
the next menu,
which the time between egg turns menu. In the same manner turn to adjust and push to
select.
9
The next menu is the turn distance menu. This tells the Incubator how far to move the
belt the eggs rest on. The Avey Incubator can adapt to a large range of egg sizes because
of this feature. A typical African Grey or Macaw egg is a setting of about 50 on the scale.
To set up your egg turning value take an egg the size you want to turn. Place a line on the
top side of the egg. Place the egg on the egg trolley with the line on the egg facing up..
On powering up, the egg turn belt moves the distance it was last set at. So by powering
off, waiting about 5 seconds, and then powering on, you can see how far your egg will
turn.
Managing eggs of different sizes.
If you wish to place eggs of differing sizes in the same incubator some additional
planning is involved. If the eggs are nearly the same size you may choose a setting for the
turn distance that is a little more than 1/2 a turn for the smaller egg and a little less than
1/2 a turn for the larger egg. For bigger egg size differences, the best approach is to take
your normal turn interval (For example 4 hours between turns) and instead turn 1/4 the
distance per turn and turn every hour. That way at the end of 4 hours you'll have a
complete turn on one size egg and perhaps 1.25 turns on the smaller eggs.
Manual Turning of Eggs.
Some breeders prefer to manually turn the eggs. To turn automatic turning off set the
time between turns to 0.
The next menu is labeled “calibration.” ere you can turn to choose additional menus,
you can reset to the factory defaults. When ready to run the incubator select “Use
Settings” and push selection knob to start Incubator..
Changing the default settings.
The factory default settings are 99.3 degrees Fahrenheit, 42% humidity, 5 hours between
turns, and 25 on the egg turn distance, i alarm limit is preset at the factory to 2 degrees
Fahrenheit above the setpoint and the low alarm limit is preset at the factory to 5 degrees
Fahrenheit below the setpoint. The Incubator remembers the last settings even if the
power has been off.
10
Restoring Factory Defaults
You may restore the factory defaults at any time. Push the selection knob and step
through the menus till you see “Calibration”. Turn the knob until “Reset to Factory” is
displayed and push selection knob to set.
11
Cleaning your Incubator
Cleaning the incubator consists of removing the egg trolley from the incubator and
soaking in a 10 to 1 solution of water to chlorine bleach. (Ten parts (actually nine parts
water to be precise)) water to one part chlorine bleach. Soak for at least 10 minutes then
rinse with clean water and allow to air dry. Lightly spray the interior surfaces of the
incubator cabinet with Nolvosan solution and let sit for 10 minutes before wiping down
with clean paper towels. (Do not use bleach as bleach vapors can affect the humidity
sensor).
The incubator window can be lightly wiped with a cotton cloth with Windex on it. The
outer cabinet surfaces can also be wiped with a Windex wetted cloth.
DO NOT IMMERSE OR SUBMERGE T E CONTROL BOX. There are delicate
electronic parts that will be damaged. Lightly wipe the outer surfaces with Nolvosan to
disinfect the control box.
Incubators and brooders carry a 1 year parts and labor warranty. Shipping to and from our
facility is still your responsibility but we warrant the rest. It is that simple.
Warranty and Liability are limited to repairing or replacing the necessary components.
Any risk or loss of eggs or babies is the buyer's responsibility. We cannot control how
you use our products, or the viability of the eggs you place in our units.
Return Policy: Returns will be accepted for 15 days after shipping date on unused
equipment returned in the original packaging. Once animals or eggs have been placed in
our products they are considered used and are not resalable as new, therefore they are not
refundable. Returned products must be in re-salable condition or adjustment will be
made. You must call for return authorization or shipment will be refused. Shipping
charges to and from our facility are your responsibility and not refundable. If a
promotional, discount, or flat rate shipping charge was used in your order, the actual
shipping charge will be used in calculating your refund. Please use FedEx or FedEx
Ground. A restocking charge of 20% will be assessed to cover re-inspection, testing and
re-packaging of the product. Packages must be insured. You need to call and notify us on
the day you ship your return and be prepared to supply your tracking number in order to
meet the terms of the return policy.
Troubleshooting
When the incubator is turned on, the egg turner belt will move the distance you last set it
at. The display will light up and the power on light will come on. If all of these things fail
12
to happen then check the power to the incubator. If any one of these things fail to happen
then it is possible that the microprocessor didn’t initialize properly. So turn of the
incubator, wait 5 seconds and turn back on. If the problem persists call factory service.
The ambient room temperature should be stable, out of drafts, direct sunshine, heater
vents. A thermostat controlled room (air conditioned or heated) is ideal. Wide swings in
ambient room temperature may adversely affect incubator performance. The incubator
micro-manages the temperature in a small space. If the ambient temperature changes too
much or too fast, those changes may affect the incubator.
Keep the incubator away from microwaves, computers, cordless phones and their base
stations, 2 way radios, welders. And other sources of radio emissions. Don’t put
anything on top of the incubator.
Egg Turner
1. Check to be sure egg trolley is hooked into control box. Make sure hooks are seated.
(All the way in and down)
2. Gently turn the drive gear. You should feel resistance. That means the wheel is in
contact with the egg turner motor. If no resistance is felt then the motor isn’t touching the
drive wheel. The adjustment is simple – call factory support for details.
3. Look to see that the egg turn drive roller turns when the egg turn drive wheel turns.
If the roller doesn’t turn then the gear is not engaged and has come loose. Call factory
support.
4. Is the belt slipping? If the drive gear and roller turn and the belt doesn’t move then
the belt is slipping. Call factory support.
Why Incubate?
Wouldn’t it be great if all your pairs sat faithfully on their eggs, skillfully hatching them
at the right time and then lovingly feed them around the clock so you didn’t have to work
so hard? Well, I guess it can happen some of the time but rarely happens all the time.
Viable eggs are a must but even some borderline eggs will have a better chance in an
incubator than they will if left with the breeding pair. I have a pair of macaws that lay
fertile but very thin shelled eggs. When left in the nest the eggs get accidentally broken,
and they dry out too fast. By precisely controlling the humidity I can keep them just right.
I didn’t get successful hatches until I pulled the eggs. At the other extreme I have a pair
of African Greys that lay eggs with very hard shells. They faithfully sit on the eggs for
the duration. But the eggs won’t hatch on their own. Why – I don’t know, they just don’t.
The parents will “assist” in the hatch if the eggs are left in the nest. Unfortunately the
parents not only open the eggs, they eat the wing tips and toes and sometimes the whole
13
baby! When I incubate these eggs I can control what happens at hatch time. The eggs still
won’t hatch on their own. There is just something wrong. This is another example of
what I mean by borderline viable eggs. Sure they are fertile but if they don’t hatch what’s
the point? So even though the eggs are fertile when the time comes for hatching I have to
“assist” the hatch and open up the egg and help the baby out. But I never got a live
complete baby until I incubated. You’ll get more babies, more fertile eggs, more
successful hatches if you incubate your eggs from the first day. You incubator will earn
its worth over and over again.
Weigh Your Eggs
This the ultimate test to determine what your humidity setting is. Most people with
questions about their humidity settings gloss over this section. And when they call for
help the first thing I ask them is “do you weigh your eggs?”
A normal egg is expected to lose about 20% (plus or minus say about 2%) of its weight
over the course of incubation. A macaw egg weighing 20 grams will weigh about 16
grams at hatching.
The key here is the word normal. In humid environments there might not be enough
weight loss, then the air sac isn't big enough and the chick "drown" in its own fluids on
pipping. ere in Colorado we have very dry air. The problem here is the eggs dry out too
fast. In my aviary, some of the birds know how to compensate (must be hardwired into
their DNA) and get their feathers wet in the water bowl and then sit on the eggs to
increase the humidity in the nestbox. But most of the time successful hatches are
adversely affected by eggs that have lost too much weight. By incubating as soon as
possible - the day the egg is laid if not sooner- :-) , the weight loss can be monitored and
controlled.
Assuming that the weight loss should be in equal amounts every day a chart that projects
what the egg should weigh can be made. I weigh once a week. So when the egg is 7 days
old it should have lost 5% of its weight. Why 5%? Figure 28 days to hatch and assume a
linear weight loss. Divide 28 days by 4 gives you 1/4 of total weight loss every 7 days.
Projected total weight loss is 20%. 1/4 of 20 is 5, hence 5%. So at 7 days multiply
original weight X .95 = projected weight loss at 14 days multiply original weight X .90 =
projected weight loss at 21 days multiply original weight X .85 = projected weight loss
If the egg has lost too much weight, then increase the humidity in the incubator. If the
egg has lost too little, then reduce the humidity. About 84 to 85 degrees on the wet bulb
or 50% humidity is about right when an egg is on target. The eggs will tell you how much
humidity you need to have.
You'll need a scale to weigh these eggs. A triple beam balance scale weighs down to 1/10
of a gram and that is close enough. I have a 4 beam scale that weighs to 1/100 of a gram.
14
So what happens when an egg has been in the nest for a week before you discover it?
ow do you know how much it weighed when laid? Well you make your best guess
based on past performance. Good records - a daily diary of life in the aviary - will give
you a hint. If your tendency is to have eggs that dry out too fast, then make a guess. I
know in my aviary that eggs in the nest dry out almost exactly twice as fast as they
should. In other words, after a week, the egg in the nest has lost 8% of its weight when it
should have lost only 4%.
A less precise but effective way to manage an egg that has lost too much weight is to
place the egg in a zip lock sandwich back alongside – but not touching – a warm wet
tissue. The plastic bag will hold in the increased humidity. Place the egg back in the
incubator. The other eggs in your incubator will continue to be humidified to your
incubator’s humidity setting while the one in the bag will be at 80% or so. You will need
to manually turn this egg. Weigh it every couple of days until it’s weight loss is back on
schedule.
Now if you had more than one incubator you could really manage your eggs well. Set one
incubator up at 42% relative humidity and 99.3 degrees.
Set up another incubator at 30% humidity at 99.3 degrees. Place your eggs that are too
dry in this incubator until weight loss is close to target weight. When target weight is
reached, move the egg to the "ideal" incubator. The third incubator could be used just for
hatching babies, or for a backup, or just cleaned and ready for the next clutch to be laid.
Cleanliness is crucial -- no.... cleanliness is the key to successful hatches. I don't run an
incubator for more than 35 days or so before a complete breakdown and cleaning of all
parts. So where do you put your eggs when you're cleaning the incubator? I put mine in
another clean incubator. aving an incubator just for hatching is a pretty good idea.
aving a separate place for cracking open eggs just might keep a bad egg from
contaminating the others. And the common thinking is babies that have pipped (broken
through the air sac in the egg and made the first hole in the shell) should be held at a
slightly lower temperature - about 98 degrees and at a elevated humidity - about 65-70%.
15

Popular Accessories manuals by other brands

ECO Sensors C-21 Instructions for use

ECO Sensors

ECO Sensors C-21 Instructions for use

Baumer OBDM 12N6920/S35A manual

Baumer

Baumer OBDM 12N6920/S35A manual

Sharpal 101N user manual

Sharpal

Sharpal 101N user manual

SICK GLS621 operating instructions

SICK

SICK GLS621 operating instructions

toboli 63900 user manual

toboli

toboli 63900 user manual

Silvercrest HG04522A-US-TX manual

Silvercrest

Silvercrest HG04522A-US-TX manual

netvox R718PG user manual

netvox

netvox R718PG user manual

Alarmcom ADC-VDB780B manual

Alarmcom

Alarmcom ADC-VDB780B manual

Dynavision B Series user manual

Dynavision

Dynavision B Series user manual

Burster 8625 Operation manual

Burster

Burster 8625 Operation manual

GESTRA NRG 16-60 Installation & operating manual

GESTRA

GESTRA NRG 16-60 Installation & operating manual

Westfalia Wetekom Master-Slave operating instructions

Westfalia

Westfalia Wetekom Master-Slave operating instructions

Toa D-001T Specifications

Toa

Toa D-001T Specifications

Festo SPAE Operating	 instruction

Festo

Festo SPAE Operating instruction

Auriol HG03031A Operation and safety notes

Auriol

Auriol HG03031A Operation and safety notes

Lenovo Precision Pen 3 quick start guide

Lenovo

Lenovo Precision Pen 3 quick start guide

MICRO-EPSILON colorSENSOR CFO Series instruction manual

MICRO-EPSILON

MICRO-EPSILON colorSENSOR CFO Series instruction manual

Azbil AUD100 Series user manual

Azbil

Azbil AUD100 Series user manual

manuals.online logo
manuals.online logoBrands
  • About & Mission
  • Contact us
  • Privacy Policy
  • Terms and Conditions

Copyright 2025 Manuals.Online. All Rights Reserved.