MADI-192 MADI Option Card Installation Guide 5
To install the MADI-192 card into AVB Network slot 3:
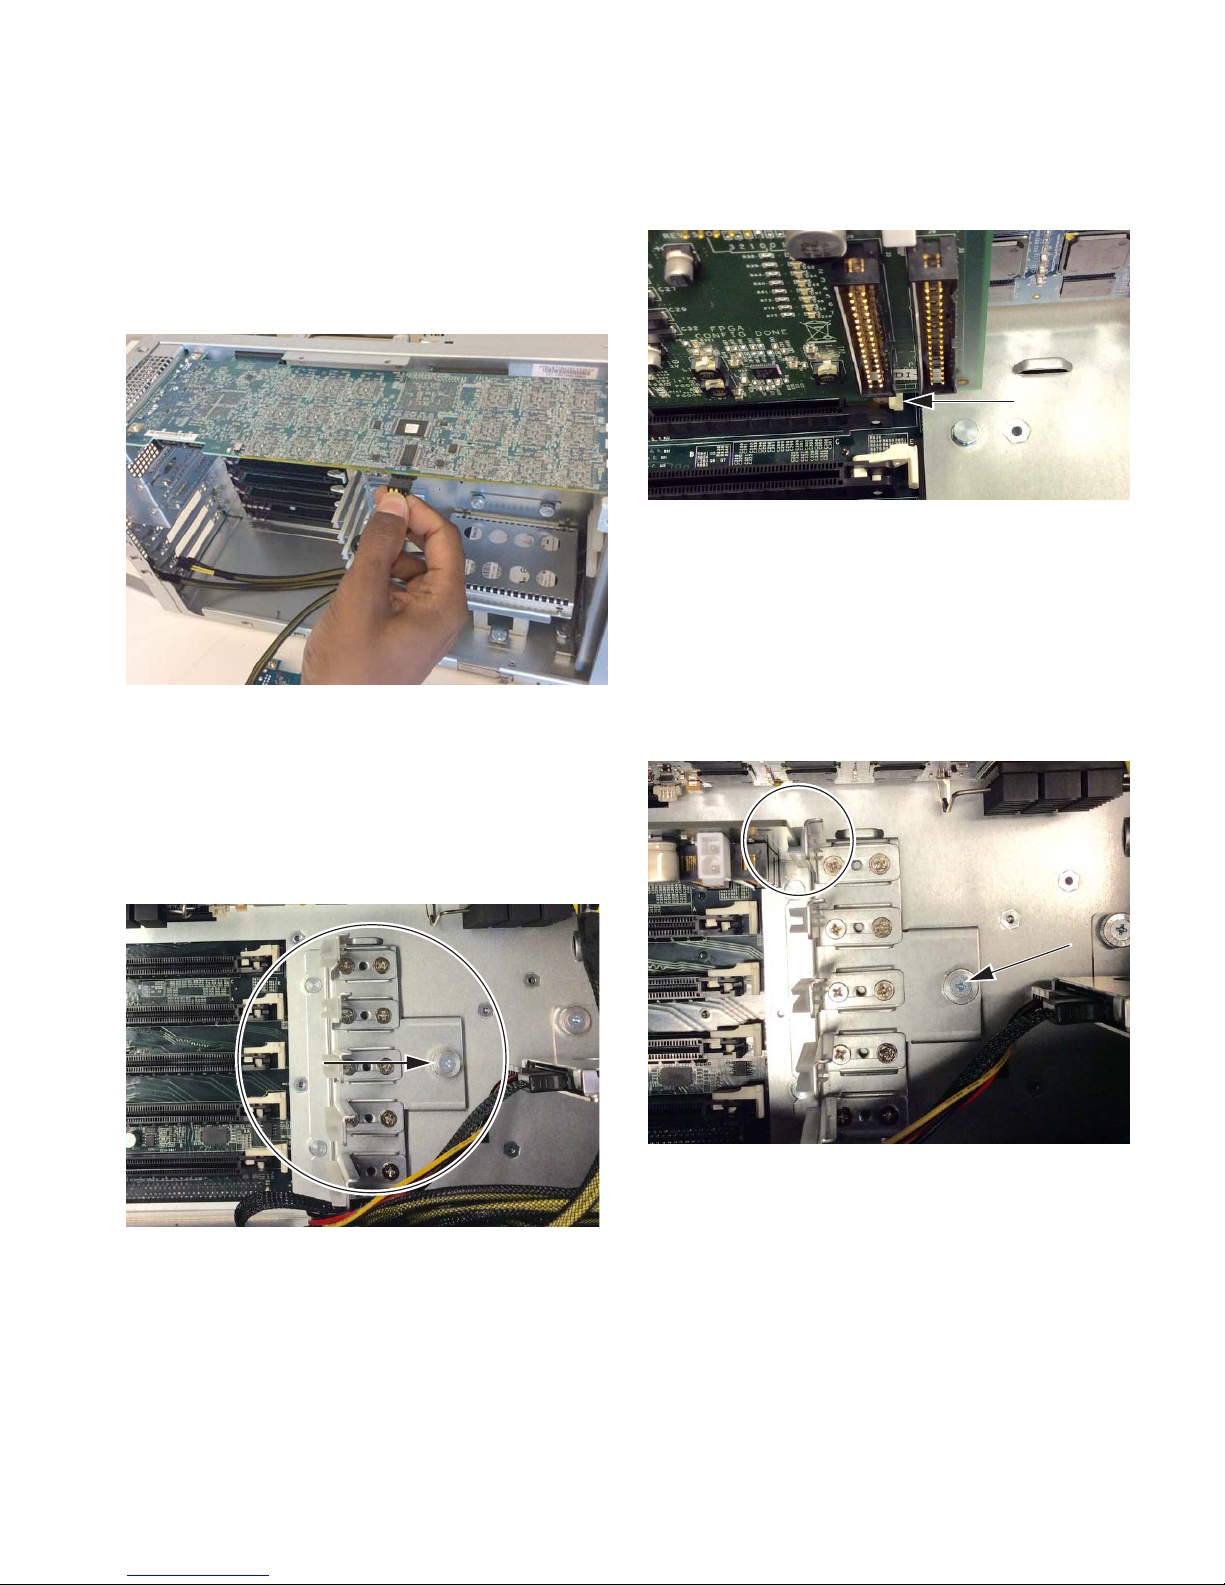
1Hold the card it by its edges.
2Inside the unit, place the face of the card into position in the
slot, with the back of the card tilting upwards.
3Using two hands, hold the front of the card in place in the slot
with one hand, and slowly move the back of the card down-
wards along the sheet metal until the card is horizontal.
4Once the card is horizontal, make sure the tab on the right side
of the faceplate of the card is positioned on the outside of the
E6L chassis slot.
5Align the PCIe connector on the card with the corresponding
PCIe port, and align the flange on the card with the retaining
clip on the PC board.
6Lift the tab on the retaining clip, and then press the card firmly
into the PCIe port and clip.
The card should look similar to the following:
7Tighten the exterior captive thumbscrew to secure the face-
plate of the MADI-192 card to the E6L.
8Proceed to “Replacing E6L Hardware” on page 5.
Additional Information
You can install either a second MADI-192 card or a WSG-HD
Waves SoundGrid Option card in AVB Network slot 3 of an
E6L-112 engine. You cannot have both a WSG-HD card and a
second MADI-192 card installed in an E6L-112 simultaneously.
If you ever want to remove the second MADI-192 card from the
E6L-112 and install it into a standard E6L Option card slot (1–4),
be sure to re-install the original Option slot faceplate.
Replacing E6L Hardware
Afterinstalling thecards,replace theretainingbracket and putthe
core back into the E6L chassis.
To replace E6L hardware:
1If you disconnected any power cables to DSP cards, reconnect
them now. Similarly, if you disconnected cables to any AVB
cards, reconnect them now (make sure to reconnect them to
their original ports).
2Carefully place the card retaining bracket back into position,
making sure to not disturb the surface of the DSP cards in the
process or pinch any cables.
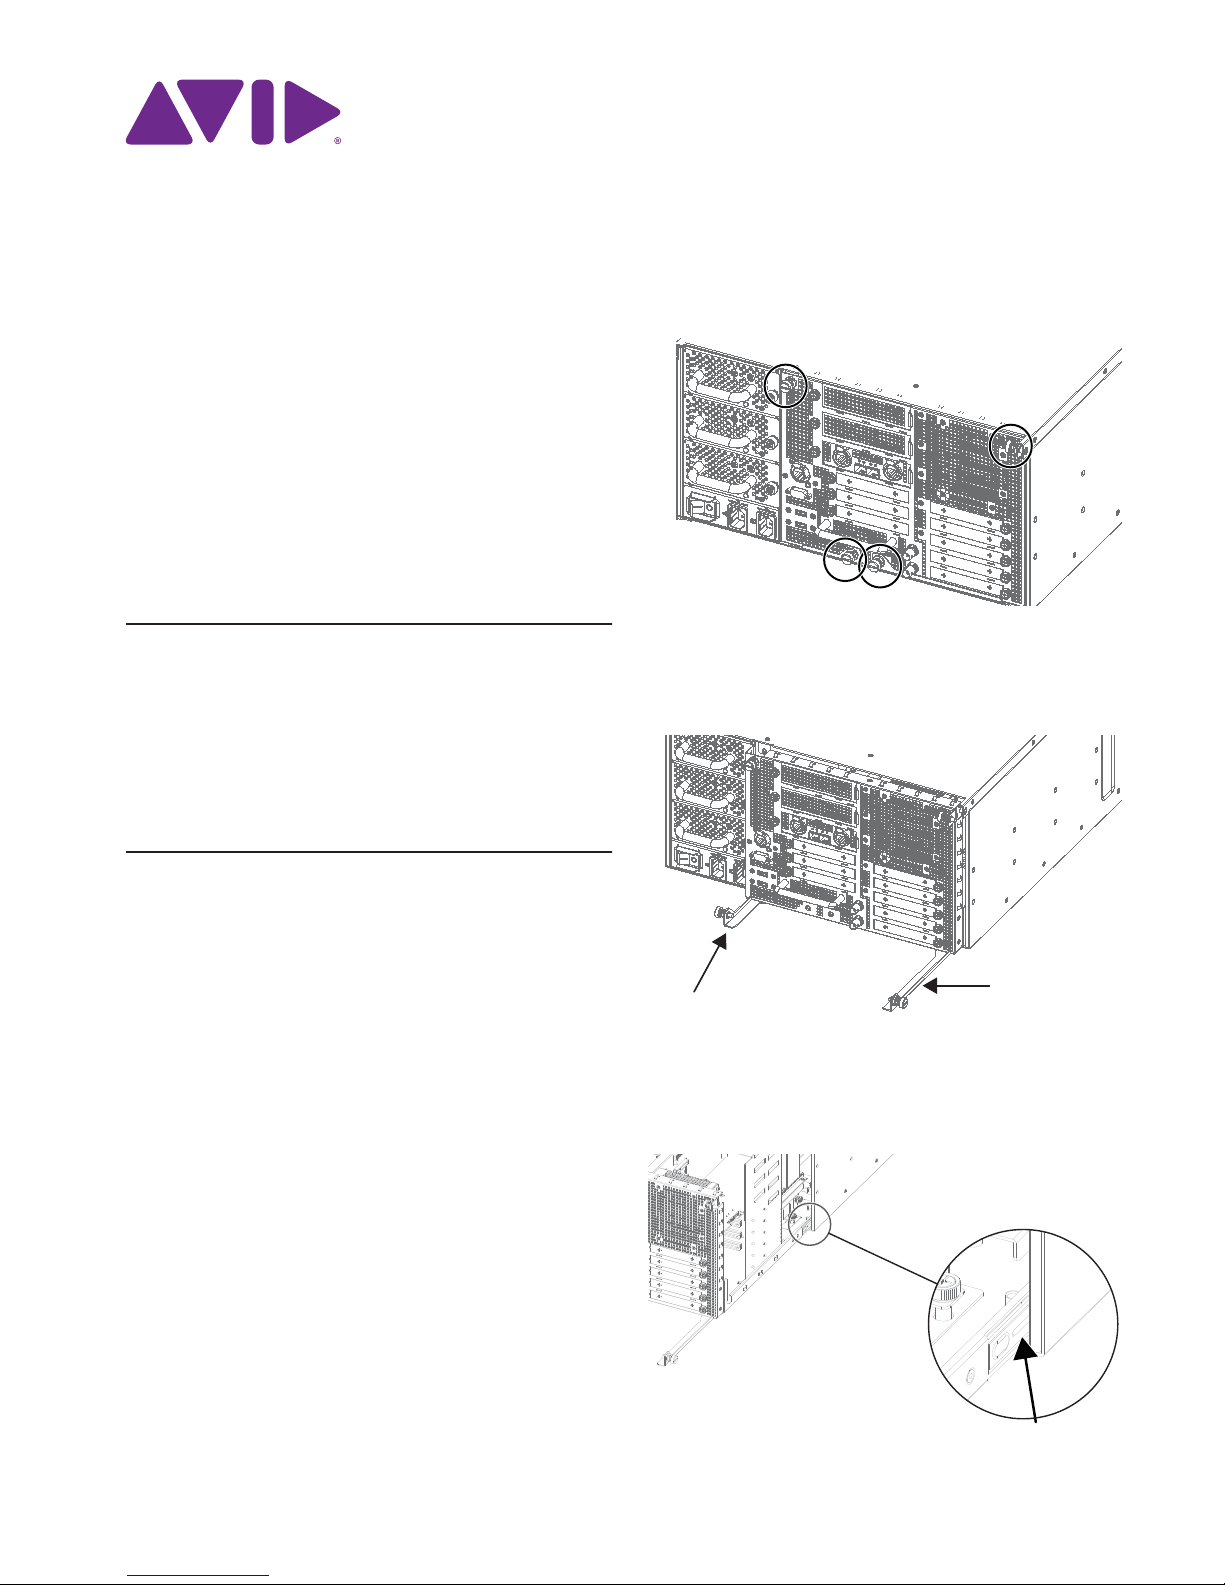
3Tighten the captive thumbscrew securing the bracket to the
bottom of the E6L engine core.
4Replace the two screws at the top of the retaining bracket.
5Slide the core back into the E6L chassis, making sure the con-
nectors face outward.
When the core is fully seated into the chassis, the two latches
at the bottom of the chassis should fully collapse.
6Tighten the four thumbscrews to secure the core to the chassis.
Figure 19. Lifting the tab on the retaining clip
Figure 20. MADI-192 card properly seated in the PCIe slot
Make sure the bottom edge of the retaining bracket is
aligned evenly with the bottom of the core. If the bracket is
misaligned it can prevent the core from sliding easily back
into the E6L.