lMozilla Firefox® browser version 3.6 or later
lGoogle Chrome™ browser 8.0 or later
lMicrosoft Edge™ browser 25 or later
lSafari® 5.0 or later
lChrome on Android™ 2.2 or later
lSafari on Apple® iOS 5 or later.
lWindows Internet Explorer® browser version 7.0 or later
NOTE: Your web browser must be configured to accept cookies or the web interface will not function correctly.
Hardware Installation
Complete the recommended procedure for installing the ACC ES Analytics Appliance:
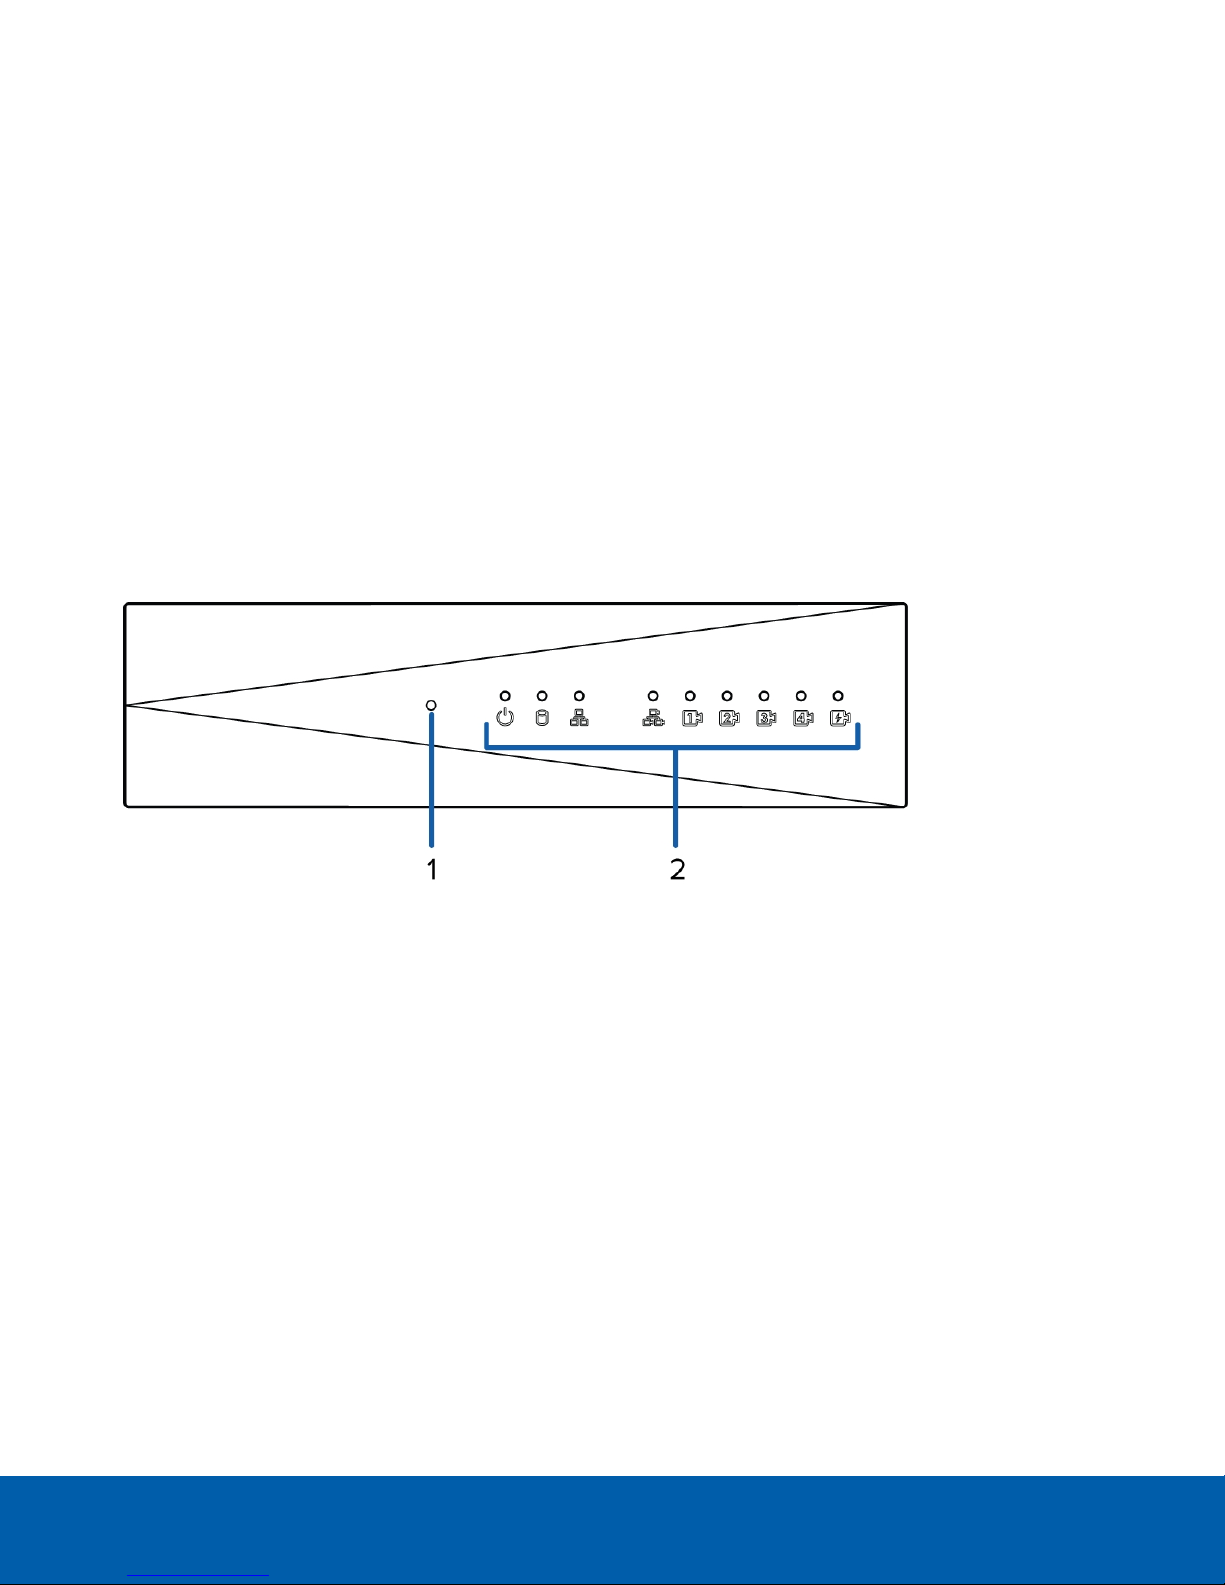
1. Connect power and wait for the appliance to start up.
Do not connect any other cables until instructed in this procedure.
The status LED turns green to indicate that the applianceis turned on.
2. Connect an Ethernet cable directly from a DHCP enabled port on your configuring laptop to the camera
network port on the appliance.
3. Open a web browser on the connected laptop and enter this IP address: https://169.254.100.100.
If you cannot reach the IP address, see Troubleshooting — Cannot Reach Default IP Address on page27.
4. When you are prompted by the web interface, enter a new password for the administrator username.
The page refreshes and you are prompted to log in.
5. Enter administrator as the username and your new password.
The Status page is displayed.
6. From the top of the page, select Setup.
7. On the ACC page, click Install ACC Client to download and install a copy of the Avigilon Control Center
(ACC) Client software to the connected laptop.
8. In the left panel, click Network.
9. On the Network page, assign a new hostname for the appliance and select how it obtains an IPaddress
from the corporate network and the camera network. For more information, see Network on page18.
10. Connect an Ethernet cable from the appliance to the corporate network.
11. Disconnect the configuring laptop from the appliance.
12. If required, mount the appliance on a wall using the supplied mounting brackets.
CAUTION — The appliance must be mounted as instructed or any issues that arise will not be
covered by the warranty.
Hardware Installation 3