Avnet MaaXBoard8ULP User manual

MaaXBoard 8ULP
Yocto User Manual
V3.1

MaaXBoard-8ULP-Linux-Yocto-UserManual-V3.0
https://www.avnet.com/wps/portal/us/products/avnet-boards/avnet-board-families/maaxboard/maaxboard-8ulp/
2
Copyright Statement:
The MaaXBoard 8ULP single board computer and its related intellectual property are owned by Avnet
Manufacturing Services.
Avnet Manufacturing Services has the copyright of this document and reserves all rights. Any part of
the document should not be modified, distributed or duplicated in any approach and form without the
written permission issued by Avnet Manufacturing Services.
Disclaimer:
Avnet Manufacturing Services does not take warranty of any kind, either expressed or implied, as to
the program source code, software and documents provided along with the products, and including,
but not limited to, warranties of fitness for a particular purpose; The entire risk as to the quality or
performance of the program is with the user of products.

MaaXBoard-8ULP-Linux-Yocto-UserManual-V3.0
https://www.avnet.com/wps/portal/us/products/avnet-boards/avnet-board-families/maaxboard/maaxboard-8ulp/
3
Revision History
Rev.
Description
Author
Date
V1.0
Initial version
Lily
2022/10/28
V2.0
Updated Yocto to kirkstone(4.0), BSP_VERSION to
lf-5.15.71-2.2.0, Converts the file format to markdown
Lily
2023/05/16
V3.0
Updated Yocto to Langdale(4.1), BSP_VERSION to lf-6.1.1-1.0.0
Lily
2023/06/21
V3.1
Updated Yocto to mickledore(4.2), BSP_VERSION to lf-6.1.22-2.0.0
Lily
2023/10/25

MaaXBoard-8ULP-Linux-Yocto-UserManual-V3.0
https://www.avnet.com/wps/portal/us/products/avnet-boards/avnet-board-families/maaxboard/maaxboard-8ulp/
4
Catalog
Chapter 1 Introduction ....................................................................................................................................7
1.1 Target Board: MaaXBoard 8ULP ......................................................................................................7
1.2 Introduction ....................................................................................................................................... 7
1.3 Feature List ....................................................................................................................................... 7
Chapter 2 Boot up System .............................................................................................................................9
2.1 Program images into MaaXBoard 8ULP ..........................................................................................9
2.1.1 Preparation for programming .................................................................................................9
2.1.2 Only Program u-boot Image ...................................................................................................9
2.1.3 Program Entire System Image .............................................................................................10
2.2 Boot from eMMC .............................................................................................................................10
2.3 Debug UARTs ................................................................................................................................. 11
2.4 Login system ...................................................................................................................................12
2.4.1 Login Directly ........................................................................................................................12
2.4.2 Login from Debug Serial ...................................................................................................... 12
2.4.3 Login from SSH ....................................................................................................................13
Chapter 3 Feature Configuration & Introduction ......................................................................................... 17
3.1 Settings in uEnv.txt ......................................................................................................................... 17
3.2 USER LED(RGB) ............................................................................................................................18
3.3 Button Switches .............................................................................................................................. 19
3.4 Display output ................................................................................................................................. 20
3.4.1 MIPI-DSI Screen .................................................................................................................. 20
3.5 Touchscreen ....................................................................................................................................20
3.6 Audio ............................................................................................................................................... 22
3.6.1 Check Audio Device IDs ...................................................................................................... 22
3.6.2 Record Audio ........................................................................................................................23

MaaXBoard-8ULP-Linux-Yocto-UserManual-V3.0
https://www.avnet.com/wps/portal/us/products/avnet-boards/avnet-board-families/maaxboard/maaxboard-8ulp/
5
3.6.3 Play Audio File ......................................................................................................................23
3.7 Video ............................................................................................................................................... 24
3.8 Camera ........................................................................................................................................... 24
3.8.1 Check Device ID ...................................................................................................................25
3.8.2 Preview .................................................................................................................................25
3.8.3 Take Photo ............................................................................................................................25
3.8.4 Record Video ........................................................................................................................25
3.9 100M Ethernet Interface .................................................................................................................26
3.9.1 Network Test .........................................................................................................................26
3.9.2 Set MAC Address .................................................................................................................26
3.9.3 Set Static IP ..........................................................................................................................26
3.9.4 Set Dynamic IP .....................................................................................................................27
3.10 Storage ......................................................................................................................................... 27
3.10.1 eMMC ................................................................................................................................. 27
3.11 USB 2.0 Interface ..........................................................................................................................27
3.11.1 USB Host ............................................................................................................................ 27
3.12 Wi-Fi ..............................................................................................................................................28
3.12.1 Enable Wi-Fi .......................................................................................................................28
3.12.2 Connect Wi-Fi Manually .....................................................................................................29
3.12.3 Wi-Fi Hotspot ......................................................................................................................31
3.13 Bluetooth 5.0 .................................................................................................................................32
3.13.1 Enable Bluetooth ................................................................................................................32
3.13.2 Connect Bluetooth Device ................................................................................................. 33
3.13.3 Configure A2DP sink or source ..........................................................................................34
3.14 Pi HAT 40 Pin Expansion Interface .............................................................................................. 35
3.14.1 GPIO ...................................................................................................................................35
3.14.2 SPI ......................................................................................................................................37

MaaXBoard-8ULP-Linux-Yocto-UserManual-V3.0
https://www.avnet.com/wps/portal/us/products/avnet-boards/avnet-board-families/maaxboard/maaxboard-8ulp/
6
3.14.3 UART ..................................................................................................................................37
3.14.4 IIC ....................................................................................................................................... 37
3.15 Reserved Ports from M33 ............................................................................................................ 38
3.16 Procedure to Increase eMMC Partition Size ............................................................................... 38
Chapter 4 Appendix ......................................................................................................................................40
4.1 Hardware ........................................................................................................................................ 40
4.2 Software ..........................................................................................................................................40
4.3 Contact Information ........................................................................................................................ 40

MaaXBoard-8ULP-Linux-Yocto-UserManual-V3.0
https://www.avnet.com/wps/portal/us/products/avnet-boards/avnet-board-families/maaxboard/maaxboard-8ulp/
7
Chapter 1 Introduction
1.1 Target Board: MaaXBoard 8ULP
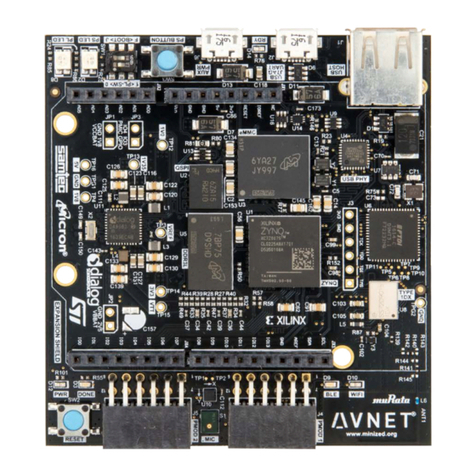
MaaXBoard 8ULP is a development board developed by Avnet, Which featuresthe NXP i.MX 8ULP
processor to achieve ultra-low power, EdgeLock® secured intelligent edge applications.
MaaXBoard 8ULP is engineered as two PCBs, a small SOM (43mm x 36mm) connected via 2x100-pin
connectors to a baseboard (BB) in compact Raspberry Pi form-factor, which supports a versatile set of I/O
interfaces. These include 100M Ethernet, two USB 2.0 host interfaces, plus separate USB 2.0 device
interface, MIPI DSI display and MIPI CSI camera interfaces, a Pi-HAT compatible 40-pin header, MikroE
Click 16-pin header plus ADC/DAC 6-pin header.
1.2 Introduction
This document provides a guide to prepare MaaXBoard 8ULP to boot up with the Verified Linux Package
and introduces how to use the functions of MaaXBoard 8ULP.
1.3 Feature List
Yocto version: mickledore(4.2), based on NXP SDK version: imx-6.1.22-2.0.0

MaaXBoard-8ULP-Linux-Yocto-UserManual-V3.0
https://www.avnet.com/wps/portal/us/products/avnet-boards/avnet-board-families/maaxboard/maaxboard-8ulp/
8
U-Boot version: 2023.04
Kernel version: 6.1.22
Evaluation image: Yocto Image
Development based on NXP i.MX 8ULP
eMMC boot
Device-tree Overlay support
Desktop (Weston 11.0.0)
100M Ethernet (RJ45)
2 x USB 2.0 Host
2 x UART debug ports from USB 2.0 Device
Pi HAT 40 Pin Expansion Interface (I2C,UART,SPI and GPIO)
WIFI & BLE 5.0
MIPI-DSI display
Audio playback
MIPI-CSI Camera/USB Camera

MaaXBoard-8ULP-Linux-Yocto-UserManual-V3.0
https://www.avnet.com/wps/portal/us/products/avnet-boards/avnet-board-families/maaxboard/maaxboard-8ulp/
9
Chapter 2 Boot up System
MaaXBoard 8ULP supports boot up from eMMC, We will introduce how to program system images to
eMMC and boot from it in this chapter.
2.1 Program images into MaaXBoard 8ULP
2.1.1 Preparation for programming
1. Set SW1 Boot Switch on MaaXBoard-8ULP to Serial Download Mode:
1(CFG0)
2(CFG1)
3(CFG4)
4(MOD0)
5(MOD1)
6(SEL)
Serial Download Mode:
0
0
0
ON
0
0
Internal Boot Mode:
0
0
0
0
ON
0
2. Connect J7(USB0/POWER)and J4(USB for Debug) to PC USB port, connect J8 to a network cable.
3. Download the program tool uuu.exe from the network, The recommended website is:
https://github.com/nxp-imx/mfgtools/releases/tag/uuu_1.5.21
4. Put the built files: u-boot image, entire system image, and uuu.exe into a same folder.
After completing the preparations, take the following images as an example:
u-boot image: u-boot-maaxboard-8ulp.bin
entire system image: avnet-image-full-maaxboard-8ulp.wic
2.1.2 Only Program u-boot Image
1. Executing uuu.exe in Command Prompt, The specific commands are as follows:

MaaXBoard-8ULP-Linux-Yocto-UserManual-V3.0
https://www.avnet.com/wps/portal/us/products/avnet-boards/avnet-board-families/maaxboard/maaxboard-8ulp/
10
uuu -b emmc u-boot-maaxboard-8ulp.bin
2.1.3 Program Entire System Image
1. Executing uuu.exe in Command Prompt, The specific commands are as follows:
uuu -b emmc_all u-boot-maaxboard-8ulp.bin avnet-image-full-maaxboard-8ulp.wic
NOTE: To program the entire system image, the boot image must be programmed at the same time.
2.2 Boot from eMMC
Set SW1 Boot Switch on MaaXBoard-8ULP to Internal Boot Mode.
1(CFG0)
2(CFG1)
3(CFG4)
4(MOD0)
5(MOD1)
6(SEL)
Serial Download Mode:
0
0
0
ON
0
0
Internal Boot Mode:
0
0
0
0
ON
0

MaaXBoard-8ULP-Linux-Yocto-UserManual-V3.0
https://www.avnet.com/wps/portal/us/products/avnet-boards/avnet-board-families/maaxboard/maaxboard-8ulp/
11
Connect the two USB type C ports to your PC, one is for serial console (J4), and another is for power
supply(J7).
When the system boots up, LED1 blinks blue.
2.3 Debug UARTs
MaaXBoard 8ULP has 4 UARTs converted from the USB 2.0 device port (J4). The first two are reserved,
the third UART is used for A35 debug, the last UART is used for M33 debug.
UARTS on MaaXBoard 8ULP
Interface Type
The first two
Reserved
The third UART
A35 Debug Interface
The last UART
M33 Debug Interface
The following is an example, when connect J4 of MaaXBoard 8ULP to the PC USB, view the Device

MaaXBoard-8ULP-Linux-Yocto-UserManual-V3.0
https://www.avnet.com/wps/portal/us/products/avnet-boards/avnet-board-families/maaxboard/maaxboard-8ulp/
12
Manager on the PC, there are four USB Serial Ports, the first two (COM25&COM26) are reserved, the
third (COM27) is A35 Debug Interface, the last one (COM28) is M33 Debug Interface.
2.4 Login system
Yocto system supports the following login methods: login directly, login from debug serial, login from SSH.
2.4.1 Login Directly
Connect screen and keyboard to MaaXBoard 8ULP. When the system boots up, it will run the Weston
Wayland Desktop Environment directly, click Wayland Terminal to operate the board.
2.4.2 Login from Debug Serial
Install the Serial Communication software (e.g. PUTTY), select the corresponding port number
(Obtained from Device Manager refer to 2.3 Debug UARTS), baud rate as 115200, data bits as 8,
stop bits as 1, parity as none.

MaaXBoard-8ULP-Linux-Yocto-UserManual-V3.0
https://www.avnet.com/wps/portal/us/products/avnet-boards/avnet-board-families/maaxboard/maaxboard-8ulp/
13
Connect the debug interface serial console(J4) to PC with USB.
When the system boots up, the serial terminal of A35 debug interface will print the following
information:
NXP i.MX Release Distro 6.1-mickledore maaxboard8ulp ttyLP1
maaxboard8ulp login:
Enter username as “root”, login without password.
When the system boots up, the serial terminal of M33 debug interface will print the following
information:
Start SRTM communication
RPMSG String Echo FreeRTOS RTOS API Demo (v2.14.0-gd2ecb41e6
e04) ...
Handle Peer Core Linkup
Nameservice sent, ready for incoming messages...
2.4.3 Login from SSH
Yocto OS install and startup SSH service automatically by default. Connect to internet, then login the
system using SSH.

MaaXBoard-8ULP-Linux-Yocto-UserManual-V3.0
https://www.avnet.com/wps/portal/us/products/avnet-boards/avnet-board-families/maaxboard/maaxboard-8ulp/
14
Linux system supports SSH in default, in windows OS, you can install ssh by yourself, or use other
software which supports SSH, such as PuTTY, WinSCP, etc.
2.4.3.1 Preparation
Check the IP of MaaXBoard 8ULP: The IP will be used in SSH login.
root@maaxboard8ulp:~# ifconfig
eth0: flags=4163<UP,BROADCAST,RUNNING,MULTICAST> mtu 1500
inet 192.168.2.151 netmask 255.255.255.0 broadcast 192.168.2.255
inet6 fe80::54c2:6ff:fece:1c8f prefixlen 64 scopeid 0x20<link>
ether 56:c2:06:ce:1c:8f txqueuelen 1000 (Ethernet)
RX packets 532 bytes 44087 (43.0 KiB)
RX errors 0 dropped 0 overruns 0 frame 0
TX packets 78 bytes 8226 (8.0 KiB)
TX errors 0 dropped 0 overruns 0 carrier 0 collisions 0
2.4.3.2 Login Command line
In this example, the IP of MaaXBoard 8ULP is 192.168.2.151, enter following command in command line
root@maaxboard-8ulp:~# ssh root@192.168.2.151
The authenticity of host '192.168.2.151 (192.168.2.151)' can't be established.
ED25519 key fingerprint is SHA256:DaOsL80SC9DMKUvYbHBmik/vvvh+naMedRIWwzOhcVc.
This key is not known by any other names
Are you sure you want to continue connecting (yes/no/[fingerprint])? y
Please type 'yes', 'no' or the fingerprint: yes
Warning: Permanently added '192.168.2.151' (ED25519) to the list of known hosts.
[ 2125.158298] audit: type=1006 audit(1663659668.823:4): pid=544 uid=0 old-auid=4294967295
auid=0 tty=(none) old-ses=4294967295 ses=3 res=1
[ 2125.173562] audit: type=1300 audit(1663659668.823:4): arch=c00000b7 syscall=64 success=yes
exit=1 a0=7 a1=fffffe66f0e0 a2=1 a3=0 items=0 ppid=1 pid=544 auid=0 uid=0 gid=0 euid=0 suid=0
fsuid=0 egid=0 sgid=0 fsgid=0 tty=(none) ses=3 comm="sshd" exe="/usr/sbin/sshd" key=(null)
[ 2125.198091] audit: type=1327 audit(1663659668.823:4):
proctitle=737368643A20726F6F74205B707269765D
Last login: Fri Nov 19 17:19:41 2021
Then create a new SSH session, login as root, enter exit to logout:
Last login: Tue Sep 20 07:43:10 2022 from 192.168.2.151
root@maaxboard-8ulp:~#
2.4.3.3 PuTTY
PuTTY supports SSH, setting method as follows:

MaaXBoard-8ULP-Linux-Yocto-UserManual-V3.0
https://www.avnet.com/wps/portal/us/products/avnet-boards/avnet-board-families/maaxboard/maaxboard-8ulp/
15
Run PUTTY, in Connection->SSH->Kex, Change the sequence of algorithm.
In Session, enter IP address, e.g. 192.168.2.151, port 22, and Connection type SSH, Then click
Open.
In the first connection, click Y in the pop-up window.

MaaXBoard-8ULP-Linux-Yocto-UserManual-V3.0
https://www.avnet.com/wps/portal/us/products/avnet-boards/avnet-board-families/maaxboard/maaxboard-8ulp/
17
Chapter 3 Feature Configuration & Introduction
First of all, please refer to the previous chapter and boot up the system. Then configure or use the
functions according to the following guidance.
3.1 Settings in uEnv.txt
User could configure some environment variables in uEnv.txt, which can be loaded in the U-boot stage.
The uEnv.txt file has a very simple file format. The format is a single property=value statement on each
line, where value is either an integer or a string. Comments may be added, or existing configuration
values may be commented out and disabled, by starting a line with the # character.
The device-tree overlay function is supported from this version and the device-tree overlay file (*.dtbo) is
placed in the overlay/ directory in the FAT partition of the eMMC. To load the device-tree overlay file
(*.dtbo), you need to set fdt_extra_overlays and dtoverlay_ prefix variable in uEnv.txt. Also you could
add other configurations defined in U-boot to the uEnv.txt file.
The specific description is as follows:
Environment Variable
Value if Set (other invalid)
To be Loading in U-boot
dtoverlay_camera
ov5640
camera-ov5640.dtbo
dtoverlay_display
mipi
display-mipi.dtbo
dtoverlay_gpio
'1' or 'yes'
ext-gpio.dtbo
dtoverlay_i2c
'4'
ext-i2c4.dtbo
dtoverlay_spi
'5'
ext-spi5.dtbo
dtoverlay_uart
'4'
ext-uart4.dtbo
fdt_file
Board base dtb file, should be maaxboard-8ulp.dtb
console
Some u-boot environment variables
Note: fdt_file must be set to a device tree binary blob, which is the basis for applying dtbo file. fdt_file
should be set, other configurations are optional.
Here is the default setting in uEnv.txt:
# Refer to readme.txt for more information on setting up U-Boot Env
# Device tree base file
fdt_file=maaxboard-8ulp.dtb
# Camera can support ov5640
#dtoverlay_camera=ov5640

MaaXBoard-8ULP-Linux-Yocto-UserManual-V3.0
https://www.avnet.com/wps/portal/us/products/avnet-boards/avnet-board-families/maaxboard/maaxboard-8ulp/
18
# Display can support mipi
dtoverlay_display=mipi
# Set 40-pin extended GPIO pin default work as GPIO
dtoverlay_gpio=yes
# Enable lpi2c4 on 40-pin extended GPIO pin
#dtoverlay_i2c=4
# Enable lpspi5 on 40-pin extended GPIO pin
#dtoverlay_spi=5
# Enable lpuart4 on 40-pin extended GPIO pin
#dtoverlay_uart=4
# Extra other device tree overlay
#dtoverlay_extra=1.dtbo 2.dtbo 3.dtbo
# U-boot bootargs for console
console=ttyLP1,115200 console=tty1
Modify uEnv.txt methods:
Mount the first partition of eMMC to the system, Then use nano or vi command to modify the uEnv.txt.
After the modification, execute sync and reboot command to make it effect.
root@maaxboard-8ulp:~# mkdir mount
root@maaxboard-8ulp:~# mount /dev/mmcblk0p1 mount/
root@maaxboard-8ulp:~# vi mount/uEnv.txt
We can edit the uEnv.txt as needed and save it.
After the modification, execute sync and reboot commands to make it effect.
root@maaxboard-8ulp:~# sync
root@maaxboard-8ulp:~# reboot
3.2 USER LED(RGB)
User can control the Tri-color LED indicators, LED1 on MaaXBoard 8ULP. Execute the following
instructions in serial terminal to control them.

MaaXBoard-8ULP-Linux-Yocto-UserManual-V3.0
https://www.avnet.com/wps/portal/us/products/avnet-boards/avnet-board-families/maaxboard/maaxboard-8ulp/
19
LED lights on and off blue:
root@maaxboard8ulp:~# echo 1 > /sys/class/leds/ledblue/brightness
root@maaxboard8ulp:~# echo 0 > /sys/class/leds/ledblue/brightness
LED lights on and off red:
root@maaxboard-8ulp:~# echo 1 > /sys/class/leds/ledred/brightness
root@maaxboard-8ulp:~# echo 0 > /sys/class/leds/ledred/brightness
LED lights on and off green:
root@maaxboard-8ulp:~# echo 1 > /sys/class/leds/ledgreen/brightness
root@maaxboard-8ulp:~# echo 0 > /sys/class/leds/ledgreen/brightness
3.3 Button Switches
There are three push-button switches on MaaXBoard 8ULP: User A, User B and Reset.
1. Test USR_KEY buttons with following instructions:
Enter evtest command, then choose the event id for gpio_keys
root@maaxboard-8ulp:~# evtest
No device specified, trying to scan all of /dev/input/event*
Available devices:
/dev/input/event0: gpio-keys
Select the device event number [0-0]: 0
Input driver version is 1.0.1
Input device ID: bus 0x19 vendor 0x1 product 0x1 version 0x100
Input device name: "gpio-keys"
Supported events:
Event type 0 (EV_SYN)
Event type 1 (EV_KEY)
Event code 2 (KEY_1)
Event code 3 (KEY_2)
Properties:
Testing ... (interrupt to exit)
Event: time 1663662568.970160, type 1 (EV_KEY), code 2 (KEY_1), value 1
Event: time 1663662568.970160, -------------- SYN_REPORT ------------
Event: time 1663662569.239617, type 1 (EV_KEY), code 2 (KEY_1), value 0
Event: time 1663662569.239617, -------------- SYN_REPORT ------------
Event: time 1663662573.704278, type 1 (EV_KEY), code 3 (KEY_2), value 1

MaaXBoard-8ULP-Linux-Yocto-UserManual-V3.0
https://www.avnet.com/wps/portal/us/products/avnet-boards/avnet-board-families/maaxboard/maaxboard-8ulp/
20
Event: time 1663662573.704278, -------------- SYN_REPORT ------------
Event: time 1663662574.025870, type 1 (EV_KEY), code 3 (KEY_2), value 0
Use “Ctrl+C” to exit this test.
2. Test Reset button
When system is on, press the Reset button for more than 8 seconds, system will restart.
3.4 Display output
MaaXBoard 8ULP supports MIPI-DSI screen.
Users can connect the screen to the board before booting up the system according to the following table.
When the system boots up, the screen will print the related startup message and login UI. Users can
connect keyboard to login the MaaXBoard 8ULP file system.
Screen Type
Screen Resolution
Interface
MIPI-DSI
720*1280
J5
3.4.1 MIPI-DSI Screen
Choose MIPI-DSI screen, the dtoverlay_display value should be set to mipi in uEnv.txt:
dtoverlay_display=mipi
MIPI-DSI supports backlight brightness adjustment. The backlight brightness has a range from 0 to 9, in
which 9 means highest brightness, 0 means lowest.
Execute the following instructions on the serial terminal to implement the backlight test:
root@maaxboard8ulp:~# echo 0 > /sys/class/backlight/pwm-backlight/brightness
root@maaxboard8ulp:~# echo 5 > /sys/class/backlight/pwm-backlight/brightness
root@maaxboard8ulp:~# echo 9 > /sys/class/backlight/pwm-backlight/brightness
3.5 Touchscreen
The MIPI-DSI supports touch screen. If the Desktop environment run automatically, user could open the
Wayland Terminal, click or drag the window, etc.
User could also use evtest command in serial terminal and then touch the screen to test:
root@maaxboard-8ulp:~# evtest /dev/input/touchscreen0
Input driver version is 1.0.1
Table of contents
Other Avnet Computer Hardware manuals
Popular Computer Hardware manuals by other brands

Fujitsu
Fujitsu MB15C101 datasheet

ekwb
ekwb EK-FB KIT ASUS R5-E10 Installation and mounting manuals

Renesas
Renesas DA16200 PMOD user manual

Nuvoton
Nuvoton MPU Gang Writer G1 user manual

SpinCore Technologies
SpinCore Technologies PulseBlasterESR-PRO SP18A owner's manual

AMD
AMD ADA3800DAA5BV Product data sheet

Synology
Synology DiskStation DS2415+ Quick installation guide

nvent
nvent Schroff PXI user manual

Lexicon
Lexicon MPX 500 V2 - UPGRADE installation instructions

Panasonic
Panasonic 2SC1318A Specification sheet

CommTech
CommTech Fastcom G232 Hardware reference guide

Viasyn
Viasyn COMPUPRO CPU 286 Technical manual