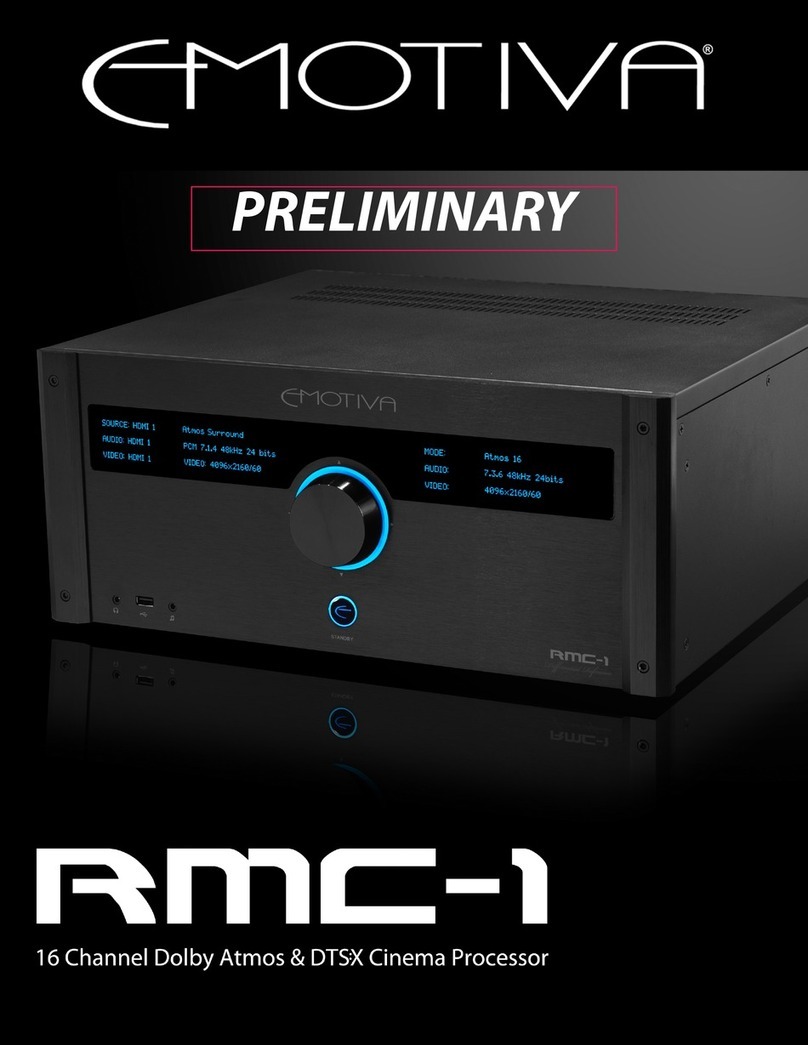
Emotiva XMC-1 User manual

ENTER
MENU DIM AUDIO INFO
STANDBY
VOLUME
INPUTS
TUNER 1 2 3 4 5 6 7 8
PRELIMINARY


Important Safety Precautions and Explanation of Symbols
The exclamation point within an equilateral triangle is intended to alert the user to the presence of important
installation, operation, and service instructions in this manual.
The lightning ash with arrowhead symbol within an equilateral triangle is intended to alert the user to the
presence of uninsulated dangerous voltages within the enclosure that may be of sucient magnitude to
constitute a risk of electrical shock to the user.
Please read this manual thoroughly before attempting to install, congure, or operate the Emotiva
XMC-1. After successful installation and conguration of the XMC-1, be sure to retain this manual in a safe
place for future reference.
Safety is a key component of a long lasting and trouble free installation. Please read and follow all
instructions and heed all warnings on the XMC-1 and in this manual. The vast majority of the subsequent
safety precautions are common sense. If you are not comfortable with the installation of audio/video
entertainment equipment, you should seek the services of a qualied installation professional or call us for
help.
WARNING: TO REDUCE THE RISK OF FIRE OR ELECTRIC SHOCK, DO NOT USE THE XMC1 NEAR WATER
OR IN WET LOCATIONS, DO NOT EXPOSE IT TO RAIN OR MOISTURE, DO NOT EXPOSE IT TO DRIPPING
OR SPLASHING FROM OTHER SOURCES, AND ENSURE THAT NO OBJECTS FILLED WITH LIQUIDS SUCH
AS VASES ARE PLACED ON IT. DOING SO MAY RESULT IN DAMAGE TO THE XMC1 AND THE RISK OF
ELECTRIC SHOCK, WHICH MAY RESULT IN BODILY INJURY OR DEATH.
WARNING: TO REDUCE THE RISK OF ELECTRIC SHOCK, DO NOT REMOVE THE COVER FROM THE
XMC1. THERE ARE NO USERSERVICEABLE PARTS INSIDE THE XMC1. REFER ALL SERVICE TO
QUALIFIED SERVICE PERSONNEL.
Do not install the XMC-1 near or above any heat sources such as radiators, heating vents, or other apparatus’
that produce heat. Do not block any ventilation openings or heat sinks. Avoid installing the XMC-1 directly
above other heat-producing equipment unless sucient ventilation or forced-air cooling is provided.
Do not install the XMC-1 in locations without proper ventilation. The XMC-1 should not be operated on a bed,
sofa, rug, or similar surface that may block vents. The XMC-1 should not be installed in an enclosed location
such as a bookcase, cabinet, or closed equipment rack unless sucient forced-air ventilation is provided.
Always install your XMC-1 according to the manufacturer’s instructions and only use attachments or
accessories specied by the manufacturer.
Do not install the XMC-1 on any stand, shelf, or other piece of furniture that is unable to support its weight. If
a cart is used to move the XMC-1, use caution to avoid injury from tip-over.
Connect the XMC-1 only to power sources of the correct voltage (as shown in this manual and on the XMC-1).
Protect power supply cables from being pinched, walked on, or otherwise damaged. Be especially careful
where the power cable enters the power outlet and the XMC-1 unit.
Only connect the XMC-1 to an electrical outlet or extension cord of appropriate type and rating.
DO NOT defeat the safety purpose of a grounding or polarized plug by removing ground pins or using unsafe
adapters. A polarized plug has two blades - one wider than the other. A grounding plug has a third ground
prong in addition to the two main conductors. The wide blade or third grounding prong is provided for your
safety. If the provided plug does not t your outlet, consult an electrician to replace your obsolete outlet. If
you replace the power cord on the XMC-1, only use one of similar type and equal or greater current rating.
!
!

The power cable for the XMC-1 should be unplugged from the outlet during severe electrical storms, or when
unused for a long period of time.
Only replace the fuse(s) in the XMC-1 with a fuse(s) of proper value and voltage rating.
The XMC-1 should only be cleaned as directed in the manual. Avoid spraying liquids directly onto the XMC-1
and NEVER spray liquids into the vents. Care should be taken so that small objects do not fall into the inside
of the XMC-1.
You should seek service for your XMC-1 by qualied service personnel if any of the following occur:
1. The power-supply cord or the plug has been damaged.
2. Objects or liquid have fallen or spilled into the vents.
3. The XMC-1 has been exposed to rain.
4. The XMC-1 exhibits a marked change in performance.
5. The XMC-1 has been dropped, or its enclosure or chassis is damaged.
NOTE: TO COMPLETELY DISCONNECT THE XMC-1 FROM THE AC POWER MAINS, DISCONNECT THE
AC POWER CORD FROM THE AC RECEPTACLE.
NOTE: THE XMC-1 AC POWER CORD MUST REMAIN READILY ACCESSIBLE AT ALL TIMES.
!
CAUTION
CAUTION: TO REDUCE THE RISK
OF ELECTRICAL SHOCK, DO
NOT REMOVE COVER. NO USER
SERVICEABLE PARTS INSIDE.
REFER SERVICING TO QUALIFIED
SERVICE PERSONNEL.
Antenna lead-in wire
Grounding conductors
(NEC section 810-20)
Antenna discharge unit
(NEC section 810-20)
Power service grounding
electrode system
(NEC art 250, part H)
Ground clamps
Ground clamp
Electric service
equipment
NEC - National Electrical Code

FCC Interference Statement
Note: This equipment has been tested and found to comply with the limits for a Class B digital
device, pursuant to Part 15 of the FCC rules. These limits are designed to provide reasonable
protection against harmful interference in a residential installation. This equipment generates,
uses and can radiate radio frequency energy and, if not installed and used in accordance with
the instructions, may cause harmful interference to radio communications. However, there is no
guarantee that the interference will not occur in a particular installation. If this equipment does
cause harmful interference to radio or television reception, which can be determined by turning
the equipment o and on, the user is encouraged to try to correct the interference by one or
more of the following measures:
Reorient or relocate the receiving antenna.
Increase the separation between the equipment and receiver.
Connect the equipment to an outlet on a circuit dierent from that of the receiver.
Consult the manufacturer or an experienced radio/TV technician for help.
For questions regarding service, please contact:
Emotiva Audio Corporation
Attn: Repair Department
139 Southeast Parkway Court
Franklin, TN 37064
1-877-366-8324
www.emotiva.com


Page 1
XMC-1: User Manual
PRELIMINARY
Contents
Important Safety Precautions and Explanation of Symbols
Introduction .......................................................................................................................2
About This Manual...........................................................................................................3
Unpacking...........................................................................................................................4
Welcome to the XMC-1 ..................................................................................................5
Specications.....................................................................................................................7
Operating the XMC-1......................................................................................................8
The XMC-1 Menu System ........................................................................................... 22
Connecting the XMC-1................................................................................................ 55
Care and Maintenance ................................................................................................ 79
Troubleshooting ............................................................................................................ 88
Emotiva Audio Corporation Limited Warranty ................................................... 89
Notes.................................................................................................................................. 92
7.2 Channel AV Preamp / Processor
Emotiva XMC-1
7.2 Channel AV Preamp Processor

Page 2
XMC-1: User Manual
PRELIMINARY
Introduction
Thank you for choosing the new Emotiva XMC-1 7.2 Channel AV Preamp/Processor. The XMC-1 is
the culmination of years of research and design, and truly represents the current state-of-the-art
in surround sound processors.
The XMC-1 is based on an all new, custom designed hardware platform that delivers cutting edge
video performance and true audiophile calibre sound quality. Powerful DSP processors decode
the latest surround sound formats; high-quality DACs deliver superb quality audio to a highly
optimized balanced analog signal path; interstage hardware-based ASRCs (asynchronous sample
rate converters), ensure immunity from the jitter that plagues other processors. Our elegant
control system is sophisticated, yet user friendly, and allows full control of the XMC-1 from the
front panel, the included all-metal remote, or by a remote control application on your computer
or smart phone. Firmware updates are also easy; and run from a simple USB stick.
While some pre/pros give you a simplied automatic room correction system, or a manual
equalizer, the XMC-1 oers a full set of powerful controls that let you get the absolute best from
your room and speakers. Dirac Live™ provides the best automatic room correction available today;
powerful parametric equalizers are available for audiophiles who prefer to manually dial-in their
own corrections; and, for those who prefer them, we’ve included real tone controls - with variable
bass and treble turnover frequencies. And the tone controls allow you to ne tune how your
system sounds even if you’re already using another room correction method.
The XMC-1 also includes a full palette of video features including 8 HDMI 1.4b inputs and 2 HDMI
outputs - with fast, powerful, glitch free video switching and full support for 4k / 60 Hz and 3D.
The XMC-1’s advanced Video on Standby feature not only lets you watch video directly when the
XMC-1 is in Standby mode, but even lets you change video inputs from Standby mode; and the
concise, easy to read, on-screen menu system displays over live video - even 3D video.
The Emotiva Team

Page 3
XMC-1: User Manual
PRELIMINARY
About This Manual
This manual will provide you with all the information you need to install and congure the
XMC-1 to achieve its optimum potential.
You may wish to record serial numbers or other purchase information on the Notes page at the
back of this manual.

Page 4
XMC-1: User Manual
PRELIMINARY
Unpacking
Your XMC-1 was carefully packed and should reach you in perfect condition. If you notice any
shipping damage or other issues when you unpack it, please contact Emotiva immediately.
Gently remove your XMC-1 from the packing carton and remove all wrappings and shipping
material.
It is important to save the box and all packing materials in case your processor ever needs to be
moved or shipped back to the factory for service.
We truly value customer feedback and would like to hear from you.
Package Contents
• XMC-1
• XMC-1 remote control
• Remote control batteries
• Power cable
• Trigger cable
• AM radio antenna
• FM radio antenna

Page 5
XMC-1: User Manual
PRELIMINARY
Welcome to the XMC-1
Dntia Refence Medi Controer
XMC-1
VOLUME
MENU DIM AUDIO INFO
TUNER 1 2 3 4 5 6 7 8
------------------------------------------ INPUTS ------------------------------------------
ENTER
STANDBY
G E N 2
The Emotiva XMC- 1 combines cutting edge features and exibility, true audiophile sound quality,
superior video switching capabilities, and a comprehensive, yet easy to use menu and control
system - in a single A/V preamp/processor that will truly redene everything you know about
home theater. Even better, the XMC-1 is designed and manufactured in the United States of
America... and costs far less than you might imagine possible.
Audiophile Sound Quality
The XMC-1 combines the latest audio processing modes and features with true audiophile sound
quality. The XMC-1’s Dierential Reference mode delivers true balanced two channel audio
performance rivalling that of the nest analog preamps available today. From analog and digital
inputs to fully balanced outputs, the XMC-1 has a true audiophile quality signal path, which
includes high quality digital-to-analog converters (DACs), hardware asynchronous sample rate
converters (ASRCs), and a true analog ladder network volume control.
Flexible Audio Processing Modes
The XMC-1 oers the ultimate combination of advanced surround sound processing modes
and purist audiophile options. In addition to the latest high-resolution surround-sound
modes, Reference Stereo Mode provides absolutely pure audiophile sound with no processing
whatsoever, and our redened Direct Mode includes minimal processing options, but still oers
bass management.
Dirac Live Automatic Room Correction System
The XMC-1 features Dirac Live, the most advanced automatic room correction system available
for both audiophile and home theater systems. Dirac Live performs a series of measurements,
then uses sophisticated mathematics to calculate a set of lters which correct both the frequency
and time domain response of your room and speakers. The result is crystal clear, accurate sound
reproduction, with a cohesive sound stage and excellent rendition of transients - even in less than
ideal rooms.

Page 6
XMC-1: User Manual
PRELIMINARY
Powerful Manual Room Correction
For those who prefer to do their own room adjustments, the XMC-1 provides powerful manual
parametric equalization controls. The XMC-1 allows you to create two entirely independent
EQ presets; each preset includes 11 fully adjustable bands of parametric equalization for each
speaker. For each input, you get to decide whether to use the automatic room correction
provided by Dirac Live or one of your two user-dened presets.
Convenient Tone Controls
In addition to manual parametric equalizers, the XMC-1 also includes true Tone Controls. Both
Bass and Treble Controls include fully congurable turnover points, and the Tone Controls are
available both as temporary adjustments (trims) and as persistent controls (which remain set until
changed). The Tone Controls and Tone Trims operate independently of each other, and both can
be used in conjunction with either Dirac or the Manual EQ Presets enabled.
True DSD Playback
The XMC-1 oers audiophile quality playback of DSD audio (when received via HDMI from an
SACD or a DSD audio le), which bypasses all processing for the most accurate audio rendition
possible.
Popular Remote Control Options
The XMC-1 oers a wide range of remote control options, including a solid metal infrared (IR)
remote control, network-based remote control, and remote control apps for a variety of portable
devices (starting with iDevices, Android devices, and Windows computers). Remote control codes
will be provided for programming intelligent IR remote controls and for developing network-
based remote control applications.
Advanced Video On Standby
The XMC-1 incorporates an advanced feature which not only allows you to watch - or continue
to watch - video on your monitor while the XMC-1 is in Standby Mode, but even allows you to
change sources while in Standby. This feature is great if you just want to do a quick check of the
weather, or let the kids watch TV without turning on your main system.
Multiple Zones
The XMC-1 oers an independent second audio zone, which can deliver a stereo version of
the same content that is selected in the Main Zone, or can be congured to play audio from a
dierent source (either digital or analog).

Page 7
XMC-1: User Manual
PRELIMINARY
Specications
Inputs
• 8 - HDMI V1.4b.
• 3 - digital optical audio (Toslink) up to 24/192K.
• 3 - digital coax audio (RCA) up to 24/192K.
• 1 - digital AES/ESB audio
• 1 - pair reference quality balanced analog audio (XLR).
• 1 - pair reference quality analog audio (RCA, 3 micron gold plated Tiany style).
• 4 - pair unbalanced analog audio (RCA).
• 1 - 7.1 channel analog input set for external source such as multichannel SACD (RCA).
• 1 - high performance AM-FM tuner - world compliant with selectable frequency step range.
• 2 - USB Type A (for rmware updates, and future additional features).
• audio le player (supports FLAC/ AAC/ WAV/MP3).
• 1 - USB-type B “USB DAC” input for PCM digital audio up to 24/192 (for connection to a
computer or other music server; uses the C-Media 6631A high-performance USB interface
chip).
Outputs
• 2 - HDMI V1.4b with CEC and ARC.
• 1- 7.2 main outputs, analog audio (RCA, solid brass, 3 micron gold plated Tiany style).
• 1 - 7.2 main outputs, balanced analog audio (XLR).
• 1 - optical record out, digital (Toslink) native bitrate output.
• 1 - coax record out, digital (RCA) native bit rate output.
• 1 - pair stereo line-level analog record outputs (RCA).
• 1 - pair stereo Analog Mix outputs with separate lossless NJW1298 analog
volume control (RCA).
• 1 - pair stereo Analog Zone 2 outputs with separate lossless NJW1298 analog
volume control (RCA).
• 1 - studio quality, high current stereo headphone output using TPA-6130
(front panel 3.5mm).

Page 8
XMC-1: User Manual
PRELIMINARY
Dntia Refence Medi Controer
XMC-1
VOLUME
MENU DIM AUDIO INFO
TUNER 1 2 3 4 5 6 7 8
------------------------------------------ INPUTS ------------------------------------------
ENTER
STANDBY
G E N 2
Operating the XMC-1

Page 9
XMC-1: User Manual
PRELIMINARY
Audio Modes
Reference Stereo Mode
Reference Stereo Mode provides the purest listening experience, with the fewest options for
processing or modifying the signal.
In Reference Stereo Mode:
• The output is always TWO CHANNEL STEREO.
• There is NO bass management, and NOTHING is sent to the subwoofer.
• You CANNOT use the Loudness Control, or the Tone Controls, or the Tone Trims.
• You CANNOT use Dirac or the manual Parametric EQ Presets.
• Level Trims, which operate in the analog domain, are still available.
• Speaker Distance adjustments are active for digital inputs but not for analog inputs.
• Stereo analog input signals are passed straight to the Volume Control and the outputs.
Stereo digital input signals are converted to analog then sent to the Volume Control.
Surround sound digital signals are decoded, mixed down to stereo (the Center Channel and
LFE signals, if present, are mixed into the stereo output), and converted to analog.
Note: Because Reference Stereo Mode does not include bass management, care should be
used when playing “small” speakers in this mode. Reference Stereo Mode CANNOT be selected
using the “Mode Up/Down” buttons, but can be selected as the current mode in the Main Zone
Conguration Menu, and can be congured as the default mode for an input.
Note: Reference Stereo Mode may also be accessed directly from the front panel controls by
pressing the Audio button while pressing and HOLDING the Enter button.
Note: When using the Analog 7.1 Channel Inputs, the ONLY available mode is Analog Bypass,
which passes the incoming analog channels directly to the output with no processing or bass
management. In this mode, the LFE channel will be routed to both subs if you have two subs
congured.
Note: In Reference Stereo Mode and Direct Mode, you cannot use PLIIx or any decoding mode
intended to “enhance” the audio signal. Decoding is limited to converting digital surround
signals to analog using the highest quality, purest decoding method possible.
Direct Mode
Direct Mode provides a relatively pure listening experience, and eliminates most processing, but
still retains bass management.
In Direct Mode:
• The output contains the same number of channels as the input signal.
No extra channels are synthesized; if the output channel that corresponds to a given input
channel is not present, that channel signal is mixed into the appropriate available
channels.

Page 10
XMC-1: User Manual
PRELIMINARY
• Bass management IS available and the subwoofer IS active.
• You CANNOT use the Loudness Control, or the Tone Controls, or the Tone Trims
• You CANNOT use Dirac or the manual parametric EQ Presets.
• Level Trims, which operate in the analog domain, are still available.
• Speaker Distance adjustments are available for both analog and digital inputs.
• Stereo digital signals are presented directly to the processor.
Stereo analog input signals are converted to digital and passed to the processor.
Surround sound digital signals are decoded, and passed to the processor.
Multi-channel discrete digital signals (like multi-PCM) are passed directly to the processor.
All signals receive bass management - but no other processing.
• If an LFE signal is present, and one or two subwoofers are also present, the LFE content
will be routed to the subs along with low-frequency content from the main channels
(as determined by the bass management settings).
Stereo Mode
Stereo Mode provides a full complement of processing and control options - with a stereo output.
In Stereo Mode:
• The output is always TWO CHANNEL STEREO.
• Bass management IS available and the subwoofer IS active.
• Loudness Control, the Tone Controls, and the Tone Trims are active.
• Dirac Live and the manual parametric EQ Presets are active.
• Level Trims are active.
• Speaker Distance adjustments are available for both analog and digital inputs.
• Stereo digital signals are presented directly to the processor.
Stereo analog input signals are converted to digital and passed to the processor.
Surround sound digital signals are decoded, down-mixed to stereo, and passed to the
processor.
Multi-channel discrete digital signals (like multi-PCM) are down-mixed to stereo and passed
to the processor.
• If an LFE signal is present, and one or two subwoofers are also present, the LFE content
will be routed to the subs along with low-frequency content from the main channels
(as determined by the bass management settings).
All Stereo Mode
All Stereo Mode provides a full complement of processing and control options - with a stereo
output. In addition, the left signal is routed to all left side speakers and the right signal is routed to
all right side speakers for a“room lling” experience. In All Stereo Mode:
• The output is always TWO CHANNEL STEREO - routed to all speakers.
The left channel is routed to all left side speakers; the right channel to all right side speakers.
• Bass management IS available and the subwoofer IS active.
• Loudness Control, the Tone Controls, and the Tone Trims are active.

Page 11
XMC-1: User Manual
PRELIMINARY
• Dirac Live and the manual parametric EQ Presets are active.
• Level Trims are active.
• Speaker Distance adjustments are available for both analog and digital inputs.
• Stereo analog signals are converted to digital audio and routed through the processor.
Stereo digital input signals are routed through the processor.
Surround sound digital signals are decoded, mixed down to stereo, and converted to analog
(the Center Channel and LFE signals, if present, are mixed into the stereo output).
• After all processing is completed, the left signal is routed to ALL left side speakers and the
right signal is routed to ALL right side speakers.
• If an LFE signal is present, and one or two subwoofers are also present, the LFE content will be
routed to the subs along with low-frequency content from the main channels (as determined
by the bass management settings).
Discrete (Digital) Surround Sound Formats
Discrete Digital Surround Sound formats like Dolby TrueHD and DTS-HD Master Audio contain
high-quality discrete multi-channel digital audio; each channel is stored separately, and the
decoded audio is an exact replica of the original content.
For audio encoded in these formats, the XMC-1 will automatically detect the format and use the
correct decoder.
Matrix Surround Sound Formats
Matrix Surround Sound processing modes like Dolby PLIIx and DTS Neo:6 use information in the
audio signal itself to create additional audio channels from the channels already present. These
processing modes can be used to recreate multi-channel audio from stereo content that was
specically encoded for them - although, unlike with discrete surround sound formats, the result
will only be an approximation of the original. Originally, various Matrix Surround Sound formats
were used to deliver surround sound content; today virtually all surround sound content is
encoded in one of the discrete formats.
Today, these modes are most commonly used to synthesize extra channels, either to transform
stereo music into 5.1 channel or 7.1 channel surround sound, or to transform discrete 5.1 channel
surround sound into synthesized 7.1 channel surround sound.
The XMC-1 will oer you the option of choosing various Matrix Surround Sound Processing Modes
where appropriate.
Note: Some Matrix Surround Sound processing modes are not appropriate to use with certain
types of input signals, and some may conict with certain other modes. For example, Dolby
PLIIx may be used to transform stereo analog content into 5.1 channel or 7.1 channel surround
sound content, and may be used to transform 5.1 channel Dolby Digital or Dolby TrueHD
content into synthesized 7.1 channel content, but cannot be used with 7.1 channel Dolby
TrueHD content (because it is already 7.1 channels). The XMC-1 will ONLY allow you the option
of choosing modes that are appropriate for your current signal source and mode.

Page 12
XMC-1: User Manual
PRELIMINARY
How the XMC-1 Treats Content in Dierent Surround Sound Formats
The combination of Surround Sound decoding and Surround Sound processing the
XMC-1 uses for a given input signal will depend on the format of the incoming signal, and on how
you have congured the Surround Mode in the Setup Inputs Menu and Main Zone Menu.
The Setup Inputs Menu allows you to congure the default behavior independently for each input
for each type of input signal :
In Auto Mode - the XMC-1 will attempt to process the incoming signal to match the number of
speakers you have congured. For example, if your XMC-1 is congured for 5.1 speakers, a Dolby
TrueHD 5.1 channel input signal will be decoded to 5.1 channels, and a Dolby TrueHD 7.1 channel
input signal will be decoded to 7.1 channels, then mixed down to 5.1 channels. If your XMC-1
is congured for 7.1 speakers, a Dolby TrueHD 5.1 channel input signal will be decoded to 5.1
channels, then the surround channels will be processed with Dolby PLIIx to create a 7.1 channel
output optimized for your 7.1 channel system.
In Last Used Mode - the XMC-1 will use as it’s default the same decoding and processing options as
were used the last time a similar signal was received on that input. (If, the last time a Dolby TrueHD
input was received on that input, you manually chose to listen in Stereo Mode, then Stereo Mode
will be the default the next time a similar signal is received on that input.)
You will also have the option of manually conguring an initial default mode for each input - for
each time of input signal which may be received. The specic options available will depend on the
type of input.
Regardless of what decoding and processing modes are selected automatically by the XMC-1,
you will always be able to manually choose to use any combination of decoding and processing
modes that are appropriate for the type of input signal being received - either by using the Mode
Selector buttons on the front panel or remote control, or from the Main Zone Menu.
Note: Reference Stereo Mode must be congured from the menu system; it cannot be selected
manually using the up/down Mode buttons.
Note: When the XMC-1 is congured for a single subwoofer, the same (monaural) signal is
presented at both of the XMC-1’s subwoofer outputs. When the XMC-1 is congured for a
single rear surround speaker, the same (monaural) surround signal is presented at both Rear
Surround outputs.

Page 13
XMC-1: User Manual
PRELIMINARY
The XMC-1 Start-Up Routine
The XMC-1 is controlled by a custom Linux-based operating system. Even though loading and
initializing the operating system is a complex process, the start up sequence on the XMC-1 has
been optimized to minimize the delays you will experience in normal operation.
The start up routine for the XMC-1 will progress dierently depending on whether you have
enabled the Video on Standby feature in the conguration menu. The Video on Standby feature is
congured in the Setup | Advanced Menu.
When the Video on Standby feature is NOT Enabled
When you turn on the rear panel Power switch, the XMC-1 will go into Standby Mode (the halo
ring around the front panel Standby button will illuminate amber).
When you then press the front panel Standby button, the XMC-1 will load and initialize the
operating system. During this time, the Emotiva logo will appear in the front panel display, and a
progress bar will be shown along the bottom of the display.
When the XMC-1 is fully initialized, the display will change to the normal Information display.
Pressing the Standby button on the front panel or the remote control will return the XMC-1 to
Standby Mode.
When the Video on Standby feature IS Enabled
When you turn on the rear panel Power switch, the XMC-1 will go into a special Standby Mode
which allows the Video on Standby feature to operate even though the main power is o.
When you rst turn on the rear panel switch, the halo ring around the front panel Standby switch
will illuminate blue. The XMC-1 will then load and initialize the operating system, during which
time the Emotiva logo will appear in the front panel display and a and a progress bar will be
shown along the bottom of the display.
When the XMC-1 is fully initialized, the display will switch o and the halo ring around the front
panel Standby button will illuminate amber. At this point the XMC-1 is is a special high-power
standby mode and the Video on Standby feature is operational.
Note: When the Video on Standby feature is enabled, pressing the Standby button (from On)
places the XMC-1 in a special standby mode. The XMC-O/S remains loaded in this mode, and
so doesn’t have to be re-loaded when you turn the XMC-1 back On. In other words, leaving the
Video on Standby Mode enabled allows the XMC-1 to switch from Standby Mode to On very
quickly. For this reason, you may prefer to have Video on Standby Mode enabled even if you
don’t watch video while the XMC-1 is in Standby Mode.

Page 14
XMC-1: User Manual
PRELIMINARY
Video On Standby
The XMC-1 has a special feature which allows it to operate in a special“high-power Standby”
mode when you switch it into Standby. In this mode, all video and audio processing is disabled,
but the XMC-1 will still pass audio and video directly to your TV or monitor, and the controls on
the XMC-1 will still allow you to change sources. This feature may be used to allow your family to
continue to watch TV on the TV monitor connected to the XMC-1 even when“the big stereo”is
turned O.
The Video on Standby feature is congured in the Setup | Advanced Menu.
Bass Management
The XMC-1 is a full 7.2 channel surround sound processor, which means that it supports two
independent “stereo” subwoofers.
If you have two subwoofers, and congure the XMC-1 accordingly, then they will be congured
independently, and will operate in full stereo mode. In modes where Bass Management is active,
the Left Subwoofer will receive audio content at frequencies below the congured crossover
points for the Left Front, Left Surround, and Left Back Surround Speakers; the Right Subwoofer
will receive audio content at frequencies below the congured crossover point for the Right Front,
Right Surround, and Right Back Surround Speakers; both subwoofers will receive audio content
below the crossover frequency for the Center Channel, and both will receive content from the LFE
(low frequency eects) channel.
If your XMC-1 is congured for a single subwoofer, all of the content intended for both subwoofers
will be summed into a single monaural subwoofer output signal, which will be available at both
subwoofer outputs. Therefore, a single subwoofer may be connected to either output.
Note: Because some “localization” of subwoofer content may occur in some situations, stereo
subs should ideally be identical, and should be positioned symmetrically in the listening room.
If you have two very dissimilar subwoofers, or plan to place two or more subs in positions
that are NOT symmetrical - perhaps for purposes of evening out response variations caused
by major room modes, you may get better performance by conguring the XMC-1 to use “a
single mono sub”, and then feeding that monaural subwoofer signal to all of your subs. Using
asymmetrically placed stereo subwoofers, or dissimilar stereo subs, may result in imperfect
imaging and a sound stage that is less than optimal. This will depend on the specics of your
subwoofers, your listening room, and your conguration.
Note: If you have two subwoofers, yet still prefer to have the XMC-1 treat them as a single sub,
simply congure the XMC-1 for a single mono subwoofer, then connect both of your subwoofers
to the two subwoofer outputs. In that conguration both subwoofer outputs will provide the
same signal. If you have more than two subwoofers, and wish to congure the XMC-1 to treat
them as a single sub, you may use one or more signal splitters on the XMC-1 subwoofer outputs
to provide extra outputs.
Other manuals for XMC-1
3
This manual suits for next models
1
Table of contents
Other Emotiva Computer Hardware manuals
Popular Computer Hardware manuals by other brands
SIIG
SIIG I/O Expander 2S Quick installation guide

ATTO Technology
ATTO Technology FastStream SC 8500E Specification sheet

Duux
Duux Whisper user manual

VersaLogic
VersaLogic Fox VL-EPM-19 Hardware reference manual
mikroElektronika
mikroElektronika CO click manual

Atmel
Atmel Dual Triple DMOS Output Drivers with Serial Input and PWM Control... product manual
