7
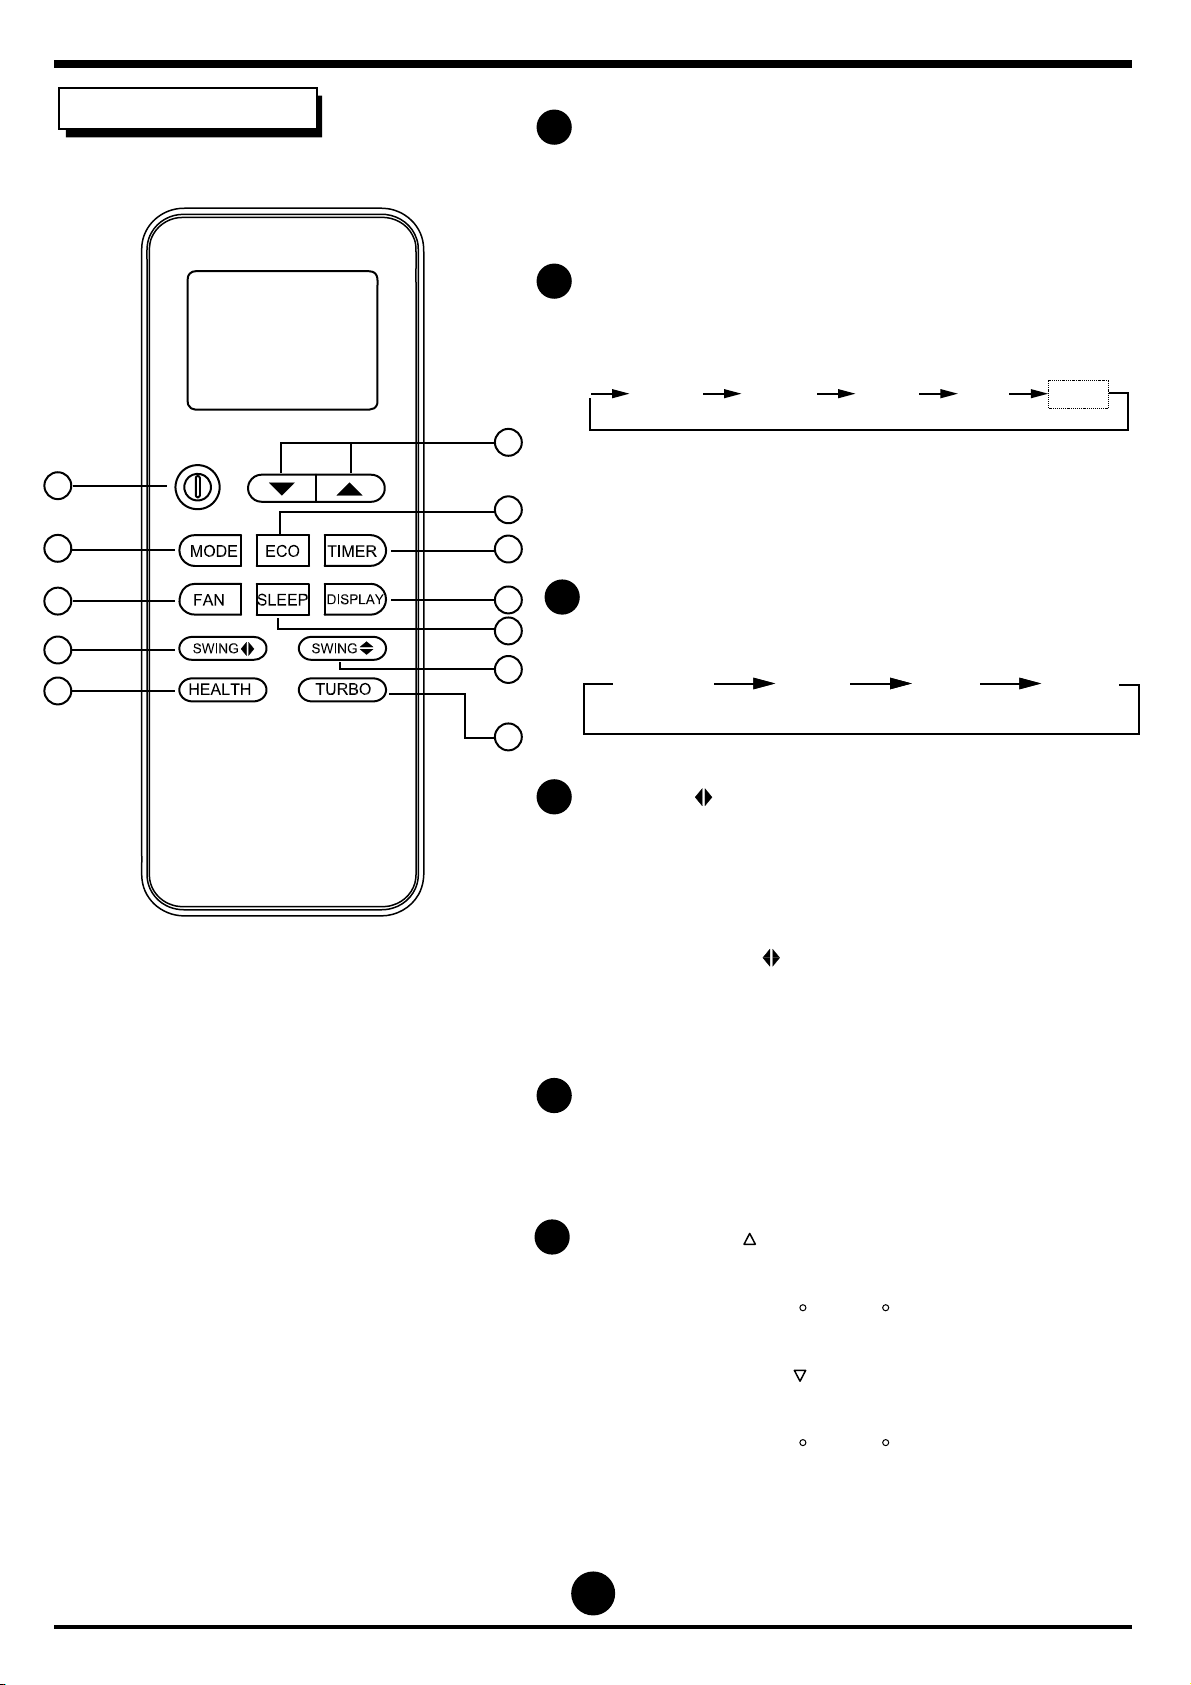
How to use the buttons
Ensure the unit is plugged in and power is
available.
1.Press the ON/OFF button to start the air
conditioner.
2.Press the MODE button to select Auto.
3.Press the UP/DOWN button to set the
desired temperature. The set temperature
only reduces 2 C and only raises 2 C.
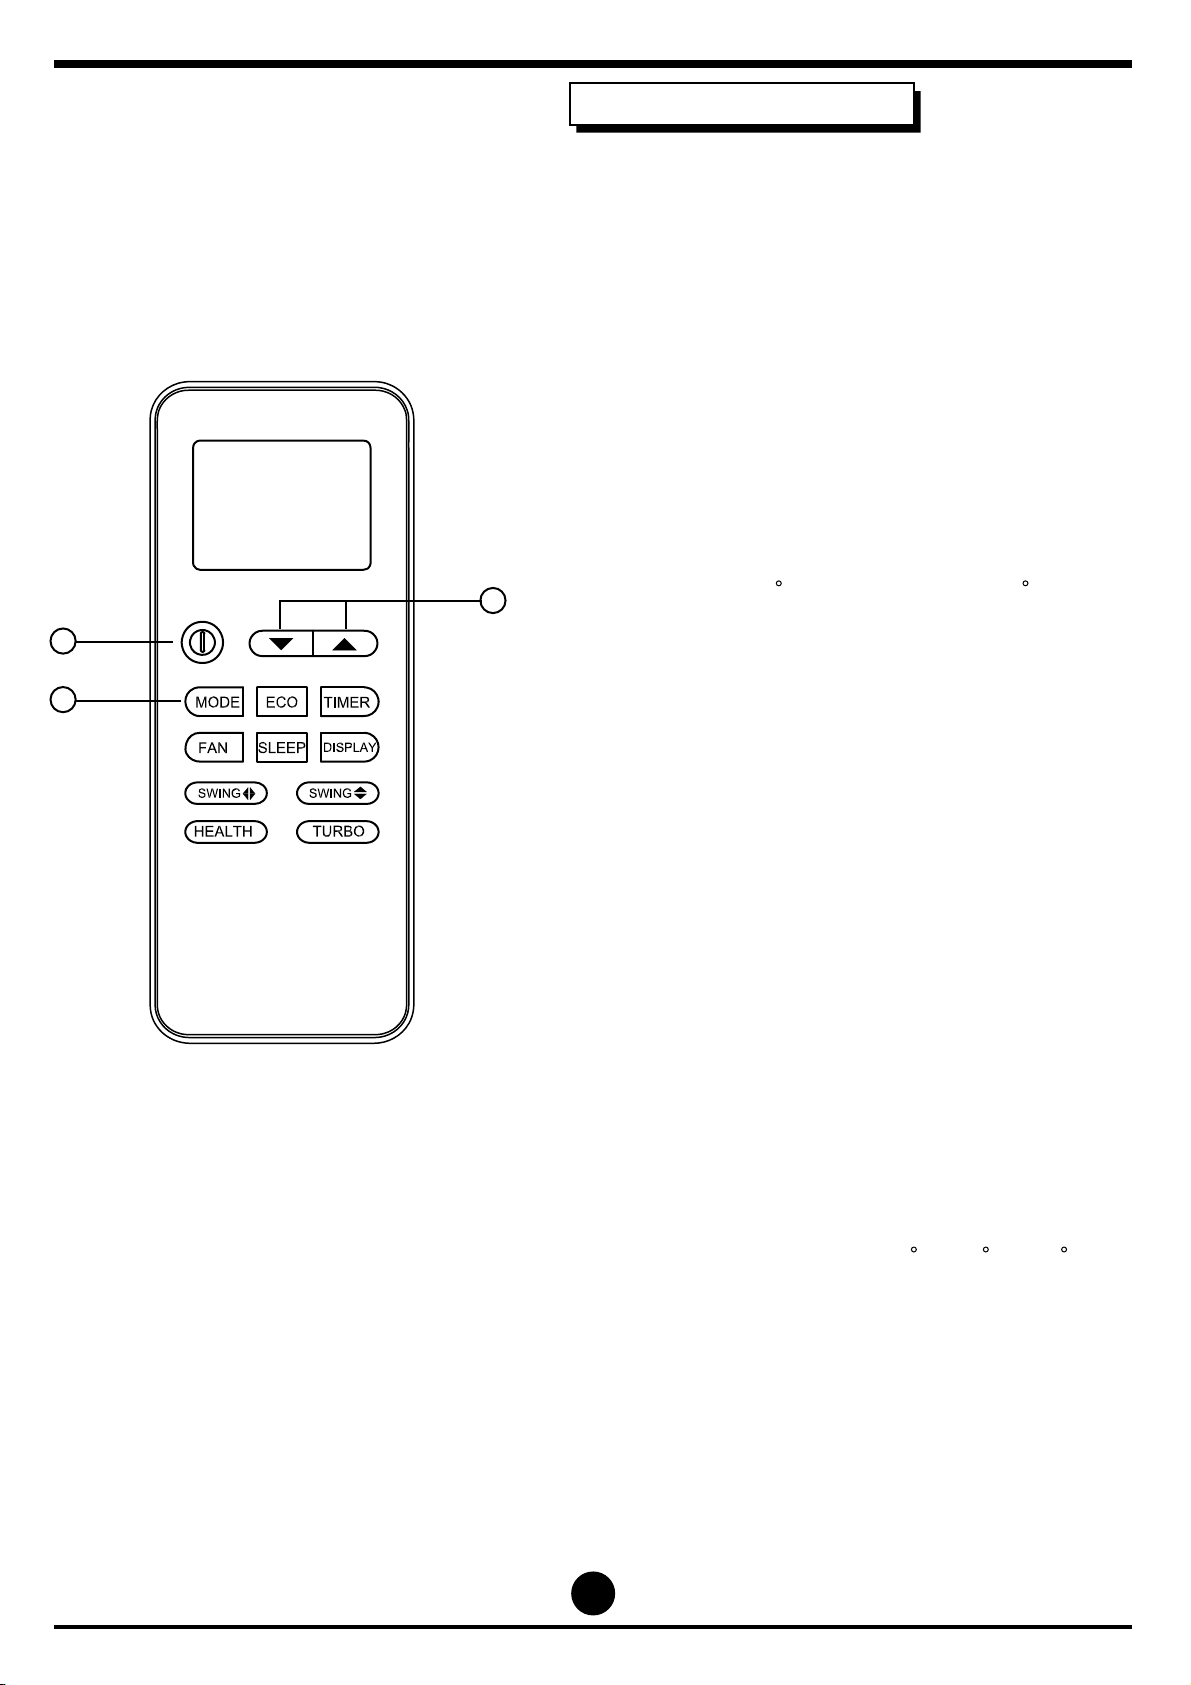
1.Press the ON/OFF button to start the air
conditioner.
2.Press the MODE button to select COOL,
HEAT(cooling & heating models only) or
FAN mode
3.Press the UP/DOWN button to set the
desired temperature. The temperature can
be set within a range of 16 C~31 C in 1 C
increments.
4.Press the FAN button to select the fan speed
in four steps-Auto,Low,Mid,or High.
Note:
1. In the Auto mode, the air conditioner can logically
choose the mode fo Cooling,Fan,and Heating
(not supported by the cooling only appliance.)
by sensing the difference between the actual
ambient room temperature and the setting
temperature on the remote controller.
2.In the Auto mode, you can not switch the fan speed.
It has already been auomatically controlled.
Note:
In the FAN mode, the setting temperature is not
displayed in the remote controller and you are not
able to control the room temperature either. In this
case, only step1, 3 and 4 may be performed.
AUTO operation
Ensure the unit is plugged in and power is
available.
Cooling/Heating/Fan operation
1
3
2
Power on for the first time,indoor unit all the
symbos displayed on the screen,then,turn
off after 1 second,the buzzer issues a beep
simultaneously.