Avson 370-210V80 User manual

INfmd001_US_CA
370-210V80
EN
ASSEMBLY INSTRUCTION
Styles and colo(u)rs may vary.
Made in China.
The owner’s manual contains important safety information as well as assembly, use and
maintenance instructions.
The Ride-on Car must be assembled by an adult who has read and understands the
instructions in this manual.
Keep the package away from children and dispose of properly before use.
Keep this manual for future reference.
Officially
Licensed Product
BENTLEY MULSANNE
BATTERY POWERED RIDE-ON
1/16

Battery
Charger
12V7AH *1
12V1000mA
Suitable age:
Load Capacity:
Speed:
Size of ride-on car:
Power way:
Charge time:
37-96 months
Under 30kg
3-5km/h
120 * 71 * 48 CM
Charging type
8-12 hours
About Your New Ride-On │1
SPECIFICATIONS:
On the purchase of your new Ride-On.
This ride-on will provide your child with many miles of riding enjoyment. To
help ensure a safe ride we ask you to please read this manual carefully, and
keep it for future reference.
Please follow the recommendations in this manual, they are designed to
improve the safety and operation of your ride-on car and it’s rider.
Manufactured by Zhejiang Jiajia Ride-On Co., Ltd in China under license from
Bentley Motors Limited England. “Bentley”, the ‘B’ in wings device and other
associated logos and names are trademarks of Bentley Motors Limited. The
body designs of Bentley motor cars are protected by Bentley Motors Limited
under design, trademark and intellectual property law.
2/16

User Notice │2
The following safety hazards may result in serious injury or death:
• Never leave child unattended. Direct adult supervision is required. Always keep child in view
when child is in vehicle.
• To reduce the risk of injury, adult supervision is required. Never use in roadways, near motor
vehicles, on or near steep inclines or steps, swimming pools or other bodies of water, always
wear shoes, and never allow more than 1 rider.
• Never use in unsafe conditions such as snow, rain, loose dirt, mud, sand, or gravel,
otherwise may result in an unexpected accident such as tipping over, and could damage the
electrical system or battery
• Not to be used in traffic.
• This toy should be used with caution since skill is required to avoid falls or collisions causing
injury to the user or third parties.
• This toy is unsuitable for children under 36 months due to its maximum speed; Maximum
user weight is 30kg.
• This toy has no brake.
WARNING!
SAFETY
●Non-rechargeable batteries are not to be recharged.
●Rechargeable batteries are to be removed from the toy before being charged.
●Rechargeable batteries are only to be charged under adult supervision.
●Different types of batteries or new and used batteries are not to be mixed.
●Batteries are to be inserted with the correct polarity.
●Exhausted batteries are to be removed from the toy.
●The supply terminals are not to be short-circuited.
BATTERY INFORMATION
• CHOKING HAZARD - Small parts. Not suitable for children under 36 months. The product
contains small parts, keep children away when assembling.
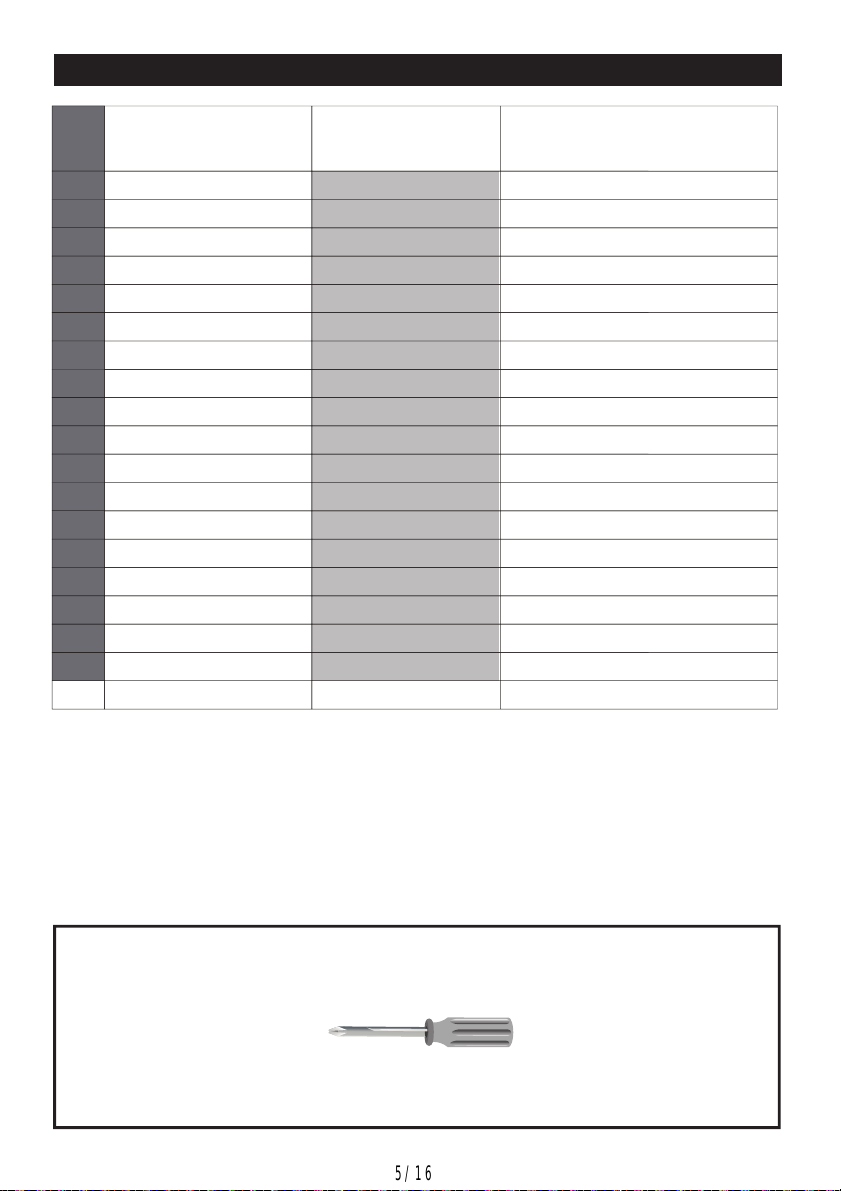
• ADULT ASSEMBLY REQUIRED.
• Always remove protective material and poly bags and dispose before
assembly.
• Protective equipment should be worn. Always wear shoes and sit in the seat when operating
the vehicle.
• Only drive on level ground. Never use on the lawn.
• Never leave a child unattended.
• Keep your hands, hair, and clothes away from moving parts.
3/16

1
4
5
4
5
6
6
13
14
10
12
8
2
911
2
2
7
3
15 14
3
17
18
16
HINT: Some parts shown are assembled on both sides of vehicle
Parts Diagram │3
4/16

PART
NO.
REMARKS
PART NAME
Q’ty (pcs)
Vehicle body
Ø12 washer
Wheel
Lock nut
Hubcap
Side mirror
Bently hood emblem
Windshield
Steering wheel
M5x35 machine screw
Ø5 nut
Seat
Motor hood
Ø4x16 screw
Wheel driver
Spanner
Charger
Remote controller
Placed on the steering wheel
For R/C type only
Placed on the steering wheel
Placed on the front and rear axle.
Parts List │4
Assembly tools required (not included):
Screwdriver
1
2
3
4
5
6
7
8
9
10
11
12
13
14
15
16
17
18
19
20
21
1
6
4
4
4
2
1
1
1
1
1
1
2
16
2
1
1
1
5/16

3
5
6
1
2
4
1
Attach the Rear Wheels │5
Rear Bottom View
Remove all the parts from the rear axle.
1-2. Fit the wheel driver to the wheel. Insert and tigthen four Ø4x16 screws to secure
the wheel driver to the wheel.
3. Slide the rear wheel onto the rear axle (Left Side). Keep it match up with the gear box
on the rear axle.
4. Slide a Ø12 washer onto the rear axle.
5. Tighten a lock nut to the end of the rear axle with a spanner. DO NOT over tighten.
Repeat the above procedure to assemble the other Rear Wheel.
HINT: An extra spanner has been provided to hold the Lock Nut on the other side of the
rear axle while tightening the Lock Nut on the other side.
6. Fit the hub caps to the wheels.
6/16

43
2
1
5
Attach the Front Wheels │6
Front Bottom View
Remove all the parts from the front axle.
1. Slide a Ø12 washer onto the front axle.
2. Slide a wheel onto the front alxe.
3. Slide a Ø12 washer onto the front axle.
4. Tighten a lock nut to the end of the front axle with a spanner. DO NOT over tighten.
5. “Snap” the hubcap to the wheel.
Repeat the above procedure to assemble the other Front Wheel.
GAP
After assembling any wheel to the axles, please check the gap
between the screw thread and the collapsible (refer to below
picture), if the gap is too big, please add two or three washers
inside the wheel, but after tightening the nut outside the wheel,
please turn the wheel by your finger to check if the wheel can run
smoothly, this is very important, because if the wheel can run
smoothly, it is ok, but if the nut press the wheel and the wheel
can’t run smoothly, the motor will be broken easily! Then you need
to decrease one or two washers to make sure the wheel can run
smoothly!
7/16

2
4
3
5
7
6
1
Attach the Steering Wheel │7
Remove the M5x35 machine screw and Ø5 nut from the steering wheel.
Turn the vehicle body upright.
5. Place the steering wheel over the the steering column, protruding from the middle of
1. With a screwdriver loosen the
screw on the battery cover located
in the center of the steering wheel.
2. Remove the battery cover from the
top of the battery compartment.
3. Insert 2x1.5 AA batteries in their
correct polarities.
4. Place the battery cover over the
battery compartment and fasten
with the screw you loosened in
step one.
Attach the Steering Wheel
HINT: If the steering wheel of your vehicle equipped with the sound function, please
follow the steps 1-4 to add the batteries (Not Included), and refer to the battery
information on page 2.
the steering wheel base.
6. Align the holes on each side of steering
End of steering column
wheel with the holes at the end
of the steering column.
7. Fasten a nut on the opposite end
of the screw to secure the
steering wheel to the steering
column.
8/16

1
Connect the Power Supply │8
Fuse
box
1. Plug the vehicle connector into the connector on the battery.
Red battery
connector
Red vehicle
connector
Rear Top View
battery
9/16

1
2
x4
3
3
Attach the Motor hood & the Seat │9
Tabs on seat back
1. Fit the motor hood over the motor.
2. Insert four Ø4x16 screws and tighten.
Repeat for the other Motor Hood.
3. Fit the tabs on the seat back into the grooves
on the rear of the vehicle.
4. With a screwdriver tighten the M5x16
screws on the top of the seat into the holes
in the vehicle.
10/16

1
2
3
Attach the Windshield, Side Mirrors, Bently Hood Emblem │10
1. Fit the tabs windshield into the grooves on the vehicle. Press until you hear it “click”
into place.
2. Fit the side mirrors to the holes on the both doors, push until you hear them “click”
into place.
3. “Snap” the Bently hood emblem to the bonnet.
11/16

41 3
2
5
Use Your Ride-on │11
IMPORTANT
1. Power button: Turns the product on and off.
2. Foot pedal: Applies power (speed) to the product.
●To move the product, press the pedal down.
●To brake or slow down, release pressure from the pedal.
3. Forward/reverse level: Changes the direction that product moves from forward to
reverse.
●To move the product forward, shift the lever to top position.
●To move the product backward, shift the lever to down position.
4. Sound buttons: Press for sound playing.
5. High/Low speed switch (if equipped):
Operates the product to move forward in high speed and low speed.
●Always stop vehicle when changing the speed or direction to avoid damage the gears
and motor.
●HIGH SPEED (If equipped): Make sure your child knows how to steer, how to start and
stop the product and knows the rules for safe driving.
Use the vehicle on generally level ground ONLY!
DO NOT Use the vehicle on Lawn space!
12/16

Charging │12
12V product less than 12.5
2
1. Plug the charger port into the input socket (the socket below the seat).
2. Plug the charger plug into a wall outlet. The battery will begin charging.
1
• The POWER SWITCH (BUTTON) must be turned in OFF position when charging.
• Before the first use, you should charge the battery for 4-6 hours. Do not recharge the battery
for more than 10 hours to avoid overheating the charger.
• When the vehicle begins to run slowly, recharge the battery.
• After each use or once a month minimum recharge time as 8 to 12 hours, less than 20 hours at
most.
• Use the only rechargeable battery and charger supplied with your vehicle. NEVER substitute the
battery or the charger with another brand. Using another battery or charger may cause a fire or
explosion.
• Do not use the battery or charger for any other product.
• If your ride-on with a Digital voltmeter (IF EQUIPPED), the magnitude of voltage will tell you
how much power is remaining in the battery when you must recharge the battery. Make sure
the vehicle is stop!
The battery needs to be charge.
• ONLY an adult is allowed charge and recharge the battery!
• This product with Charging Protection: when charging, all functions will be cut off.
WARNING!
Battery Disposal
The battery will eventually lose the ability to hold a charge. Depending on the amount of use, and
varying conditions, the battery should operate for one to three years.
Important! Recycle the dead battery responsibly. The battery contains lead acid (electrolyte) and
must be disposed of properly and legally. It is illegal in most areas to incinerate lead acid batteries
or dispose of them in landfills. Take it to a federal or state-approved lead acid battery recycler,
such as local automotive battery retailer.
Do not throw the battery away with your regular household waste!
13/16

.
Problem Possible Cause Solution
Vehicle does not run
very long
Vehicle runs sluggishly
Vehicle needs a push
to go forward
Difficult shifting from
forward to reverse or
vice-versa
Loud grinding or clicking
noises coming from
motor or gear box
Battery low on power
Thermal fuse has tripped
Battery connector or wires
are loose
Battery is dead
Electrical system is damaged
Motor is damaged
Battery is under charged
Battery is old
Battery is old
Vehicle is overload
Vehicle is being used in harsh
conditions
Poor contact of wires or
connectors
“Dead Spot” on motor
Motor or gears are damaged
Battery low on power
Recharge battery.
Reset fuse, see <Fuse>
Check that the battery connectors are firmly plugged
into each other. If wires are loose around the motor
contact your distributor please.
Check that the battery connectors are firmly plugged
into each other. If wires are loose around the motor,
contact your distributor please.
A dead spot means the electric power is not being
delivered to the terminal connection and the vehicle
needs repair. Contact your distributor please.
Attempting to shift while the
vehicle is motion
Completely stop the vehicle and shift, see <Use Your
Ride-On>
Check that the battery connectors are firmly plugged
into each other when recharging
Replace battery, contact your distributor please.
Reduce weight on vehicle.
Avoid using vehicle in harsh conditions, see <Safety>.
Recharge battery, contact your distributor please.
Contact your distributor please.
Battery will not
recharge
Charger feels warm
when recharging
Battery connector or adapter
connector is loose
Charger not plugged in
Charger is not working
This is normal and not a
cause for concern
Check that the battery connectors are firmly plugged
into each other.
Check that the battery charger is plugged into a
working wall outlet.
Completely read through this manual and the troubleshooting guide table before calling. If you
still need help resolving the problem Contact your distributor please.
Troubleshooting Guide │13
14/16

Maintaining │14
The battery features a thermal fuse with a rest fuse that will automatically trip and cut all
power to the vehicle if the motor, electric system or battery is overloaded. The fuse will
reset and power will be restored after the unit is turned OFF for 20 seconds and then
turned ON again. If the thermal fuse trips repeatedly during normal use, the vehicle may
need repair. Contact your distributor please.
To avoid losing power, follow these guidelines:
●Do not overload the vehicle.
●Do not tow anything behind the vehicle.
●Do not drive up steep slopes.
●Do not drive into fixed objects, which may cause the wheels to spin, causing the motor to
overheat.
●Do not drive in very hot weather, components may overheat.
●Do not allow water or other liquids to come in contact with the battery or other electric
components.
●Do not tamper with the electric system. Doing so may create a short, causing the fuse to trip.
• It is parents' responsibility to check main parts of the toy before using, Must regularly
examine for potential hazard, such as the battery, charge, cable or cord, plug, screws
are fastening enclosure of other parts and that in the event of such damage, the toy
must not be used until that damage had been properly removed.
• Park the vehicle indoors or cover it with a tarp to protect it from wet weather.
• Recharge the battery after each use. Only an adult can handle the battery. Recharge
the battery at least once a month when the vehicle raider is not being used.
• Do not wash the vehicle with a hose. Do not wash the vehicle with soap and water. Do
not drive the vehicle in rainy or snowy weather. Water will damage the motor, electric
system and battery.
• Clean the vehicle with a soft, dry cloth. To restore shine to plastic parts, use a non-
wax furniture polish. Do not use car wax. Do not use abrasive cleaners.
• When not using, all the electrical source should be turn off. Turn off the power switch
and disconnect the battery connection.
RISK OF FIRE. Do not bypass. Replace only with a new fuse.
Fuse
15/16

Our products are suitable for
ASTM F963; GB6675; EN71 and EN62115 standard.
16/16

ASSEMBLY INSTRUCTION
Les styles et les couleurs peuvent varier.
Fabriqué
en Chine.
Le manuel d’instructions contient des informations importantes sur la sécurité,ainsi que des
instructions d’assemblage, d'utilisation et de maintenance.
La voiture doit être assemblée par un adulte ayant lu et compris les instructionsde ce manuel.
Conservez l'emballage hors de portée des enfants et éliminez-le avant l’utilisation.
Conservez ce manuel pour référence ultérieure.
Officially
Licensed Product
BENTLEY MULSANNE
VOITURE AUTOPORTÉE ALIMENTÉE PAR BATTERIE
1/16
370-210V80
FR

Pile
Chargeur
12V7AH *1
12V1000mA
Âge approprié
Capacité de charge:
Vitesse:
Taille de la voiture:
Moyen de puissance:
Temps de charge:
37-96 mois
Moins de 30kg
3-5km/h
120 * 71 * 48 CM
Type de charge
8-12 heures
SPÉCIFICATIONS:
Àproposdevotrenouveauvéhicule
│
1
Àl'achat de votre nouveau véhicule.
Ce véhicule procurera àvotre enfant de nombreuxkilomètres deplaisir. Pour
vous assurer une conduite sûre, ainsi qu’àvotre enfant,nous vous prions de
lire attentivement ce manuel et de le conserverpour pouvoir vous y référer
ultérieurement.
Suivezles recommandations de ce manuel, elles sont conçues pourassurer
la sécuritéet le fonctionnement de votre voiture et de sonconducteur.
Fabriquée en Chine par Zhejiang Jiajia Ride-On Co., Ltd sous licence de Bentley
Motors Limited Angleterre. "Bentley", le "B"dans le dispositif des ailes et les
autres logos et noms associés sont des marques de Bentley Motors Limited.
Les dessins de la carrosserie des voitures Bentley sont protégés par Bentley
Motors Limited en vertu du droit des dessins et modèles, des marques et de la
propriétéintellectuelle.
2/16

Avis auxutilisateurs
│
2
Les risques de sécurité suivants peuvent entraîner des blessures graves ou la mort:
• Ne jamais laisser l'enfant sans surveillance. La surveillance directe d'un adulte est nécessaire.
Gardez toujours l'enfant en vue lorsqu'il est dans le véhicule.
• Pour réduire le risque de blessure, la surveillance d'un adulte est requise. Ne l'utilisez jamais
sur la route, à proximité de véhicules à moteur, sur ou près depentes ou de marches abruptes,
de piscines ou d'autres plans d'eau.Portezdes chaussures, et n'autorisez jamais plus d’un
conducteur.
• Ne jamais utiliser dans des conditions dangereuses telles que la neige, la pluie, la terre
meuble, la boue, le sable ou le gravier, car cela pourraitprovoquer un accident inattendu, comme
le renversement, et endommager lesystème électrique ou la batterie.
• Ne pas utiliser dans la circulation.
• Ce jouet doit être utilisé avec prudence, car il faut savoir éviter les chutes ou les collisions qui
pourraient causer des blessures à l'utilisateur ou à des tiers.
• Ce jouet ne convient pas aux enfants de moins de 36 mois en raison de sa vitesse maximale;
le poids maximal de l'utilisateur est de 30 kg.
• Ce jouet n'a pas de frein.
AVERTISSEMENT!
SÉCURITÉ
• Les piles non rechargeables ne doivent pas être rechargées.
• Les piles rechargeables doivent être retirées du jouet avant d'être rechargées.
• Les piles rechargeables ne doivent être rechargées que sous la surveillance d'un adulte.
• Les différents types de piles ou les piles neuves et usagées ne doivent pas être mélangés.
• Les piles doivent être insérées avec la polarité correcte.
• Les piles épuisées doivent être retirées du jouet.
INFORMATIONS SUR LA BATTERIE
•DANGER- Petites pièces. Ne convient pas aux enfants de moins de 36 mois.
Le produit contient de petites pièces, tenez les enfants à l'écart lors du montage.
•ASSEMBLAGE PAR UN ADULTE REQUIS.
•Toujours enlever le matériel de protection et les sacs en poly et les éliminer avant l'assemblage.
•Il faut porter un équipement de protection. Portez toujours des chaussures et asseyez-vous sur
le siège lorsque vous utilisez le véhicule.
•Ne roulez que sur un terrain plat. Ne jamais utiliser sur la pelouse.
•Ne laissez jamais un enfant sans surveillance.
•Gardez vos mains, vos cheveux et vos vêtements loin des pièces en mouvement.
3/16

1
4
5
4
5
6
6
13
14
10
12
8
2
911
2
2
7
3
15 14
3
17
18
16
CONSEIL: Certaines pièces illustrées sont assemblées des deux côtés duvéhicule.
Schéma des pièces
│
3
4/16
Table of contents
Languages:
Other Avson Motorized Toy Car manuals
Popular Motorized Toy Car manuals by other brands

Kyosho
Kyosho Mini-Z Racer MR-015 RM Type instruction sheet

ahead RC
ahead RC Adventurer Crawler G3308 Assembly manual

Reely ROAD
Reely ROAD Blue Splash H2O operating instructions

ECX
ECX ruckus ECX01000T1 instruction manual

Team Losi
Team Losi XXX-T Matt Francis Edition owner's manual

Baghera
Baghera 1938 Assembly instruction

Radio Shack
Radio Shack JackHammer owner's manual

Carrera RC
Carrera RC Track2Wheel Assembly and operating instructions

Jamara
Jamara Rupter 2,4 GHz Instruction

Kids Car Sales
Kids Car Sales Mercedes-AMG G63 owner's manual

Reely
Reely "Cyclone" 4WD RtR operating instructions

Rollplay
Rollplay 12V COLORADO W451 Owner's manual and assembly instructions