AVYCON AVK P2500 User manual

Keyboard Controller
Keyboard Controller
AVK-P2500
User`s Manual
This document contains preliminary information and is subject to change without notice.

11. KEYBOARD CONTROLLER (AVK-P2500 )
11.1 Connection
A user may connect cameras and Keyboard to a DVR.
Please see below for connection examples. RS485 ports are used for connections.
11.1.1 Configuration Diagram
Example
Please make sure to connect “Tx to Rx“ or “Rx to Tx” with same polarity. (+ to +) and (- to -).
11.1.2 USB Connection
In order to use Touch Pad on AVK-P2500 , a user should connect AVK-P2500 and DVR with provided
USB cable. DVR will automatically recognize the Touch Pad.
11.2 Keyboard Setup in DVR
Enter “Setup>SYSTEM>General>Setup” and define the ID of DVR.
When a user connects more than two DVRs then each DVR has to have a different ID.
Then move to “Setup>Device>Camera” and select AVK-P2500 .
Then, choose PTZ protocol and Camera ID. (For detailed information on setting PTZ camera, please refer to DVR manual)

11.3 Keyboard Configuration
KEYS DVR Mode SPD mode
DVR control Mode PTZ Mode
①EXIT Key N/A N/A
②
DVR Mode select Key
SPD Mode select Key
Setup Key
③
~ Number Pad Key
Clear Key
ENTER Key
④
(PRESET)
Display Key N/A Preset Key
(SCAN)
Audio Key N/A Scan Key
(AUTO)
Sequence Key N/A Auto Key

System Log Key N/A N/A
Emergency recording
Key N/A N/A
(TOUR)
Search Key N/A Activate Tour Key
(PATTERN)
Archive Key N/A Activate Pattern Key
(HOLD)
Spot control Key N/A Hold Key
Pause on Live Key N/A N/A
DVR Menu Key N/A N/A
⑤
REW Key N/A N/A
Backward Key N/A N/A
Play/Pause Key N/A N/A
Forward Key N/A N/A
FF Key NA N/A
⑥
(MENU)
PTZ Mode Key N/A Camera Menu Key
(OPEN)
N/A Activate Preset Key Open Iris Key
(CLOSE)
N/A Set Preset Key Close Iris Key
N/A Focus control Key Focus control Key
N/A Zoom control Key Zoom control Key
⑦JOYSTICK Direction key Pan, Tilt, Zoom
⑧Touch Pad Mouse N/A

11.4 Setup
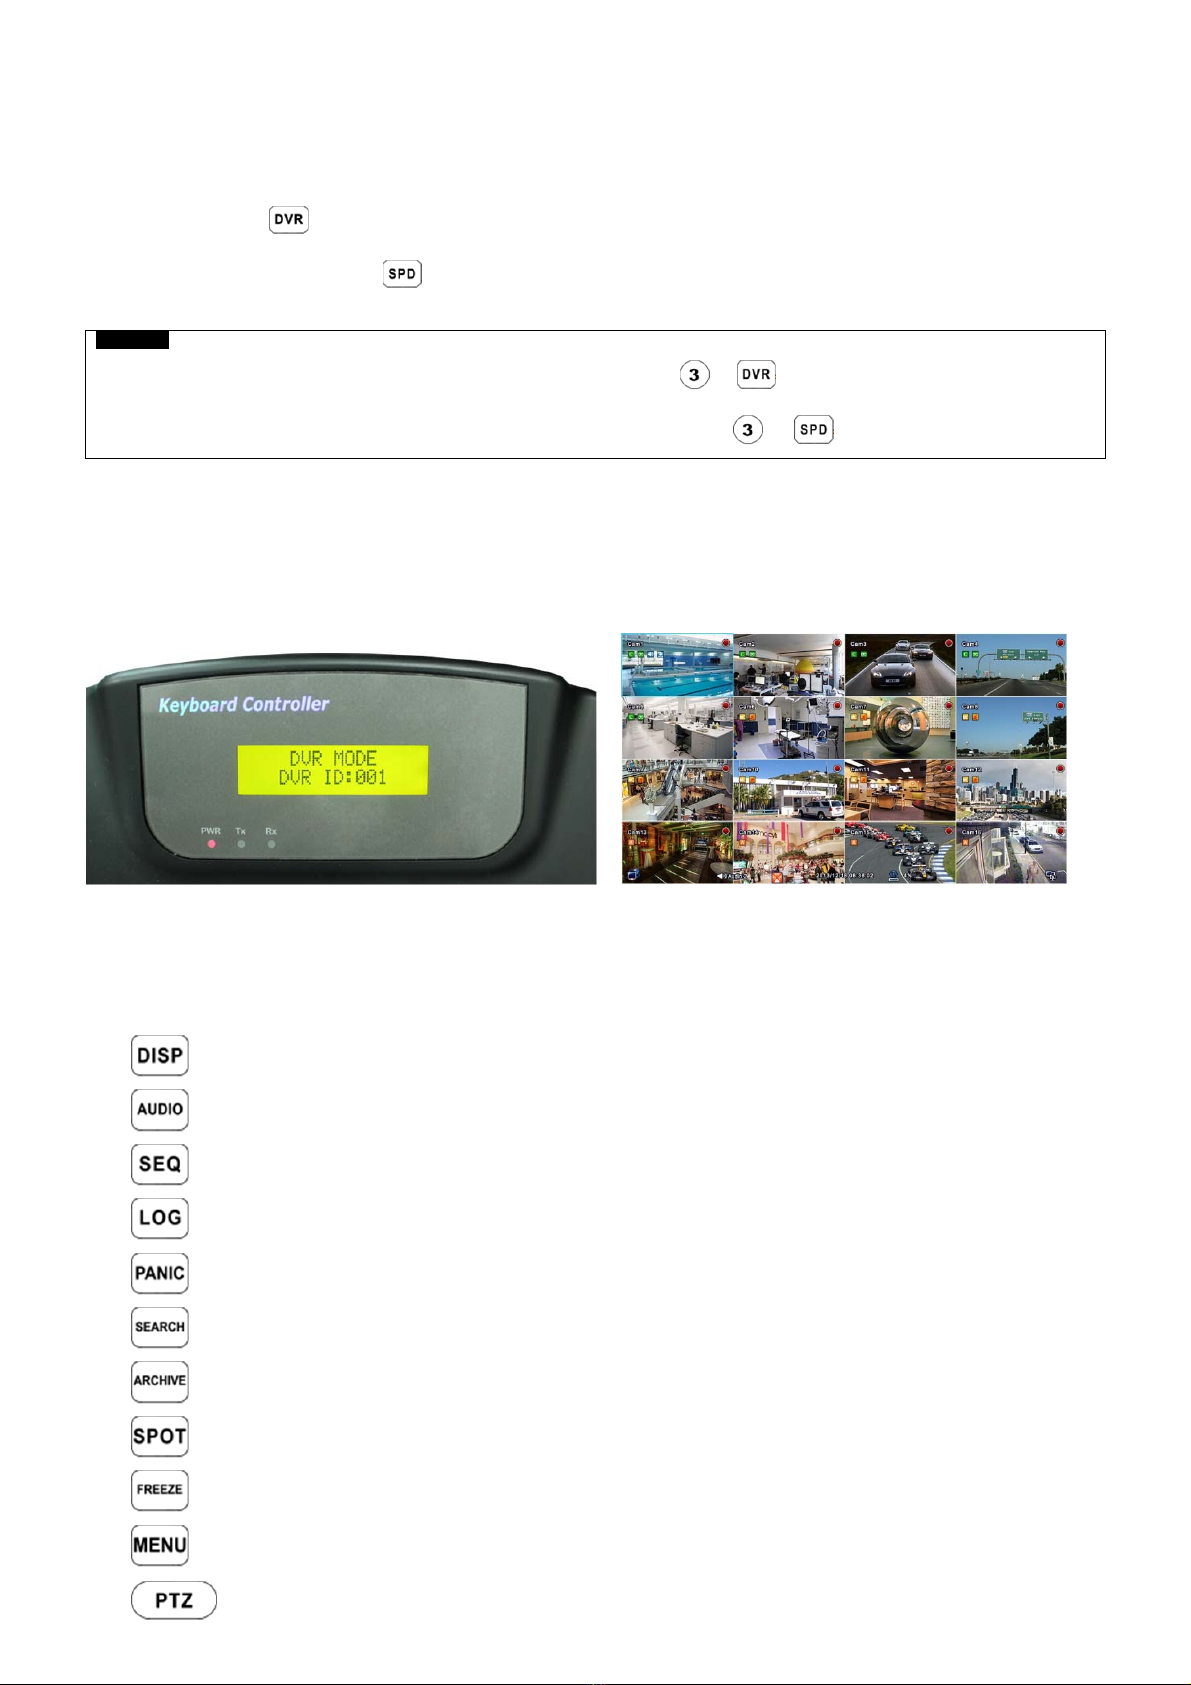
11.4.1 DVR Control Mode
Press + in DVR Mode to enter Main Setup and enter password. (Default password is 0000)
Keyboard Detail Option
VER Firmware version -
DATE Date setting YY/MM/DD
TITLE SET Camera title -
CONTROL ID ID No. Change -
DVR SPD Set Baud rate 2.4Kbps~57.6Kbps
COMM Communication setting RS422 / RS485
BACKLIGHT Backlight setting for LCD OFF / ON / AUTO
SLEEP Sleep mode setting OFF / 1Min / 5Min / 10Min / 30Min / 1 Hr
BUZZER Buzzer setting OFF / ON
TERMINATE Termination OFF / ON
JOYSTICK SPD Joystick speed 50MS~300MS
PASSWORD Change password Default password: 0000
FACTORY SET Factory reset -
SAVE/EXIT Save and Exit NO / YES
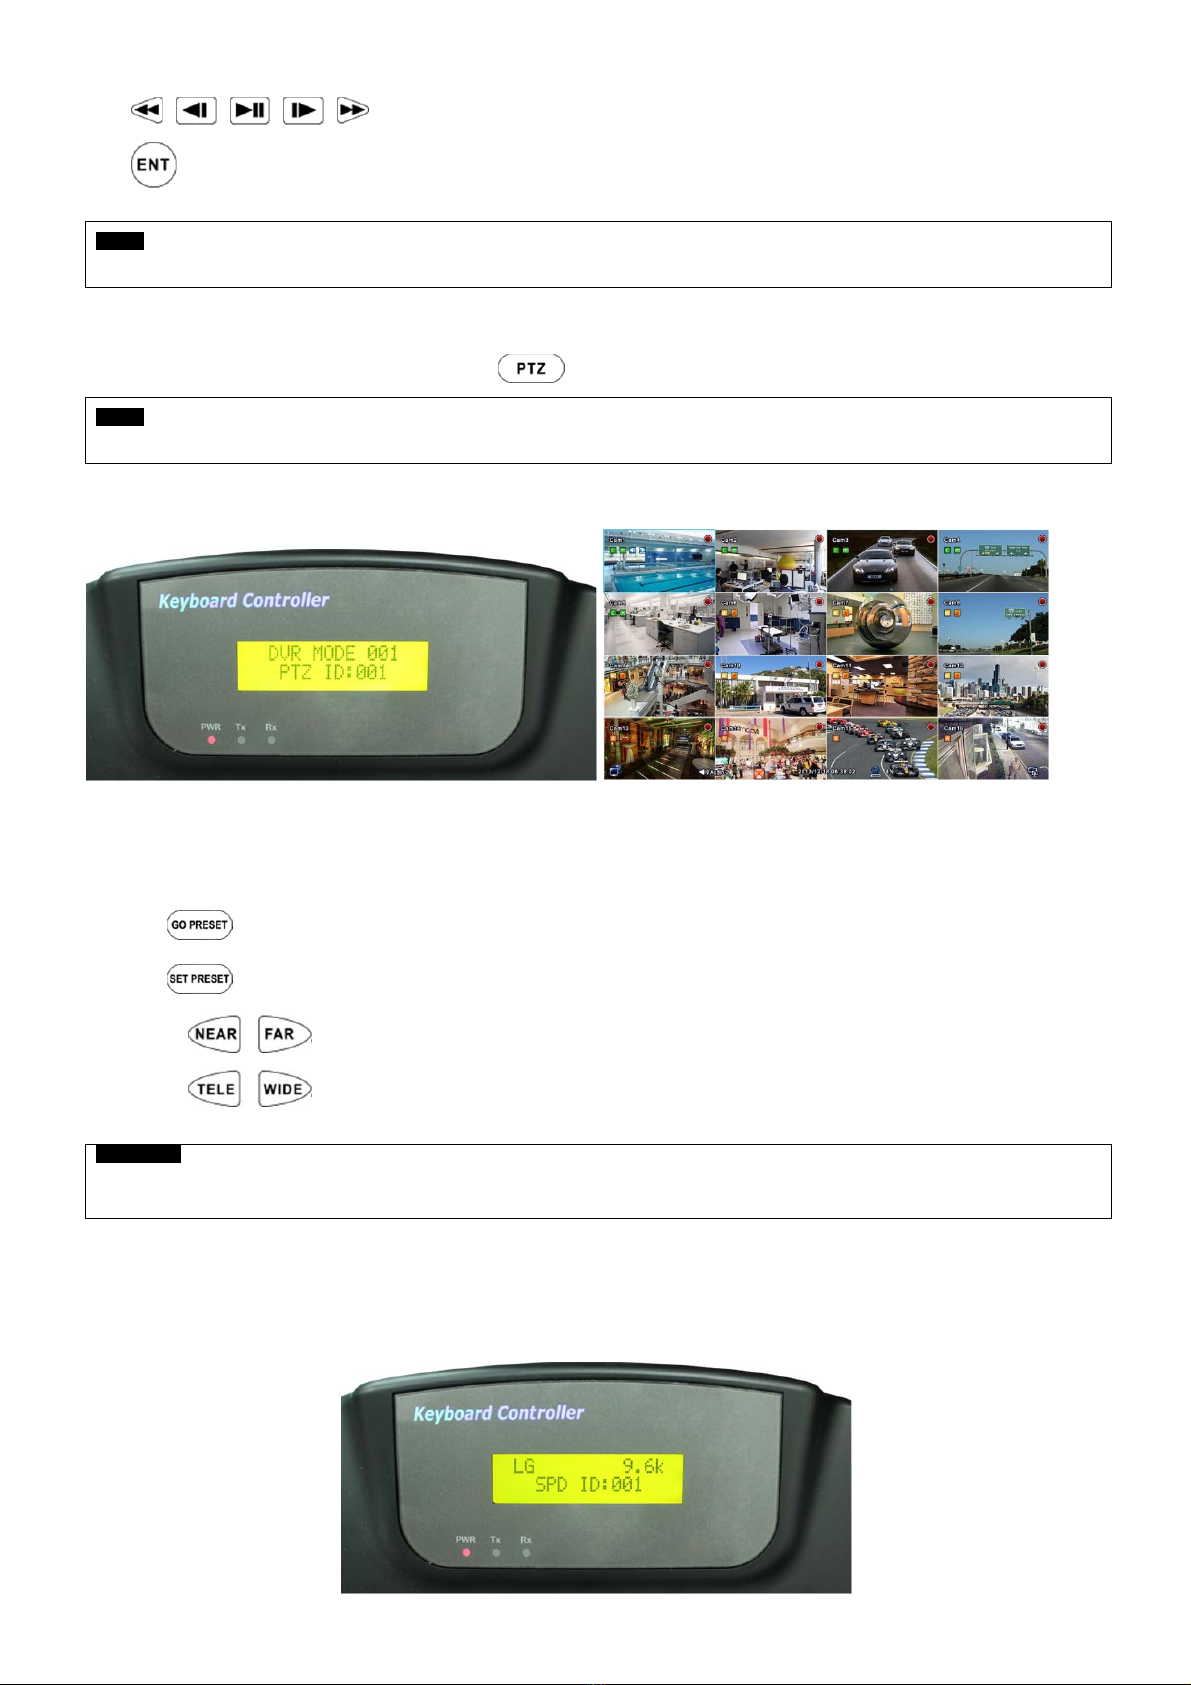
11.4.2 Speed Dome Setup
Press + in SPD Mode to enter Speed Dome Setup and enter password. (Default password is 0000)
Keyboard Detail Option
ADDRESS Camera ID number 1~255
MODEL Select Camera -
PROTOCOL Set Protocol PEL-D / PEL-P / W-DRX / SAM-E / LGP /
SAM-T / PANAS / VICON / AD / HWELL
BAUDRATE Set Baud rate 2.4Kbps~57.6Kbps
PARITY Set Parity NONE / EVEN / ODD
PROP Set Camera speed Slow PTZ => PROP: ON
Speed PTZ => PROP: OFF
11.4.3 Joystick Calibration
Press + to enter Joystick Calibration and enter password. (Default password is 0000)
Keyboard Detail Option
PTZ OFFSET Rest position value setting -
PAN LEFT Left Pan value setting -
PAN RIGHT Right Pan value setting -
TILT UP Tilt Up value setting -
TILT DOWN Tilt Down value setting -
ZOOM WIDE Zoom Wide value setting -
ZOOM TELE Zoom Tele value setting -

11.5 Operation
11.5.1 DVR/SPD Mode Conversion
Press “System ID” + “ ” to enter DVR control Mode.
Press “Speed Dome Camera ID” + “ ” to enter PTZ camera control Mode.
Example
If a user wishes to connect to SYSTEM ID 3 DVR then press Num Pad “ “+ “ ”.
If a user wishes to connect to Speed Dome camera ID 3 then press Num Pad “ “ + “ ”.
11.5.2 DVR Control Mode
11.5.2.1 Connection
If the DVR Control Mode is selected followings will display on Keyboard LCD and Live OSD as “KBD: #” on the right-bottom
corner.
Then, a user should be able to operate the DVR functions by AVK-P2500 .
11.5.2.2 Buttons
In DVR control mode, all buttons are operated according to texts written on each button. The functions are same as Front
buttons of DVR as follows:
-: Change display mode on Live and Playback in sequence of 1CH>4CH>9CH>16CH>1CH.
-:Activates and the AUDIO function and change Audio channel
-: Turn on/off Sequence function. Only supports 1CH, 4CH, 9Ch display mode
-: Pop up System Log
-: Active Emergency recording.
-: Pop up Search Menu in Live or switches to Live in Playback mode.
-: Pop up Archive window.
-: Change the channel of a monitor connected to the Spot output.
-: Freeze a current image in Live mode ONLY.
-: Pop up Setup window.
-: Enter PTZ control mode and able to use PTZ function of DVR.

-, , , , : Playback control in DVR Search Mode.
-:View a channel in full screen (by selecting a number with ENTER button).
NOTE
For detailed information on PTZ Mode, please refer to 4.3.5 Camera.
11.5.2.3 PTZ Mode
In order to enter PTZ mode, press “Camera ID” + “ “.
NOTE
PTZ Mode only can be switched from DVR Mode.
If the PTZ Mode is selected following will display on Keyboard LCD and OSD
Then, a user should be able to operate the PTZ camera with AVK-P2500 .
In PTZ mode, all buttons are operated according to texts written on each button. The functions are same as Front buttons of
DVR as follows:
-# + “ “ will move to saved Preset point.
-# + “ “ will save new Preset point under #.
-Press “ “ to adjust the Focus.
-Press “ “ to activate the Zoom.
WARNING
DEPENDING ON THE PROTOCOL BEING USED BY THE SPEED DOME CAMERA, CONTROLLING CAMERA MENU
COULD BE DIFFERENT. PLEASE CHECK SPEED DOME CAMERA MANUAL.
11.5.3 SPD Control Mode (Speed Dome)
11.5.3.1 Connection
If the SPD Control Mode is selected followings will display on Keyboard LCD:

Then, a user should be able to operate the Speed Dome camera directly with AVK-P2500 .
NOTE
Please check Protocol and Baud rate before operating the Speed Dome Camera using AVK-P2500 .
11.5.3.2 Buttons
(PRESET): Press number Key and PRESET then the camera will move to designated point.
(PATTERN): Press number Key and PATTERN then the designated Pattern will run
(AUTO): Press number Key and AUTO then the designated Auto will run.
(TOUR): Press number Key and TOUR then the designated Tour will run.
(SCAN): Press number Key and SCAN then the designated Scan will run.
(HOLD): Press HOLD to lock the Keyboard. To unlock a user has to input Password. (Default password is 0000)
: Press NEAR/FAR to adjust the focus of Speed Dome camera.
: Press TELE/WIDE to adjust the zoom of Speed Dome camera.
NOTE
SPD Control Mode is only supported when Speed Dome Camera is directly connected to AVK-P2500 .
WARNING
DEPENDING ON THE PROTOCOL BEING USED BY THE SPEED DOME CAMERA, CONTROLLING CAMERA MENU
COULD BE DIFFERENT. PLEASE CHECK SPEED DOME CAMERA MANUAL.
NOTE
When a Key does not Work after Set up
-If the communication speed of DVR and CP are not co-related, it may not work. Please make sure the Baud rate of Keyboard sets on
9.6kbps.
-Press the button to enter PTZ mode and switch to DVR mode again.
-Please reboot the DVR.
When Tx Blinks Continually on the LED Window
-If Tx blinks continually without any operation, it may be caused by improper set up of Joystick.
-OFFSET of the Joystick may not appropriately set up.
-Please do Joystick calibration.
Other manuals for AVK P2500
1
Other AVYCON Keyboard manuals