Axion STIM-PRO X9a User manual

INSTRUCTION MANUAL
STIM-PRO X9a
axion GmbH
Mollenbachstr. 13
71229 Leonberg
GERMANY
2460

The primary functions of the STIM-PRO X9a are the
treatment /pain relief with the TENS mode and electrical
muscle stimulation with the EMS mode.
Explanation of pain
Pain is a warning system and the body’s method of telling
us that something is wrong. Without it, abnormal conditions
and injuries to vital parts of the body may go undetected. A
persisting (long-term) pain is known as chronic pain. Pain
occurs when information signals travel to the brain via ner-
ve fibres, where it gets decoded, analyzed, and then reacted
to. The pain information travels from the injured area along
the small nerves leading to the spinal cord. Here it travels
up the spinal cord to the brain. The information is then
interpreted, referred back and the pain is felt.
Explanation of TENS
TENS = Transcutaneous Electrical Nerve Stimulation, uses
tiny electrical impulses sent through the skin to the under-
lying nerves. TENS does not cure any physiological problem;
it only helps control the pain. TENS does not work to the
same extent for everyone; however, most patients report
that it is eective in reducing or eliminating the pain.
It should only be used on medical advice or by prescription.
How TENS works
TENS can be applied in two operational modes:
The constant and weak activity with high frequency can block
the transmission of the pain signals from reaching the brain.
The brain cells process the pain signal. If the pain signal does
not reach the brain, no pain is felt. The second operational
INTRODUCTION
INTRODUCTION
2
AXION
EN

mode of TENS is for the purpose of stimulating the body’s own
natural pain control.
The “Burst”-mode (B) in a lower frequency may stimulate the
organism, so that analgesic substances are set free which
are called endorphins. For further details please refer to your
doctor.
EMS
Electrical Muscle Stimulation is an accepted and proven
way of treating muscular injuries. This is being widely used
in hospitals and sports clinics for the treatment of muscular
injuries and for the re-education of paralyzed muscles, to
prevent atrophy in aected muscles and improving muscle
tone and blood circulation. EMS has also been used suc-
cessfully for many years in the field of high-performance
sport for muscle regeneration and muscle development.
How EMS works
The brain sends impulses to a muscle which causes the
muscle to work. EMS generates artificial stimulation of the
muscle by the use of low frequency electrical pulses that
stimulate the nerves located beneath the skin. That leads to
a reaction of the targeted muscles.
The muscle is unable to distinguish between an impulse
from the brain or one that comes from outside. The muscle
reacts with a contraction in both cases and uses up energy.
3
STIM-PRO X9a
EN

GENERAL DESCRIPTION
SAFETY INFORMATION
The device is a battery-operated pulse generator that trans-
mits electrical impulses via electrodes to the body. These
impulses reach the nerves and muscles through the skin. The
electronics of the STIM-PRO X9a creates electrical impulses
whose in intensity, pulse duration and frequency using the
manual modes. All functions are easy to handle and the big
LCD display shows all parameter values clearly readable.
Read the instructions carefully before using the device.
Keep this device out of the reach of children.
Do not place electrodes in the area of the carotid arteries!
Do not place electrodes on the front of the throat!
Be careful with stimulation over metal implants.
Do not place electrodes above your heart!
Use with caution during pregnancy. Consult a doctor first!
Do not use electrodes on open wounds / injuries.
Do not use if you have fever.
Do not use if you have arrhythmia.
Do not use if you have epilepsy.
Never use the device when you are operating machines.
Never use near explosive or flammable gases.
Always TURN OFF the device before placing / removing
electrodes.
4
AXION
EN

Select P mode with
In program mode you can choose between 37 dierent
programs for various areas of application. These are fully
pre-programmed - just set the intensity for the connected
channels and start the application!
The program starts immediately when you set the intensity!
Most programs run in continuous mode, recognizable by a
“C” shown in the lower right corner of the display. But some
programs also have a pre-defined duration. The device ends
the application automatically after the time expires. Please
use these programs for the pre-defined duration only and
do not extend or shorten the duration of the application.
To set a program, press the „MODE“
button until you reach P mode,
recognizable by a P shown in the
bottom-left corner of the display.
Press or to select the
desired programs (P1 – P37). You find
an overview over all available
programs on pages 32 to 36.
When you chose the right program, please set the intensity
for the connected channels (1-4).
Increase intensity
Decrease intensity
In P mode, the parameters are set by default and can not
be changed!
Steps to select a program (P)
5
STIM-PRO X9a
EN

Program mode (P)
TENS – Programs P1 - P16
P01 Classic TENS-mode
To be applied in most existing types of pain (as acute or
chronic). Gate-Control-Eect.
P02 Low frequent TENS (Burst)
Release of endorphins. Application for example in case of
radiating pain on arms/legs/feet, muscular deeper-lying
pain, lumbago-ischialgia syndrome, knee arthrosis
P03 Modulated TENS (massaging eect)
Against addiction when applied for longer periods. To be
applied in most existing types of pain (as acute or chronic).
P04 Alternating frequencies 15/2Hz
Application for example in case of sti joints, neck pains,
lumbago, menstrual problems.
P05 Alternating frequencies 80/2 Hz
Perfect for a variety of dierent pain conditions.
P06 The special program for nausea, feeling of sickness, travel
sickness, seasickness
The electrodes should be placed above the acupuncture
point C6.
P07 Migraine and sensible parts of the body
Due to the reduced duration of pulse these applications are to
be specifically used in cases of tension headache, face pain,
neck pain, herpes zoster, migraine.
All parameters are set by default.
The programs have proven to be helpful in most cases for
the suggested applications. However, they might be used for
the treatment of other injuries or discomforts as well. Every
patient responds individually to stimulation current.
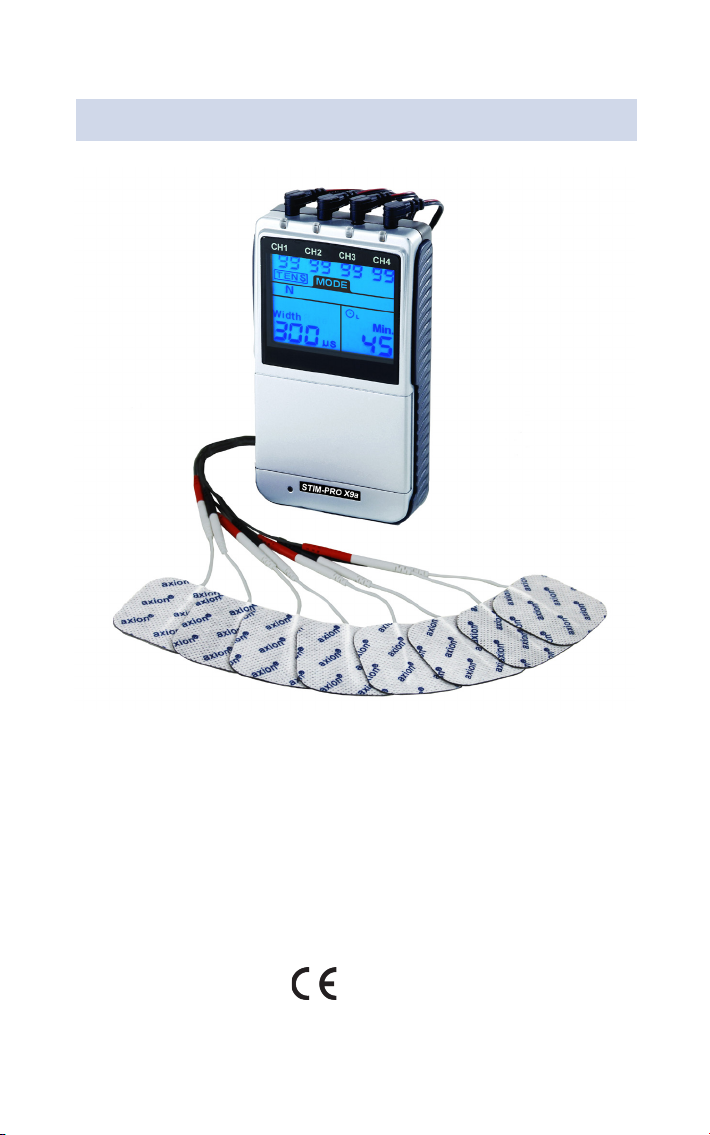
TENS – STIMULATION
6
AXION
EN

TENS – Programs P1 - P16
P08 Pains (as acute or chronic)
Application in case of pains in the neck, hip, shoulders,
elbows, rheumatic pains, back pain (lumbago), menstrual
problems and knee arthrosis.
P09 Rheumatic pains
Pains due to rheumatoid arthritis, radiating pain on arms/
legs/feet, through modulation suitable for long-term use.
P 10 Sweep-Mode 2 – 125 Hz
In cases of therapy-resistant complaints, stimulation both
on sensory and motor basis, against addiction.
P 11 Frequency change (2 – 100 Hz) and pulse duration
modulation
Perfect application for most types of acute and chronic pain.
P 12 Frequency modulation
Application in case of pains in the back, knee, shoulders,
legs, elbows and neck, rheumatic pains.
P 13 Prof. Han - stimulation
Muscular spasms, allodynia, duration: 30 minutes.
P 14 High-frequent TENS
Acute pains, tensions, Gate-Control-Eect.
P 15 Combi-TENS-Mode
4-Phases TENS. In cases of persisting pains. Consists of
high and low frequent TENS as well as frequency/pulse
duration/intensity modulation. Duration: 40 minutes.
P 16 Frequency-Wobbel-mode
Pains in the wrist and fingers, long-term application. Dura-
tion: 40 minutes.
7
STIM-PRO X9a
EN

EMS – Programs P17 - P30
P17 EMS – Strength (beginners)
for small muscle groups
P18 EMS – Strength (beginners)
for large muscle groups
P19 EMS – Strength (fully trained persons)
for small muscle groups
P20 EMS – Strength (fully trained persons)
for large muscle groups
P21 EMS – Muscle mass (beginners)
for small muscle groups
P22 EMS – Muscle mass (beginners)
for large muscle groups
P23 EMS – Muscle mass (fully trained persons)
for small muscle groups
P24 EMS – Muscle mass (fully trained persons)
for large muscle groups
P25 EMS – Endurance (beginners)
for small muscle groups
P26 EMS – Endurance (beginners)
for large muscle groups
P27 EMS – Endurance (fully trained persons)
for small muscle groups
P28 EMS – Endurance (fully trained persons)
for large muscle groups
Please note that the respective programs consist of several
phases. Programs 17 – 28 contain a warming-up phase of
approx. 60 seconds, followed by the stimulation itself which
may also consist of various phases.
EMS – STIMULATION
8
AXION
EN

MASSAGE - Programs P31 - P32
P31 Massage I
consists of three dierent massaging phases
P32 Massage II
consists of three dierent massaging phases
P29 EMS – Relax I
muscle regeneration, muscle relaxation – moderate intensity
P30 EMS – Relax II
muscle regeneration, muscle relaxation – moderate intensity
What are small and large muscle groups?
The muscles can be devided into small and large muscle
groups. Here you will find some examples for a better
understanding:
Large muscle groups:
thigh musculature
buttock musculature
abdominal musculature
back musculature
chest musculature
Small muscle groups:
calf musculature
biceps and triceps
shoulder musculature
forearms
fingers and toes
9
STIM-PRO X9a
EN

In case of cardiac pacemakers and during pregnancy the
device is only to be used under medical supervision (!).
In case of overflow bladder the device should not be used.
The device must not be used in the case of cervical cancer,
fistulas or prolapse of the vagina.
The device must not be used in the case of epilepsy.
The device must not be used if there are any infections in
the vaginal or rectal areas.
For reasons of hygiene, a probe must only be used by a
single person and must not be shared.
The device must not be used in case of a complete
denervation of the pelvic floor.
STIMULATION OF THE PELVIC
FLOOR MUSCLES
CONTRAINDICATIONS (pelvic floor training)
Programs P33 - P37
Application only possible in conjunction with a vaginal or
rectal probe (not part of the scope of delivery).
Noticeable but pleasant contractions of the pelvic floor
musculature. Please alternate the programs in use to pre-
vent habituation eects. Please use contact gel to ensure
optimal stimulation.
Session duration: 20 minutes
Application: several times a day as necessary
10
AXION
EN

1. Connecting the wires
Unpack the vaginal / rectal probe and clean it under running
water and dry it. Connect the wires to the device and attach
it to the probe.
2. Inserting the probe
Begin by emptying your bladder. The exercises should be
carried out when lying down with your knees slightly bent.
Apply contact gel to the probe and insert it slowly and
carefully.
3. Program selection, performing the stimulation
Turn on the device. Select the desired program (P33 -P37)
and start the stimulation by increasing the intensity by
pressing the buttons of the respective channel.
The program starts immediately when you set the
intensity!
4. Finishing the stimulation
Turn o the device and slowly remove the probe. Attention:
To prevent broken cables please grab the probe by the
shaft and do not pull on the cables. Use mild soap and
water to clean the probe.
PERFORMING PELVIC FLOOR
EXERCISES
11
STIM-PRO X9a
EN

Power On/O button and intensity control
The device can be switched on and o by pressing the On/
O button. The intensity can be reduced or increased by
pressing the intensity buttons. The intensity can be set per
channel from 0 to 100mA in steps of 1mA.
There are 4 LED lights at the top of the device. They shine
yellow to indicate activity of the corresponding channel.
Mode control
There are 5 TENS modes available (B,
N, M, SD1, SD2) and 3 EMS modes (C,
S, A) as well as the P mode (programs
1-37). The modes can be selected
by pressing the “MODE“ button. If a
TENS mode is selected, the LCD-dis-
play shows “TENS“. If an EMS mode is
selected, “EMS” is displayed.
Set control
By pressing the control, you may enter the setting
you intend to make adjustment. You may start to set the
value by pressing the or controls when the value is
flashing.
Increment control
When pressing this button, the parameter will increase. This
button controls the increase of settings.
Decrement control
When pressing this button, the parameter will decrease.
This button controls the decrease of parameter.
OPERATING THE DEVICE
12
AXION
EN

How to set personal TENS parameters
The settings can be adjusted according to the following steps.
1. Turn on the device
After the electrodes are placed firmly on skin and the lead
wires are plugged in the socket of device, press the
button.
2. Select mode
Select a mode by pressing the “MODE”
control. The mode you select will be
shown on the display. There are 5
modes available:
(B) Burst, (N) Normal, (M) Modulation, SD1 and SD2.
When a TENS-mode is selected, the LCD-Display will show
“TENS“. After a mode is selected, press control to enter
next setting. Then press the or control to change
the settings. The settings are stored in the unit as soon as
selected.
Dual timer
The unit has a timer of 1-60 minutes and Continuous mode.
It can be adjusted by pressing the and the or
controls. Its output will be shut o when time is up.
Displaying time (L) for channels 1+2 / (R) for channels 3+4
Low battery indicator
If this symbol is shown, the battery is low and the device
needs to be recharged immediately.
13
STIM-PRO X9a
EN

3. Set pulse width
The pulse width can be set from 30 µs to
400 µs. Press control to enter this
setting. Then press the or control
to change the settings. If no instructions
regarding the pulse width are given in
therapy, set the control to 70 – 120 µs.
4. Set pulse rate
The pulse rate is adjustable from 2Hz
to 150Hz. Press control to enter
this setting. Then press the “Increment”
or “Decrement” control to change the
settings. If no instructions regarding the
pulse width are given in therapy, set the
control to 70 – 120 µs.
5. Set timer
There are two adjustable timers available.
controls the application duration for the channels CH 1&2
controls the application duration for the channels CH 3&4
The settings are adjustable from 1 to 60 minutes. With the
setting (C) the machine runs in continuous mode. Press
control to enter the settings. Press or control to
adjust setting. Press the control when the Timer shows
60 minutes to set the timer to continuous stimulation. Both
Timers can be adjusted in the same way.
14
AXION
EN

(L) Timer CH1 & CH2 (R) Timer CH3 & CH4 Continuous
6. Adjusting the intensity
The intensity can be adjusted from 0 – 100. Press or
control to adjust the setting on the respective channels 1-4.
The settings can be adjusted according to the following steps:
1. Turn on the device
After the electrodes are placed firmly
on skin and the lead wires are plugged
in the socket of device, turn the on/o
control.
2. Select mode
Select a mode by pressing the “Mode” control.
The mode you selected will show up on the top of liquid
crystal display. There are 3 modes available: C (Constant), S
(Synchronous) and A (Asynchronous).
When an EMS mode is selected, the LCD display will show
“EMS“. After a mode is selected, press control to enter next
setting. Then press the or control to change the settings.
The settings are set as soon as they are selected.
How to set personal EMS parameters
15
STIM-PRO X9a
EN

3. Set ramp time
The ramp time controls the time of output
current that increase from 0 to the setting
level, and from the setting value back to
0. The ramp time is adjustable from 1 to 8
seconds.
4. Set contraction time (ON-Time)
The ON time controls the contraction time.
By pressing the control, the contraction
time is adjustable from 0 – 90 seconds. This
time includes the ramp time twice, once for
the ramp up and once for the ramp down.
Example: 10s ON time & 3s ramp time
= 3s ramp up, 4s full intensity, 3s ramp down
5. Set pause time (OFF-Time)
The O Time controls the time of relaxation
between two cycles. By pressing the
control, the relaxation time can be adjusted.
Both channels’ stimulation is cycled on
and o by the contraction and relaxation
settings. The range is adjustable from 0 to
90 seconds. In Alternate mode, the OFF
time should be equal or more than the ON
time.
(OFF TIME ≥ ON TIME)
6. Set pulse width
The pulse width is adjustable from 30 to
400 uS. Press control to enter this
setting. Then press the or control
to change the settings. If no instructions
regarding the pulse width are given in
therapy, set the control to 70 – 120 µs.
16
AXION
EN

7. Set Pulse Rate
The pulse rate is adjustable from 1Hz to
150Hz. Press control to enter this
setting. Then press the or control
to change the settings. If no instructions
regarding the pulse rate are given in
therapy, set the control to 70 – 120 Hz.
8. Set timer
There are two adjustable timers available.
controls the application duration for the channels CH 1&2
controls the application duration for the channels CH 3&4
The settings are adjustable from 1 to 60 minutes. With the
setting (C) the machine runs in continuous mode. Press
control to enter the settings. Press or control to ad-
just setting. Press the control when the timer shows 60
minutes to set the timer to continuous stimulation. Both timers
can be adjusted in the same way.
(L) Timer CH1 & CH2 (R) Timer CH3 & CH4 Continuous
9. Adjusting the intensity
The intensity can be adjusted from 0 – 100. Press or
control to adjust the setting on the respective channels 1-4.
17
STIM-PRO X9a
EN

Front
CONSTRUCTION OF THE DEVICE
18
AXION
EN

Back
19
STIM-PRO X9a
EN

This unit can store 60 sets of operation records. Total
treatment time up to 999 hours can be stored.
Check & delete individual records
Press “Mode” control and turn on the power simultaneously.
The LCD will show the number of records and operation
time. Press the or button to check each record. To
delete a record, press control for 3 seconds.
Check & delete accumulative record
At the individual records menu, press “Mode” control to
switch to accumulative record menu. Press the “SET”
control first, then press the “Mode” control simultaneously
for 3 seconds and all of the records will be deleted followed
by a beeper sound.
PATIENT COMPLIANCE METER
20
AXION
EN
Table of contents
Other Axion Fitness Equipment manuals