6
Recall a station:
1. Select band (if needed)
2. Press a preset button for less than one second to select stored station.
Note:7KLVXQLWLVHTXLSSHGZLWKEXLOWLQPHPRU\,&,QWHJUDWHG&LUFXLWVWRVDYHXVHUVHWWLQJVVXFKDVWXQHUSUHVHWVWDWLRQV
DQGDXGLRFRQWUROVHWWLQJV7RFDQFHOWKHVHVHWWLQJVVZLWFKWR5DGLRPRGHSUHVVDQGKROGEXWWRQ“1”IRUVHFRQGVGRQRW
UHOHDVHEXWWRQIROORZHGE\SUHVVLQJMDEXWWRQ8QLWZLOODXWRPDWLFDOO\UHVWDUWDIWHUVHFRQGV
5. STEREO/MONO SELECTOR (ST)
This function will only affect FM reception. Press this button if the FM reception becomes noisy/hissy. If the station being
UHFHLYHGLVLQVWHUHRLWZLOOQRZEHKHDUGLQPRQR3UHVVWKLVEXWWRQDJDLQIRUQRUPDOUHFHSWLRQ
6. EQUALIZER CONTROL (EQ)
Press EQ to select between Off/Pop/Rock/Classic/Flat equalizer modes.
7. LOCAL/DISTANT BUTTON (LOC)
Press this button in strong signal areas to allow the radio to scan strong stations during manual tuning (LOC appears). Press
to Distant position for listening to weak stations.
8. MODE / LOUDNESS BUTTON (MD/LD)
Press MD to select between: AUX/TUNER/CD-MP3/USB or MMC/SD modes.
LOUDNESS: Press and hold the button to select LOUDNESS mode.
9. BAND SELECTOR BUTTON (BD)
3XVKWKLVVZLWFKWRVHOHFWWKHGHVLUHGEDQGHLWKHU$0RU)0
10. AUTOMATIC OR MANUAL TUNING (FREQ UP OR FREQ DOWN )
(A) RADIO MODE
:KHQSUHVVHGIRUOHVVWKDQVHFRQGWKHVHNH\VRSHUDWHDV6((.7XQLQJPRGH
:KHQSUHVVHGORQJHUWKDQVHFRQGWKH\RSHUDWHDV0$18$/WXQLQJPRGH
,IWKHNH\VDUHQRWSUHVVHGIRUVHFRQGVWKH\ZLOOUHWXUQWR$XWRPDWLFPRGH
%&'033/$<(502'(
:KHQSUHVVHGIRUOHVVWKDQVHFRQGWKHVHNH\VRSHUDWHDV75$&.83RU75$&.'2:1PRGH
When pressed longer than 1
second
WKH\ZLOORSHUDWHDV&8(RU5(9,(:PRGH
11. AUTOMATICALLY STORE STATIONS (A/PS)
Select six strong stations and store them in current band.
1. Select a band (if needed)
2. Hold A/PS button for more than three seconds. The new stations replace stations already stored in that band.
Preset Scan
Scan stations stored in current band
1. Select a band (if needed)
2.
Hold A/PSIRUPRUHWKDQRQHVHFRQGEXWOHVVWKDQWKUHHVHFRQGV5DGLRSDXVHVIRUÀYHVHFRQGVDWHDFKVWDWLRQ3UHVV
A/PS again to stop scanning when desired station is reached.
12. ACTIVE MATRIX DISPLAY
The Active Matrix Display will display the current state of the unit.
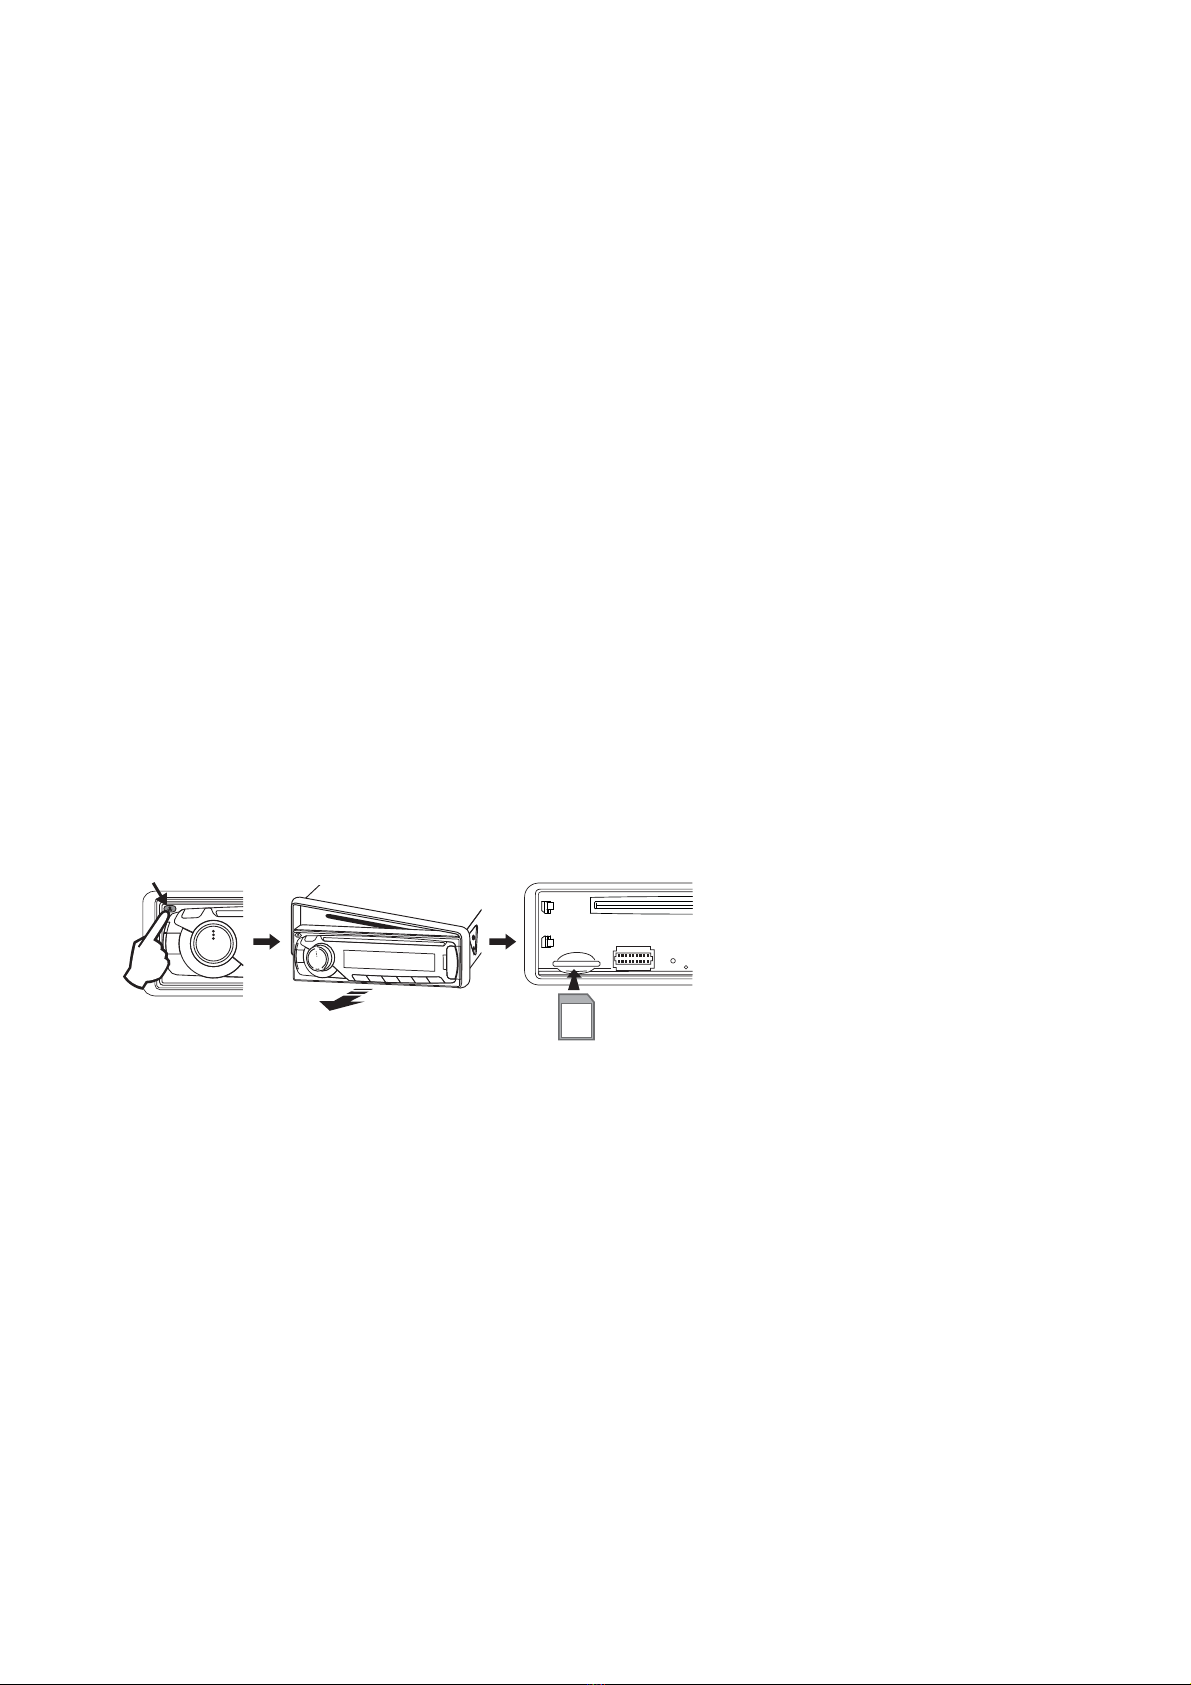
13. PANEL RELEASE BUTTON ( )
Press button andthe front panel will detached.
CD/MP3 CONTROL
Inserting the CD
Carefully slide the CD or CD-R or CD-RW through the CD slot into the CD compartment. The CD starts playing automatically.
TRACK/SEARCH BUTTON
FORWARD AND REVERSE TRACK SEARCH (10)
Press and release to advance to next track or to return to the beginning of the current track (track number will be displayed). Press
and hold to fast forward or reverse . Play will begin at the point when you release the button.
14. CD SLOT
15. CD EJECT BUTTON (
)
Press the EJECT button to remove the CD. The receiver will automatically switch to radio mode.
16. PAUSE BUTTON (PAU)
Press PAU button to pause CD playback. Press again to resume playback.
17. REPEAT BUTTON (RPT)
:KHQWKLVEXWWRQLVSUHVVHG¶537·LQGLFDWLRQLVGLVSOD\HGDQGWKHVHOHFWHGWUDFNZLOOEHFRQWLQXDOO\UHSHDWHGXQWLOWKH7UDFN
5HSHDWPRGHLVFDQFHOOHGE\SUHVVLQJ¶537·EXWWRQDJDLQ