EN-6
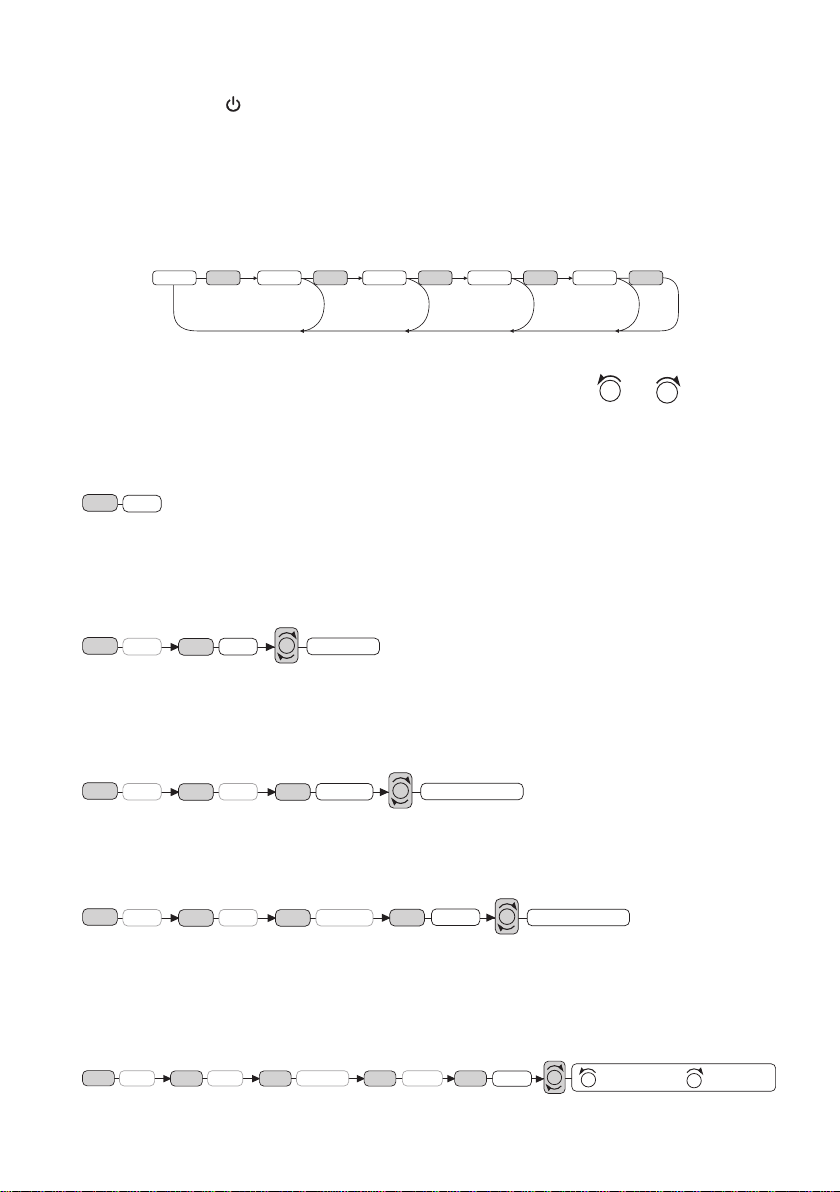
AUDIO DSP CONTROLS (2)
Press the SEL button again (for more than 2 seconds) to activate Selecting mode for DSP:
2 sec.
SELBEEP ON / 2nd / OFF
VOL
2 sec. BEEP
SELSELFLAT / POP / ROCK / CLASSICALDSP
SELADJVOL
SEL
SEL
STEREO
SEL
LOCDISP SEL
STEREO
SEL
LOCDISP SEL
2 sec.
SELSTEREO/MONO
VOL
STEREO
SEL
LOCDISP SEL
2 sec.
SELDX/LOCAL
VOL
LOCDISP SEL
2 sec.
SELDISP
STEREO
SEL
LOCDISP SEL
SEL
ADJ to set hourto set minute /
VOL VOL
VOL
4. PRESET STATIONS (1-6)
Six numbered preset buttons store and recall stations for each band.
Storing a station:
1. Select a band (if needed)
2. Select a station
3. Hold a preset button longer than one second. Preset station number appears in the display when station is
saved.
Recall a station:
1. Select band (if needed)
2. Press a preset button for less than one second to select stored station.
Note: This unit is equipped with built-in memory I.C. (Integrated Circuits) to save user settings such as tuner
preset stations and audio control settings. To cancel these settings, switch to Radio mode, press and hold
button “1” for 2 seconds (do not release button) followed by pressing MD button. Unit will automatically
restart after 5 seconds.
5. MODE / SUBWOOFER BUTTON (MD/SUB)
Press MD to select between: AUX/TUNER/CD-MP3/USB or MMC/SD modes.
SUBWOOFER: Press and hold this button to engage subwoofer output.
6. BAND SELECTOR / LOUDNESS BUTTON (BD/LD)
Pushthisswitchtoselectthedesiredband,eitherAMorFM.
LOUDNESS: Press and hold the button to select LOUDNESS mode.
7. AUTOMATIC OR MANUAL TUNING (FREQ UP OR FREQ DOWN )
(A) RADIO MODE
Whenpressedforlessthan1second,thesekeysoperateasSEEKTuningmode.
Whenpressedlongerthan1second,theyoperateasMANUALtuningmode.
Ifthekeysarenotpressedfor3seconds,theywillreturntoAutomaticmode.
(B) CD/MP3 PLAYER MODE
Whenpressedforlessthan1second,thesekeysoperateasTRACKUPorTRACKDOWNmode.
When pressed longer than 1
second
,theywilloperateasCUEorREVIEWmode.
8. AUTOMATICALLY STORE STATIONS (A/PS)
Select six strong stations and store them in current band.
1. Select a band (if needed)
2. Hold A/PS button for more than three seconds. The new stations replace stations already stored in that
band.
Preset Scan
Scan stations stored in current band
1. Select a band (if needed)
2.
Hold A/PS for more thanonesecond but less thanthreeseconds. Radio pauses for veseconds at each
station. Press A/PS again to stop scanning when desired station is reached.
9. ACTIVE MATRIX DISPLAY
TheActive Matrix Display will display the current state of the unit.
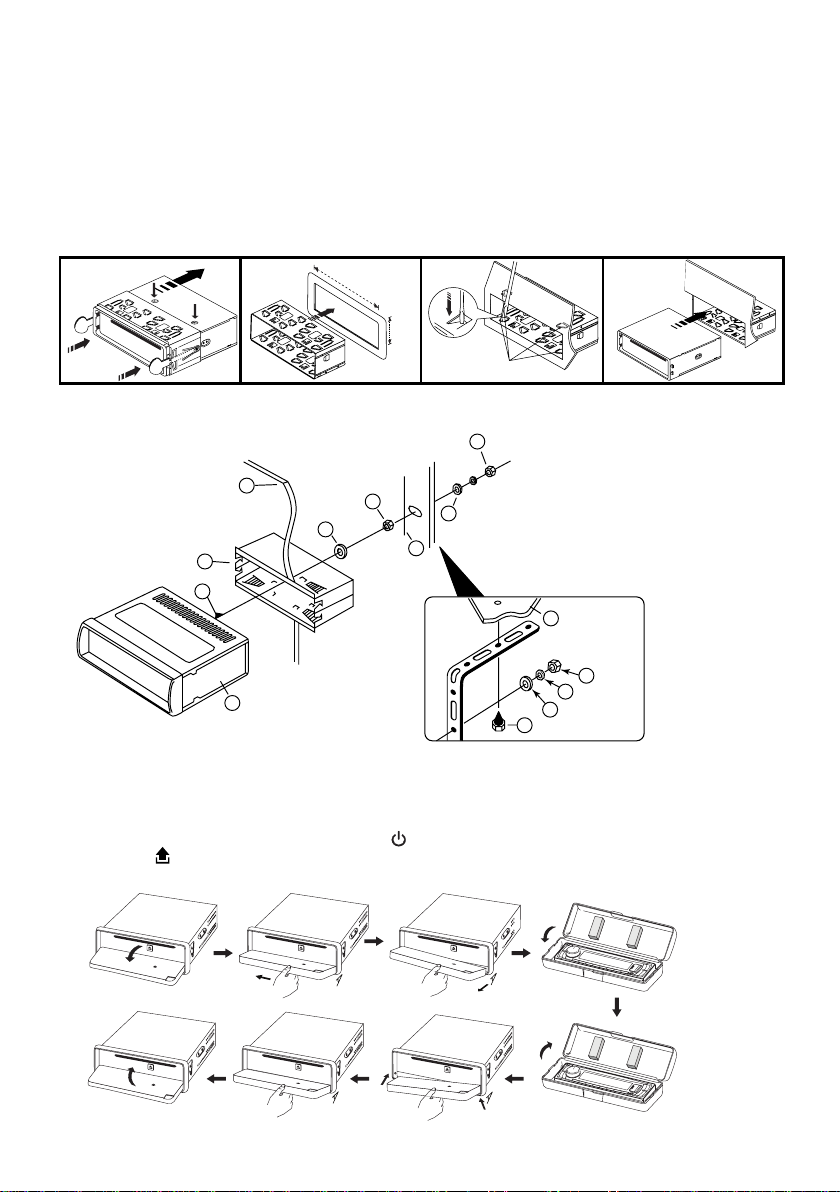
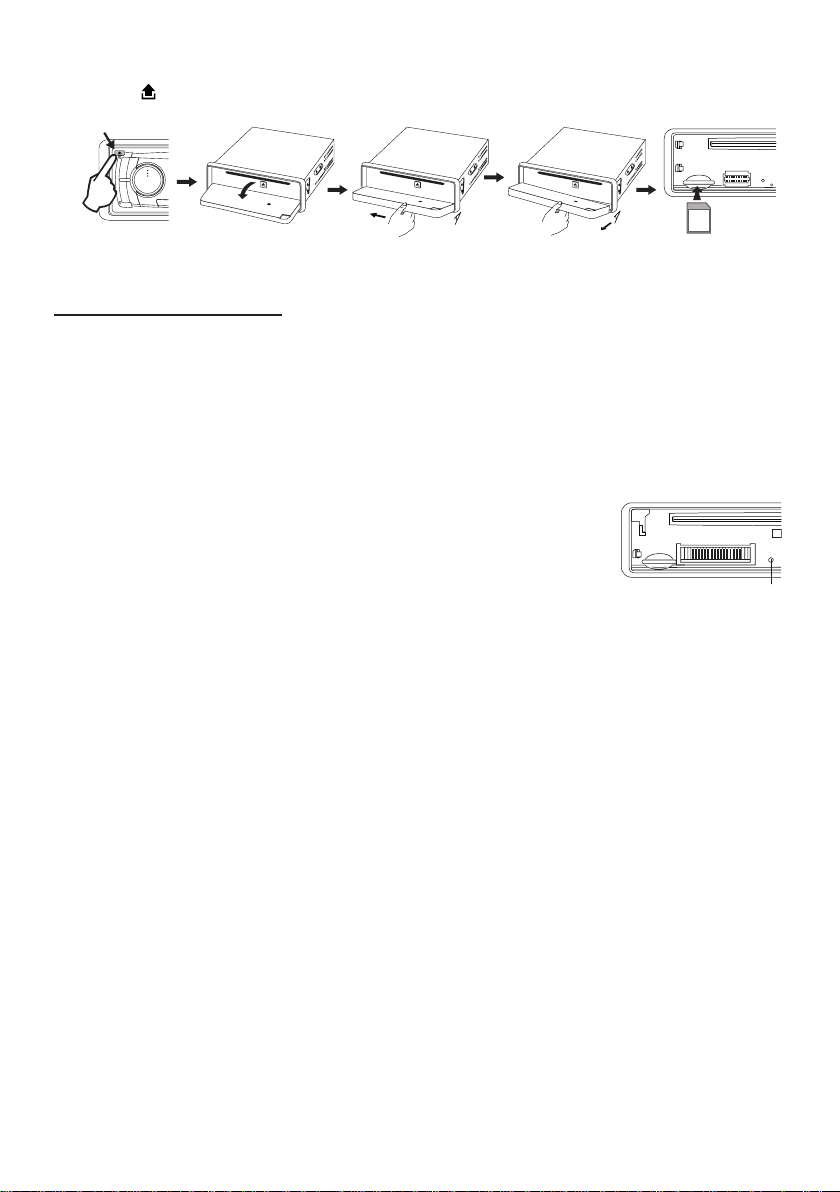
10. OPEN PANEL RELEASE BUTTON ( )
Press button and the front panel will open.