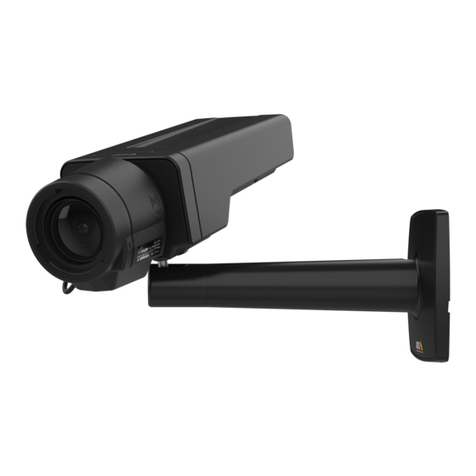
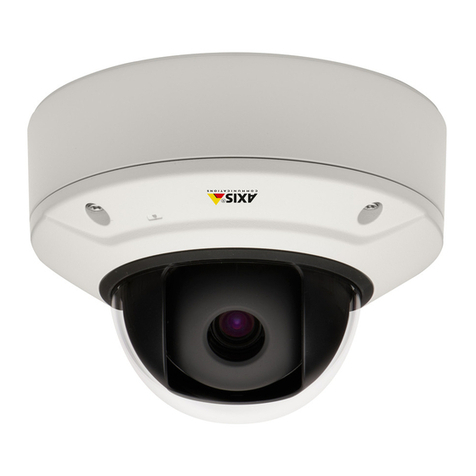
Axis Q1635-E User manual

AXIS Q1635-E Fixed Network Camera
User Manual

About this Docume t
This manual is intended for administrators and users of the AXIS
Q1635-E Network Camera, and is a licable to rmware 5.80 and
later. It includes instructions for using and managing the roduct on
your network. Previous ex erience of networking will be of use when
using this roduct. Some knowledge of UNIX or Linux-based systems
may also be benecial, for develo ing shell scri ts and a lications.
Later versions of this document will be osted to the Axis website,
as required. See also the roduct’s online hel , available via the
web-based interface.
Legal Co sideratio s
Video and audio surveillance can be regulated by laws that vary from
country to country. Check the laws in your local region before using
this roduct for surveillance ur oses.
This roduct includes one (1) H.264 decoder license and one (1) AAC
decoder license. To urchase further licenses, contact your reseller.
Liability
Every care has been taken in the re aration of this document. Please
inform your local Axis ofce of any inaccuracies or omissions. Axis
Communications AB cannot be held res onsible for any technical or
ty ogra hical errors and reserves the right to make changes to the
roduct and manuals without rior notice. Axis Communications AB
makes no warranty of any kind with regard to the material contained
within this document, including, but not limited to, the im lied
warranties of merchantability and tness for a articular ur ose. Axis
Communications AB shall not be liable nor res onsible for incidental or
consequential damages in connection with the furnishing, erformance
or use of this material. This roduct is only to be used for its intended
ur ose.
I tellectual Property Rights
Axis AB has intellectual ro erty rights relating to technology embodied
in the roduct described in this document. In articular, and without
limitation, these intellectual ro erty rights may include one or more
of the atents listed at www.axis.com/patent.htm and one or more
additional atents or ending atent a lications in the US and other
countries.
This roduct contains licensed third- arty software. See the menu item
“About” in the roduct’s user interface for more information.
This roduct contains source code co yright A le Com uter,
Inc., under the terms of A le Public Source License 2.0 (see
www.opensource.apple.com/apsl). The source code is available from
https://developer.apple.com/bonjour/
Equipme t Modicatio s
This equi ment must be installed and used in strict accordance with the
instructions given in the user documentation. This equi ment contains
no user-serviceable com onents. Unauthorized equi ment changes or
modications will invalidate all a licable regulatory certications
and a rovals.
Trademark Ack owledgme ts
AXIS COMMUNICATIONS, AXIS, ETRAX, ARTPEC and VAPIX are
registered trademarks or trademark a lications of Axis AB in various
jurisdictions. All other com any names and roducts are trademarks or
registered trademarks of their res ective com anies.
A le, Boa, A ache, Bonjour, Ethernet, Internet Ex lorer, Linux,
Microsoft, Mozilla, Real, SMPTE, QuickTime, UNIX, Windows, Windows
Vista and WWW are registered trademarks of the res ective holders.
Java and all Java-based trademarks and logos are trademarks or
registered trademarks of Oracle and/or its afliates. UPnPTM is a
certication mark of the UPnPTM Im lementers Cor oration.
SD, SDHC and SDXC are trademarks or registered trademarks of SD-3C,
LLC in the United States, other countries or both. Also, miniSD, microSD,
miniSDHC, microSDHC, microSDXC are all trademarks or registered
trademarks of SD-3C, LLC in the United States, other countries or both.
Regulatory I formatio
Europe
This roduct com lies with the a licable CE marking directives
and harmonized standards:
•Electromagnetic Com atibility (EMC) Directive 2004/108/EC. See
Electromagnetic Compatibility (EMC) on page 2 .
•Low Voltage (LVD) Directive 2006/95/EC. See afety on page 3 .
•Restrictions of Hazardous Substances (RoHS) Directive 2011/65/EU.
See Disposal and Recycling on page 3 .
A co y of the original declaration of conformity may be obtained from
Axis Communications AB. See Contact Information on page 3 .
Electromag etic Compatibility (EMC)
This equi ment has been designed and tested to fulll a licable
standards for:
•Radio frequency emission when installed according to the
instructions and used in its intended environment.
•Immunity to electrical and electromagnetic henomena when
installed according to the instructions and used in its intended
environment.
USA
Using an unshielded network cable (UTP) – This equi ment has
been tested using an unshielded network cable (UTP) and found to
com ly with the limits for a Class A digital device, ursuant to art
15 of the FCC Rules. These limits are designed to rovide reasonable
rotection against harmful interference when the equi ment is
o erated in a commercial environment. This equi ment generates,
uses, and can radiate radio frequency energy and, if not installed and
used in accordance with the instruction manual, may cause harmful
interference to radio communications. O eration of this equi ment in a
residential area is likely to cause harmful interference in which case
the user will be required to correct the interference at his own ex ense.
Using a shielded network cable (STP) – This equi ment has also
been tested using a shielded network cable (STP) and found to com ly
with the limits for a Class B digital device, ursuant to art 15 of the
FCC Rules. These limits are designed to rovide reasonable rotection
against harmful interference in a residential installation. This
equi ment generates, uses and can radiate radio frequency energy and,
if not installed and used in accordance with the instructions, may cause
harmful interference to radio communications. However, there is no
guarantee that interference will not occur in a articular installation. If
this equi ment does cause harmful interference to radio or television
rece tion, which can be determined by turning the equi ment off and
on, the user is encouraged to try to correct the interference by one or
more of the following measures:
•Reorient or relocate the receiving antenna.
•Increase the se aration between the equi ment and receiver.
•Connect the equi ment into an outlet on a circuit different from
that to which the receiver is connected.
•Consult the dealer or an ex erienced radio/TV technician for hel .
To be used in a residential area or a demanding electrical environment,
the roduct shall be connected using a shielded network cable (STP)
that is ro erly grounded.
Canada
This digital a aratus com lies with CAN ICES-3 (Class B). The roduct
shall be connected using a shielded network cable (STP) that is
ro erly grounded. Cet a areil numérique est conforme à la norme
CAN NMB-3 (classe B). Le roduit doit être connecté à l'aide d'un câble
réseau blindé (STP) qui est correctement mis à la terre.
Europe
This digital equi ment fullls the requirements for RF emission
according to the Class B limit of EN 55022. The roduct shall be
connected using a shielded network cable (STP) that is ro erly
grounded.
This roduct fullls the requirements for immunity according
to EN 61000-6-1 residential, commercial and light-industrial
environments.
This roduct fullls the requirements for immunity according to
EN 61000-6-2 industrial environments.
This roduct fullls the requirements for immunity according to
EN 55024 ofce and commercial environments.
Australia/New Zealand
This digital equi ment fullls the requirements for RF emission
according to the Class B limit of AS/NZS CISPR 22. The roduct shall
be connected using a shielded network cable (STP) that is ro erly
grounded.
apan
この装置は、クラスB情報技術装置です。この装置は、家庭環境で使⽤することを⽬的としていますが、この装置がラジオやテレビジョン受信機に近接して使⽤されると、受信障害を引き起こすことがあります。取扱説明書に従って正しい取り扱いをして下さい。本製品は、シールドネットワークケーブル(STP)を使⽤して接続してください。また適切に接地してください。Korea
이 기기는 가정용(B급) 전자파적합기기로서 주로 가정에
서 사용하는 것을 목적으로 하며, 모든 지역에서 사용할 수
있습니다. 적절히 접지된 STP (shielded twisted pair) 케이
블을 사용하여 제품을 연결 하십시오.
Safety
This roduct com lies with IEC/EN/UL 60950-1 and
IEC/EN/UL 60950-22, Safety of Information Technology
Equi ment. The roduct shall be grounded either through a shielded
network cable (STP) or other a ro riate method.
The ower su ly used with this roduct shall fulll the requirements
for Safety Extra Low Voltage (SELV) and Limited Power Source (LPS)
according to IEC/EN/UL 60950-1.
Battery
Low battery ower affects the o eration of the RTC, causing it to reset
at every ower-u . When the battery needs re lacing, a log message
will a ear in the roduct’s server re ort. For more information about
the server re ort, see the roduct´s setu ages or contact Axis su ort.
The battery should not be re laced unless required, but if the battery
does need re lacing, contact Axis su ort at www.axis.com/techsup for
assistance.
Lithium coin cell 3.0 V batteries contain 1,2-dimethoxyethane; ethylene
glycol dimethyl ether (EGDME), CAS no. 110-71-4.
WARNING
•Risk of ex losion if the battery is incorrectly re laced.
•Re lace only with an identical battery or a battery which is
recommended by Axis.
•Dis ose of used batteries according to local regulations or
the battery manufacturer's instructions.
Disposal a d Recycli g
When this roduct has reached the end of its useful life, dis ose of
it according to local laws and regulations. For information about
your nearest designated collection oint, contact your local authority
res onsible for waste dis osal. In accordance with local legislation,
enalties may be a licable for incorrect dis osal of this waste.
Europe
This symbol means that the roduct shall not be dis osed of
together with household or commercial waste. Directive 2012/19/EU
on waste electrical and electronic equi ment (WEEE) is a licable in
the Euro ean Union member states. To revent otential harm to
human health and the environment, the roduct must be dis osed
of in an a roved and environmentally safe recycling rocess. For
information about your nearest designated collection oint, contact
your local authority res onsible for waste dis osal. Businesses should
contact the roduct su lier for information about how to dis ose
of this roduct correctly.
This roduct com lies with the requirements of Directive 2011/65/EU on
the restriction of the use of certain hazardous substances in electrical
and electronic equi ment (RoHS).
China
This roduct com lies with the requirements of the legislative
act Administration on the Control of Pollution Caused by Electronic
Information Products (ACPEIP).
Co tact I formatio
Axis Communications AB
Emdalavägen 14
223 69 Lund
Sweden
Tel: +46 46 272 18 00
Fax: +46 46 13 61 30
www.axis.com
Support
Should you require any technical assistance, lease contact your Axis
reseller. If your questions cannot be answered immediately, your
reseller will forward your queries through the a ro riate channels to
ensure a ra id res onse. If you are connected to the Internet, you can:
•download user documentation and software u dates
•nd answers to resolved roblems in the FAQ database. Search
by roduct, category, or hrase
•re ort roblems to Axis su ort staff by logging in to your rivate
su ort area
•chat with Axis su ort staff
•visit Axis Su ort at www.axis.com/techsup/
Lear More!
Visit Axis learning center www.axis.com/academy/ for useful trainings,
webinars, tutorials and guides.

AXIS Q1635-E Fixed Network Camera
able of Contents
Hardware Overview . . . . . . . . . . . . . . . . . . . . . . . . . . . . . . . . . . . . . . . . . . 6
Connectors and Buttons . . . . . . . . . . . . . . . . . . . . . . . . . . . . . . . . . . . . . . . . . . 7
LED Indicators . . . . . . . . . . . . . . . . . . . . . . . . . . . . . . . . . . . . . . . . . . . . . . . . . . 9
Status LED Behavior for Focus Assistant . . . . . . . . . . . . . . . . . . . . . . . . . . . . . 9
Buzzer Signal for Focus Assistant . . . . . . . . . . . . . . . . . . . . . . . . . . . . . . . . . . . 10
Status LED Behavior and Buzzer Signal for Levelling Assistant . . . . . . . . . . . 10
Re lace the Lens . . . . . . . . . . . . . . . . . . . . . . . . . . . . . . . . . . . . . . . . . . . . . . . . 10
Access the Product . . . . . . . . . . . . . . . . . . . . . . . . . . . . . . . . . . . . . . . . . . 12
Access from a Browser . . . . . . . . . . . . . . . . . . . . . . . . . . . . . . . . . . . . . . . . . . . 12
Access from the Internet . . . . . . . . . . . . . . . . . . . . . . . . . . . . . . . . . . . . . . . . . . 12
Set the Root Password . . . . . . . . . . . . . . . . . . . . . . . . . . . . . . . . . . . . . . . . . . . 13
The Live View Page . . . . . . . . . . . . . . . . . . . . . . . . . . . . . . . . . . . . . . . . . . . . . . 14
Media Streams . . . . . . . . . . . . . . . . . . . . . . . . . . . . . . . . . . . . . . . . . . . . . 17
How to Stream H.264 . . . . . . . . . . . . . . . . . . . . . . . . . . . . . . . . . . . . . . . . . . . . 17
MJPEG . . . . . . . . . . . . . . . . . . . . . . . . . . . . . . . . . . . . . . . . . . . . . . . . . . . . . . . . 17
AXIS Media Control (AMC) . . . . . . . . . . . . . . . . . . . . . . . . . . . . . . . . . . . . . . . . 17
Alternative Methods of Accessing the Video Stream . . . . . . . . . . . . . . . . . . . . 18
Access Audio Streams . . . . . . . . . . . . . . . . . . . . . . . . . . . . . . . . . . . . . . . . . . . . 18
Set Up the Product . . . . . . . . . . . . . . . . . . . . . . . . . . . . . . . . . . . . . . . . . . 20
Basic Setu . . . . . . . . . . . . . . . . . . . . . . . . . . . . . . . . . . . . . . . . . . . . . . . . . . . . 20
Adjust Focus . . . . . . . . . . . . . . . . . . . . . . . . . . . . . . . . . . . . . . . . . . . . . . . . . . . 20
Focus Assistant . . . . . . . . . . . . . . . . . . . . . . . . . . . . . . . . . . . . . . . . . . . . . . . . . 21
Video and Audio . . . . . . . . . . . . . . . . . . . . . . . . . . . . . . . . . . . . . . . . . . . . 22
Set U Video Streams . . . . . . . . . . . . . . . . . . . . . . . . . . . . . . . . . . . . . . . . . . . . 22
Stream Proles . . . . . . . . . . . . . . . . . . . . . . . . . . . . . . . . . . . . . . . . . . . . . . . . . 24
ONVIF Media Proles . . . . . . . . . . . . . . . . . . . . . . . . . . . . . . . . . . . . . . . . . . . . 24
Camera Settings . . . . . . . . . . . . . . . . . . . . . . . . . . . . . . . . . . . . . . . . . . . . . . . . 25
View Area . . . . . . . . . . . . . . . . . . . . . . . . . . . . . . . . . . . . . . . . . . . . . . . . . . . . . 28
Overlay . . . . . . . . . . . . . . . . . . . . . . . . . . . . . . . . . . . . . . . . . . . . . . . . . . . . . . . . 28
Privacy Mask . . . . . . . . . . . . . . . . . . . . . . . . . . . . . . . . . . . . . . . . . . . . . . . . . . . 30
Focus . . . . . . . . . . . . . . . . . . . . . . . . . . . . . . . . . . . . . . . . . . . . . . . . . . . . . . . . . 30
Set U Audio . . . . . . . . . . . . . . . . . . . . . . . . . . . . . . . . . . . . . . . . . . . . . . . . . . . 31
Audio Cli s . . . . . . . . . . . . . . . . . . . . . . . . . . . . . . . . . . . . . . . . . . . . . . . . . . . . 33
Congure the Live View Page . . . . . . . . . . . . . . . . . . . . . . . . . . . . . . . . . 34
PTZ (Pan Tilt Zoom) . . . . . . . . . . . . . . . . . . . . . . . . . . . . . . . . . . . . . . . . . 36
Preset Positions . . . . . . . . . . . . . . . . . . . . . . . . . . . . . . . . . . . . . . . . . . . . . . . . . 36
Guard Tour . . . . . . . . . . . . . . . . . . . . . . . . . . . . . . . . . . . . . . . . . . . . . . . . . . . . . 36
Advanced . . . . . . . . . . . . . . . . . . . . . . . . . . . . . . . . . . . . . . . . . . . . . . . . . . . . . . 36
Install PTZ Driver . . . . . . . . . . . . . . . . . . . . . . . . . . . . . . . . . . . . . . . . . . . . . . . . 37
Control Queue . . . . . . . . . . . . . . . . . . . . . . . . . . . . . . . . . . . . . . . . . . . . . . . . . . 37
Detectors . . . . . . . . . . . . . . . . . . . . . . . . . . . . . . . . . . . . . . . . . . . . . . . . . . 38
Camera Tam ering . . . . . . . . . . . . . . . . . . . . . . . . . . . . . . . . . . . . . . . . . . . . . . 38
Shock Detection . . . . . . . . . . . . . . . . . . . . . . . . . . . . . . . . . . . . . . . . . . . . . . . . 38
Audio Detection . . . . . . . . . . . . . . . . . . . . . . . . . . . . . . . . . . . . . . . . . . . . . . . . 38
Applications . . . . . . . . . . . . . . . . . . . . . . . . . . . . . . . . . . . . . . . . . . . . . . . 40
A lication Licenses . . . . . . . . . . . . . . . . . . . . . . . . . . . . . . . . . . . . . . . . . . . . . 40
U load A lication . . . . . . . . . . . . . . . . . . . . . . . . . . . . . . . . . . . . . . . . . . . . . . 40
A lication Considerations . . . . . . . . . . . . . . . . . . . . . . . . . . . . . . . . . . . . . . . . 40
AXIS Video Motion Detection . . . . . . . . . . . . . . . . . . . . . . . . . . . . . . . . . 42
Considerations . . . . . . . . . . . . . . . . . . . . . . . . . . . . . . . . . . . . . . . . . . . . . . . . . . 42
Start and Sto the A lication . . . . . . . . . . . . . . . . . . . . . . . . . . . . . . . . . . . . . 42
Congure A lication . . . . . . . . . . . . . . . . . . . . . . . . . . . . . . . . . . . . . . . . . . . . 42
Using the A lication in an Action Rule . . . . . . . . . . . . . . . . . . . . . . . . . . . . . 45
Events . . . . . . . . . . . . . . . . . . . . . . . . . . . . . . . . . . . . . . . . . . . . . . . . . . . . 47
Set U Action Rules . . . . . . . . . . . . . . . . . . . . . . . . . . . . . . . . . . . . . . . . . . . . . 47
Add Reci ients . . . . . . . . . . . . . . . . . . . . . . . . . . . . . . . . . . . . . . . . . . . . . . . . . . 49
Create Schedules . . . . . . . . . . . . . . . . . . . . . . . . . . . . . . . . . . . . . . . . . . . . . . . . 51
Set U Recurrences . . . . . . . . . . . . . . . . . . . . . . . . . . . . . . . . . . . . . . . . . . . . . . 51
Recordings . . . . . . . . . . . . . . . . . . . . . . . . . . . . . . . . . . . . . . . . . . . . . . . . . 52
Find Recordings . . . . . . . . . . . . . . . . . . . . . . . . . . . . . . . . . . . . . . . . . . . . . . . . . 52
Play Recording . . . . . . . . . . . . . . . . . . . . . . . . . . . . . . . . . . . . . . . . . . . . . . . . . . 52
4

AXIS Q1635-E Fixed Network Camera
able of Contents
Ex ort Video Cli . . . . . . . . . . . . . . . . . . . . . . . . . . . . . . . . . . . . . . . . . . . . . . . . 53
Recording List . . . . . . . . . . . . . . . . . . . . . . . . . . . . . . . . . . . . . . . . . . . . . . . . . . 53
Continuous Recording . . . . . . . . . . . . . . . . . . . . . . . . . . . . . . . . . . . . . . . . . . . . 54
Languages . . . . . . . . . . . . . . . . . . . . . . . . . . . . . . . . . . . . . . . . . . . . . . . . . 55
System Options . . . . . . . . . . . . . . . . . . . . . . . . . . . . . . . . . . . . . . . . . . . . . 56
Security . . . . . . . . . . . . . . . . . . . . . . . . . . . . . . . . . . . . . . . . . . . . . . . . . . . . . . . 56
Date & Time . . . . . . . . . . . . . . . . . . . . . . . . . . . . . . . . . . . . . . . . . . . . . . . . . . . . 58
Network . . . . . . . . . . . . . . . . . . . . . . . . . . . . . . . . . . . . . . . . . . . . . . . . . . . . . . . 59
Storage . . . . . . . . . . . . . . . . . . . . . . . . . . . . . . . . . . . . . . . . . . . . . . . . . . . . . . . 64
Ports & Devices . . . . . . . . . . . . . . . . . . . . . . . . . . . . . . . . . . . . . . . . . . . . . . . . . 66
Maintenance . . . . . . . . . . . . . . . . . . . . . . . . . . . . . . . . . . . . . . . . . . . . . . . . . . . 67
Su ort . . . . . . . . . . . . . . . . . . . . . . . . . . . . . . . . . . . . . . . . . . . . . . . . . . . . . . . 68
Advanced . . . . . . . . . . . . . . . . . . . . . . . . . . . . . . . . . . . . . . . . . . . . . . . . . . . . . . 68
Reset to Factory Default Settings . . . . . . . . . . . . . . . . . . . . . . . . . . . . . . . . . . . 69
Troubleshooting . . . . . . . . . . . . . . . . . . . . . . . . . . . . . . . . . . . . . . . . . . . . 70
Check the Firmware . . . . . . . . . . . . . . . . . . . . . . . . . . . . . . . . . . . . . . . . . . . . . 70
U grade the Firmware . . . . . . . . . . . . . . . . . . . . . . . . . . . . . . . . . . . . . . . . . . . 70
Sym toms, Possible Causes and Remedial Actions . . . . . . . . . . . . . . . . . . . . . 71
Technical Specications . . . . . . . . . . . . . . . . . . . . . . . . . . . . . . . . . . . . . . 74
Connectors . . . . . . . . . . . . . . . . . . . . . . . . . . . . . . . . . . . . . . . . . . . . . . . . . . . . 76
Connection Diagrams . . . . . . . . . . . . . . . . . . . . . . . . . . . . . . . . . . . . . . . . . . . . 77
Performance Considerations . . . . . . . . . . . . . . . . . . . . . . . . . . . . . . . . . . . . . . . 78
5

AXIS Q1635-E Fixed Network Camera
Hardware Overview
Hardware Overview
1. tatus LED indicator
2. Zoom puller
3. Lock screw for focus ring
4. Focus ring
5. Network connector (PoE)
6. Control button (1)
7. Function button (2)
8. micro D Card slot
9. Audio in
10. Audio out
11. I/O connector
12. Iris connector
13. Power connector *
14. Power LED indicator
15. Network LED indicator
16. R 485/R 422 connector
* Not used for powering of AXIS Q1635-E. AXIS Q1635-E is powered by PoE.
6

AXIS Q1635-E Fixed Network Camera
Hardware Overview
1unshield adjustment
2unshield
3Top cover
4Network connector (PoE IN)
5afety wire tab
6Cable hole
7Network connector (PoE OUT, connected at delivery)
8Bottom cover screws (4x)
9Cable cover
10 Cable cover screws (2x)
11 Network camera
12 Bottom cover
13 Heaters
14 Bracket adapter
15 Bracket screws (4x)
16 Bracket adjustment screw
17 Wall bracket
18 Alternative cable hole
Co ectors a d Butto s
For technical s ecications, see page 74.
Network Co ector
RJ45 Ethernet connector with Power over Ethernet (PoE).
7

AXIS Q1635-E Fixed Network Camera
Hardware Overview
NONO
NOTICETICE
TICE
Due to local regulations or the environmental and electrical conditions in which the roduct is to be used, a shielded network
cable (STP) may be a ro riate or required. All cables connecting the roduct to the network and that are routed outdoors
or in demanding electrical environments shall be intended for their s ecic use. Make sure that the network devices
are installed in accordance with the manufacturer’s instructions. For information about regulatory requirements, see
Electromagnetic Compatibility (EMC) on page 2 .
I/O Co ector
Use with external devices in combination with, for exam le, tam ering alarms, motion detection, event triggering, time la se recording
and alarm notications. In addition to the 0 V DC reference oint and ower (DC out ut), the I/O connector rovides the interface to:
•Digital output – For connecting external devices such as relays and LEDs. Connected devices can be activated by the
VAPIX® A lication Programming Interface, out ut buttons on the Live View age or by an Action Rule. The out ut will
show as active (shown under System Options > Ports & Devices) if the alarm device is activated.
•Digital input – An alarm in ut for connecting devices that can toggle between an o en and closed circuit, for exam le:
PIRs, door/window contacts, glass break detectors, etc. When a signal is received the state changes and the in ut becomes
active (shown under System Options > Ports & Devices).
Note
The I/O connector is connected to the housing (fan/heater) on delivery. In the case of a fan or heater error, an in ut signal
will be triggered in the camera. Set u an action rule in the camera to congure which action the signal shall trigger. For
information about events and action rules, see Events on page 47.
Audio Co ector
The Axis roduct has the following audio connectors:
•Audio in (pink) – 3.5 mm in ut for a mono micro hone, or a line-in mono signal.
•Audio out (green) – 3.5 mm out ut for audio (line level) that can be connected to a ublic address (PA) system or an
active s eaker with a built-in am lier. A stereo connector must be used for audio out.
RS485/RS422 Co ector
Two terminal blocks for RS485/RS422 serial interface used to control auxiliary equi ment such as an-tilt devices.
SD Card Slot
NONO
NOTICETICE
TICE
• Risk of damage to SD card. Do not use shar tools or excessive force when inserting or removing the SD card.
• Risk of data loss. To revent data corru tion, the SD card should be unmounted before removal. To unmount, go to Setup >
System Options > Storage > SD Card and click Unmount.
This roduct su orts microSD/microSDHC/microSDXC cards (not included).
For SD card recommendations, see www.axis.com
Co trol Butto
For location of the control button, see Hardware Overview on page 6 .
The control button is used for:
• Resetting the roduct to factory default settings. See page 69.
• Connecting to an AXIS Video Hosting System service. See page 60. To connect, ress and hold the button for about 3
seconds until the Status LED ashes green.
8

AXIS Q1635-E Fixed Network Camera
Hardware Overview
• Connecting to AXIS Internet Dynamic DNS Service. See page 60. To connect, ress and hold the button for about 3 seconds.
Fu ctio Butto
The function button has multi le functions:
•Levelling assistant – This function hel s to ensure the camera is level. Press the button for about 3 seconds to start the
levelling assistant and ress again to sto the leveling assistant. The status LED and buzzer signal assist levelling of the
camera, see tatus LED Behavior and Buzzer ignal for Levelling Assistant on page 10. The camera is level when the
buzzer bee s continuously.
•Focus assistant – This function is used for enabling the Focus Assistant. To enable the focus assistant, ress and very
quickly release the button. Press again to sto the focus assistant. For more information, see the Installation Guide.
LED I dicators
Note
• The Status LED can be congured to be unlit during normal o eration. To congure, go to Setup > System Options > Ports
& Devices > LED. See the online hel for more information.
• The Status LED can be congured to ash while an event is active.
• The Status LED can be congured to ash for identifying the unit. Go to Setup > System Options > Maintenance .
Status LED Indication
Green Steady green for normal o eration.
Amber Steady during startu . Flashes when restoring settings.
Note
The Network LED can be disabled so that it does not ash when there is network trafc. To congure, go to Setup > System
Options > Ports & Devices > LED. See the online hel for more information.
Network LED Indication
Green Steady for connection to a 100 Mbit/s network. Flashes for network activity.
Amber Steady for connection to a 10 Mbit/s network. Flashes for network activity.
Unlit No network connection.
Note
The Power LED can be congured to be unlit during normal o eration. To congure, go to Setup > System Options > Ports &
Devices > LED. See the online hel for more information.
Power LED Indication
Green Normal o eration.
Amber Flashes green/amber during rmware u grade.
Status LED Behavior for Focus Assista t
The status LED ashes when the Focus Assistant is active.
9

AXIS Q1635-E Fixed Network Camera
Hardware Overview
Color Indication
Red The image is out of focus.
Adjust the lens.
Amber The image is close to focus.
The lens needs ne tuning.
Green The image is in focus.
Buzzer Sig al for Focus Assista t
Buzzer Lens
Fast interval O timally adjusted
Medium interval Less o timally adjusted
Slow interval Poorly adjusted
Status LED Behavior a d Buzzer Sig al for Levelli g Assista t
For information on the Function button used for levelling the camera, see Connectors and Buttons.
Press and hold the function button (2) for more than two seconds to level the camera.
• When the camera is level, both LEDs are steady green, and the bee is continuous.
• When the camera is not level, the LEDs ash a combination of red, green and orange, and the bee occurs at slow intervals.
Both LEDs briey ash green to indicate that the levelling is getting better.
Replace the Le s
Note
There is no need to restart the roduct after changing the lens. However, the roduct must be restarted if you are
interchanging between a P-Iris, DC iris or xed/manual iris lens. In order to set the focus and osition the lens, the roduct
must be connected to the network.
It is ossible to use o tional lenses for the Axis roduct.
To re lace the lens:
1. Disconnect the iris cable.
2. Unscrew the standard lens.
3. Attach and screw on the new lens.
Note
If you select a DC iris conguration le for a P-Iris lens, an error message will a ear below the iris conguration ty e in the
Camera Settings age. For custom DC iris lenses, select Generic DC iris o tion.
To change the iris conguration:
1. Go to Setup > Video and Audio > Camera Settings.Iris conguration shows the current congured iris ty e.
2. Click Edit.
3. Select the installed iris lens from the dro -down list and click OK.
10

AXIS Q1635-E Fixed Network Camera
Hardware Overview
To change the iris conguration for P-Iris lenses not listed in the dro -down list:
1. Download the iris conguration le from www.axis.com
2. Go to Setup > Video and Audio > Camera Settings.Iris conguration shows the current congured iris ty e.
3. In Iris conguration: Click Edit.
4. Go to the Upload tab.
5. Click Browse and select the conguration le.
6. Click Upload. The installed iris lens should now be included in the Iris Selection dro -down list.
7. Select the installed iris lens from the dro -down list and click OK.
11

AXIS Q1635-E Fixed Network Camera
Access the Product
Access the Product
To install the Axis roduct, see the Installation Guide su lied with the roduct.
The roduct can be used with most o erating systems and browsers. The recommended browsers are
• Internet Ex lorer®with Windows®
• Safari®with OS X®
• ChromeTM or Firefox®with other o erating systems.
See Technical pecications on page 74.
To view streaming video in Internet Ex lorer, allow installation of AXIS Media Control (AMC) when rom ted.
The Axis roduct includes one (1) H.264 decoder license for viewing video streams and one (1) AAC audio license. The licenses are
automatically installed with AMC. The administrator can disable the installation of the decoders, to revent installation of unlicensed
co ies.
Note
• QuickTimeTM is also su orted for viewing H.264 streams and for audio.
Access from a Browser
1. Start a web browser.
2. Enter the IP address or host name of the Axis roduct in the browser’s Location/Address eld.
To access the roduct from a Mac com uter (OS X), go to Safari, click on Bonjour and select the roduct from the
dro -down list.
If you do not know the IP address, use AXIS IP Utility to locate the roduct on the network. For information about
how to discover and assign an IP address, see the document Assign an IP Address and Access the Video tream on Axis
Su ort web at www.axis.com/techsup
Note
To show Bonjour as a browser bookmark, go to Safari > Preferences.
3. Enter your user name and assword. If this is the rst time the roduct is accessed, the root assword must rst be
congured. For instructions, see et the Root Password on page 13.
4. The roduct’s Live View age o ens in your browser.
Note
The controls and layout of the Live View age may have been customized to meet s ecic installation requirements and
user references. Consequently, some of the exam les and functions featured here may differ from those dis layed in
your own Live View age.
Access from the I ter et
Once connected, the Axis roduct is accessible on your local network (LAN). To access the roduct from the Internet you must
congure your network router to allow incoming data trafc to the roduct. To do this, enable the NAT-traversal feature, which
will attem t to automatically congure the router to allow access to the roduct. This is enabled from Setup > System Options >
Network > TCP/IP Advanced.
For more information, see NAT traversal (port mapping) for IPv4 on page 62. See also AXIS Internet Dynamic DNS Service at
www.axiscam.net
12

AXIS Q1635-E Fixed Network Camera
Access the Product
For Technical notes on this and other to ics, visit the Axis Su ort web at www.axis.com/techsup
Set the Root Password
To access the Axis roduct, you must set the assword for the default administrator user root. This is done in the Congure Root
Password dialog, which o ens when the roduct is accessed for the rst time.
To revent network eavesdro ing, the root assword can be set via an encry ted HTTPS connection, which requires an HTTPS
certicate. HTTPS (Hy ertext Transfer Protocol over SSL) is a rotocol used to encry t trafc between web browsers and servers. The
HTTPS certicate ensures encry ted exchange of information. See HTTP on page 56.
The default administrator user name root is ermanent and cannot be deleted. If the assword for root is lost, the roduct must be
reset to the factory default settings. See Reset to Factory Default ettings on page 69.
To set the assword via a standard HTTP connection, enter it directly in the dialog.
To set the assword via an encry ted HTTPS connection, follow these ste s:
1. Click Use HTTPS.
A tem orary certicate (valid for one year) is created, enabling encry tion of all trafc to and from the roduct, and the
assword can now be set securely.
2. Enter a assword and then re-enter it to conrm the s elling.
3. Click OK. The assword has now been congured.
Set Power Li e Freque cy
Power line frequency is set the rst time the Axis roduct is accessed and can only be changed from Plain Cong (see page 69)
or by resetting the roduct to factory default.
Select the ower line frequency (50 Hz or 60 Hz) used at the location of the Axis roduct. Selecting the wrong frequency may cause
image icker if the roduct is used in uorescent light environments.
Note
Power line frequency varies de ending on geogra hic region. The Americas usually use 60 Hz, whereas most other arts of
the world use 50 Hz. Local variations could a ly. Always check with the local authorities.
PTZ Mode
PTZ mode is set the rst time the Axis roduct is accessed and can only be changed by resetting the roduct to factory default.
Digital PTZ is the default mode and should be used when a an/tilt motor is not used.
If the camera is mounted to a an/tilt motor, select Uploadable PTZ driver. For information about how to u load a PTZ driver, see
Install PTZ Driver on page 37.
Co gure Capture Mode
Ca ture mode denes the maximum resolution and maximum frame rate available in the Axis roduct. The ca ture mode setting also
affects the camera’s angle of view.
Select the desired ca ture mode from the dro -down list and click OK.
See also Capture Mode on page 25.
13

AXIS Q1635-E Fixed Network Camera
Access the Product
The Live View Page
The controls and layout of the Live View age may have been customized to meet s ecic installation requirements and user
references. Consequently, some of the exam les and functions featured here may differ from those dis layed in your own Live View
age. The following rovides an overview of each available control.
Co trols o the Live View Page
Click the View size buttons to show the image in full size (right button) or to scale down the image to
t the browser window (left button).
Click WDR on to enable WDR in intense backlight conditions. Click WDR off to disable WDR in low
light conditions for o timal ex osure.
Select a stream role for the Live View age from the Stream Prole dro -down list. For information
about how to congure stream roles, see page 24.
Click Pulse to activate the roduct’s out ut ort for a dened eriod of time. For information about how
to enable and congure out ut buttons, see page 35. The out ut button name may differ de ending on
the name entered in the I/O Ports conguration.
Click the Active/Inactive buttons to manually activate and inactive the roduct’s out ut ort. For
information about how to enable and congure out ut buttons, see page 35.
The Manual Trigger button is used to trigger an action rule from the Live View age. For information
about how to congure and enable the button, see Manual Trigger on page 14.
Click Snapshot to save a sna shot of the video image. This button is rimarily intended for use when
the AXIS Media Control viewer toolbar is not available. Enable this button from Live View Cong >
Action Buttons.
Click Defog to enable or disable the Defog feature. For more information see Enable Defog on page 26.
The Audio clip dro -down list allows you to lay an audio cli from the Live View age. Select the
audio cli and click the Play button.
Ma ual Trigger
The Manual Trigger is used to trigger an action rule from the Live View age. The manual trigger can for exam le be used to
validate actions during roduct installation and conguration.
To congure the manual trigger:
1. Go to Setup > Events.
2. Click Add to add a new action rule.
3. From the Trigger dro -down list, select Input Signal.
14

AXIS Q1635-E Fixed Network Camera
Access the Product
4. From the second dro -down list, select Manual Trigger.
5. Select the desired action and congure the other settings as required.
For more information about action rules, see Events on page 47.
To show the manual trigger buttons in the Live View age:
1. Go to Setup > Live View Cong.
2. Under Action Buttons, select Show manual trigger button.
AXIS Media Co trol viewer toolbar
The AXIS Media Control viewer toolbar is available in Internet Ex lorer only. See AXI Media Control (AMC) on page 17 for more
information. The toolbar dis lays the following buttons:
The Play button connects to the Axis roduct and starts laying a media stream.
The Stop button sto s the media stream.
The Snapshot button takes a sna shot of the video image. The location where the image is saved can be s ecied
in the AMC Control Panel.
Click the View Full Screen button and the video image will ll the entire screen. Press ESC (Esca e) on the com uter
keyboard to cancel full screen view.
The Record button is used to record the current video stream on your com uter. The location where the recording is saved
can be s ecied in the AMC Control Panel. Enable this button from Live View Cong >Viewer Settings.
AMC Audio Co trols
AMC audio buttons control the s eakers and micro hone connected to the client com uter. The buttons are only visible when
audio is enabled.
For information about how to congure audio, see et Up Audio on page 31.
Speaker button — Click to turn the s eakers on or off.
Microphone button – Click to mute or unmute the micro hone. In implex - speaker only mode, the Microphone and Talk
buttons must both be active to send audio to the Axis roduct. Click either button to sto audio transmission.
Use the slider to control the volume of the s eakers and the micro hone.
Half-duplex mode
The Talk/Listen button is used to switch between sending and receiving audio. The button can be congured
from the Audio tab in the AMC Control anel:
• Push-To-Talk mode: Click and hold the button to talk/send. Release the button to listen.
• Toggle mode: Click once to switch between talking and listening.
implex – speaker only mode
To send audio, the Talk and Microphone buttons must both be active. Click either button to sto audio
transmission.
15

AXIS Q1635-E Fixed Network Camera
Access the Product
Note
These controls are available if digital PTZ is enabled in the selected view area or if a PTZ driver has been u loaded. For more
information on view areas, see View Area on page 28. For more information on how to u load a driver, see Install PTZ Driver
on page 37. To switch between the two o tions see PTZ Mode on page 13.
Click the Emulate joystick mode button and click in the image to move the camera view in the direction of the
mouse ointer.
Click the Center mode button and click in the image to center the camera view on that osition.
The center mode button could also be used to zoom in on a s ecic area. Click in the image and drag to draw a
rectangle surrounding the area to be magnied. To zoom out, rotate the mouse wheel.
Click the Ctrl panel button to o en the PTZ control anel which rovides additional PTZ controls.
User-dened buttons can also a ear in the Control anel. See Controls on page 36.
To view a s ecic view area or reset osition, select it from the Source list.
The PTZ controls can be disabled under PTZ > Advanced > Controls, see Controls on page 36.
16

AXIS Q1635-E Fixed Network Camera
Media Streams
Media Streams
The Axis roduct rovides several audio and video stream formats. Your requirements and the ro erties of your network will
determine the ty e you use.
The Live View age in the roduct rovides access to H.264 and Motion JPEG video streams, audio streams and to the list of available
stream roles. Other a lications and clients can access video and audio streams directly, without going via the Live View age.
How to Stream H.264
H.264 can, without com romising image quality, reduce the size of a digital video le by more than 80% com ared with the Motion
JPEG format and as much as 50% more than the MPEG-4 standard. This means that much less network bandwidth and storage s ace
are required for a video le. Or seen another way, much higher video quality can be achieved for a given bit rate.
Deciding which combination of rotocols and methods to use de ends on your viewing requirements, and on the ro erties of
your network. The available o tions in AXIS Media Control are:
Unicast RTP This unicast method (RTP over UDP) is used
for live unicast video, es ecially when it is
im ortant to have an u -to-date video stream,
even if some frames are dro ed.
RTP over RTSP This unicast method (RTP tunneled over RTSP)
is useful as it is relatively sim le to congure
rewalls to allow RTSP trafc.
RTP over RTSP over HTTP This unicast method can be used to traverse
rewalls. Firewalls are commonly congured to
allow the HTTP rotocol, thus allowing RTP to
be tunneled.
Unicasting is used for video-on-demand
transmission so that there is no video trafc
on the network until a client connects and
requests the stream.
Note that there are a maximum of 10
simultaneous unicast connections.
Multicast RTP This method (RTP over UDP) should be used for live multicast video. The video stream is always
u -to-date, even if some frames are dro ed.
Multicasting rovides the most efcient usage of bandwidth when there are large numbers of
clients viewing simultaneously. A multicast cannot however, ass a network router unless the
router is congured to allow this. It is not ossible to multicast over the Internet, for exam le.
Note also that all multicast viewers count as one unicast viewer in the maximum total of 10
simultaneous connections.
AXIS Media Control negotiates with the Axis roduct to determine the trans ort rotocol to use. The order of riority, listed in the
AMC Control Panel, can be changed and the o tions disabled, to suit s ecic requirements.
Note
H.264 is licensed technology. The Axis roduct includes one H.264 viewing client license. Installing additional unlicensed
co ies of the client is rohibited. To urchase additional licenses, contact your Axis reseller.
MJPEG
This format uses standard JPEG still images for the video stream. These images are then dis layed and u dated at a rate sufcient
to create a stream that shows constantly u dated motion.
The Motion JPEG stream uses considerable amounts of bandwidth, but rovides excellent image quality and access to every image
contained in the stream. The recommended method of accessing Motion JPEG live video from the Axis roduct is to use the AXIS
Media Control in Internet Ex lorer in Windows.
AXIS Media Co trol (AMC)
AXIS Media Control (AMC) in Internet Ex lorer in Windows is the recommended method of accessing live video from the Axis roduct.
17

AXIS Q1635-E Fixed Network Camera
Media Streams
The AMC Control Panel can be used to congure various video and audio settings. Please see the AXIS Media Control User’s
Manual for more information.
The AMC Control Panel is automatically installed on rst use, after which it can be congured. O en the AMC Control Panel from:
• Windows Control Panel (from the Start screen or Start menu)
• Alternatively, right-click the video image in Internet Ex lorer and click Settings.
Alter ative Methods of Accessi g the Video Stream
You can also access video and images from the Axis roduct in the following ways:
•Motion PEG server push (if su orted by the client, Chrome or Firefox, for exam le). This o tion maintains an o en HTTP
connection to the browser and sends data as and when required, for as long as required.
•Windows Media Player. This requires AXIS Media Control and the H.264 decoder to be installed. The following aths
can be used:
•QuickTimeTM. The following aths can be used:
Note
•<ip>= IP address
• The Axis roduct su orts QuickTime 6.5.1 and later.
• QuickTime may add latency to the video stream.
• It may be ossible to use other layers to view the H.264 stream using the aths above, although Axis does not guarantee
this.
Access Audio Streams
The Live View age rovides access to audio through AXIS Media Control; in addition audio can be accessed in the following ways:
•VAPIX® Application Programming Interface (API) For more information, visit www.axis.com/develo er
•Windows Media Player su orts sim lex audio. The following aths can be used:
- Unicast via RTP: axrtpu://<ip>/axis-media/media.amp
18

AXIS Q1635-E Fixed Network Camera
Media Streams
- Unicast via RTSP: axrtsp://<ip>/axis-media/media.amp
- Unicast via RTSP, tunneled via HTTP: axrtsphttp://<ip>/axis-media/media.amp
- Multicast: axrtpm://<ip>/axis-media/media.amp
•QuickTimeTM su orts G.711 and AAC audio encoding. The following aths can be used:
-rtsp://<ip>/axis-media/media.amp
-rtsp://<ip>/axis-media/media.3gp
19

AXIS Q1635-E Fixed Network Camera
Set Up the Product
Set Up the Product
The Axis roduct can be congured by users with administrator or o erator rights. To o en the roduct’s Setu ages, click Setup in
the to right-hand corner of the Live View age.
•Administrators have unrestricted access to all settings.
•Operators have restricted access to settings, see Users on page 56
See also the online hel .
Basic Setup
Basic Setu rovides shortcuts to the settings that should be made before using the Axis roduct:
1. Users. See page 56.
2. TCP/IP. See page 59.
3. Date & Time. See page 58.
4. Video Stream. See page 22.
5. Focus. See page 30
6. Audio Settings. See page 31.
The Basic Setu menu can be disabled from System Options > Security > Users.
Adjust Focus
To adjust the zoom and focus follow these instructions:
Note
• Set focus as recisely as ossible with the focus ring or Focus Assistant before starting automatic ne tuning. Using
the focus ring normally gives the best result.
• The iris should always be o ened to its maximum while focusing. This gives the smallest de th of eld and thus the
best conditions for correct focusing.
1. O en the roduct’s home age and go to Setup >Basic Setup >Focus.
2. Under the Basic tab, click Open iris. If the button is inactive the iris is already o en.
3. If focus has been set before, click Reset to reset the back focus.
4. Loosen the zoom uller and the lock screw for the focus ring (see Hardware Overview on page 6 ) on the lens by turning
them counter-clockwise. Move the zoom uller and the focus ring to set zoom and focus and check the quality of
the image in the image window.
5. Re-tighten the zoom uller and the lock screw for the focus ring.
6. On the Focus age, click Fine-tune focus automatically and wait until automatic ne tuning is com leted.
7. Click Enable iris. If the button is inactive the iris is already enabled.
8. If needed, make further adjustments under the Advanced tab. See the online hel for more information.
20
Other manuals for Q1635-E
1
Table of contents
Other Axis Security Camera manuals