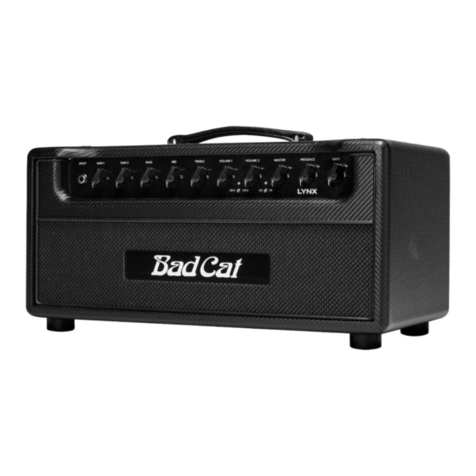
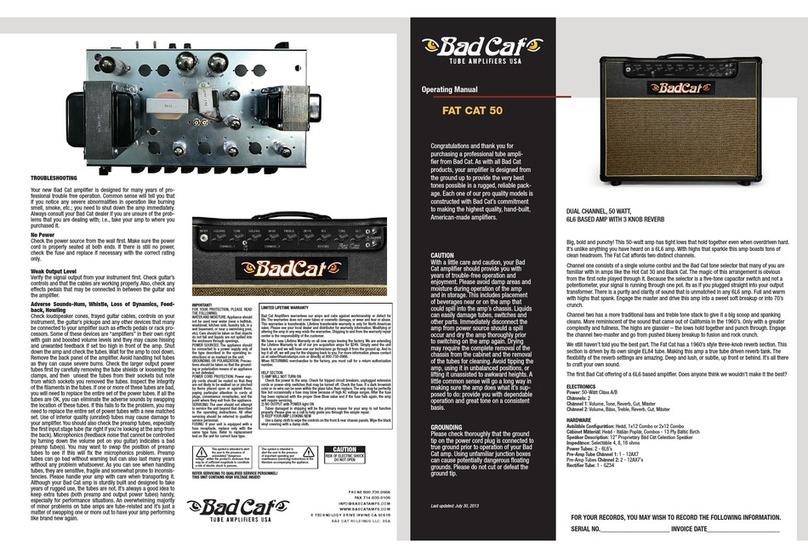
Bad Cat Cub User manual

Cub Owner's Manual
Bad Cat Amps
Costa Mesa, California
For the latest information go to: www.badcatamps.com. Whilst the information contained
herein is correct at the time of publication, due to our policy of constant improvement and
development, Bad Cat Amps reserves the right to alter specifications without prior notice.

Read these instructions.
Keep these instructions.
Heed all warnings.
Follow all instructions.
Do not use this apparatus near water.
Clean only with a dry cloth.
Do not block any ventilation openings.
Install in accordance with the manufacturer’s instructions.
Do not install near any heat sources such as radiators, heat registers, stoves, or other
apparatus (including amplifiers) that produce heat.
Do not defeat the safety purpose of the polarized or grounding-type plug. A polarized plug
has two blades with one wider than the other. A grounding type plug has two blades and a
third grounding prong. The wide blade or the third prong are provided for your safety. If the
provided plug does not fit into your outlet, consult an electrician for replacement of the
obsolete outlet.
Protect the power cord from being walked on or pinched particularly at plugs, convenience
receptacles, and the point where they exit from the apparatus.
Unplug this apparatus during lightning storms or when unused for long periods of time.
Turning off the power switch does not completely isolate this product from the power line so
remove the plug from the socket if not using it for extended periods of time.
Install this product near the wall socket and keep the power plug easily accessible.
WARNING—This apparatus shall be connected to a mains socket outlet with a protective
earthing connection.
Refer all servicing to qualified service personnel. Servicing is required when the apparatus
has been damaged in any way, such as power-supply cord or plug is damaged, liquid has
been spilled or objects have fallen into the apparatus, the apparatus has been exposed to
rain or moisture, does not operate normally, or has been dropped.
Do not install this equipment on the far position from wall outlet and/or convenience
receptacle.
Do not install this equipment in a confined space such as a box for the conveyance or similar
unit.
Excessive sound pressure from earphones and headphones can cause hearing loss.
Use only with the cart, stand, tripod, bracket, or table specified by the manufacturer, or sold
with the apparatus. When a cart is used, use caution when moving the cart/ apparatus
combination to avoid injury from tip-over.
This apparatus is for moderate climates areas use, not suitable for use in tropical climates
countries.
The ventilation should not be impeded by covering the ventilation openings with items, such
as newspapers, table-cloths, curtains, etc.
No naked flame sources, such as lighted candles, should be placed on the apparatus.
IMPORTANT SAFETY INSTRUCTIONS
READ THE FOLLOWING INFORMATION CAREFULLY. SAVE ALL INSTRUCTIONS FOR FUTURE
REFERENCE! NO USER SERVICEABLE PARTS INSIDE. DO NOT ATTEMPT TO GAIN ACCESS TO
THE INTERIOR OF THE PRODUCT. REFER ALL SERVICING TO AUTHORIZED BAD CAT SERVICE
CENTERS.
1.
2.
3.
4.
5.
6.
7.
8.
9.
10.
11.
12.
13.
14.
15.
16.
17.
18.
19.
20.
21.
22.
23.
This symbol is intended to alert the user to the presence of important operation and
maintenance (servicing) instructions in the literature accompanying the appliance.
This symbol is intended to alert the user to the presence of uninsulated “dangerous
voltage” within the product’s enclosure that may be of sufficient magnitude to constitute a
risk of electric shock to persons.
All electrical and electronic products should be disposed of separately from the municipal
waste stream via designated collection facilities appointed by the government or the local
authorities
!

Introduction
Congratulations and thank you for purchasing a tube amplifier from Bad Cat.
As with all Bad Cat products, your amplifier is designed from the ground up to
provide the very best tones possible in a rugged, reliable package. Each one
of our models is constructed with Bad Cat’s commitment to making the
highest quality amps, designed and built in Costa Mesa, California. Our users
benefit from our passion every time they plug in and crank up their favorite
Bad Cat amp. Since we also play what we build, it is truly gratifying for the Bad
Cat Team to be a part of bringing each amp to life and welcome you to the
Bad Cat den.
Features
The Cub was among the original Bad Cat designs – boutique and highly
desired, it has been used on countless stages and recording sessions. Its
original circuitry was simple and yet extremely versatile, offering punch and
chime. It gained up smoothly and set the standard for touch responsiveness,
establishing itself as a classic. Over the years, this amp’s design has been
refined and improved. Every iteration brings something new to the table and
our newest Cub is no exception.
A single channel amplifier now with two gain modes, the original Cub circuitry
is accessed in the clean mode on this amplifier. In this mode, the Cub Is
capable of bright chiming, classic clean tones to smooth, touch responsive
edge of breakup. Switch the front panel toggle to overdrive mode to engage
an additional tube gain stage for more harmonic content and complexity not
found on prior Cub models. The new Cub also offers two switchable
independent master volume controls that can be preset for lead and rhythm
volumes. The Cub has been further expanded by adding a powerful midrange
control, studio quality reverb, and a fully buffered effects loop.
You can understand why we are so excited to introduce the new Cub and how
hard it was to stop playing it long enough to write this.
Thank you,
The Bad Cat Team

Front Panel (from left to right)
Input
Plug your guitar in here. Always use a good quality screened guitar lead.
Volume
This controls the overall gain (input volume) of the amplifier's preamp in both the Clean and
Overdrive mode. Turning the control clockwise increases the gain and harmonics.
Clean/Overdrive Toggle Switch
This control allows you to run in the Clean mode or engage another tube gain stage to get higher
gain tones. Notice that there isn’t a large jump in perceived volume as you engage the extra gain
stage. This is intentional.
Bass
Controls the amount of low frequency in the preamp. Counterclockwise decreases the amount of
low frequency and turning the control clockwise will increase the low frequencies.
Mid
This control is very important in the shaping of the overall amplifier tone. Full counter-clockwise
will scoop out the midrange frequencies emphasizing the bass and treble frequencies. Pushing
this control clockwise will increase the amount of midrange in the amplifier. It is normal that this
control seems to increase the overall volume level of the amplifier when in the more extreme
(past noon) settings.
Treble
This control manages the treble frequencies. Turning to the right , past noon will brighten the
signal adding more high frequencies and attack. This control is designed so that generally
keeping it at the noon position is a good starting point. Turning this control counter-clockwise
can also allow in more midrange frequencies.
Presence
The Presence knob is a global control of the higher mid and treble frequencies after the Return
stage of your amplifier. Use it to set the overall brightness of your amplifier.
Master 1
The Cub amplifier has two independent master volume controls. These control the overall
amplitude and volume of the amplifier. Use the Gain control to regulate the amount of overdrive
and control the output level / amplitude with the Master. You can set one Master for rhythm
volume and the other for lead solo volumes. This is a footswitchable function.
Master 1 and Master Toggle Switch
You can toggle and activate either of the two Master volume controls using this toggle switch.
(This is bypassed when the footswitch is engaged)
Master 2
The Cub amplifier has two independent master volume controls. Like Master 1, this controls the
overall amplitude and volume of the amplifier. Use the Volume control to regulate the amount of
gain or distortion and control the amplitude with the Master. You can set one Master for rhythm
volume and the other for lead solo volumes. This is a footswitchable function.
Reverb
Controls the wet/dry ratio between the unaffected dry signal and the wet, effected reverb signal.
Turning this control to full counterclockwise will remove the reverb from the circuit. Turning the
control clockwise will gradually increase the amount of reverb in the circuit. Set it where you feel
it suits your playing style and circumstances best.

Rear Panel (from left to right)
Power Input
This is where you connect your power cable. Use IEC power cable only. The cable should only be
connected to a power outlet that is compatible with the voltage, power and frequency
requirements stated on the rear panel.
Power Switch
When engaged voltage is applied to all internal circuits except for the high voltage for all signal
amplifying audio stages.
Standby Switch
Applies the high voltage to all signal amplifying audio stages.
HT Fuse
The value of the HT Fuse is specified on the rear panel. Never use a fuse of the incorrect value or
attempt to bypass it.
Footswitch
The supplied 2-button footswitch is connected here. The footswitch enables you to switch
between Channel 1 or Channel 2 and LO or HI mode.
FX Loop Send
This jack sends a -10dB low impedance signal to your effects devices, regardless if it is pedals or
rack units. Use a shielded instrument cable.
NOTE: The internal Noise Gate is processing the signal right before the SEND output, so that the
trail of time based effects like delay or reverb decay naturally and are unaffected.
FX Loop Return
High Impedance input to the recovery stage of the FX Loop and a direct input to the power amp.
This jack disconnects the preamp signal from the power amp when used in case you want to
utilize the power amp only. Plug a shielded instrument cable into this jack and connect to the
effects.
NOTE: Signals applied will not be processed by the internal Noise Gate
Speaker Outputs
There are overall 5 speaker outputs, 1x 16Ω, 2x 4Ω and 2x 8Ω. Both 4Ω as well as both 8Ω are
wired in parallel. In case you want to use two cabinets at the same time, 2x 16Ω cabinets should
be connected to the two 8Ω jacks, 2x 8Ω cabinets should be connected to the two 4Ω jacks.
NOTE: Always be sure that your amplifier is connected to a proper load or a speaker cabinet
before the amplifier is switched on.
Line Out
Non frequency compensated output with a tenth of the output level to drive post effects or
external power amps when running a wet/dry system or a speaker simulation device such as IR
loaders.

Designed and Built in Southern California
Custom Hand-wound Bad Cat Transformers
30 Watts
2 – EL34 Power Tubes
3 – 12AX7 Tubes
Single Channel
Clean / Overdrive Mode
2 Switchable Master Volumes
Studio Quality Reverb
Buffered FX Loop
Custom UK 12” Celestion speaker
Two Button Footswitch: Clean / OD and Master One / Two
Individual Speaker Outputs (16, 2x4, 2x8 ohms)
Line Out
Baltic Birch Cabinet
5-year Limited Warranty
20.75” Width x 10.375” Depth x 10” Height (Head Dimensions)
31 lbs Head Weight
23.75” Width x 10.375” Depth x 19” Height (Combo Dimensions)
48 lbs Combo Weight
Custom UK 12” Celestion speaker (Combo)
Two Button Footswitch Included
Bad Cat Cub Technical Specifications
Bad Cat Manufacturer Warranty
Every Bad Cat amp is backed by a 5 year non-
transferable warranty. Registration and proof of
purchase is required for Manufacturer’s Warranty
coverage. To learn about the warranty and to register
your amp, please visit
www.badcatamps.com/support
and fill out the registration form.

Cub Tube Chart
Table of contents
Other Bad Cat Amplifier manuals

Bad Cat
Bad Cat Hot Cat User manual

Bad Cat
Bad Cat Cougar 50 User manual
Bad Cat
Bad Cat TREM CAT 30 User manual
Bad Cat
Bad Cat KOOL CAT 30 User manual
Bad Cat
Bad Cat Black Cat Series User manual
Bad Cat
Bad Cat BOBCAT 5 User manual
Bad Cat
Bad Cat Hot Cat Series User manual
Bad Cat
Bad Cat Black Cat User manual
Bad Cat
Bad Cat Black Cat Series User manual
Bad Cat
Bad Cat LIL'15 User manual


