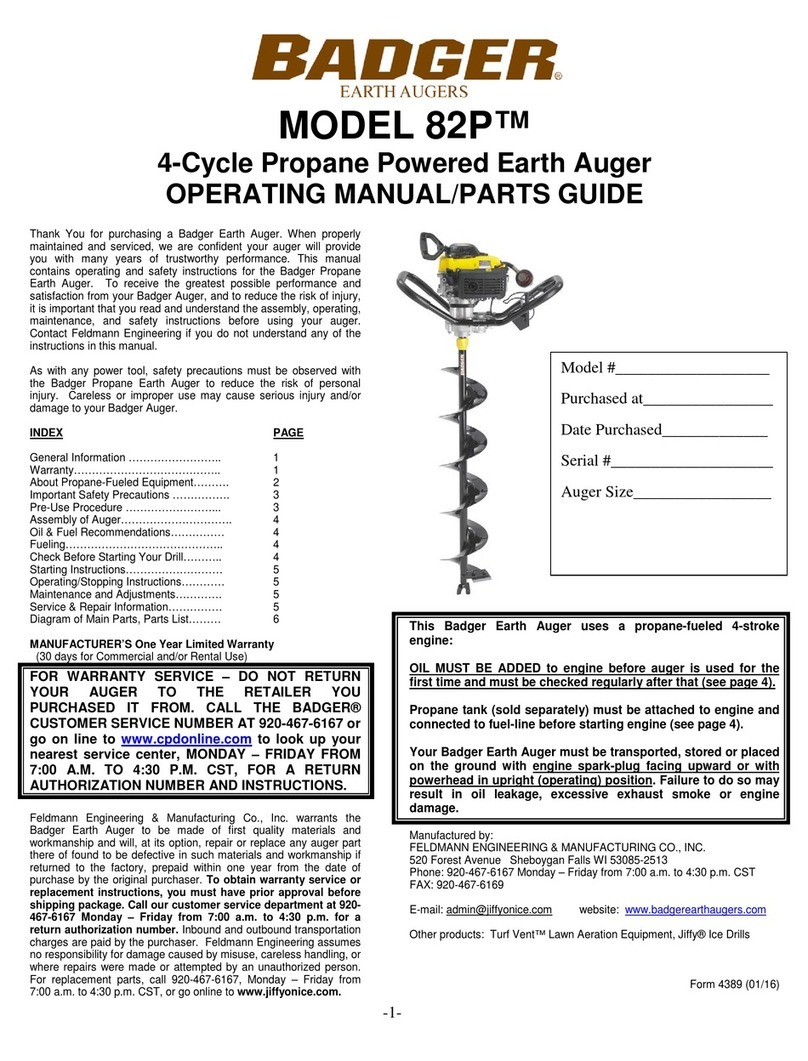
Badger Basket 82G User manual

-1-
MODEL 82G™
4-Cycle Gasoline Powered Earth Auger
OPERATING MANUAL/PARTS GUIDE
Thank You for purchasing a Badger Earth Auger. When properly
maintained and serviced, we are confident your auger will provide
you with many years of trustworthy performance. This manual
contains operating and safety instructions for the Badger Gasoline
Earth Auger. To receive the greatest possible performance and
satisfaction from your Badger Auger, and to reduce the risk of injury,
it is important that you read and understand the assembly, operating,
maintenance, and safety instructions before using your auger.
Contact Feldmann Engineering if you do not understand any of the
instructions in this manual.
As with any power tool, safety precautions must be observed with
the Badger Earth Auger to reduce the risk of personal injury.
Careless or improper use may cause serious injury and/or damage
to your Badger Auger.
INDEX PAGE
General Information …………………….. 1
Warranty………………………………….. 1
Important Safety Precautions ……………. 2
Pre-Use Procedure ……………………... 2
Assembly of Auger…………………………. 3
Oil & Fuel Recommendations…………… 3
Fueling…………………………………….. 3
Check Before Starting Your Drill……….. 3
Starting Instructions……………………… 4
Operating/Stopping Instructions………… 4
Maintenance and Adjustments…………. 4
Service & Repair Information…………… 5
Diagram of Main Parts, Parts List……… 6
MANUFACTURER’S One Year Limited Warranty
(30 days for Commercial and/or Rental Use)
FOR WARRANTY SERVICE – DO NOT RETURN
YOUR AUGER TO THE RETAILER YOU
PURCHASED IT FROM. CALL THE BADGER®
CUSTOMER SERVICE NUMBER AT 920-467-6167,
MONDAY – FRIDAY FROM 7:00 A.M. TO 4:00 P.M.
CST, FOR A RETURN AUTHORIZATION NUMBER
AND INSTRUCTIONS.
Feldmann Engineering & Manufacturing Co., Inc. warrants the
Badger Earth Auger to be made of first quality materials and
workmanship and will, at its option, repair or replace any auger part
thereof found to be defective in such materials and workmanship if
returned to the factory, prepaid within one year from the date of
purchase by the original purchaser. To obtain warranty service or
replacement instructions, you must have prior approval before
shipping package. Call our customer service department at 920-
467-6167 Monday – Friday from 7:00 a.m. to 4:00 p.m. for a
return authorization number. Inbound and outbound transportation
charges are paid by the purchaser. Feldmann Engineering assumes
no responsibility for damage caused by misuse, careless handling, or
where repairs were made or attempted by an unauthorized person.
For replacement parts, call 920-467-6167, Monday – Friday from
7:00 a.m. to 4:00 p.m. CST.
This Badger Earth Auger uses a gasoline-fueled 4-stroke
engine:
OIL MUST BE ADDED to engine before auger is used for the
first time and must be checked regularly after that (see page 3).
Your Badger Earth Auger must be transported, stored or placed
on the ground with engine spark-plug facing upward,
carburetor facing upward or with powerhead in upright
(operating) position. Failure to do so may result in oil leakage,
excessive exhaust smoke or engine damage.
Manufactured by:
FELDMANN ENGINEERING & MANUFACTURING CO., INC.
520 Forest Avenue Sheboygan Falls WI 53085-2513
Phone: 920-467-6167 Monday – Friday from 7:00 a.m. to 4:00 p.m. CST
FAX: 920-467-6169
E-mail: admin@jiffyonice.com website: www.badgerearthaugers.com
Other products: Turf Vent™ Lawn Aeration Equipment, Jiffy® Ice Drills
Form 4390 (5-16)
Model #___________________
Purchased at________________
Date Purchased_____________
Serial #____________________
Auger Size_________________

-2-
IMPORTANT SAFETY PRECAUTIONS
Please read this manual carefully. Operate your equipment
according to the safety instructions and recommendations found
throughout this manual. Anyone who uses this equipment must read
and fully understand the instructions and be familiar with its
operation.
To receive the greatest possible performance and satisfaction from
your Badger Earth Auger, and to reduce the risk of injury, it is
important that you read and understand the assembly, operating,
maintenance, and safety instructions before using your Badger Earth
Auger. Contact Feldmann Engineering if you do not understand any
of the instructions in this manual.
Your Badger Earth Auger is designed and manufactured to provide
safe and dependable operation, provided it is operated in
accordance with the following safety precautions.
Preventing accidents is the responsibility of every power equipment
operator. The safety precautions identified in this manual must be
fully understood and followed by every operator of this Badger
Auger. Review the safety precautions frequently and never take
chances.
Take the time to become familiar with your Badger Auger and its
components, then operate it in a safe manner. Study the appropriate
sections of this manual for the description of the controls and
function of your Badger Auger. Teach the safety precautions to all
persons who use your Badger Earth Auger.
Avoid mishandling and abuse of your Badger Auger. Handle it
with care, as any rough treatment can cause damage to your
Badger Earth Auger or it can cause a malfunction.
Should the engine stop while drilling, do not attempt to restart it
while the auger bit is in the hole.
Never attempt to adjust or repair your Badger Earth Auger while
the engine is running. Avoid possible injury from moving parts
by first stopping the engine.
+ Never modify your Badger Earth Auger in any way. Only
Badger Earth Augers and accessories supplied by Feldmann
Engineering or expressly approved by Feldmann Engineering
for use with your Badger Earth Auger are authorized for
connection and use. The use of non-Badger or unauthorized
components may cause damage or injury.
Check the tightness of screws, nuts, and bolts at regular
intervals and re-tighten if necessary.
Do not wear loose clothing while operating your Badger Earth Auger
and keep all clothes and parts of the body (hands, feet, etc.) clear of the
rotating earth auger assembly to avoid being drawn into the boring
auger.
Do not allow children to operate your Badger Earth Auger at any time.
Do not allow adults to operate your auger without proper operational
instructions, including all safety precautions.
Do not lend or rent your Badger Earth Auger without providing the
owner’s manual. Be sure that anyone who uses your Badger Earth
Auger understands the information contained in this manual.
Give your complete and undivided attention to the proper operation of
your Badger Earth Auger. To operate it properly, you must be in good
physical condition and mental health and not under the influence of any
substance (alcohol, drugs, etc.) which might impair vision, dexterity, or
judgment.
+ Using your Badger Earth Auger may be strenuous. If you have any
condition that may be aggravated by strenuous activity, check with your
doctor before operating your Badger auger.
+ Do not operate your auger when you are tired. Fatigue may result in
loss of control.
+ Do not carry your Badger auger or leave it unattended while the engine
is running.
Only run your Badger Earth Auger in well-ventilated areas.
Badger Gasoline Earth Auger must be transported, stored or
placed on the ground with spark plug facing upward, or with
powerhead in upright (operating) position. Failure to do so may
result in oil leakage, excessive exhaust smoke or engine damage.
Always allow engine to cool before storing.
+ When transporting your Badger Auger in a vehicle, properly secure it to
prevent it from tipping over, which may cause oil leakage or engine
damage.
+ Gasoline is flammable and caution must be used when handling or
storing it.
+ Do not fill the fuel tank while your Badger Auger is running, if the engine
is hot, or when in an enclosed area.
Always fill the fuel tank outdoors.
Only use your Badger Earth Auger for its intended purpose.
PRE-USE PROCEDURE
Before using your Badger Earth Auger to drill holes, follow this procedure to
prepare for proper and correct use.
•Find, read, and understand the Badger operating/parts manual.
•Assemble the components of your Badger Earth Auger as indicated
in the Assembly of Drill section of this manual.
•Re-read and follow the Starting Instructions section of this manual.
•If the engine does not run satisfactorily, or if you feel it needs an
adjustment of some kind, contact Feldmann Engineering for the
proper repair information. Do not attempt to adjust the engine
operation yourself. Only an authorized service person may make
adjustments to your Badger Earth Auger’s engine without invalidating
the unit warranty.
•DO NOT RETURN your Badger Earth Auger TO THE RETAILER
THAT SOLD IT TO YOU. THEY ARE NOT AUTHORIZED TO
PROVIDE REPAIRS OR WARRANTY REPLACEMENT. If you have
any questions concerning service, contact Feldmann Engineering as
indicated in the Service & Repair Information section of this manual.

-3-
ASSEMBLY AND DISASSEMBLY OF AUGER AND POWERHEAD
E-Z Connect™ Collar
Connect auger assembly to powerhead by sliding E-Z Connect™
Collar down and pulling clevis pin out. Then slide auger assembly
onto output shaft. Reinsert clevis pin through auger assembly and
output shaft, then slide E-Z Connect™ Collar up and twist collar
slightly to lock pin in place.
Note: Do not remove clevis pin from collar
tether.
ENGINE OIL RECOMMENDATION
1. Your Badger Earth Auger is powered by a 4-stroke engine. You
must add six ounces of Jiffy 4-Cycle 0W40 Synthetic Oil (Part
No. 4288) before starting the engine.
2. Change engine oil at least once per year, more often if used in
extremely dusty conditions.
3. Before adding oil to the engine, attach earth auger. Place the
powerhead in the upright (operating) position. See Photo Below.
4. Locate the oil fill plug, as pictured below.
Oil Fill Plug
5. Remove the oil fill plug and gauge and set aside. Slowly pour 6
ounces of oil into the oil fill tube.
6. Replace oil fill plug and gauge. Remove to check for proper oil
level. Note: Oil should be checked with the oil plug screwed all
the way in. Oil level should fall within the cross marks on the end
of the oil fill gauge, as shown below.
7. Replace oil fill plug and gauge, turn clockwise until tight.
8. When changing oil, remove oil-fill plug from engine and turn unit
over so oil can be poured into a proper oil disposal container.
After engine oil has been drained, repeat steps 3 – 6 above.
FUELING
1. Gasoline vapor pressure may build up inside of the fuel tank of the
engine depending on weather conditions, the venting system of the
tank, and the fuel used. To reduce the risk of injury from escaping gas
fumes and vapor, remove the fuel cap on your drill slowly to release
pressure build-up.
+ NEVER FILL FUEL TANK INDOORS, WHILE ENGINE IS RUNNING,
OR WHILE ENGINE IS HOT.
+ NEVER FILL FUEL TANK COMPLETELY. FILL TANK TO ½ INCH
BELOW BOTTOM OF FILLER NECK TO PROVIDE SPACE FOR
FUEL EXPANSION. WIPE ANY FUEL SPILLAGE FROM ENGINE
AND EQUIPMENT BEFORE STARTING ENGINE.
CLEAN, FRESH, UNLEADED REGULAR FUEL WITH NO
ETHANOL IS RECOMMENDED. IF YOU USE FUEL WITH
ETHANOL, YOU SHOULD NEVER USE FUEL WITH MORE
THAN 10% ETHANOL BLEND.
FUEL MUST BE FRESH AND CLEAN. NEVER USE FUEL LEFT
OVER FROM LAST SEASON OR STORED FOR LONG
PERIODS. DO NOT USE FUEL CONTAINING METHANOL
(WOOD ALCOHOL).
NOTE: THE USE OF ALTERNATIVE FUELS SUCH AS E85, E20 OR
E15 ARE NOT TO BE USED IN BADGER EARTH AUGERS.
ALTERNATIVE FUELS WITH HIGH ETHANOL CONTENT CAN
CAUSE HARD STARTING, POOR PERFORMANCE, AND
INTERNAL ENGINE DAMAGE. NEVER STORE GASOLINE
INDOORS OR IN ENCLOSED, POORLY VENTILATED
ENCLOSURES, WHERE FUEL FUMES MAY REACH AN OPEN
FLAME, SPARK OR PILOT LIGHT AS ON A FURNACE, WATER
HEATER, CLOTHES DRYER, ETC.
DAMAGE AND/OR PERFORMANCE PROBLEMS THAT WILL
OCCUR FROM USE OF FUELS, OTHER THAN THOSE LISTED
IN THE MANUAL WILL NOT BE CONSIDERED WARRANTY.
CHECK THE FOLLOWING BEFORE STARTING YOUR AUGER
1. Be sure spark plug wire is ATTACHED to spark plug.
2. Be sure ignition switch is in the RUN (ON) Position.
3. Inspect the machine for proper condition and operation, paying
special attention to the throttle control assembly, RUN/STOP
(ON/OFF) switch, and drilling assembly.
TO REDUCE THE RISK OF INJURY FROM THE TURNING
ASSEMBLY OR FROM REACTIVE FORCES, THE THROTTLE
ASSEMBLY AND RELATED MECHANISM MUST MOVE FREELY
AND RETURN IMMEDIATELY TO THE IDLE POSITION WHEN
RELEASED.
+ NEVER OPERATE YOUR AUGER IF IT HAS BEEN DAMAGED,
IMPROPERLY ADJUSTED OR NOT COMPLETELY AND
SECURELY ASSEMBLED.
+ NEVER RUN ENGINE IN POORLY VENTILATED AREAS. ENGINE
EXHAUST CONTAINS CARBON MONOXIDE, AN ODORLESS
AND DEADLY GAS.
+ TO REDUCE THE RISK OF INJURY FROM REACTIVE FORCES,
THE OPERATOR MUST HAVE A FIRM GRIP ON THE MACHINE
AND A GOOD FOOTHOLD BEFORE STARTING THE AUGER
AND OPENING THE THROTTLE.
+ KEEP HANDS, FEET, HAIR AND LOOSE CLOTHING AWAY
FROM ANY MOVING PARTS ON ENGINE AND EQUIPMENT.
+ WARNING – TEMPERATURE OF MUFFLER AND NEARBY
AREAS MAY EXCEED 150° F (65° C) AVOID THESE AREAS TO
AVOID BURNS OR OTHER INJURY.

-4-
STARTING-OPERATION-STOPPING INSTRUCTIONS
STARTING PROCEDURE: Starting engine for the first time or after
engine has cooled off or after running out of fuel.
1. Press primer bulb until gas (return) line is free of bubbles.
2. Check to make sure the rocker switch is in the RUN (ON)
position.
3. Move choke lever to FULL CHOKE or (l\l) position, (operators
left)
4. Depress throttle control with left hand and grasp the starter
handle in your right hand.
5. Slowly pull starter handle until you feel resistance from engine,
then pull vigorously with short quick pull, ONCE.
6. Move choke lever to HALF CHOKE and pull starter handle to
start.
7. If engine fails to start after 5-6 pulls, press the primer bulb 5-10
times and repeat steps 5 and 6.
8. After engine starts, move choke lever to OFF position until
engine runs smoothly.
9. After hole is drilled, slowly raise unit from the hole. Depress and
hold rocker switch in the STOP (OFF) position until engine
comes to a complete stop.
USING YOUR BADGER EARTH AUGER
NOTE: The clutch slips when the auger is overloaded, when
this happens, raise complete unit slightly to ease load.
NOTE: If drilling additional holes, carry unit in upright
position by handles only, to next location and proceed
with normal starting and operating instructions.
1. When all holes have been drilled, and engine is stopped, lay
unit down, resting on wing handle with engine spark-plug facing
upward. Disconnect auger assembly from powerhead by sliding
E-Z Connect™ Collar down and pulling clevis pin from auger.
Do not remove pin from collar tether. Slip auger assembly off of
engine output shaft, then re-insert the clevis into assembly and
slide E-Z Connect™ Collar up to cover clevis pin.
TRANSPORTING AND STORAGE
1. Disconnect spark plug wire from spark plug and keep it away
from spark plug.
2. Make sure all fuel is drained from fuel tank, and fuel cap is
screwed on tight.
3. Never store powerhead with fuel in tank indoors or in enclosed,
poorly ventilated enclosures where fuel fumes may reach an
open flame, spark or pilot light as on a furnace, water heater,
clothes dryer, etc.
4. Always transport and store powerhead in an upright
(operating) position or engine spark-plug facing upward.
Make sure powerhead and auger assembly are properly
anchored to prevent damage.
MAINTENANCE AND ADJUSTMENTS
Check SPARK PLUG, periodically.
1. Before removing plug, wipe dirt and debris from spark plug base.
2. Remove and inspect spark plug for carbon build up.
3. Replace spark plug if electrodes are pitted, burned, or porcelain is
cracked. For replacement use: Jiffy Spark Plug #4290, AutoLite®
4194 spark-plug or equivalent. Failure to use proper spark-plug
may result in engine damage.
4. Check spark-plug gap with wire feeler gauge and set gap at .018”.
5. Install spark plug in engine and tighten securely.
THROTTLE LEVER AND CONTROL CABLE – This assembly and the
carburetor throttle shaft should be checked before each use for proper
movement and function. These components should also be lubricated
periodically by spraying silicone spray down both ends of the throttle cable
sheath, as well as on the throttle shaft on the carburetor. See below for
lubricating points. This lubricating procedure should also be performed at the
end of the season before storage. Also check throttle cable for any bends or
kinks, which can also cause improper operation of the throttle assembly.
EZ CONNECT COLLAR™ - This item is used to connect your BADGER
power head to the drill assembly and should be checked before each use for
proper installation and connection. Improper installation or positioning of the
EZ Connect Collar™ could cause the loss of your drill assembly down the
hole if the connection is not properly installed
AIR FILTER – The engine has an air cleaner which helps prevent premature
engine wear and failure. Never run an engine without a complete, clean air
filter properly installed. Clean or replace air filter as needed.
Servicing Foam Filter:
1. Remove filter cover.
2. Wash in warm water with mild soap until dirt and debris are
removed. Press filter when washing - do not twist.
3. Rinse thoroughly until water is clear.
4. Wrap in a clean cloth and press, do not twist, until completely dry.
5. Saturate with clean engine oil and press, do not twist, to distribute
oil.
6. Remove excess oil.
7. Attach filter and cover to the engine.
REPLACEMENT BLADE AND POINT
Improper cutting may be due to a damaged or worn auger blade or point.
Only genuine Badger auger blades and points are to be used as
replacement.
Lubricate

-5-
SERVICE & REPAIR INFORMATION
ENGINE SPEED – NEVER TAMPER WITH ENGINE SPEED
CONTROL SYSTEM, OVERSPEEDING THE ENGINE CAN
BE DANGEROUS AND MAY CAUSE PERSONAL INJURY
OR DAMGE TO UNIT. TAMPERING WITH ENGINE SPEED
CONTROL SYSTEM WILL VOID ENGINE WARRANTY.
For engine adjustments, repairs or warranty service not covered in
this manual, call our customer service number at 800-344-0712
Monday – Friday from 7:00 a.m. to 4:30 p.m. CST.When requesting
warranty service, proof of purchase (sales receipt) establishes the
date of sale and the start of the warranty period.
IMPORTANT NOTE: TRANSPORTING YOUR BADGER EARTH
DRILL
WHEN TRANSPORTING YOUR BADGER EARTH DRILL ON AN
ATV, IT IS EXTREMELY IMPORTANT TO FOLLOW THESE
INSTRUCTIONS AND USE CAUTION TO AVOID DAMAGE TO
THE AUGER POWER HEAD OR RELATED EQUIPMENT:
THERE ARE MANY AFTER MARKET ATV DRILL CARRIER
MOUNTING SYSTEMS TO CHOOSE FROM. MAKE SURE THE
CARRIER SYSTEM YOU PURCHASE OR USE HAS THE PROPER
SUPPORT FOR THE AUGER POWER HEAD (ENGINE AND
TRANSMISSION). MANY SYSTEMS ARE DESIGNED TO ONLY
SUPPORT AND MOUNT TO THE LOWER DRILL ASSEMBLY.
THIS LEAVES THE POWER HEAD TOTALLY UNSUPPORTED
AND THIS SITUATION WILL RESULT IN MAJOR DAMAGE TO
THE ENGINE AND TRANSMISSION. TAKE THE NECESSARY
STEPS TO INSURE PROPER SUPPORT OF THE AUGER POWER
HEAD AS NOTED ABOVE. IF THE POWER HEAD IS NOT
PROPERLY SUPPORTED DURING TRANSPORTATION, THIS
WILL VOID THE LIMITED WARRANTY AND ALL REPAIRS OR
REPLACEMENT COSTS WILL BE THE RESPONSIBILITY OF THE
OWNER. PURCHASE THE CORRECT CARRIER MOUNTING
SYSTEM AND EXERCISE EXTREME CAUTION WHEN
TRANSPORTING THE AUGER.
NOTE: TO FURTHER PROTECT YOUR AUGER POWER HEAD
WHEN TRANSPORTING, MAKE SURE THE AUGER POWER
HEAD IS COVERED TO MINIMIZE ANY DIRT, SAND OR DEBRIS
BUILD-UP OR ACCUMULATION ON ANY OF THE FUNCTIONAL
ENGINE PARTS SUCH AS THE CARBURETOR, THROTTLE OR
THROTTLE CABLE ASSEMBLIES. BADGER HAS AN
ACCESSORY POWER HEAD COVER #4022 TO PROTECT THE
POWER HEAD FROM THESE TYPES OF CONDITIONS.

-6-
BADGER 82G GASOLINE EARTH AUGER
PARTS LIST
REF. # PART # DESCRIPTION #USED
1 4180 Mitten Grip Recoil Handle 1
2 4304 Recoil Assembly 1
3 4322 Yellow Engine Shroud 1
4 4327 Ignition Coil 1
5 2519 Handle Plate 1
6 4048 Throttle Control Assembly 1
7 4170 Machine Screw for Cushioned Handles 1
8 4394 Cushion Handles 2
9 2549 Handle Plate 1
10 2840 Hex Capscrew 4
11 2841 Locknut 4
12 4306 Muffler 1
13 4307 Muffler Cover 1
14 4349 Oil Fill Tube 1
15 4345 Oil-Fill Dipstick with O-Ring 1
16 4373 Fuel Tank with Fuel Lines 1
21 4376 Fuel Line Support Clip Kit 1
22 4468 Gas Cap 1
25 4290 Spark Plug 1
26 4323 On-Off Switch 1
27 3818 Breather Tube 1
28 4339 Inside Air Cleaner Cover 1
29 4338 Foam Air Filter Element 1
30 4337 Outside Air Cleaner Cover 1
31 4321 Gasket 1
32 4363 Carburetor 1
33 4369 Carburetor Adaptor Kit 1
34 4542 Valve Cover 1
35 4524 Valve Cover Gasket 1
50 4049 Set Screw 1
51 2768 Clutch Washer 1
52 2383 Clutch Driver 1
53 2384 Clutch Drum Assembly 1
54 1985 Ball Bearing (Large) 4
55 2349 Snap Ring 1
56 3973 Engine Adaptor 1
57 4053 Socket Head Capscrew 4
58 1996 Hex Capscrew 8
59 1683 Hex Capscrew 2
60 3003 Upper Gear Case Assembly with Bearings 1
61 1119 Lock Washer 4
62 1986 Ball Bearing (Small) 2
63 1983 Main Gear and Pinion Assembly 1
64 1984 Main Gear and Shaft Assembly 1
65 2006 Gasket 1
66 3004 Lower Gear Case Assembly with Bearings 1
67 2336 Lock Nut 6
68 1670 Flat Washer 1
69 2008 Snap Ring 1
75 3996 E-Z Connect™ Collar with Pin 1
76 2647 2” Earth Auger Assembly 1
“ 3133 3” Earth Auger Assembly 1
“ 2649 4” Earth Auger Assembly 1
“ 2650 6” Earth Auger Assembly 1
“ 2651 8” Earth Auger Assembly 1
“ 2652 12” Earth Auger Assembly 1
77 2019 Lock Nut (for 3”, 4”, 6”, 8” Blade) 2
“ 2019 Lock Nut (for 12” Blade Set) 4
78 2359 Hex Capscrew (for 3”, 4”, 6”, 8” Blade) 2
“ 2359 Hex Capscrew (for 12” Blade Set) 4
79 2661 Replacement Blade for 3” & 4” Auger Assembly 1
“ 2013 Replacement Blade for 6” Auger Assembly 1
“ 2014 Replacement Blade for 8” Auger Assembly 1
“ 2499 Replacement Blade Set for 12” Auger Assembly 1
80 3635 Replacement Point for 2” & 3” Auger Assembly 1
“ 2648 Replacement Point for 4”, 6”, 8”, & 12” Assembly 1
81 1039 Cotter Pin 1
82 2655 Clevis Pin for 2” & 3” Auger Assembly 1
“ 2614 Clevis Pin for 4”, 6”, 8”, & 12” Auger Assembly 1
83 3503 Shaft Support Clips 2
83
35 34
Table of contents
Other Badger Basket Lawn And Garden Equipment manuals