manuals.online logo
Brands
  1. Home
  2. •
  3. Brands
  4. •
  5. Balboa
  6. •
  7. Heat Pump
  8. •
  9. Balboa Clim8zone Troubleshooting guide

Balboa Clim8zone Troubleshooting guide

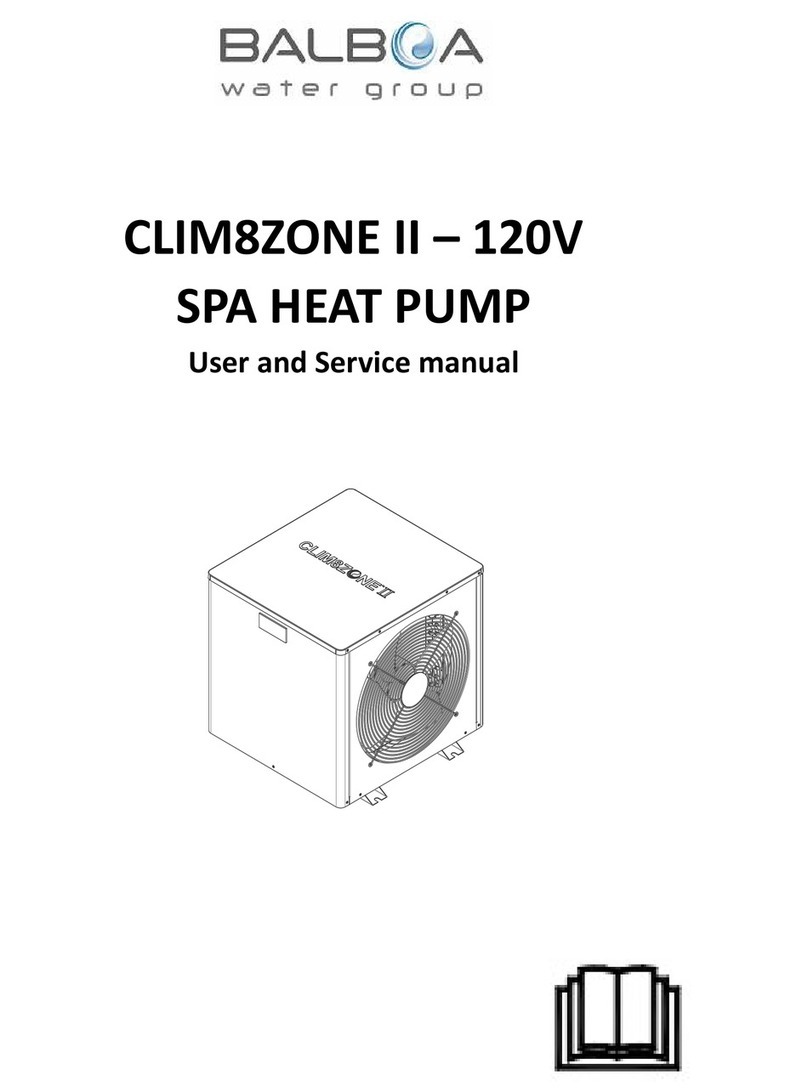
CLIM8ZONE II – 230V
INVERTER Heat Pump for Spas
User and Service manual
Spa Heat Pump
2
3
User and Service Manual (standalone mode)
INDEX
1. Specifications
2. Dimension
3. Installation and connections
4. Electrical Wiring
5. Display Controller Operation
6. Maintenance
SAFETY INSTRUCTIONS:
This manual contains all the necessary information for the use and installation of your heat pump
1. To ensure personal safety and prevent equipment damage, it is important to follow all safety
instructions provided on the equipment and within this manual.
2. The installer must read the manual carefully and follow the instructions for installation and
maintenance. The installer is responsible for the product's installation and should follow all the
manufacturer's instructions and applicable regulations.
3. The manufacturer is not responsible for any damage caused to people, objects, or errors resulting
from installation that disregards the manual guidelines.
4. Any use that does not conform to the product's original manufacturing is considered hazardous.
5. The warranty may become void if the equipment is not installed, maintained, or serviced properly.
Improper installation contrary to the manual will void the entire warranty.
6. Any use that does not conform to the product's original manufacturing is considered hazardous.
7. Any repair or service of the heat pump should only be carried out by an authorized service center.
8. In case of necessary service, please get in touch with your local sales representative.
SAFETY SIGNALS:
This document contains safety signals placed where specific attention is necessary.
DANGER: Disregarding the following instructions will result in serious injury or even death.
WARNING:Disregarding the following instructions can result in serious injury or even death.
NOTICE: Disregarding the following instructions can result in damage to your heat pump.
When installing and using your heat pump, it is crucial to always follow basic safety precautions. Please
take note of the following warnings to ensure the safety of yourself and others.
4
DANGERS:Disregarding the following instructions will result in serious injury or even death
The heat pump utilizes high voltage and rotating equipment, so use caution when servicing.
Always turn off the power supply before opening the cabinet to access the interior of the heat
pump, as there is high voltage electricity inside.
This heat pump is equipped with variable frequency compressor drive store electricity even after
the power has been deactivated at the power breaker. Wait for 5 minutes after the shutdown of
equipment before servicing.
Follow all National Electric Codes (NEC) and/or State and Local guidelines.
WARNINGS:Disregarding the following instructions can result in serious injury or even death.
Installation and repairs must be performed by a qualified technician.
The heat pump contains refrigerant under pressure. Repairs to the refrigerant circuit must not be
attempted by untrained and/or unqualified individuals. Service must be performed only by qualified
HVAC technicians. Recover refrigerant before opening the system.
Improper water chemistry can present a serious health hazard. To avoid possible hazards, maintain
pool/spa water per standards as detailed in hot tub or spa manual instructions.
Prolonged immersion in water warmer than normal body temperature may cause a condition
known as Hyperthermia. People having an adverse medical history or pregnant women should
consult a physician before using a hot tub or spa. Children and the elderly should be supervised by a
responsible adult.
Prolonged immersion in water colder than normal body temperature may cause a condition known
as Hypothermia. Persons having an adverse medical history or pregnant women should consult a
physician before immersing in a cold body of water. Children and the elderly should be supervised
by a responsible adult.
Do not use any methods to speed up the defrosting process or for cleaning, other than those
recommended by the manufacturer. The appliance must be stored in a room without continuously
operating ignition sources, such as open flames, operating gas appliances, or operating electric
heaters. Do not puncture or burn the appliance. It is recommended to install the unit outdoors. If it
must be installed indoors, ensure that ventilation is adequate. Please note that refrigerants may not
have an odor. NOTE: The manufacturer may provide other suitable examples or additional
information regarding refrigerant odors.
NOTICES: Disregarding the following instructions can result in damage to your heat pump.
Maintain proper water chemistry to avoid damage to the pump, filter, hot tub or spa shell, etc.
Water flow exceeding the maximum flow rate requires a bypass. Damage due to excessive water
flow will void the warranty.
Please ensure to keep the display controller in a dry area to prevent it from being damaged by
humidity.
Always remember to drain the water from the heat pump during winter or when the ambient
temperature drops below 0℃. Failure to do so may result in damage to the Titanium exchanger due
to freezing, which will void your warranty.
5
1. Specifications
1.1 Technical data
230V Clim8zone II – Compact Heat Pump for Spas
Product model C8ZII-230V
Advised spa volume(m3)(with cover) 5-15
Heating operating ambient temperature range(
℃
)-5 ~43
Cooling operating ambient temperature range(
℃
)10 ~40
Operating water temperature(℃) heating 15~40
Operating water temperature(℃) cooling 5~35
Parameters
heating*
Heating capacity (kW) 4.0~1.0
Heating capacity (BTU/h) 13600~3400
Input power (kW) 0.8~0.11
COP 5.0~9.5
heating**
Heating capacity (kW) 2.5~0.65
Heating capacity (BTU/h) 8500~2210
Input power (kW) 0.6~0.1
COP 4.0~6.1
Cooling capacity (kW) 1.6
Maximum current (A) 5.5
Advised water flow(m³/H)1.72
IP Grade (Level of protection) IPX4
Anti-electric shock Rate I
Noise (dB(A)) in 1 meter ≤45
Net weight/Gross weight(kg) 28/30
Diameter of pipe (mm) Φ48.3mm (1.5” socket)
Standard
Configuration
Metal plate Metal Casing
Body size(W*D*H) mm 496 x 498 x 486
Refrigerant R32/260g
Power supply 220 ~240V/1 Ph/50Hz-60Hz
Condenser Titanium in PVC
Remark: heating*: working condition, Inlet water temperature 26
℃
, Outlet water temperature 28
℃
, Dry
bulb temperature 27
℃
.Humidity 80%.
heating**: working condition, Inlet water temperature 26℃, Outlet water temperature 28℃, Dry bulb
temperature 15
℃
. Humidity 70%.
Cooling: working condition, Inlet water temperature 28
℃
, Dry bulb temperature 35
℃
. Humidity 80%.
6
2. Dimensions (mm)
2.1
unit: mm
7
2.2 Exploded View
8
3. Installation and connections
3.1 Notes
The factory supplies only the heat pump. All other components must be provided by the user or the installer.
Install a bypass if the water flow from the water pump is more than 20% greater than the allowable flow through the heat
exchanger of the heat pump.
Always place the heat pump on a solid foundation and use the included rubber mounts to avoid vibration and noise.
Always hold the heat pump upright. If the unit has been held at an angle, wait at least 24 hours before starting the heat
pump.
3.2 Heat pump location
The unit will work properly in any desired location as long as the following three items are present:
1. Fresh air – 2. Electricity – 3. Adequate water flow
The unit may be installed in virtually any outdoor location as long as the specified minimum distances to other objects are
maintained (see drawing below). To protect the unit from snow and rain, it is suggested to add an open sides shed cover
over the heat pump and ensure sufficient ventilation. Please consult your installer for installation with an indoor spa.
Installation in a windy location does not present any problem at all, unlike the situation with a gas heater (including pilot
flame problems).
ATTENTION:
Never install the unit in a closed room with a limited air volume in which the air expelled from the unit will be reused, or
close to shrubbery that could block the air inlet. Such locations impair the continuous supply of fresh air, resulting in
reduced efficiency and possibly preventing sufficient heat output.
See the drawing below for minimum dimensions.
3.3 Distance from your spa
The heat pump is normally installed within a perimeter area extending 2m (6.5ft) from the spa. To minimize heat loss, it is
recommended to install the heat pump as close to the spa as possible and add insulations over the pipes connecting the
heat pump and the spa.
3.4 Plumbing Connections
9
3.4.1 Plumbing diagram
3.4.2 Check-valve installation (recommended)
If automatic dosing equipment for chlorine and acidity (pH) is used, it is essential to protect the heat pump against
excessively high chemical concentrations which may corrode the heat exchanger. For this reason, equipment of this sort
must always be fitted in the piping on the downstream side of the heat pump, and it is recommended to install a
check-valve to prevent reverse flow in the absence of water circulation.
Damage to the heat pump caused by failure to follow this instruction is not covered by the warranty.
3.5 Electrical Connection
DANGER:Electrical connections below must be done by a qualified and licensed electrician. Failure
to do so injury or death may occur.
1. Turn the spa breaker to OFF position before making electrical connection.
2. Make sure electrical ratings of the power source match with the electrical ratings marked on the label of this unit.
3. Attention: This unit is provided with a grounding lug and must be electrically bonded to the spa common bonding
grid. Connect the grounding lug with the spa common bonding grid with a #8 minimum solid copper wire.
4. Power to this unit must be supplied through a residual current device (RCD) having a rated residual operating
current not exceeding 30mA.
5. Connect the unit to 230VAC AV port of the spa controller. A splitter (PN 22934, not included) may be needed if the
AV port is being used for other equipment.
6. If a spa controller is not used, the unit may be hard wired to the power supply panel and must be done by a
licensed electrician.
3.6 Initial operation
Note: In order for the heat pump to operate, the water circulating pump must be running to cause the water to circulate
through the heat pump. The heat pump will not start up if the water is not circulating.
After all connections have been made and checked, follow the following procedure:
1. Switch on the water circulating pump. Check for leaks and verify that water is flowing from and to the spa.
2. Switch on power to the heat pump.
10
3. Press the Power button on front panel for 2 seconds.
4. Set the unit to Heat or Cool mode by pressing the Mode button. Heating = Red LED on. Cooling = Green LED on.
5. Set temperature by pressing Up or Down buttons.
6. The unit will start up after the time delay expires.
7. After a few minutes, air will be blowing out of the fan grill.
8. Complete!
Time delay - The heat pump has a built-in 3-minute start-up delay to protect the circuitry and avoid excessive contact
wear. The unit will restart automatically after this time delay expires. Even a brief power interruption will trigger this time
delay and prevent the unit from restarting immediately. Additional power interruptions during this delay period do not
affect the 3-minute duration of the delay.
3.7 Condensation
In heat mode, the air drawn into the heat pump is greatly cooled by the operation of the heat pump for heating the spa
water, which may cause condensation on the fins of the evaporator. The amount of condensation may be as much as
several litters per hour at high relative humidity. This is condensation water, not leaked water.
4. Electrical Wiring
4.1 CLIM8ZONE II HEAT PUMP WIRING DIADRAM
11
5. Controller Panel Operation
5.1 Controller Panel Display:
5.2 Button Descriptions:
No Key Description
1 Turn ON/OFF the controller panel
2 Increase the setting values.
3 Decrease the setting values.
4 Change modes.
5Red LED On Heating mode
6Green LED On Cooling mode
7Red LED flashing Defrosting mode
8Red & Green LED Off Heat pump OFF
5.3 Operation Instructions:
1. Turn ON/OFF
Press the button for 2 seconds.
2. Mode conversion
Press button to switch heat / cooling mode; Heating =Red LED On ; Cooling = Green LED On.
3. Change temperature unit Fahrenheit/Celsius
Long press three buttons + + at the same time to switch the display of Fahrenheit and Celsius.
4. Forced defrosting
When the outer coil pipe temperature is below the Exit Defrosting Temperature, press two buttons + for
3 seconds to enter the Forced Defrosting.
5. Change Set Temperatures:
Set temperatures can be adjusted by pressing Up or Down buttons.
6. Status Query
To enter the unit status query, press button for 3 seconds to view the temperature parameters. See table
12
below.
Status Query Table
Query code Meaning Display the range
A01 Inlet water temp. -30~99℃
A01 Outlet water temp. -30~99℃
A03 Ambient temp. -30~99℃
A04 Exust temp. 0~125℃
A05 Return gas temp. -30~99℃
A06 Outer coil temp. -30~99℃
A08 Electronic expansion valve
opening degree
0~480
A10 Compressor current
A11 Heat-sink temperature
A12 DC bus voltage value
A13 Actual compressor speed
A14 Total main board current
A15 DC fan speed 0~1590
A16 Unit operation mode 0:AP* mode/1: BP** mode
* AP = Standalone; ** BP = Integrated with Balboa BP Spa Controller
7. Change Unit operation mode
Long press two buttons and for 15 seconds at the same time to switch between AP and BP modes;
A16: = 0 heat pump operates in AP mode; A16 = 1: heat pump operates in BP mode.
5.4. Query and setting of the system parameters
Query: Press button for 3 seconds to enter the parameter query state. Press or button to switch from
one parameter to another. Press button to view the value of the parameter. Press button to return and exit the
query.
Modify: To modify the parameter, a password will be needed. The password is 68. Follow the below procedure:
Long press and button to enter the input password interface,
Press button to enter the first password digit "6" by pressing or buttons,
Press button to advance to the second password digit and enter "8" by pressing or buttons,
Press button to submit the password. After entering, select or change parameters by using or
buttons
Press button to make entry changes or confirm and return to the viewing status.
13
System parameter table
Parameter
code Parameter name Adjust range Default value
P01 Return Difference for
Target Water Temp.
1℃~18℃ 1℃
P02 Reserved -- --
P03 Reserved -- --
P04 Cooling setting temp. 8℃~28℃ 27℃
P05 Heating setting temp. 15℃~40℃ 27℃
P06=TP4 The setting temp. that Exhaust
temp. too high protection 80℃~125℃ 110℃
P07=TP0 Recover The setting temp. from the
too high exhaust temp. 50℃~100℃ 90℃
P08 Compressor current protection 2A~50A Reserved--Without
this function
P09 Inlet water temp. compensation -5℃~15℃ 0℃
P10 Reserved -- --
P11 Defrosting cycle 20MIN~90MIN 40MIN
P12 Defrosting enters the temp. -15℃~-1℃ -3℃
P13 Defrosting time 2MIN~20MIN 5MIN
P14 Desrosting exit temperature 1℃~40℃ 18℃
P15 Temp. difference between
defrosting environment and coil
pipe
0℃~15℃ 9℃
P16 Ambient temperature of the
defrosting
0℃~20℃ 17℃
P17 Expansion valve cycle 20-90 30
P18 Overheat Degree in Heating Mode -5-10 3
P19 Main valve set exhaust gas 70-125 95
P20 Main valve defrosting opening
degree
2-45 30
P21 Minimum opening degree of
the main valve
5-15 8
P22 Expansion valve mode 0 Manual /
1 Automatic
1
P23 Manual steps of the main valve 2-45 35
P24 Cooling opening degree of the
main valve
2-45 30
14
5.5. Error Code table:
Error
code
Error description description Solution suggestion
E03 Water flow failure 1. The water flow switch fault
2. Low water flow
3. The inlet and outlet water are
reversed
4. There is air in the pipe
5. The pipe blocked
1.Check the water flow switch
and replace it if it is faulty
2.Check the water valve and
the temperature difference
between inlet and outlet water
3.Whether the inlet and outlet
water pipes are correctly
connected
4.Emptying
5.Pipe cleaning
E04 winter anti-freezing The ambient temperature is lower
than the antifreeze setting value
Normal protection
procedure
E05 High pressure protection 1. Low water flow
2.. Pressure switch fault
3. The fan motor unwork or the
speed too low
4.Overcharged the refrigerant
1. Check whether the
temperature difference
between inlet and outlet water
is too large, and whether the
outlet water temperature is too
high
2. Use a multimeter to check
whether the high voltage
protection switch works
3. Check the water flow of the
water pump and the speed of
the fan
4. Refill the refrigerant
E09 Communication with
the upper computer failed
( Communication with
Balboa system failed)
1. Replace the main board
2. Check the communication
cables between the main board
and Balboa system
3. Check whether the Balboa
system software matches
E10 Communication fault of
frequency conversion
module (alarm when
communication is
disconnected between
external board and drive
board)
1. The mainboard or driver board
damaged
2. The connector of the
communication cable between the
mainboard and the driver board is
in poor contact or falls off
3. The communication cable is
1. Replace the main board or
driver board
2. Check the communication
cables between the main board
and driver board
3. Replace the communication
cable
15
damaged
E12 Exhaust too high
protection
1. Less refrigerant or leakage
2. The system blocked
3. Compressor refrigerant oil is
insufficient
4. The resistance value of the
exhaust probe is offset, and the
inlet temperature probe is
dropped
1. Refill the refrigerant
2. Replace the filter
3. Add refrigerant oil to the
compressor
4. Replace the exhaust probe
and reconnect the water inlet
temperature probe
E15 Inlet water temp. Error The sensor plug is in poor contact
or off, or the sensor is damaged
Check and replace the water
inlet temperature sensor(T2
sensor)
E16 Outer coil pipe temp.
Error
The sensor plug is in poor contact
or off, or the sensor is damaged
Check and replace the coil pipe
temperature sensor(T3)
E18 Exhaust gas temp. Error The sensor plug is in poor contact
or off, or the sensor is damaged
Check and replace the exhaust
gas temperature sensor(T1)
E20 Abnormal protection of
frequency conversion
module
IPM module internal fault, check
related problems according to the
attached table
E21 Ambient temp. Error The sensor plug is in poor contact
or off, or the sensor is damaged
Check and replace the ambient
temperature sensor(T4)
E27 Outlet temperature fault The sensor plug is in poor contact
or off, or the sensor is damaged
Check and replace the water
outlet temperature sensor(T6)
E29 Return gas temp. Error The sensor plug is in poor contact
or off, or the sensor is damaged
Check and replace the suction
gas sensor(T5)
E46 DC Fan Error 1.Dc fan failure
2.Plug is in poor contact or off
1. Replace the DC fan
2. Reconnect cables to the DC
fan
E20 fault will display the following error codes at the same time, the error codes will switch every 3 seconds. Among
them, error codes 1-128 are displayed in priority.
When error codes 1-128 don’t appear, then error codes 257-384 can show.
If two or more error codes appear at the same time, then display error codes accumulation.
For example, 16 and 32 occur at the same time, display 48.
Error
Code
name description Solution suggestion
1 IPM Over-current 1. The IPM overloaded or
overheated
2. The U,V,W driver
short-circuited
3. The IPM module fault
4. The compressor damaged
1 Ensure that the ring
temperature, water
temperature, water flow, etc. are
within the operating range of
the unit;
2. Use a multimeter to measure
16
the motor U,V,W in ohmic gear
to ensure no short circuit
3. Replace the frequency
conversion module
4. Replace the compressor
2 compressor synchronous
abnormal
1. The compressor
overloaded instantaneously
2. The compressor does not
match the program
3. The difference between
high and low pressure starts
the compressor excessively
1 Ensure that the ring
temperature, water
temperature, water flow, etc. are
within the operating range of
the unit;
2. Replace the driver board with
the correct program
3. Ensure that the high and low
pressure difference starts
normally
8 compressor output phase
absent
1. The U, V, and W cables of
the compressor are missing
or improperly connected
2. The compressor does not
match the program
3. The difference between
high and low pressure starts
the compressor excessively
1. Check whether the U, V,
and W wires of the
compressor are missing or in
poor contact
2. Update the driver
3. Ensure that the high and
low pressure difference starts
normally
16 DC bus low voltage 1. The power supply unstable
2.AC suddenly power off, the
inverter capacitor residual
power supply chip detects
that the DC voltage will be
too low
3. The PFC module fault
1. Ensure that the power
supply is stable
2. Check the capacitor after it
is powered off
3. Replace the faulty
frequency conversion module
32 DC bus high voltage 1. The power supply voltage
too high.
2. The capacitor fault
3. The PFC module fault
1. Ensure that the power
supply voltage is normal
2. Replace the capacitor
3. Replace the faulty
frequency conversion module
64 Radiator over
temperature
1. The fan on the host is
faulty
2. The air duct is blocked
1. Check and replace the fan
2. Ensure proper ventilation
128 Radiator temperature
error
1. The heat sink sensor is
short-circuited or open
2. Heat sink fouling
3. The ambient temperature
too high
1. Replace the frequency
conversion module
2. Remove dust and scale
from the heat sink
3. Lower the ambient
temperature
257 communication failure 1. The connector of the 1. Reconnect and ensure
17
communication cable
between the mainboard and
the driver board is in poor
contact or falls off
2. Internal components of the
heat pump damaged
3. The output voltage of the
power supply board in the
module abnormal or no
output
stability
2. Replace the internal
components
3. Replace the power module
264 AC Input low voltage 1. The input voltage too low
2. The current transformer
damaged during
transportation
1. Ensure that the input
voltage is normal
2. Ensure that the current
transformer works properly
288 IPM too high temperature 1. The fan is faulty or the air
duct blocked
2. The ring temperature rises
too fast, resulting in
over-temperature drop too
late to react
3. The power supply voltage
and current too high or too
low
1. Replace the fan
2. Ensure that the air duct
unblocked
3. Reduce the ring
temperature
4. Ensure that the power
supply voltage and current
are normal
320 Compressor peak current
too high
1. Compressor load is too
large;
2. The driver board is faulty
3. The compressor is
damaged
1 Ensure that the ring
temperature, water
temperature, water flow, etc. are
within the operating range of
the unit;
2. Replace the compressor driver
plate.
3. Replace the compressor
18
6. Maintenance
1. Check the water supply system regularly to avoid the air trapped in the system and occurrence of low water flow,
because it would reduce the performance and reliability of heat pump.
2. Clean your spa and filtration system regularly to avoid the damage of the unit as a result of the dirty of clogged
filter.
3. Remove all water from the heat pump if it will not be used for a long period of time (especially during the winter).
4. After the unit has been properly winterized, it is recommended to cover the heat pump with special winter cover.
5. After a long winter shutdown, before start to run the heat pump again, make sure the spa is filled with fresh and
clean water and all valves to the heat pump are open.
6. When the unit is running, there is all the time some water discharged under the unit.
7. Clean the outside of the heat pump regularly.

Other manuals for Clim8zone

2

This manual suits for next models

1

Other Balboa Heat Pump manuals

Balboa Clim8zone User manual

Balboa

Balboa Clim8zone User manual

Balboa Clim8zone Troubleshooting guide

Balboa

Balboa Clim8zone Troubleshooting guide

Popular Heat Pump manuals by other brands

AIREDALE StoreMaster STM50R-P Technical manual

AIREDALE

AIREDALE StoreMaster STM50R-P Technical manual

Carrier 38BNE018-036 owner's manual

Carrier

Carrier 38BNE018-036 owner's manual

Daikin FTK(X)M-P Series Service manual

Daikin

Daikin FTK(X)M-P Series Service manual

AAON RN Series Installation operation & maintenance

AAON

AAON RN Series Installation operation & maintenance

Bosch Compress 7400i AW Installer's guide

Bosch

Bosch Compress 7400i AW Installer's guide

iglu Inuit 6I installation manual

iglu

iglu Inuit 6I installation manual

Siddons Solarstream MACHRW020ZA/(B01) Installation instructions manual

Siddons Solarstream

Siddons Solarstream MACHRW020ZA/(B01) Installation instructions manual

AERMEC WRL-H Technical manual

AERMEC

AERMEC WRL-H Technical manual

Nibe F1155 Series user manual

Nibe

Nibe F1155 Series user manual

fluidra 74143 owner's manual

fluidra

fluidra 74143 owner's manual

NeoRe TG Series user manual

NeoRe

NeoRe TG Series user manual

Midea CBU-06HRFN1-MV0W Owner's manual & installation manual

Midea

Midea CBU-06HRFN1-MV0W Owner's manual & installation manual

CTC Union EcoAir 500M Installation and maintenance manual

CTC Union

CTC Union EcoAir 500M Installation and maintenance manual

Daikin EHYHBH05AA Operation manual

Daikin

Daikin EHYHBH05AA Operation manual

Lennox HPXA15-024 installation instructions

Lennox

Lennox HPXA15-024 installation instructions

Dimplex WI 90CG Installation and operating instructions

Dimplex

Dimplex WI 90CG Installation and operating instructions

Calorex IPT 8 Series Owners & installation manual

Calorex

Calorex IPT 8 Series Owners & installation manual

Clint CHA 91 manual

Clint

Clint CHA 91 manual

manuals.online logo
manuals.online logoBrands
  • About & Mission
  • Contact us
  • Privacy Policy
  • Terms and Conditions

Copyright 2025 Manuals.Online. All Rights Reserved.