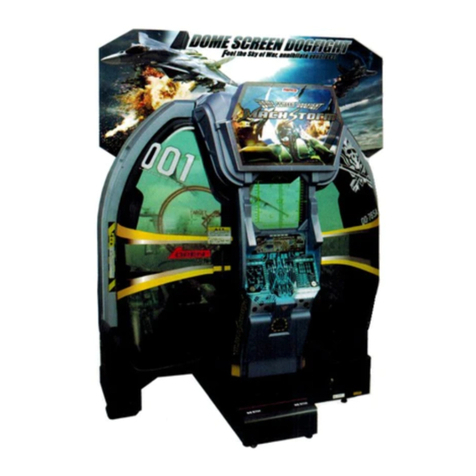
Bandai Namco Star Wars Battle Pod User manual

2751001100
取扱説明書
WARNING
StarWars
Thespecificationsofthemachineandthecontentsofthisoperationmanualare
subjecttochangewithoutpriornoticeduetoproductimprovements.
StarWars
:BattlePod
OPERATIONMANUAL
Theactualproductmaydifferslightlyfromtheillustrationsinthismanual.
PartNo.-
FirstEditionPublishedinJune2015
STARWARS
©&™2014LucasfilmLtd.Allrightsreserved.
OPERATIONMANUAL
:BattlePod
●
Toensuresafeoperationoftheproducts,besuretoreadthisOperationManualbeforeuse.
●
KeepthisOPERATIONMANUALinasafeplaceforeasyreferencewhenneeded.
FirstEdition

Introduction
Thank you very much for purchasing the Star Wars: Battle Pod (referred to as "this machine" in this Operation Manual).
This Operation Manual describes:
• How to properly understand this machine.
• How to safely install, move, transport, operate, service and dispose of the machine.
• How to operate the machine properly and make full use of its functions.
• How to ensure the safety of players and bystanders.
Contact for Machine and Machine Repair Inquiries
• For inquiries regarding the machine or machine repairs, contact your distributor.
The copyrights, trademarks and other rights used by the machine are noted at the end of this Operation
Manual.

1
1. Safety Precautions – Be sure to read to ensure safe operation –
Instructions to the Owner
If you delegate the work for installing, moving, transporting, operating, maintaining or disposing of
this machine to other people, ensure that these people read the relevant sections of this operation
manual carefully before starting work, and observe the corresponding precautions.
1-1 Levels of Risk
The safety and property damage precautions on the machine labels and in this Operation Manual
are classified according to their risk level, as follows.
WARNING
: Failure to avoid these risks may result in serious injury or death
: Failure to avoid these risks may result in light injury or damage to other property
Notes about functionality that are not related to safety are indicated by the following symbol.
: Information about product functions or protection
1-2 Definition of "Technician"
This Operation Manual is designed for arcade personnel. However, the sections marked "Must be
performed by a technician" in the Table of Contents are written for technicians. These must be
performed by technicians only.
A technician is a person involved in the design, manufacture, inspection, maintenance or service at
an amusement device manufacturer, or a person involved in routine maintenance or management
(such as repair) of amusement devices who has specialized knowledge of electricity, electronics or
mechanical engineering equivalent to or higher than a technical high school graduate.

1. Safety Precautions – Be sure to read to ensure safe operation –
2
1-3 Critical Safety Precautions
●Should any abnormalities occur, turn off the power switch immediately to stop operations. Then, be sure
to disconnect the power cord plug from the outlet. Operating the machine while the abnormality persists
may result in fire or accident.
●Dust accumulating on the power cord plug may result in fire. Inspect the plug regularly and remove any
dust.
●Fully insert the power cord plug into the outlet. Poor contact may generate heat and result in fire or
burns.
●Damage to the power cord may result in fire, electric shock or electrical leakage. Be sure to observe the
following.
• Keep the power cord away from heaters.
• Do not twist the power cord.
• Do not forcibly bend the power cord.
• Do not alter the power cord.
• Do not bundle the power cord.
• Do not pull the power cord. (Always unplug by holding the plug and not the power cord.)
• Do not place objects on the power cord.
• Do not allow the power cord to be caught between the machine and other devices or the wall.
• Do not do anything else that might damage the power cord.
●Do not expose the power cord and power cord plug to water. Doing so may result in electric shock or
electrical leakage.
●Do not touch the power cord plug with wet hands. Doing so may result in electric shock.
●The power capacity of the machine is as follows:
• Models operating on 110 and 120 VAC: Maximum current consumption is A
• Models operating on 220 and 230 VAC: Maximum current consumption is A
To prevent fire and electric shock, use indoor wiring that conforms to these power supply specifications.
●Use the machine with the power supply voltage in the following ranges:
• Model operating on 110 VAC: 100 to 120 VAC
• Model operating on 120 VAC: 110 to 130 VAC
• Model operating on 220 VAC: 210 to 230 VAC
• Model operating on 230 VAC: 220 to 240 VAC
Using a voltage outside this range may result in fire or electric shock.
However, to optimize use of the machine, operate the machine with the following power supply voltages
as much as possible:
• Model operating on 110 VAC: 110 VAC
• Model operating on 120 VAC: 120 VAC
• Model operating on 220 VAC: 220 VAC
• Model operating on 230 VAC: 230 VAC
●In order to ensure safe use of the machine, be sure to perform the pre-operation inspection ("7-3 Pre-
operation Inspection" and "8B. Service") described in this Operation Manual.
Omitting these inspections or service may result in an accident.
WARNING

1. Safety Precautions – Be sure to read to ensure safe operation –
3
●Use the consumables and service parts (including screws) that are specified by BANDAI NAMCO Games
Inc. To request repairs or to order parts, contact your distributor.
●Do not modify the machine without permission. Do not perform any operations that are not described in
this Operation Manual. Modifying the machine may create unforeseen hazards.
●If you decide to transfer ownership of this machine, be sure to provide this Operation Manual along with
the operation manual for the machine.
WARNING

1. Safety Precautions – Be sure to read to ensure safe operation –
4
1-4 Machine Warning Labels
●The warning labels attached to the machine contain important information for ensuring safety. Be sure
to observe the following.
• In order to ensure that the warning labels attached to the machine are always clearly visible, install
the machine in an appropriate, sufficiently lit location and keep the labels clean at all times. Also,
make sure that the labels are not hidden by other machines or objects.
• Do not remove or alter the warning labels.
• If a warning label becomes excessively dirty or damaged, replace it with a new one. To order warning
labels, contact your distributor.
WARNING
・Warning sticker Service B
Part No.: 461-534
830141XX01
・Caution sticker regarding hypersensitivity to light(P)
Part No.:

1. Safety Precautions – Be sure to read to ensure safe operation –
5
・
Warning sticker
Coin mech
Part No.: 461-822
・
Warning sticker High temperature(A)NEL
Part No.:

6
2. Specifications
(1)Ratedpowersupply 110VAC110V±10VAC
120VAC120V±10VAC
220VAC220V±10VAC
230VAC230V±10VAC
(2)Ratedpowerconsumption 270W(110VAC/120VAC)
154W(220VAC/230VAC)
(3)Maximumcurrentconsumption 3.0A(110VAC/120VAC)
1.6A(220VAC/230VAC)
(4)Displayunit Liquid-crystaldisplay(42inches)
(5)Dimensions
[1]Wheninstalled
Installationsize:
Width(W)1,210xDepth(D)1,490xHeight(H)2,240[mm]
2240
1490 1210

2. Specifications
7
[2] When disassembled
∙Cabinet assembly Width (W) 1,210 x Depth (D) 720 x Height (H) 1,780 [mm]
∙ Seat assembly Width (W) 560 x Depth (D) 840 x Height (H) 1,270 [mm]
1780
720 1210
840
1270
560

2. Specifications
8
∙ Sign box assembly Width (W) 990 x Depth (D) 265 x Height (H) 545 [mm]
(6) Weight
[1] When installed 210 kg
[2] When disassembled ∙ Cabinet assembly 170 kg
∙ Seat assembly 32 kg
∙ Sign box assembly 8 kg
545
265 990

9
7. Operation
●Should any abnormalities occur, turn off the power switch immediately to stop operations. Then, be sure
to disconnect the power cord plug from the outlet. Operating the machine while the abnormality persists
may result in fire or accident.
●Dust accumulating on the power cord plug may result in fire. Inspect the plug regularly and remove any
dust.
●Fully insert the power cord plug into the outlet. Poor contact may generate heat and result in fire or
burns.
●Before operating the machine, be sure to check that installation has been performed according to
the instructions and specified procedures in this Operation Manual (see "5. Delivery and Installation
Conditions"). Failure to install the machine correctly may result in fire, electric shock, injury or
malfunction.
●The warning labels attached to the machine contain important information for ensuring safety. Be sure
to observe the following. (For information about where to attach the warning labels, see "1-4 Machine
Warning Labels".)
• In order to ensure that the warning labels attached to the machine are always clearly visible, install
the machine in an appropriate, sufficiently lit location and keep the labels clean at all times. Also,
make sure that the labels are not hidden by other machines or objects.
• Do not remove or alter the warning labels.
• If a warning label becomes excessively dirty or damaged, replace it with a new one. To order warning
labels, contact your distributor.
●In order to ensure safe use of the machine, be sure to perform the pre-operation inspection ("7-3 Pre-
operation Inspection"), service ("8B-1 Inspection and Service") described in this Operation Manual.
●Set the cabinet volume within a range that allows the player to hear alarms and warning announcements
within the operating facility.
Omitting these inspections or service may result in an accident.
WARNING
7-1 People Who Should Not Play the Game
●In order to ensure the safety of players, be careful not to let people play under the following conditions. It
may result in an accident.
• People who are sensitive to light such as strobe lights
• People whose feet cannot reach the floor when sitting on the seat
• People under the influence of alcohol
• People who are injured or ill
• People who are pregnant
• People with heart conditions
• People with other ailments
• People whose behavior is against what is described on the warning labels on this machine.
●The machine is designed for one player. To prevent accidents, be careful not to let two or more people
attempt to enter the machine at the same time.

7. Operation
10
7-2 Consideration for Players
●If players start feeling ill due to game images or light stimulation, they must stop playing and take a
break immediately.
●In rare cases, stimulation by lights or video images may cause the player to have a seizure or lose
consciousness. If this happens, make sure that the player gets immediate medical assistance. In
particular, if the player is under 6 years old, be sure to advise the parents to keep an eye on their child.
7-3 Pre-operation Inspection
Check the points below before starting machine operations.
If there is an abnormality, resolve it by referring to "8B-2 Troubleshooting".
●Before operating the machine, check the following locations. This is necessary to prevent accident or
injury.
●Do not operate this machine when any part is damaged, broken, or deteriorated, or when this machine is
not correctly installed. Doing so may cause injury to the players and the people around them. If you find
any abnormalities, replace the affected parts immediately. To order a fuse, contact your distributor.
WARNING
7-3-1 Safety Inspection (Before Power On)
(1) Are the warning labels attached? (See "1-4 Machine Warning Labels".)
(2) Are all warning labels legible? (See "1-4 Machine Warning Labels".)
(3) Have all the level adjusters been adjusted? (See "8A-3-7 Level Adjuster Adjustment".)
(4) Is the specified play zone provided? (See "5-1-2 Play Zone to be Set Up during Installation".)
(5) Are the power cord and the LAN cable laid out safely so that they will not cause players or other customers
to trip over them?
(6) Is the rubber cover of the control lever torn or removed?
(7) Is the finger guard of the throttle lever cracked or removed?
(8) Are the parts that the player touches damaged, such as the seat and the control lever?

7. Operation
11
7-3-2 Safety Inspection (After Power On)
Inspect the following points after turning on the power switch. If you discover an abnormality, turn off the
power switch immediately to stop operations.
Then, disconnect the power cord plug from the outlet and contact your distributor.
(1) Is any part of the power cord or plug abnormally hot?
(2) Does touching the machine give a tingling electric shock?
(3) Is there a burning smell, abnormal noise or vibration?
(4) Is there any other abnormality or malfunction?
7-3-3 Function Inspection (After Power On)
(1) Check the images. (See "7-6-5 Screen Adjustment (MONITOR TEST)".)
(2) Check the audio. (Is sound emitted from each speaker?) (See "7-6-6 Sound Adjustment (SOUND TEST)".)
(3) Check the lamps. (Do the view change buttons light up?) (See "(c) OUTPUT TEST".)
(4) Check each LED module (Does the LED module light up?) (See "(c) OUTPUT TEST".)
To inspect the following points, press the Service switch and actually play the game. (See "7-5-2 Adjustment
Switches".)
(1) Check the operation of the control lever. (Does the course of the vehicle change when you operate the
control lever?)
(2) Check the operation of the throttle lever. (Does the vehicle speed up or slow down when you move the
throttle lever forward or backward?)
(3) Check the operations of the main trigger and the special button. (Is a bullet fired when you press the
button?)
(4) Check the operation of the vibration motor. (Does the control lever vibrate when a bullet is fired?)
(5) Check the operations of the view change button. (Does the display change when you press the button?)

7. Operation
12
7-4 Playing the Game
7-4-1 Outline of the Game
This machine enables players to take part in sensory dogfight shooting games. Players ride well-known
vehicles from the Star Wars movies such as X-wing Fighters and Speeder Bikes to shoot down enemy
vehicles quickly in order to carry out their missions.
7-4-2 Operation Method
Operation Method When Selecting the Mission
(1) Control lever
• Tilt the lever forward, backward, right and left to select a mission.
• Press the main trigger or the special button to enter the mission.
Operation Method during the Mission
(1) Control lever
• Tilt the lever forward, backward, right and left to pilot your vehicle.
Tilt forward/backward: Dives/climbs
Tilt to the right/left: Turns to the right/left
• When you operate the main trigger or the special button, the corresponding weapons will be fired.
(2) Throttle lever
• Tilt the lever forward or backward to speed up or slow down the vehicle.
Tilt forward: The vehicle speeds up temporarily and closes the distance with the enemy vehicle.
Tilt backward: The vehicle slows down temporarily and the distance to the enemy vehicle widens.
(3) View change button
• Press the button to switch between showing/hiding the cockpit.
View change button
Turn left
Turn right
Climb
Dive
Slow down
Speed up
Throttle lever
Main trigger
Special button
Control lever

7. Operation
13
7-4-3 Game Flow
How to Start the Game
When a credit is established after a coin has been inserted, the game starts. The game mode selection screen
is displayed.
Selecting a Game Mode
To play a one-person game, select "シングルプレイ" (SINGLE PLAY). To play a two-person game, select
"マルチプレイ" (MULTI-PLAY).
Selecting the Mission
Select a mission from among five missions, each with a different level of difficulty.
Missions
(1) Basic Dogfight
Operate the control lever and throttle lever to align the lock-on circle onto enemy vehicles that
appear before you, attack the enemy vehicle by pulling the main trigger, and attempt to deliver a
damaging blow to shoot it down.
You can inflict great damage on the enemy vehicle if you align the center of the lock-on circle with
the center of the enemy vehicle.
If you keep aligning the center of the lock-on circle with the enemy vehicle, it will be locked on.
Press the special button while locking on to carry out a crushing attack and quickly shoot down the
enemy vehicle.
(2) Counterattack by Enemy Vehicles
If you fail to shoot down the enemy vehicle quickly, it will counterattack. If your vehicle is attacked
by the enemy vehicle, the endurance of your vehicle will fall. If it reaches 0, the mission will end in
failure.
(3) Final Dogfight
Toward the end of each mission. the final dogfight takes place. You must accomplish your goal
within the time limit. If you fail to accomplish your goal, the mission will end in failure.
Results
Regardless of success or failure, when the mission finishes, you can display the result screen to check your
score and rank.
When the mission finishes, irrespective of the mission being a success or failure, you can enter the player's
name.
Continue
Display the continue selection screen after displaying the results. If you do not insert a coin and select
continue at this time, the game will be over.
If you continue, you will be able to select from among five missions. You can select a mission that you have
successfully completed.
Ranking
The ranking list is displayed when the game ends.
The most recent players compete in this ranking. Old data is automatically deleted in chronological order.

7. Operation
14
7-5 Power Switch and Adjustment Switch
7-5-1 Turning the Power Switch On
Turn on the main power switch located at the rear bottom of the cabinet assembly.
フォーク位置
Main power switch
ON
OFF

7. Operation
15
7-5-2 Adjustment Switches
The adjustment switches are located inside the service door.
(a) Service switch (red)
Press this button to increase the credit count without operating the coin counter. When credits
are added using the Service switch, the side LED lamp on the rear cover lights up green.
(b) Test switch
Set this switch to ON to enter Test mode. Test mode is used to set the game cost and perform
the I/O test.
(c) Select switch
Flip this switch up or down to select an item or setting to be confirmed or changed.
(d) Enter switch (green)
After selecting an item or setting with the Select switch, press this switch to enter or execute
the selection.
サービスSW
SERVICESW
ON
OFF
(a) Service switch (red)
(b) Test switch
Service door
(c) Select switch
(d) Enter switch (green)
Service door
セレクトSW
SELECTSW
エンターSW
ENTERSW
テストSW
TESTSW
サービスSW
SERVICESW
ON
OFF
セレクトSW
SELECTSW
エンターSW
ENTERSW
テストSW
TESTSW

7. Operation
16
7-6 Test Mode
7-6-1 Description of the Main Menu Screen (MENU)
1
Use the service key to unlock and open the service door, and set the Test switch to ON. The
MENU screen appears.
2
Flip the Select switch up or down to select the item.
The selected item blinks.
3
Press the Enter switch to enter the selected item.
When the selection is entered, the display changes to the selected test menu.
4
When all the adjustments are finished, set the Test switch to OFF.
The display returns to the game screen.
Item Description
Reference section
(a) COIN OPTIONS Sets the game cost. P-17
(b) GAME OPTIONS Sets the game contents. P-18
(c) I/O TEST Performs I/O test of switches and devices. P-20
(d) MONITOR TEST Adjusts the monitor. P-26
(e) SOUND TEST Adjusts the volume. P-27
(f) BOOKKEEPING Reviews the operating time and game data. P-29
(g) OTHERS Sets the time and the language. P-31
(h) NETWORK OPTIONS
Displays information on the network. Available only on NBLINE-
compatible machines.
P-34
(i) ROM Displays software version or revision. -
(j) LEFT CREDIT Displays the number of credits remaining from the last time the game
was played. -
(k) USE CREDIT Displays the number of credits used the last time the game was
played. -
(l) STAGE
Displays the last stage that was played the last time the game was
played.
("0" on Attract mode)
-
MENU screen
STAGE
( l
)

7. Operation
17
7-6-2 Game Cost Settings (COIN OPTIONS)
This screen is used to change the settings of the game cost and free play.
1
In the MENU screen, select COIN OPTIONS and press the Enter switch. The COIN OPTIONS
screen appears.
2
Flip the Select switch up or down to select the item.
The selected item blinks.
3
Press the Enter switch to enter the selected item, and use the Select switch to change the
setting. After changing the setting, press the Enter switch to return to the item selection.
4
Select EXIT and press the Enter switch to return to the MENU screen.
COIN OPTIONS screen
Item Description Default
(a) GAME COST Sets the number of coins required for game play.
The setting range is 1 to 19. 3
(b) CONTINUE COST Sets the number of credits required to continue.
The setting range is 1 to 19.
Setting value cannot be larger than the GAME COST.
2
(c) FREE PLAY Sets whether to allow free play.
OFF: regular coin operation
ON: free play
∙ If FREE PLAY is turned ON, GAME COST and CONTINUE COST
cannot be selected.
∙ Depending on the specification, FREE PLAY cannot be turned ON.
OFF

7. Operation
18
7-6-3 Game Contents Settings (GAME OPTIONS)
This screen is used to set the game difficulty and initialize ranking.
1
In the MENU screen, select GAME OPTIONS and press the Enter switch. The GAME OPTIONS
screen appears.
2
Flip the Select switch up or down to select the item.
The selected item blinks.
3
Press the Enter switch to enter the selected item, and use the Select switch to change the
setting of the item. After changing the setting, press the Enter switch to return to the item
selection.
4
Select EXIT and press the Enter switch to return to the MENU screen.
GAME OPTIONS screen
LINK OK
SEAT ID 1 ( MULTI / MAIN )
Table of contents
Other Bandai Namco Game manuals
Popular Game manuals by other brands

Fundex Games
Fundex Games Chalk Line Express instruction manual

Tiger
Tiger WCW Nitro Sting 74-092 instruction manual

Hathaway
Hathaway PRO Series Assembly instructions

Hasbro
Hasbro Quiz Wiz Keychain Game 65-156 instruction manual

Jennison Entertainment Technologies
Jennison Entertainment Technologies Kahuna's Big Wave Service manual

Unicorn
Unicorn SportCraft 78055 instruction manual

MD SPORTS
MD SPORTS SOC054_118M Assembly instructions

Best Choice Products
Best Choice Products SKY5468 instruction manual

MD SPORTS
MD SPORTS AWH072_017E Assembly instructions

Carromco
Carromco Foosball 522.03 manual

MD SPORTS
MD SPORTS BG130Y21001 Assembly instructions

MD SPORTS
MD SPORTS TT218Y21003 Assembly instructions