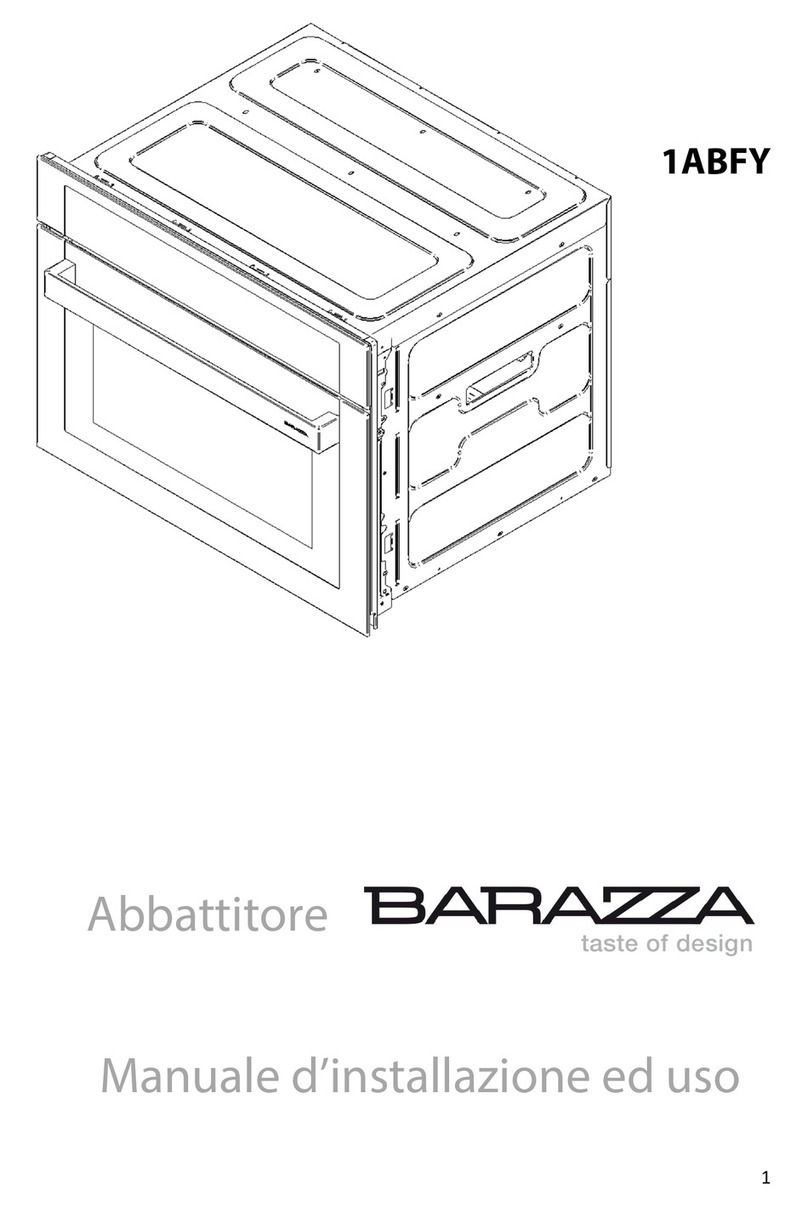
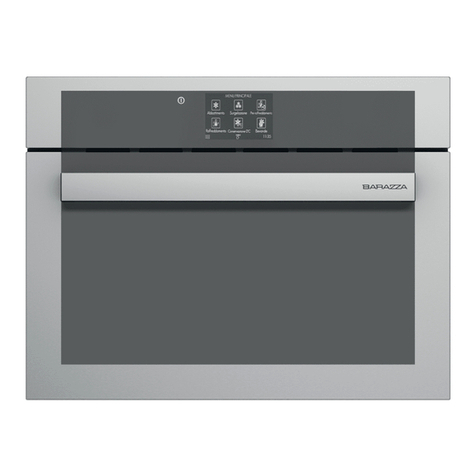
Barazza 1ABEVG User manual

Instruction manual
1ABEVG
1ABEVS
1ABEVEN
1ABEVN

2
Summary
1. SAFETY INFORMATION ............................................................................................................................. 4
1.1 Safety informations ........................................................................................................................... 4
2. INSTALLATION......................................................................................................................................... 11
2.1 Introduction..................................................................................................................................... 11
2.2 Transportation and handling........................................................................................................... 12
2.3 Unpacking........................................................................................................................................ 12
3. INSTALLATION......................................................................................................................................... 12
3.1 Label data ........................................................................................................................................ 12
3.2 Electrical connection ....................................................................................................................... 13
3.3 Positioning....................................................................................................................................... 13
3.4 Ambient temperature and air exchange ......................................................................................... 14
3.5 Final checks...................................................................................................................................... 14
3.6 Safety devices.................................................................................................................................. 14
3.7 Notes for the user.................................................................................................................. 14
3.8 Internal preparatory cleaning.......................................................................................................... 14
3.9 The core probe ................................................................................................................................ 14
3.10 The containers and lids to be used during the cycles...................................................................... 15
3.11 Food arrangement........................................................................................................................... 15
3.12 Effective chilling and freezing cycles ............................................................................................... 15
3.13 Storage of blast chilled or shock frozen foods ................................................................................ 15
3.14 Programs.......................................................................................................................................... 15
3.15 The display and user interaction ..................................................................................................... 16
3.16 Icons key.......................................................................................................................................... 17
3.17 Turning on and off........................................................................................................................... 17
3.18 Program selection............................................................................................................................ 18
3.18.1 End of the program.................................................................................................................. 18
3.18.2 Pre-cooling............................................................................................................................... 18
3.18.3 Blast chilling............................................................................................................................. 18
3.18.4 Shock freezing.......................................................................................................................... 19
3.18.5 Cooling..................................................................................................................................... 20
3.18.6 Beverages ................................................................................................................................ 20
3.18.7 0°C Preservation ...................................................................................................................... 21
3.18.8 Raw fish ................................................................................................................................... 21
3.18.9 Thawing ................................................................................................................................... 22
3.18.10 Ready to serve ..................................................................................................................... 22
3.18.11 Slow cooking........................................................................................................................ 23
3.18.12 Raising.................................................................................................................................. 23
4. ROUTINE MAINTENANCE........................................................................................................................ 25
4.1 Basic Safety Rules ............................................................................................................................ 25
4.2 External surface cleaning................................................................................................................. 25

3
4.3 Inner liner cleaning.......................................................................................................................... 25
4.4 Inactivity periods ............................................................................................................................. 25
5. NON-SCHEDULED MAINTENANCE.......................................................................................................... 25
5.1 Malfunctions.................................................................................................................................... 26
6. TROUBLESHOOTING................................................................................................................................ 26
6.1 Alarm table ...................................................................................................................................... 26
7. TECHNICAL DATA .................................................................................................................................... 26
7.1 Dimensions ...................................................................................................................................... 27
8. ELECTRICAL WIRING…………………………………………………………………………………………………………………………… 28
9. INFO......................................................................................................................................................... 28
9.1 Service ............................................................................................................................................. 28
9.2 Customer data................................................................................................................................. 28

4
1. SAFETY INFORMATION
1.1 Safety informations
•Before using your new blast chiller, please read this manual thoroughly to ensure that you know
how to operate the features and functions that your new appliance offers safely and efficiently.
•This appliance is not intended for use by persons (including children) with reduced physical,
sensory, or mental capabilities, or those who lack experience and knowledge, unless they have
been given supervision or instruction concerning the use of the appliance by a person
responsible for their safety.
•This appliance can be used by children aged from 8 years and above and persons with reduced
physical, sensory or mental capabilities or lack of experience and knowledge if they have been
given supervision or instruction concerning use of the appliance in a safe way and understand
the hazards involved. Children shall not play with the appliance. Cleaning and user maintenance
shall not be made by children without supervision. Children aged from 3 to 8 years are allowed
to load and unload refrigerating appliances.
•Warnings and Important Safety Instructions in this manual do not cover all possible conditions
and situations that may occur. It is your responsibility to use common sense, caution, and care
when installing, maintaining, and operating your appliance.
•R-290 is used as a refrigerant. Check the compressor label on the rear of the appliance or the
rating label inside the appliance to see which refrigerant is used for your refrigerator. This
product contains flammable gas (Refrigerant R-290), contact your local authority in regard to
safe disposal of this product.
•In order to avoid the creation of a flammable gas-air mixture if a leak in the refrigerating circuit
occurs, the size of the room in which the appliance may be sited depends on the amount of
refrigerant used.
•Never start up an appliance showing any signs of damage. If in doubt, consult your dealer. The
room must be 1 m³ in size for every 8 g of R-290 refrigerant inside the appliance. The amount of
refrigerant in your appliance is shown on the identification plate inside the appliance.
•Refrigerant squirting out of the pipes could ignite or cause an eye injury. When refrigerant leaks
from the pipe, avoid any naked flames and move anything flammable away from the product and
ventilate the room immediately. Failing to do so may result in fire or explosion.
•It is hazardous for anyone other than an Authorized Service Person to service this appliance.
•To avoid contamination of food, please respect the following instructions:
oOpening the door for long periods while the appliance is working, can cause a significant
alteration of the temperature in the compartments of the appliance.
•Clean regularly surfaces that can come in contact with food.

5
Important safety symbols and precautions:
Please follow all safety instructions in this manual. This manual uses the following safety symbols:
WARNING
Hazards or unsafe practices that may result in severe personal injury, property damage, and/or
death.
CAUTION
Hazards or unsafe practices that may result in severe personal injury and/or property damage.
NOTE
Useful information that helps users understand or benefit from the appliance.
These warning signs are here to prevent injury to you and others.
Please follow them carefully.
After reading this section, keep it in a safe place for future reference.
Severe warning signs for transportation and site
WARNING
•When transporting and installing the appliance, care should be taken to ensure that no parts of
the refrigerating circuit are damaged. Refrigerant leaking from the pipe work could ignite or
cause an eye injury. If a leak is detected, avoid any naked flames or potential sources of ignition
and air the room in which the appliance is standing for several minutes.
•This appliance contains a small amount of propane refrigerant (R-290), a natural gas with high
environmental compatibility that is, however, also combustible. When transporting and installing
the appliance, care should be taken to ensure that no parts of the refrigerating circuit are
damaged.
Critical installation warnings
WARNING
•This is a built-in appliance and it must be installed inside an adequate built-in structure.
•To avoid a hazard due to instability of the appliance, it must be fixed in accordance with the
instructions.
•Keep ventilation openings, in the appliance enclosure or in the built-in structure, clear of
obstruction.
•Do not install the appliance in a damp location or place where it may come in contact with water.
•Deteriorated insulation on electrical parts may cause an electric shock or fire.
•Do not place the appliance in direct sunlight or expose it to the heat from stoves, room heaters,
or other appliances.
•Do not plug several devices into the same multiple power strip. The appliance should always be
plugged into its own individual electrical outlet which has a voltage rating that matches the
voltage listed on the appliance’s rating plate. This provides the best performance and also

6
prevents overloading of house wiring circuits, which could cause a fire hazard from overheated
wires.
•If the wall socket is loose, do not insert the power plug. There is a risk of electric shock or fire.
•Do not use a power cord that has cracks or abrasion damage along its length or at either end.
•Do not bend the power cord excessively or place heavy objects on it.
•Do not pull or excessively bend the power cord.
•Do not twist or tie the power cord.
•Do not hook the power cord over a metal object, place a heavy object on the power cord, insert
the power cord between objects, or push the power cord into the space behind the appliance.
•When moving the appliance, be careful not to roll over or damage the power cord. This may result
in an electric shock or fire.
•Never unplug your appliance by pulling on the power cord. Always grip the plug firmly and pull
straight out from the outlet. Damage to the cord may cause a short-circuit, fire, and/or electric
shock.
•Do not store explosive substances such as aerosol cans with a flammable propellant in this
appliance.
•Do not install this appliance near a heater or inflammable material.
•Do not install this appliance in a location where gas may leak. This may result in an electric shock
or fire.
•This appliance must be properly located and installed in accordance with the instructions in this
manual before you use it.
•Make sure that the power plug is not crushed or damaged by the back of the appliance.
•Keep the packing materials out of reach of children. There is a risk of death from suffocation if a
child puts the packing materials on his or her head.
•The appliance must be positioned so that the plug is accessible after installation. Failing to do so
may result in an electric shock or fire due to electric leakage.
•Do not install this appliance in a humid, oily or dusty location, in a location exposed to direct
sunlight and water (rain drops). Deteriorated insulation of electrical parts may cause an electric
shock or fire.
•If any dust or water is in the appliance, pull out the power plug and contact your Service Center.
Otherwise there is a risk of fire.
•Do not stand on top of the appliance or place objects (such as laundry, lighted candles, lighted
cigarettes, dishes, chemicals, metal objects, etc.) on the appliance. This may result in an electric
shock, fire, problems with the product, or injury.
•You need to remove all the protective plastic film before you initially plug the product in.
•The appliance must be safely grounded. Always make sure that you have grounded the appliance
before attempting to investigate or repair any part of the appliance. Power leakages can cause
severe electric shock.
•Never use gas pipes, telephone lines, or other potential lightning attractors as an electrical ground.
You must ground the appliance to prevent any power leakages or electric shocks caused by
current leakage from the appliance.
•This may result in an electric shock, fire, explosion, or problems with the product.
•Plug the power plug into the wall socket firmly. Do not use a damaged power plug, damaged
power cord, or loose wall socket. This may result in an electric shock or fire.
•The fuse on the appliance must be changed by a qualified technician or service company. Failing to
do so may result in an electric shock or personal injury.
•When positioning the appliance, ensure the supply cord is not trapped or damaged.
•Do not locate multiple portable socket-outlets or portable power supplies at the rear of the
appliance.
7
Installation cautions
CAUTION
•Allow sufficient space around the appliance and install it on a flat surface.
•Allow the appliance to stand for 2 hours before loading foods after installation and turning on.
oWe strongly recommend you have a qualified technician or service company install the
appliance. Failing to do so may result in an electric shock, fire, explosion, problems with the
product, or injury.
•Overload on the door may fell the appliance, causing physical injury.
Critical usage warnings
WARNING
•Do not insert the power plug into a wall socket with wet hands. This may result in an electric
shock.
•Do not store articles on the top of the appliance. When you open or close the door, the articles
may fall and cause personal injury and/or material damage.
•Do not insert hands, feet or metal objects (such as chopsticks, etc.) into the bottom or the back of
the appliance. This may result in an electric shock or injury.
•Any sharp edges may cause a personal injury.
•Do not touch the inside walls of the appliance or products chilled in the appliance with wet hands.
This may cause frostbite.
•While operating and according to the selected program the appliance may become hot.
•Do not put a container filled with water on the appliance. If spilled, there is a risk of fire or electric
shock.
•Do not keep volatile or flammable objects or substances (benzene, thinner, propane gas, alcohol,
ether, LP gas, and other such products) in the appliance. This appliance is intended for food only.
•This may result in fire or explosion.
•Children should be supervised to ensure that they do not play with the appliance. Keep fingers out
of “pinch point” areas. Clearances between the doors and cabinet are necessarily small. Be careful
when you open the doors if children are in the area.
•Do not let children hang on the door. A serious injury may occur.
•Do not let children go inside the appliance. A serious injury may occur.
•Do not insert your hands into the bottom area under the appliance. Any sharp edges may cause
personal injury.
•Do not store pharmaceutical products, scientific materials, or temperature sensitive products in
the appliance.
•Do not use electrical appliances inside the food storage compartments of the
appliance, unless they are of the type recommended by the manufacturer.
oIf you smell pharmaceutical or smoke, pull out power plug immediately and contact your
Service Center.
•If any dust or water is in the appliance, pull out power plug and contact your Service Center.
Otherwise there is a risk of fire.
•Do not leave the doors of the appliance open while the appliance is unattended and do not let
children enter inside the appliance.
•Opening the door for long periods can cause a significant increase of the temperature in the
compartments of the appliance.

8
•Do not overfill the appliance with food. When you open the door, an item may fall out and cause
personal injury or material damage.
•Do not spray volatile material such as insecticide onto the surface of the appliance. As well as
being harmful to humans, it may also result in an electric shock, fire, or problems with the
product.
•Do not use or place any substances sensitive to temperature such as flammable sprays, flammable
objects, dry ice, medicine, or chemicals near or inside of the appliance.
•Do not use a hair dryer to dry the inside of the appliance. Do not place a lighted candle in the
appliance for removing bad odors. This may result in an electric shock or fire.
•Do not stand on top of the appliance or place objects (such as laundry, lighted candles, lighted
cigarettes, dishes, chemicals, metal objects, etc.) on the appliance. This may result in an electric
shock, fire, problems with the product, or injury. Do not put a container filled with water on the
appliance. If spilled, there is a risk of fire or electric shock.
•Do not use mechanical devices or any other means to accelerate the defrosting process, other
than those recommended by the manufacturer.
•Do not damage the refrigerant circuit.
•Keep fingers out of “pinch point” areas. Clearances between the doors and cabinet are necessarily
small. Be careful when you open the doors if children are in the area.
•If a gas leak is detected, avoid any naked flames or potential sources of ignition, and air the room
in which the appliance is standing for several minutes.
oDo not touch the appliance or power cord.
oDo not use a ventilating fan.
oA spark may result in explosion or fire.
•Use only the LED Lamps provided by the manufacturer or its Service Center.
•Bottles should be stored tightly together so that they do not fall out.
•This product is intended mainly for blast chilling and shock freezing food in a domestic
environment.
•Do not attempt to repair, disassemble, or modify the appliance yourself.
•Unauthorized modifications can cause safety problems. To reverse an unauthorized modification,
we will charge the full cost of parts and labor.
•Do not use any fuse (such as cooper, steel wire, etc.) other than a standard fuse.
•If your appliance needs to be repaired or reinstalled, contact your nearest Service Center. Failing
to do so may result in an electric shock, fire, problems with the product, or injury.
•If the LED lamp has gone out, contact your nearest Service Center.
•If the appliance emits a burning smell or smoke, unplug the appliance immediately and contact
your Service Center. Failing to do so may result in an electric or fire hazards.
•As the product is equipped with LED lamps, do not disassemble the LED lamps yourself. Contact
the Service Center.
•Plug the power plug into the wall socket firmly.
•Do not use a damaged power plug, damaged power cord or loose wall socket. This may result in an
electric shock or fire.
Usage cautions
CAUTION
•Use special containers to store foods such as meat and raw fish inside the appliance, so that they
do not come into contact with or drip on other foods.

9
•Do not re-freeze frozen foods that have thawed completely. Do not place carbonated or fizzy
drinks in the appliance. Do not put bottles or glass containers in the appliance. When the contents
freeze, the glass may break and cause personal injury.
•If you won’t be using the appliance for a very long period of time, (3 weeks or more), switch off,
defrost, wipe excess moisture from the inside walls, clean and leave the door open to prevent
mould developing within the appliance empty the appliance.
•To get the best performance from the product:
oDo not place food too close to the vents at the rear of the appliance as this can obstruct
free air circulation in the appliance compartment.
oWrap food up properly or place it in airtight containers before putting it into the appliance.
oPlease observe maximum storage times and expiration dates of frozen goods.
oThere is no need to disconnect the appliance from the power supply if you will be away for
less than three weeks. However, if you will be away for more than three weeks, unplug the
appliance, wipe excess moisture from the inside walls, and leave the doors open to prevent
odors and mold.
•Be careful to place glass or bottles or carbonated beverages into the appliance. The container may
freeze and break, and this may result in injury. When the contents freeze, the glass may break and
cause personal injury and property damage.
•Service Warranty and Modification:
•Any changes or modifications performed by a 3rd party on this finished appliance are not covered
under manufacturer warranty service, nor is the manufacturer responsible for safety issues that
result from 3rd party modifications.
•Do not block the air vents inside the appliance. If the air vents are blocked, especially with a plastic
bag, the refrigerator can be over cooled.
•Wipe excess moisture from the inside and leave the doors open. Otherwise, odor and mold may
develop.
•If the appliance is disconnected from the power supply, you should wait for at least five minutes
before plugging it back in.
•When the appliance got wet by water, pull out the power plug and contact your Service Center.
•Do not strike or apply excessive force to any glass surface. Broken glass may result in a personal
injury and/or property damage.
•If the appliance is flooded, make sure to contact your nearest Service Center. There is a risk of
electric shock or fire.
Cleaning cautions
CAUTION
•Clean regularly surfaces that can come in contact with food and accessible drainage systems.
•Do not spray water directly on the inside or outside the appliance. There is a risk of fire or electric
shock.
•Do not use a hair dryer to dry the inside of the appliance.
•Do not place a lighted candle in the appliance to remove bad odors. This may result in an electric
shock or fire.
•If any foreign substance such as water has entered the appliance, unplug the power plug and
contact your nearest Service Center. Failing to do so may result in an electric shock or fire.
•Use a clean, dry cloth to remove any foreign matter or dust from the power plug blades. Do not
use a wet or damp cloth when cleaning the plug. Otherwise, there is a risk of fire or electric shock.
•Do not clean the appliance by spraying water directly onto it.

10
•Do not use benzene, thinner, or Clorox, Chloride for cleaning. They may damage the surface of the
appliance and may cause a fire.
•Before cleaning or performing maintenance, unplug the appliance from the wall socket. Failing to
do so may result in an electric shock or fire.
•Use a clean sponge or soft cloth and a mild detergent in warm water to clean the appliance.
•Do not use abrasive or harsh cleansers such as window sprays, scouring cleansers, flammable
fluids, muriatic acid, cleaning waxes, concentrated detergents, bleaches, or cleansers containing
petroleum products on exterior surfaces (doors and cabinet), plastic parts, door and interior liners,
and gaskets. These can scratch or damage the material.
•Do not clean glass shelves or covers with warm water when they are cold. Glass shelves and covers
may break if exposed to sudden temperature changes or impacts such as bumping or dropping.
Critical disposal warnings
WARNING
•Please dispose of the packaging material from this product in an environmentally friendly manner.
•Ensure that none of the pipes on the back of the appliance are damaged prior to disposal.
•R-290 is used as a refrigerant. Check the compressor label on the rear of the appliance or the
rating label on the side of the appliance to see which refrigerant is used for your appliance. This
appliance contains flammable gas (Refrigerant R-290), contact your local authority in regard to
safe disposal of this product.
•When disposing of this appliance, remove the door/door seals and door latch so that small
children or animals cannot become trapped inside. Children should be supervised to ensure that
they do not play with the appliance. If trapped inside, a child may get hurt or suffocate to death. If
trapped inside, the child may become injury and suffocate to death.
•HFC gases are used in the insulation. The gases in the insulation material require a special disposal
procedure. Please contact your local authorities in regard to the environmentally safe disposal of
this product.
•Keep all packaging materials well out of the reach of children, as packaging materials can be
dangerous to children. If a child places a bag over his or her head, the child could suffocate.
Additional tips for proper usage
•In the event of a power failure, call the local office of your electric company and ask how long the
failure is going to last. Most power failures that are corrected in an hour or two will not affect your
refrigerator temperatures. However, you should minimize the number of door openings while the
power is off.
•Should the power failure last more than 24 hours, remove and discard all frozen food.
•The appliance might not operate consistently if sited for an extended period of time in a location
where ambient air temperatures are constantly below the temperatures for which the appliance is
designed.
•In case of particular foods, keeping it under refrigeration can have a bad effect on preservation
due to its properties.
•Your appliance is frost free, which means there is no need to manually defrost your appliance. This
will be carried out automatically.
•Do not re-freeze frozen foods that have thawed completely.

11
Saving energy tips
•Install the appliance in a cool, dry room with adequate ventilation. Ensure that it is not exposed to
direct sunlight and never put it near a direct source of heat (a radiator, for example).
•Not to block any vents and grilles is recommended for energy efficiency.
•Do not keep the door of the refrigerator open for too long when putting food in or taking food
out. The shorter the time the door is open, the less frost build-up you’ll have in the freezer.
•It is recommended to install the appliance with clearance to the back and sides. This will help
reduce power consumption and keep your energy bills lower.
This appliance is intended to be used in household and similar applications such as
•staff kitchen areas in shops, offices and other working environments;
•farm houses, hotels and other residential type environments;
•bed and breakfast type environments;
•catering and similar non-retail applications.
Instructions about the WEEE
Correct Disposal of This Product (Waste Electrical & Electronic Equipment)
(Applicable in countries with separate collection systems)
This marking on the product, accessories or literature indicates that the product and its
electronic accessories (e.g. charger, headset, USB cable) should not be disposed of with
other household waste at the end of their working life. To prevent possible harm to the
environment or human health from uncontrolled waste disposal, please separate these
items from other types of waste and recycle them responsibly to promote the sustainable
reuse of material resources.
Household users should contact either the retailer where they purchased this product, or
their local government office, for details of where and how they can take these items for
environmentally safe recycling.
Business users should contact their supplier and check the terms and conditions of the
purchase contract. This product and its electronic accessories should not be mixed with
other commercial wastes for disposal.
Appropriate separate collection of parts for recycling, or environmentally friendly treatment or
disposal helps to avoid possible negative effects on the environment and on health, and promotes
the reuse and/or recycling of the parts themselves.
Illegal disposal of the equipment by the user entails the application of administrative sanctions
provided for by law. The main materials the equipment is made up of are:
•Steel;
•Plastic;
•Copper;
•Aluminium;
•Polyurethane.
2. INSTALLATION
2.1 Introduction

12
The installation must be performed only by authorized and qualified personnel, observing the warnings,
instructions and requirements contained in this document.
The manufacturer of this equipment declares the conformity of each appliance with the regulations in force.
2.2 Transportation and handling
Loading and unloading of the appliance from the truck must be performed by appropriate means, such as a
trolley, without which at least two people are required.
During handling operations every precaution that may be necessary to avoid harm to persons, property or to
the appliance must be observed. Specific instructions are given on the package.
2.3 Unpacking
Open the top of the box by bending back the side flaps to operate more easily, then remove the top cover
and the side polystyrene angle protection (fig.1). Remove then the protective bag (fig.2), then, using the
appropriate lifting handles, remove the equipment from the box by lifting it upwards (fig.3).
Fig.1 Fig.2 Fig.3
After removing the packaging, and before any other operation, make sure the appliance is free of damage.
In case of abnormalities do not turn on the appliance and contact your dealer.
The materials of the packaging must be disposed of according to the regulations in the country where the
appliance is used and never dumped irresponsibly.
Lift the machine with a suitable tool, using protective gloves, and place it in position.
Remove any protective film, removing any traces of adhesive with a soft cloth and a neutral detergent. Do
not use scouring pads or sponges that could irreparably scratch the surfaces.
The materials of the packaging can be potentially dangerous for children and animals.
3. INSTALLATION
3.1 Label data
The appliance data are indicated on a label on the side (Fig. 4).

13
Fig. 4 –Product data label
Note: do not remove, alter, damage or modify the data label.
3.2 Electrical connection
Before installing the appliance ensure that the existing electrical systems comply with the law and correspond
to the data on the appliance label to be installed in terms of voltage [V], frequency [Hz] and input power [W].
The appliance has a power cable with a 16 A Schuko plug.
3.3 Positioning
Do not install in places with poor ventilation and high temperatures, or locations in direct sunlight or subject
to weathering. Avoid proximity to heat sources.
Make sure, once the installation is complete, there are no obstacles to the door opening.
Do not use extensions to the power cable in order to avoid overheating problems.
Note: for the proper operation of the appliance an air flue of at least 250 cm2is required (Fig. 5) on the
rear of the appliance.
Once the positioning is complete, secure the appliance with suitable screws.
438 mm
450 mm
50 mm

14
Fig.5 –Size of the built-in niche
3.4 Ambient temperature and air exchange
Appliance performance is guaranteed only with the air temperature inside the range 10÷32°C (SN climatic
class) provided that the air exchange is as described in paragraph 2.3.
3.5 Final checks
Once the positioning and electrical connections are complete check the following:
•the electrical connection is correct;
•wait at least 4 hours before turning on the appliance to allow the thermodynamic circuit to stabilise.
3.6 Safety devices
The appliance is equipped with some safety devices:
•A time-lag miniature fuse on the power board to protect against overload;
•A thermal motor protector inside the compressor to protect against overheating;
•A thermal motor protector inside the evaporator blower to protect against overheating;
•An all-pole disconnection manual reset thermal cut-out in series with the heating element to protect
against overheating.
USE
This appliance is intended mainly for blast chilling and shock freezing food. If cooked and rapidly chilled, the
foods retain their organoleptic properties for 5-7 days; if rapidly frozen, thawed foods retain their consistency
and their original flavour.
3.7 Notes for the user
•Read this manual carefully and always refer to it;
•This appliance is intended for the use for which it was designed: blast-chilling, shock-freezing,
thawing, leavening, slow cooking, warming, sanitising foods and cooling beverages at home. Any
other use is considered improper and potentially dangerous.
3.8 Internal preparatory cleaning
Once the electrical connections and the positioning are complete and before turning on the appliance it is
necessary to deep clean the inner liner, using a soft cloth and a neutral detergent.
Do not use steel wool, scrapers or abrasive, acidic or aggressive substances as this may damage the inner
surfaces. Remove any detergent residue.
3.9 The core probe
The core probe is a device used for measuring the temperature inside the food. In programs that require the
use of the core probe, the process ends automatically when the setpoint temperature is reached.
Correct use of the probe requires the probe to be inserted into the food before starting the program.
Note: the core probe must be inserted into the core of the food so that it cannot come out.
In the event that the core probe is not inserted in the food because it was forgotten on the bottom of the
cell or because it came out from the food, the appliance automatically switches to "Recipe" mode.
Handle the probe carefully and pay attention to its tip. When the core probe is no longer needed, clean it
with a soft cloth using warm water, and then store it.

15
Tip: in order to improve the effectiveness of the programs, insert the probe into the largest piece of food.
Some programs feature the "Recipe" mode. In this mode the core probe is not necessary: the process is
automatic and depends on the program settings.
Note: while in "Recipe" mode, the use of the core probe has no effect on the program.
3.10 The containers and lids to be used during the cycles
Trays and shallow containers are preferred as they facilitate internal ventilation.
Tip: to increase the effectiveness of blast chilling and shock freezing, spread out the food portion in the air
flow as much as possible; avoid covering the trays and containers as this increases the insulation. Make sure
containers are compatible with low-temperature applications (-40°C).
Tip: metal or ceramic containers and materials suitable for temperatures up to 75°C are recommended for
those programs with hot functions.
3.11 Food arrangement
Whenever possible avoid stacking food in the tray, instead spread out the food as much as possible over a
large area to maximise internal ventilation.
3.12 Effective chilling and freezing cycles
The best results in terms of chilling and freezing are obtained by introducing the food immediately after
cooking, avoiding exposure at room temperature since this will lead to the loss of humidity and deterioration
in the original colour, aroma and flavour.
Tip: the chilling and freezing programs are shorter and lead to better results if a pre-cooling cycle is run first.
3.13 Storage of blast chilled or shock frozen foods
At the end of blast chilling or shock freezing programs the appliance keeps foods at the setpoint temperature;
however, the food should not be stored for a long time inside the appliance but stored in the refrigerator or
freezer.
Since the shock frozen products can be stored for long periods (6÷12 months), they should be identified with
a label referring to its contents and date of expiry.
The proper place of storage of blast chilled foods is the refrigerator while those of shock frozen food is the
freezer; it is therefore recommended to use such equipment.
Tip: to further enhance the shelf-life of chilled foods vacuum packaging is recommended, with equipment
suitable for the purpose and observing the regulatory requirements of temperatures and times.
3.14 Programs
BLAST CHILLING
With this program it is possible to store food in the refrigerator for 5÷7 days. The rapid cooling to
+3°C stops the evaporation of water from freshly baked products. By reducing the exposure of the
food in the temperature range of bacteria proliferation, it lengthens the storage time of the food
itself.
SHOCK FREEZING
The rapid cooling process to -18°C allows foods to be stored for several months. The organoleptic
qualities of the food: flavour, aroma and appearance are maintained by the rapid solidification of the
water, that avoids tearing the fibres.

16
PRE-COOLING
Pre-cooling optimises preparation times in the kitchen as it takes place during the preparation of the
recipes. Pre-cooling reduces the execution time of programs that include operations such as blast
chilling and shock freezing very hot foods by cooling the internal parts of the equipment.
COOLING
When freshly cooked food cannot be consumed immediately because it is too hot, this program
accelerates the cooling process without having to wait for natural acclimatisation.
BEVERAGES
A wine cellar is used to store beverages at the desired temperature. However, blast chillers are very
helpful when there is not enough time to cool down a bottle. This program reduces the temperature
of a drink according to the available time.
0°C PRESERVATION
This program aims to preserve the organoleptic properties of raw foods and it is suitable for
preserving foods such as meats, fish and vegetables for a few hours before their preparation.
RAW FISH
Incorrect storage of fishery products may cause health risks in relation to contamination by Anisakis,
a parasite that can be eliminated by prolonged cooking processes or freezing and storage at -30°C
(sanitation). This program uses the high performing chiller to reproduce the sanitisation process at
home.
THAWING
This brings food from freezing temperature to 1-3°C without loss of liquids and without starting the
cooking process, avoiding the protein processing that happens, for example, when defrosting meat
in the microwave.
READY TO SERVE
This program warms a previously cooked food kept in the refrigerator, so it can be served at the
correct temperature.
SLOW COOKING
This cooks a recipe at a constant temperature for the desired time. This technique, thanks to limited
water evaporation from the food, maintains the quality and tenderness of the food.
RAISING
The raising program creates a microclimate in controlled temperature and humidity conditions.
Fermentation can then take place in optimum conditions, producing the natural swelling of the
dough. By programming the duration of the leavening it is possible to reduce the amount of yeast in
the recipe, obtaining a lighter and more digestible product, at the same time favouring the desired
aroma.
3.15 The display and user interaction
The control panel is composed of a 4.3" LCD display with integrated capacitive touchscreen and a power
button on the side.

17
Fig.6 –The main menu and an example selection screen
1. Function icon: tap the icon to run the desired program.
2. Settings menu: enter and set the language, time, display brightness and volume of the buzzer.
3. Current time: shows the system clock.
4. “Back” button: return to previous screen.
5. “Main Menu” button: return to the program selection screen.
6. Swipe icon: indicates the screen area that can be scrolled through to see all the options.
3.16 Icons key
Regardless of the selected program, some icons are recurrent in several screens during user interaction with
the display. Their meaning is described below.
HOME
To return to the Main Menu.
All entered data are deleted.
SETTINGS MENU
To enter the edit mode of the main settings: display brightness, buzzer volume, language, clock.
BACK
To return to the previous screen.
If on a selection screen, the data on the previous screen are saved.
START
To start the selected program.
After pressing this button, the icon for the program in execution will turn blue, to indicate the state of
operation of the appliance.
STOP
To suspend the running program.
It is necessary to confirm the cancellation by pressing "yes" on the following screen.
The program will be interrupted and the display will return to the Main Menu.
LIGHTING
To turn on/off the internal lighting: the light will be switched on or off depending on the bulb colour
(either black or white). After prolonged absence of user interaction the light switches off.
3.17 Turning on and off
To turn on the appliance press the ON/OFF button located to the side of the display for at least 2 seconds.
The logo is displayed for a few seconds, then the "Main Menu” screen appears.
1
2
3
4
5
6

18
In the absence of interaction for 5 minutes, the appliance turns into power save mode, displaying the current
time.
To turn off the appliance press and hold the ON/OFF button to the side of the display for at least 2 seconds.
This can be done at any time. If you switch the appliance off while a program is running, a message appears
on the display and the program is stopped.
3.18 Program selection
The operating mode is chosen in the "Main Menu", by tapping the desired icon. Press and hold an icon to
display a “Help” screen, displaying some brief information about the program (fig.7).
Fig.7 –Example of “Help” screen
Each program features a power-saving screen (screensaver) that is automatically activated if the user does
not interact with the display. The screen shows the current time or, if a program is running, the program icon.
To exit the screensaver tap anywhere on the screen.
3.18.1 End of the program
At the end of each program the appliance will beep to signal that it is possible to remove the tray. Some
programs automatically switch to a preservation mode if the user does not remove the tray, alerting the user
with an appropriate screen. To stop the preservation mode simply press the "OK" icon.
The "Shock freezing", "Raw fish" and "0°C Preservation" programs also include an automatic defrosting stage
at the end of the program, or when the program is interrupted by the user. Defrosting is indicated by a special
screen and lasts about 20 minutes, after which the display returns to the Main Menu. Automatic defrosting
can be interrupted at any time by pressing the "OK" icon, then confirming with "yes".
3.18.2 Pre-cooling
To reduce the cycle time of the blast chilling and shock freezing it could be useful to prepare the equipment
with a pre-cooling cycle.
PRE-COOLING
Before starting
It is possible to verify the information in the summary screen.
During the program
The display shows the settings and the remaining time to the end of the program.
AT THE END OF THE PROGRAM
The device beeps and displays an information message.
No preservation action is carried out and the appliance is ready to start other programs.
3.18.3 Blast chilling
With this program it is possible to store food in the refrigerator for 5÷7 days at +3°C. Rapid cooling stops the
evaporation of water and the loss of vitamins, protein and mineral salts from freshly baked products. By
reducing the exposure of the food in the temperature range of bacteria proliferation, it lengthens the storage

19
time of the food itself. It is also possible to blast chill foods which have just been cooked even at temperatures
of 90°C.
BLAST CHILLING
It is possible to choose from two blast chilling modes: "Recipe" and "Core".
Recipe mode does not require the use of the core probe but it is necessary to indicate the weight of the food and
its initial tray temperature.
RECIPE MODE
Options
Type of food: specify the type of food to be chilled.
Preparation: specify if the food on the tray is whole or in a different form (i.e.: sliced,
diced, in pieces, etc.).
Weight: select the quantity of food on the tray.
Initial state: if the food has just been baked or if it’s hot, select “hot”. If it’s at room
temperature or warm, select “Room temp.”.
Before starting
It is possible to verify the information in the summary screen and, if necessary, modify the
duration of blast chilling process. The factory pre-set duration value blinks and by single
press it is possible to access to the screenshot where it is possible to modify the duration
value.
During the program
The display shows the settings and the remaining time to the end of the program.
CORE MODE
Options
Type of food: specify the type of food to be chilled.
Preparation: specify if the food on the tray is whole or in a different form (i.e.: sliced,
diced, in pieces, etc.).
Before starting
It is possible to verify the information in the summary screen.
During the program
The display shows the settings and the remaining time to the end of the program.
AT THE END OF THE PROGRAM
For any blast chilling operation mode, at the end of the program the appliance beeps and displays an information
message. It then switches to preservation mode which maintains the temperature of +3°C at the food core until the
user intervenes.
Note: opening the door during blast chilling introduces warm and moist air, increasing the duration of
the process. In the "Recipe" mode the duration of the program is fixed: repeatedly opening the appliance
door could lead to imperfect blast chilling. Do not open the appliance door during the blast chilling program.
3.18.4 Shock freezing
Shock freezing is a rapid cooling process that allows foods to be stored for numerous months if kept in a
freezer at -18°C. The organoleptic qualities of the food: flavour, aroma and appearance are maintained by
the rapid solidification of the water, that avoids tearing the fibres.
SHOCK FREEZING
It is possible to choose from two blast chilling modes: "Recipe" and "Core".
Recipe mode shock freezing does not require the use of the core probe but it is necessary to indicate the weight of the
food and its initial temperature in the tray.
Core mode shock freezing allows the temperature at the core of the food to be read accurately and the user only needs
to enter a few pieces of information.
RECIPE MODE

20
Options
Type of food: specify the type of food to be chilled.
Preparation: specify if the food on the tray is whole or in a different form (i.e.: sliced, diced,
in pieces, etc.).
Weight: select the quantity of food on the tray.
Initial state: if the food has just been baked or if it’s hot, select “hot”. If it’s at room
temperature or warm, select “Room temp.”.
Before starting
It is possible to verify the information in the summary screen and, if necessary, modify the
duration of shock freezing process. The factory pre-set duration value blinks and by single
press it is possible to access to the screenshot where it is possible to modify the duration value.
During the program
The display shows the freeze settings and the remaining time to the end of the program.
CORE MODE
Options
Type of food: specify the type of food to be chilled.
Preparation: specify if the food on the tray is whole or in a different form (i.e.: sliced, diced,
in pieces, etc.).
The above settings are necessary to determine which program will produce optimal freezing.
Before starting
It is possible to verify the information in the summary screen.
During the program
The display shows the settings and the remaining time to the end of the program.
AT THE END OF THE PROGRAM
In any shock freezing operation mode, at the end of the program the appliance beeps and displays an information
message. It then switches to preservation mode which maintains the temperature of -18°C at the food core until the user
intervenes. At the end of all steps a defrosting cycle is carried out.
Note: opening the door during shock freezing causes the introduction of warm and moist air, increasing
the duration of the process. In the "Recipe" mode the duration of the program is fixed: repeatedly opening
the appliance door could lead to imperfect shock freezing. Do not open the appliance door during the shock
freezing program.
3.18.5 Cooling
Freshly cooked food is not at the correct temperature for serving or for further processing and therefore
there is a waiting period for natural acclimatisation.
The cooling program reduces these waiting times in the kitchen.
COOLING
Options
Air temperature: select the desired temperature for cooling the food.
Cycle length: select the duration of the cooling program.
Before starting
It is possible to verify the information in the summary screen.
During the program
The display shows the settings and the remaining time to the end of the program.
AT THE END OF THE PROGRAM
The device beeps and displays an information message.
No temperature preservation function is carried out to ensure the food is served correctly.
3.18.6 Beverages
Blast chillers are very helpful when there is not enough time to prepare beverages for drinking. This program
reduces the temperature of a drink according to the available time.
This manual suits for next models
3
Table of contents
Other Barazza Chiller manuals
Popular Chiller manuals by other brands

Carrier
Carrier AQUAFORCE 30XA080-500 installation instructions

Galletti
Galletti MCA Series Technical manual

Hydrofarm
Hydrofarm ActiveAqua AACH10HP instructions

Carrier
Carrier 30RY 017 Installation, operation and maintenance instructions

Trane
Trane CGAT Series Installation operation & maintenance

York
York YCAS0295EB Installation operation & maintenance