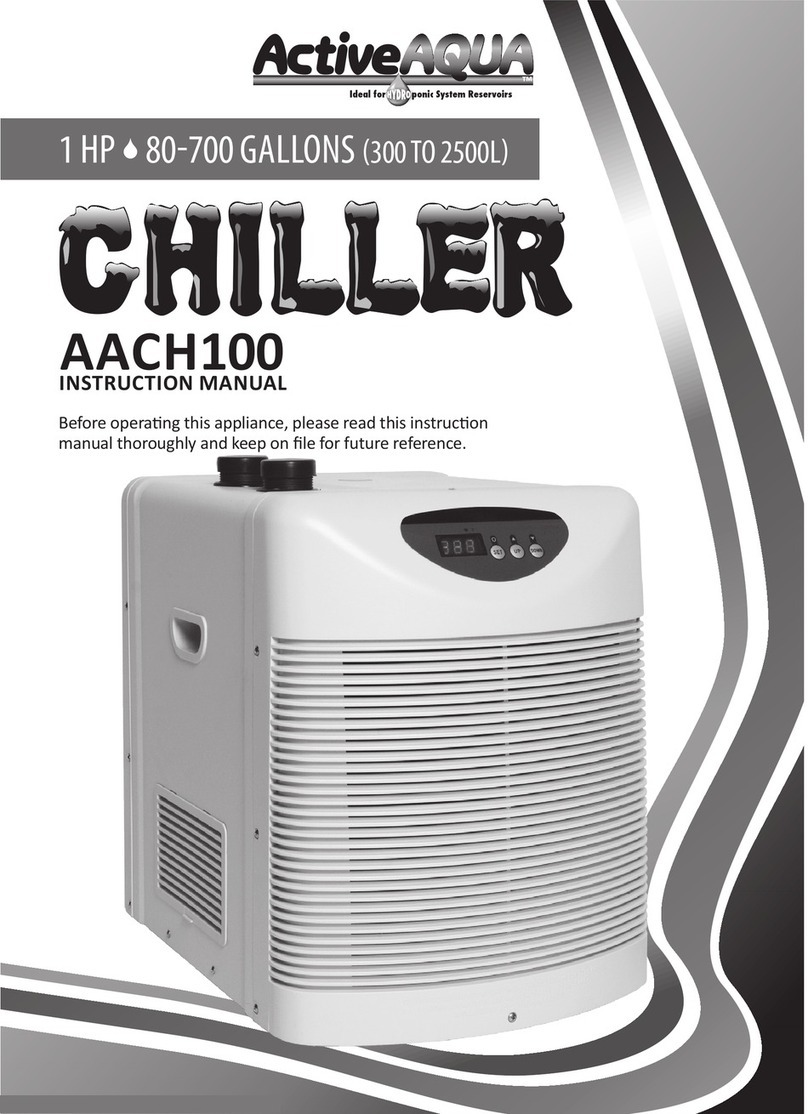
Hydrofarm ActiveAqua AACH10HP User manual

INSTRUCTIONS
WATER CHILLERS
AACH10HP AACH25HP
AACH50HP AACH100HP

INSTRUCTIONS
www.Hydrofarm.com
2

3
INSTRUCTIONS
Model
AACH10HP
Rated Voltage
110-120V
Rated Frequency
60Hz
Working Current
2.2A
Power
1/10 HP
*BTU
1020 BTU/H
Refrigerant
R134a
Refrigerant Weight
180‒200g
Rate of Flow
132‒396 GPH (500‒1500 L/H)
Reservoir Capacity
10‒40 gal (50‒150 L)
Weight
34 lbs
Size
16.93" x 9.76" x 15.28"
1. The rate of ow is decided according to the max jet of the pump (immersible pump or other
external power lter) and the circulaon equipment.
2. The refrigeraon performance test is indicated when the ambient temperature is 100°F (34°C),the
reservior capacity is 10 gal to 40 gal, the chilling eciency reaches its best.
3. The refrigeraon eciency is determined according to the installaon locaon, heang source,
lighng, pump lter and other connecng parts.
4. When there is not enough circulaon in a room, the refrigeraon eciency is reduced.
*The BTU is measured at an ambient temperature of 97°F (36°C) and the chiller is working
at 1100W/9.6A power.
Recommended pump: Hydrofarm AAPW160 OR AAPW250 OR AAPW400

INSTRUCTIONS
www.Hydrofarm.com
4

INSTRUCTIONS
5
Model
AACH25HP
Rated Voltage
110‒120V
Rated Frequency
60Hz
Working Current
4.7A
Power
1/4 HP
*BTU
3010 BTU/H
Refrigerant
R134a
Refrigerant Weight
210‒240g
Rate of Flow
1500
‒
3500 L/h
396
‒
925 gal/h
Weight
41 lbs
Size
18.03"x 12.99" x 17.32"
1. The rate of ow is decided according to the max jet of the pump (immersible pump or other
external power lter) and the circulaon equipment.
2. The refrigeraon performance test is indicated when the ambient temperature is 100°F (34°C),
the reservior capacity is 40 gal to 90 gal, the chilling eciency reaches its best.
3. The refrigeraon eciency is determined according to the installaon locaon, heang source,
lighng, pump lter and other connecng parts.
4. When there is not enough circulaon in a room, the refrigeraon eciency is reduced.
*The BTU is measured at an ambient temperature of 97°F (36°C) and the chiller is working
at 1100W/9.6A power.
Recommended pump: Hydrofarm AAPW250 or AAPW550 or AAPW800

INSTRUCTIONS
www.Hydrofarm.com
6

7
INSTRUCTIONS
Model
AACH50HP
Rated Voltage
110‒120V
Rated Frequency
60Hz
Working Current
5.4A
Power
1/2 HP
*BTU
4020 BTU/H
Refrigerant
R134a
Refrigerant Weight
250‒280g
Rate of Flow
3000‒6000 L/h
800‒1600 G/h
Weight
48.5 lbs
Size
19.02" x 14.09" x 19.09"
1. The rate of ow is decided according to the max jet of the pump (immersible pump or other
external power lter) and the circulaon equipment.
2. The refrigeraon performance test is indicated when the ambient temperature is 100°F (34°C),
the reservior capacity is 90 gal to 172 gal, the chilling eciency reaches its best.
3. The refrigeraon eciency is determined according to the installaon locaon, heang source,
lighng, pump lter and other connecng parts.
4. When there is not enough circulaon in a room, the refrigeraon eciency is reduced.
*The BTU is measured at an ambient temperature of 97°F (36°C) and the chiller is working
at 1100W/9.6A power.
Recommended pump: Hydrofarm AAPW800 or AAPW1000 or AAPC1010

INSTRUCTIONS
www.Hydrofarm.com
8

INSTRUCTIONS
9
Model
AACH100HP
Rated Voltage
110‒120V
Rated Frequency
60Hz
Working Current
10.2A
Power
1 HP
*BTU
10050 BTU/H
Refrigerant
R410a
Refrigerant Weight
420‒450g
Rate of Flow
5000‒15000 L/h
1320‒3900 G/h
Reservoir Capacity
80‒250 gal (300-950 L)
Weight
69 lbs
Size
21.92"x 15.75"x 20.28"
1. The rate of ow is decided according to the max jet of the pump (immersible pump or other
external power lter) and the circulaon equipment.
2. The refrigeraon performance test is indicated when the ambient temperature is 100°F (34°C),
the reservior capacity is 132 gal to 396 gal, the chilling eciency reaches its best.
3. The refrigeraon eciency is determined according to the installaon locaon, heang source,
lighng, pump lter and other connecng parts.
4. When there is not enough circulaon in a room, the refrigeraon eciency is reduced.
*The BTU is measured at an ambient temperature of 97°F (36°C) and the chiller is working
at 1100W/9.6A power.
Recommended pump: Hydrofarm AAPW1010 or AAPC1010 or AAPC1020 or AAPC20

INSTRUCTIONS
www.Hydrofarm.com
10
Chiller Unit 1 ea.
Inow/oulow ng kit: 1 ea.
a. Inlet/outlet ngs 2 ea.
b. Worm drive hose clamps 2 ea.
c. Rubber replacement collars (extras) 2 ea.
d. Replacement Fuse 1 ea.
• Convenient microcomputer control system
• The high quality condenser is manufactured by American OAK production line
• Anti-corrosive pure titanium evaporator for fresh and salt water
• The compressor protection device system is built to shut off the circuit automatically
to prevent the motor from burning out when it is overheating
• Temperature memory system that allows the chiller to refrigerate continuously according to the
previous temperature setting
• Boost function accelerates the chilling process with two available options: 2-hour expedited
chilling and continuous (24 hrs/day, 7 days/week) maximum chilling.
FEATURES

INSTRUCTIONS
11
Thank you for purchasing the Acve Aqua Series Chiller. The chiller represents a signicant
step forward in horcultural chiller engineering, oering state of the art technology at highly
compeve prices. With this chiller, water temperatures for reservoirs can be quickly and
economically maintained. The super silent design results in signicantly lower noise levels which
are quieter than any other similar chillers. The Acve Aqua Series Chillers have a strong chassis
with an ABS plasc housing which is an-rust and an-corrosive, ensuring that the chiller does
not look out of place in any seng. For a complete understanding of this chiller, we recommend
reading this instrucon manual thoroughly.
Several symbols are used in this manual and on the product itself which are aimed at promong
proper and safe operaon in order to prevent personal injuries or damage to the chiller. Please
familiarize yourself with the symbols below before reading the manual or trying to operate the
chiller.
Hazard levels will be indicated in wring or shown by pictures. The symbol on the le provides
general emphasis of the hazard, but specic details of the acon which must be taken will be
shown by a picture or explanaon near the symbol.
This term indicates the possibility that connuing to operate the chiller while ignoring this
warning or operang the chiller incorrectly, may cause personal injury or equipment damage.
This symbol advises you of a potenal hazard which should be noted (including danger and
warning).
This symbol advises you of a mandatory acon which must be taken in order to avoid danger.
This symbol advises you of an acon which is prohibited in order to avoid danger.
1. Do not install the chiller outdoors. (Fig. 1)
2. Place the chiller in a venlated space away from ammable materials, high temperatures, direct
sunlight, moisture, and dust. (Fig. 2)
3. Place the unit on a stable horizontal surface. (Fig. 3)

INSTRUCTIONS
www.Hydrofarm.com
12
4. Install at least 12-16 inches (30-40 cm) away from walls in order to give the chiller adequate
venlated space. (Fig. 4)
5. Do not cover or move the chiller while it is operang.
6. The circulaon water ow of the chiller is indicated in the technology parameter table. This chiller
does not have a water pump, so it needs a pump with an available external lter. Using a pump
without an external lter may cause a water leak or other damage. (Fig. 6)
7. Do not put the chiller on its side or upside down as this will cause damage to the chiller. If the
chiller is placed on its side, readjust the unit to its correct upright posion and wait 20 minutes
before turning it on. (Fig. 7)
1. Remove the chiller unit and all of the contained hardware from the box and packaging material.
2. Set the chiller unit upright in the desired area on a stable surface ensuring there is at least 1'of
clearance around the body (sides, top and back) of the unit.
3. Install the inlet/outlet ngs onto the inow and oulow threaded sites
NOTE: If the inow and oulow ngs are dierent sizes, typically the larger one is used on the
inow and the smaller one on the oulow.
4. Aach the desired length of tubing onto each inow and oulow ng adapter with the worm
drive hose clamps. The inow should connect the chiller to the appropriate sized submersible
water pump, such as an Acve Aqua Water Pump, in the proper sized reservoir
performance curve chart). The oulow tube should hang freely in the reservoir to re-introduce
the chilled water back into the holding tank.

INSTRUCTIONS
13
NOTE: Please note that the lter (with the pump) must be located below the reservoir water level.
If you wish to place the unit at the side of the reservoir, you must ll the ltraon system with
water before turning it on.
1. Do NOT power on the chiller unit yet. Fully submerge the water pump to be used, plug it in, and ensure
that water is moving freely between the holding reservoir and the chiller unit.
2. Plug the chiller into a grounded outlet and ensure the power switch located on the back of the
unit is in the “ON” (I) posion.
• Do NOT cover the chiller unit with anything during operation.
• Place the chiller in the upright position ONLY for operation and storage purposes.
• Avoid direct contact with liquids to the external body of the chiller unit. Failure to do so may
result in damage to the unit or electric shock.
• Keep power cord free of obstructions, such as heavy or sharp objects sitting directly on it.
• This chiller is approved for indoor use ONLY.
• Keep the unit away from flammable vapors, direct sunlight, high temperature exposure, and high
humidity.
• Do NOT submerse the chiller. Doing so will damage the unit and may inflict electric shock.
1. Press and hold the SET buon down for approximately 3 seconds to enter the water temperature
programming mode. The previous water temperature seng will display.
2. Use the /\ or \/ buons on the control panel to increase or decrease the desired water
temperature. Press the SET buon once more, or wait approximately 8 seconds to select the
desired temperature.
Press the SET buon once to display the current set temperature value of the chiller unit, then
press the SET buon again to display the actual temperature value of the water. The blinking display
indicates the set temperature.
1. When the reservoir water temperature diers from the set temperature value, a “II” indicaon
should appear in the display.
2. Press and hold the /\ and \/ buons at the same me for approximately 6 seconds to enter the error
adjustment programming mode. The display will blink once this status is acve.
3. By pressing either the /\ or \/ buons, the error adjustment range can be modied +/- 1.5 degrees
Celsius.

INSTRUCTIONS
www.Hydrofarm.com
14
The boost feature accelerates the chilling process with two available opons: 2-hour expedited
maximum chilling and connuous (24 hrs/day, 7 days/week) maximum chilling.
To engage the boost feaure, press BOOST once. The LED on the le marked “2 hours” will light. The
boost funcon is now set to accellerate chilling for 2 hours, aer which boosted chilling will stop and
the chiller will return to the regular seng.
To set the boost funcon to constant operaon, press BOOST twice. The LED under “24/7” will light.
The chiller will now connue in boosted mode unl the BOOST pad is pressed again.
The refrigeraon compressor will automacally turn o when the water reaches, or is below, the set
temperature. When the compressor turns o, it will stay o for approximately 3 minutes or unl the
water is 3 degrees above the set temperature.
An indicator light in the top right poron of the display will appear when the compressor is acve. The
indicator light will disappear when the set water temperature has been reached, and will blink when
the compressor is in the 3 minute protecon mode.
Certain text will appear on the display panel in the event of an error. “P1” is an example that means
there is a defect in the temperature sensor. If error codes are appearing on the display, return the unit
to the original place of purchase for a warranty assessment.
Flushing of the internal chiller components is recommended at least once every 1-2 months to ensure
opmum performance and eciency. Over me, nutrient deposits and other debris may accumulate
inside the chiller, reducing its eecvness
.
Note: Do NOT use soap or detergents for cleaning the internal components of the chiller system.
1. Disconnect the chiller and submersible water pump from the power supply.
2. Clean o the pump with a high powered hose or sprayer to remove debris and dirt from the pre-
1. Temperature indicator
2. Temperature display
3. Point indicator
4. Key for decreasing temperature
5. Key for increasing temperature
6. Key for setting temperature
7. Working state indicator

15
INSTRUCTIONS
lter and housing. Clean the pre-lter as well if one is used.
3. Reconnect the pump to the chiller inow tubing and place it in a clean reservoir.
4. Fill the reservoir with clean water and a ushing agent formulated to remove salt deposits and
excess nutrients from the plant system and grow medium (available at most indoor gardening
and hydroponic retailers). Note: Using a ushing agent is completely oponal.
1. LOOSEN SCREW ON FRONT PANEL
2. GENTLY REMOVE FRONT PANEL
3. LOOSEN FILTER SCREWS
4. REMOVE FILTER
5. LIFT AND REMOVE SIDE PANEL
6. LOOSEN SCREEN ON SIDE PANEL
5. REMOVE FILTER
8. REMOVE DUST WITH BRUSH, VACUUM, OR RINSE
CAUSE
The unit doesn’t run and
the display is blank
Power is not turned on Turn on the power
Plugged in incorrectly Be sure the power cord is fully plugged
in
The unit cycles on and
off
Wrong voltage and/or frequency Apply to correct power source
Chiller is in protection mode
A. Check if the water circulation is
normal
B. If the fan and the chiller dissipate
heat normally, wait for 3 minutes and
the unit will automatically turn on
again
Performance is
decreased or there is no
refrigeration
Fan is not working Return to place of purchase
The set temperature is higher
than the aquarium water
temperature
Reset temperature
The air inlet or outlet are clogged Clean the air inlet/outlet with a brush
or a vacuum cleaner
Loud operation Not installed on a flat surface Reinstall correctly

www.Hydrofarm.com
16
WARRANTY
Hydrofarm warrants the chiller to be free from defects in materials and workmanship. The warranty
term is for one year beginning on the date of purchase. Misuse, abuse, or failure to follow instrucons
is not covered under this warranty. Hydrofarm’s warranty liability extends only to the replacement cost
of the product. Hydrofarm will not be liable for any consequenal, indirect, or incidental damages of
any kind, including lost revenues, lost prots, or other losses in connecon with the product. Some
states do not allow limitaon on how long an implied warranty lasts or the exclusion of incidental
or consequenal damages, so the above limitaons or exclusions may not apply to you. Hydrofarm
will, at our discreon, repair or replace the chiller covered under this warranty if it is returned to the
original place of purchase. To request warranty service, please return the chiller, with original sales
receipt and original packaging, to your place of purchase. The purchase date is based on your original
sales receipt.
Hydrofarm garant que le chiller ne présente aucun défaut de pièces et main-d’œuvre. La période de
garane est d’un an à parr de la date d’achat. Une ulisaon incorrecte, abusive, ou le non-respect
des instrucons n’est pas couvert(e) par cee garane. La responsabilité de la garane Hydrofarm
couvre uniquement le coût de remplacement du produit. Hydrofarm ne pourra être tenu responsable
des dommages consécufs, indirects ou fortuits de tout type, y compris les pertes de revenus, de
prots ou autres en rapport avec le produit. Certains états n’autorisent aucune limite concernant
la durée de la garane implicite ou l’exclusion des dommages fortuits ou consécufs ; les limites ou
exclusions menonnées ci-dessus peuvent donc ne pas être applicables à votre cas. Hydrofarm se
réserve le droit de réparer ou remplacer le chiller couvert par cee garane si celui-ci est renvoyé au
lieu d’achat d’origine. Pour solliciter le service de garane, veuillez renvoyer le chiller avec sa facture et
son emballage d’origine à votre lieu d’achat. La date d’achat est indiquée sur votre facture originale.
Hydrofarm garanza que el chiller no presentará defectos de fabricación. La garana tendrá una
duración de un año desde la fecha de compra. En caso de no respetarse estas instrucciones o de un
uso inadecuado del producto, la garana no cubrirá los posibles daños. La cobertura de la garana
ofrecida por Hydrofarm únicamente incluye los costes de sustución del producto. Hydrofarm no
será responsable de ningún daño indirecto, accidental o derivado de ningún po, incluyendo pérdidas
de ingresos o benecios, o cualquier otra pérdida relacionada con el producto. En algunos estados
no se permiten limitaciones sobre la duración de una garana implícita o la exclusión de los daños
accidentales o derivados; en cuyo caso las limitaciones y exclusiones anteriores no serán de aplicación.
Hydrofarm, a su discreción, podrá reparar o sustuir el chiller cubierto por esta garana siempre que
se devuelva al lugar original de compra. Para reclamar la garana, devuelva el chiller con el cket de
compra y el embalaje original al lugar de compra. La fecha de compra será la indicada en el cket
original.
AcveAqua Chiller Instrucons revised - April 17, 2018 4:37 PM
This manual suits for next models
3
Table of contents
Other Hydrofarm Chiller manuals
Popular Chiller manuals by other brands

Skope
Skope SK Series user manual

Thermo Scientific
Thermo Scientific thermoflex Installation, operation and maintanance

Weber
Weber Refrigerator owner's guide

SMC Networks
SMC Networks HRS050-A*-20 Series Operation manual

lancer
lancer S4E V2 Hi-Carb Superchiller Installation, operation & service manual

Nordcap
Nordcap SKF 15 GN 1/1 Installation

VALERA
VALERA KIC PR40 datasheet

Climer
Climer ECOHEAT PRO RF EH160 Installation and user manual

Carrier
Carrier PRO-DIALOG PLUS 30RW manual

Haskris
Haskris R1600 instruction manual

CLIVET
CLIVET MSRT-XSC3 Installation and operating manual

Ferroli
Ferroli JOLLY TOP I-VM Installation, maintenance and user manual