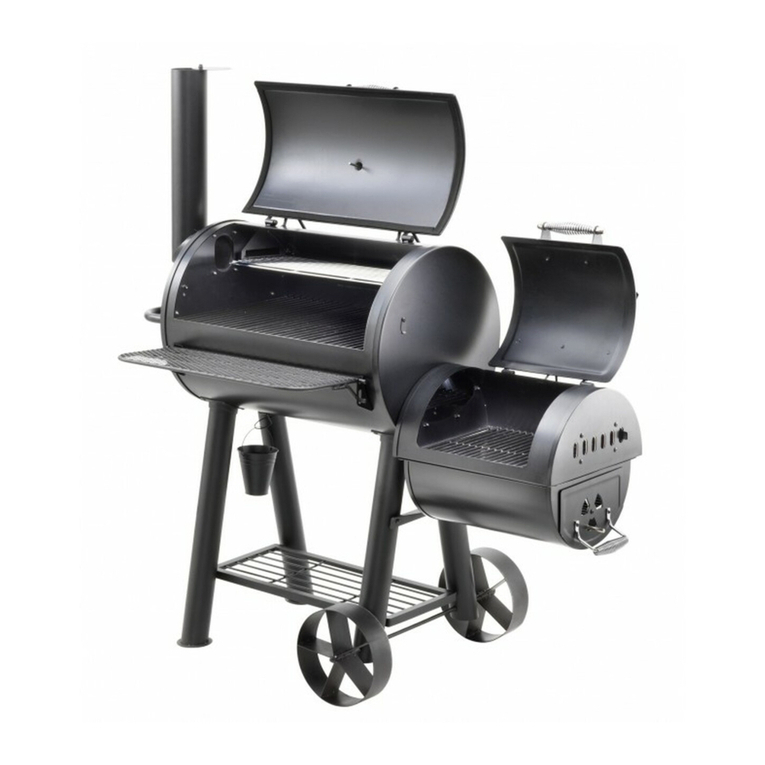
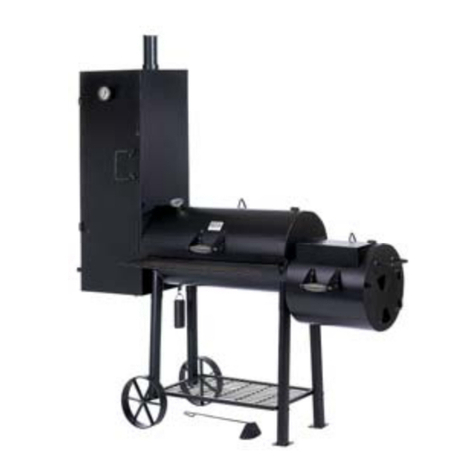
Barbeques Galore BILLABONG OFFSET SMOKER User manual

WELCOME TO THE WORLD OF BARBEQUES GALORE
OUTDOOR COOKING
INSTRUCTIONS
BILLABONG OFFSET SMOKER
For The Safe Use And Enjoyment
Of Your New Barbeque/Smoker
PRODUCT CODE:BBOFF
BILLABONG OFFSET
SMOKER
Tools required
1 adjustab e spanner
1 phi ips head screwdriver

2
Thank you and congratulations for choosing a quality product as part of your outdoor entertaining world.
By fo owing these instructions for safe and easy operation, you wi enjoy satisfying, troub e-free outdoor cooking.
And when you’re fu y up and running, you can visit your retai er for some great accessories and cooking tips to make
your experience even more rewarding.
But first things first....
Australia has an excellent safety record when it comes to outdoor cooking. This reflects both the high quality
of appliances sold, as well as growing consumer awareness about safe practice. We urge you to follow the
guidelines below together with these instructions for safe use, to prevent overheating and to produce great
cooking results.
This unit is for outdoor use on y. Under no circumstances shou d it be used indoors.
It is important that you insta your smoker exact y as described in these instructions. In particu ar you shou d keep
it c ear of combustib e materia .
Do not store chemica s or f ammab e materia s near this smoker.
Do not p ace artic es on or against, or enc ose this smoker.
The smoker gets extreme y hot whi e in use. Keep chi dren, pets and the infirm away from the smoker unti it has
coo ed to norma temperatures.
Do not move or transport the smoker whi st it is hot or in use.
NEVER eave the smoker unattended when in use or hot.
Take care when touching a hot smoker, especia y on surfaces c ose to the firebox or roasting hood.
WAR I G
Read instruction manua for additiona warnings and operating procedures.
Carbon Monoxide Hazard! Burning charcoa inside an enc osed area can ki you; It gives off carbon monoxide,
which has no odour. Never burn charcoa or wood under a roof or enc osed area (i.e. home, garage, porch,
vehic es.)
Never add or use ighter f uid, gaso ine or other high y vo ati e f uids as a starter. Never add starter f uid or any
other high y vo ati e f uid to burning or hot charcoa , as this may cause an exp osion.
Wear heat resistant g oves when removing gri racks and adding charcoa .
Wear heat resistant g oves when turning on/off the air vents.
P ace unit on a eve surface to prevent possib e tipping.
The minimum distance from any side of the unit to wa s or rai ing is 1000mm. DO NOT USE UNDER A ROOF!
Do not use on combustib e materia (i.e. wood, decks, dry grass.)
Do not use this unit near heat sensitive or combustib e structures such as viny or wood siding.
Keep chi dren, the infirm and pets away at a times whi e in use or hot.
Unit is hot whi e in use. Do not touch or move whi e in use or hot.
Hot coa s must be comp ete y out and coo ed before removing ashes and storing unit.
For outdoor use on y. Never eave unit unattended whi e in use or hot.
On y move the unit once it is has coo ed down comp ete y.

3
Most importantly, you must observe the clearances listed below and on the warning plate on your smoker.
It wi te you how c ose you can put the unit to combustib e surfaces (wood, gyprock, trees, wooden fences etc). If you
don’t fo ow these c earances, there is a chance that nearby surfaces wi heat up and catch fire.
CLEARANCES FROM COMBUSTIBLE MATERIALS 1000MM IN ALL HORIZONTAL DIRECTIONS. DO NOT
USE UNDER A ROOF!
Keep the unit she tered from the wind.
Make sure the surface is eve . This is safer, and makes cooking easier.
Don’t put the smoker too c ose to windows or anywhere e se where cooking smoke is ike y to cause a prob em.
DO NOT USE DURING A TOTAL FIRE BAN.
Putting Your Smoker In An Enclosure
This unit must on y be used in an above ground open-air situation with fu venti ation, without stagnant areas, where
products of combustion are rapid y dispersed by wind and natura convection.

4
STEP 1
OPEN THE CARTON, UNPACK AND CHECK THE PARTS.
Open the shipping carton, take out the parts and parts box packed inside, and remove a packing materia s.
Main
Hood (10)
Main
Charcoal
Grill (12)
Two Right
Legs (21)
Axle Rod (22)
Two Side
Shelf Long
Brackets (10)
Two Left Legs
(17)
Three Main
Cooking
Grills (11)
Main Firebox (14)
Offset Hood
& Lid (32)
Side Shelf (7))
Warming Rack (5)
Two Wheels (20)
Two Offset
Cooking
Grills (29)
Two Leg
Brackets (23)
Smoke Stack (1)
Offset Charcoal
Grill (30)
Two Leg
Tops (16)
Bottom Shelf (19)
Offset
Firebox (26)
Two Side
Shelf Short
Brackets (8)
Two Plastic
Feet (18)
Offset
Support (31)
Two HubCaps (24)
Two Hood Handles (6)
Thermometer (5)
Bolt Pack
Small Parts
Box
Smoke Stack
Damper (4)

5
21
18
16
17
STEP 2 OPEN THE BOLT PACK READY FOR ASSEMBLY
The fo owing hardware are provided in a b ister pack for convenient use.
STEP 3
□ Pay c ose attention to when assemb ing gri egs. Right Leg (21) is shorter to accommodate whee s.
□ Insert one Right Leg (21) and one Left Leg (17) into the first Leg Top (16) as shown.
□ Fit one Plastic Foot (18) to the bottom of the Left Leg (17).
A. M6X10mm bo t Qty: 17 pcs D. Sp it Pin
Qty: 2 pcs
E. M6 Hex Nut
Qty: 32 pcs
B. M6X40mm bo t Qty: 12 pcs F. M6 F at Washer Qty: 4 pcs
C. M6X50mm bo t Qty: 2 pcs 13. M6X20mm shou der Bo t
Qty: 2 pcs
Note These
holes all need
to be on the
same side as
shown.

6
17
18
16
21
STEP 4
□ Attach one Leg Bracket (23) to Right Leg (22) as shown using one M6x40mm Bolt (B) and one M6 Hex Nut (E).
Repeat on opposite side. Leave the bottom ho es of the Leg Brackets open at this stage.
□ Do not fu y tighten bo ts yet.
STEP 5
□ Repeat Step 3 to attach another Left Leg(17) and another Right Leg(21) into the second Leg Top(16). Right Leg
(21) is shorter to accommodate whee s.
□ Fit one Plastic Foot (18) to the bottom of the Left Leg (17).
23
Note These
holes all need
to be on the
same side as
shown.

7
STEP 6
□ A he per is needed for this step.
□ Insert the Bottom Shelf(19) into ho es of assemb ed egs as shown.
STEP 7
□ Attach the other end of Leg Bracket (23) to Right Leg (21) as shown using one M6x40mm Bolt (B) and one M6
Hex Nut (E). Repeat on opposite side. Leave the bottom ho es of the Leg Brackets open at this stage.
□ Do not fu y tighten bo ts yet.
19

8
STEP 8
□ Insert the Axle Rod(22) though the ho es in the Right Legs as shown.
□ S ide the Wheels(20) onto the Axle Rod(22) and secure using Split Pin(D), packed in b ister pack. Note: make
sure the side of the whee s with the depressed ho e for the Hubcaps in the center is facing outward as shown.
Snap the two Hub Caps(24) onto the ends of Whee assemb y as shown.
STEP 9
□ P ace the Main Firebox (14) onto the eg assemb y with the smoker opening on the same side as the whee s.
□ Tight y secure the Main Firebox to each Leg Top using four M6x40mm Bolts(B) and four M6 Hex Nuts(E). Do
not fu y tighten bo ts yet.
22 20 24
14

9
STEP 10
□ A he per is needed for this step.
□ A ign the ho es in the Side Shelf (7) with the ho es in the Main Firebox as shown.
□ Insert two M6x50mm bolts(C) through the ho es in the Main Firebox and Side Shelf Short Brackets (8) into the
Side Shelf. Secure with two M6 hex nuts (E) as shown.
STEP 11
(a) ON THE NON-WHEEL LEG SIDE:
□ Attach one end of each of the Side Shelf Long Brackets (9) into the ower ho e in the Leg Bracket as shown
be ow using two M6x40mm bolts(B). Secure with two M6 hex nuts(E).
□ Attach the other end of each of the Side Shelf Long Brackets (9) to the Side Shelf using two M6x10mm
bolts(A).
(b) ON THE WHEEL LEG SIDE:
□ Lock the other end Leg Bracket ower ho es in p ace using two M6x40mm bolts(B). Secure with two M6 hex
nuts(E).
7 8
9

10
STEP 12
□ Insert two M6x10mm bolts(A) through the ho es in the Offset Support(31). Secure using two M6 hex nuts(E)
as shown. Now go back and fully tighten all nuts and bolts from STEP 4 onwards.
STEP 13
□ A he per is needed for this step.
□ Insert six M6x10mm bolts(A) through the ho es in the Offset Hood & Lid (32) and through the Main Firebox.
Secure firm y using six M6 hex nuts(E) as shown. It's best to do nuts and bo ts one at a time oose y first. Once a
nuts and bo ts are connected, then tighten a six firm y,
31
32

11
STEP 14
□ Insert four M6x10mm bolts(A) through the ho es in the Offset Firebox(26) into Offset Hood. Secure using four
M6 hex nuts(E) as shown.
□ Insert one M6x10mm bolt(A) through the ho e INSIDE the Offset Firebox into the Offset Support (31). Tighten
a bo ts firm y.
STEP 15
□ Attach one Hood Handle(6) to the Offset Lid as shown using two M6 flat washers (F) and two M6 Hex Nuts (E).
Tighten firm y.
6

12
STEP 16
□ A ign the Main Hood(10) with the Main Firebox as shown. Secure using two M6x20mm Shoulder Bolts(13)
packed in b ister pack.
STEP 17
□ Insert the Smoke Stack (1) through the Main Hood from inside and secure with two M6x10mm bolts (A) and two
M6 hex nuts (E).
□ Unscrew the M6 Cap Nut (2) and remove the Spring (3) from the Smoke Stack (1).
□ Secure the Smoke Stack Damper (4) to the Smoke Stack with the Spring (3) and the M6 Cap Nut (2) as shown.
10
13
1
42
32
3
1
4

13
STEP 18
□ Unscrew the wing nut from the Thermometer (5).
□ Insert the Thermometer (5) through the s otted ho e into the Main Hood.
□ Secure the Thermometer (5) to the Main Hood with the wing nut.
STEP 19
□ Attach one Hood Handle (6) to the Main Hood using two M6 flat washers (F) and two M6 hex nuts (E).
□ Doub e check that ALL screws and bo ts in the comp ete unit are proper y tightened.
6
5

14
STEP 20
□ Insert the Warming Rack (15) egs into the top of the Main Firebox as shown. Fit the Warming Rack top hinge
arms into the main hood as shown. The Warming Rack shou d stay f at as the Main Hood is opened and c osed.
□ Insert the Main Charcoal Grill (12) into the ower firebox as shown.
STEP 21
□ P ace the Main Cooking Grills (11) into the Main Firebox as shown.
□ Insert the Offset Charcoal Grill (30) into the Offset Firebox as shown.
□ P ace the Offset Cooking Grills (29) into the Offset Firebox as shown.
15
12
29
30
11

15
Safe Storage and Maintenance
Inspect hardware tightness on a regu ar basis to ensure the smoker is in a safe working condition.
ALWAYS a ow smoker to coo comp ete y before hand ing.
ALWAYS empty charcoa gri s after use on y when ashes have comp ete y coo ed. This wi he p pro ong charcoa
gri ife.
C ean your smoker cooking surfaces with mi d c eaning agents.
Wipe the outside of smoker with damp rag. DO NOT use oven c eaner.
ALWAYS cover and store co d smoker in a protected area.
Indoor storage of smoker is permissib e on y if the charcoa has burned to a comp ete ash AND is co d. A ow up to
48 hours for this. Remember to remove co d ashes before storing.
This smoker is made of stee and wi rust over time. If rusting occurs on outside surfaces, c ean it with sand paper
or stee woo , then re-paint outside surfaces with heat resistant paint avai ab e from your oca Barbeque Ga ore
Store.
If rusting occurs on the inside surface of the smoker, c ean it with sand paper or stee woo , then coat with cooking
oi . NEVER USE PAINT ON THE INSIDE SURFACES OF THE SMOKER. Smoke bui d up the inside of the unit
wi protect the stee and resist rusting.
Grilling Instructions and Tips
1. Preheat the smoker for 5-10 minutes.
2. Before heating, ight y coat the cooking gri s with cooking oi to prevent food from sticking.
3. Your smoker is equipped with an adjustab e vent on the offset firebox to vary the rate of burn. Grasp the vent ever
with mitts or meta p iers and rotate the vent to increase opening and raise the temperature. Decrease the vent
opening to ower the temperature.
4. The smoke stack on this smoker is equipped with a damper cap to vary cooking temperature. Use meta p iers to
grasp the damper door tab and rotate the damper cap to increase the opening and raise the temperature.
Decrease the opening to ower the temperature.
WARING: To avoid injury, DO NOT touch vents or dampers with bare hands un ess the smoker is comp ete y coo . Use
mitts or meta p iers to adjust the damper cap. Use meta p iers to adjust the vent openings.

16
It is strong y recommended to pre-burn your smoker prior to your first use. By ighting a SMALL charcoa fire to simu ate
the cooking process, you wi burn off any residues or oi s from the manufacturing process. This wi a so cure and
harden the high temperature paint finish. This is a once on y process.
LIGHTING A FIRE
Open the hood of your smoker, as we as a of the vents and dampers.
Remove the cooking gri s. Add charcoa or timber. Do not put more than 1.5kgs of charcoa briquettes or 1.0 kgs of
ump charcoa into the smoker, onto the charcoa gri s. Do not et burning charcoa or wood come in contact with the
wa s of the smoker (keep fue approximate y 50 mm away from the smoker sides). Use fire ighters to start the fire,
fo owing the directions on the packet. Set vent and damper each about ha f open.
A ow the charcoa enough time to comp ete y ash over before beginning to cook, so that the fire ighters have enough
time to burn off. Starting to cook too soon can eave your food tasting ike fire ighters. After ash over is comp ete, use
ong-hand ed tongs to spread the charcoa into a sing e ayer on the charcoa gri s.
Chimney starters, e ectric starters, or other types of fire starters may be used instead of fire ighter to ight the fire – but
on y according to those manufacturers’ instructions. Never use instant ight charcoa or charcoa ighter f uid with any of
these other starting methods.
CONTROLLING A FIRE
A ow enough time for proper y bui ding the fire and getting the smoker up to desired temperature before attempting to
cook.
Rising heat and smoke wi move up and out of the unit, pu ing in coo er air behind it, which provides more oxygen for
the fire. Your smoker has a vent and a damper that contro airf ow, which ets you fine tune the temperature. NOTE:
Dampers and vents wi become very hot after ighting the charcoa - be sure to wear insu ated gri mitts during
adjustment
。
After the fire is estab ished and the unit reaches the desired cooking temperature, the vents and dampers can be eft
comp ete y open, providing maximum airf ow for a higher temperature or c osed as needed to decrease airf ow for a
ower temperature. Use the temperature indicator to monitor.
Ha f opening the damper on the stack and ha f opening the vent on the smoker side pane wi create a convection
effect inside the gri when the hood is c osed. This wi a ow for extended cooking times when Indirect Cooking. Too
much fue with vents and damper fu y open wi overheat and damage your smoker.
ADDING ADDITIONAL FUEL
To achieve the extended cooking times needed for Indirect Cooking or s ow smoking, additiona fue can be added by

17
opening the offset firebox id. Take out the cooking gri using a grate too and insu ated gri mitts - as the cooking gri
can be VERY hot. Using ong-hand ed tongs, stoke the coa s enough to a ow excess ash to fa through the charcoa
grate. Again using insu ated mitts and ong-hand ed tong add fue to the charcoa grate as needed and return the
cooking gri back into p ace.
NEVER use ighter f uid or instant ight charcoa when adding additiona fue to an existing fire. This can be VERY
dangerous. Do not attempt to empty the ash pan whi e charcoa or ashes are sti hot. Wait unti the ashes and who e
unit have comp ete y coo ed before emptying the ashes.
See the “Cooking Methods” section be ow for more information on Indirect Cooking and s ow smoking.
COOKING METHODS
You can use your smoker to cook in 3 different ways – depending on the type of food, and how you want to prepare it.
BARBEQUE DIRECT GRILLING
Barbeque Gri ing is cooking direct y over the fire, using direct heat. This method is the quickest and works we for
foods that are tender before you cook them – inc uding steaks, beef or pork tender oin, burgers, hot dogs, sausages,
chicken, seafood, etc.
Barbeque Gri ing uses temperatures that are over 160 °C (325 °F). When cooking at these temperatures, it is
important to carefu y watch your food to keep it from burning. A so, you can c ose the id and vents and dampers to put
out any grease f are-up that may occur when fats and oi s start to run from cooking food.
You can barbeque in the main firebox, the offset firebox or both. Just a sma amount of fue is needed as the food is
direct y above the heat.
BARBEQUE INDIRECT COOKING
Indirect Cooking is cooking using indirect heat and smoke. This method takes a itt e onger, but can be used for near y
any kind of food you want to cook (inc uding those above). As Indirect Cooking uses ower temperatures and onger
cooking times - this method works best for cuts of meat that need time to tenderise – such as ribs, brisket, pork
shou der, wi d game, etc
Indirect Cooking uses temperatures from 105°C (225°F) to 160°C (325°F). Try to maintain around 135°C (275°F) for
optima resu ts.
You can indirect cook in the main firebox on y, using either a sma fire in the main firebox, away from the food, or using
on y the offset firebox for the fire. Use just a sma amount of fue , topping up frequent y as required to maintain
temperature.
SLOW SMOKING
S ow smoking uses much ower temperatures and much onger cooking times. S ow smoking is actua y a way to cure
meats rather than cook them. S ow smoking is idea for turkeys, chickens, beef briskets, cheese and sausage.
S ow smoking uses temperatures that range from 60°C (140°F) to 105°C (225°F). Many s ow smoking recipes ca for
the use of sa t or brine that he ps preserve the meat and avoid bacteria contamination during the cooking process. It is
recommended to on y cook above 105°C (225°F) un ess you are experienced at how to avoid bacteria contamination,
It is OK to smoke food, and then straight away Barbeque Gri it for immediate consumption.

18
For s ow smoking, on y cook in the main firebox, with the fire on y in the offset firebox. Use just a sma amount of fue ,
usua y in just one ha f of the offset firebox.
USING CHARCOAL AND WOOD
CHARCOAL
Your smoker is made idea y to burn charcoa briquettes or natura wood ump charcoa – both of which have different
cooking attributes. Charcoa briquettes typica y provide onger burn times than ump charcoa – but ump charcoa
burns hotter than briquettes. Using the charcoa pan access door to add more charcoa makes both briquettes and
umps easy and convenient for extended cooking times. Heat Beads™ can a so be used, but take care to fu y burn
them in before cooking. Heat Beads™ genera y wi burn for onger but at a ower temperature per kg.
SMOKING WOODS
Adding smoking woods to your smoker is an easy and effective way to create wonderfu f avor combinations for a
types of Barbeque Gri ed, Indirect Cooked, or S ow Smoked foods. Wood chips are typica y used for shorter cooking
times, where chunks are better for onger cooking times.
When choosing smoking woods, the ru e of thumb is to use a fruited hardwood – from a tree that bears a nut, fruit, or
berry. The most popu ar and wide y avai ab e smoking woods are hickory and mesquite. Hickory imparts a mi der f avor,
where mesquite is more intense. Other common wood varieties are oak, app e, pecan, cherry, etc.
It is important to never use pine, gums, cedar, or ki n dried wood as they contain resins than taste bad and can be
poisonous
Any smoking woods used shou d be we cured. Green wood sti contains a the sap and moisture needed to keep the
tree a ive, and wi impart a very strong-tasting smoke that wi turn your foods b ack. A so, when you try burning green
wood, it is hard to reach a good temperature, because a the moisture inside the wood can put the fire out whi e it’s
burning. We -cured wood ights easi y, maintains cooking temperature, and produces a great tasting smoke f avor that
isn’t too strong. Smoke from some woods can be poisonous. On y use wood from a safe source that you trust!
Never use any timber that may have previous y been painted or treated as it cou d be poisonous. If you are not sure of
the source, assume it is poisonous and don’t use it.
The amount of smoke f avor imparted to your food can be contro ed by not just the type of wood you use (whether a
mi d wood or more intense), but a so by the ength of time the meat is smoked. Indirect Cooking typica y adds more
smoke f avor to food than Barbeque Gri ing, due to the onger cooking times. You can a so contro the amount of
smoke f avor by wrapping meats in a uminum foi for part of the cooking process. Cook meat for 1/2 to 2/3 of the tota
cooking time, or unti it ooks to be the perfect co or. Then wrap the meat in foi and finish cooking the meat unti done.
“!” WARNING “!”
Most surfaces on this unit are VERY hot when in use. Use extreme caution.
Keep others away from the smoker when it is in use or sti hot..
A ways wear protective c othing to prevent injury.
Keep chi dren and pets away from the unit when it is in use.
Do not move this unit during operation.
Never substitute gaso ine, kerosene or a coho for fire ighters.

19
Be ow exp oded diagram and parts ist for your after service reference.
1 2 3 4 5 6 7 8 9
10
11
12
13
14
17
18
19
20
16
21
22
23
24
25
15
26
27 28
30
29
31
06
32

20
Key Description Qty Part
Number GLG Code
1
Smoke Stack with damper, spring
& Nut
1 1600017
PGS1600017 1 set
2 1 1600091
3 1 1600021
4 1 1600018
5 Thermometer 1 52200015 PGS52200015 1
6 Hood Hand e 2 1600095 PGS1600095 1
7
Side She f & brackets
1 1600059
PGS1600059 1 set 8 2 1600057
9 2 1600058
10 Main Hood & Hinge 1 1600004 PGS1600004 1 set
13 2 1600014
11 Main Cooking Gri 3 1600030 PGS1600030 1
12 Main Charcoa Gri 1 1600031 PGS1600031 1
14 Main Firebox 1 1600034 PGS1600034 1
15 Warming Rack 1 1600015 PGS1600015 1
16
Leg set
2 1600067
PGS1600067 1 set 17 2 1600068
21 2 1600069
18 P astic Foot 2 1600072 PGS1600072 2
19 Bottom She f 1 1600087 PGS1600087 1
20 Whee & Hubcap 2 01600073A
PGS1600073AB 1 set
24 2 01600073B
22 Ax e & Sp it Pin 1 1600074 PGS1600074 1 set
25 2 110050
23 Leg Bracket & Offset Support 2 1600070 PGS16000701 1 set
31 1 1600071
26 Offset Firebox 1 1600043 PGS1600043 1
27 Side Pane & Vent assemb y 1 1600049 PGS1600049 1 set
28 1 1600050
29 Offset Cooking Gri 2 1600047 PGS1600047 1
30 Offset Charcoa Gri 1 1600048 PGS1600048 1
32 Offset Hood & Lid 1 1600035 PGS1600035 1
Not Pictured
B ister Hardware Pack 1
PGSBBOFFBOLT 1 set
Instruction Manua 1
This manual suits for next models
1
Table of contents
Other Barbeques Galore Smoker manuals
Popular Smoker manuals by other brands

Char-Broil
Char-Broil 12101625 Product guide

Benedini
Benedini TBS Mini V2 Operation manual

Rational
Rational VarioSmoker Applications manual

Outdoor Gourmet
Outdoor Gourmet Swinehouse 156603 Assembly instructions & user manual
Masterbuilt
Masterbuilt CS40G1DW instruction sheet
SmokinTex
SmokinTex 1300 Pro Series operating manual

