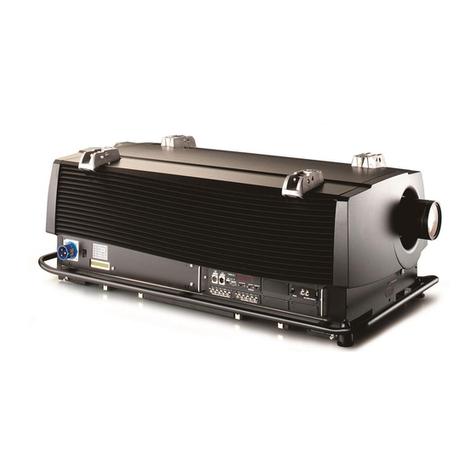
Barco DP2K S-series User manual

Projector is booting up.
Projector is running correctly.
Projector in sleep mode without errors, warnings and notifications.
Projector is running with warnings. Event can go on but a technical
intervention will be necessary in the near future to prevent a
complete stop of the projector.
Projector in sleep mode with warnings.
Projector is in error state. Problem could prevent normal operation.
Solve the problem before continuing
with the projector.
Projector in sleep mode with errors.
Projector runs in notification state. Maintenance action required. Lamp
run time is exceeded, filters needs to be cleaned, etc.
Projector in sleep mode with notifications.
3
1
2
6
2
7
8
9
10
11
4
5
Caution !
High voltage and strong UV radiation is present in the projector.
To prevent personal injury, electrical shock, exposure to UV
radiation and fire hazard, always refer to the “Safety manual” of
the projector.
Projector Status LightProjector Status Light
Projector ComponentsProjector Components
DP2K S-series Quick Start Guide - Trained projectionist
Exhaust Output: removes heat from lamp house. Must be connected to external extraction system.
Important: the extraction system must be running. A flexible duct must be installed.
Touch panel position: places where a touch panel can be mounted.
Status light: shows the status of the projector. Can be green, yellow, red or blue.
Mains power switch: powers projector on and off. Shuts off all electrical connections.
Important: the lamp must be cooled down for 5 minutes before switching off.
Lamp house cover: to be removed to replace the lamp house.
Keypad: Used for local operations on the projector such as switching the lamp on-off, dowser, selecting a macro
or test pattern or switching the projector to standby or sleep mode.
Touch panel connector: provides power and communication for the touch panel.
Important: To avoid connector damage, align the pins before you connect the cable.
Integrated Cinema Processor (ICP).
Input slot for IMB, IMS, or HDSDI module.
Cinema Controller.
Automated motorized lens: automatically adjusts the image between screen formats when a macro is selected.
Always remove the lens cap prior to use.
11
10
9
8
7
6
5
4
3
2
1
General
R5905465/00
Printed on FSC certied paper (www.fsc.org)
1
C
M
Y
CM
MY
CY
CMY
K
r5905465_00_userguide.pdf 1 17-12-2012 9:20:10

Source connectionsSource connections
Local keypadLocal keypad Communication connectionsCommunication connections
DP2K S-series Quick Start Guide
1
2
SMPTE 292/424 input, port A
(maximum cable length of 30 m
allowed)
SMPTE 292/424 input, port A
(maximum cable length of 30 m
allowed)
1
2
Local Area Network (LAN: 10/100/1000 base-T) with build in Ethernet switch. Only for as
projector interface, not for content.
General purpose input/output (GPIO), can be programmed by macros.
3D interface to connect external 3D devices to the projector.
USB out: for future use.
USB in: for communication with the projector via RS232.
3
4
5
1
2
3
4
5
6
7
8
9
10
11
12
Numeric buttons or macro buttons (1 to 6) to start up a specific macro
that setup the projector for a specific show.
Marker area for macro name.
Standby button: switch the lamp on or off.
Important: The lamp cooling fans remain active for about 5 minutes.
Dowser button: opens or closes the electronic dowser.
Test pattern button: opens directly the internal test patterns. Press
again to scroll to next pattern.
Lens focus button to focus the image on the screen.
Lens shift button to shift the image up/down or left/right.
Sleep button: press 3 seconds to put projector in sleep mode. Press
sleep again to put projector in standby. This function can be part of a
predefined macro.
Star button: user defined button.
Key button is used in the authorization procedure after servicing. Not
used in normal operation.
Lens zoom to zoom the projected image in or out.
Media buttons to navigate through the content on the integrated media
server.
General
Optional HD-SDI
Connections to an IMS or an IMB : consult the
corresponding documentation of the manufac-
turer.
SMPTE 292/424 IN
AB
SEL
SYNC OK
SEL
SYNC OK
1 2
1 2 3 4 5
DOWSER
1 4
2 5
3 6
ZOOM
FOCUS
SHIFT
21 3 4 5 6 7
8 9 10 11 12
Trained projectionist
2
C
M
Y
CM
MY
CY
CMY
K
r5905465_00_userguide.pdf 2 17-12-2012 9:20:10

Trained projectionist
Power upPower up Play a movie controlled by the serverPlay a movie controlled by the server
Play a movie manuallyPlay a movie manually
Power downPower down
DP2K S-series Quick Start Guide
1
1
1
2
3
4
5
6
2
3
4
5
1
2
3
2
3
4
5
Press Standby button or switch off lamp with Communicator.
Lamp is switched off and cool down starts.
Allow the projector to cool down for at least 5 minutes until
the speed of the fans decreases.
Switch off the projector.
Important! Damage will result if you do not allow the lamp to
cool down.
1
2
Press Standby button or switch off lamp with Communicator.
Lamp is switched off and cool down starts.
Press Sleep button for 3 seconds. When the lamp is still too
hot, the projector will finish first the cool down process. Then
it goes into sleep mode. Power consuption is less than 15W.
No fans are turning and lamp power supply is switched off
completely.
During normal operations, the server should start the
projector automatically. If it does not start automatically, use
the following steps.
Press Standby button. Check if button turns green.
Select the appropriate macro for the next show. Allow a
moment for the lens to move into position
Press Dowser button if required.
Play the movie from the server.
Check the image on screen for proper alignment and color.
Optional: if the image is not aligned with the screen masking,
use the Lens adjustment buttons to correct the image on
screen. Be sure to notify the theatre technician.
General
Ensure that the exhaust system is properly installed.
Press the Power Switch to switch the projector ON. Allow up
to one minute for the projector to finish the boot-up sequence.
Note: projector starts up in the same state as it was switched
off. When switched off in sleep mode, it starts up in sleep
mode, when switched off in standby, it starts up in standby.
Projector status light turns green or flash green. If the status
ligth turns or flashes red, yellow or blue, refer to the trouble-
shooting section.
When it starts up in sleep mode, press Sleep button for 3
seconds or wake up projector via Communicator. Projector
goes in standby. Press Standby button or activate lamp via
Communicator.
When it starts up in standby mode, press Standby button or
activate lamp via Communicator.
Press Dowser button or open dowser via Communicator.
DOWSER
DOWSER
Play the movie from the server.
Check if the Standby button turns green.
Check if the Dowser button turns green.
Check that the appropriate macro is selected.
Check the image on screen for proper alignment and color.
Optional: if the image is not aligned with the screen
masking, use the Lens adjustment buttons to correct the
image on screen. Be sure to notify the theatre technician.
5min
Put in Sleep modePut in Sleep mode
3
C
M
Y
CM
MY
CY
CMY
K
r5905465_00_userguide.pdf 3 17-12-2012 9:20:11

Smart maintenanceSmart maintenance
CleaningCleaning
Dust filter replacement (large filter next to the lens)Dust filter replacement (large filter next to the lens)
DP2K S-series Quick Start Guide
1
1
2
1
2
1
2
2
3
4
1
1
2
2
3
Maintenance
Maintenance type A = monthly maintenance
Check dust filters for dust and grease. See cleaning the dust
filters.
Check the surface of the lens for dust. Only clean if neces-
sary.
Check the porthole for dust.
Maintenance type B = 3 monthly maintenance
Clean the back/side air inlet vents of the Lamp Power
Supply.
Clean the housing of your projector.
Loosen the two captive screws (7 mm flat screwdriver).
Pivot the assembly away from projector.
The other side of the assembly contains two mounting lips which are engaged in the projector chassis.
Push both latches of the dust filter inwards to detach the dust filter from the cover plate.
Check the “air in” side of the dust filter for dust and/or grease.
In case the filter is contaminated with grease wash and dry the dust filter.
In case the filter contains dust but doesn't feel greasy then vacuum clean the dust filter.
Attach a clean dust filter to the cover plate. Ensure that both latches and both mounting lips of the dust filter are engaged.
Install the dust filter assembly back at the front side of the projector. Secure both captive screws. Ensure that both mounting lips of
the assembly are engaged in the projector chassis.
Lens
Always wipe lenses with a CLEAN Toraysee cloth.
Wipe lens in a single direction.
Do not leave the cleaning cloth in either an open room, do
not use liquid cleaners on the cloth, as doing so can
contaminate the cloth.
Exterior of the projector
Switch off the projector and unplug from the mains power
net.
Clean projector’s outside housing with a clamp cloth.
Stubborn stains may be removed with a cloth that is lightly
dampened with a mild detergent solution.
Vacuum cleaning dust filters
Lightly tap the filter on its dusty side to expel heavy dust
contamination
Carefully vacuum the air inlet side of the dust filter. Use a
vacuum cleaner with a soft brush suction nuzzle. The air
inlet side of the dust filter is the side which is surrounded
with a silicon edge.
2
1
4
3
3
Trained projectionist
4
C
M
Y
CM
MY
CY
CMY
K
r5905465_00_userguide.pdf 4 17-12-2012 9:20:16

Washing and drying a dust filterWashing and drying a dust filter Dust filter replacement (small filter below the lens)Dust filter replacement (small filter below the lens)
DP2K S-series Quick Start Guide
1
1
2
3
4
5
6
2
3
4
Optical System MaintenanceOptical System Maintenance
1
2
3
When needed, clean the lens with a CLEAN Toraysee cloth.
See cleaning lens.
When needed, clean the Port window.
Replace the lamp when the maximum lamp run time is
reached and the Status light turns blue or when the
projector’s light output falls below optimum requirements.
Loosen the captive screw (7 mm flat screwdriver).
Pivot the assembly away from projector.
The other side of the assembly contains a mounting lip which is engaged in the projector chassis.
Push both latches of the dust filter inwards to detach the dust filter from the cover plate.
Check the “air in” side of the dust filter for dust and/or grease.
In case the filter is contaminated with grease wash and dry the dust filter.
In case the filter contains dust but doesn't feel greasy then vacuum clean the dust filter.
Attach a clean dust filter to the cover plate. Ensure that both latches and both mounting lips of the dust filter are engaged.
Install the dust filter assembly back at the front side of the projector. Secure the captive screw. Ensure that the mounting lip of the
assembly is engaged in the projector chassis.
Make a solution with a ratio of 30 gram (handful) sodium
carbonate to 1 liter hot water.
Soak the dust filters in the solution for 30 to 60 minutes.
The grease should be dissolved after 1 hour.
If the dust filter is still clogged repeat this procedure.
Rinse the dust filters with clean water to flush all grease
residue away.
Shake out all excess liquid by repeatedly swinging the filter
to-and-fro in a centrifugal action.
Then allow the filters to dry thoroughly. Typically
this can take up to 24h and more, depending on the drying
conditions.
UNDER NO CIRCUMSTANCES SHOULD WET FILTERS BE
INSTALLED BACK INTO THE PROJECTOR. THIS CAN HAVE
SERIOUS SAFETY CONSEQUENCES AS WELL AS JEOPARDIZE THE
INTERNAL OPTICS OF THE SYSTEM.
It's recommended to have a second set of dust filters which
can be used while cleaning the first set. 2
13
4
3
Maintenance
Trained projectionist
5
C
M
Y
CM
MY
CY
CMY
K
r5905465_00_userguide.pdf 5 17-12-2012 9:20:16

Use of the Communicator on PCUse of the Communicator on PC Use of Communicator LiteUse of Communicator Lite
DP2K S-series Quick Start Guide
1
22
1
3
1
2
3
4
5
6
3
4
1
2
3
4
5
Make sure your PC and projector are connected to the same LAN.
Install Communicator on the PC, no registration is necessary. You only have to fill out your name
and company.
Start up the Communicator.
If your projector is visible in Environment selection, dubble click on the icon to make a connection,
otherwise fill out the IP address and click Connect.
The Communicator window opens with the Control functions accessible.
To start projection:
Click Lamp button to strike the lamp.
Select the appropriate Macro for the next show.
Click Dowser button if required to open the dowser.
Play the movie from the server.
Check the image on screen for the proper alignment and color.
Optional: if the image is not aligned with the screen masking, use Configuration - Lens - Lens
settings to correct the image on screen. Be sure to notify the theatre technician.
No extra software installation required.
Make sure your PC and projector are connected to the same LAN.
Open your webbrowser and type in the hostname or IP address of the projector.
The startup page opens. Login to control the projector.
To start projection:
Click Control.
Click Lamp On to strike the lamp.
Select the appropriate Macro for the next show.
Click Dowser Open if required to open the dowser.
Play the movie from the server.
Check the image on screen for the proper alignment and color.
Optional: if the image is not aligned with the screen masking, use Lens control to correct the
image on screen. Be sure to notify the theatre technician.
Communicator
Trained projectionist
6
C
M
Y
CM
MY
CY
CMY
K
r5905465_00_userguide.pdf 6 17-12-2012 9:20:16

The Lamp does not strikeThe Lamp does not strike The image appears dimThe image appears dim Creating a Diagnostic PackageCreating a Diagnostic Package
Button backlight colorsButton backlight colors
DP2K S-series Quick Start Guide
1 1 1
2
3
4
22
Press Standby button. Between each strike attempt, allow 10
seconds (if lamp is cold) or 1 minute (if lamp is hot).
If after te third attempt the lamp does not strike, check with
communicator for errors, then contact the theatre’s techni-
cian.
In Communicator or on the Touch panel, select Control tab
and press Service button.
Check the Current Light Output reading. If the light output
does not indicate at least 11 Fl, contact the theater technician
In Communicator, press Diagnostic tab and click Package.
Click on Create diagnostics package.
1
2
3
4
Reselect the proper Macro button on the projector for the
current movie.
Use the Test Pattern button to select color bars. Check that
red, green and blue can all be seen.
Reselect the current Macro button again for the current
movie.
Restart the projector and server and try to replay the movie.
Let the lamp cool down for at least 1 minute prior to
restarting
1
2
3
4
5
6
7
Check to see if the lamp is on and the dowser is open.
Check that the lens cap is removed.
Verify that the correct macro is selected.
Verify that the server is playing.
Verify the operation of the projector with a Test pattern.
Check all connection between projector and server. Try
playing different content.
Restart projector and server. Try to play the movie again. Let
the projector lamp cool down for at least one minute prior to
restarting.
Red = Error condition. Restart the projector if the
status light turns green, problem is resolved. Check
Communicator or Touch panel for ‘red’ marked error
messages. If you find an error, report it ot the
theatre technician.
Yellow = Warning condition. Check Communicator or
Touch panel for ‘yellow’ marked warning messages
and take action accordingly.
Blue = Maintenance notification. Check Communi-
cator or Touch panel for ‘blue’ marked messages
and perform the suggested maintenance.
1
2
3
4
Check the booth’s ambient temperature.
These must be between:
* 50 - 95 degrees Fahrenheit
* 10 - 35 degrees Celsius
Check that the extraction system is operating.
Check that the filters are clean.
Contact the theater technician.
Browse to the storage location, accept the proposed file
name or change the name.
Click Save to create the diagnostics package. Once finished,
send this package to a technician for analyse purposes.
Troubleshooting
Content is distorted or not playing with the
correct color
The projector indicates an overheating error
There is no image on the screen The projector status light is solid red, yellow
or blue
Button enabled. Default backlight color.
Button pressed. Request is ongoing.
Standby, Sleep, Macro = function is activated
Dowser = dowser open, Test pattern = no pattern selected.
Standby = lamp is off, Dowser = dowser closed
Test pattern = test pattern selected
Shift, Zoom, Focus = end of range
Macro = error in at least one step
Numeric buttons = Key button pressed.
Trained projectionist
7
C
M
Y
CM
MY
CY
CMY
K
r5905465_00_userguide.pdf 7 17-12-2012 9:20:17
Table of contents
Other Barco Projector manuals

Barco
Barco DP2K SLP Series Operating manual

Barco
Barco DP2K-36BLP Operating manual

Barco
Barco R9001950 User manual

Barco
Barco CINE7 R9010040 User manual

Barco
Barco OverView D Series User manual

Barco
Barco SIM 7Q User manual

Barco
Barco Cine 5 User manual

Barco
Barco R9001390 User manual

Barco
Barco iD H250 User manual

Barco
Barco GRAPHICS 1208S R9000893 User manual

Barco
Barco Galaxy NH-12 User manual

Barco
Barco iQ (PRO) G350 User manual

Barco
Barco CV series User manual

Barco
Barco DP2K8S User manual

Barco
Barco GRAPHICS 808s User manual

Barco
Barco HDX W18 Owner's manual

Barco
Barco PFWX-51B User manual

Barco
Barco FL40 series User manual

Barco
Barco F22 Series User manual

Barco
Barco XDM User manual