Manual 2100-034G
Page 2 of 21
General Information
The User's Application Guide covers a wide range of heating and cooling products manufactured by Bard
Manufacturing Company. It is intended to be a general guide for care and operation of typical systems and covers the
most important features you should be aware of and are responsible for as the user of the equipment.
Because our product offerings are so varied and can be equipped with many features and options, it is not possible to
cover all aspects of what your specic system may be congured for. Some systems may be quite simple in features to
provide basic cooling and possibly heating, while other systems may also incorporate various ventilation technologies,
dehumidication circuits and many different internal controls as well as room temperature controls. Therefore, you
should request a detailed operation sequence and explanation of any special features from your installer and/or service
company and also have them instruct you as to any routine maintenance procedures you are responsible for.
Contents
Overview ........................................................................3
Documentation .............................................................4
Unit Literature Assembly – Documentation Provided
with Your Units .....................................................4
Unit Installation ...........................................................5
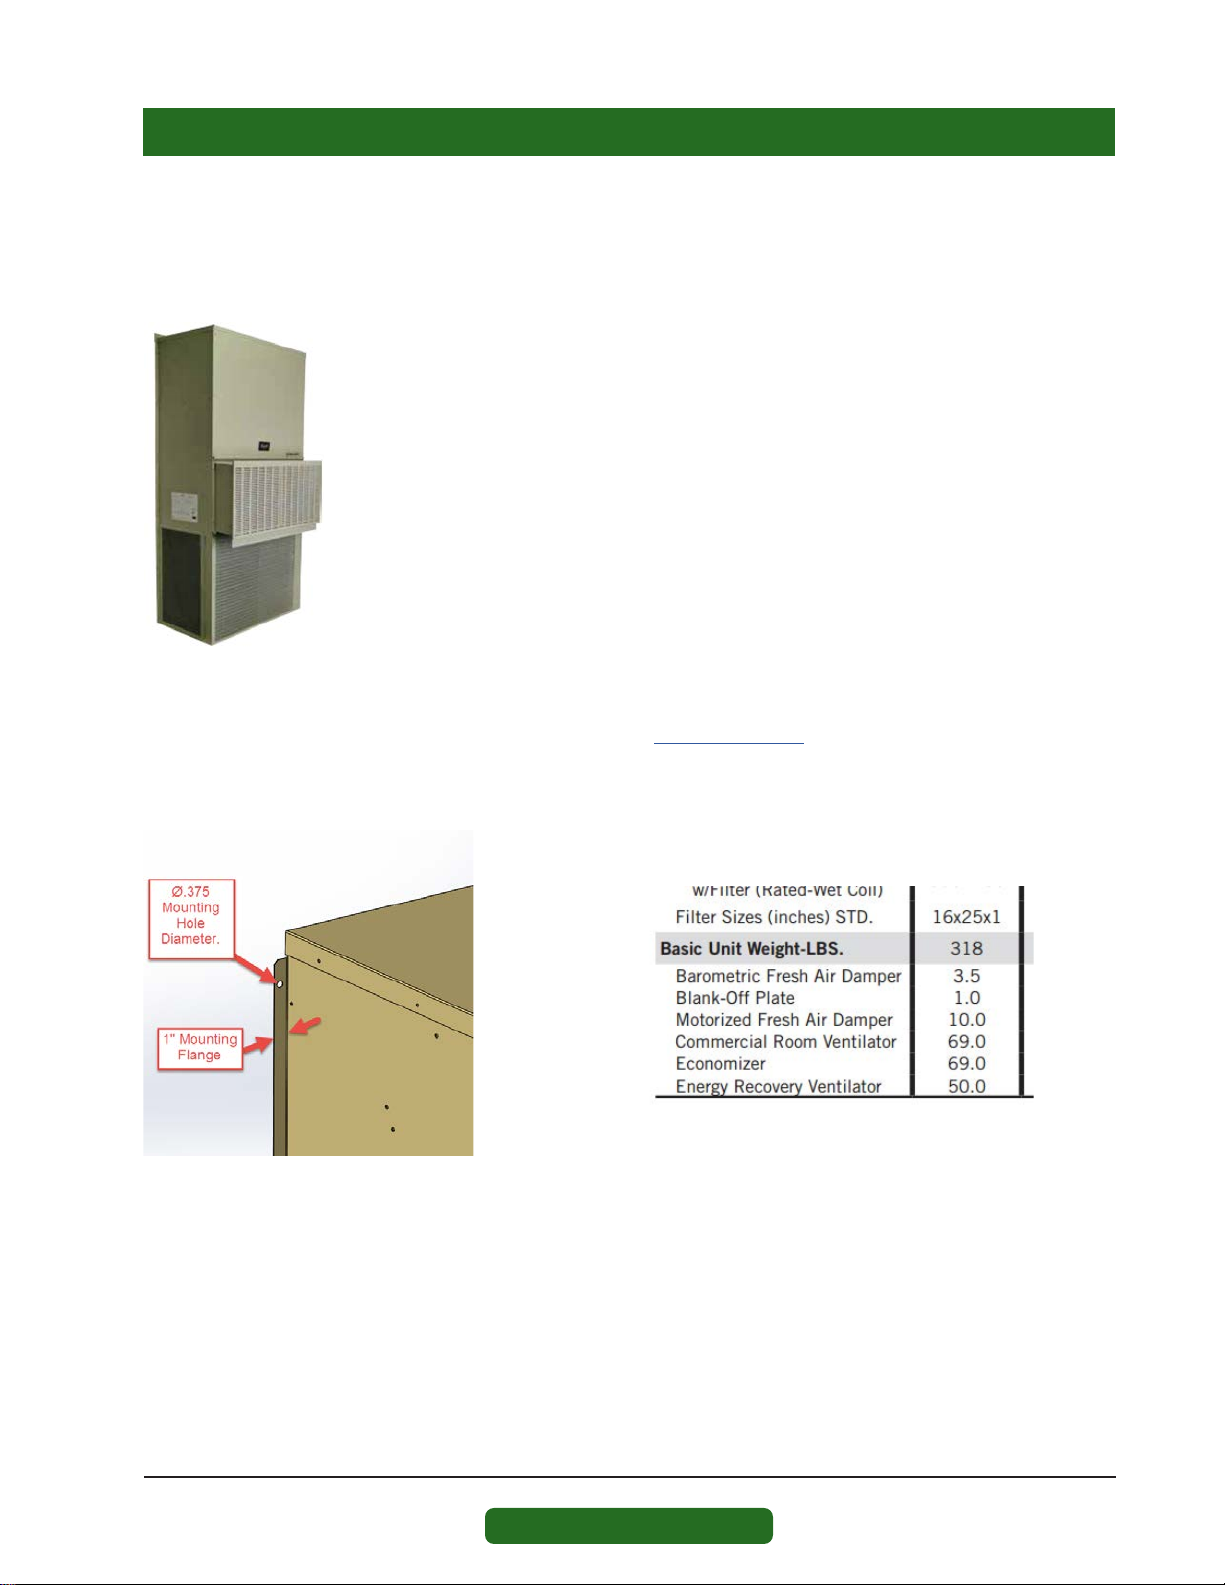
WALL MOUNT Products – Mounting the Product on
Wall Surface .........................................................5
WALL MOUNT Products – Clearances for Outdoor
Condenser Fan Airow ...........................................6
WALL MOUNT Products – Clearances for Indoor
Supply and Return Airow......................................6
WALL MOUNT Products – Condensate and Defrost
Drainage ..............................................................7
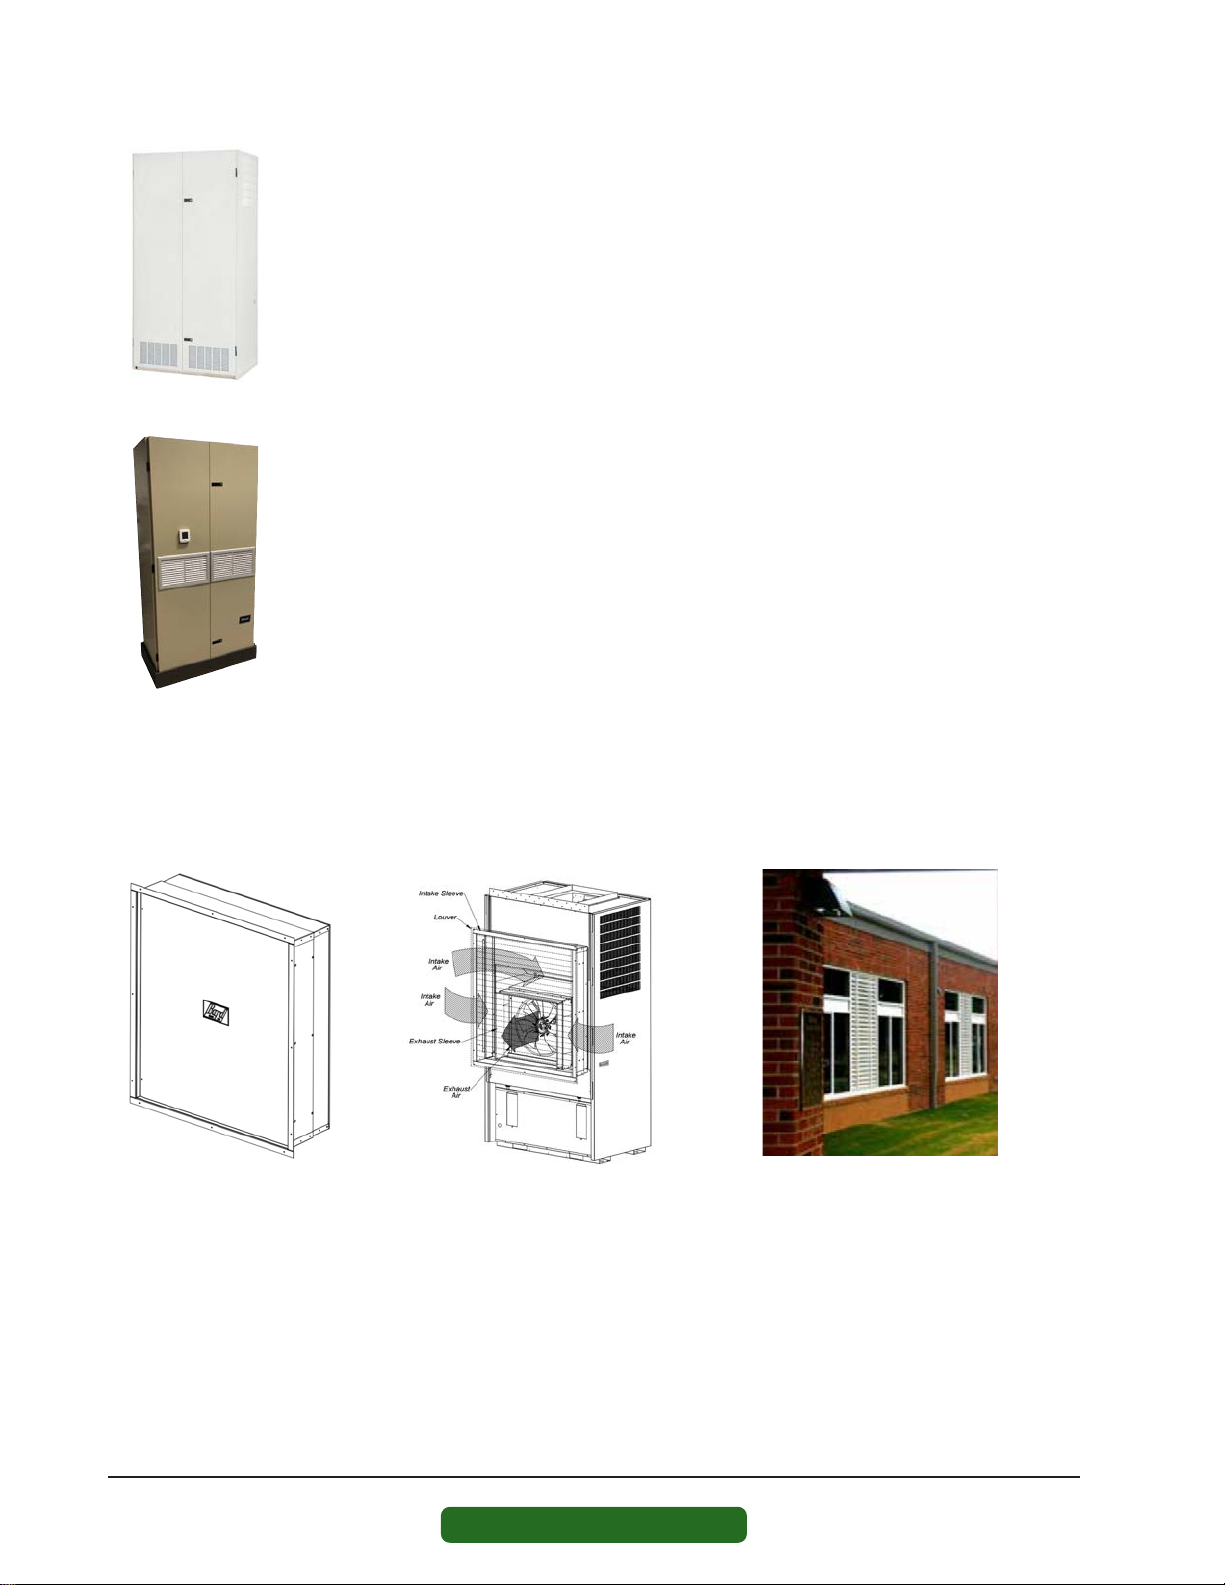
I-TEC and Q-TEC Products – Installing the Product
Inside a Room ......................................................8
I-TEC and Q-TEC Products – Clearances for Outdoor
Condenser Fan Airow ...........................................8
I-TEC and Q-TEC Products – Clearances for Indoor
Supply and Return Airow......................................9
I-TEC Air Path................................................9
Q-TEC Air Path...............................................9
I-TEC and Q-TEC Products – Condensate Drainage .10
All Products – Power Supply Verication................11
Field-Supplied Voltage ..................................11
Single and Three Phase Power .......................11
Hertz (Frequency).........................................11
Unit Maintenance .......................................................12
All Products – Filters and Filter Servicing ..............12
Outdoor Unit Wall Mount Room Air Filters.......12
WALL MOUNT Products – Filters and Filter
Servicing............................................................13
I-TEC Indoor Products – Filters and Filter
Servicing............................................................14
Q-TEC Indoor Products – Filters and Filter
Servicing............................................................15
All Products – Coil Cleaning .................................16
Equipment Corrosion Protection.....................16
All Products – Condenser Airow ..........................17
Unit Operation ............................................................18
Air-to-Air Cooling Products (Air Conditioners) .........18
Air-to-Air Cooling and Heating Products
(Heat Pumps) .....................................................18
Cooling Mode ...............................................18
Heating Mode ..............................................18
Water-to-Air Cooling and Heating Products
(Geothermal Heat Pumps)....................................19
Cooling Mode ...............................................19
Heating Mode ..............................................19
Water Supply Systems...................................19
Dehumidification and Ventilation Operation.......20
Dehumidication (Air-to-Air or Water-to-Air
Systems) ............................................................20
Ventilation Options (Air-to-Air or Water-to-Air
Systems) ............................................................20
Troubleshooting .........................................................21
All Units – Troubleshooting ..................................21