Barista Core All Grind User manual
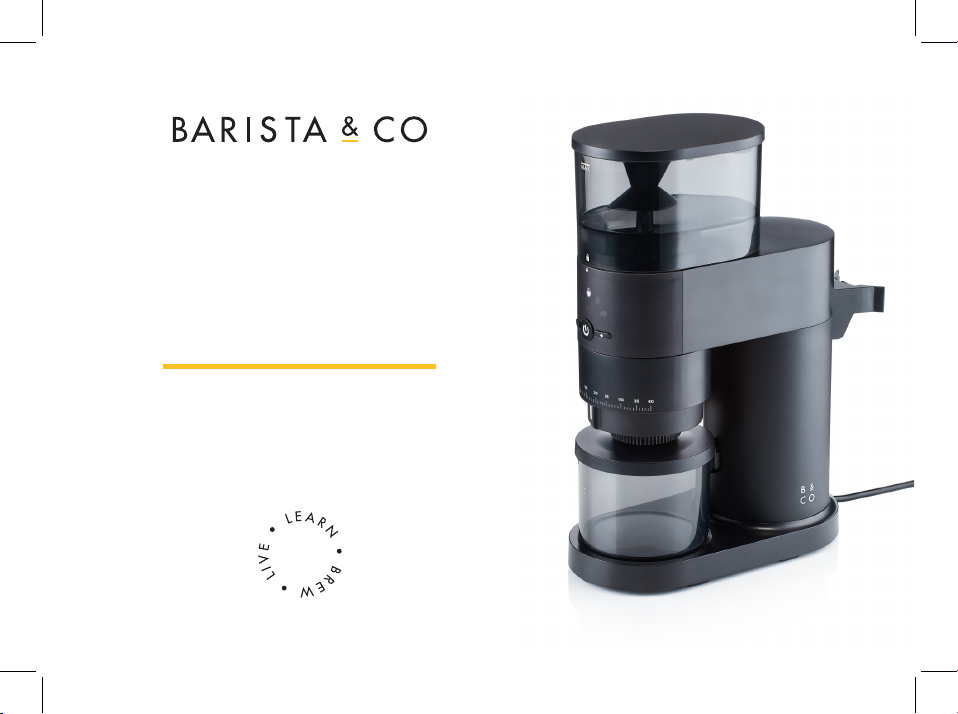
Core All Grind
User Manual

1
Contents
Content ...................................................................... 1
Important Safeguards ......................................................... 2
Know Your Core All Grind ......................................................4
Before First Use ...............................................................6
Operating The Core All Grind ...................................................6
Grinding Coffee Beans with the Storage Container ......................................................................................... 6
Grinding Coffee with the Portafilter Attachment and Dispenser ...................................................................... 11
Cleaning And Maintenance .....................................................12
Grind Tips & Settings ..........................................................13
My Grind Settings .............................................................14
Disposal .....................................................................15
Don’t forget to sign up to our Home Brew Coffee Club
for brewing tips, special offers and your warranty.
English

2 3
Important Safeguards
Before using your Core All Grind, the following basic precautions should always be followed including the
following:
1. Read all instructions.
2. Before use check that the voltage of the wall outlet corresponds with the one shown on the rating plate.
3. Do not operate the grinder if it has been dropped or damaged.
4. If the cord or plug is damaged it must be replaced by an authorised service agent or a qualified technician.
5. Unplug from outlet when not in use, before putting on or taking off parts, and before cleaning.
6. Please take care when handling the grinder unit head, emptying the bowl and during cleaning.
7. Do not let the cord hang from a table or bench and avoid hot surfaces such as cookers.
8. Do not immerse the Core Grinder in liquid or place in the dishwasher. All components should be wiped clean
only.
9. The Core All Grind should never be used by children and ensure close supervision if it is in use near children.
10. Ensure fingers are kept away from moving parts and do not attempt to remove parts unless the power is
disconnected.
11. Do not remove any components (including the storage and hopper) until the burr grinder has stopped
completely.
12. Do not attempt to operate without the hopper being in place.
13. Do not turn on the grinder until the hopper has been loaded. Running with an empty load can damage the
burr grinder and reduce the lifetime of your grinder.
14. Immediately turn off the grinder if you hear an abnormal sound during grinding, the grinder seems hot
to touch or there is smoke during use. Contact hello@baristaandco.com so guidance from an authorised
service agent can be provided.
15. Ensure the grinder is cleaned on a regular basis and there are no foreign objects in the burr grind
mechanism. Never clean when the power is connected.
16. Do not disassemble, repair or rebuild the burr grinder head unit. If damaged or worn a replacement should
be purchased.
17. Do not plug and unplug the grinder with wet hands or any other wet material such as a cloth.
18. Do not drag, bend or twist the power cord.
19. Do not shake or knock the grinder at any point including cleaning.
20. Check grinding chamber for presence of foreign objects before use.
21. This appliance is not intended for used by persons (including children) with reduced physical, sensory or
mental capabilities, or lack of experience and knowledge.
22. The grinder should only be used to grind coffee at home and is not for commercial use.
23. Do not use outdoors.
24. Misuse and failure to follow the grinder safeguards can cause injury.
English
4 5
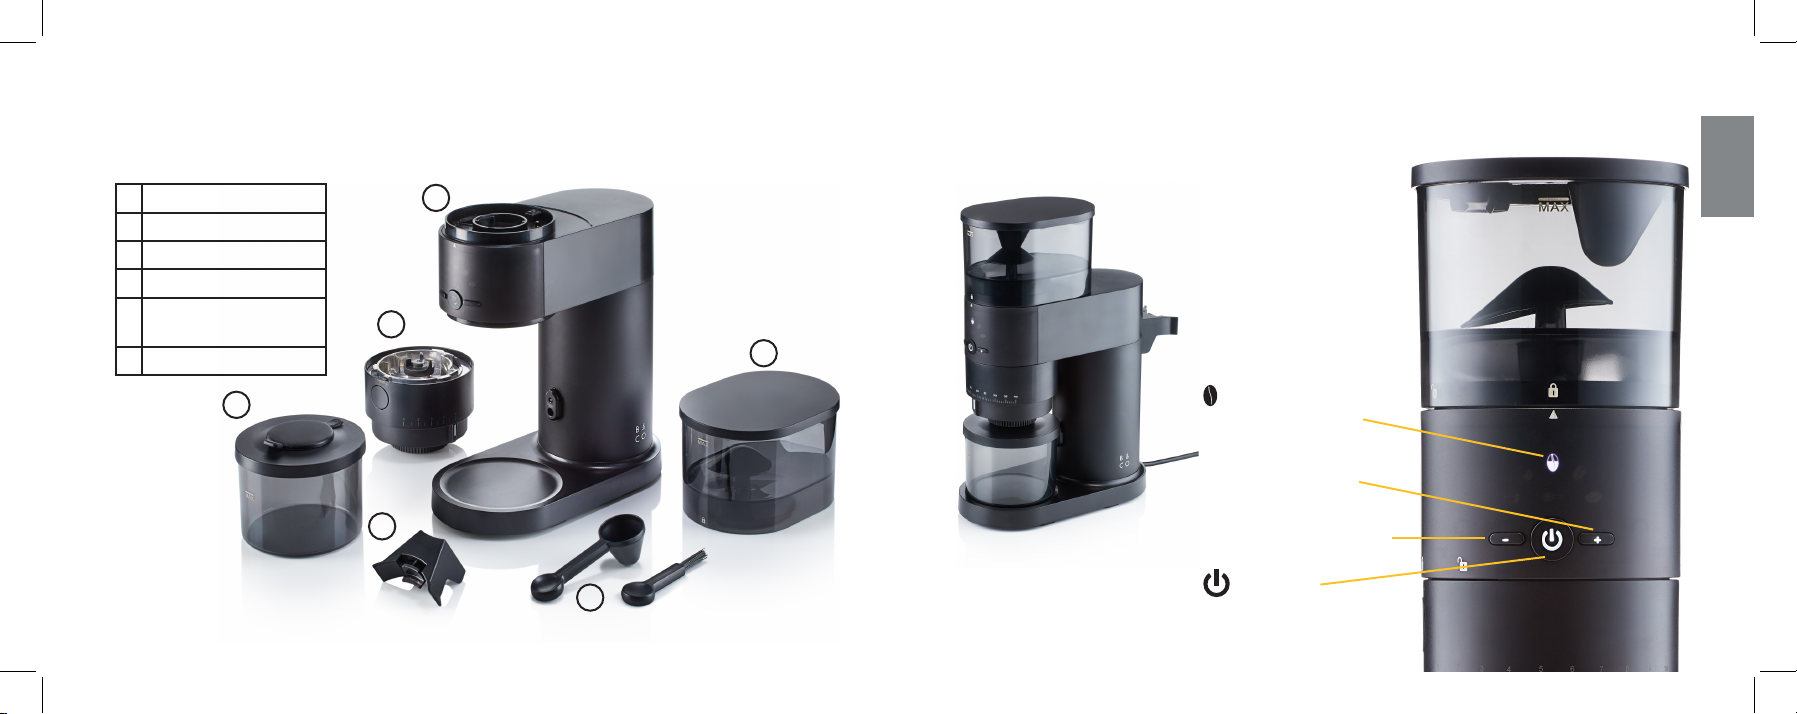
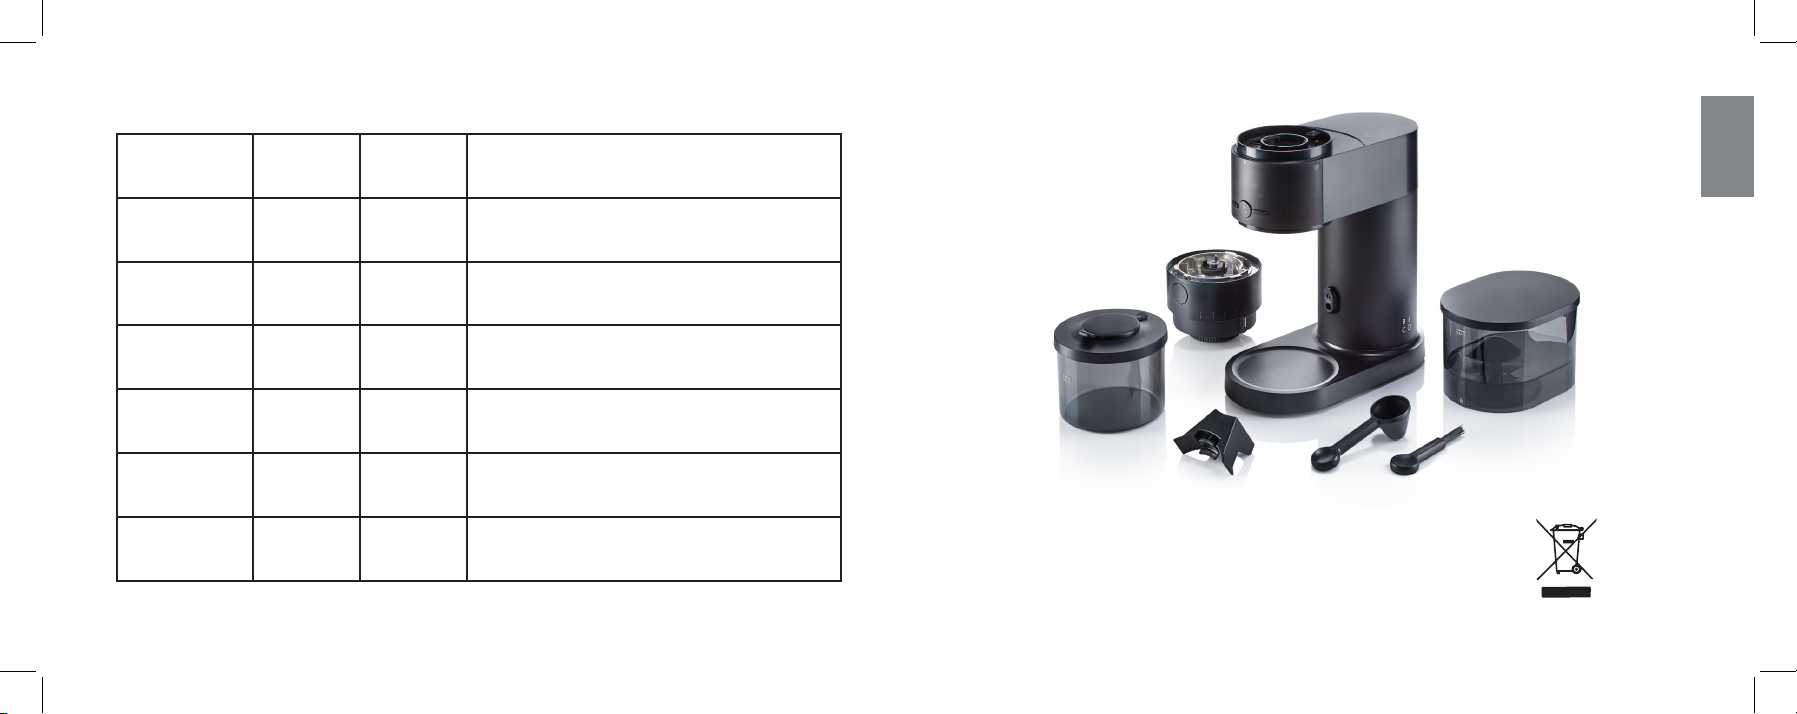
Know Your Core All Grind
Control Panel
Button increases the grind
time by 10 seconds
+
Button decreases the
grind time by 10 seconds
-
Start / Stop
Ground Coffee Indicator.
10 second increment
1
2
3
6
4
5
1 Main Body
2 Grinder Unit
3 Ground Coffee Container
4 Portafilter Attachment
5 Measure Scoop and
Cleaning Brush
6 Bean Hopper
English
6 7
Grinding Coffee Beans with the Storage Container
Operating The Core All Grind
Before First Use
1. Please recycle all the relevant packaging materials.
2. Remove any dust that may have accumulated during storage and packaging.
3. Rinse the bean hopper and ground coffee container with water and then dry thoroughly.
CAUTION: Never immerse the grinder in water and do not fill the grinder unit with water for cleaning.
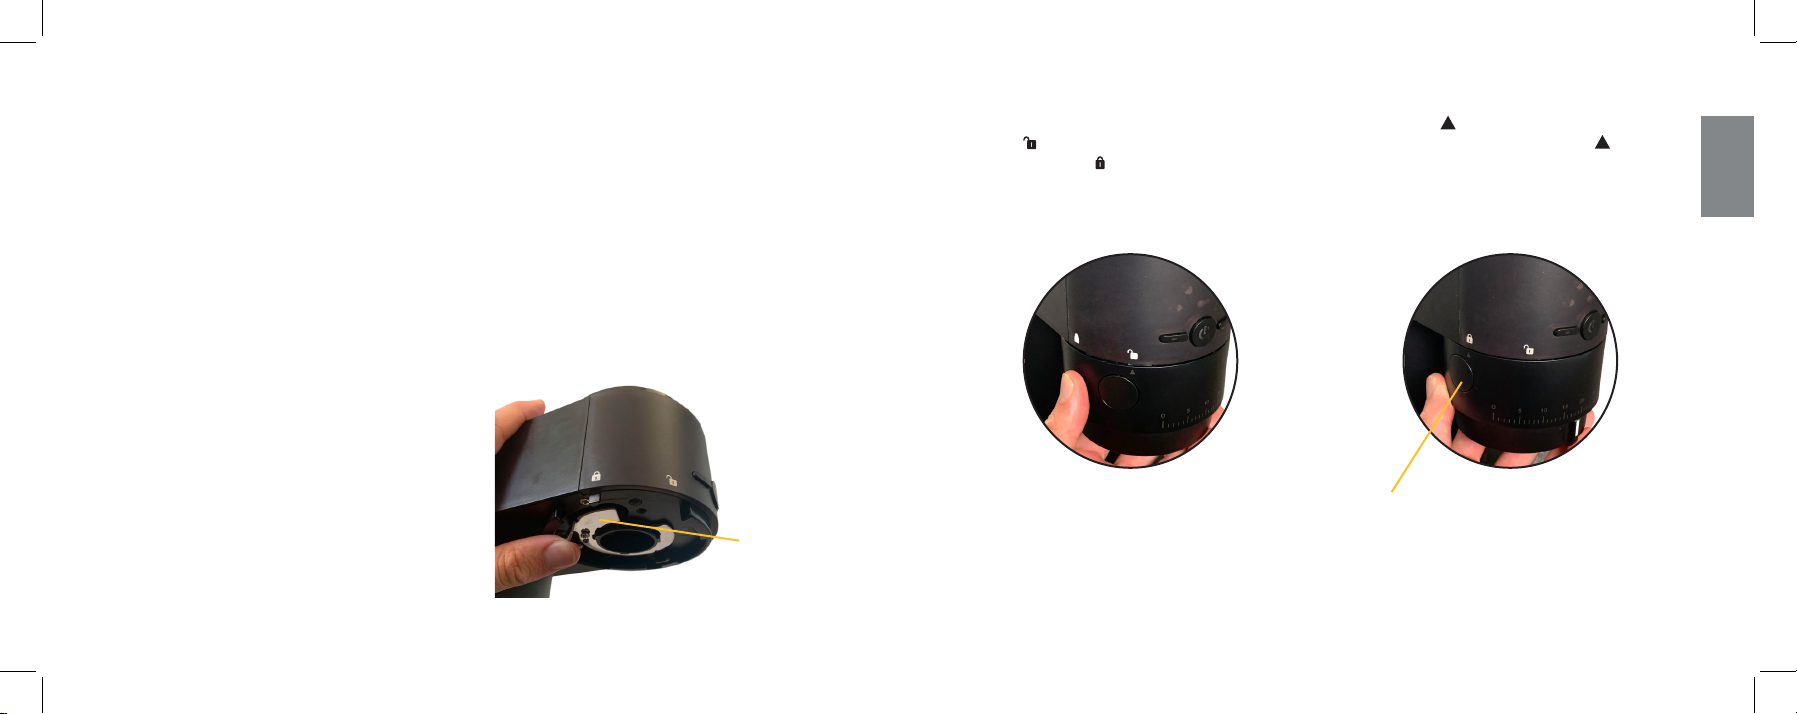
1. Place the coffee grinder on a flat surface.
2. Check and make sure that the coffee
channel outlet cover is closed (see Fig.1),
3. Install the grinder unit onto the main body as follows: Firstly, align the “ ” symbol on the grinder unit with
the “ ” symbol on the main body (see Fig.2), then rotate the grinding unit clockwise until the “ ” symbol
aligns with the “ ” symbol (see Fig.3) . If you want to remove the grinding unit, firstly run the grinder to
finish grinding and beans through, then press down the release button and simultaneously turn the unit
anticlockwise to remove from the main body.
Fig.2 Fig.3
NOTE: The grinding unit is equipped with a microswitch
so that it must be assembled in position before operation,
or the appliance will not work.
Release Button
Fig.1
Coffee channel
outlet cover
Visit baristaandco.com or Barista & Co on YouTube
to watch our first use video.
English
8
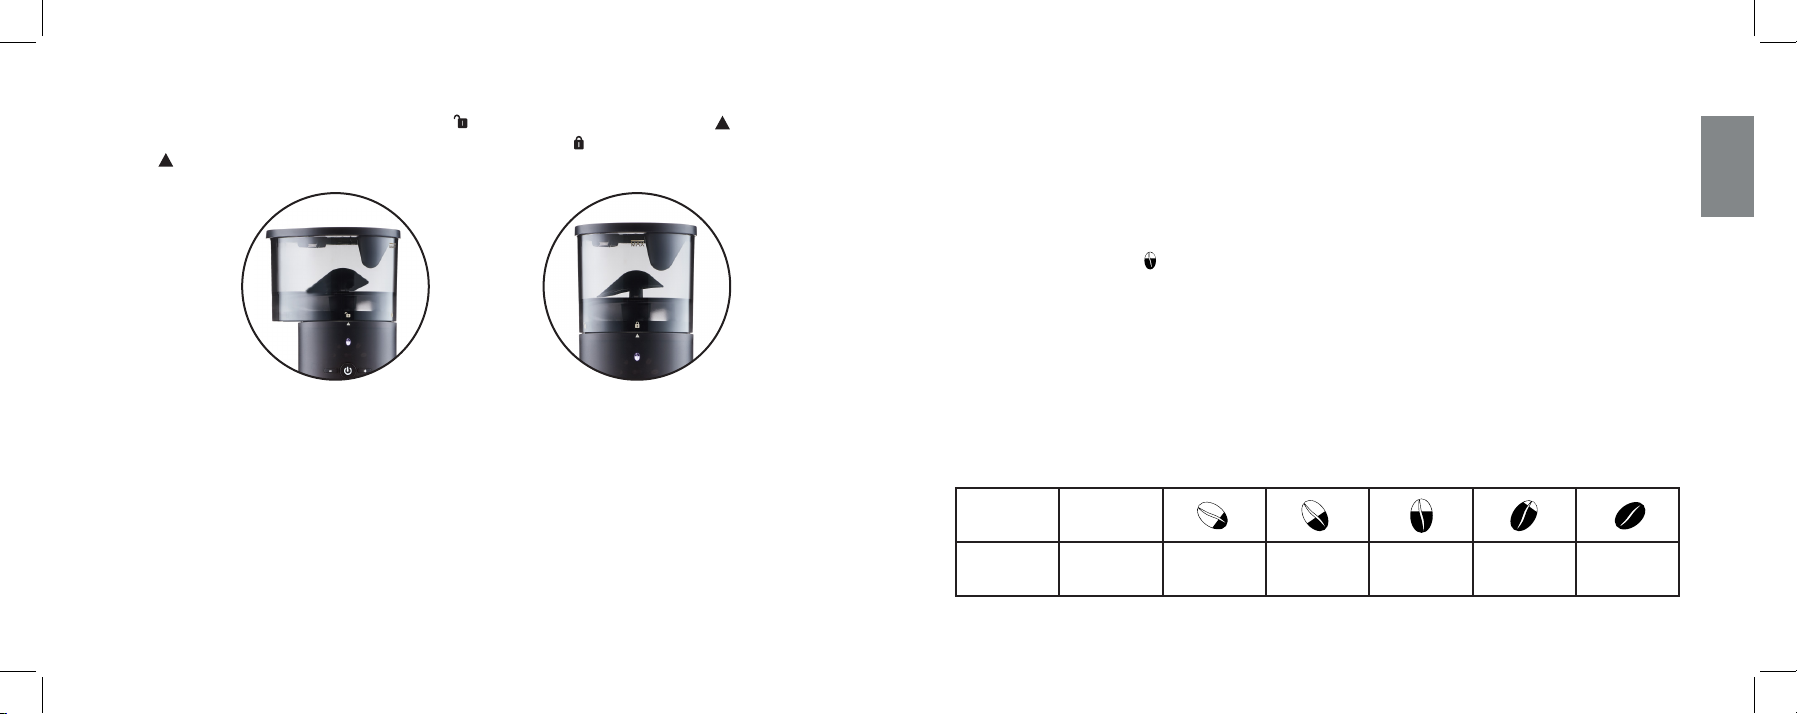
4. For bean hopper attachment: Firstly, align the “ ” symbol on the bean hopper with the “ ” symbol on the
main body (see Fig.4), then rotate the hopper clockwise until the “ ” symbol on the hopper aligns with the
“ ” symbol on the main body (see Fig. 5). Reverse this method to remove the bean hopper.
5. Add your desired amount of whole bean coffee to the coffee hopper or to the maximum fill line
(approximately 240g). You can also add whole bean coffee to the hopper when using weighing scales and
then attach to the grinder. The automatic shut off valve will prevent the coffee beans from escaping.
6. If using with the storage container remove the silicone lid and place the storage container on the grinder
base. The opening of the storage container should be directly below the grinder to avoid spillage.
7. Always ensure the storage holder base section of the grinder is clean and free of ground coffee to prevent
abrasion and ensure the storage container fits securely.
8. If using your own storage container ensure it is centered under the grinder outlet.
9. Turn the grind control dial on the grinder to select your desired grind size. Turn left (towards 0) for a finer
grind size and right (towards 40) for a coarse grinder. You can find a grind size guide on page 12.
10. The ground coffee amount is determined by grinding time, therefore, you can press “+” or “-” button to
select your desired grinding time by referring to Table 1. If you do not want to adjust the grinding time, the
appliance will work under the default grind time of one minute.
11. Connect the grinder to your power source, all the indicators will blink three times, then the corresponding
grind time indicator of “ ” lights up.
12. Press the Start/Stop button to start grinding your fresh coffee.
13. When desired grinding time is reached, the coffee grinder will stop working automatically. All the indicators
will extinguish and the grinder will enter into sleep mode if no operation is triggered within 90 seconds. To
reactivate the appliance, press any button.
14. If you would like to grind based on your own time you can use the manual on off button rather than fixed
increments. For those who grind on weight this can be achieved by removing the hopper and using weighing
scales.
15. Turn off the grinder, slide out the storage container and replace the silicone plug for storage or remove the lid
to serve immediately.
Icon
Grind Time
Setting
1 Minute
(Defult)
10 Seconds 20 Seconds 30 Seconds 40 Seconds 50 Seconds
Table 1
Fig.4 Fig.5
English
10 11
IMPORTANT NOTES:
1. The grinder will power down and enter sleep mode after 90 seconds
2. You can press the Stop button at any time during the grinding
3. The grinder should not be used for more than a total of 6 minutes within a 10 minute period. Each grind
should be no more than 90 seconds with a rest after each grind of 90 seconds.
4. If the grinder is left running for 3 minutes it will automatically power down for 30 minutes to prevent over
heating.
5. The maximum capacity is approximately 110g of fine grind coffee, please ensure the container does not
exceed the maximum fill line if adding multiple grinds
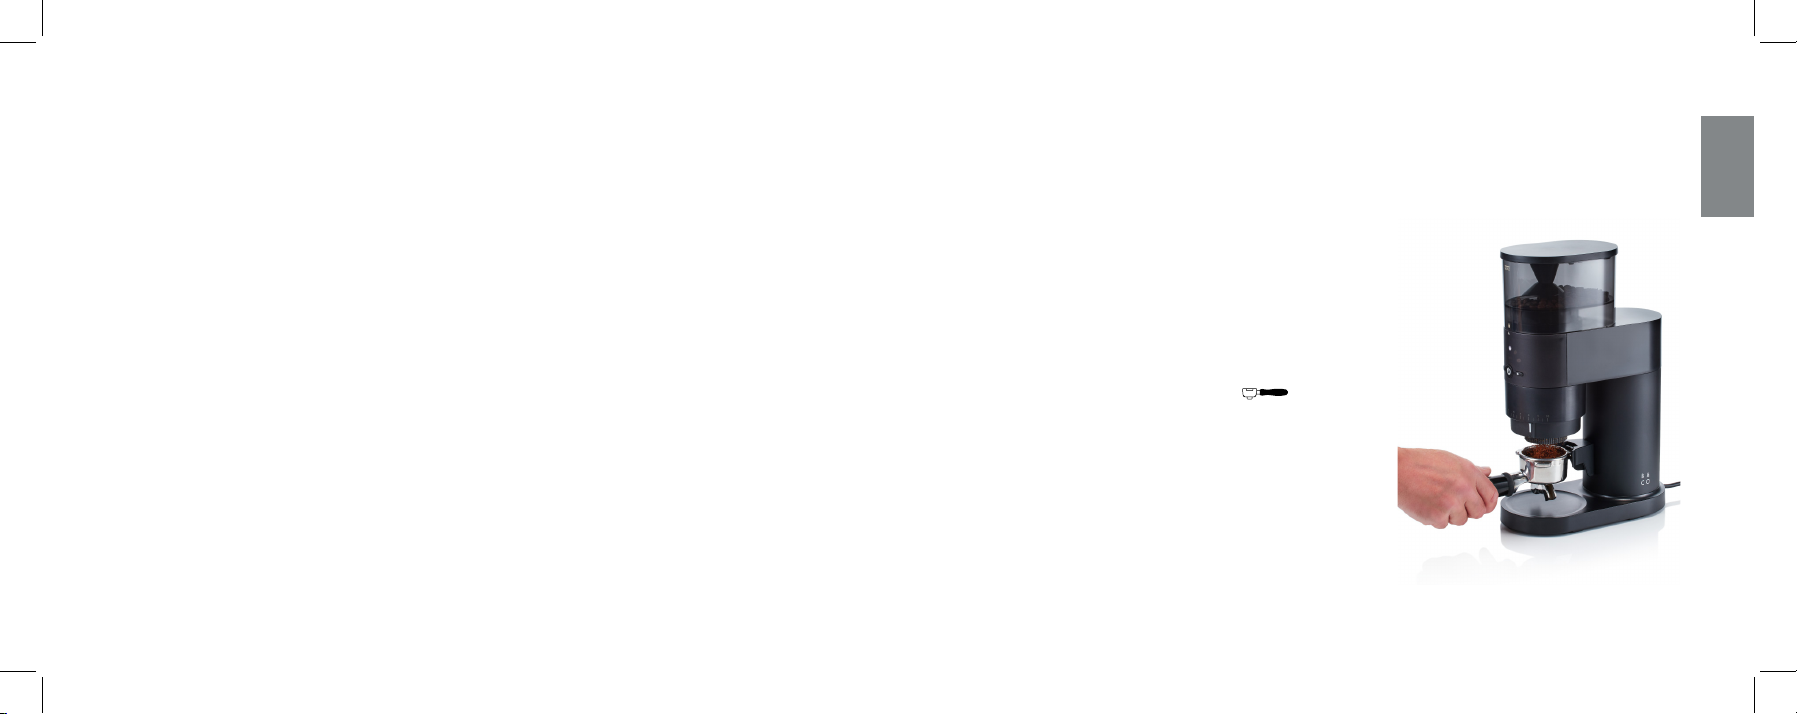
Grinding Coffee with the Portafilter Attachment and Dispenser
1. Follow the operations of Step 1-6 of “GRIND COFFEE
BEANS AUTOMATICA LY”.
2. Attach the portafilter cradle.
3. Turn the grind control dial to your desired setting for
espresso.
4. Ensure the machine is plugged into the power supply.
5. Place the portafilter into the cradle and gently push towards
the grinder (see Fig. 6). The indicator “ “ and the
grinder will turn on.
6. When you have your desired amount of ground coffee,
remove the portafilter and the machine will stop grinding.
All the indicators will extinguish, and the machine will enter
sleep mode if nothing is triggered within 90 seconds.
The Core All Grind can also grind directly into a portafilter for espresso brewing. The attachment is stored on the
back of the grinder when not in use. The attachment is triggered when the portafilter is put into the cradle, to stop
simply remove. The grinder also has a removable dispenser allowing coffee to be evenly distributed when using
with portafilters of various sizes.
Top Tip:
The included storage container has UV protection, but we
always recommend storing your coffee in a cool dark place.
Try to grind fresh for the best results.
Fig.6
English

12 13
1. Disassemble the hopper by following the operation on page 7, and then rinse the hopper, ground coffee
container and lid with water.
2. Disassemble the grinder unit by following the operation mentioned on page 7, then detach the ground coffee
outlet cover and clean the residual coffee on the grinder blades with the brush provided. Finally, reattach the
grinder unit.
3. The grinder unit is NOT dishwasher safe
4. Wipe the external body with a damp cloth to clean and leave to dry or use a cloth to dry.
5. Store it in a dry and cool environment.
CAUTION:
Unplug the grinder and allow it to cool before cleaning. To prevent electrical shock the power cord, plug and
electrical grinder unit should not come into contact with water. Do not use water to clean the conical grinder burrs.
Dialing In Your Grind
Many variables, such as temperature, can impact your grind so we suggest using the notes area to mark your
grind settings. You can also expect the burrs to wear over time and you may need to adjust your settings
accordingly and eventually replace the burrs. This is an approximate guide and may vary depending on your coffee
maker and brew preference. The Core All Grind can grind from 250 microns to over 1000 microns with the greatest
consistency between 400 and 800 microns. This means the grinder can be used for espresso and offers even
more consistency for other manual brewers.
For a further guide on micron grinding sizes, ratios, brew time and water temperature please visit the learning
section at baristaandco.com.
NOTE:
Always operate with caution and remember the grinder has sharp moving parts so care must always be
taken when in use and during cleaning.
Troubleshooting
If the grinder stops working, please visit baristaandco.com for troubleshooting suggestions. If the problem
Cleaning And Maintenance Grind Tips & Settings
English
Coarse Grind
Dial Setting: 15- 25
Cafetiere / One Brew /
Brew It Stick
Cold Brew Coarse Grind
Dial Setting: 15- 25
Cold Brew
Medium Coarse Grind
Dial Setting: 10 - 20
Filter / Twist Press
Medium Fine Grind
Dial Setting: 5 - 10
Stovetop
Fine Espresso Grind
Dial Setting: 0 - 5
Espresso Machine
14 15
Disposal
You can help protect the environment! Please remember to respect the local regulations
and hand in any broken electrical equipment to an appropriate waste disposal center.
Coffee Grind
Setting
Date Notes
..................... ................ ..../..../....
................................................................
................................................................
..................... ................ ..../..../....
................................................................
................................................................
..................... ................ ..../..../....
................................................................
................................................................
..................... ................ ..../..../....
................................................................
................................................................
..................... ................ ..../..../....
................................................................
................................................................
..................... ................ ..../..../....
................................................................
................................................................
My Grind Settings
English
Table of contents


