Barq Myron Mixon User manual

1
Getting Started with
your Myron Mixon
BARQ Pellet Grill
Please read all instructions before assembly
and installation of your Myron Mixon
BARQ Pellet Grill. Failure to follow these
instructions could result in property
damage, bodily injury or even death.
Contact your local building or fire official
about restrictions and installation
inspection requirements in your area.
A MAJOR CAUSE OF FIRES IS
FAILURE TO MAINTAIN REQUIRED
CLEARENCE (AIR SPACES) TO
COMBUSTIBLE MATERIALS. IT IS OF
UTMOST IMPORTANCE THAT THIS
PRODUCT BE INSTALLED ONLY IN
ACCORDANCE WITH THESE
INSTRUCTIONS.
SAVE THESE INSTRUCTIONS
DANGER! Hazardous voltage is present
which can shock, burn or cause death.
Disconnect the power cord before servicing the
Grill unless otherwise noted in the Owner’s
Manual.
DANGER! Never use or store flammable
liquids near the Grill.
DANGER! Never use gasoline or lighter fluid
to manually light your Grill.
WARNING! When operating this Grill,
maintain a MINIMUM distance of 12” from
the Grill to combustibles.
WARNING! When operating this Grill under
overhead combustibles a MINIMUM of 40
inches is required.
WARNING! Assemble and operate this Grill
ONLY per the instructions in this Owner’s
Manual.
WARNING! This Grill is intended for
OUTDOOR USE ONLY.
WARNING! Never use heating fuel pellets in
the Grill, due to potential hazardous
contaminants and additives that may be
present.
WARNING! Use ONLY High Quality Food
Grade BBQ Pellets. We Recommend Myron
Mixon BBQ Pellets.
CAUTION! Always store wood pellets in a
dry location, away from heat-producing
appliances and other fuel containers.
CAUTION! Keep the Grill clean – See the
cleaning Instructions in this Owner’s Manual.
CAUTION! Do not use accessories not
specified for use with this Grill.
WARNING! Many parts of the Grill will
become very hot during operation. Care must
be taken to avoid burns, both during operation
and afterwards, while the Grill is still hot. It
should never be left unattended when young
children are present. Never move the Grill
when it is operating. Let it thoroughly cool
before moving or attempting to transport.
2
Unpacking & Assembly
1. Carefully cut straps and lift
cardboard upward and away from
the unit.
2. Remove bands securing the Grill to
the skid.
3. Lift the cook chamber lid and
remove the loose components.
4. Carefully roll the Grill off of the
skid.
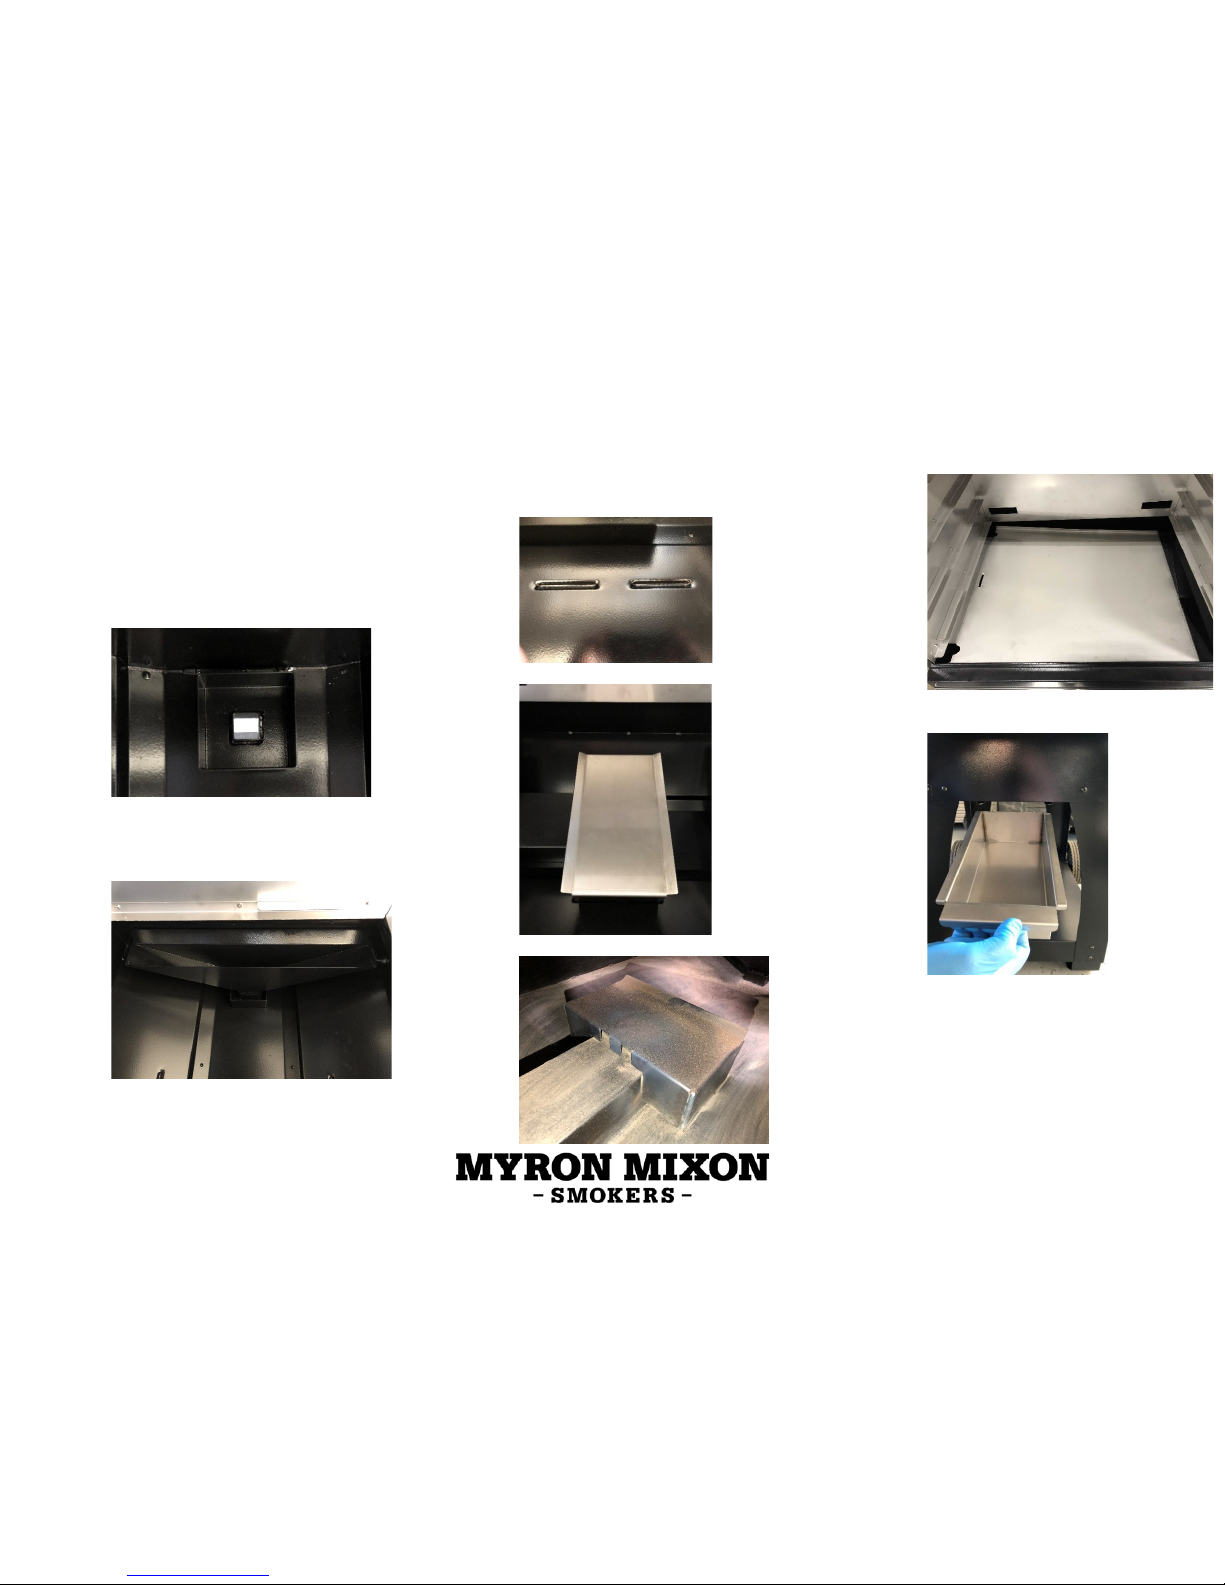
5. Install grease trap into square cut
out at the bottom right side of Grill.
6. Install grease funnel into the grease
trap. The flange on the grease
funnel should rest on the hem inside
of the cook chamber.
7. Install flame deflector. Rest the
flame deflector into the four
notches at the center of the cook
chamber. For the BARQ-3600,
make sure the open side of the
flame deflector is facing right and
the closed side is fitted into the
notches on the auger tube.
BARQ-1700, BARQ-2400:
BARQ-3600:
8. Install drip pan above the flame
deflector. Align the right flange
pointed downward and over the
grease funnel. The tab on the left
side of the cook chamber should fit
into the slot of the drip pan.
9. Slide grease pan into place from the
bottom right side of the grill.
10. Install racks in the cook chamber.

3
Initial Firing
•The initial systems check, ignition and
seasoning instructions are intended for
the first time firing up your Grill. The
ignition step should be followed
anytime you run out of pellets.
Initial Systems Check
1. Remove the cook racks, drip pan
and flame deflector from the cook
chamber.
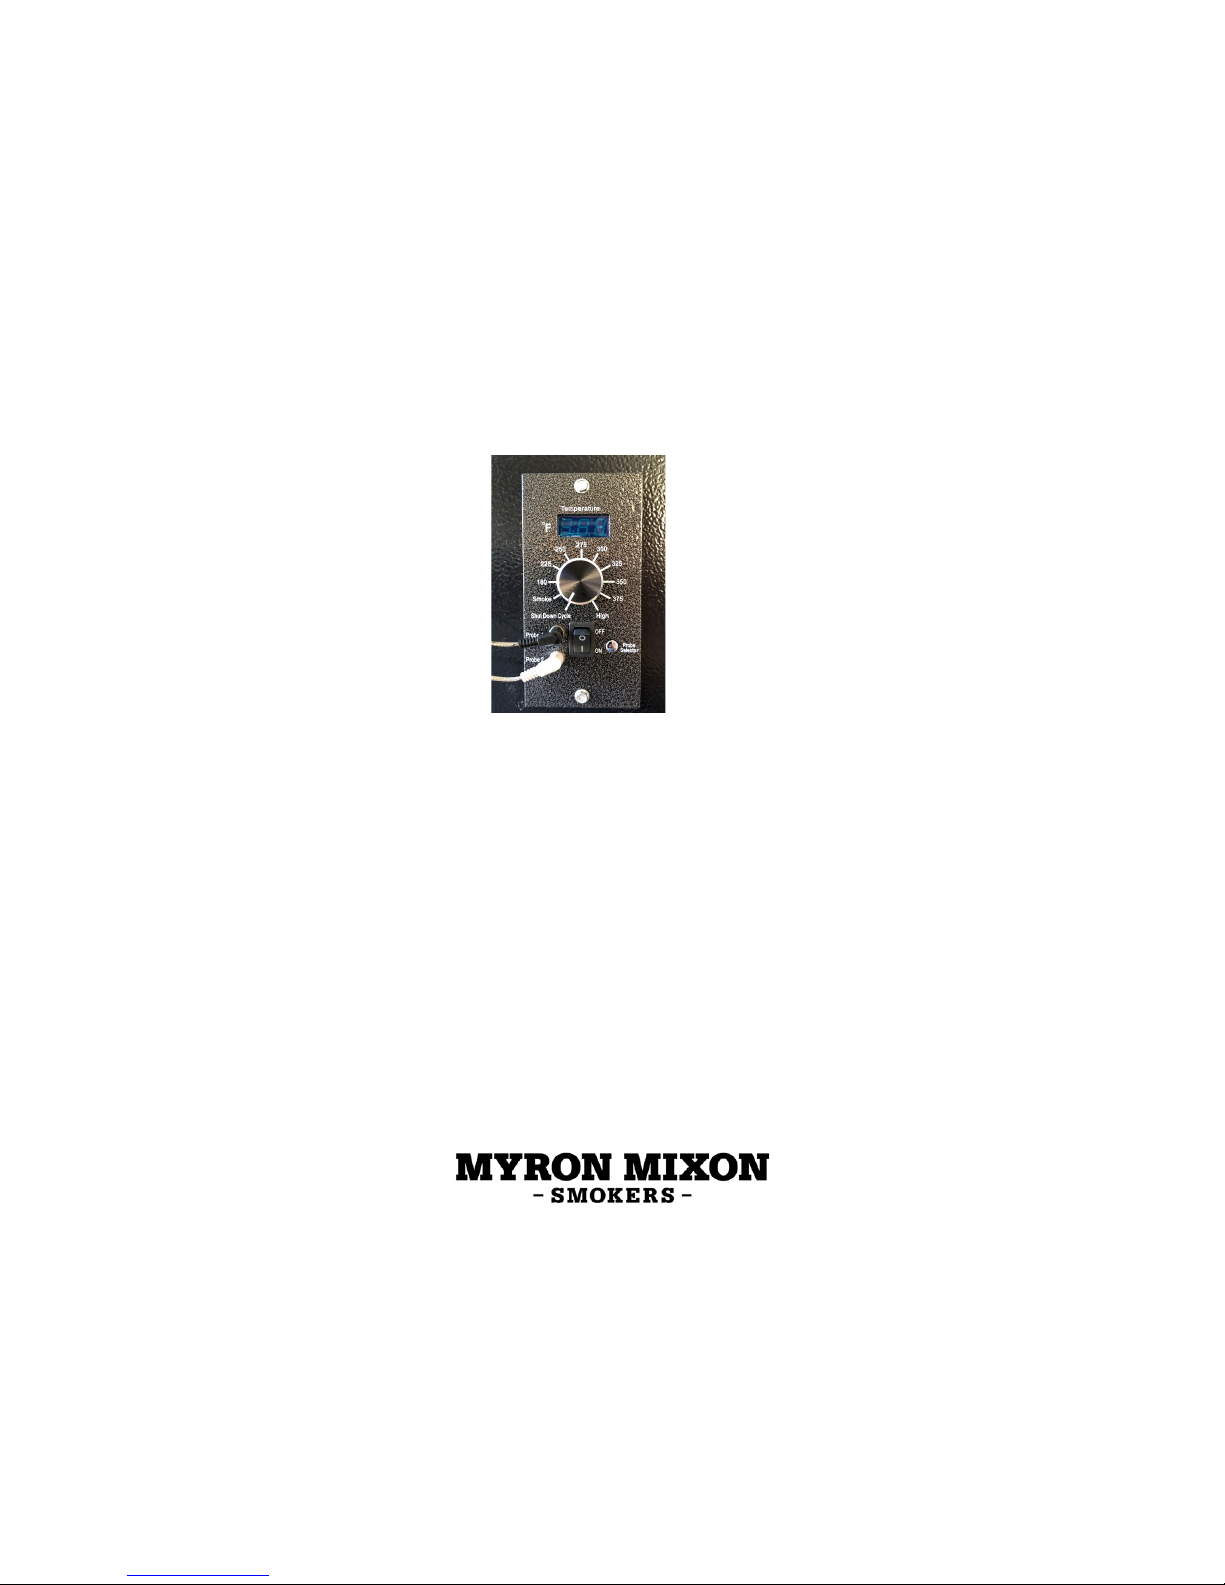
2. Making sure that the control switch
is in the OFF (o) position, plug the
cord into the receptacle on the Grill
and the other end into a grounded
electrical outlet.
3. Open the hopper lid, check that no
foreign objects are in the auger,
turn the control switch ON (-) and
the temperature knob to the
SMOKE setting. Confirm by
observation through the hopper lid
that the auger is turning.
4. Check for airflow, by placing your
fingers in the open space above the
firepot. Check that the ignitor has
turned red. CAUTION! Do not
touch!
5. Turn the temperature knob to
SHUT DOWN CYCLE.
Ignition
1. Fill the pellet hopper with high
quality food grade BBQ pellets. We
recommend Myron Mixon BBQ
Pellets.
2. Turn the temperature knob to HIGH
3. Wait for the pellets to begin falling
into the firepot. During initial
startup this will take a moment.
4. Once the pellets begin to fall, turn
the temperature knob to SHUT
DOWN CYCLE for a moment and
then to SMOKE.
5. Allow time for the pellets to come
to full flame. Once flames can be
seen from the firepot, turn the
temperature knob to SHUT DOWN
CYCLE. Let the Grill cool.
Seasoning the Grill
1. Reposition the flame deflector, drip
pan and cook racks.
2. While the cook chamber door is
open, set the temperature knob to
SMOKE. Within a few moments,
smoke should begin to flow into the
cook chamber.
3. Before cooking any food items for
the first time, the Grill should be
seasoned. To season your Grill, turn
the temperature knob to HIGH and
run for 45 minutes with the door
closed.
Time to Cook
1. See the Cleaning, Maintenance and
Best Practices section for helpful
tips that can be done prior to
cooking to ease clean-up.
2. Set to your desired temperature and
allow the Grill approximately 10
minutes to preheat with the door
closed.
4
Startup Instructions
1. With the cook chamber door open turn
the switch to the ON (-) position and
temperature knob to SMOKE. Within a
few moments, smoke should begin to
flow into the cook chamber.
2. Close the cook chamber door and set
the temperature knob to the desired
setting. Allow to preheat for
approximately 10 minutes before
placing food items into the cook
chamber.
3. The auger will operate continuously
until the selected temperature is
reached. The controls with then cycle
the auger on and off to maintain the
selected temperature.
4. If operating in SMOKE mode, the
auger will cycle 15 seconds on and 65
seconds off. Temperature control is not
available while operating in SMOKE
mode.
Meat Probes
1. Insert the meat probes into the
receptacles located on the lower left
side of the controller.
2. Insert the probes into the meat through
the cook chamber door. Closing the
door on the wires will not damage the
probes.
3. Be sure to insert the meat probe into the
thickest part of the meat.
4. When the meat probes are in use the
probe selector button on the controller
will allow for toggling back and forth
between the meat probe(s) and Grill
temperature.
Operating Tips
•The temperature knob can be adjusted
at any time during a cook to increase or
decrease the temperature.
•WARNING! Pellet Grill should never
be moved while it is hot. Prior to
moving make sure the fire is
completely out.
•DANGER! Never add pellets by hand
to the firepot. If the pellets run out
during a cook, let the Grill cool
completely and follow the initial firing
instructions.
•CAUTION! To avoid risk of grease
fire, be sure that the flame deflector is
properly installed prior to operation.
•CAUTION! Grease fires are caused by
improper maintenance and failing to
clean the drip pan, grease funnel,
grease trap and grease pan.
•In the unlikely event of a grease fire,
turn the control switch to the OFF (o)
position. Keep the cook chamber door
closed. If this does not extinguish the
fire, open the cook chamber door and
sprinkle baking soda on the fire. Keep
the door closed until the fire goes
completely out. CAUTION! Take
care to avoid burns.
5
Controller Safety Features
•The electronic control comes equipped
with safety features that allow for proper
operation.
•When the cook chamber temperature
stays below 125 degrees longer than 10
minutes the low temperature alarm will
activate reading LEr on the display. This
will cause all internal components to
shut down. This will display until the
main power is switched to the OFF (o)
position.
•When the cook chamber temperature
exceeds 550 degrees the high
temperature alarm will activate reading
HEr on the display. This will cause all
internal components to shut down. This
will display until the main power is
switched to the OFF (o) position.
Shutdown Instructions
1. When finished cooking, set the
temperature knob to SHUT DOWN
CYCLE. The fan will run for 10
minutes to burn pellets remaining in the
firepot.
2. Once the fan stops running, switch the
control switch to the OFF (o) position
and unplug the unit.
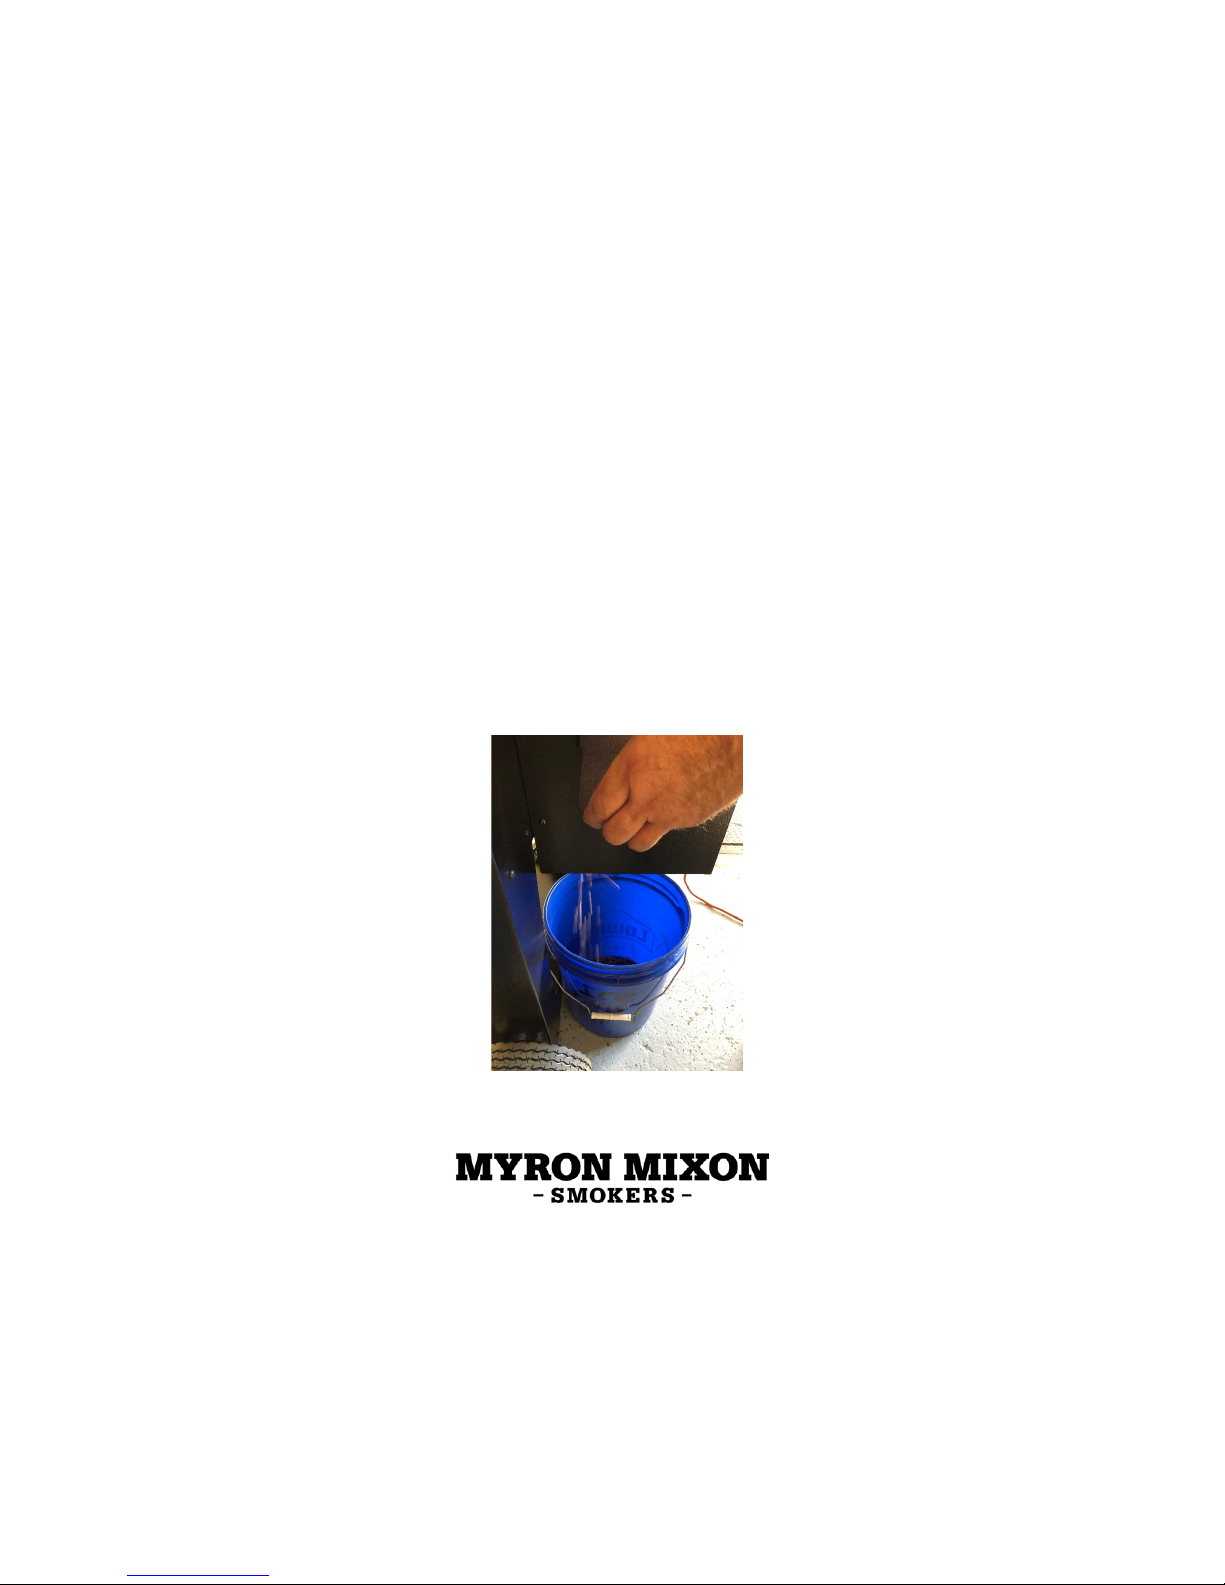
3. Empty the hopper of all pellets. The
cleanout door is located on the lower
rear of the hopper. Place a large
container under the door. Lift and pull
the cleanout leaver and allow the
pellets to fall into container. Store
pellets in a dry location. Push in and
down on the leaver to close the door.
4. We recommend removing the pellets
left in the auger, this can be done by
powering the Grill back on and setting
the temperature knob to HIGH. Allow
the auger to run until no pellets remain.
Turn the temperature knob to SHUT
DOWN CYCLE. Once powered down,
unplug the unit.
5. Empty and clean the grease trap. This
must be done after ever cook. See
maintenance section for further
cleaning details.
6
Cleaning, Maintenance and
Best Practices
Creosote and grease accumulation are a
normal result while using any wood burning
appliance but should be removed to avoid
risk of fire and to keep your grill running at
top performance.
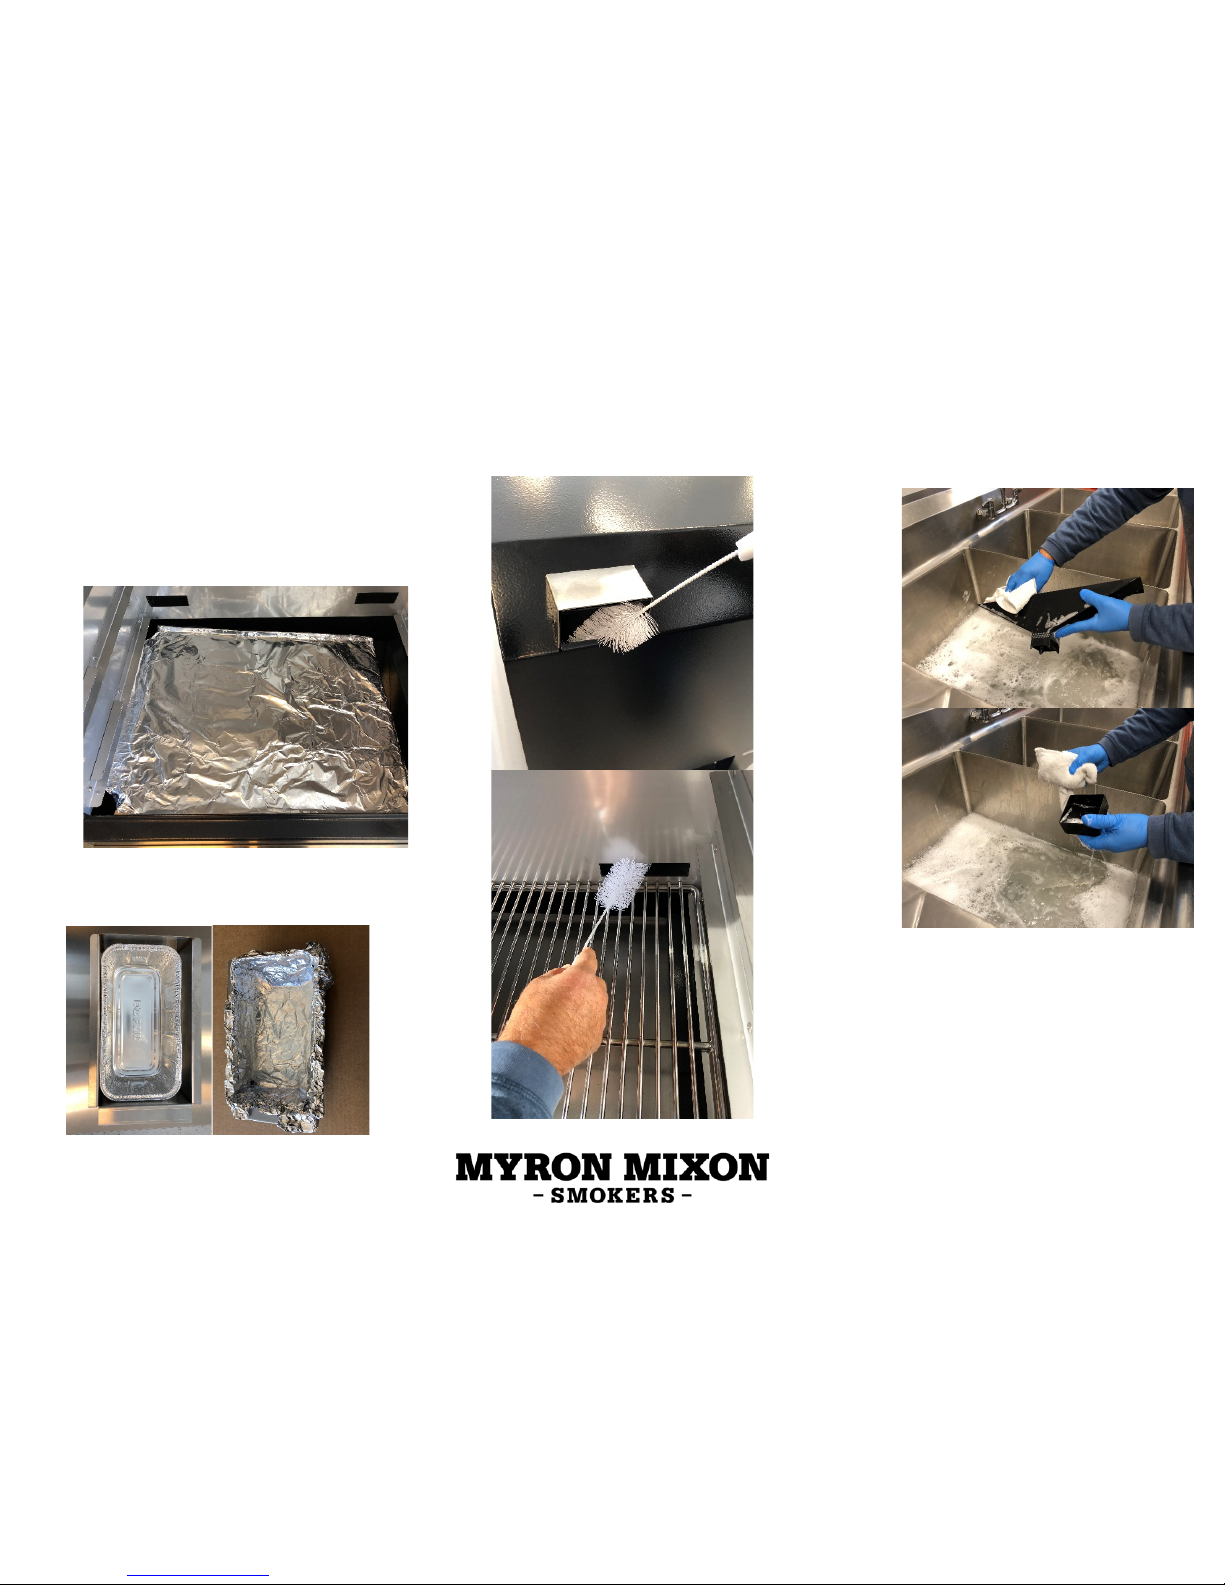
•We recommend lining your drip pan
with foil for easier cleanup.
•We recommend using a loaf pan in
your grease pan or lining with foil for
easier cleaning.
•The flue exhaust should be inspected at
least two times a year for buildup and
cleaned, as needed. It should be cleaned
with a bristle brush that can reach the
entire length of the flue. Debris should
be removed with a towel.
•The grease funnel, grease trap and
grease pan should be cleaned after
every cook with a mild dish soap, water
and a soft cloth. Be sure the Grill is in
the OFF (o) position and unplugged
from a power source prior to cleaning.
•Cook racks should also be removed and
cleaned with a mild dish soap and
warm water.

7
•The outside of the Grill should be
wiped down with a cloth dampened
with water and a mild dish soap. Do not
use oven cleaner or other abrasive
cleaning methods.
•If the Grill is stored outside, be sure
that no water penetrates the pellet
hopper. When wet, wood pellets
expand and can cause an auger jam.
See shut down instructions for
removing pellets after every cook.
•Ash should be removed from the
firepot regularly as excessive build up
can smother a fire. When your Grill is
cold, remove the racks, drip pan, and
flame deflector to access the firepot.
Using a vacuum cleaner remove ashes
from the firepot and surrounding area.
Ash should be removed from the
vacuum cleaner and placed in a metal
container with tight fitting lid, free of
combustible material.

8
855-464-7853
Mon-Fri: 8am – 5pm
180 Cross Road
Waterford, CT 06385
www.myronmixonsmokers.com
Table of contents
Popular Grill manuals by other brands


Brinkmann
Brinkmann ALL IN ONE Owners manual assembly and operating instructions

Magma
Magma Gourmet Monterey II A10-1225-2GS, Gourmet Monterey II... owner's manual

Kenmore
Kenmore 141.152832 Use and care guide

SUNWIND
SUNWIND DISA 440526 user manual

Brabantia
Brabantia BBEK1045 instruction manual

Kaiser
Kaiser PROFI E20B50B24-SB Care and use instructions